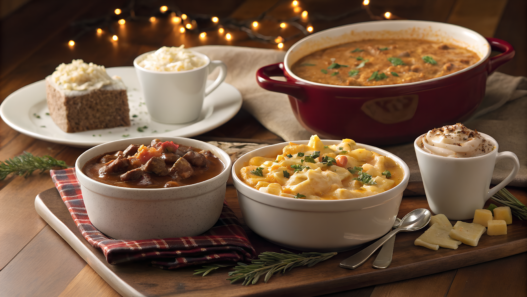

On cold winter evenings, the menu often starts to include thick soups, casseroles, and pasta with sauces. This kind of comfort food turns out filling, warm, and satisfying.
Here I’ve put together 10 homemade comfort food recipes that are easy to cook in a regular home kitchen. There are different dishes here — some of them are ready in about 30 minutes, while others slowly cook in the oven or a slow cooker while you take care of other things.
All the ingredients in these recipes are simple — chicken, pasta, potatoes, vegetables, cheese, cream, and fresh herbs. Everything is straightforward and practical, and these dishes are convenient to cook for the family, even for several days ahead.
1. Creamy Chicken and Wild Rice Soup with Fresh Herbs
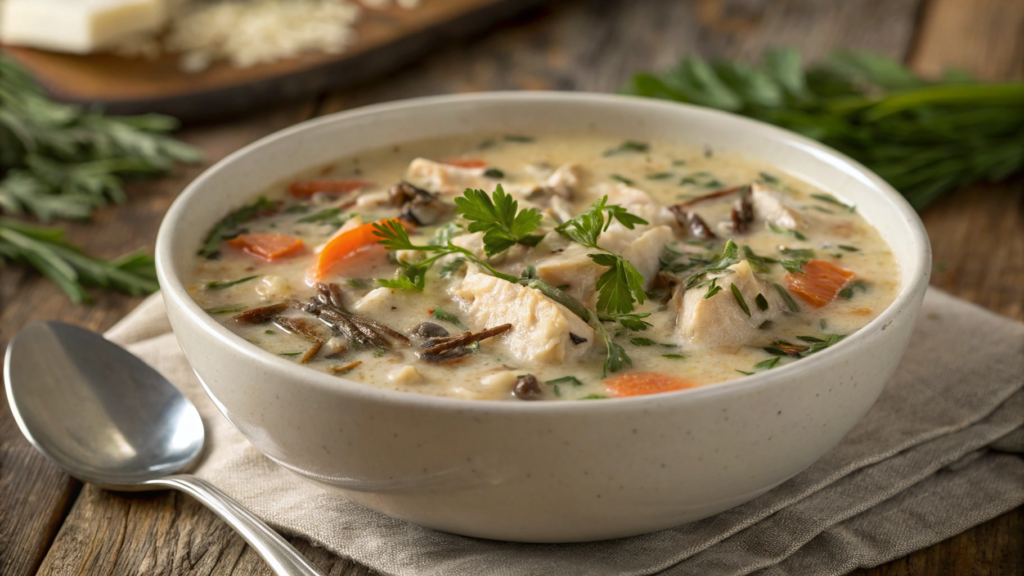
This creamy chicken and wild rice soup turns out hearty, thick, and very easy to make.
Wild rice adds an interesting texture and a light nutty flavor, while heavy cream makes the broth smoother and richer. Fresh herbs at the end may seem like a small detail, but they noticeably improve the overall flavor.
Ingredients
- 1 lb chicken breast or boneless chicken thighs (≈450 g)
- ¾ cup wild rice (≈140 g)
- 2 tbsp butter (≈30 g)
- 1 tbsp olive oil
- 1 medium onion, finely chopped
- 2 carrots, diced
- 2 celery stalks
- 3 garlic cloves
- 6 cups chicken broth (≈1.4 L)
- 1 cup heavy cream 30–33% (≈240 ml)
- 2 tbsp flour (≈16 g)
- 1 tsp dried thyme
- 1 tsp dried rosemary
- ½ cup fresh parsley, chopped
- 2 tbsp fresh dill
- salt and black pepper to taste
How to Cook
- Prepare the vegetable base.
In a large pot, melt the butter and add olive oil. Add the chopped onion, carrots, and celery. Cook over medium heat for about 5–7 minutes until the vegetables become soft and fragrant. Then add the minced garlic and cook for about 30 seconds more. - Add the rice and broth.
Stir the wild rice into the pot, then pour in the chicken broth. Add thyme, rosemary, salt, and pepper. Bring everything to a boil, then reduce the heat and simmer for about 35–40 minutes, until the rice becomes tender. - Add the chicken.
Cut the chicken fillet into small pieces and add them directly to the pot. Cook for about 10–12 minutes until the chicken is fully cooked and tender. - Make the soup creamy.
In a small bowl, whisk together the heavy cream and flour until smooth. Slowly pour this mixture into the soup while stirring constantly. Let the soup cook for another 5–7 minutes, allowing it to become slightly thicker. - Add fresh herbs.
At the very end, stir in the chopped parsley and dill. Taste the soup and adjust the salt and pepper if needed.
For soups like this, it’s very convenient to use a heavy pot that holds heat well. At our home we’ve been using the Lodge 6 Quart Enameled Cast Iron Dutch Oven for several years — soups cook evenly in it and don’t burn.
How to Serve
This creamy chicken soup is best served hot, right after cooking. It’s quite filling on its own, but for a little variety you can serve it with:
- crispy baguette
- toasted rustic bread
- a sprinkle of grated parmesan
If the soup sits for about 10–15 minutes, it will become slightly thicker — many people even prefer it this way. The flavor develops even more on the next day.
This recipe is convenient because it’s easy to adjust depending on what you have in the refrigerator. Sometimes I add fresh spinach, or replace part of the cream with milk if I want a lighter version. The most important thing is not to skip the fresh herbs at the end — they make the soup taste brighter and balance the creamy base very well.
2. Slow Cooker Beef Stew with Red Wine and Root Vegetables
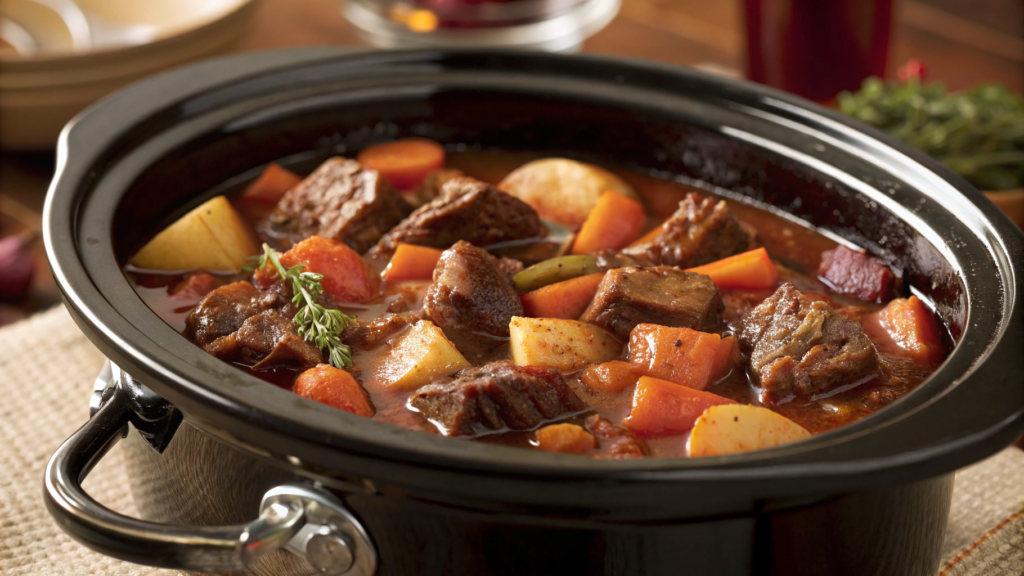
This beef stew in a slow cooker is very straightforward to prepare. There are no complicated steps at the beginning, and then the slow cooking process does the real work: the meat becomes tender, the vegetables absorb the sauce, and red wine adds depth of flavor without making the dish sharp.
Personally, I really love recipes where you don’t have to stand by the stove all evening. You can put everything into the cooker in the morning or early afternoon, and by dinner time there’s already a proper hot meal waiting at home.
Ingredients
- 900 g beef chuck, cut into large cubes
- 2 tbsp olive oil
- 1 large onion, sliced
- 4 carrots, cut into large chunks
- 3 parsnips (or 2 extra carrots if you don’t have parsnips), roughly chopped
- 3 medium potatoes (≈500–600 g), cut into large pieces
- 3 celery stalks, chopped
- 4 garlic cloves, minced
- 2 tbsp tomato paste
- 2 tbsp all-purpose flour
- 1 cup dry red wine (240 ml)
- 3 cups beef broth (720 ml)
- 1 tbsp Worcestershire sauce
- 1 tsp salt (plus more to taste)
- ½ tsp black pepper
- 1 tsp dried thyme
- 1 tsp dried rosemary
- 2 bay leaves
- 1 cup green peas (≈150 g, optional)
- 2 tbsp fresh parsley, chopped (for serving)
How to Cook
- Brown the meat if you have time.
Pat the beef cubes dry with paper towels, season them with salt and pepper, and lightly coat with flour. Heat a skillet with olive oil and sear the beef in batches for about 2–3 minutes per side. You don’t need to cook it through — the goal is simply to get a golden crust, which will later add richer flavor to the stew. - Prepare the vegetable base.
Place the onion, carrots, parsnips, potatoes, celery, and garlic into the slow cooker bowl. Spread the tomato paste over the vegetables. It’s better to cut the vegetables into large chunks, especially the potatoes and carrots, so they hold their shape during the long cooking time. - Add liquids and seasonings.
Transfer the seared beef into the slow cooker. Pour in the red wine, beef broth, and Worcestershire sauce. Add the thyme, rosemary, and bay leaves. Stir gently to combine everything. The liquid doesn’t need to completely cover the ingredients — in a slow cooker, moisture barely evaporates, so the stew will still turn out juicy. - Cook slowly and patiently.
Cover with the lid and cook on LOW for 8–9 hours or HIGH for 4½–5½ hours. The low setting usually gives the most tender results. By the end of cooking, the beef should be soft enough to pull apart easily with a spoon or fork. If it still feels firm, simply give it another 30–60 minutes. - Adjust the thickness if needed.
About 20–30 minutes before the end, taste the sauce. If you want a thicker stew, mix 1 tbsp flour or cornstarch with 2 tbsp cold water, then stir it into the stew and let it cook a bit longer. At this stage you can also add frozen peas, which warm up quickly and add a fresh touch to the dish. - Remove bay leaves and let the stew rest.
Once the cooking is done, remove the bay leaves and let the stew sit for about 10 minutes. The sauce will settle slightly and the flavor will become more balanced. Sprinkle fresh parsley on top before serving.
For recipes like this, it’s convenient to have a large slow cooker such as the Crock-Pot 7-Quart Slow Cooker, Portable Programmable with Timer, Locking Lid, Stainless Steel. It has a 7-quart capacity, a programmable timer, and a locking lid, which makes it especially useful for family meals and long slow cooking.
How to Serve
This slow cooker beef stew is already a complete dinner, so there’s no need to complicate the plate. It’s best to pair it with something simple that helps soak up the sauce without competing with the main flavor.
You can serve it with:
- warm rustic bread
- mashed potatoes if you want a heartier option
- buttered egg noodles
- a simple green salad with a light dressing
If you cook the stew ahead of time, that’s actually a bonus. The next day the stew often tastes even better, because the meat and vegetables absorb more of the sauce and the gravy thickens slightly in the refrigerator.
For reheating, warm it gently over low heat or in short microwave intervals so the beef stays tender.
This dish is perfect for weekend cooking: you can portion it into containers and have dinners ready for a couple of days. Another advantage is how easily the recipe adapts to the season — if you don’t have parsnips, just use more carrots, and if Yukon Gold potatoes aren’t available, any firm potato variety will work well.
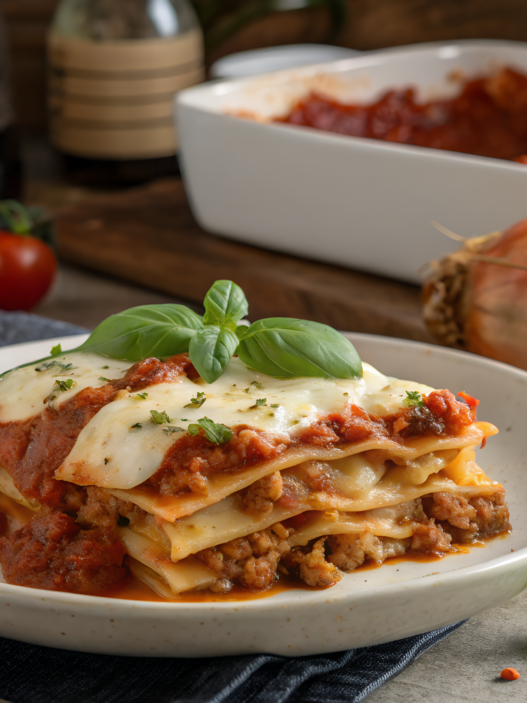
3. Cozy Baked Rigatoni with Sausage and Spinach
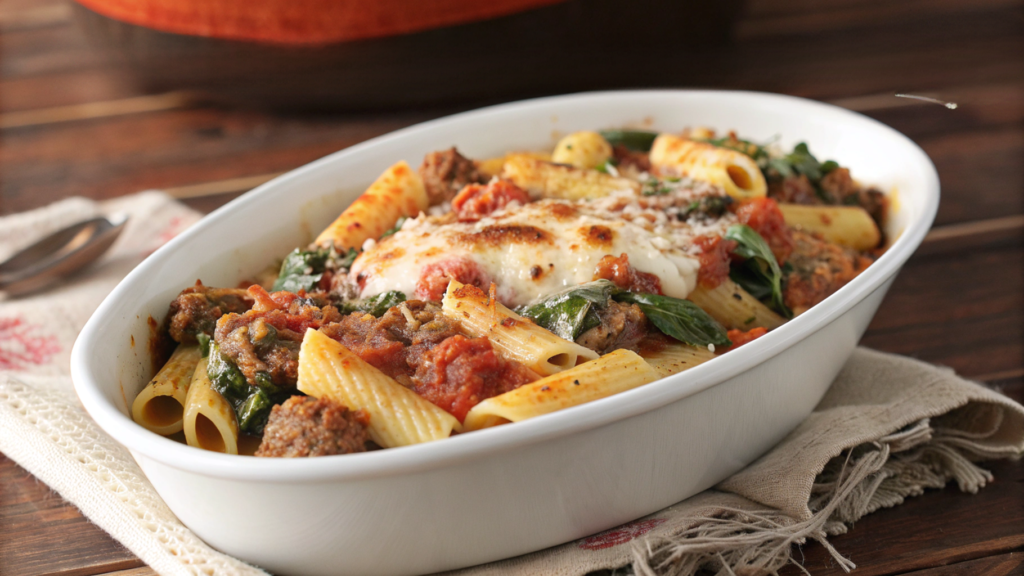
Rigatoni with sausage and spinach is convenient to cook for the whole family or even for a couple of days ahead. This dish combines a rich tomato sauce, browned Italian sausage, fresh greens, and several types of melting cheese that bring everything together. And the result is incredibly satisfying.
Ingredients
- 450 g rigatoni pasta
- 450 g Italian sausage (mild or spicy), casing removed
- 1 tbsp olive oil
- 1 medium onion, finely chopped
- 3 garlic cloves, minced
- 700 g tomato sauce or crushed tomatoes
- 1 tsp dried oregano
- ½ tsp dried basil
- ½ tsp red pepper flakes (optional)
- 3 cups fresh spinach (≈90 g)
- 1 cup ricotta cheese (≈240 g)
- 1½ cups shredded mozzarella (≈170 g)
- ½ cup grated parmesan (≈50 g)
- salt and black pepper to taste
How to Cook
- Cook the pasta.
Bring a large pot of salted water to a boil and cook the rigatoni pasta until al dente. Usually this is about 1–2 minutes less than the package instructions. Since the pasta will continue cooking in the oven, it’s important not to overcook it. Drain the pasta and set it aside. - Brown the sausage.
Heat a large skillet with olive oil over medium heat. Add the Italian sausage, breaking it into small pieces with a spatula. Cook for about 5–6 minutes until the meat is nicely browned. If there is excess fat in the pan, you can remove a little with a spoon. - Add the vegetable base.
Add the chopped onion to the sausage and cook for about 3–4 minutes until it becomes soft and slightly translucent. Then add the minced garlic and cook for another 30 seconds until fragrant. - Make the tomato sauce.
Pour in the tomato sauce or crushed tomatoes. Add oregano, basil, salt, black pepper, and red pepper flakes if you like a little heat. Stir well and let the sauce simmer gently for 8–10 minutes, allowing the flavors to develop. - Add the spinach.
Stir the fresh spinach directly into the hot sauce. It will quickly wilt and reduce in volume within 1–2 minutes, blending smoothly into the sauce. - Assemble the pasta.
In a large bowl, combine the cooked rigatoni with the sauce and half of the mozzarella cheese. Then add the ricotta cheese and gently fold everything together so the ricotta forms small creamy pockets throughout the pasta. - Bake the dish.
Transfer the mixture into a baking dish. Spread the remaining mozzarella evenly over the top and sprinkle with grated parmesan. Bake at 375°F (≈190°C) for about 20–25 minutes, until the cheese melts and the surface becomes lightly golden.
How to Serve
Let the baked rigatoni rest for about 5–10 minutes after it comes out of the oven. During this time the sauce settles slightly, making it easier to serve neat portions.
This pasta works especially well with:
- a simple green salad
- garlic bread
- a light lemon dressing for the salad
If some of the dish remains, it stores very well in the refrigerator for 2–3 days. When reheating, add a few spoonfuls of water or tomato sauce so the pasta stays moist.
One of the best things about baked pasta recipes is how flexible they are. Sometimes people add mushrooms, sometimes a bit of roasted bell pepper, or even zucchini pieces. The base stays the same, but the flavor can easily change depending on what ingredients you have at home.
4. One-Pot Creamy Mushroom Orzo for Busy Nights
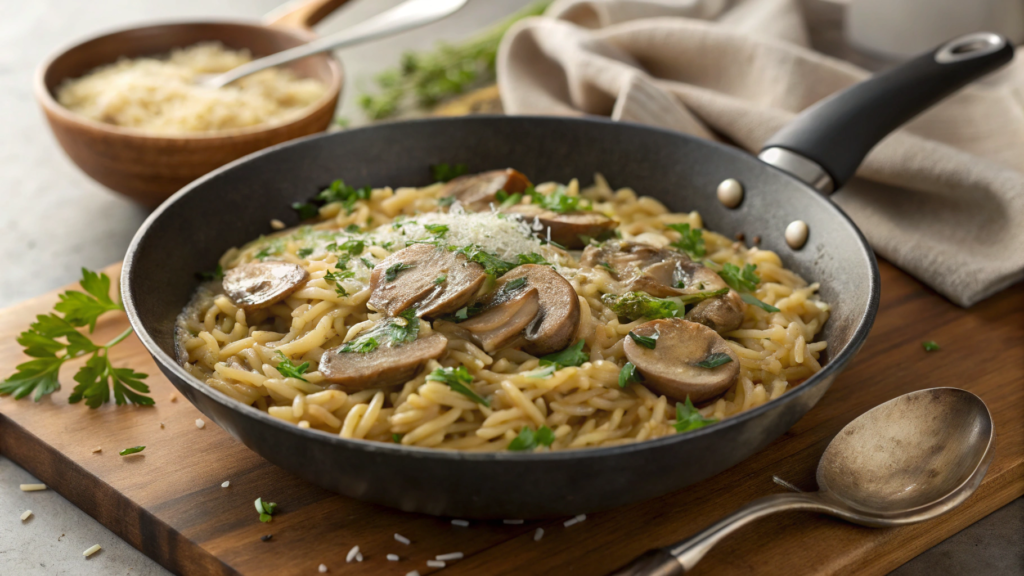
Mushroom orzo cooked in one pot is prepared step by step in a single pan: first the mushrooms, then the orzo, broth, a little cream, and cheese. In the end you get a thick, creamy pasta dish that feels similar in texture to risotto, but it’s much easier to cook. The dish is filling enough that you won’t feel the need for extra snacks afterward.
Ingredients
- 1 tbsp olive oil
- 2 tbsp butter
- 450 g mushrooms (button or cremini), sliced
- 1 small onion, finely chopped
- 3 garlic cloves, minced
- 1 cup orzo pasta (≈200 g)
- 2½ cups vegetable or chicken broth (≈600 ml)
- ½ cup heavy cream (≈120 ml)
- ½ cup grated parmesan (≈50 g)
- ½ tsp dried thyme
- salt and black pepper to taste
- 2 tbsp fresh parsley, finely chopped
- 1 tsp lemon zest (optional)
How to Cook
- Brown the mushrooms.
Heat a large skillet or deep sauté pan over medium heat. Add the olive oil and butter. Once the butter melts, add the sliced mushrooms.
Try not to stir them too often at first. Let the mushrooms cook undisturbed for about 4–5 minutes so they release moisture and start to develop a golden color. Then stir and cook for a few more minutes until they become nicely browned. - Add the onion and garlic.
Add the chopped onion to the mushrooms and cook for about 3–4 minutes until it becomes soft and slightly translucent. After that, add the minced garlic and cook for about 30 seconds. At this stage the base of the dish is ready and the aroma becomes noticeably richer. - Toast the orzo.
Pour the dry orzo pasta directly into the pan. Stir it together with the mushrooms and cook for about 1–2 minutes. This quick step lightly toasts the pasta and gives the dish a deeper flavor. - Add broth and cook the orzo.
Pour in the broth, then add thyme, salt, and black pepper. Bring the mixture to a gentle simmer and reduce the heat to medium-low.
Cook for about 10–12 minutes, stirring occasionally. The orzo pasta will gradually absorb the broth and become tender. If the liquid evaporates too quickly, you can add a little extra broth or hot water. - Make the texture creamy.
Once the orzo is soft, pour in the heavy cream and stir well. Then add the grated parmesan cheese. The cheese will melt into the sauce and make the dish thicker and creamier. Cook for another 1–2 minutes until the texture becomes smooth. - Final additions.
Remove the pan from the heat and stir in the fresh parsley. If you’re using lemon zest, add it now. It adds a light freshness that balances the creamy mushroom sauce.
How to Serve
This creamy mushroom orzo is best served immediately after cooking. While the orzo is still hot, the texture stays soft and creamy, and the cheese melts smoothly into the sauce.
Before serving you can:
- add a little more grated parmesan
- sprinkle fresh parsley on top
- finish with a bit of freshly ground black pepper
If the orzo sits for a while and becomes thicker, simply stir in a few spoonfuls of hot broth or water. The texture will quickly become creamy again.
The convenience of this one-pot pasta recipe is that you don’t need to cook the pasta separately or prepare the sauce in another pot — everything happens in one pan and the entire dish takes about 25–30 minutes.
Another advantage is how flexible the recipe is. Sometimes I add fresh spinach at the end, and other times a little crispy bacon or cooked chicken for extra protein.
5. Twist on Classic Chicken and Broccoli Casserole (No Canned Soup)
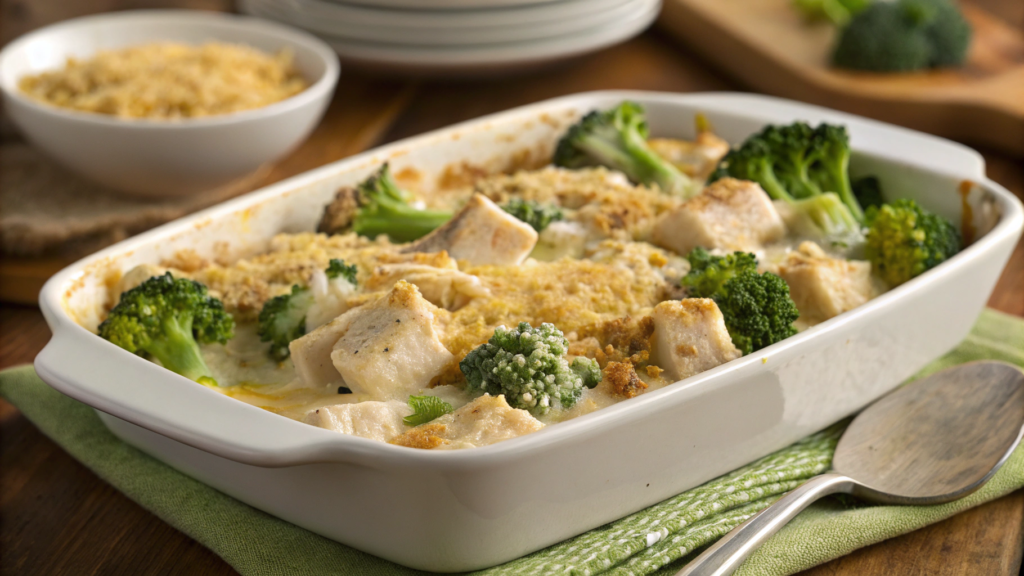
Chicken and broccoli casserole is usually made with canned cream soup because it’s quick. But once you make a homemade creamy sauce, it’s hard to go back to the canned version.
In this variation we prepare a simple sauce using butter, flour, broth, and milk. The result is a smooth and thick sauce that brings together the chicken, broccoli, and rice or pasta. Everything bakes under a layer of melted cheese and crispy topping.
Ingredients
- 2 cups cooked chicken, cut into pieces (≈300–350 g)
- 3 cups broccoli florets (≈250 g)
- 2 cups cooked rice (≈350–400 g)
For the sauce
- 2 tbsp butter (≈30 g)
- 2 tbsp all-purpose flour
- 1½ cups chicken broth (≈360 ml)
- 1 cup milk (≈240 ml)
- ½ tsp garlic powder
- ½ tsp dried thyme
- salt and black pepper to taste
For the topping
- 1½ cups shredded cheddar cheese (≈170 g)
- ½ cup breadcrumbs (≈50 g)
- 1 tbsp melted butter
How to Cook
- Prepare the broccoli and chicken.
Preheat the oven to 375°F (≈190°C).You can quickly blanch the broccoli florets in boiling water for 2–3 minutes so they become slightly tender but keep their bright color. Immediately transfer them into cold water, then drain and pat dry.
The chicken can already be cooked — for example roasted or boiled chicken breast cut into bite-size pieces. - Make the homemade creamy sauce.
In a small saucepan melt the butter over medium heat. Add the flour and cook for about 1 minute, stirring constantly until a light paste forms.
Slowly pour in the chicken broth, whisking continuously to avoid lumps. Then add the milk.
Cook the sauce for about 4–5 minutes until it begins to thicken. Season with garlic powder, thyme, salt, and black pepper. - Combine the casserole base.
In a large bowl mix the cooked rice, chicken, and broccoli. Pour the creamy sauce over the mixture and gently stir until everything is evenly coated. - Transfer to a baking dish.
Lightly grease a baking dish with a little oil or butter. Add the rice, chicken, and broccoli mixture and spread it evenly across the dish. - Add cheese and crispy topping.
Sprinkle the shredded cheddar cheese evenly over the surface.
In a separate bowl mix the breadcrumbs with melted butter, then scatter this mixture over the casserole. This layer creates a light crispy crust while baking. - Bake the casserole.
Place the dish in the oven and bake for 20–25 minutes, until the cheese melts and the top turns lightly golden.
How to Serve
After removing the casserole from the oven, let it rest for 5–10 minutes. During this time the sauce will thicken slightly and the portions will be easier to serve neatly.
This chicken broccoli casserole pairs well with:
- a simple green salad
- a light lemon dressing
- a slice of warm bread
The dish stores well in the refrigerator for up to 3 days, and you can reheat it either in the oven or microwave.
The main difference in this version is the homemade sauce instead of canned soup. It takes only a few minutes to prepare but makes the dish taste fresher and more balanced. The base is also easy to adjust — you can replace the rice with pasta, add mushrooms, or mix in a little corn. The core idea stays the same: chicken, vegetables, creamy sauce, and a cheesy baked topping.
6. 30-Minute Creamy Tuscan Skillet Chicken
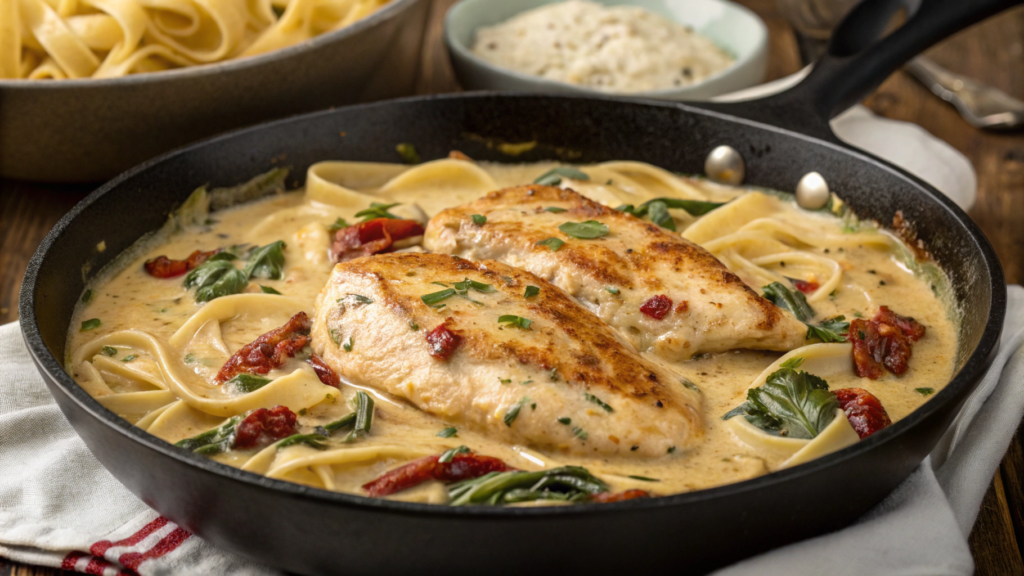
Chicken in a creamy Tuscan sauce takes about 30 minutes to cook and requires only one skillet. There’s nothing complicated here — just seared chicken breast, garlic, sun-dried tomatoes, spinach, and a creamy parmesan sauce.
The sauce becomes thick and rich, which makes this dish perfect with pasta, rice, or fresh bread. It’s easiest to cook it in a wide skillet with high sides, so the sauce can simmer and reduce comfortably.
Ingredients
- 2 large chicken breasts (≈600 g), sliced lengthwise into 4 fillets
- 1 tbsp olive oil
- 1 tbsp butter
- 3 garlic cloves, minced
- ½ cup sun-dried tomatoes, chopped (≈80 g)
- 1 cup chicken broth (≈240 ml)
- 1 cup heavy cream (≈240 ml)
- ½ cup grated parmesan cheese (≈50 g)
- 2 cups fresh spinach (≈60 g)
- 1 tsp Italian seasoning or dried basil
- ½ tsp paprika
- salt and black pepper to taste
- 1 tsp lemon juice (optional)
How to Cook
- Prepare the chicken.
Slice the chicken breasts lengthwise into thinner fillets so they cook faster and more evenly. Season both sides with salt, black pepper, and paprika. If the fillets are very thick, you can lightly pound them with a kitchen mallet until they are about 1.5–2 cm thick. - Sear the chicken until golden.
Heat a large skillet over medium heat and add the olive oil and butter. Place the chicken in a single layer and cook for about 4–5 minutes per side, until the surface becomes golden brown. The chicken does not need to be fully cooked at this stage — the center can still be slightly underdone. Transfer the chicken to a plate. - Build the flavor base for the sauce.
In the same skillet reduce the heat slightly. Add the minced garlic and cook for about 30 seconds until fragrant. Then add the sun-dried tomatoes and cook for 1–2 minutes so they release their flavor into the oil. - Add broth and deglaze the pan.
Pour in the chicken broth and gently scrape the bottom of the skillet with a spatula. This releases the browned bits left from the chicken, which add extra depth to the sauce. Let the broth simmer for 2–3 minutes so it reduces slightly. - Make the creamy sauce.
Add the heavy cream and Italian seasoning. Reduce the heat to medium-low and cook for about 3–4 minutes until the sauce begins to thicken. Stir in the grated parmesan cheese and mix until it melts completely into the sauce. - Return the chicken to the skillet.
Place the seared chicken back into the sauce and spoon some sauce over the top. Cook for another 4–5 minutes until the chicken is fully cooked and the creamy sauce thickens slightly. - Add the spinach.
Stir the fresh spinach into the hot sauce. It will wilt and reduce in volume within 1–2 minutes. At the very end you can add a little lemon juice, which lightly brightens the flavor of the creamy sauce.
How to Serve
This Tuscan skillet chicken is best served straight from the pan while the sauce is still warm and creamy. Because the sauce is thick and rich, it works especially well with sides that can absorb it.
The dish is often served with:
- fettuccine or penne pasta
- steamed rice
- mashed potatoes
- fresh crusty bread
If some of the dish remains, it can be stored in the refrigerator for up to 2 days. When reheating, add 2–3 tablespoons of broth or cream so the sauce becomes smooth again.
This recipe is popular because it combines simple ingredients with deep flavor. Everything cooks in one skillet, and the sauce brings together the taste of chicken, garlic, and sun-dried tomatoes into one balanced dish.
7. Cheesy Garlic Pull-Apart Bread with Fresh Thyme
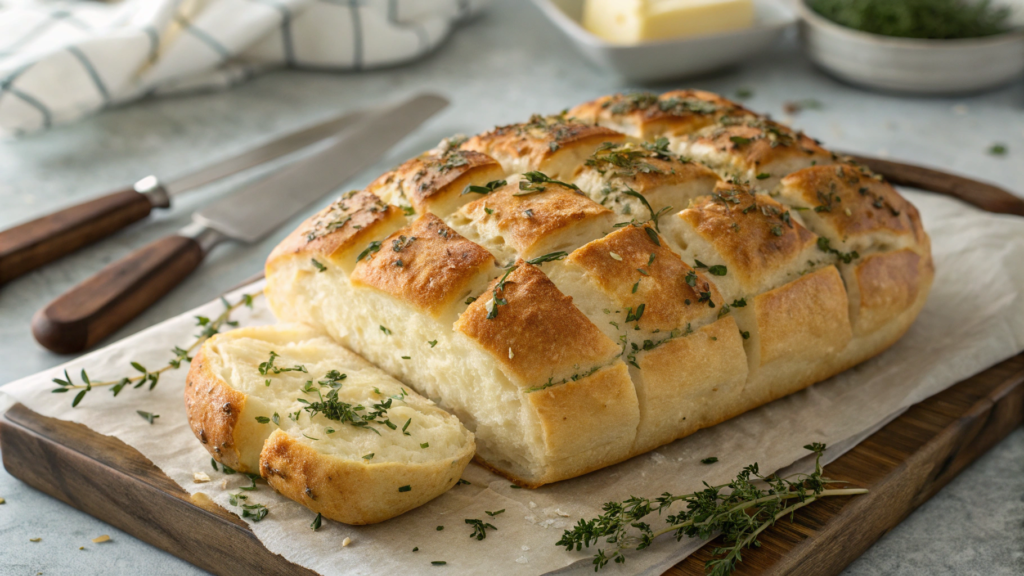
Garlic pull-apart bread with cheese is a soft loaf with deep cuts filled with garlic butter, melted cheese, and fresh thyme. After baking, the bread easily separates into pieces, and each bite is soaked with aromatic butter and herbs.
This recipe is often served as an appetizer with soups or pasta. While the main dish is cooking, the bread is already in the oven, filling the kitchen with the smell of garlic and fresh herbs.
Ingredients
- 1 round sourdough loaf or rustic bread (≈500–600 g)
- 100 g butter
- 3–4 garlic cloves, finely minced
- 1½ cups shredded mozzarella (≈170 g)
- ½ cup grated parmesan (≈50 g)
- 1 tbsp fresh thyme, finely chopped
- 2 tbsp fresh parsley, chopped
- ½ tsp salt
- ¼ tsp black pepper
How to Cook
- Prepare the bread.
Preheat the oven to 375°F (≈190°C). Take the round bread loaf and use a sharp knife to cut it first in one direction and then in the other, creating a grid pattern. Make sure not to cut all the way through — the base of the bread should stay intact so the loaf keeps its shape. - Make the garlic butter.
Melt the butter over low heat or in the microwave. Add the minced garlic, salt, black pepper, and half of the fresh thyme. Stir well and let the mixture sit for about one minute so the garlic releases its flavor into the butter. - Fill the bread.
Gently open the cuts in the loaf and pour the garlic butter inside, making sure it gets into every section. Then distribute the shredded mozzarella between the slices. Some of the cheese can be pressed deeper into the cuts so it melts inside the bread. - Add parmesan and herbs.
Sprinkle the loaf with grated parmesan and the remaining fresh thyme. During baking the parmesan creates a light golden crust, while the thyme adds a fresh aroma. - Bake the bread.
Transfer the loaf to a baking dish or skillet. Cover it loosely with foil and bake for 10–12 minutes so the cheese begins to melt.
Then remove the foil and bake for another 8–10 minutes until the top becomes golden and the cheese is fully melted. - Add fresh herbs.
As soon as the bread comes out of the oven, sprinkle it with chopped parsley. It adds a bit of freshness and balances the rich garlic butter flavor.
For baking, it’s convenient to use a small baking dish or cast iron skillet. For example, the Lodge 10.25 Inch Cast Iron Skillet holds heat very well and helps the bread brown evenly.
How to Serve
This cheesy garlic pull-apart bread is best served hot, straight from the oven. While it’s still warm, the pieces separate easily by hand and the melted cheese stretches between the layers.
It works well placed in the center of the table alongside:
- soups and stews
- pasta dishes
- fresh salads
- baked casseroles
If the bread cools down a little, you can return it to the oven for about 5 minutes so the cheese melts again.
Sometimes people add a little cheddar cheese, crispy bacon, or even chopped olives to the filling. But even the simplest version with garlic butter and cheese turns out incredibly good.
8. Loaded Potato and Bacon Bake

Loaded potato bake is baked potatoes with cream, cheese, bacon, and fresh herbs. It’s basically a version of classic loaded baked potatoes, but everything cooks together in one dish.
The potatoes absorb the cream and melted cheese, the bacon adds a deep savory flavor, and green onions with sour cream at the end help balance the richness.
Ingredients
- 1.2 kg potatoes (about 6–7 medium potatoes)
- 200 g bacon
- 1 cup shredded cheddar cheese (≈110 g)
- 1 cup shredded mozzarella (≈110 g)
- ¾ cup heavy cream (≈180 ml)
- ½ cup sour cream (≈120 g)
- 2 tbsp butter
- 3 garlic cloves, minced
- 3 green onions, sliced
- ½ tsp paprika
- salt and black pepper to taste
How to Cook
- Prepare the potatoes.
Preheat the oven to 375°F (≈190°C). Peel the potatoes and slice them into thin rounds about 3–4 mm thick. The more evenly the slices are cut, the more evenly the potatoes will cook. A sharp knife or vegetable slicer works best for this step. - Cook the bacon.
Heat a skillet over medium heat and add the bacon strips. Cook for about 6–8 minutes until the bacon becomes crispy and golden. Transfer the bacon to paper towels to remove excess fat, then chop it into small pieces. - Prepare the creamy base.
In a small saucepan melt the butter. Add the minced garlic and cook for about 30–40 seconds until fragrant. Then pour in the heavy cream, add paprika, salt, and black pepper, and warm the mixture for about 2 minutes so the garlic releases its flavor. - Assemble the casserole layers.
Lightly grease a baking dish. Add the first layer of potato slices, sprinkle lightly with salt, and drizzle with some of the cream mixture. Then add a small portion of the cheese and bacon. Repeat the layers until all ingredients are used. The top layer should finish with cheese and bacon. - Bake the potatoes.
Cover the dish with foil and bake for about 35 minutes. Then remove the foil and continue baking for another 15–20 minutes, until the potatoes are tender and the cheese on top becomes golden and bubbly. - Add sour cream and herbs.
Let the casserole rest for 5–10 minutes after baking. Before serving, add sour cream on top and sprinkle with sliced green onions.
How to Serve
This loaded potato bake can be served as a main dish or as a hearty side for meat. Because of the bacon and cheese, it’s already quite filling.
It pairs especially well with:
- a fresh green salad
- roasted chicken
- braised meat dishes
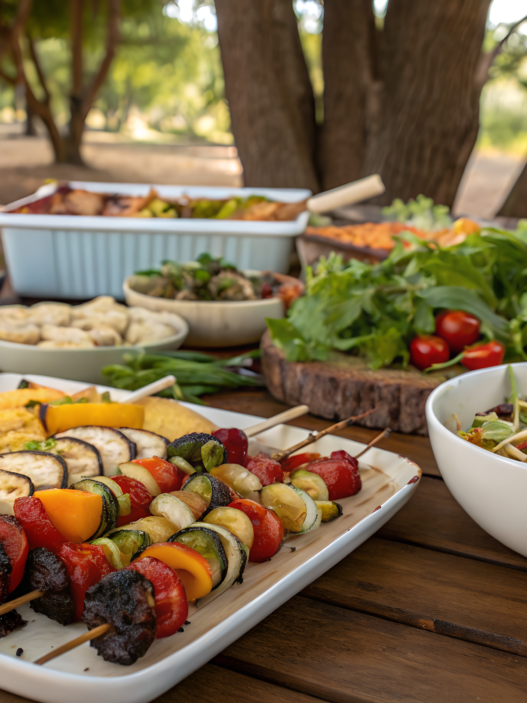
- grilled vegetables
If the casserole cools down, it can easily be reheated in the oven for about 10 minutes at 350°F (≈175°C).
Loaded potato bake is often made for family dinners or when you need to feed several people at once. The recipe is also easy to adjust — you can add sautéed mushrooms, caramelized onions, or simply increase the amount of cheese for a richer version.
9. Zesty Lemon-Parmesan Orzo with Roasted Veggies
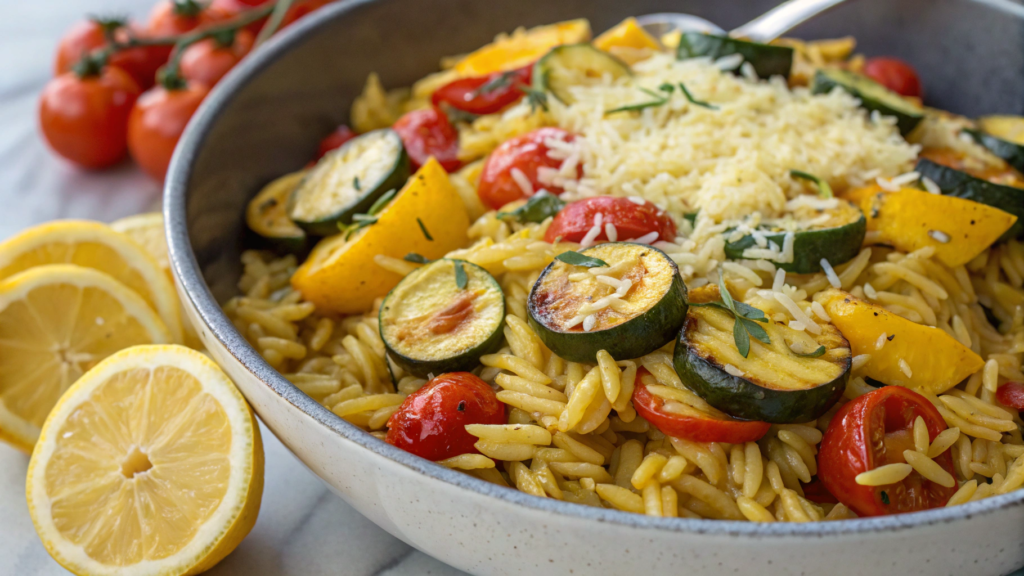
In this lemon parmesan orzo with roasted vegetables, the flavor comes from roasted veggies, garlic, olive oil, and a bright lemon note.
The dish turns out aromatic but not heavy, and it works well either as a side dish or a light dinner. For roasting the vegetables, it’s best to use a wide baking sheet or roasting pan so they brown properly instead of steaming.
Ingredients
For the vegetables
- 1 zucchini (≈200 g), diced
- 1 red bell pepper, chopped
- 1 cup cherry tomatoes (≈150 g)
- 1 small red onion, sliced
- 2 tbsp olive oil
- ½ tsp dried oregano
- salt and black pepper to taste
For the orzo
- 1 cup orzo pasta (≈200 g)
- 2 cups vegetable broth (≈480 ml)
- 2 tbsp butter
- ½ cup grated parmesan cheese (≈50 g)
- 1 tbsp lemon zest
- 1–2 tbsp lemon juice
- 2 tbsp fresh parsley, finely chopped
- 1 tbsp fresh basil (optional)
How to Cook
- Prepare the vegetables.
Preheat the oven to 400°F (≈200°C). In a large bowl combine the diced zucchini, red bell pepper, cherry tomatoes, and red onion. Add olive oil, oregano, salt, and black pepper. Toss everything well so the vegetables are evenly coated. - Roast the vegetables.
Spread the vegetables in a single layer on a baking sheet. This is important — if they are too crowded, they will steam instead of roasting. Bake for about 18–22 minutes until the edges begin to brown slightly and the tomatoes soften. - Cook the orzo.
While the vegetables roast, bring the vegetable broth to a boil in a small saucepan. Add the orzo pasta and cook for about 8–10 minutes, stirring occasionally. The orzo should become tender but not overcooked. If the liquid evaporates too quickly, add a little hot water. - Build the flavor base.
Drain any excess liquid if needed, then add the butter to the hot orzo. Stir until it melts completely. - Add cheese and lemon.
Stir in the grated parmesan, lemon zest, and lemon juice. The butter and cheese will give the pasta a light creamy texture. - Combine everything.
Add the roasted vegetables directly to the pot with the orzo. Mix gently so the vegetables distribute evenly. Finish the dish with fresh parsley and basil.
How to Serve
This lemon parmesan orzo can be served in several ways, depending on the role it plays in your meal.
If the orzo is served as a side dish, it pairs well with:
- roasted chicken
- grilled fish
- simple turkey patties
If it’s the main dish, you can finish it with:
- a little extra grated parmesan
- a few drops of olive oil
- some fresh herbs
Another good option is to serve the orzo slightly warm instead of hot. The lemon flavor becomes brighter, and the roasted vegetables keep their texture. If some of the dish remains, store it in the refrigerator for up to 2 days. Before serving, add a little olive oil or a few spoonfuls of broth and warm it gently in a pan.
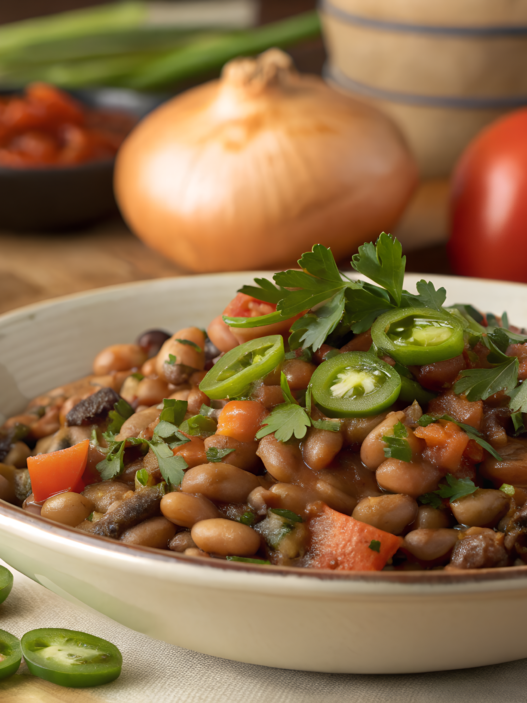
10. Chili Mac and Cheese That Beats Any Takeout
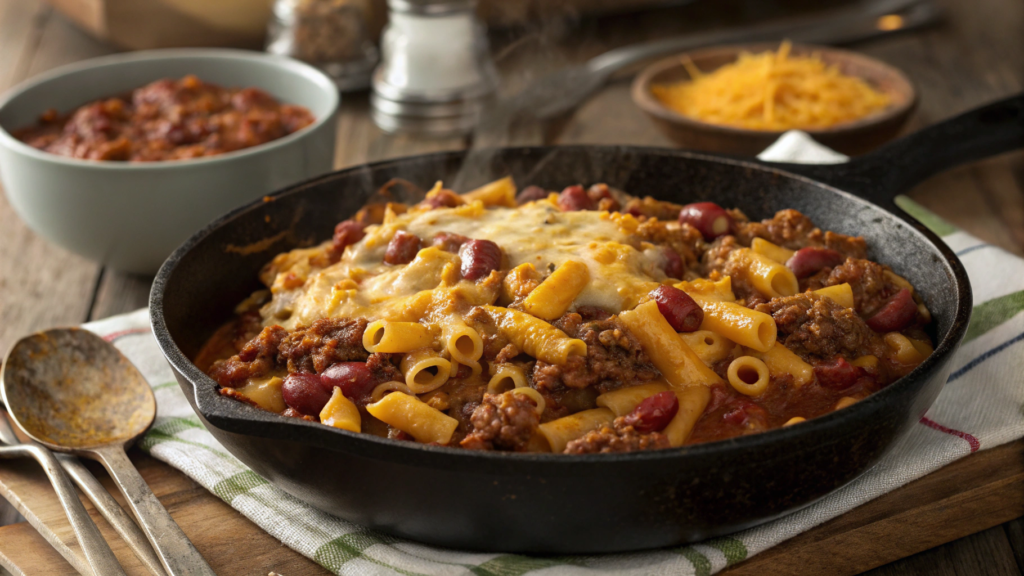
Chili Mac and Cheese is a simple and filling dish. It combines two familiar meals: a chili-style meat sauce and classic macaroni and cheese. The result is a thick pasta dish with tomato sauce, ground beef, beans, spices, and melted cheese.
Everything cooks in one large skillet or pot, which makes this recipe convenient even for a busy weeknight dinner.
Ingredients
- 400 g elbow macaroni pasta
- 450 g ground beef
- 1 tbsp olive oil
- 1 small onion, finely chopped
- 3 garlic cloves, minced
- 1 cup tomato sauce (≈240 ml)
- 1 cup crushed tomatoes (≈240 ml)
- 1 cup beef broth (≈240 ml)
- 1 cup red kidney beans (≈170 g), rinsed and drained
- 1 tsp paprika
- 1 tsp ground cumin
- ½ tsp chili powder
- ½ tsp oregano
- salt and black pepper to taste
- 1½ cups shredded cheddar cheese (≈170 g)
- ½ cup shredded mozzarella (≈55 g)
- 2 tbsp sliced green onions for serving
How to Cook
- Cook the pasta.
Bring a large pot of salted water to a boil. Add the elbow macaroni and cook until al dente, usually about 7–8 minutes. The pasta should stay slightly firm because it will continue heating in the sauce later. Drain and set aside. - Cook the meat base.
Heat a large skillet or pot over medium heat. Add the olive oil, then the ground beef. Cook for about 5–6 minutes, breaking the meat into small pieces with a spatula. When the beef begins to brown, add the chopped onion and cook another 3–4 minutes until it becomes soft. - Add garlic and spices.
Stir in the minced garlic and cook for about 30 seconds until fragrant. Then add paprika, cumin, chili powder, and oregano. Stir well so the spices warm up with the meat and release their flavor. - Make the chili sauce base.
Pour in the tomato sauce, crushed tomatoes, and beef broth. Add the kidney beans, salt, and black pepper. Stir everything together and let the sauce simmer for 8–10 minutes over medium heat until it thickens slightly and the flavors develop. - Add the pasta.
Transfer the cooked macaroni into the skillet with the sauce. Stir gently so the pasta becomes evenly coated with the chili meat sauce. - Add the cheese.
Reduce the heat to low. Stir in half of the cheddar cheese and the mozzarella. Continue stirring until the cheese melts completely and the sauce becomes thick and creamy. - Finish with a cheese layer.
Sprinkle the remaining cheddar cheese on top, cover the pan with a lid, and let it sit for 2–3 minutes until the cheese melts.
How to Serve
Chili Mac and Cheese is best served right after cooking, while the sauce is thick and the cheese is fully melted.
Before serving you can add:
- sliced green onions
- a spoon of sour cream
- a pinch of smoked paprika
If you want to make the meal more filling, you can serve it with:
- cornbread
- a simple green salad
- sliced avocado
Another option is to transfer the finished dish into a small baking dish, sprinkle extra cheese on top, and place it in the oven for 5–7 minutes so a light cheese crust forms.
Simple Comfort Food
Comfort food doesn’t require rare ingredients. Most often it’s simply well-cooked, satisfying food — soup, pasta, casseroles, or meals made in one skillet.
In this collection there are different recipes that are convenient to cook and even prepare for several days ahead. You can rotate them, adjust ingredients depending on the season, or just cook them whenever you want something warm and filling.
Which recipe from this list will you try first? Maybe it will be the creamy chicken and wild rice soup, the baked rigatoni pasta, or the chili mac and cheese.Write in the comments, and if you’ve already cooked something from this list, share how it turned out. Your feedback often helps other readers decide which recipe to start with.