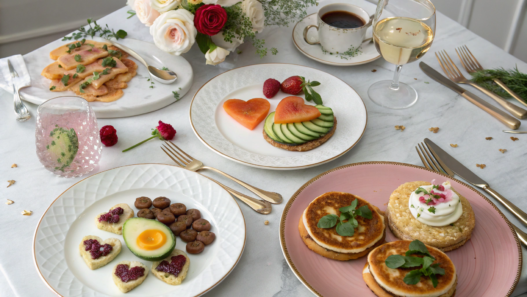
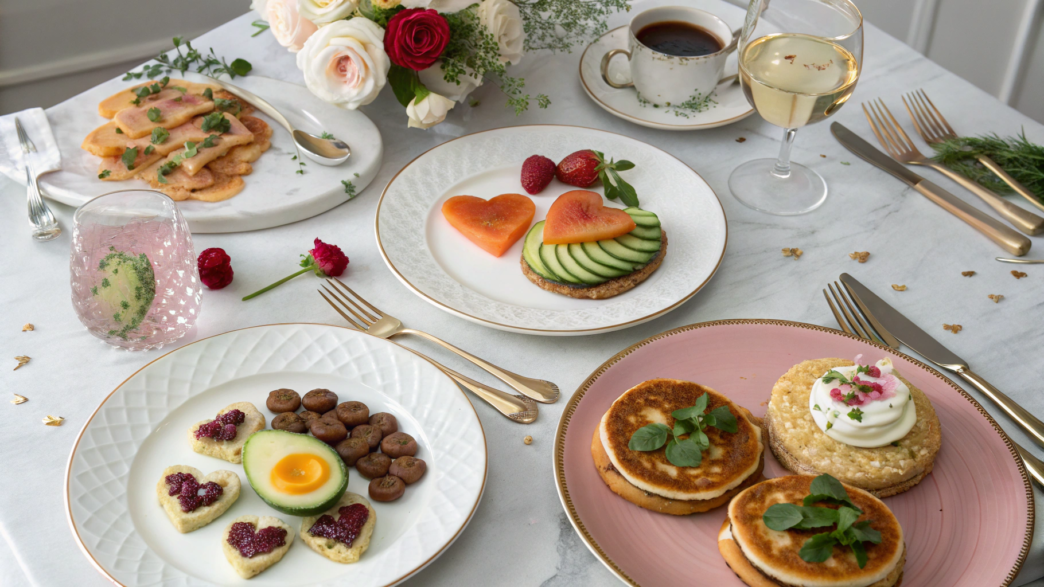
It doesn’t matter whether you’re making Valentine’s brunch for two, for your family, or having friends over — you want the food to look beautiful without spending the entire morning preparing it.
There’s usually a little more color on the table, good coffee, sweet dishes, and a couple of filling savory options. Some things can be prepared ahead, while others are made right before eating. I tried to put together these 10 Valentine’s brunch ideas so the dishes look festive but are still easy to make at home without too much effort.
For a beautiful Valentine’s brunch, sometimes all you need is some berries, nice dishes, a couple of bright details, and food you actually want to eat while it’s still warm.
1. NYC diner cinnamon roll pancakes with orange zest glaze
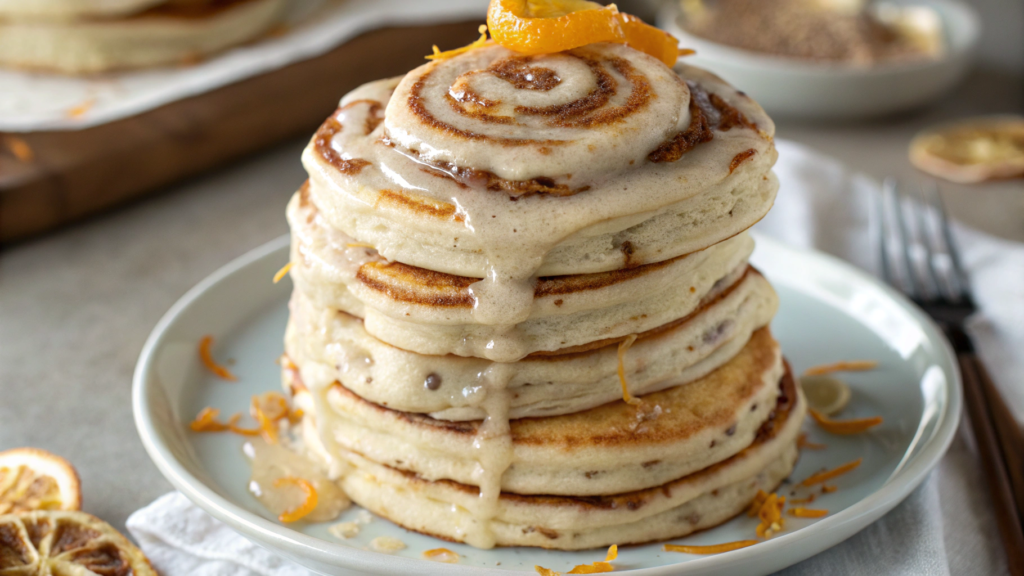
For a Valentine’s breakfast, I’d start with these pancakes. They look festive and are almost as easy to make as regular pancakes. They taste like cinnamon rolls, only there’s no yeast dough and no long proofing time. I pour an orange glaze with zest over the pancakes.
They’re best served in a tall stack, like in old-school American diners. But for a festive breakfast, I add a cinnamon swirl right into the batter. You can still see it after cooking, and the pancakes taste like cinnamon rolls.
What you’ll need
Makes about 8–10 pancakes:
- 1½ cups all-purpose flour (about 190 g)
- 2 tbsp sugar
- 2 tsp baking powder
- ½ tsp salt
- 1¼ cups milk (about 300 ml)
- 1 large egg
- 3 tbsp melted butter
- 1 tsp vanilla extract
For the cinnamon mixture:
- 3 tbsp softened butter
- ¼ cup brown sugar (about 50 g)
- 1½ tsp ground cinnamon
For the glaze:
- ¾ cup powdered sugar (about 90 g)
- 1½–2 tbsp fresh orange juice
- 1 tsp finely grated orange zest
These pancakes are easiest to cook on a wide, flat skillet or another surface without high sides.
How to make cinnamon pancakes with orange glaze
- Make the cinnamon mixture. Mix the softened butter, brown sugar, and cinnamon until thick and smooth. Transfer the mixture to a small bag and snip off a tiny corner. This makes it easy to pipe the swirl later.
- Make the batter. In one bowl, mix the flour, sugar, baking powder, and salt. In another, lightly whisk the milk, egg, melted butter, and vanilla. Combine the two mixtures and stir just until there’s no dry flour left. A few small lumps are fine.
- Heat the skillet. Place it over medium heat and lightly grease it with butter. I usually make one small test pancake first. It tells you right away whether the temperature is right.
- Make the cinnamon swirl. Pour about ¼ cup of batter onto the skillet. Once bubbles start appearing on top, pipe a thin spiral of the cinnamon mixture over it. Leave about ½ inch (1–1.5 cm) around the edge so the sugar doesn’t run out onto the skillet.
- Flip the pancake. Cook for about another minute. The brown sugar will start to caramelize a little, so this side will be darker than usual. If a lot of melted sugar is left on the skillet, wipe it away with a paper towel between batches.
- Make the orange glaze. Mix the powdered sugar and orange zest with 1½ tbsp of juice to start. Add a little more juice if needed. The glaze should slowly run off the spoon rather than being completely thin.
Stack the pancakes in a tall pile and pour the orange glaze over them right before serving. It looks beautiful when the glaze slowly runs down the sides instead of completely covering the pancakes, so it’s better to start with less juice.
A little fresh zest on top is nice too.
The tall stack and cinnamon swirl keep that NYC diner pancake feel, while the orange glaze makes them a great breakfast for February 14. Lindy usually asks for a little extra glaze on her portion, while I prefer more fresh zest.
2. Parisian soft scrambled eggs with crème fraîche and chives
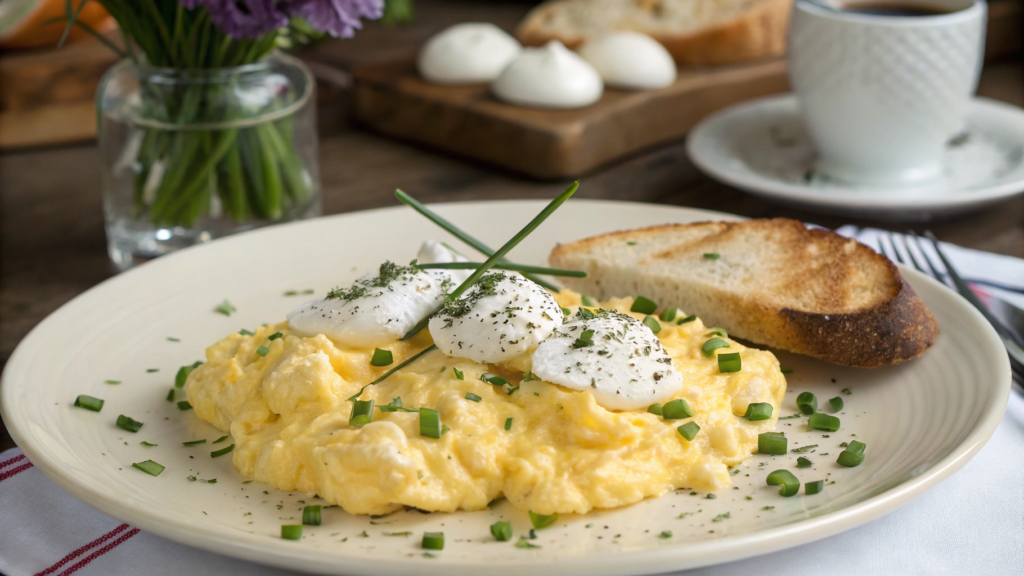
This Parisian-style scramble is a great fit for the savory side of a Valentine’s brunch. Eggs, good bread, a little crème fraîche, and fresh chives — there aren’t many ingredients, but everything looks neat and understated on the plate, very French.
What you’ll need
Makes about 2 servings:
- 5 large eggs
- 1 tbsp butter
- 2 tbsp crème fraîche
- 1–2 tbsp finely chopped fresh chives
- ¼ tsp salt, or to taste
- freshly ground black pepper
- 2 thick slices of good bread for serving
How to make soft scrambled eggs with crème fraîche and chives
- Prepare the eggs. Crack the eggs into a bowl, add the salt, and mix well with a fork or whisk until the whites and yolks are fully combined. There’s no need to whisk too hard — we don’t want foam.
- Melt the butter. Place a small skillet over low heat and melt the butter. It should just coat the bottom without starting to sizzle hard or brown.
- Start cooking the eggs slowly. Pour the eggs into the skillet and immediately begin stirring constantly with a silicone spatula, scraping along the bottom and sides. Keep the heat low. At first, it may seem like nothing is happening, and then the eggs will gradually start to thicken.
- Watch the texture. Don’t wait for the usual large curds of scrambled eggs. The eggs should form very soft, small folds and still look glossy. If they start setting too quickly, take the skillet off the heat for 15–20 seconds and keep stirring.
- Add the crème fraîche. When the eggs are almost done but still look a little softer than you want them on the plate, remove the skillet from the heat. Add the crème fraîche and stir. The residual heat will be enough to bring the scramble to the right consistency.
- Add the chives. Stir in about half of the chopped chives and taste the eggs. Add a little more salt and freshly ground pepper if needed.
- Take them off the heat at the right time. Don’t leave the scramble sitting in the hot skillet after cooking. Even with the heat off, the eggs will keep cooking from the residual heat and can lose their creamy texture pretty quickly.
I spoon the soft scrambled eggs onto thick slices of toasted bread, then add the remaining chives and a little freshly ground black pepper on top. It’s best served right away, while the eggs are still warm and tender.
I’d make this scramble for Lindy on the morning of February 14 and serve it right away with hot toast while the eggs are still really soft. Honestly, you don’t need much else — coffee, two plates on the table, and a normal breakfast together without all the restaurant fuss.
3. Dragon fruit yogurt bowls with lime sugar and pistachios
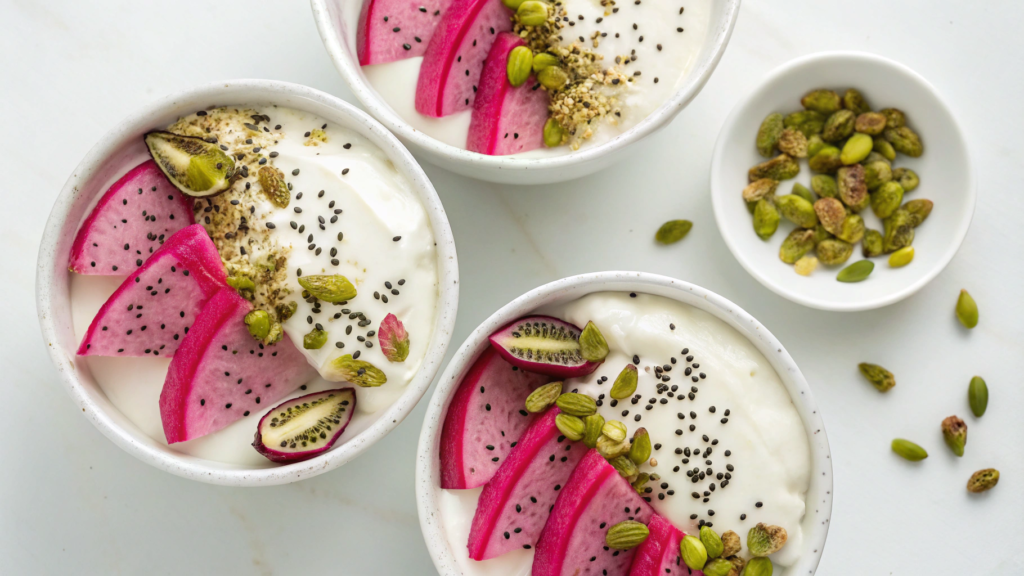
Dragon fruit is beautiful all on its own. Once you cut into that bright pink skin, breakfast already looks like it was made especially for February 14. I like these bowls for the contrast — thick white yogurt, pink dragon fruit, green pistachios, and a little lime on top.
If you can find red-fleshed dragon fruit, grab it. The color is absolutely gorgeous, and it’s a great choice for a Valentine’s brunch, especially when there are pancakes, waffles, and other more filling dishes on the table.
What you’ll need
Makes about 2 servings:
- 2 cups thick Greek yogurt (about 16 oz / 450 g)
- 1 large ripe dragon fruit
- ¼ cup shelled unsalted pistachios (about 1 oz / 30 g)
- 2 tbsp granulated sugar
- finely grated zest of 1 lime
- 1–2 tsp fresh lime juice
- 2 tsp honey, optional
- a few fresh berries for serving, optional
It’s easier to zest the lime with a fine grater, like the Microplane Premium Classic Zester Grater, so only the fragrant green part of the peel gets into the sugar.
How to make dragon fruit yogurt bowls
- Make the lime sugar. Pour the sugar into a small bowl, add the finely grated lime zest, and rub the mixture between your fingers for 20–30 seconds. The sugar will become slightly damp, and the lime aroma will be much stronger than if you simply sprinkled zest over the finished bowl.
- Prepare the dragon fruit. Cut the fruit in half and scoop out the flesh with a large spoon. Cut it into cubes or thin slices. You can scoop some of the flesh into small balls with a melon baller, but regular pieces look great too.
- Prepare the pistachios. Roughly chop them with a knife. Don’t turn the nuts into fine crumbs — you want the pistachio pieces to stay noticeable and give you a good crunch.
- Add the yogurt. Divide the thick yogurt between two shallow bowls. If it’s too tart for your taste, stir a teaspoon of honey into each portion.
- Add the dragon fruit. Arrange the fruit over the yogurt. I don’t mix it in ahead of time — that way the bright color stays on top and the bowl looks much prettier.
- Add the lime and pistachios. Sprinkle each portion with lime sugar and chopped pistachios. At the very end, add just a few drops of fresh lime juice. You don’t need much, especially if the yogurt is already fairly tart.
For a Valentine’s brunch, I use wide, light-colored bowls — the pink dragon fruit really stands out against them. You can add a few berries around the edge, but I’d still keep pink, white, and green as the main colors. Add the lime sugar right before serving so it doesn’t have time to dissolve into the yogurt.
Lindy would definitely approve of these bowls — she loves fruit for breakfast, and of course, coffee with it. Dragon fruit with lime and pistachios already looks festive without any extra decorations.
4. Sheet pan croissant French toast with raspberry jam swirls
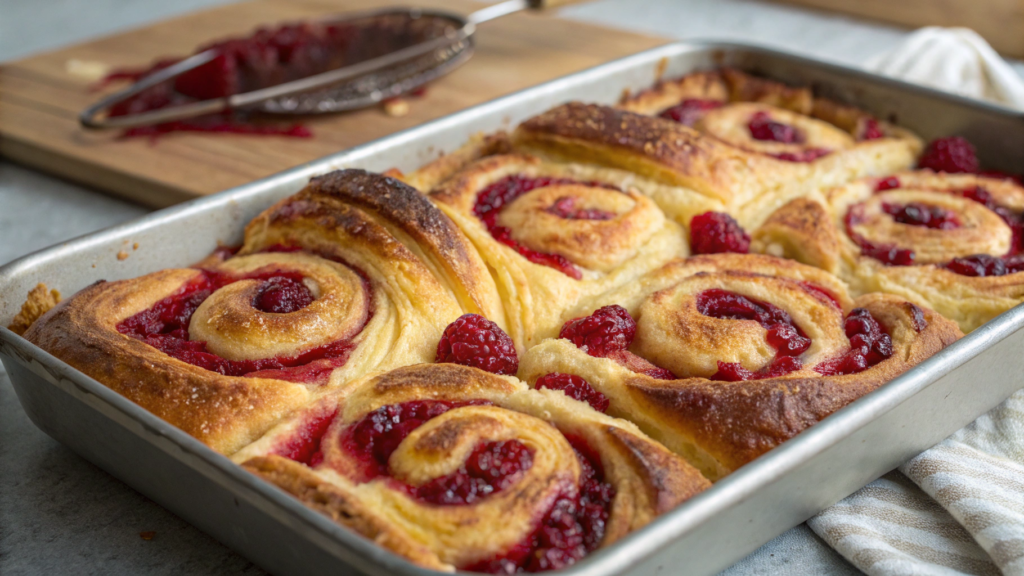
The croissants are baked all together in one dish with an egg mixture and raspberry jam between the layers. It works really well for brunch because you don’t have to cook each portion separately.
I think raspberry jam is a great fit for February 14. It adds a beautiful color, goes well with the buttery flavor of the croissants, and doesn’t need any extra decoration.
What you’ll need
Makes about 6 servings:
- 6 large croissants, preferably day-old
- 5 large eggs
- 1½ cups whole milk (about 360 ml)
- ½ cup heavy cream (about 120 ml)
- ¼ cup sugar (about 50 g)
- 1 tsp vanilla extract
- ½ tsp ground cinnamon
- ¼ tsp salt
- ⅓ cup raspberry jam (about 110 g)
- 1 tbsp butter for the baking dish
- powdered sugar for serving, optional
- fresh raspberries for serving, optional
I bake breakfasts like this in a rectangular baking dish or a small rimmed sheet pan so the egg mixture doesn’t spill out. Something like the Nordic Ware Naturals Baker’s Half Sheet works well.
How to make croissant French toast with raspberry jam
- Prepare the croissants. Cut each croissant in half or into large pieces. Day-old croissants work even better than fresh ones because they absorb the egg mixture well without turning mushy.
- Mix the custard. In a large bowl, whisk together the eggs, milk, cream, sugar, vanilla, cinnamon, and salt. You don’t need to whisk for long — just until the eggs are fully mixed with the milk.
- Arrange the croissants. Grease the baking dish with butter and place the croissant pieces fairly close together. I like to leave the tops of some pieces sticking up a little higher so they get especially golden in the oven.
- Pour over the egg mixture. Slowly spread it over the whole dish. Gently press the croissants down with a spatula or your hand so the lower pieces soak up the mixture well.
- Add the raspberry jam. Spoon small amounts of jam between the croissant pieces and over the top. Then lightly run a knife through a few spots so the jam mixes slightly with the custard and creates raspberry swirls. Don’t stir it in completely.
- Let the croissants soak. Leave the dish for about 10–15 minutes while the oven heats up. During this time, the lower pieces will absorb some of the custard, while the tops stay a little drier and brown nicely later.
- Bake. Put the dish into an oven preheated to 350°F (175°C) and bake for about 30–35 minutes. The top should be golden, and the center should no longer look liquid. If the croissants start getting too dark on top, loosely cover the dish with foil for the last 10 minutes.
- Let the French toast rest in the dish for about 5 minutes after baking. This makes it easier to divide into portions, and the jam won’t be quite so hot.
For serving, I think a little fresh raspberry and just a light dusting of powdered sugar is enough. The raspberry swirls and browned croissant edges already look pretty and appetizing on their own.
Lindy always picks the piece with a little more raspberry jam in it. We eat these croissants while they’re still warm, with the edges still crisp and the jam inside soft and slightly sticky.
5. Smoked salmon bagel board with pickled shallots and capers
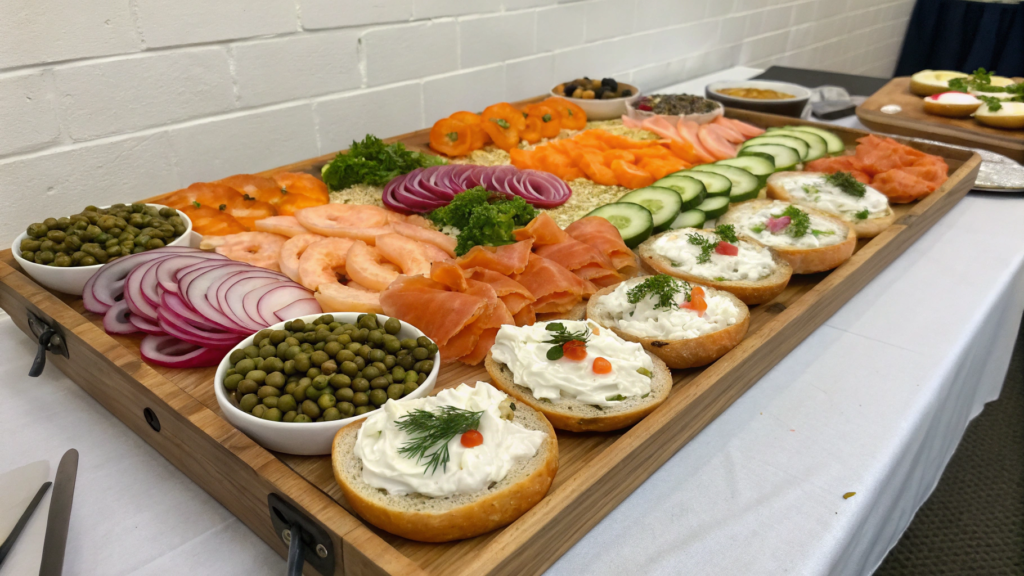
On one large board, you can arrange bagels, smoked salmon, cream cheese, vegetables, and a few extras, and then everyone just picks what they want. No one has to ask who wants what or how much.
For a smoked salmon bagel board, pickled shallots really belong there. They’re milder than raw onion and add the right amount of acidity with the salmon and cream cheese.
What you’ll need
Makes about 4 servings:
- 4 large bagels
- 8 oz smoked salmon (about 225 g)
- 8 oz cream cheese (about 225 g)
- 1 small shallot
- ¼ cup red wine vinegar (about 60 ml)
- 1 tsp sugar
- ½ tsp salt
- 2 tbsp capers
- 1 small cucumber
- 1 small tomato or a few cherry tomatoes
- 1 lemon
- a small bunch of fresh dill
- freshly ground black pepper
It’s easy to serve everything on a large wooden board with a rim, especially if there are already a few other dishes on the table.
How to assemble a smoked salmon bagel board
- Pickle the shallot. Slice it into very thin rings and place them in a small bowl. Add the vinegar, sugar, and salt, stir, and leave for about 20–30 minutes. During that time, the shallot will soften and lose some of its sharp raw onion bite.
- Prepare the bagels. Cut them in half. You can leave them fresh or lightly toast them. Don’t toast them too much — they should stay soft inside.
- Slice the vegetables. Cut the cucumber into thin rounds and the tomato into small slices. Cut the lemon into wedges so everyone can add a little juice to their own bagel.
- Prepare the salmon. Separate large slices with your hands or a knife into pieces that are easier to pick up. There’s no need to roll them into roses or build a complicated arrangement — the salmon already looks great on the board.
- Arrange the main ingredients. Put the cream cheese in a small bowl, then place the bagels and smoked salmon next to it. I try not to pile the fish too tightly so individual slices are easier to grab.
- Add the shallots and capers. Drain the extra vinegar from the pickled shallots and transfer them to a small bowl. Put the capers next to them. You can add the dill and lemon nearby too.
- Fill the empty spaces with cucumber and tomatoes, then add a little freshly ground black pepper over the salmon. At that point, the board is ready.
I put the board in the center of the table and keep a small knife nearby for the cream cheese. It’s better not to spread the bagels ahead of time — some people like a thin layer, while others add so much cream cheese that the salmon barely fits on top. I keep the pickled shallots and capers in small bowls right on the board so everyone can add as much as they like.
Breakfasts like this usually go by without anyone saying, “Make mine the same.” Everyone grabs half a bagel and puts it together however they want. Pretty convenient, right? I always end up adding more shallots than I planned because they’re so good with smoked salmon and cream cheese.
6. Ricotta toast trio with hot honey, lemon, and berries
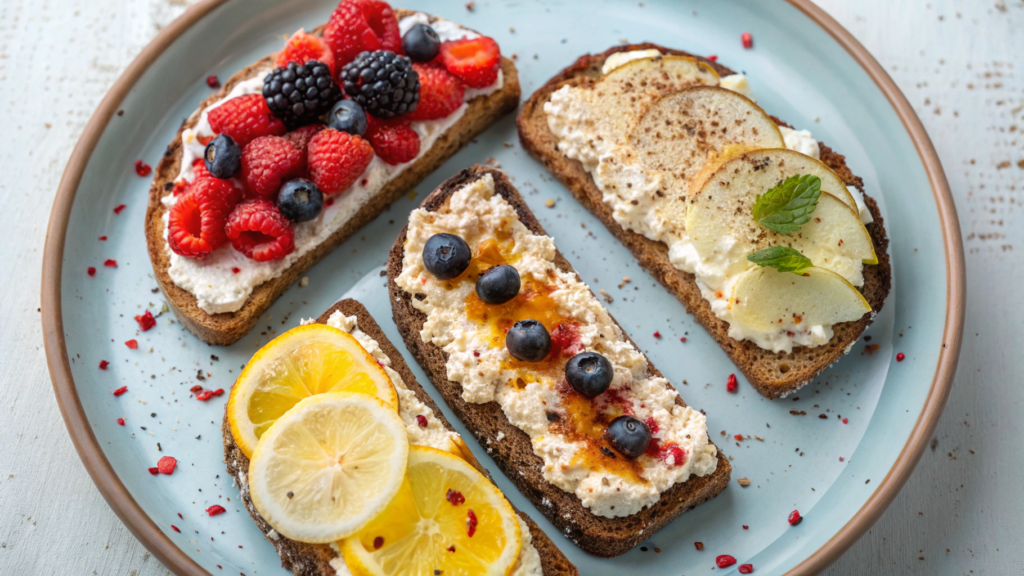
These ricotta toasts all start with the same base, but you can change the flavor with just a couple of toppings. One is sweet and spicy, the second has lemon, and the third has berries. And for brunch, you don’t have to pick just one — you can try them all.
I use bread with a firm crumb so it can hold the ricotta and toppings without falling apart. Slices that are too thin will get soggy pretty quickly. And don’t be shy with the ricotta — you should actually taste it, not just have a thin layer covering the bread.
What you’ll need
- sourdough bread or another sturdy bread
- 1 cup whole-milk ricotta (about 8 oz / 225 g)
- 1–2 tbsp olive oil
- 1½ tbsp honey
- a pinch of red pepper flakes
- zest of ½ lemon
- 1–2 tsp fresh lemon juice
- ½ cup fresh berries (about 3 oz / 85 g)
- a little salt
- freshly ground black pepper
How to make three kinds of ricotta toast
- Toast the bread. Lightly brush the slices with olive oil and toast them in a toaster, skillet, or oven. The outside should get crisp while the middle stays a little soft.
- Prepare the ricotta. Transfer it to a bowl, add a pinch of salt and about 1 tsp olive oil. Stir until the texture is a little smoother. If the ricotta is very wet, let some of the extra liquid drain off first.
- Make the hot honey. Mix the honey with a small pinch of red pepper flakes and leave it for a few minutes. Start with just a little pepper — you can always make it hotter later.
- Make the hot honey toasts. Spread a generous layer of ricotta over the bread and drizzle the spicy honey on top. You can add a few more red pepper flakes if you like.
- Make the lemon toasts. Add a little fresh lemon zest, a few drops of lemon juice, and freshly ground black pepper over the ricotta. You only need a little juice so the bread doesn’t start getting soggy.
- Make the berry toasts. Cover the bread with ricotta and add fresh berries. Slice larger strawberries, while raspberries and blueberries can stay whole. You can add a little regular honey on top.
I arrange the different toasts on one large plate without trying to line them up in perfect rows. You can already see which ones have hot honey, which have lemon, and which have berries, so everyone can just grab the one they like best.
For a group, this is honestly a great way to serve them — make more toasts with different flavors and don’t decide ahead of time which one has to be the main option. For a Valentine’s brunch, I’d go with the berry and lemon versions. They already bring the right mood to the table, even without hearts or any extra decorations.
7. Red velvet waffles with cream cheese cloud topping
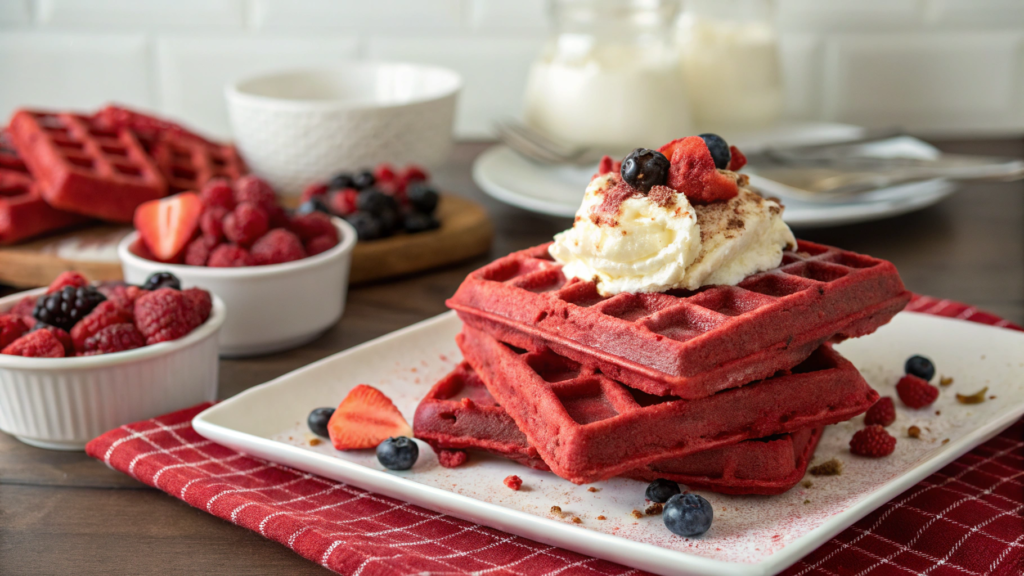
Red velvet waffles barely need any extra decorating for a Valentine’s brunch. The color already does most of the work. I borrowed the idea from the classic Red Velvet cake with its red sponge, light cocoa flavor, and cream cheese frosting. The waffle batter also has a little cocoa, vanilla, and buttermilk, so they come out bright, with a light chocolate flavor and a little tang.
For breakfast, I like a softer cream cheese and whipped cream topping. You can add a generous spoonful right onto a warm waffle, then finish with berries on top.
What you’ll need
Makes about 6–8 waffles:
- 2 cups all-purpose flour (about 250 g)
- 2 tbsp unsweetened cocoa powder
- 2 tbsp sugar
- 2 tsp baking powder
- ½ tsp baking soda
- ½ tsp salt
- 2 large eggs
- 1¾ cups buttermilk (about 420 ml)
- ⅓ cup melted butter (about 75 g)
- 1 tsp vanilla extract
- 1–2 tsp red gel food coloring
For the topping:
- 4 oz cream cheese (about 115 g), at room temperature
- ½ cup heavy cream (about 120 ml)
- 2 tbsp powdered sugar
- ½ tsp vanilla extract
For serving:
- fresh strawberries or raspberries
- a little powdered sugar, optional
I’ve had a deep-pocket waffle maker for a long time, and I use it every time I make waffles.
How to make red velvet waffles
- Mix the dry ingredients. In a large bowl, combine the flour, cocoa, sugar, baking powder, baking soda, and salt. Whisk the cocoa in well so there aren’t any dark lumps left in the batter.
- Prepare the wet mixture. In another bowl, lightly whisk the eggs, buttermilk, melted butter, and vanilla. Add the red food coloring. I start with about 1 tsp and check the color of the batter, then add a little more if needed.
- Combine the batter. Pour the wet ingredients into the dry ingredients and mix just until the flour disappears. A few small lumps are completely fine. Don’t overmix or the waffles can turn out denser.
- Heat the waffle maker. Lightly grease the surface if your model needs it. Add the amount of batter recommended by the manufacturer so it doesn’t spill over the edges.
- Cook the waffles. Cook until the surface looks dry and the edges are lightly crisp. This usually takes about 3–5 minutes, but the timing can vary quite a bit between waffle makers. Don’t stack the finished waffles too tightly right away, or the steam will quickly soften the crisp edges.
- Make the topping. Beat the cream cheese with the powdered sugar and vanilla until smooth. In a separate bowl, lightly whip the cold cream to soft peaks, then gently fold it into the cream cheese. The topping should be light and hold on a spoon without being as dense as cake frosting.
- Add the topping right before serving. Spoon a generous amount of the cream cheese topping onto each warm waffle. There’s no need to spread it over the whole surface — it’s better as a soft mound on top, slowly melting into the warm waffle.
A few berries on top work well, along with a very light dusting of powdered sugar if you want it. Cut the strawberries into larger pieces and leave the raspberries whole. On a red waffle, the white topping and berries already stand out nicely, so there’s really no need to decorate it any further.
For a Valentine’s brunch, this is probably one of the most obvious choices color-wise, and I’m completely fine with that. Lindy probably wouldn’t argue either, especially with a cup of coffee already sitting nearby.
8. Baked feta eggs with cherry tomatoes and oregano
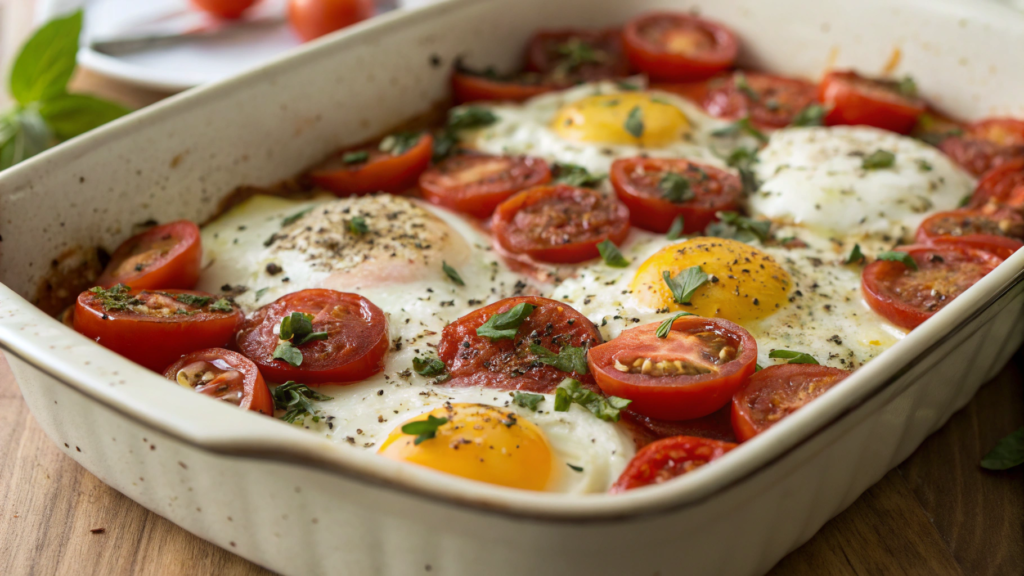
Eggs with feta and cherry tomatoes are a must for brunch when you want something warm and savory, and the whole thing can be baked in one dish and brought straight to the table while it’s still hot. Simple, easy, and delicious.
What you’ll need
Makes about 4 servings:
- 6 large eggs
- 8 oz feta (about 225 g)
- 2 cups cherry tomatoes (about 300 g)
- 2 tbsp olive oil
- 1 tsp dried oregano
- 1 small garlic clove
- ¼ tsp red pepper flakes, optional
- a little salt
- freshly ground black pepper
- fresh oregano or parsley for serving, optional
- bread for serving
I’d use a small ceramic or cast-iron baking dish for this, something you can take straight from the oven to the table.
How to make baked eggs with feta and tomatoes
- Prepare the tomatoes. Add the cherry tomatoes to the baking dish, then add the olive oil, oregano, finely grated or chopped garlic, and a little black pepper. Mix everything right in the dish.
- Add the feta. Break the cheese into larger pieces and tuck them in between the tomatoes. Don’t crumble it too finely — it’s nicer when you still get soft, salty pieces after baking.
- Bake the base. Put the dish into an oven preheated to 400°F (205°C) for about 12–15 minutes. The tomatoes should start to burst, and the feta should soften and brown slightly around the edges.
- Add the eggs. Take the dish out and use a spoon to make small spaces between the tomatoes. Crack the eggs into them. Go easy on the salt — feta is already pretty salty on its own.
- Put it back in the oven. Bake for another 7–10 minutes, depending on how you like your yolks. The whites should be set, while the yolks can stay soft.
- Add a little heat. If you’re using red pepper flakes, sprinkle them over the eggs after baking. That makes it easier to control the spice without overpowering the feta and tomatoes.
Like I said, you can bring the whole dish straight to the table, serve it with good bread, and let everyone spoon eggs, warm tomatoes, and feta onto their own plate. The juices from the cherry tomatoes mix with the olive oil and cheese, so the bread really does come in handy here.
At a Valentine’s brunch, this dish usually gets plenty of attention because after something sweet, you always want something warm and savory. I’ve seen it happen more than once.
9. Mini breakfast tacos with salsa verde and cotija

We make these mini tacos with eggs, salsa verde, and cotija small, so they’re easy to pick up by hand, and you can try one without skipping all the other dishes already on the table.
There’s a really nice mix of soft eggs, salty cotija, and salsa verde. The flavor is bold enough, but the tacos still stay simple without a mountain of toppings and ten bowls around them.
Makes about 10–12 mini tacos:
- 10–12 small corn tortillas
- 6 large eggs
- 1 tbsp butter
- ½ cup salsa verde (about 120 ml)
- ½ cup crumbled cotija cheese (about 2 oz / 55 g)
- 1 small avocado
- 2 tbsp finely chopped cilantro
- 1 lime
- salt
- freshly ground black pepper
- thinly sliced jalapeño, optional
Small tortillas cool down quickly, so after heating them in the skillet, I keep them warm in a tortilla warmer, like the Imusa Cloth Tortilla Warmer. That way they stay soft and don’t start cracking while I assemble the rest of the tacos.
How to make mini breakfast tacos
- Prepare the toppings. Crumble the cotija, cut the avocado into small pieces, chop the cilantro, and cut the lime into wedges. It’s also better to open the salsa and keep it nearby ahead of time — the eggs cook quickly.
- Warm the tortillas. Heat them for a few seconds on each side in a dry skillet. They should become soft and fold easily in half without cracking around the edges. Keep the warmed tortillas under a clean towel or in a tortilla warmer.
- Cook the eggs. Crack the eggs into a bowl, add a little salt and pepper, and mix with a fork. Melt the butter in a skillet over medium-low heat, pour in the eggs, and cook while constantly moving them with a spatula. Take them off the heat a little earlier than you think — they’ll keep cooking slightly in the hot pan.
- Fill the tacos. Add a little egg to each warm tortilla. Don’t overfill them, or the mini tacos will be hard to pick up and eat.
- Add the salsa verde. Spoon about a teaspoon of salsa over the eggs. If it’s pretty runny, try to use more of the thicker part so the tortillas don’t get soggy before serving.
- Add the cotija and the rest. Sprinkle cotija cheese over the top, then add a little avocado and cilantro. You can add jalapeño to only some of the tacos if not everyone at the table likes spicy food.
- Finish with lime. A few drops of fresh lime juice go really well with the salsa and cotija. You don’t need much — I usually squeeze it on right before the taco goes onto the plate.
I arrange the finished mini tacos on a large plate or shallow serving dish, with the remaining salsa, cotija, and lime set separately nearby. That way everyone can add a little more cheese or salsa to their own plate. It’s best to assemble the tacos right after warming the tortillas, while they’re still soft and warm.
After a couple of sweet treats, your hand naturally reaches for a taco with eggs and salsa, so these small savory bites fit really well into a Valentine’s brunch.
10. Espresso tiramisu overnight oats with cocoa dust
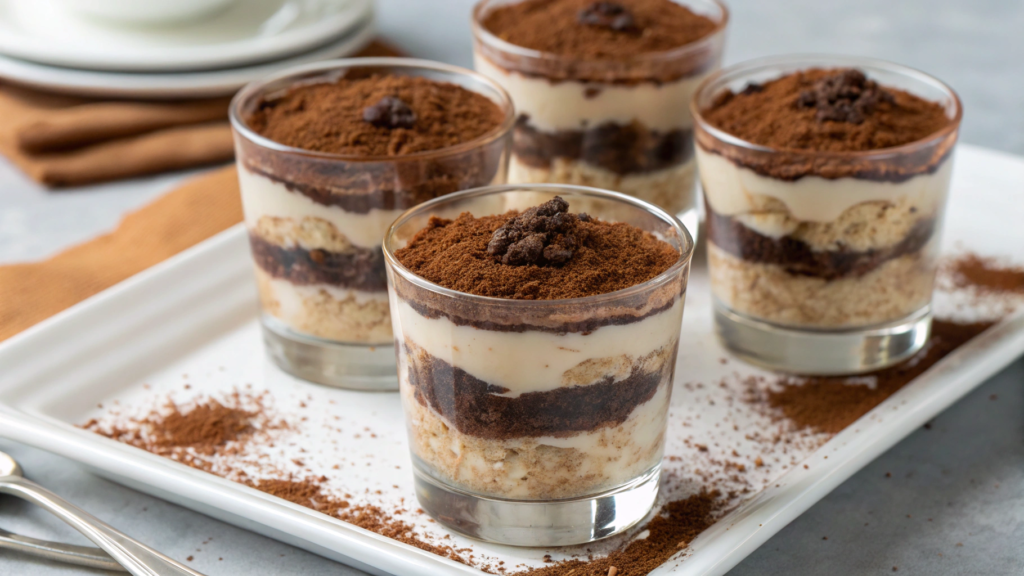
This oatmeal keeps the most recognizable flavors of the dessert — strong espresso, mascarpone, and a generous layer of cocoa on top. At the same time, it doesn’t turn out as sweet or heavy as actual tiramisu.
Lindy loves pretty much anything where coffee can somehow make its way into the food, so this one works for us. For brunch, I like serving this oatmeal in individual small glasses, where you can see the coffee layer, the light cream, and the cocoa on top. It looks really nice.
What you’ll need
Makes about 4 servings:
- 2 cups old-fashioned oats
- 2 cups milk
- ½ cup thick Greek yogurt
- 2 shots espresso, cooled
- 2 tbsp maple syrup or honey
- 1 tsp vanilla extract
- a pinch of salt
- ½ cup mascarpone
- ¼ cup thick Greek yogurt for the top layer
- 1 tbsp powdered sugar
- 1–2 tbsp unsweetened cocoa powder for serving
If you’re making these portions ahead of time, small glass jars with lids are really handy, like Ball Mason 8 oz Jelly Jars.
How to make espresso tiramisu overnight oats
- Mix the base. In a large bowl, combine the oats, milk, cooled espresso, ½ cup Greek yogurt, maple syrup, vanilla, and a pinch of salt. Mix well so the coffee is evenly distributed.
- Divide into jars. Spoon the oat mixture into glasses or small jars. Don’t fill them all the way to the top — you’ll still need room for the creamy layer.
- Refrigerate. Cover the jars and leave them in the fridge for at least 6 hours, or preferably overnight. During that time, the oats will absorb the milk and coffee and soften.
- Make the top layer. Mix the mascarpone, ¼ cup Greek yogurt, and powdered sugar until smooth. The mixture should be soft and creamy, but not runny.
- Add the cream. In the morning, spread the mascarpone mixture over the oatmeal. You can make a simple even layer with a spoon — there’s no need to smooth it perfectly.
- Dust with cocoa. Right before serving, sift a little unsweetened cocoa powder over the top. If you do this too early, the cocoa will darken quickly and absorb moisture from the cream.
I take the jars out of the fridge about 10–15 minutes before eating so the oatmeal isn’t completely ice-cold. Then I add the mascarpone cream, dust it with cocoa, and, if I feel like it, add a little chocolate shaving on top. Usually, one good layer of cocoa is enough for me.
As you’ve probably figured out by now, this oatmeal can be made ahead, and in the morning you only need to add the cream on top. That’s really useful for a Valentine’s brunch, especially when there are already hot dishes on the table that need attention at the last minute. And the espresso and mascarpone keep the whole tiramisu idea going without turning breakfast into an actual dessert.
What are you making?
If someone goes back for seconds, the coffee needs another refill, and there’s barely anything left on the plates, that usually means everything went pretty well.
The best celebrations are the ones where you can actually eat, talk, and not check the oven every five minutes. So I’d pick a few ideas from this list, prep some of them the night before, and stop there.
And if you have a dish you make every year for Valentine’s brunch, tell me about it in the comments. I love those family traditions a lot more than perfectly planned holiday menus.