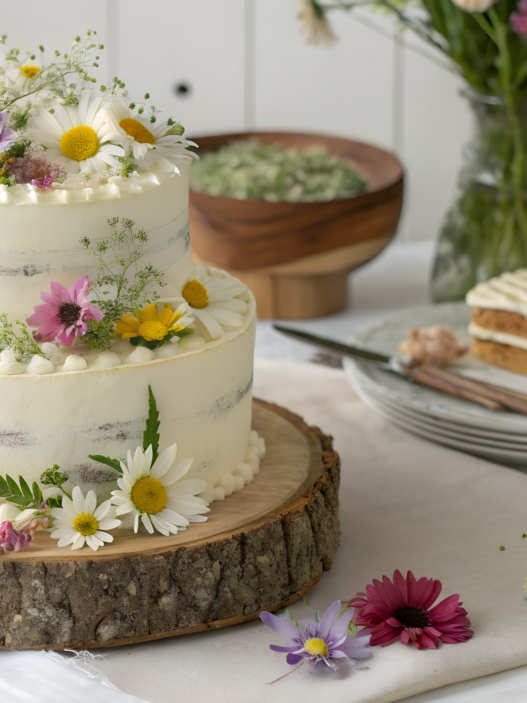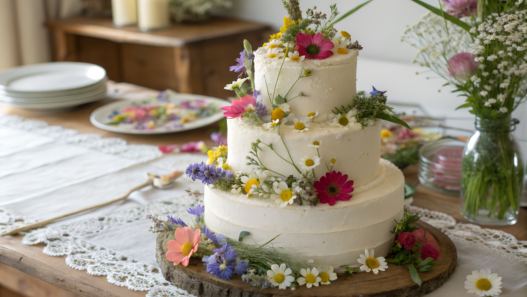
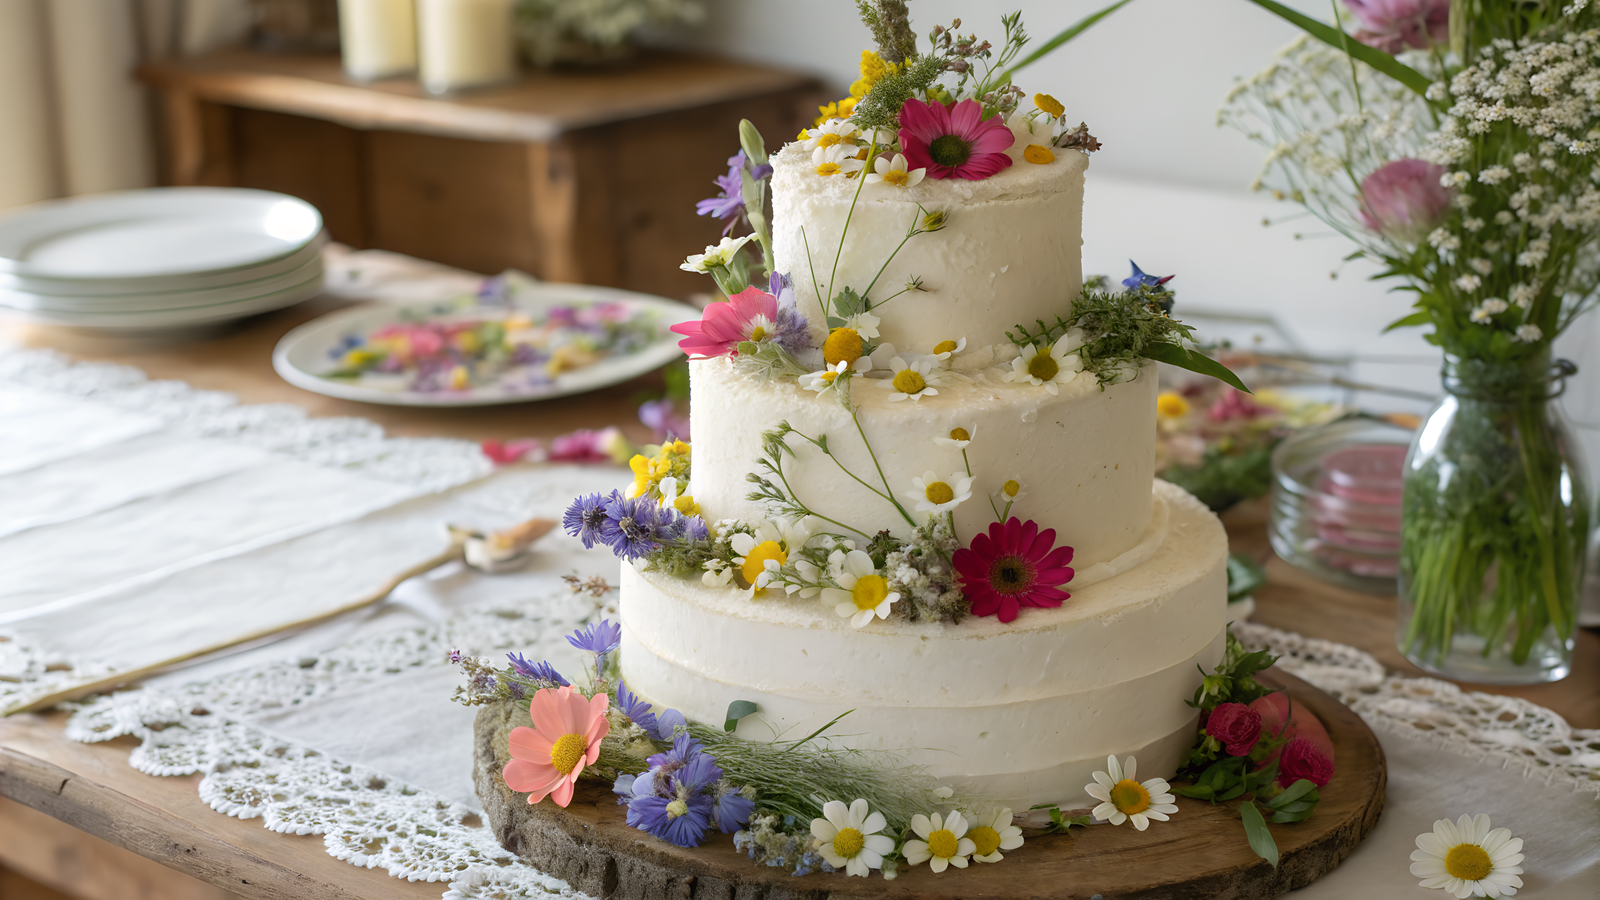
Wildflower cake ideas help make a cake beautiful, homemade, and not too formal. You can use regular cake layers: a boxed mix, ready-made cake layers from a bakery, or any vanilla, lemon, or white cake that already works for you.
Here the focus is not on cake layer recipes, but on how to decorate a cake with buttercream wildflowers. We will talk about buttercream decor, real flowers with a safe barrier, and small flavor details.
If you decided to use real flowers for making the cake, choose them carefully. You need only edible flowers. Regular bouquets from a flower shop are not suitable for a cake.
Let’s see what we can make from simple and realistic enough ideas for a regular kitchen.
1. Simple Wildflower Sheet Cake With One Tip Piping
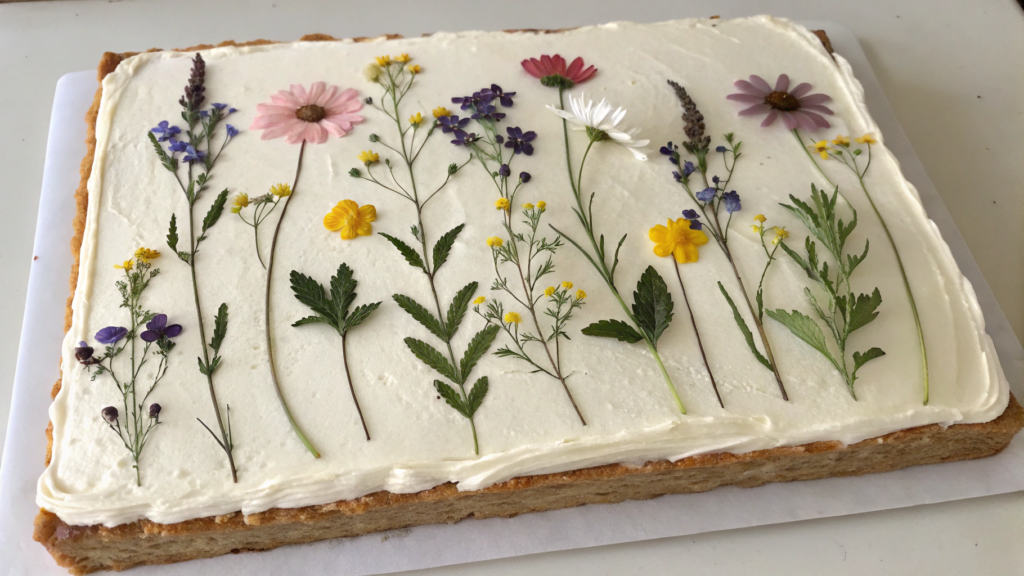
This is a rectangular cake with buttercream wildflowers, and to make it you need one cake layer, simple buttercream, and one star tip. You do not need perfectly even flowers here, because in a garden they do not stand in a straight line either.
What you’ll need
For the base, you can bake a regular rectangular vanilla cake, 9 × 13 inches (about 23 × 33 cm). A homemade recipe or a boxed cake mix will work. I would only add vanilla extract or a little lemon zest to make the flavor fresher.
For the cake and decor, you will need:
- 1 baked and completely cooled rectangular cake, 9 × 13 inches;
- 1 cup unsalted butter, soft but not melted (227 g);
- 4 cups powdered sugar (about 480 g);
- 2–3 tbsp milk or cream (30–45 ml);
- 1 tsp vanilla extract;
- a pinch of salt;
- gel food colors: pink, yellow, green, purple;
- 1 piping bag;
- 1 star tip;
- a small spatula or knife for frosting.
For this kind of decor, it is useful to have a star piping tip. With one tip like this, you can make small rosettes, stars, flower centers, and green accents between them.
How to make it
- Bake and cool the cake.
Bake the rectangular cake using your recipe or the instructions on the box. Before decorating, it should be completely cool. If the frosting touches a warm cake layer, it will start to melt, and the flowers will lose their shape. - Make the buttercream.
Beat the soft butter for 2–3 minutes, until it becomes lighter. Add the powdered sugar in parts, then vanilla, salt, and 2 tbsp milk or cream. If the frosting is too thick, add a little more milk. If it is too soft, add powdered sugar. The frosting should stay on the spatula, but pipe easily from the bag. - Cover the cake with a thin layer of frosting.
Spread some of the white frosting on top and smooth it with a spatula. A perfectly smooth surface is not needed. If the cake is crumbly, make a very thin first layer, put the cake in the fridge for 15 minutes, then add a little more frosting. - Divide and color the frosting.
Leave part of the frosting white or creamy. Put the rest into small bowls and color it pink, yellow, purple, and green. For wildflower cake decor, it is better not to make the colors too bright. Soft shades look nicer on a light background. - Make the first flowers.
Fill the bag with pink frosting. Hold the tip almost vertical, press lightly, make a small turn with your wrist, and release the pressure. You will get a simple rosette. Make a few flowers like this nearby in different sizes. - Make flowers in other shades.
Then make yellow and purple flowers. Do not place them in straight rows. It is better to make one corner fuller, a couple of flowers closer to the center, and a small trail along the lower edge. This way the decor will look like a little flower patch, not like a pattern from a template. - Add green details.
You need only a little green frosting. Make short green strokes between the flowers with the same tip. They may not look like real leaves. Their job is to connect the flowers together.
If you want to add real flowers, be careful. Not all flowers are edible, and not all store-bought flowers are suitable for food. The University of Minnesota advises using only flowers that are definitely safe to eat and have not been treated with chemicals.
Before serving, chill the cake for 20–30 minutes. The frosting will become firmer, the flowers will hold their shape better, and the slices will cut more neatly. You can serve the cake right in the pan or move it to a board. For a birthday, it is better to place the candles on the side, so you do not damage the flower design.
This option is good for a first try with floral cake decorating: one shape, one tip, a few shades of frosting — and the cake already looks festive. I am sure you can handle this without feeling like you are taking an exam at pastry school.
2. Buttercream Wildflower Wreath Cake With Quick Crumb Coat
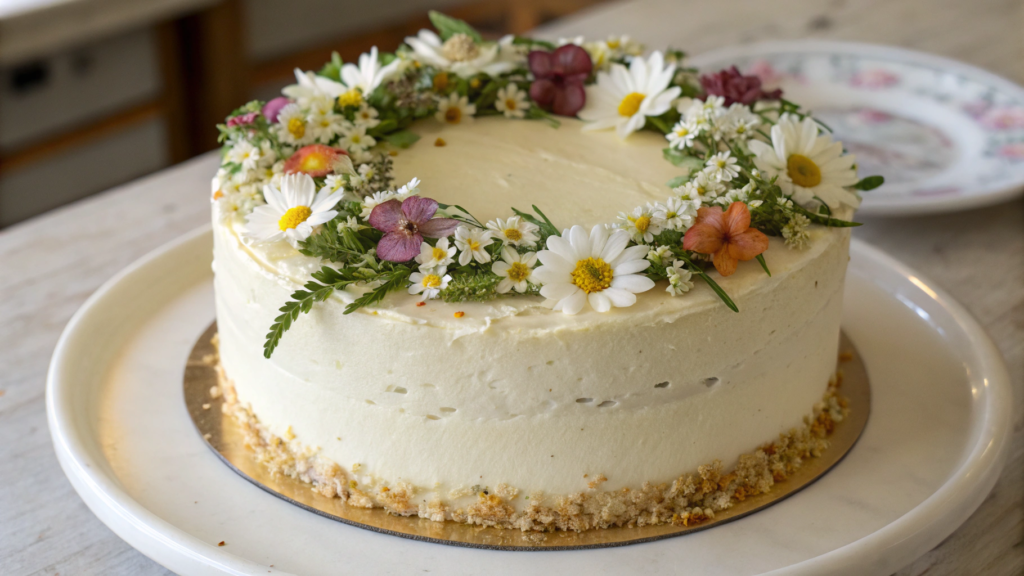
This is a round cake with a wreath of buttercream wildflowers. First, cover the cake layers with a quick crumb coat to seal in the crumbs, then add the final coat and decorate the top with buttercream flowers in a circle. This cake looks dressier than a simple sheet cake, but it still feels manageable for a home kitchen.
What you’ll need
For this cake, it is better to bake two round cake layers, 8 or 9 inches. You can use a homemade vanilla recipe or a boxed cake mix. If you use a boxed mix, add 1 tsp vanilla extract or a little lemon zest. That will make the flavor fresher, and it will not add much extra work.
You will need:
- 2 baked and fully cooled round cake layers, 8–9 inches;
- 1 cup unsalted butter, soft but not melted (227 g);
- 4 cups powdered sugar (about 480 g);
- 2–3 tbsp milk or cream (30–45 ml);
- 1 tsp vanilla extract;
- a pinch of salt;
- gel food colors: pink, yellow, green, lavender;
- 1–2 piping bags;
- a star tip and a small round tip;
- a frosting spatula.
For the crumb coat, it is handy to use an angled icing spatula → Wilton Angled Icing Spatula. It makes it easier to spread the frosting on the sides and top, especially if the cake is small.
How to make it
- Make the buttercream.
Beat the soft butter for 2–3 minutes, until it becomes lighter. Add the powdered sugar in parts, then vanilla, salt, and 2 tbsp milk or cream. If the frosting is too thick, add a little more milk. If it is too soft, add powdered sugar. The frosting should hold its shape, but still come out of the piping bag easily. - Assemble the cake from two layers.
Place the first cake layer on a board or plate. Spread a layer of frosting about ½ inch thick (about 1.2 cm), then place the second layer on top. If the top is too domed, carefully trim it with a knife. Surgical precision is not needed here — just remove the strong unevenness. - Make a quick crumb coat.
Spread a thin layer of frosting over the top and sides. This is the crumb coat that catches the crumbs and helps the final coat go on more neatly. It does not need to look pretty. Its job is to cover the cake and keep the crumbs from mixing into the next layer. - Chill the cake.
Put the cake in the fridge for 15–20 minutes. During that time, the frosting will firm up a little. Then it will be easier to add the second layer, and the surface will look neater. During this time, you can divide the frosting into bowls and prepare the colors for the wreath. - Add the final coat of frosting.
Cover the cake with a second layer of frosting. You can make the top smoother and leave the sides slightly textured. The main focus will be the flower wreath, so there is no need to spend an hour trying to get perfectly smooth sides. - Mark the circle for the wreath.
Lightly draw a circle with a toothpick closer to the edge of the cake. This will be the guide for the flowers. Leave the center open. You can place a candle there, a small message, or simply leave it empty. - Make the buttercream flowers.
Start with pink and lavender rosettes. Hold the tip straight up, press gently, make a short turn, and release the pressure. Then make small yellow flowers with a round tip or the same star tip. Do not make all the flowers the same: the wreath looks better when large flowers and very small dots sit next to each other. - Add green details.
Pipe short green strokes between the flowers. Do not fill the whole circle with leaves. A few small green accents are enough for the flower wreath to look pulled together and for the flowers themselves not to get lost.
For a cake, you need only edible flowers grown without treatment, or a full buttercream decor.
For this cake, I would choose buttercream flowers — simpler, safer, and there is no need to guess what was on the stems.
Before serving, chill the cake again for 20–30 minutes. The flowers will become firmer, and the wreath will hold up better when sliced. This cake looks good on a simple white plate or a wooden board.
I would prefer to leave just the flower circle — without extra decor and without trying to fill every inch.
3. Pink Meadow 1st Birthday Cake With Tiny Daisies
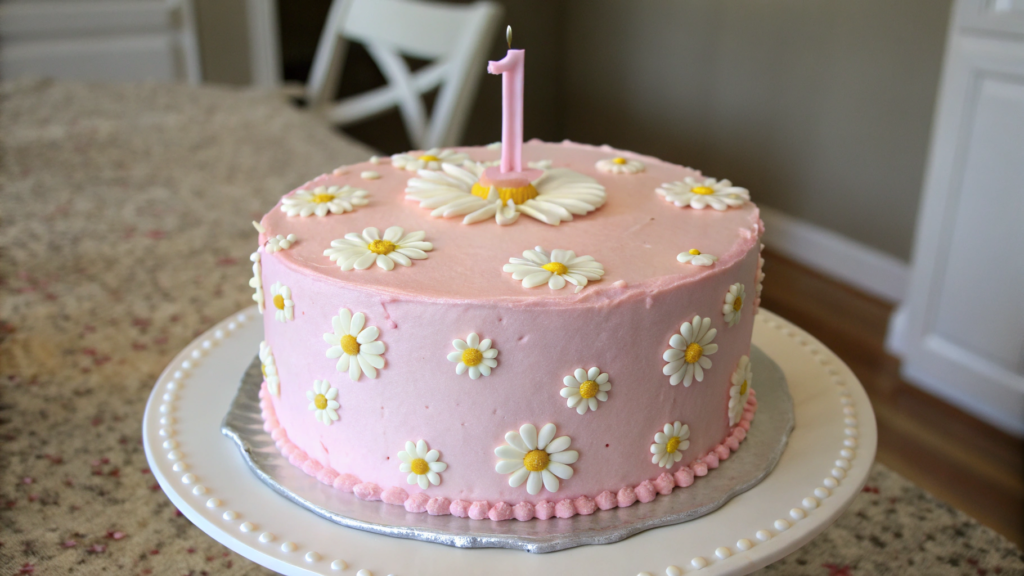
The base for Pink Meadow 1st Birthday Cake With Tiny Daisies can be round or rectangular, but this decor looks best on a small 6- or 8-inch round cake. It looks festive, soft, and childlike, but without huge figures, heavy decor, or colors that are too bright.
For a first birthday, it is better to think of this cake as a party cake for the family table, adult guests, a candle, and photos. In this format, tiny buttercream daisies look very cute: they give the cake soft decor, do not overload the top, and look pretty next to one candle.
What you’ll need
For the base, you can bake two round cake layers, 6 or 8 inches. Vanilla, lemon, or a light almond flavor will work best. I often use a boxed cake mix, and you can add a little vanilla or lemon zest to make the flavor a little brighter.
You will need:
- 2 baked and fully cooled round cake layers, 6–8 inches;
- 1 cup unsalted butter, soft but not melted (227 g);
- 4 cups powdered sugar (about 480 g);
- 2–3 tbsp milk or cream (30–45 ml);
- 1 tsp vanilla extract;
- a pinch of salt;
- pink, yellow, and green gel food colors;
- 2–3 piping bags;
- a small round tip;
- a petal tip or a small star tip;
- a frosting spatula.
You do not need a large professional set of piping tips here. A small round tip for the centers and a tip that can pipe short petals are enough.
How to make it
- Make the buttercream.
Beat the soft butter for 2–3 minutes. Add the powdered sugar in parts, then vanilla, salt, and 2 tbsp milk or cream. The frosting should be soft, but not runny. For tiny daisies, it is important that the frosting holds its shape, otherwise the petals will blend into white spots. - Assemble a small cake.
Place the first cake layer on a plate or cake board. Spread a layer of frosting, cover it with the second cake layer, and press lightly. If the top is too domed, carefully trim it with a knife. Surgical precision is not needed here — the cake will still be covered with frosting. - Color the background soft pink.
Set aside a little white frosting for the daisies and a tiny bit of frosting for the yellow centers and green details. Color the main part a soft pink. Add the food color one drop at a time. - Cover the cake with pink frosting.
Spread the frosting on top and around the sides. The surface can stay slightly textured. I like it when the background is not perfectly smooth: it looks more like a soft meadow, not a plastic surface. But strong lines are not needed either, because the daisies should be the main accent. - Mark the places for the daisies.
Do not cover the whole cake with flowers. Make one small group of daisies on the side, a few flowers on top, and a couple of separate dots closer to the edge. The pink background should stay visible, otherwise the idea of a pink meadow cake disappears. - Make the tiny daisies.
Pipe short petals with white frosting around the future center. You can make 5–7 petals for one flower. Do not try to make all the daisies the same. With tiny flowers, a little difference in size actually looks good. - Make the yellow centers.
Pipe small dots of yellow frosting in the center of each daisy. Here it is better not to press too hard on the bag. The center should be neat, but not huge. One small yellow dot immediately makes the flower recognizable. - Add a little greenery.
Pipe a few short green strokes next to the daisies. Do not turn the top of the cake into grass. For this design, the greenery is just a small extra detail.
Tip. For this cake, it is better to make the pink frosting a little lighter than you want at first. On a large layer, the color almost always looks brighter than it does in a small bowl. Add the food color one drop at a time, mix it, and let the frosting sit for 5–10 minutes: gel colors often become more noticeable, but not right away.
Before serving, chill the cake for 20–30 minutes. This will make the daisies firmer, and the pink frosting layer will not smear as much when sliced. It is better to place the candle closer to the center or on the side, so you do not ruin the flowers.
In the decor for a pink meadow cake, there should always be some open space. A little pink background, a few tiny daisies, one neat accent for the candle — and the cake already looks pretty and soft, not like a bakery display where everything possible was placed on the surface.
4. Rectangle Wildflower Snack Cake With Jam Brush Finish
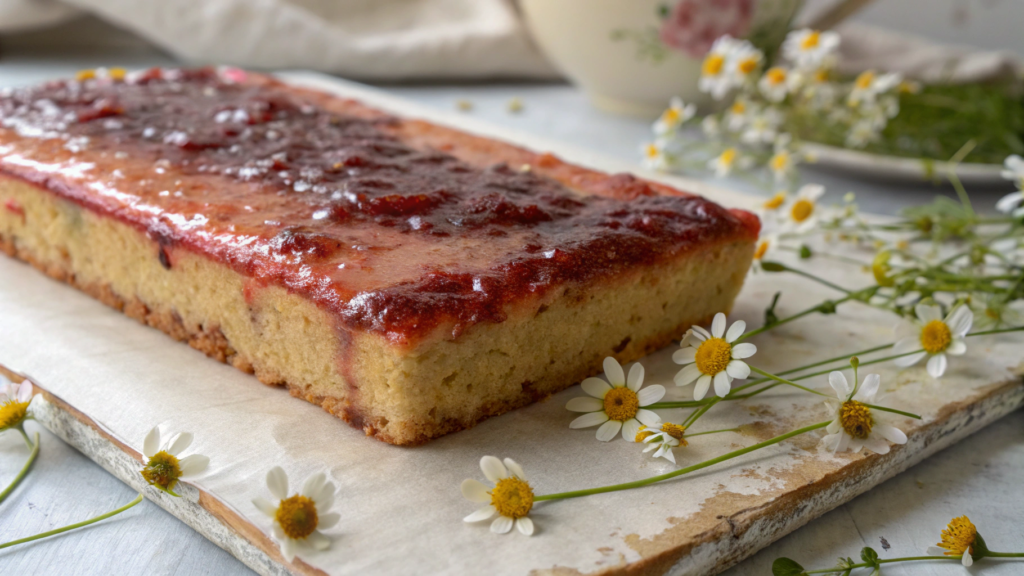
In this cake, we do not make a thick layer of frosting over the whole surface. Instead, we lightly brush the top with warm jam. You get a thin fruity shine, a little flavor, and a pretty background for small buttercream wildflowers.
What you’ll need
For the base, use a boxed cake mix or an already baked rectangular cake layer. An 8 × 8 or 9 × 13 inch pan works best, depending on how many pieces you need. Vanilla, lemon, or almond cake goes well here with berry jam.
You will need:
- 1 baked and fully cooled rectangular cake layer;
- ½ cup smooth berry jam (about 160 g);
- 1–2 tsp water or lemon juice;
- ½ cup unsalted butter, soft but not melted (113 g);
- 2 cups powdered sugar (about 240 g);
- 1–2 tbsp milk or cream (15–30 ml);
- ½ tsp vanilla extract;
- a pinch of salt;
- gel food colors: white, yellow, green, pink;
- a piping bag;
- a small round tip or star tip;
- a food-safe brush.
How to make it
- Prepare the rectangular cake layer.
If you are using a boxed mix, bake the cake layer according to the instructions and let it cool completely. For a snack cake, it is better not to take the cake out of the pan too early: a rectangular cake layer can crack easily if it is still warm. - Make a quick frosting for the flowers.
Beat the soft butter for 2 minutes, add the powdered sugar in parts, then vanilla, salt, and a little milk or cream. The frosting should be thicker than frosting for a regular coating. We do not need much frosting, only small flowers and a few green details. - Divide the frosting into colors.
Leave part of the frosting white for the petals. Color a little yellow for the centers, a little green for the stems and leaves, and just a little pink for a couple of accent flowers. There should not be many colors. In this cake, the main surface is the jam brush finish, not a thick frosting layer. - Warm the jam.
Put the jam into a small bowl, add 1–2 tsp water or lemon juice, and warm it slightly. You can do this in the microwave in short 5–10 second bursts. The jam should become thinner, but not hot. If it has large pieces of berries, it is better to press it through a sieve. - Brush the top with jam.
Use the brush to spread a thin layer of jam over the top of the cake. Do not pour it over the surface. The jam brush finish should be light: a little shine, a little berry flavor, but no sticky puddle on top. Strawberry, raspberry, or apricot jam looks especially pretty. - Make small buttercream flowers.
When the jam layer has cooled slightly and stopped spreading, pipe small white flowers on top of the cake. You can make simple dots in a circle or short petals around a yellow center. For this format, very small flowers look good, because the cake itself is low and simple. - Add green details.
With green frosting, make a few short strokes next to the flowers. Do not draw long stems across the whole cake. For a snack cake, small flower spots look better: one corner, the middle, and a few dots closer to the edge.
Tip. Do not use jam that is too dark if you want a soft wildflower look. Blueberry or blackberry jam can taste good, but the background will be darker, and tiny flowers will look heavier on it. For a lighter look, it is better to use strawberry, raspberry, or apricot jam and spread it very thinly.
This cake is easy to serve as small squares with tea. Slice it after the jam layer has stopped sticking to the knife. To keep the pieces neat, wipe the knife after a few cuts. This way the top stays clean, and the small flowers do not smear across the jam.
5. Wildflower Drip Cake With White Chocolate Ganache Shortcut
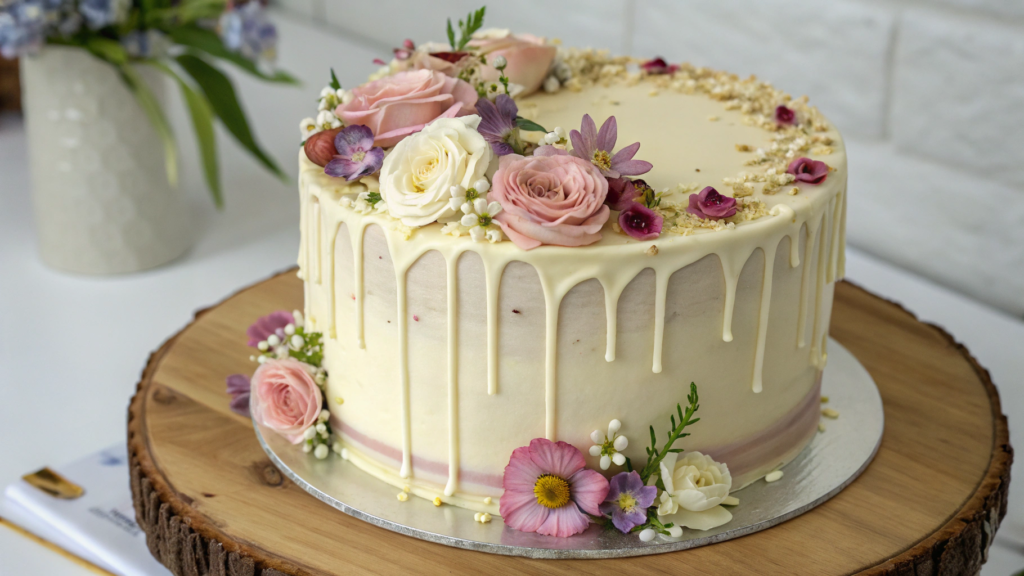
This cake looks dressier than a regular frosted cake, and it is not as hard to make as it seems. The main thing here is to let a quick white chocolate ganache run down the edge of the cake in thin drips, then add a few buttercream flowers on top.
For this cake, it is better to use a round shape and two ready-made 8- or 9-inch cake layers.
What you’ll need
For the base, use a boxed cake mix or already baked cake layers. Vanilla, lemon, or strawberry flavor goes well with white chocolate. Chocolate cake also works, but the cake will look more contrasting: a dark base, light ganache, and flowers on top. For a softer and more delicate look, it is better to choose a light cake layer.
You will need:
- 2 baked and fully cooled round cake layers, 8–9 inches;
- 1 cup unsalted butter, soft but not melted (227 g);
- 4 cups powdered sugar (about 480 g);
- 2–3 tbsp milk or cream (30–45 ml);
- 1 tsp vanilla extract;
- a pinch of salt;
- gel food colors: pink, yellow, green, lavender;
- 6 oz white chocolate or white chocolate chips (about 170 g);
- ⅓ cup heavy cream (about 80 ml);
- piping bags;
- a small round tip and a star tip;
- a spoon or a small bottle for the ganache.
How to make it
- Make the buttercream.
Beat the soft butter for 2–3 minutes. Add the powdered sugar in parts, then vanilla, salt, and a little milk or cream. For the coating, you can keep the frosting light, but not perfectly white: a creamy shade will look softer next to the white chocolate ganache. For the flowers, set aside part of the frosting in a separate bowl. If it is too soft, add 1–2 tbsp powdered sugar and mix well. The frosting for the flowers should come out of the piping bag easily, but not spread after piping. - Assemble the cake layers.
Place the first cake layer on a cake board, spread a layer of frosting, cover it with the second cake layer, and press lightly. If the top is domed, carefully trim off the extra. Here a level top matters more than perfect sides, because the drips will immediately draw attention to the top edge. - Cover the cake with frosting.
Cover the cake with a thin layer of frosting on top and around the sides. If you want the white chocolate ganache drips to be more noticeable, leave the frosting creamy, very light pink, or pale yellow, not pure white. Then the ganache will not disappear into the background. The sides do not have to be perfectly smooth, but it is better to cover any large dents. Drips look better on a chilled frosting coating, so put the cake in the fridge while you make the ganache. - Make a quick white chocolate ganache.
Put the white chocolate in a bowl. Heat the cream until it is almost hot, but do not boil it. Pour the cream over the chocolate, leave it for 2 minutes, then stir until smooth. If there are still pieces left, warm the mixture in short 5-second bursts and stir again. - Check the ganache thickness.
The ganache should not be hot or too runny. Drip a little down the inside of a glass or along the edge of a plate. If the drip runs too fast, wait a couple of minutes. If it barely moves, add a tiny bit of warm cream. The right ganache flows slowly, not all the way down to the bottom of the cake. - Make the drips around the edge.
Apply the ganache along the top edge of the cake with a spoon or bottle. First make a few test drips on the back side. Then move around the cake and add the ganache in small amounts. You do not need to cover the whole edge at once. This makes it easier to control the length of the drips. - Add buttercream flowers.
When the ganache has set a little, make small rosettes, daisies, or simple stars from buttercream on top. It is better to place the flowers in groups: one larger, two smaller, and a little greenery nearby. The wildflowers should not cover the whole shiny top. - Add green details.
With green frosting, make short strokes between the flowers. If the top is already busy with ganache, you need only a little greenery. A few neat strokes are enough to make the flower groups look connected.
Tip. For white chocolate ganache, it is better to use real white chocolate with cocoa butter, not the cheapest white baking chips. Cheap chips sometimes melt worse and give a grainy texture. If the ganache turns out too thick, do not panic: add a little warm cream and stir until smooth.
After adding the ganache, let the cake sit for 10–15 minutes in the fridge or about 20 minutes at cool room temperature. The drips should stay soft, but no longer keep running down the side. After that, make the buttercream flowers: one small group closer to the center, one at the edge, and a couple of green strokes nearby.
Do not cover the top with too many flowers. This way the white chocolate ganache drips stay visible, and the buttercream wildflowers look like a neat accent, not like an attempt to cover the whole cake with decor.
6. Real Flower Garden Cake With Food Safe Barrier Method
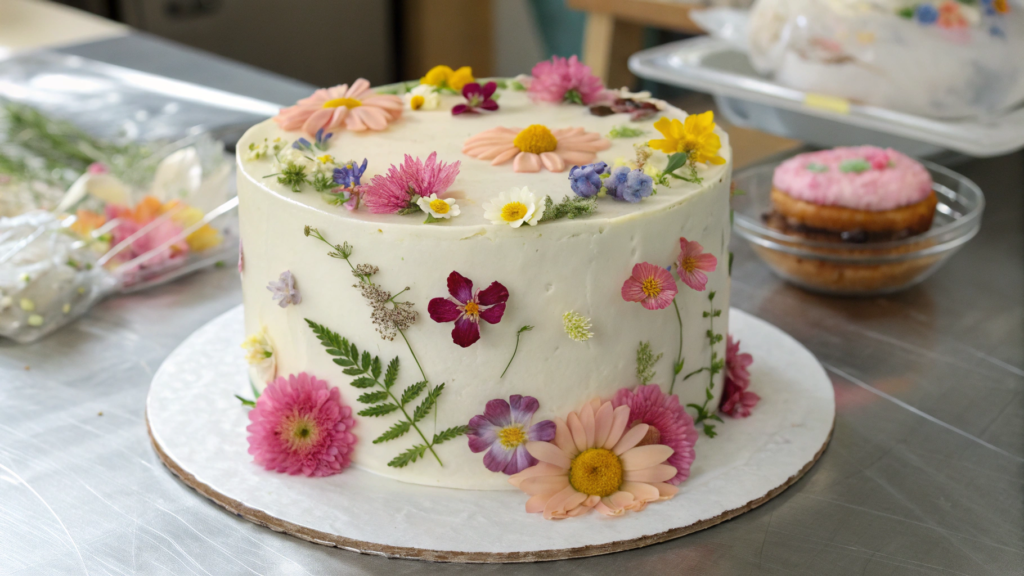
In Real Flower Garden Cake With Food Safe Barrier Method, we make pretty garden decor, but we separate the flowers from the surface of the cake with parchment paper, plastic wrap, a small cake board, or special flower tubes.
I can picture how beautiful this cake would look at a spring birthday, a garden party, or a small wedding. Real flowers are not just buttercream decoration. Here it is important to know which flowers you can use, where they came from, and how they touch the cake.
What you’ll need
For the base, use a boxed cake mix or already baked cake layers. It is better to use an 8- or 9-inch round cake with an even layer of frosting on top. The flowers will be the main decor, so the cake itself can stay simple: just cover it with white, creamy, light pink, or soft yellow frosting.
You will need:
- 2 baked and fully cooled round cake layers, 8–9 inches;
- 1 cup unsalted butter, soft but not melted (227 g);
- 4 cups powdered sugar (about 480 g);
- 2–3 tbsp milk or cream (30–45 ml);
- 1 tsp vanilla extract;
- a pinch of salt;
- real flowers suitable for food decor;
- parchment paper or plastic wrap for the barrier;
- small flower tubes or cocktail straws;
- scissors;
- tweezers or small tongs;
- a frosting spatula.
For this kind of decor, it is useful to have cake flower tubes → Plastic Flower Tubes for Cakes. They help separate the stems from the cake, especially if the flowers need to stand upright instead of simply lying on top.
How to make it
- Make the buttercream.
Beat the soft butter for 2–3 minutes, until it becomes lighter. Add the powdered sugar in parts, then vanilla, salt, and 2 tbsp milk or cream. If the frosting is too thick, add a little more milk or cream. If it is too soft, add a little powdered sugar. For this cake, the frosting is mostly for coating, so it should spread easily with a spatula and stay on the sides of the cake. - Cover the cake with an even layer of frosting.
Assemble the cake from two layers, spread frosting between the layers, then on top and around the sides. You do not need a complicated texture here. The real flowers will already add volume, so it is better to keep the frosting calm and light. - Choose flowers for the decor.
Buy edible flowers that are sold specifically for food: in the greens section, from local farmers, in a baking supply shop, or through services that sell microgreens and edible flowers. A regular bouquet from a flower shop is not suitable for a cake: those flowers are not grown or transported as a food product. - Remove extra leaves and long stems.
Cut the stems short, leaving only what you need for placing the flowers. Remove any leaves that would touch the frosting. If the flower will lie on top, you can remove almost the whole stem. If it will stand upright, leave a short stem for the tube. - Make the food-safe barrier.
For flowers that lie on top, cut a small piece of parchment paper or plastic wrap and place it under the flower group. For flowers on stems, use special tubes or clean cocktail straws: place the stem inside first, then insert the tube into the cake. The stem should not touch the frosting or cake layer directly. - Place the flowers in one group near the edge of the cake.
Choose a spot on the top surface of the cake, closer to the edge, around “10 o’clock” or “2 o’clock” if you imagine the cake as a clock face. Place the largest flower first, add 2–3 smaller flowers next to it, and angle the greenery slightly toward the center. Do not cover the whole surface. One flower group looks neater and is easier to remove before slicing. - Leave room for slicing.
If the cake will be cut at the table, do not place the flowers exactly where the first cut will go. It is more convenient to keep the arrangement closer to one edge. Then you can remove it in one motion before slicing, without taking apart the whole top of the cake.
Tip. Before placing the flowers on the cake, lay out the arrangement on a plate or a piece of parchment paper. This way you can see which flowers are too large, where you need smaller details, and how much space the whole decor will take. On the cake itself, it is better to move the real flowers as little as possible, because you can damage the decor.
Real flowers on a cake look beautiful, but they should stay decor, not filling. Before slicing, remove the flowers together with the barrier, and only then cut the cake. This keeps the frosting clean, makes the slices look neater, and stops guests from wondering which part of the decoration is edible and which part is better left on the plate.
7. Wedding Wildflower Cake With Minimalist Piped Botanicals
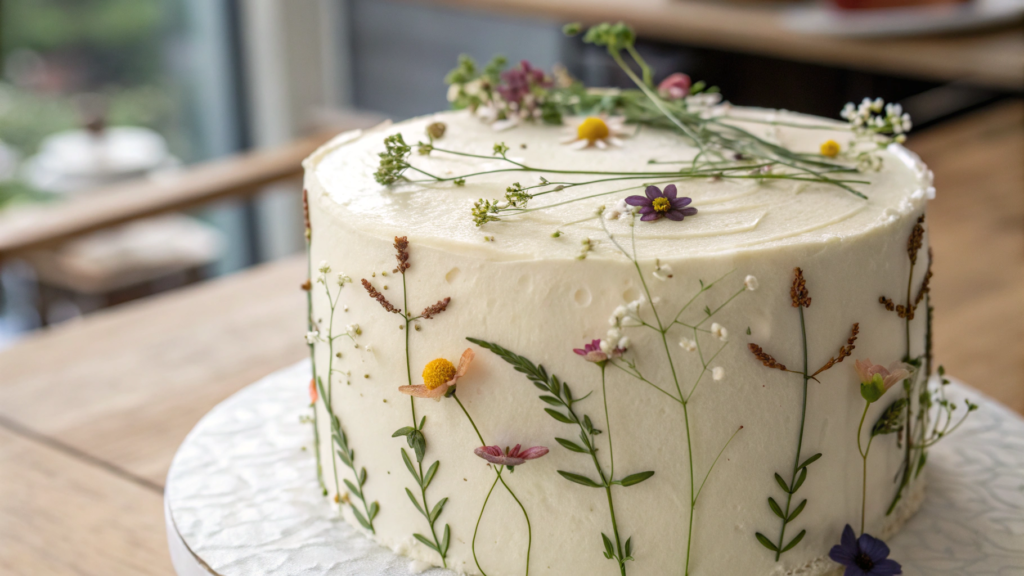
This kind of cake looks especially good for a small wedding, a home ceremony, or a dinner in the garden. It stays elegant, but it does not look overloaded. The main idea of this cake is plenty of open space, light frosting, and a few precise floral lines.
The whole decor is built around thin stems, small buds, short leaves, and a few buttercream wildflowers.
What you’ll need
For the base, use a boxed cake mix or already baked cake layers. It is better to use 2–3 round cake layers, 8 or 9 inches. Vanilla, lemon, or almond flavor works well for a wedding cake.
You will need:
- 2–3 baked and fully cooled round cake layers, 8–9 inches;
- 1 cup unsalted butter, soft but not melted (227 g);
- 4 cups powdered sugar (about 480 g);
- 2–3 tbsp milk or cream (30–45 ml);
- 1 tsp vanilla extract;
- a pinch of salt;
- gel food colors: green, white, soft yellow, light pink;
- 2–3 piping bags;
- a small round tip;
- a small leaf tip;
- a frosting spatula;
- a toothpick for light marking.
For thin stems and small dots, it is useful to have a round piping tips set → Wilton Round Piping Tips Set. Small sizes are exactly what you need here, because a large tip will quickly make the decor look too heavy.
How to make it
- Make the frosting for coating and decor.
Beat the soft butter for 2–3 minutes, add the powdered sugar in parts, then vanilla, salt, and a little milk or cream. For coating, the frosting can be a little softer. For thin stems and leaves, keep part of the frosting thicker. Frosting that is too soft will not give clean lines, and the botanical decor will start to spread. - Assemble a tall, neat cake.
Place the first cake layer on a cake board, spread a layer of frosting, then place the next cake layer on top. If you have three layers, repeat one more time. Press the top lightly so the cake stands straight. It is important that the cake does not lean, because that can ruin the whole decor. - Cover the cake with light frosting.
Spread the frosting on top and around the sides. It is better to keep the color white, creamy, or very light. On this kind of background, thin green lines and small flowers are easier to see. The sides of the cake do not have to be mirror-smooth, but it is better to remove large uneven spots. - Mark 2–3 areas for the decor.
Use a toothpick to lightly mark where the stems will go. Do not draw branches all over the cake. For a minimalist wedding version, one vertical line on the side, a small group on top, and a couple of separate buds closer to the edge are enough. Open space here is just as important as the flowers themselves. - Pipe thin stems.
With green frosting and a small round tip, pipe short curved lines. Do not make them perfectly identical. The stems can be slightly different in length and angle. The main thing is not to press too hard on the bag, so the lines do not become thick. - Add leaves and small buds.
With a small leaf tip, make short leaves along the stems. Then add white, yellow, or light pink dots as buds. Minimalist decor can quickly become heavy if you add too many details, so it is better to stop in time. - Make a few wildflowers.
Add 3–5 small buttercream flowers. They can be very simple: a few white petals and a yellow center. You do not need to turn a wedding cake into a flower bed. In this idea, the flowers act as accents, not as a dense surface.
Tip. Before piping the stems on the cake, practice on a piece of parchment paper. Make 5–6 lines, a couple of leaves, and a few dots. This way your hand gets used to the pressure on the bag, and the first awkward tries will not end up directly on the wedding cake.
It is better to move this cake already on its cake board and not touch the sides after decorating. Thin stems can easily smear from a finger or the edge of the box. If you need to transport the cake, leave a little space between the decor and the edge of the cake board, so the box does not touch the frosting.
A cake with minimalist buttercream botanicals always looks airy and festive. A few thin stems, small buds, a light background — and that is enough for a wedding.
8. Victoria Sponge Style Wildflower Cake With Rose Jam Layer
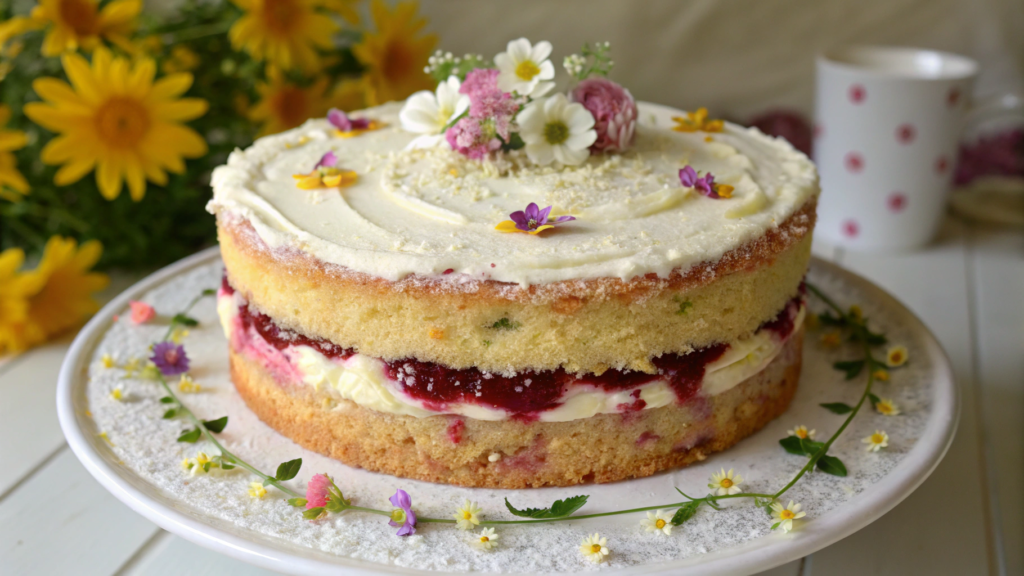
I like baking Victoria Sponge Style Wildflower Cake With Rose Jam Layer with a small difference from the classic version. I add rose jam and tiny buttercream flowers, and in this form it works beautifully for a birthday or tea with friends.
What you’ll need
For the base, use a boxed cake mix or already baked round cake layers. It is better to use 2 cake layers, 8 or 9 inches. A simple flavor works here: vanilla, butter, or lemon. A very bold flavor is not needed, because the rose jam should be noticeable.
You will need:
- 2 baked and fully cooled round cake layers, 8–9 inches;
- ½ cup rose jam or rose petal jam (about 160 g);
- 1 cup unsalted butter, soft but not melted (227 g);
- 4 cups powdered sugar (about 480 g);
- 2–3 tbsp milk or cream (30–45 ml);
- 1 tsp vanilla extract;
- a pinch of salt;
- gel food colors: pink, yellow, green;
- a piping bag;
- a small round tip or star tip;
- a frosting spatula;
If you cannot find rose jam in a regular store, you can use rose petal jam → Cortas Rose Petal Jam. Just spread it thinly: rose has a strong aroma, and a thick layer can quickly overpower the flavor of the cake.
How to make it
- Make the buttercream.
Beat the soft butter for 2–3 minutes, add the powdered sugar in parts, then vanilla, salt, and a little milk or cream. For the filling, the frosting can be softer, and for the small flowers on top, set aside part of the frosting and keep it thicker. The buttercream flowers should hold their shape, even if there are only a few of them. - Prepare the two cake layers.
If you are using a boxed mix, bake the cake layers according to the package instructions and let them cool completely. For this cake, it is better not to cover the sides with frosting. So the edges should be neat, and large crumbs can simply be brushed off with a pastry brush or a clean hand. - Assemble the cream and jam layer.
Place the first cake layer on a plate. Spread a layer of frosting, but do not take it all the way to the edge. Add a thin layer of rose jam on top. Then place the second cake layer on top. If the jam comes out the sides, it means there was too much of it. For this cake, a thin fragrant layer is better than a sticky filling. - Leave the sides open.
Do not cover the whole cake with frosting. In the Victoria sponge style, open cake layers and a visible filling layer look prettier. On top, you can spread a very thin layer of frosting or simply leave the top almost clean and lightly dust it with powdered sugar. - Add buttercream flowers.
Make a few small flowers on top: 3–5 rosettes, a couple of yellow centers, and a few green strokes nearby. Do not cover the whole top. The buttercream wildflowers should look like a small delicate decoration, not like a fluffy frosting cap. - Lightly dust with powdered sugar.
Take just a little powdered sugar and dust the top of the cake. Do not cover the flowers completely. A light dusting helps keep the Victoria sponge look and makes the top look airier.
Tip. Before assembling, stir the jam with a spoon and check the thickness. If it is too thick, warm it slightly for 5–10 seconds and let it cool until warm. This way the jam will spread more easily in a thin layer and will not tear the frosting under the spoon.
This cake is better to slice with a sharp knife, without pressing too hard from above. The open sides and jam layer can shift a little if you press too strongly. Make the first cut slowly, wipe the knife, then keep cutting. This way each slice will show the light cake, frosting, and thin pink layer. It looks pretty, neat, and appetizing.
9. Tahini Vanilla Wildflower Cake With Toasty Nutty Notes
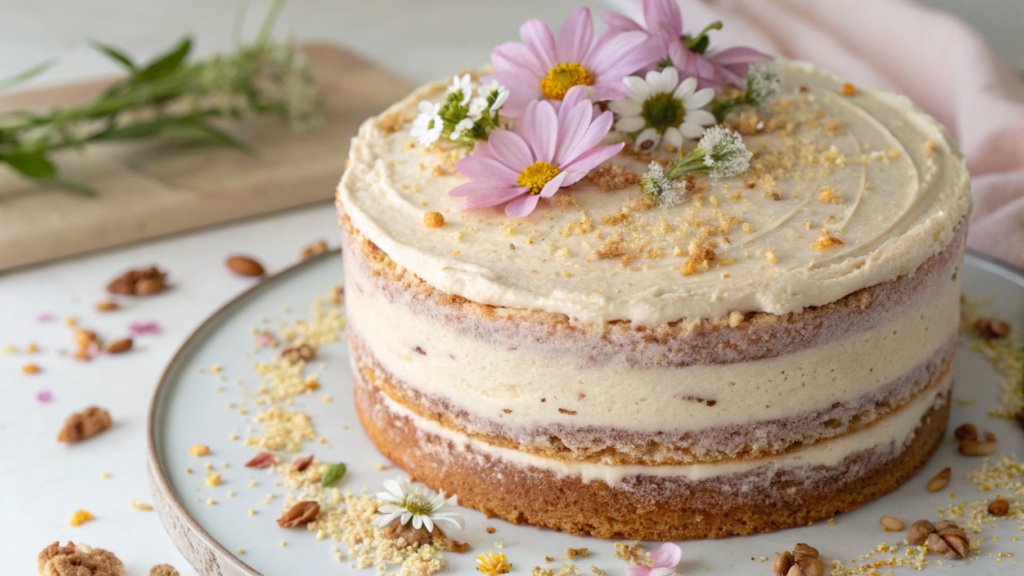
In this cake, the main thing is the vanilla tahini frosting, the soft color, and the small flowers on top. Tahini gives a light bitterness, a warm sesame aroma, and balances the sweetness of the powdered sugar well.
What you’ll need
For the base, use a boxed cake mix or already baked cake layers. It is better to choose a vanilla or white cake, so the tahini does not get lost behind chocolate or strong berry flavors.
You will need:
- 2 baked and fully cooled round cake layers, 8–9 inches;
- ¾ cup unsalted butter, soft but not melted (170 g);
- ¼ cup tahini, well stirred (about 60 g);
- 3½–4 cups powdered sugar (about 420–480 g);
- 2–3 tbsp milk or cream (30–45 ml);
- 1 tsp vanilla extract;
- a pinch of salt;
- gel food colors: white, yellow, green, light pink;
- piping bags;
- a small round tip;
- a star tip;
- a frosting spatula.
For this cake, it is better to use smooth tahini. If the paste has separated in the jar, stir it well before adding it to the frosting. Tahini that is too thick or grainy can make the frosting heavy and uneven.
How to make it
- Make the vanilla tahini frosting.
Beat the soft butter for 2–3 minutes. Add the tahini and vanilla, then beat again until smooth. After that, add the powdered sugar in parts. At the end, add salt and a little milk or cream. The frosting should be smooth, thick, and easy to spread on the cake layer. - Prepare the cake layers.
If you are using a boxed mix, bake the cake layers according to the instructions and let them cool completely. A warm cake layer will quickly soften the frosting, especially if it has tahini in it. Lightly brush crumbs off the edges, so the frosting layer goes on better. - Set aside frosting for the flowers.
Keep part of the frosting for coating and filling, and divide a small part for the decor. For flowers, it is better to make the frosting a little thicker: add a little powdered sugar if it is too soft. Tahini makes the frosting silkier, but small petals still need shape. - Assemble the cake.
Place the first cake layer on a cake board, spread a layer of vanilla tahini frosting, place the second cake layer on top, and press lightly. Do not make the filling too thick. Tahini has a rich flavor, so a thin layer is usually enough. - Cover the cake with frosting.
Spread the frosting on top and around the sides. You can leave the color natural: it will be slightly warm, not pure white. That is fine. Small white, yellow, and light pink buttercream flowers look good on this kind of background. - Add buttercream wildflowers.
Make a few small rosettes and daisies on top. It is better to place them not in a tight circle, but in small groups: one near the edge, one closer to the center, and a few separate dots nearby. The flowers should not cover the whole top, because this cake already has its own special flavor and soft natural shade. - Add green details.
With green frosting, make short strokes near the flowers. Here it is better not to use too much bright green. On warm tahini frosting, a soft olive-green shade will look nicer than acid green.
Tip. Before adding tahini to the frosting, taste it on its own. Good tahini should taste nutty, sesame-like, and slightly bitter. If the paste tastes very bitter or old, it will be even more noticeable in the frosting. For this cake, it is better to open a fresh jar.
This cake is good to serve with coffee, black tea, or berries without syrup. This way the vanilla, sesame, and soft sweetness of the frosting do not get lost behind extra toppings.
10. Mexican Vanilla Wildflower Cake With Cinnamon Milk Soak
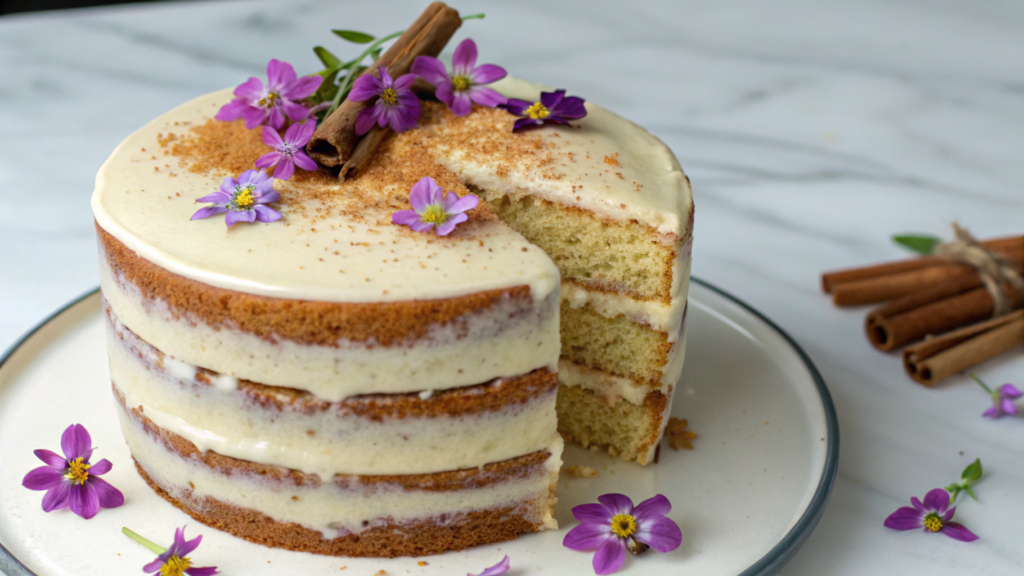
With Mexican Vanilla Wildflower Cake With Cinnamon Milk Soak, the flavor changes because of the soak: milk, vanilla, cinnamon, and a little time so the cake layer becomes softer and more aromatic.
We do not pour so much over the cake that it becomes wet. Instead, we carefully soak the cake layers with a brush or spoon. In the end, you get a soft vanilla cake with a warm cinnamon flavor that goes well with light frosting and small flowers.
What you’ll need
For the base, use a boxed cake mix or already baked round cake layers. It is better to use a vanilla or white cake. Chocolate flavor will be too strong here and will overpower the vanilla and cinnamon.
You will need:
- 2 baked and fully cooled round cake layers, 8–9 inches;
- ½ cup milk (about 120 ml);
- 1 tbsp condensed milk or cream;
- ½ tsp ground cinnamon;
- 1 tsp Mexican vanilla or regular vanilla extract;
- 1 cup unsalted butter, soft but not melted (227 g);
- 4 cups powdered sugar (about 480 g);
- 2–3 tbsp milk or cream (30–45 ml);
- a pinch of salt;
- gel food colors: white, yellow, green, light pink;
- piping bags;
- a small round tip;
- a star tip;
- a food-safe brush or spoon.
How to make it
- Prepare the cake layers.
If you are using a boxed mix, bake the cake layers according to the instructions and let them cool completely. This is important for the soak: a warm cake layer can become too loose, and the milk will spread unevenly. - Make the cinnamon milk soak.
In a small bowl, mix the milk, condensed milk or cream, vanilla, and cinnamon. Stir well so the cinnamon does not stay in dry spots on top. The soak should be aromatic, but not too sweet, because there will still be frosting on top. - Soak the cake layers.
Place the first cake layer on a cake board and lightly brush the top with the milk mixture. It is better to do this with a brush or spoon, in small portions. Do not pour everything at once. For one cake layer, 2–3 tbsp of soak is usually enough. The cake layer should become softer, but not fall apart. - Make the frosting.
Beat the soft butter for 2–3 minutes, add the powdered sugar in parts, then salt, vanilla, and a little milk or cream. For coating, you can leave the frosting light. For the flowers, set aside a small part and color it yellow, green, and light pink. The frosting for the flowers is better a little thicker, so the petals do not spread on the soft cake. - Assemble the cake.
Spread a layer of frosting on the first soaked cake layer, place the second cake layer on top, and press lightly. If you want, you can also lightly brush the top of the second cake layer with the soak. Too much milk mixture will make the cake heavy. - Cover the cake with frosting.
Spread the frosting on top and around the sides. For this cake, it is better to keep the frosting light or slightly creamy, without a bright color. This way the small flowers on top will be more visible, and the cinnamon flavor will stay the main thing inside. You can leave light spatula marks, and there is no need to chase a perfectly smooth finish. - Add buttercream wildflowers.
Make a few small rosettes, daisies, or simple stars on top. For this cake, it is better to choose warm shades: creamy, pale yellow, soft pink, and a little green. Flowers that are too bright will look sharp on the light frosting, so it is better to keep the decor soft. - Add the final details.
With green frosting, make short leaves near the flowers. To highlight the cinnamon flavor, you can very lightly dust the edge of the cake with cinnamon through a fine sieve. Just do not sprinkle cinnamon on the flowers: it quickly stains light frosting.
Tip. First, make the soak weaker than you think you need. Milk does not absorb right away, and after 10 minutes the cake layer will become softer. If you add too much mixture at the beginning, you will not be able to fix it. It is better to add a little, wait, and only then decide if you need more.
This cake is better to slice after a short pause, when the milk soak has had time to spread inside the cake layer. It should not be wet, but it should slice softly and smell like vanilla and cinnamon.
Cake decoration
Many people try to decorate the whole top right away. You look at the open space and think, “Maybe one more flower?” And then one more. And one more. At some point, the cake already looks like a big fluffy frosting cap.
It is better to stop a little earlier. Leave some light background, give the flowers space, and do not hide the shape of the cake under the decor. Even a few small details can look beautiful when they have enough room.
What kind of cake do you usually like making for holidays, and how do you decorate it? Write in the comments. I am really interested in how other home bakers feel this fine line and know when to stop.