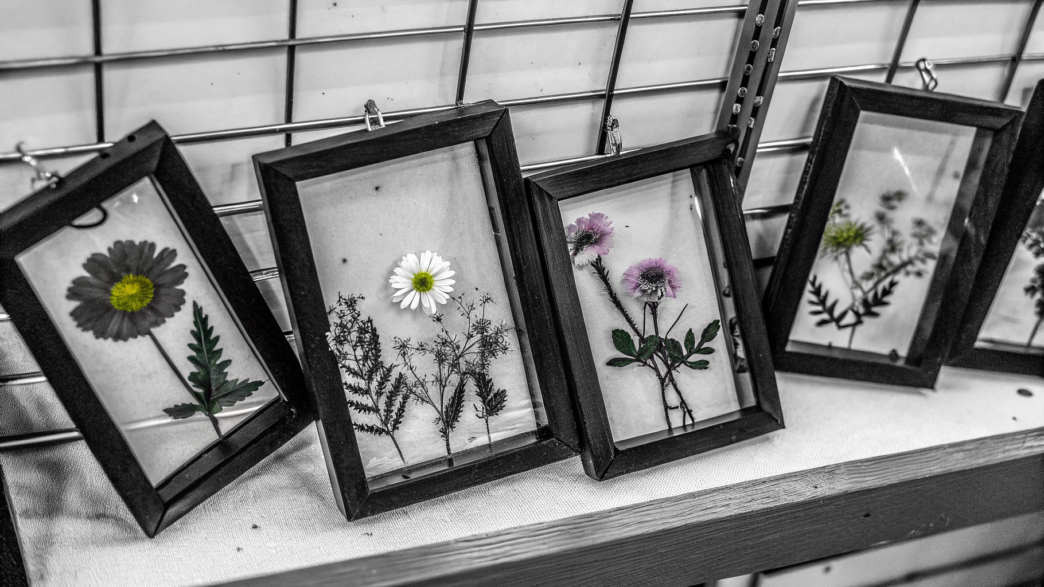
Flowers we receive as gifts or grow ourselves often bring back happy memories. And sometimes it’s such a shame when a beautiful bouquet starts to wilt. So I’d like to share a few ideas for how to preserve flowers using epoxy resin and other easy-to-find materials.
Like many people, we’ve collected quite a few of these little memories over the years. It’s especially nice to preserve flowers we’ve lovingly grown ourselves and then see them among our favorite things at home.
I’ll share some methods that will help preserve the shape and beauty of flowers for a long time, along with a few things to watch out for so your projects turn out neat and pretty.
1. Preparing flowers for resin art
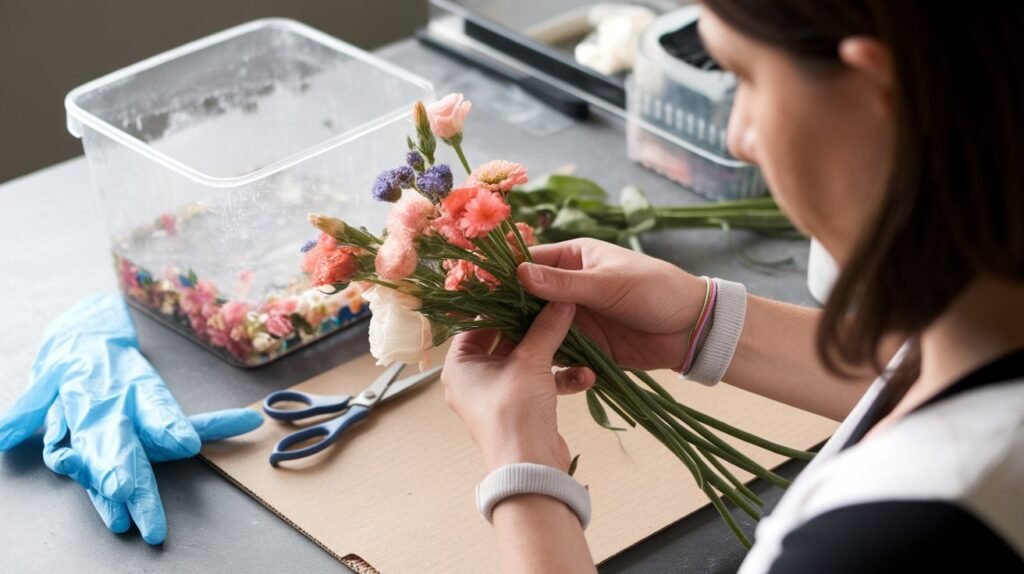
Preserving your favorite flowers in clear epoxy resin is a wonderful idea, especially when they hold special memories. They could be flowers from a wedding bouquet, the first roses from your own garden, or a small bouquet given to you by someone you love.
So many flowers bloom in our garden every year that it’s hard to bring ourselves to toss some of them into the compost. That’s why I always want to save a few blooms so I can remember what the garden looked like in the middle of summer when winter comes around.
But before pouring resin over flowers, you need to prepare them properly. Most importantly, choose undamaged flowers, clean them, and remove all moisture. Otherwise, the petals may turn dark, and bubbles or cloudy spots may appear inside the finished piece.
Which flowers are best to use
For your first projects, I recommend choosing small flowers with thin petals. For example, daisies, pansies, forget-me-nots, lavender, or baby’s breath. They’re easier to dry and then arrange in small molds.
Large roses and peonies can also be preserved, but their thick petals and dense centers make them much harder to dry whole.
What you’ll need
- Fresh flowers without damaged petals or signs of wilting.
- Small scissors for trimming stems and removing extra leaves.
- A soft brush for removing dust and small bits of debris from the petals.
- Tweezers for carefully handling small flowers
- Paper towels for removing surface moisture.
How to prepare flowers
- Pick flowers in dry weather.
It’s best to head out into the garden closer to noon, once the morning dew has evaporated. Cut the flowers with sharp scissors instead of pulling them off by hand to avoid damaging the stems and petals. I take a small basket and try not to pack the flowers too tightly. Delicate petals can easily get crushed, even under the weight of other flowers. - Check each flower.
Carefully inspect both sides of the petals, especially near the center, where tiny insects may be hiding. Remove any yellowed or damaged parts. If a flower has large brown spots, it’s better to choose another one. Once it’s sealed in resin, you won’t be able to fix those imperfections. - Trim the stems. For small decorations, leaving about ¼–½ inch (6–13 mm) is enough. Make the cut just below the base of the flower without damaging its center. If you’re planning to preserve a small bouquet whole, measure the depth of your mold beforehand. I sometimes lay the flowers right next to the mold to figure out which stems should be left longer.
- Gently clean the petals.
Use a soft, dry brush to remove dust, pollen, and tiny bits of soil. Work from the center of the flower toward the edges, barely pressing on the surface. Be careful with poppies and other flowers with thin petals. If there’s a drop of water left on a flower, gently blot it with a paper towel without rubbing. - Arrange the flowers for drying.
Prepare a clean, dry surface and sort the flowers by size. Keep small buds separate so they don’t get lost among the larger ones.
If you’re going to press the flowers, arrange the petals in the position you want right away. If you want to keep flowers three-dimensional, such as small roses or buds, it’s better to dry them in silica gel. It helps remove moisture while preserving the flower’s shape and the position of its petals.
After preparing the flowers, you need to dry them completely before pouring resin over them. Don’t skip this step, even with the tiniest buds.
When I started making these projects, I realized how important it is to handle the resin properly. From the outside, it all looks pretty simple — mix two components and pour the resin over the flowers.
But uncured epoxy resin needs to be handled carefully. Work in a well-ventilated area, wear safety goggles and gloves suitable for handling chemicals. Before you start, be sure to read the instructions for the resin you’ve chosen.
For now, pick out your prettiest flowers and decide which ones you’d like to preserve whole and which ones would be better separated into individual petals. Good luck!
2. Drying flowers before resin casting
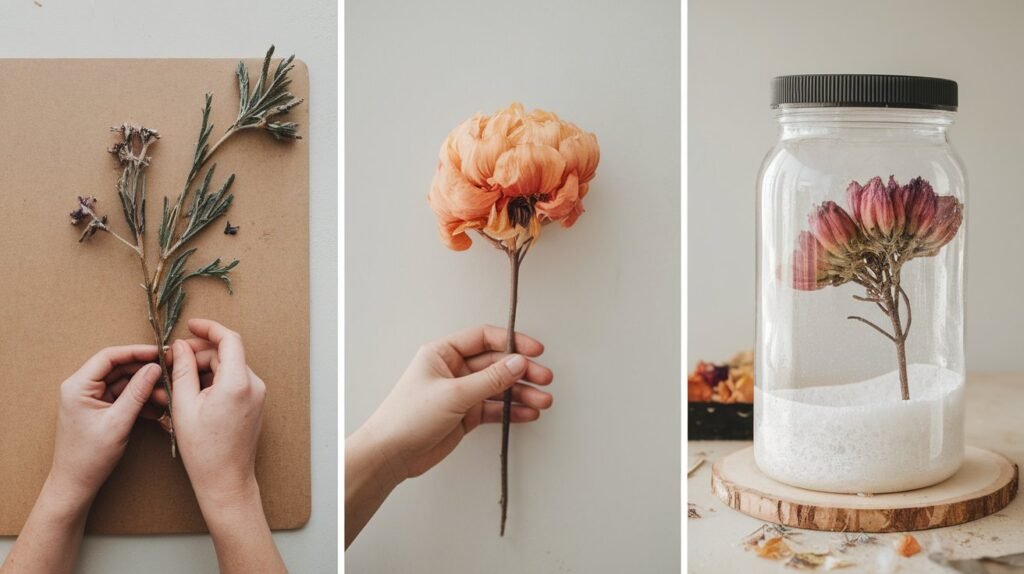
Flowers need to be completely dry before casting them in epoxy resin. Even a small amount of moisture inside a bud can cause bubbles, cloudy spots in the resin, or changes in the color of the petals. So don’t rush into casting, even if the flower already looks dry on the outside.
There are different ways to dry flowers. For example, we often dry lavender in small bunches, hanging them upside down by their stems. But this method doesn’t always work for epoxy resin projects. If you want to preserve the shape of a rose or a small bud, it’s better to use silica gel. It absorbs moisture and helps the petals keep their natural appearance and shape.
What you’ll need
- Fresh, prepared flowers without damaged petals.
- Silica gel for drying flowers — small granules that absorb moisture.
- A plastic container with a tight-fitting lid, deep enough so the flowers won’t touch it.
- A small spoon for carefully spreading the granules between the petals.
- A soft brush for removing any remaining silica gel after drying.
How to dry flowers in silica gel
- Prepare the container.
Pour a layer of silica gel about ½–1 inch (1.3–2.5 cm) thick onto the bottom. The container should be clean and completely dry. For a few small flowers, a regular plastic container with a tight-fitting lid will do. - Arrange the flowers.
Place the buds upright, with their centers facing up, leaving a little space between them. Flowers with a flatter shape can be placed horizontally. The main thing is to make sure the petals aren’t pressed against the sides of the container or other flowers. - Cover the flowers with silica gel.
Use a small spoon to gently spread the granules around each flower and between the petals. Don’t dump the whole container in at once! A heavy stream of granules can bend or tear delicate petals. Gradually cover the flowers completely, then close the lid. - Let the flowers dry.
Small flowers may need just 2–3 days, while thicker buds often take 5–7 days. The exact drying time depends on the type of flower, its size, and the silica gel you’re using. Keep the container closed in a dry place, away from direct sunlight. - Carefully remove the flowers.
Once the petals are dry, gently move the granules aside and lift out each flower, supporting it from underneath. Use a soft brush to remove any remaining silica gel. If the base of the bud still feels damp or the petals are still soft, let the flower dry a little longer.
Once, after drying a few small flowers, they looked so fragile that I was afraid to pick them up with my fingers. That’s why I keep tweezers and a soft brush nearby for moments like this. Dried petals can break easily, especially when you’re trying to remove granules from the center of a flower.
What about pressing flowers?
For flat projects, you can skip the silica gel. For example, pansies, daisies, and individual petals can be dried between sheets of absorbent paper under a press.
Lay the flowers on the paper, carefully spread out the petals, cover them with another sheet, and place them between the pages of a heavy book. It’s better to add extra sheets of paper to protect the book’s pages. Leave the flowers for about 1–3 weeks, checking on them and replacing any damp paper.
I used to dry flowers this way long before I started making epoxy resin projects. Even now, we sometimes come across a forgotten dried flower between the pages of an old book. Of course, these flattened flowers won’t work for three-dimensional decorations anymore.
Store your dried flowers in a closed container, protected from moisture and sunlight. And don’t put off your epoxy resin projects for too long, so the dried flowers don’t start absorbing moisture from the air again.
3. Casting flowers in clear resin
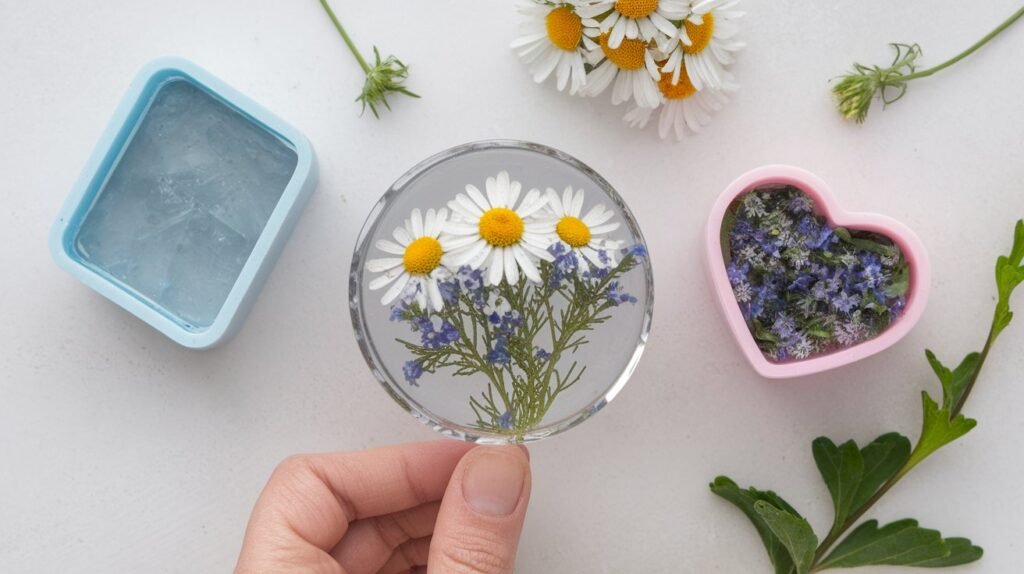
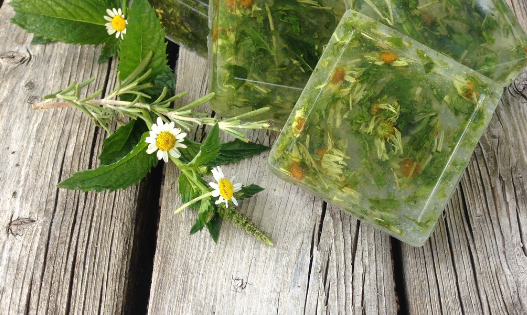
Casting flowers in clear epoxy resin lets you preserve them in small decorations, keepsakes, and decorative figurines. You can see every petal, almost as if the flower were frozen inside glass.
We often use flowers from our own garden for these projects. For example, small daisies or forget-me-nots that easily fit into round or oval molds. Sometimes all you need is one flower and a couple of green leaves, but it’s easy to get carried away! If you put too many plants inside a small mold, they can overlap and end up looking a little messy.
You can use silicone molds in different sizes and shapes for casting flowers in resin. For example, round, oval, heart-shaped, cube-shaped, or small pyramid molds. Flat molds are great for individual flowers and petals, while deeper ones let you preserve a whole bud.
For your first projects, I recommend choosing a small round or oval mold. It’s easier to work with and keep an eye on how the flowers are arranged.
What you’ll need
- Completely dried flowers, prepared ahead of time.
- Clear epoxy casting resin with hardener. For example, a Clear Epoxy Casting Resin Kit.
- A silicone mold in a suitable size.
- Measuring cups and mixing sticks for combining the components.
- Tweezers and toothpicks for arranging flowers and removing air bubbles.
- Safety goggles and suitable chemical-resistant gloves.
How to cast flowers in clear resin
- Prepare the mold.
Place it on a flat surface and check for dust, lint, or tiny bits of debris inside. Even a small speck can remain visible in your clear resin piece. Then lay the dried flowers next to the mold and decide how you want to arrange them. - Mix the resin and hardener.
Measure both components according to the manufacturer’s instructions. The mixing ratios vary between brands, so you can’t use the same ratio for every product. Stir the mixture slowly, making sure to scrape the sides and bottom of the cup. Mixing too quickly can create extra air bubbles. - Pour the first layer.
Pour a small amount of clear resin into the bottom of the mold, about ⅛ inch (3 mm), if this thickness is suitable for your resin. Let the layer thicken until it’s slightly tacky, following the manufacturer’s instructions. This will make it easier to keep the flowers in place. - Arrange the flowers.
Carefully transfer them onto the prepared layer using tweezers. Adjust the petals with a toothpick and gently press the flower against the surface. If you’re using a mold where the front of the finished piece will face downward, keep the direction of the flowers in mind. - Add the remaining resin.
Slowly pour it along the side of the mold, trying not to move the flowers. Make sure the resin gets between the petals. If air bubbles appear, carefully release them with a toothpick. Deeper molds may require several pours with curing time between layers. Always check the maximum layer thickness in your resin’s instructions. - Let the piece cure.
Cover the mold with a clean dust cover and place it somewhere it won’t be disturbed. Some resins allow you to remove the piece from the mold after about 24 hours, while others take much longer. Full curing can also take several days, so follow the manufacturer’s instructions.
How to prevent air bubbles
Air can get trapped between the petals of dried flowers and escape after you’ve already poured the resin. This happens especially often with dense flower buds.
To help prevent this, you can apply a thin coat of mixed epoxy resin to the flower with a small brush or stick before the main pour, carefully covering the hard-to-reach areas. Then place the flower in the mold. This can help reduce trapped air pockets.
I recommend practicing with one small flower first instead of starting with a whole bouquet. It’s much easier to get a feel for the resin’s thickness, the placement of the petals, and how long it takes to set.
Once the piece has fully cured, carefully remove it from the silicone mold. If the surface is smooth, you might not need to do anything else to finish it.
We keep these little resin flower keepsakes on our bookshelf among family photos and other meaningful things. Small figurines can be displayed on wooden stands, while flat pieces can be turned into keychains or jewelry. Just keep them away from direct sunlight, since epoxy resin can turn yellow over time and the flowers may lose their color.
4. Making resin flower coasters
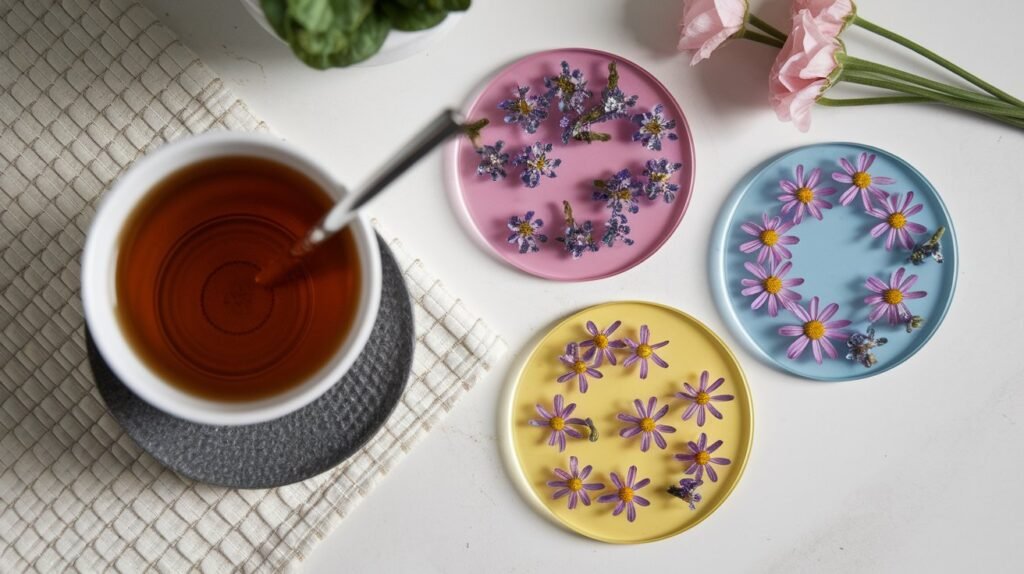
Coasters with real flowers inside can be made at home using clear epoxy resin. Daisies, forget-me-nots, and individual rose petals look really beautiful in these projects.
Lindy and I can always find a spot for things like these in our kitchen. We love drinking tea at our big table, and flowers from our own garden make even ordinary coasters feel a little more special. You can make a whole set of four, using different flowers or repeating the same design.
For the coasters, it’s best to use round silicone molds about 4 inches (10 cm) in diameter. That’s big enough for most cups and glasses.
What you’ll need
- Completely dried flowers that are small in size, or individual petals.
- Clear epoxy resin with suitable heat resistance for drink coasters.
- Silicone coaster molds about 4 inches (10 cm) in diameter.
- Measuring cups and mixing sticks for preparing the resin.
- Tweezers for arranging the flowers.
- Self-adhesive cork circles for the bottoms of the coasters.
- Safety goggles and chemical-resistant gloves.
How to make resin flower coasters
- Prepare the molds.
Place the silicone molds on a flat surface and make sure there’s no dust inside. For coasters, molds about ¼–⅜ inch (6–10 mm) deep are convenient to use. They allow you to completely cover small flowers with a layer of resin. - Pour the first layer of resin.
Mix the components according to the manufacturer’s instructions and pour a thin layer into the bottom of each mold. Wait until it thickens a little. This will help hold the flowers in place and keep them from moving during the next pour. - Arrange the flowers.
Use tweezers to place the dried flowers on the first layer. For example, you can put one small daisy in the center and arrange a few tiny petals around it. I recommend trying out the arrangement before adding any resin, so you won’t have to move the fragile flowers around too many times. - Fill the molds with resin.
Slowly add the remaining mixture, completely covering the flowers. Don’t exceed the maximum pour thickness specified by the manufacturer. If air bubbles appear around the petals, carefully remove them with a toothpick. - Let the coasters cure completely.
Cover the molds to protect them from dust and leave them for the time specified by the manufacturer. Then carefully remove the coasters. If the edges turn out sharp or uneven, you can gently smooth them with fine-grit sandpaper once the resin has fully cured. - Attach the cork backing. Stick a thin cork circle or several small cork pads onto the bottom of each coaster. They’ll help protect your table from scratches and make the coasters less slippery.
Can you put hot cups on them?
Not every epoxy resin can handle high temperatures. Some regular crafting resins start to soften at around 120–140°F (49–60°C). A hot cup can leave a mark or a small dent on this kind of coaster.
So, for coasters meant for hot drinks, choose a resin whose manufacturer clearly specifies the temperature it can safely withstand when in contact with hot cups. And make sure the piece has fully cured. If that information isn’t available, use the coasters only for cool drinks.
Keep your finished resin flower coasters away from direct sunlight to prevent the resin from yellowing and help the flowers keep their color longer. You can leave a set on the kitchen table or give it to friends along with a little box of homemade cookies. I think that’s a pretty good idea.
Lindy usually prefers simple decorations without too many details, so she made a couple of coasters with one large flower in the center. For the others, you can use several tiny flowers from the garden.
5. Creating a resin flower paperweight
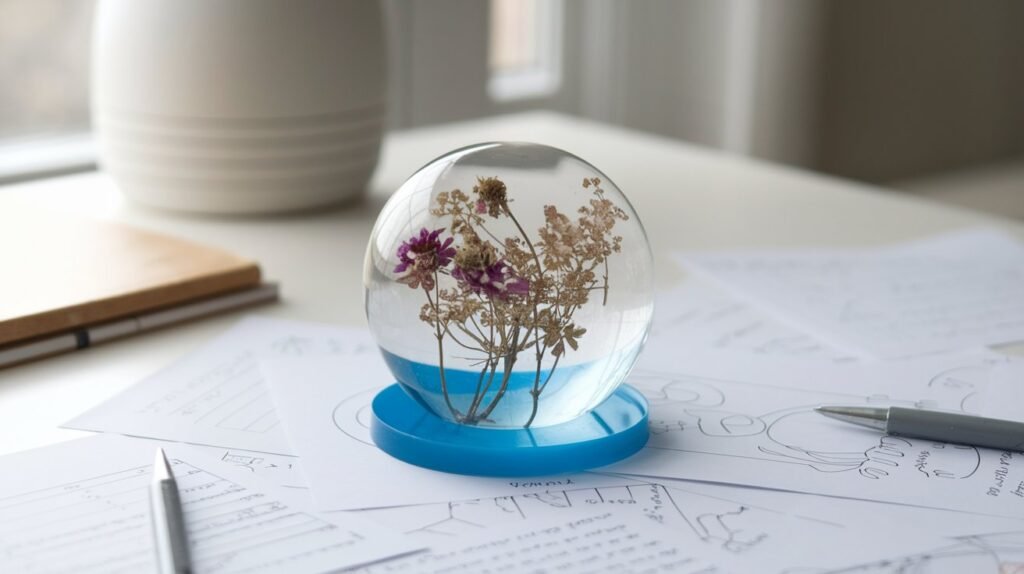
My desk is constantly covered with sketches of garden plans, notes, and to-do lists. Lindy always laughs at how many pieces of paper I manage to collect in a week. Sometimes all it takes is opening a window, and those papers go flying around the room. So a small epoxy resin flower paperweight would really come in handy here. And if you put dried flowers from the garden inside, you’ll also have a beautiful decoration for your desk.
For this project, you can use a hemisphere-shaped silicone mold about 3 inches (7.6 cm) in diameter with a flat base. The finished piece will be heavy enough to hold down a few sheets of paper, and you’ll be able to see the flower arrangement clearly through the transparent resin.
What you’ll need
- Completely dried flowers — small roses, baby’s breath, daisies, or other flowers that fit inside the mold.
- Clear deep-pour epoxy resin, suitable for making three-dimensional pieces.
- A hemisphere-shaped silicone mold about 3 inches (7.6 cm) in diameter.
- Measuring cups and mixing sticks for mixing the components.
- Tweezers and toothpicks for arranging the flowers.
- Safety goggles and chemical-resistant gloves.
How to make a resin flower paperweight
- Choose your flower arrangement.
Start with one small bud and a few tiny flowers. Check that they fit inside the mold without touching its sides. You can add a couple of dried leaves, but it’s better to leave enough space around the plants so each flower is clearly visible. - Prepare the mold and resin.
Clean any dust out of the silicone mold and place it on a flat surface. Mix the resin and hardener according to the manufacturer’s specified ratio. For a large resin paperweight, choose a formula designed specifically for deep pours, since regular resin can get very hot when poured in layers that are too thick. - Pour the first layer.
Pour a little clear resin into the mold. Let it thicken until it can hold the flowers in place. The waiting time depends on the resin you’re using. This will keep the flowers from moving freely inside the mold as you continue working. - Arrange the flowers.
Carefully lower the prepared flowers into the mold using tweezers. With a hemisphere-shaped mold, remember that the finished piece will be flipped over so its flat base faces down. So think ahead about which side will give you the best view of the arrangement. Adjust each flower with a toothpick. - Gradually fill the mold.
Add the resin in several stages if the maximum permitted pour thickness requires it. Apply each new layer according to the manufacturer’s instructions. Make sure the flowers don’t float to the surface and that no large air bubbles remain around the petals. If needed, gently release them with a toothpick. - Let the resin cure completely.
Leave the mold somewhere protected from dust. Don’t try to remove the piece too early, even if the top layer feels hard. Once the resin has fully cured, gently pull back the silicone sides and remove your paperweight. If the flat base has any sharp edges, you can carefully smooth them after the resin has completely hardened.
A few decorating ideas
You don’t need a lot of flowers for a resin flower paperweight. One small rosebud in the center of a clear hemisphere already looks lovely. Or you can arrange a few tiny flowers to create something that looks like a little piece of your summer garden.
I always try to save flowers from special family occasions. For example, a small flower from a bouquet Lindy gave me on a special day. That way, the paperweight becomes more than just a desk decoration. It’s a little reminder of that moment.
You can place the finished piece next to your notebook or use it to hold down notes and photographs. Just keep it out of direct sunlight to help prevent the resin from yellowing and the dried flowers from losing their color.
6. Preserving flowers without resin
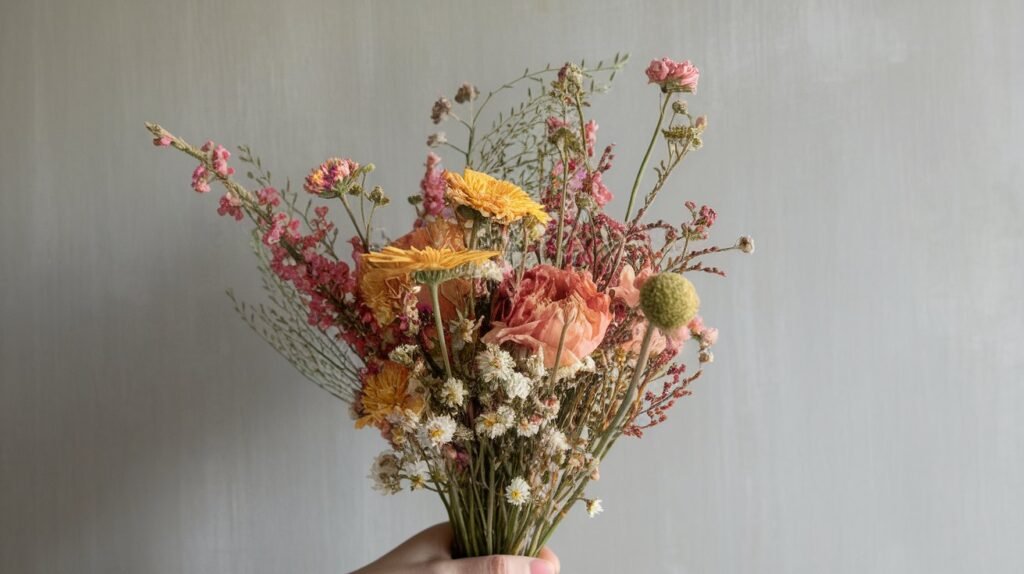
You can preserve flowers without epoxy resin, too. One of the easiest ways is to dry them while keeping the shape and natural color of their petals. You can use these dried flowers to make small bouquets, wall decorations, and arrangements under glass. And for most of these projects, you probably already have the materials at home.
On our homestead, we left some flowers to produce seeds, cut others for bouquets, and wanted to save the prettiest ones for winter by drying a small bouquet.
For this, it’s best to choose plants that hold their shape well after drying.
What you’ll need
- Fresh flowers — lavender, strawflowers, statice, yarrow, or baby’s breath.
- Small scissors or pruning shears for trimming the stems.
- Cotton string or twine for tying the flowers into bunches.
- Hooks or hangers for hanging the bouquets.
- A small vase for the finished arrangement.
How to preserve flowers without resin
- Choose the right flowers.
It’s best to use fresh flowers without wilted petals. You can cut lavender when some of its buds have already opened, and strawflowers before their flower heads have fully opened. Don’t pick flowers right after it rains, since the extra moisture will slow down the drying process. - Prepare the stems.
Remove the leaves from the lower parts of the stems, especially those that might trap moisture inside the bunch. Leave the stems about 8–12 inches (20–30 cm) long so you can easily hang the bouquet and later put it in a vase. - Tie the flowers into small bunches.
Gather 5–10 stems and secure them with twine. Don’t tie the string so tightly that it damages the stems, but keep in mind that they’ll become thinner as they dry. - Hang the flowers upside down.
Choose a dry, dark place with good air circulation. A pantry or another well-ventilated room will do. Don’t hang the bunches too close together so air can move freely between them. - Wait until they’re completely dry.
This usually takes about 2–4 weeks, depending on the plants and the humidity. The stems will become dry and brittle, and the petals will no longer feel damp or soft. - Arrange the bouquet.
Take down the bunches, carefully untie the twine, and trim the stems to the length you want. Place the flowers in a dry vase without water. A few sprigs of lavender, yarrow, and baby’s breath are enough for a small bouquet.
What else can you make with dried flowers?
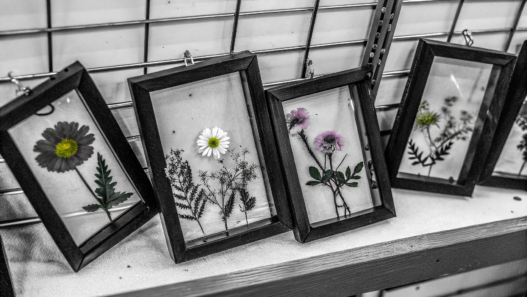
Besides bouquets, you can display dried flowers in a frame under glass. We use flat flowers that have already been dried in a flower press for this. For example, pansies, daisies, or individual rose petals.
It’s best to keep these projects in a dry place, away from direct sunlight. Natural petals may fade a little over time, but with proper storage, flowers can keep their shape and appearance for years.
Lindy always finds just the right spot around the house for small decorations made from natural materials. A few dried flowers in a simple wooden frame can decorate a wall near a bookshelf or a small table. And when the flowers come from your own garden, it’s always nice to remember exactly where they grew and what was happening when you picked them.
7. Sealing pressed flowers for journals
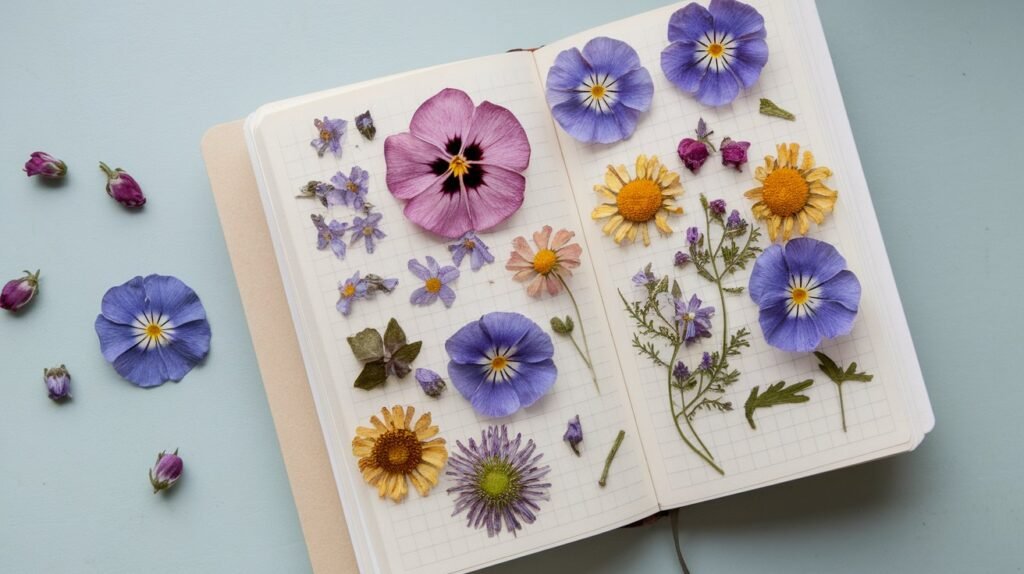
I love keeping little things that remind me of our garden. Sometimes it’s photos of our first harvest, sometimes notes about new plantings, and sometimes just a flower dried between the pages of a journal. You can secure pressed flowers to paper and cover them with clear protective film to keep the delicate petals from falling apart when you turn the pages.
I think anyone would enjoy opening an old journal a few years later and finding a flower next to an entry about the day they picked it.
For this project, it’s best to choose flat, completely dried flowers. Forget-me-nots, pansies, small daisies, and individual rose petals are all good choices.
What you’ll need
- Pressed flowers, completely dried between sheets of paper.
- A journal or notebook with thick, acid-free pages — this type of paper is less likely to yellow or deteriorate over time, making it better for preserving meaningful notes and dried flowers for years.
- Clear self-adhesive film to protect the flowers
- Tweezers for arranging delicate petals.
- Scissors for cutting the film.
- A small brush for removing dust from the flowers.
How to seal pressed flowers in a journal
- Prepare the page.
For these projects, it’s best to use a journal with thick paper that won’t bend easily under the weight of the flowers and protective film. Decide where you want to place your flower arrangement, leaving enough space for the date, plant name, or a short note. I usually try to position the flowers closer to the middle of the page, away from the binding, so the petals are less likely to get damaged when turning the pages. - Arrange the flowers.
Depending on what you use your journal for, you can place one or two small flowers in a corner or along the edge of the page, leaving most of the space for writing. Or you can dedicate an entire page to a flower arrangement, adding a date, photos, or short notes. Use tweezers to position the delicate petals carefully without damaging them. - Prepare the protective film.
Cut a piece of clear self-adhesive film slightly larger than the flower or the entire flower arrangement. Leave about ¼ inch (6 mm) around the edges so the film can stick securely to the paper. You don’t need to cover the entire page, especially if you plan to write on it. - Seal the flowers.
Carefully peel back part of the protective backing and start applying the film from one edge. Slowly lower it over the flower, smoothing the areas around it from the center toward the edges. Try not to press down on the fragile petals. - Check the edges.
Make sure the film is firmly attached to the paper all the way around. If there are small air bubbles underneath, try gently smoothing them toward the edge. There’s no need to press hard on the flower itself.
Keep your finished journal in a dry place, away from direct sunlight. This will help prevent the paper from absorbing moisture and the dried flowers from losing their color. And try not to bend the pages with flowers on them, so you don’t damage the fragile petals.
I always leave little notes next to the flowers — where they grew, when they bloomed, and why we decided to keep them. Sometimes I add the date, a few words about the weather, or what was happening in the garden that day. Lindy adds her own comments, too.
A few years later, it’s really interesting to flip through those pages and remember not just the flowers themselves, but the events connected to them. Some little details fade from memory over time, and those notes help bring them back.
8. Displaying resin flowers in shadow boxes
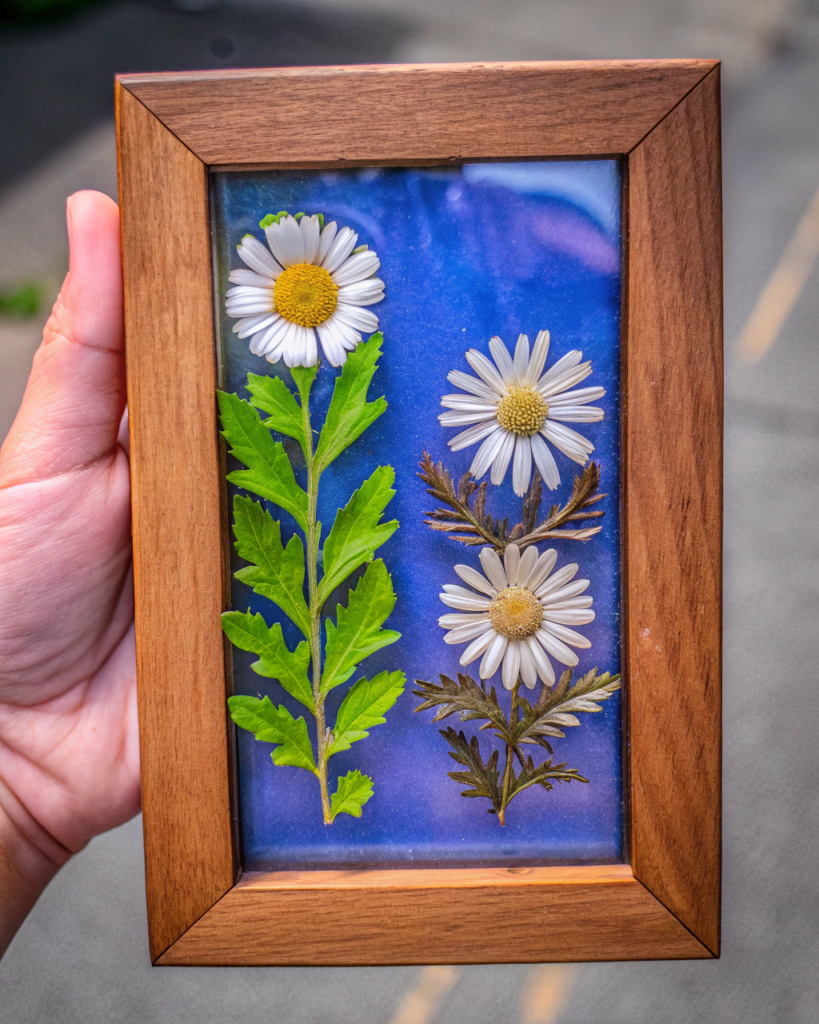
A shadow box frame with glass lets you turn several flowers preserved in epoxy resin into a wall decoration. Unlike a regular picture frame, it has space between the back panel and the glass, so you can display three-dimensional objects inside.
I’ve liked these frames for a long time, especially ones with wooden frames. We already have a few decorations made from natural materials around our home, and an arrangement with flowers from the garden could be a nice addition. For example, three small clear resin pieces with daisies arranged in a row.
I think an 8 × 10-inch (20 × 25 cm) shadow box frame would work well. You can fit several small, flat resin pieces inside, leaving enough space between them.
What you’ll need
- Finished resin flowers — small, flat epoxy resin pieces about ¼–½ inch (6–13 mm) thick.
- A shadow box frame with glass and a removable back panel. For example, a Shadow Box Display Frame.
- Thick cardboard or a thin wooden panel for the base of the arrangement (if needed).
- Decorative paper or linen fabric for the background.
- Clear silicone adhesive for securing the resin pieces.
- A ruler and pencil for marking positions.
- Wall mounting hardware rated for the weight of the finished frame.
How to display resin flowers in a shadow box
- Choose a suitable frame.
Measure the thickness of your finished resin pieces and make sure they fit comfortably between the back panel and the glass. Leave a little space so the pieces don’t press against the glass. For pieces about ½ inch (13 mm) thick, a shadow box with an interior depth of around 1–1½ inches (2.5–3.8 cm) is a good choice. - Prepare the background.
Cover the frame’s back panel with linen fabric or decorative paper. If the panel is too thin, you can reinforce it with thick cardboard. A light background will bring out the colors of the flowers, while a dark one will make the outlines of the clear resin more visible. Before attaching anything permanently, place the pieces against the background and see which combination looks best. - Arrange the composition.
Place the resin pieces on the prepared background without attaching them yet. You can arrange three flowers vertically, create a small circle, or spread them across the frame. I usually try a few different arrangements and then take a photo of the one I like so I don’t forget where everything goes. - Secure the resin pieces.
For small, flat epoxy resin pieces, use clear silicone adhesive that’s suitable for the material of your background. Apply a little adhesive to the back of each piece and press it against the sturdy back panel of the frame. Let the adhesive cure completely according to the manufacturer’s instructions. Before assembling the frame, make sure everything stays securely in place when held upright. - Assemble the frame.
Carefully clean the inside of the glass to remove dust and fingerprints. Put the back panel with the attached resin flowers into place and close the frame. Before hanging it, check that all the pieces stay in position when the frame is upright. - Choose where to display it.
Hang the shadow box using wall mounting hardware rated for its total weight, including the glass and resin pieces. It’s best to choose a wall that doesn’t get direct sunlight.
What else can you add to the arrangement?
Inside the shadow box, next to the resin flowers, you can attach a small photograph or a card with the date when the flowers were picked. Especially if they’re from a wedding bouquet or were a gift from someone you love. Just leave a little extra space on the back panel when planning your arrangement.
Lindy and I love keeping little reminders of different stages of our lives. The finished decoration can remind us not only of the flowers themselves, but also of the time when we grew them.
Don’t place the shadow box in direct sunlight. The flowers inside the resin may lose some of their color over time, and the resin itself can turn yellow. Otherwise, caring for it is simple. Just wipe the glass occasionally with a soft, dry cloth.
Give It a Try!
As you can see, we use the simplest materials for our projects and don’t rush into making large arrangements. Even if your first attempt doesn’t turn out quite the way you imagined, it’ll be easier next time. Things don’t always work out on the first try for us either, especially when we’re trying something new.
Which of these ideas did you like the most? Maybe you know other ways to preserve flowers that I haven’t mentioned? Share your thoughts in the comments! I’d love to hear your tips and see photos of your finished projects.