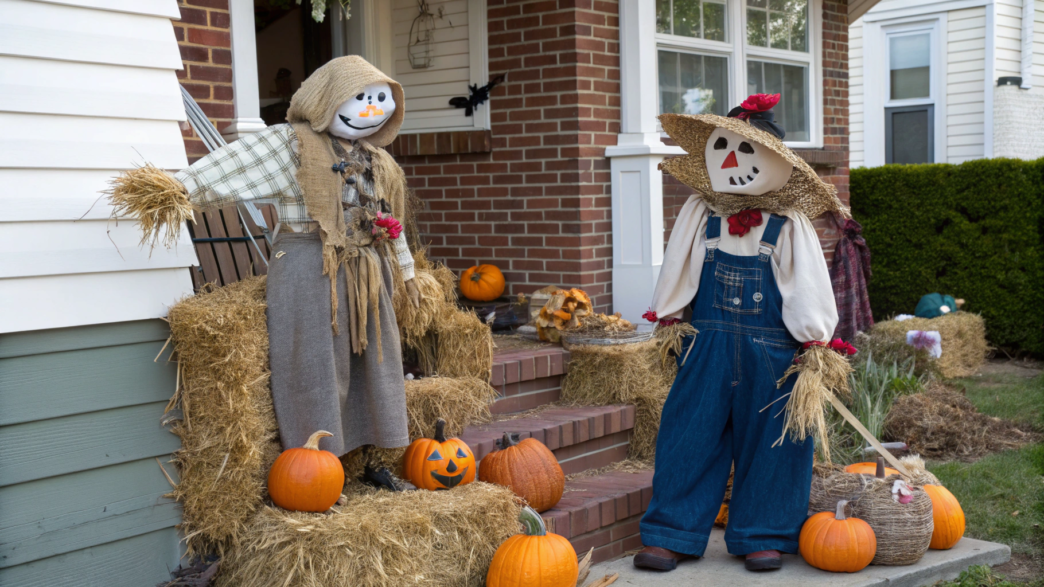
I’ve always been interested in homemade scarecrow costumes. You can use old clothes, leftover fabric, and even materials you would normally use for garden crafts. There’s so much room for creativity! Sometimes, just opening your craft supply closet is enough to spark a new idea.
Here are 10 homemade scarecrow costumes you can make yourself. Some are great for kids, others for adults, and you can mix and match certain details. I hope you’ll find something for your own Halloween celebration!
1. Thrift Store Flannel Scarecrow Costume

An old plaid shirt, worn jeans, and a few patches can make a great Halloween scarecrow costume. You can find most of the clothing at a thrift store and use leftover fabric you already have at home for the decorations.
Lindy and I often stop by thrift stores looking for things for our home and garden. You can find some good flannel shirts for $3–7 there, and a little wear and tear is actually a plus for this costume. Choose a shirt one or two sizes larger than you normally wear, preferably with a bold plaid pattern in red, brown, or mustard yellow.
What you’ll need
- Loose-fitting plaid flannel shirt.
- Old jeans or overalls with some wear and tear.
- Fabric scraps in different colors for patches.
- Needle and thick thread in black or brown.
- Natural raffia to imitate straw.
- Wide-brimmed straw hat.
How to make a scarecrow costume
- Prepare the clothes. Wash the thrift store clothes and try the shirt on over a plain T-shirt. Leave a few top buttons undone and roll up the sleeves slightly. If the shirt is long, tuck one side into your jeans and leave the other side hanging loose. You can use an old belt or suspenders to hold up pants that are too loose.
- Sew on the patches. Cut three or four squares from different fabrics, about 4 × 4 inches (10 × 10 cm) each. Leftover denim, burlap, or small-check cotton fabric will work. Arrange them on the elbows, knees, and near the pockets, then secure them with large stitches using contrasting thread. I usually leave the patch edges a little uneven and deliberately make the stitches visible. This makes the costume look more like the clothes of an old garden scarecrow.
- Sew on the imitation straw. Cut the raffia into 6–8-inch (15–20 cm) pieces and gather them into small bundles. Tie each bundle in the middle with thread, then sew it to the inside of the shirt cuffs and along the bottom hem. For the pants, a few bundles near the ankles will be enough. Make sure the raffia doesn’t scratch your skin or restrict your movement.
- Decorate the hat. Wrap a strip of plaid fabric about 2 inches (5 cm) wide around the crown and tie a small knot on the side. You can tuck a few pieces of raffia or dried leaves underneath it. If the brim is too flat, gently bend one side upward and secure it with a few stitches. Just don’t deliberately tear the hat, or it might quickly lose its shape.
- Add simple scarecrow makeup. Use face makeup to create two orange circles on your cheeks, then draw three or four short stitches near each corner of your mouth with a black pencil. You can also draw a small triangular patch on your nose. Only use makeup products intended for the face. If the costume is for a child, choose age-appropriate products and follow the manufacturer’s instructions.
When we start working on crafts like this, Lindy usually lays out all the materials on the table first and tries different combinations. For a scarecrow costume, we choose worn fabrics, patches in different colors, and old clothes. Even a hat you find in the closet might work better than a new one, since we’re going for a slightly worn-out look.
The main thing is not to make everything too neat. On a real garden scarecrow, the shirt rarely fits perfectly, the patches don’t match, and straw sticks out of the sleeves. Those are exactly the details we try to recreate in the costume.
2. Coffee Filter Scarecrow Collar

Paper coffee filters can be turned into a fluffy collar for a Halloween scarecrow costume. Their wavy edges resemble dried leaves, and adding a little color to the paper makes a fun addition to an old plaid shirt or overalls.
You can use regular white basket-style coffee filters. They’re thin, easy to gather into folds, and inexpensive. We love using materials we already have at home for our crafts, and for this collar, you’ll only need a little paint, ribbon, and some basic sewing supplies.
What you’ll need
- Paper coffee filters — about 25–35.
- Wide cotton ribbon about 30–36 inches (76–91 cm) long.
- Watercolor paints in brown, yellow, and orange.
- Paintbrush and a small bowl of water.
- Stapler or needle and thread for attaching the paper to the ribbon.
- Scissors.
How to make a scarecrow collar
- Prepare the coffee filters. Take 25–35 paper filters, flatten them out, and gently crumple them in your hands, then open them up again. The paper will get a little wrinkled, and the folds will give the collar more volume. You don’t need to squeeze the filters into tight balls. Just crumple the edges a little.
- Add some color to the paper. Dilute the brown, orange, and yellow watercolors with a little water. Use a paintbrush to apply the paint around the edges of the filters, leaving the centers light. Make some filters brown and others orange or yellow. Lay them out on a paper towel and let them dry completely.
- Make the first row of the collar. Lay the cotton ribbon on a table, leaving about 10–12 inches (25–30 cm) at each end for tying. Take a dry filter, fold it in half, and use your fingers to gather the paper into several small folds along the folded edge. Secure the folds with one staple, then sew that part of the filter to the ribbon with two or three stitches. The wavy edge should hang freely downward. Repeat with the remaining filters, sewing them next to each other so their edges overlap slightly.
- Add a second row of filters. Take a few more filters, fold them in half, and gather the paper into folds again. Secure each filter with a stapler, then sew it to the ribbon between the pieces you’ve already attached. Place the new filters over the first row so their wavy edges sit a little higher. Alternate the colors and fluff up the ruffles with your hands until the collar is full enough.
- Attach the collar to the costume. Place the finished collar over the shirt so the paper ruffles sit around the base of the neck and slightly cover the shoulders. Tie the loose ends of the ribbon at the back without pulling them too tight. Make sure the metal staples are covered by fabric and don’t touch the skin. For a child’s costume, it’s safer to sew the ribbon directly to the shirt collar and skip the ties around the neck.
Just keep in mind that a paper collar doesn’t do well in the rain. If you’re planning to spend a long time outdoors on Halloween, it’s better to save this one for an indoor party.
When Lindy and I work on crafts like this, we often try a few different arrangements before attaching everything permanently. And here, try mixing painted and unpainted filters, alternating white, brown, yellow, and orange shades. First, lay them out on the ribbon and see how the colors look together. It’s much easier to change their positions before the filters are sewn on, of course.
3. Paper Bag Stitched Scarecrow Mask

Did you know you can turn an ordinary brown paper bag into a creepy scarecrow mask for Halloween? Lindy and I have tried making crafts like this, and you’ll only need a few simple materials for this one. Drawn stitches around the mouth, fabric patches, and wrinkles in the brown paper will make the mask look like the face of an old garden scarecrow.
The main thing is to find a large, sturdy paper bag that fits loosely over your head. We’ll use the whole bag, keeping its shape, and then decorate the front.
What you’ll need
- Large brown paper bag, such as Large Brown Kraft Paper Grocery Bags.
- Black and brown markers for drawing stitches and facial details.
- Scissors for cutting openings.
- Cotton fabric scraps for patches.
- Craft glue for attaching the fabric.
- Thick black yarn for decorative stitches.
- Hole punch for making holes for the yarn.
How to make a scarecrow mask
- Prepare the paper bag. Open the bag and place it on the table with the bottom facing up and the open end at the bottom. Remove the handles if there are any. Then gently crumple the paper with your hands and smooth it out again. Uneven wrinkles will appear on the surface, making it look like old burlap. Don’t crumple the bag too much, or it might lose its shape.
- Cut openings for the eyes, nose, and mouth. Carefully put the bag over your head and ask someone to mark the positions of your eyes, nose, and mouth with a pencil. Take the bag off and use scissors to cut two large eye openings, along with openings for the nose and mouth. If needed, cut small notches on the sides of the bag’s lower edge so it doesn’t press against your shoulders. Try the mask on again and make sure you can see and breathe freely.
- Draw the scarecrow’s face. Use a black marker to draw an uneven outline around the mouth opening and large dark outlines around the eyes. Add a few short lines across the mouth outline to make them look like rough stitches. Use a brown marker to draw small stains and worn spots. Just sketch the design in pencil first, then trace it with the marker.
- Make stitches with yarn. Lay the bag on the table and use a hole punch to make several pairs of holes along the drawn mouth line, without cutting into the breathing opening itself. Thread short pieces of thick black yarn through the holes to create large stitches. Tie the ends inside the bag and trim off the excess. Make sure the knots don’t touch your face and the yarn doesn’t cover the openings for the eyes, nose, or mouth.
- Glue on the fabric patches. Cut two or three squares from plaid or solid-colored fabric, about 2–3 inches (5–7.5 cm) in size. Glue them to the forehead and sides of the mask without covering any openings.
Draw short black stitches around the edges of the patches. The details don’t all have to look the same. For example, you can place one patch slightly crooked and leave another with uneven edges. - Check the finished mask. Let the glue dry completely and try the bag on again. Make sure it fits loosely over your head, doesn’t block your vision, and doesn’t interfere with breathing. This kind of mask is better suited for a short photo shoot or a supervised costume performance than a long walk. For young children, it’s better to choose an open-face mask that doesn’t cover the entire head.
When Lindy and I make Halloween decorations, I always find it interesting to see how ordinary materials can become almost unrecognizable. A brown paper bag, a few fabric scraps, and some yarn — and you’ve got a pretty creepy mask! Pair it with a plaid shirt and old overalls, and you’ll have a complete scarecrow costume.
4. Haunted Hayride Scarecrow Makeup

Dark eyes, pale skin, and a mouth with drawn-on stitches can turn an ordinary scarecrow costume into a pretty creepy look. This is exactly the kind of makeup you might see on actors at Halloween haunted hayrides, where tractor-pulled wagons take visitors through cornfields and other spooky settings.
Unlike the usual scarecrow with orange cheeks and a smile, this face looks much darker. All you need for this makeup is regular cosmetics and face paints. You can use them to draw all the details.
What you’ll need
- Light-colored foundation for the makeup base.
- Black and white water-activated face paint.
- Brown and gray eyeshadows for darkening certain areas of the face.
- Black makeup pencil for drawing outlines and stitches.
- Brushes and a makeup sponge for applying and blending the makeup.
- Makeup remover.
How to do scary scarecrow makeup
- Prepare your face. Clean your skin, apply your usual moisturizer, and let it absorb. Then apply a thin layer of light-colored foundation. Choose a shade slightly lighter than your natural skin tone, but don’t make your face completely white. Use brown eyeshadow to lightly darken your temples and the areas under your cheekbones.
- Draw dark circles around the eyes. Use a black makeup pencil to outline large ovals around your eyes, covering the eyelids and the area below the lower lashes. Carefully fill them in with black face paint using a brush, keeping it away from the waterline. Blend a little gray and brown eyeshadow around the outer edges to make the transition from black to pale skin less harsh.
- Outline the mouth. Use a black pencil to draw a wide, curved line from one corner of your mouth to the other, extending it about 1–2 inches (2.5–5 cm) onto each cheek. Then fill in your lips with black face paint, connecting them to the drawn line. You’ll end up with a long, dark mouth that looks much wider than your real one.
- Add fake stitches. Use a thin brush to draw short black lines across the painted mouth. Angle them slightly, leaving about ½ inch (1.3 cm) between the stitches. You can cross some of the lines to create rough X-shaped stitches. Add a few thin strokes of white face paint next to the black lines to make them stand out more.
- Draw a patch on the nose. Paint a small triangle on the tip of your nose with brown face paint. Outline it with a black pencil and draw short stitches around the edges. Lightly blend some brown eyeshadow along the bridge and sides of your nose.
- Add the finishing details. Use brown and gray eyeshadows to draw a few uneven lines on your forehead and along your cheekbones. Then lightly blend them with a makeup sponge to make your face look dirt-smudged. Don’t cover the eyes and mouth you’ve already painted. After that, you can put on an old plaid shirt, overalls, and a straw hat. Now that’s the look we’re going for!
And don’t forget to use only cosmetics and face paints made for use on the skin. Acrylic, gouache, and other craft paints aren’t meant to be applied to your skin. Test any new product on a small area of skin before using it, and when applying makeup around your eyes, follow the manufacturer’s instructions and restrictions.
For me, the most interesting part of this makeup is how the drawn-on mouth changes your facial expression. Even a regular smile looks pretty creepy with those long black stitches.
By the way, a straw hat can make a noticeable difference to the whole look. If you pull it slightly down over your forehead, the upper part of your face will be in shadow, making the dark circles around your eyes look even more sinister. Just don’t pull the brim too low, or it might block your vision.
5. No Itch Kids Scarecrow Costume

You can make a kids’ Halloween scarecrow costume using soft clothes and replacing scratchy straw with strips of fleece or yarn. They look like dried grass but won’t scratch your child’s neck, wrists, or legs. And for a kid who’s going to spend several hours walking around, playing, and collecting candy, that really matters.
The base of the costume will be a plaid shirt, denim overalls, and a soft hat. We’ll add a few patches and bundles of imitation straw sticking out of the pockets and sleeves. All the decorations will be attached to the clothing.
What you’ll need
- Soft cotton plaid shirt.
- Denim overalls or loose-fitting pants.
- Tan or yellow fleece fabric.
- Felt or cotton fabric scraps for patches.
- Kids’ fabric hat with a soft brim.
- Scissors, needle, and thread for attaching the decorations.
- Brown makeup pencil for a little face makeup.
How to make a kids’ scarecrow costume
- Choose comfortable clothes. Take a cotton shirt your child has already worn and put loose-fitting overalls over it. Make sure the straps don’t slip off and the pant legs don’t drag on the ground. If the celebration is outdoors, you can put a thin long-sleeved T-shirt under the shirt. The clothes shouldn’t restrict movement.
- Make soft straw. Cut the fleece into strips about ½ inch (1.3 cm) wide and 5–6 inches (13–15 cm) long. Gather four or five strips into small bundles and sew them together at one end. Fleece doesn’t fray along the edges, so there’s no need to finish each strip. For some variety, you can mix light yellow and beige strips.
- Attach the bundles to the clothes. Turn the shirt sleeves inside out and sew the base of each bundle to the inside of the cuffs so the loose ends stick out about 2–3 inches (5–7.5 cm). Attach a few more bundles inside the overall pockets. Then turn the clothes right side out again and check that the seams don’t rub against the skin. If the decorations around the wrists bother your child, leave them only on the pockets.
- Sew on fabric patches. Cut three or four squares or rectangles from soft felt and cotton fabric, about 3 × 3 inches (7.5 × 7.5 cm). Sew them onto the front of the overalls and around the knees using large stitches. You can use red plaid fabric, brown felt, and yellow cotton. Don’t sew patches over the pockets in a way that stops your child from using them.
- Decorate the hat. Take a soft fabric hat that fits your child and wrap a strip of plaid fabric around the crown. Secure it with a few stitches, then sew a small bundle of fleece straw onto one side. Make sure the hat doesn’t slip down over the eyes. If your child doesn’t like wearing hats, you can skip it — the overalls with patches already give the costume a recognizable scarecrow look.
- Add a little makeup. Use a brown makeup pencil to draw a small triangle on the tip of the nose and three short stitches near each corner of the mouth. Only use products suitable for children’s skin, and follow the manufacturer’s age restrictions. If your child doesn’t like face makeup, leave their face as it is.
Lindy and I pay a lot of attention to how comfortable our clothes are when we’re working in the garden. Something that looks great in a photo isn’t always comfortable to wear for several hours. I follow the same principle with kids’ costumes. It’s better to leave a couple of soft straw bundles in the pockets than to decorate every sleeve and spend the whole evening adjusting your child’s clothes. And most importantly, let your child try on the costume and run around in it a little before the celebration.
6. Harvest Festival Scarecrow Outfit

Harvest festivals always remind me of what we love about fall. Pumpkins, sunflowers, baskets of apples, and colorful leaves everywhere. For a celebration like this, you can make a scarecrow costume in bright fall colors, with flowers on the hat and a few decorative patches.
The outfit is based on a burgundy plaid shirt, brown or beige overalls, and a straw hat. What makes it different from a regular garden scarecrow is the decoration with artificial fall leaves and sunflowers. This costume is great for a festival parade, fair, or family photo shoot.
What you’ll need
- Burgundy or orange plaid shirt with long sleeves.
- Brown or beige overalls.
- Wide-brimmed straw hat.
- Artificial fall leaves and small sunflowers.
- Cotton fabric scraps in yellow, red, and green.
- Scissors, needle, and thread for attaching the decorations.
- Orange blush and a brown makeup pencil for face makeup.
How to make a harvest festival scarecrow costume
- Choose the clothes. Wear the plaid shirt under the overalls. Burgundy, orange, and brown shades are great for this outfit, since they’re often found in fall decorations. Check the length of the pant legs and roll them up if needed. If the festival is outdoors, you can wear an extra warm layer under the shirt.
- Sew on colorful patches. Cut three or four squares from cotton fabric, about 3–4 inches (7.5–10 cm) in size. Arrange them on the overalls’ chest pocket, near the knees, and on one sleeve of the shirt. Sew the patches on with large stitches using contrasting thread. For a festive outfit, you can choose fabrics with small plaid patterns or fall leaf prints.
- Decorate the straw hat. Wrap a strip of burgundy fabric about 2 inches (5 cm) wide around the crown and secure it with a few stitches. Place two or three small artificial sunflowers on one side, along with a few red and yellow leaves. Sew the decorations on by their fabric or wire bases, making sure to cover any sharp ends first. Don’t place flowers on the front of the brim where they could block your face.
- Attach fall leaves to the clothes. Take a few artificial leaves and sew them along the top edge of the overalls’ chest pocket. You can attach another one or two near a shoulder strap. Use small decorations without stiff, protruding parts. They shouldn’t catch on your clothes or get in the way of using the pockets when you move.
- Add festive face makeup. Apply a little orange blush to your cheeks and blend it in circular motions. Use a brown makeup pencil to draw a small triangle on the tip of your nose, then add three short stitches near each corner of your mouth. Only use cosmetics intended for facial use. This makeup will complete the costume without covering your natural facial features.
- Complete the look with a basket. Take a small woven basket and put a few decorative pumpkins or artificial apples inside. Choose a lightweight basket with a comfortable handle so it’s easy to carry around during the celebration.
In our family, fall has always been connected with harvesting, so sunflowers, pumpkins, and fall leaves are much more interesting to me than random costume decorations. And you don’t need to use everything at once. For example, a few sunflowers on a straw hat already give it a festive feel, and you can match the other details to the colors of your shirt.
I think an outfit like this looks wonderful among real pumpkins and fall plants, where it becomes part of the whole festive scene.
7. Leaf Pocket Flannel Costume

I think this is an interesting idea for a Halloween scarecrow costume. You can combine red, yellow, and orange leaves with a few bundles of straw, and wear the shirt with regular jeans and a straw hat.
For this outfit, it’s best to choose a shirt with two chest pockets. If you only attach the leaves inside the pockets, they won’t be visible enough, so you can place a few near the collar too. I think artificial fabric leaves would work well because they hold their shape and don’t crumble when you move.
What you’ll need
- Plaid flannel shirt with chest pockets.
- Jeans or denim overalls.
- Artificial fabric fall leaves in different colors, such as Artificial Silk Fall Maple Leaves.
- Small bundles of raffia to imitate straw.
- Needle and thread for attaching the decorations.
- Scissors.
- Straw hat to complete the costume.
How to make a costume with leaves in the pockets
- Prepare the shirt. Choose a loose-fitting flannel shirt with fairly deep chest pockets. Wear it with jeans or overalls and make sure the pockets aren’t covered by the overall straps. If the pockets have flaps, leave them unbuttoned and fold them upward.
- Choose the fall leaves. Take about 10–15 artificial leaves in different colors and sizes. Leaves about 3–5 inches (7.5–13 cm) long will be enough for the pockets. If they’re attached to plastic stems, carefully remove them. It’s better to remove any wire stems so they don’t poke through the fabric or scratch your skin.
- Arrange the leaves in the pockets. Put four or five leaves in each pocket so their tops stick out about 2–3 inches (5–7.5 cm) above the edge. Place the larger leaves at the back and the smaller ones in front. Alternate red, yellow, and orange shades. Don’t stuff the pockets too tightly, or the fabric will start bulging awkwardly.
- Secure the decorations. To keep the leaves from falling out while you move, sew their lower parts to the inside of the pockets. Two or three small stitches per leaf will be enough. If the leaf fabric is very thin, stitch closer to the base, where the material is thicker. Once they’re attached, gently tug on each leaf to make sure it holds securely.
- Add a little raffia. Gather two small bundles of raffia about 4–6 inches (10–15 cm) long and tie each bundle at the base with thread. Place one bundle between the leaves in each pocket and sew it to the fabric. The raffia should only peek out a little from behind the leaves. There’s no need to fill the whole pocket with it.
- Finish the costume. Put on a straw hat and decorate it with a few fabric leaves, securing them with thread to the band around the crown. For the makeup, use brown and black makeup pencils. Draw and fill in a small triangle on the tip of your nose with the brown pencil, then use the black one to add a few short stitches near the corners of your mouth.
When Lindy collects fall leaves for crafts, she always notices how different their colors can be. Yellow, orange, red, and brown leaves can look really nice together. So for this costume, we also choose leaves in different colors. Let more red leaves peek out of one pocket, and more yellow and orange ones out of the other. But it’ll look pretty either way, I promise!
8. Raffia Hair Scarecrow Wig

Messy raffia hair makes a great addition to a Halloween scarecrow costume. It looks like dried straw, sticks out in different directions, and looks pretty funny under an old hat. You can make this wig yourself by attaching bundles of raffia to a regular fabric cap.
For this craft, choose natural raffia in a light yellow or straw color. Its long fibers are easy to gather into bundles and trim with scissors. And the soft cap underneath will let you wear the wig without the stiff fibers touching your hair or scalp.
What you’ll need
- Natural raffia.
- Thin fabric cap made of cotton or soft fleece that fits your head.
- Strong thread in a color that matches the raffia.
- Large-eye needle for sewing on the bundles.
- Scissors.
- Straw hat, optional.
How to make a scarecrow wig
- Prepare the base. Take a thin fabric cap without a pom-pom or bulky seams. Try it on and make sure it fits snugly without feeling too tight. Then take it off and lay it on the table. If the cap is stretchy, don’t pull it too tightly while sewing on the raffia, or the finished wig will be uncomfortable to wear.
- Cut the raffia. Prepare several dozen pieces about 12–16 inches (30–40 cm) long. Gather five to seven strands together and tie each bundle in the middle with strong thread. Leave the thread ends about 5–6 inches (13–15 cm) long so you can use them to attach the bundle to the cap.
- Sew on the first bundles. Start at the top of the cap. Place the middle of the first bundle against the fabric so the strands spread out in two directions. Thread the loose ends of the tying thread through the needle and pass them through the cap fabric one at a time. Tie the ends in a knot on the inside of the cap. Attach a few more bundles along the top of the head the same way.
- Add hair to the sides and back. Keep sewing on the bundles in rows, gradually working your way down from the crown to the edges of the cap. Space them about 1–2 inches (2.5–5 cm) apart. After each row, spread out the raffia and check whether the fabric base is showing through. Use shorter pieces near the temples so they don’t get in your eyes.
- Trim the finished wig. Put the cap on and gently arrange the raffia with your hands. Trim any strands that are too long on the sides, leaving them around shoulder length or a little shorter. In the front, you can make short, uneven bangs that won’t cover your eyes. Don’t try to cut everything perfectly even. A garden scarecrow probably wouldn’t have perfectly neat hair anyway!
- Try the wig on with the costume. Put on a plaid shirt or overalls, then the wig. If you’re planning to wear it with a straw hat, make sure the hat fits comfortably over the cap and doesn’t push it down over your eyes. Also check that the raffia doesn’t catch on your collar or make it difficult to turn your head.
We often use raffia in our fall crafts. And I’ve noticed that shorter bundles look messier, while longer ones hang down almost like regular hair. That’s why it makes more sense to use both lengths for a scarecrow wig, keeping the shorter strands on top and around the face. And if some strands stick out in different directions, there’s no need to trim them. That’s perfectly fine for this look!
9. Patchwork Scarecrow Overalls

Old denim overalls covered with colorful fabric scraps are perfect for a Halloween scarecrow costume. It’s best to use fabrics with different patterns — plaid, striped, and solid-colored. These patches really stand out against worn denim, making the outfit look like clothes that have been patched and repaired many times.
For this idea, we’ll take loose-fitting overalls and decorate them with plenty of fabric patches. Unlike a regular scarecrow costume, where a couple of patches on the knees are enough, here they’ll be the main decoration.
What you’ll need
- Old denim overalls with long pant legs.
- Cotton fabric scraps in different colors and patterns, such as Assorted Cotton Fabric Scraps for Patchwork.
- Fabric glue for attaching the patches to the overalls.
- Needle and thick cotton thread in a contrasting color.
- Scissors for cutting the fabric.
- Plaid shirt to complete the costume.
- Straw hat, optional.
How to make patchwork scarecrow overalls
- Prepare the overalls. Wash them and lay them face up on a flat surface. Smooth out the pant legs and bib so the fabric lies flat without large wrinkles. Look at the pockets, knees, and areas near the side seams. These are good places for the most noticeable patches, without covering the fasteners or straps.
- Cut the fabric scraps. Prepare about 12–15 pieces in different shapes and sizes. For example, 4 × 4-inch (10 × 10 cm) squares, 3 × 5-inch (7.5 × 13 cm) rectangles, and a few small triangles. Use fabrics in brown, red, mustard yellow, and green. You can slightly fray the edges of some cotton patches by pulling out a few threads with your fingers.
- Arrange the patches on the overalls. Start by placing the largest pieces on the bib and knees, then fill the gaps with smaller scraps. You can position some patches at an angle or overlap them slightly. I recommend alternating patterned and solid-colored fabrics so the plaid patches don’t blend into each other. Before gluing, try on the overalls and make sure the patches don’t get in the way when you bend your knees.
- Glue on the fabric. Apply a thin layer of fabric glue to the back of each patch, leaving a little space around the edges if you want to keep the loose threads. Press the patches onto the overalls and let the glue dry according to the manufacturer’s instructions. Don’t use too much glue, or the fabric might become stiff. To avoid accidentally gluing the front and back of the pant legs together, place a piece of cardboard inside.
- Make decorative stitches. Take a needle and thick thread in a contrasting color and sew large stitches along the edges of the patches. Space them about ½ inch (1.3 cm) apart. On some patches, you can make crossed stitches in the shape of an X. If the patches are already securely glued, stitching just a few sections for decoration will be enough. Remove the cardboard from the pant legs when you’re done.
- Complete the look. Wear a long-sleeved plaid shirt under the overalls. Choose one with a pattern that differs from most of the patches. Put on a straw hat and comfortable boots. Make sure the overall straps don’t cover the largest patches on the bib.
For these overalls, you can use fabric scraps from a ready-made assortment or pieces of old shirts with different patterns. Even small leftover pieces from previous sewing projects can be used. They’ll finally have a place here, and you can clear out that box of fabric you’ve been meaning to sort through for ages. Don’t you agree?
10. Painted Burlap Scarecrow Hat

A burlap hat with painted patches and fall patterns will definitely be a noticeable detail in a Halloween scarecrow costume. You can paint pumpkins, leaves, or sunflowers on the rough fabric, and fray the edges a little so the hat looks old and worn.
What makes this idea interesting is the burlap itself, with its coarse woven texture. Paint doesn’t go on this kind of fabric perfectly evenly, and you can use that when decorating the hat. For the base, take an old wide-brimmed hat that fits well and cover it with burlap.
What you’ll need
- Natural burlap.
- Old wide-brimmed hat for the base.
- Acrylic fabric paints in brown, orange, yellow, and black.
- Brushes in different sizes for the designs and small details.
- Hot glue gun and glue sticks for attaching the burlap.
- Scissors for cutting the fabric.
- Jute rope for decorating the crown.
- A small piece of cardboard and a pencil for a simple leaf template.
How to make a painted scarecrow hat
- Prepare the base. Take an old hat with fairly stiff brims. Make sure it fits properly and doesn’t slip over your eyes. Remove any unnecessary decorations and clean the surface. If the hat already has a fabric band, you can leave it so you can cover the burlap seam later.
- Cover the crown with burlap. Cut a rectangular piece of burlap large enough to wrap around the crown with a small overlap. Wrap the fabric around the hat and secure it with small amounts of hot glue, starting at the back. Then cut a separate piece for the top of the crown and glue it around the edges. Try not to leave large folds on the top. Only apply hot glue while the hat is off your head, and be careful.
- Cover the brim with burlap. Place the hat on the fabric and trace the outer edge of the brim with a pencil. Cut out a circle with a little extra allowance, then make a hole in the center the size of the crown base. Put the cut piece onto the hat and glue the burlap to the top side of the brim, smoothing the fabric as you go. Trim the extra edges with scissors. You can carefully pull out a few threads along the outer edge to create a little fringe.
- Paint fall patterns. First sketch a few simple designs on the brim and crown with a pencil. For example, two orange leaves, a small pumpkin, and a few short twigs. Take a thin brush and apply the fabric paint. Use yellow and brown shades for the leaves, and make the pumpkin orange with dark lines. Wait until the paint dries before adding more details.
- Glue on a fabric patch. Cut a small square about 3 × 3 inches (7.5 × 7.5 cm) from an old plaid shirt. Glue it to the side of the crown with a hot glue gun, then paint large black stitches around the edges to imitate seams. You can fray the edges of the fabric a little so the patch looks worn.
- Decorate the hat with jute rope. Wrap the jute rope around the base of the crown two or three times and secure the ends with hot glue at the back. Once the paint is completely dry, try the hat on. Be sure to check that the burlap doesn’t touch your forehead with rough edges and that the brim doesn’t block your view.
I know from experience how quickly burlap edges start to fray. So it’s better to leave a little fringe only along the edges of the brim, and carefully trim any loose threads near the forehead so they don’t scratch your skin.
As for the designs, a few fall leaves and one fabric patch are enough. There’s no need to over-decorate the hat, because the burlap itself already has plenty of texture.
Your own scarecrow
That’s all our ideas! To me, the most interesting thing about costumes like these is the chance to use old things that have been sitting around waiting for their moment. And there really is no need to buy something new for just one evening.
What did you like most? Maybe you’ve already made a scarecrow costume for Halloween and came up with your own unusual details? Share in the comments! Lindy and I would love to see photos of your costumes and read about how you made them.