We completely transformed our abandoned and overgrown garden using all-natural, no-till garden practices to create a beautiful and productive garden within a year!
I can’t believe that we’ve been at our “new” homestead for almost 2 years now!
Part of me is so f-ing proud of everything that we’ve done! And the other part of me is like “what the heck are you doing with yourself?! This place is still a disaster!” And the other part of me is like “Girl, you are soooo tired at this point. Just run away while you still can!”
At the end of August of 2016, we bought our current home/homestead. The property was a bit on the rough side. And by “rough”, I mean that it looked like a hoarder lived here for several years before totally abandoning the place. And what the actual heck was that terrible smell??? It was like a mix of rotting fruit (or maybe human flesh?), feces and pot. Perfect, right? But beauty is in the eye of the beholder! When we saw it, we knew it was absolutely PERFECT! All we could see was potential, even if everyone else saw total a hot mess!
So for those of you who are just starting this journey (and I’m excited that a lot of you are!), let me tell you that you absolutely can do it! And for those of you who are still trudging along after a couple years, wondering how much longer you can continue at this pace: you didn’t come this far to only come this far! (That’s my new power motto right now, btw!)
So, let’s talk about the garden!
The garden area was one of the features that made me fall in love with this place instantly! And we were so very lucky that our property already had a designated garden area! So, so very lucky! There are six 8×16 foot raised beds and three 8×8 foot raised beds. The pathways all have landscape fabric covered with pea-gravel. The fabric is weathered, but at least it’s there to help prevent weeds!
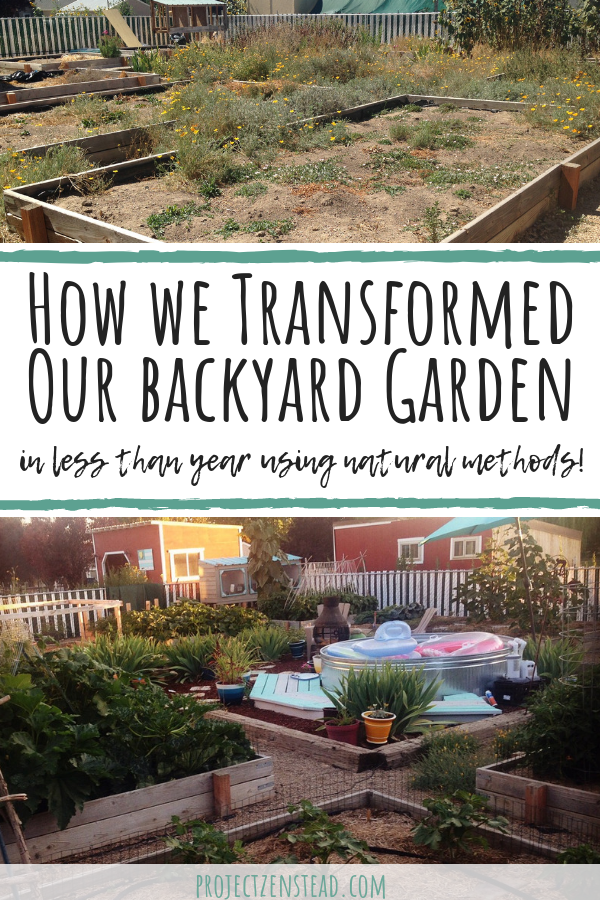
Here’s a peak at the progress we’ve made over the last 2 years:
How We Transformed our Abandoned & Overgrown Garden Area:
Weed the garden area:
We began the process by removing weeds from the garden beds by hand pulling them. Obviously, if you are growing your food in the area, you don’t want to use any herbicides or even horticultural vinegar, as it can effect your soil quality. So hand pulling is the best way to go.
If the weeds have flowered and set seed, you will definitely want to remove them so that you don’t end up mixing the seeds into your new soil and creating more weeds! If the weeds haven’t flowered or set seed, you can actually leave them if you are going to turn the soil. They will break down and help add organic material back to the garden. I figure it’s their civic duty to put back all the nutrients that they took from the soil in the first place!
Test the soil:
I performed a soil texture test using the Mason jar method. The soil quality wasn’t terrible, but it also wasn’t the rich loam that all gardeners desire. That meant that we needed to amend the soil. We also needed to add more soil to the beds since the soil levels were low. Since we planned to greatly amend the soil, we decided to wait on getting a soil test done since the nutrient levels would change once we amended the soil.
Add high quality garden soil & compost:
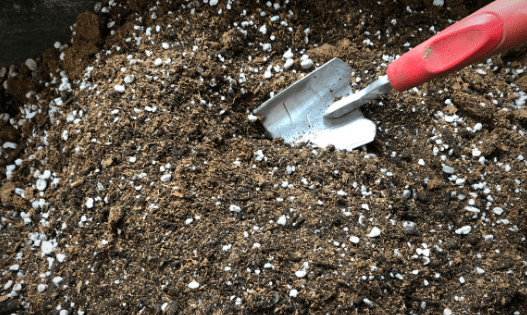
In the Spring of 2016, we started amending the soil in the raised beds. We did this by hauling in truckloads of high quality garden soil from our local organic nursery. When it comes to filling your garden beds, soil isn’t something that you want to skimp on because you are literally relying on it to grow your dinner! Yes, we could have found free fill dirt on Craigslist, but it wouldn’t have been pH balanced, weed seed free or as nutritious as the specially formulated garden soil is.
We ended up buying 5 yards of soil, which cost just under $300. I get that it’s a lot of money! If you are in a pinch and can’t afford high quality garden soil, you can try finding the cleanest fill dirt possible and amending it heavily with rich compost and organic material. Since we wanted to utilize the garden that same year and because we had the resources to afford it, purchasing soil was the best choice for us. Because we use no till and biodynamic gardening methods to improve and continually build soil, we will never have to spend that amount of money on soil again. Thank goodness!
Mix garden soil and compost into existing garden beds:
Next, we spent a couple months amending the soil in each garden bed. We did this by digging down into the soil and mixing in the new garden soil and a good amount of compost – basically turning the soil to fully mix it. It was back-breaking work! By the time we got to the last bed, I was so over moving dirt! But wheelbarrow-full by wheelbarrow-full, we finally finished! The wonderful thing is that we will never have to do this again, as long as we continue amending the soil each year with compost and organic material!
Once your beds have the new soil and compost mixed in, let them rest for a bit before planting. The amount of time will vary based on how hot your compost is. Hot compost usually needs to rest for about 3 months. If using cold compost, you can plant right away.
Mulch, mulch, mulch!
Be sure to thoroughly mulch your garden beds. The mulch will help maintain moisture, keep soil temps lower, repress weeds, and encourage microorganisms and earthworms. You can mulch with a variety of materials including grass clippings, organic straw, hay, bark, or shredded leaves.
We mulch with alfalfa hay that our goats waste (they are such picky eaters!). Since alfalfa is a legume, it adds nitrogen to the soil over time as it breaks down. It usually doesn’t cause as much sprouting as grass hay, because alfalfa is cut before it flowers and sets seed. When you plant your seeds or starts, be sure to pull the mulch away from the base of the plant/seedling. Gardens should also be mulched before winter so that your soil isn’t exposed during the off-season.
Amend regularly:
Your garden soil is a living entity. It should literally be crawling with life! The best way to keep your soil healthy is to top dress it at least once a year with compost and organic matter. Most people will do this in the fall before they put the garden to “bed” for the winter. You can also add more organic material in early Spring, a couple months before planting. Cover crops are another great way to increase your soil’s fertility, and they can be grown at different times of the year. Whatever methods you choose, your soil will always return the favor when you feed and care for it!
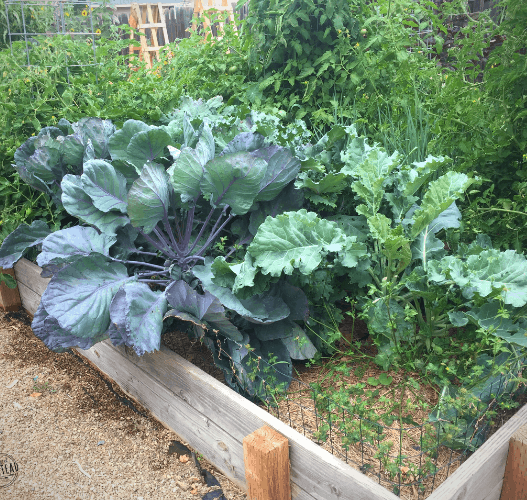
Just for fun, here are some before and after shots of our garden area ?
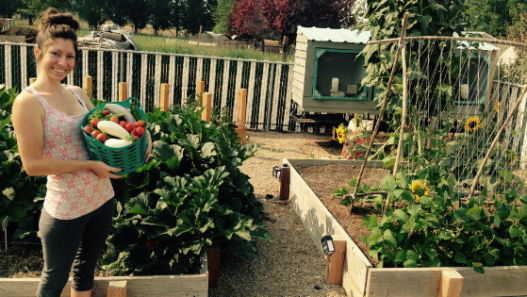
Bringing this garden back to its former glory days has been one of the most rewarding things that we’ve accomplished on this property! The soil has come to life and the bees and birds have already returned. Seeing it flourish and get better each year has been a truly healing experience for both me and the earth!
I know many of you have taken on destitute properties as well. Believe me: the work is worth it and you can do it! I hope this will inspire you to see how much a garden can change and improve, even in a short amount of time! Keep investing your love in the earth and it will repay it ten-fold with its beauty and fruitfulness!
I would love to hear what questions you have about reviving an abandoned garden area! Drop them in the comments below!




I abandoned my food-producing garden beds due to neighborhood cats using them as a toilet, yuck. How do you deal with this issue? Obviously not wanting to hurt the cats, but I have yet to find a successful solution. Thanks, enjoying your blog!
Ugh! Yeah, that is no fun! I never had an issue with that, but we just got a new kitten and I caught her using one of our raised garden beds the other day! I know that there are certain scent deterrents that you can try (orange peels, planting thyme and lavender, etc). Or, you can lay hardware cloth or that plastic mesh fencing over your bed until you are ready to plant. Hopefully they will find a new place to go! If they are still using though, you can try using sticks (pointing upright) around the area they use and see if that deters them. I’d love to know what you try and if it works! 🙂
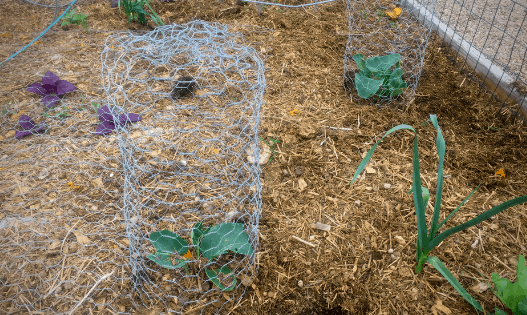
I have had this issue with my own animals and I usually just put a bit of chicken wire over the beds after planting them… the seedings will grow up through and the cats hate it. Hope that helps.
That’s what we ended up doing with our garlic now that we have the World’s Worst Farm Cat ? It worked really well! I think I’ll end up doing it with my spring seeds too! Glad to hear that it has worked for you too!
This looks amazing! You guys have done a great job! I love those rabbit cages in the corner of the top picture? Do you talk more about your rabbits anywhere? I’m trying to decide if I want to add them to our farm.
Thank you so much! It’s funny you should mention the rabbits! I was giving their cages a good cleaning yesterday and realized I don’t have any posts about them or how we set up their cages. I will definitely have to write one now! We ended up with bunnies because we aren’t great at saying “no” to rescue animals ? so they are fuzzy little composters for us. They do a great job! Before we had goats, the bunnies and chickens were our primary source of manure and compost so they were absolutely vital. Now that we also have goats creating tons of manure and wasted hay, the bunnies are as vital, but we still enjoy having them. And, can you ever really have too much compost/manure?? ?
You’ve done a brilliant job, I’m loving how green and lush it all looks. This is inspiring me to start making some progress in my own garden. I’ve been trying to grow edibles on and off with small successes. Now I want my own before and after shots ?
Wow! Your garden looks AMAZING! Thanks for the detailed post… now you have me motivated to do something in our crazy overgrown garden! The weeds are HUGE though so I’m not even sure where to start!
Very inspiring. Totally makes me ready for Spring so I can get back to my (small) garden. I do a lot of experimenting with different types of plants, many I haven’t had luck with but I’m still trying.
I know the feeling! I think that gardening teaches us more about how to fail than how to succeed! But it also shows us that failure really isn’t that big of deal after all! You just keep going 🙂 I hope your garden this year teaches you all sorts of new things! I know mine sure does!
Rabbits are a cold manure which means you can add right to the garden no composting.