A special seed starting soil mix allows your seeds to grow under the best conditions possible! And, it’s easy and affordable to make your own seed starting soil mix at home – here’s how!
Why exactly do you need a special seed starting soil mix? I must admit that when I first started gardening, I plunked my seeds into any potting soil mix I had lying around! Not surprisingly, a lot of those little seeds didn’t do so well.
Sure, there are some hardier seeds that will do just fine under most soil conditions and may not need a special soil mix – looking at you, squash family! However, there are many seeds that are just a bit more delicate and, well, “high maintenance”. These seeds need just the right conditions in order to germinate.
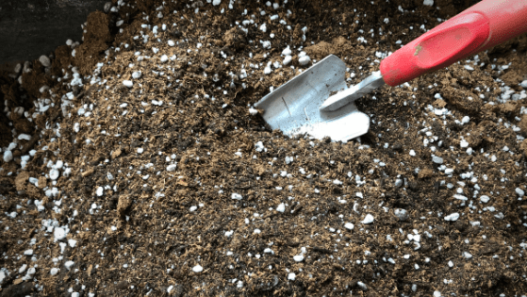
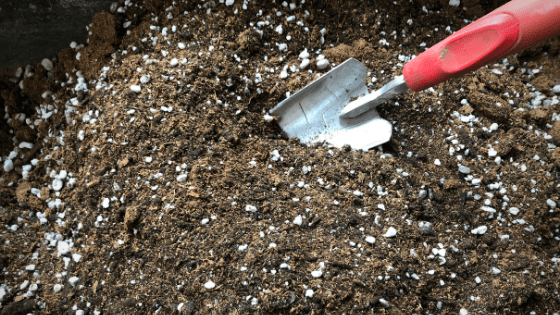
Seed starting soil is special because it doesn’t actually contain any soil at all!
Once your seeds have germinated and are large enough to transplant, you will be able to pot them up into larger containers with a regular potting soil mix. But there area a number of benefits to using a special soil mix when starting your seeds and seedlings!
More of a visual learner? Check out my IGTV post showing how to make this seedling soil mix! Then, pop over to my Insta profile to check out my entire IGTV series on seed starting where I share info on everything from planting your seeds to watering them and potting them up!
[mv_video doNotOptimizePlacement=”false” doNotAutoplayNorOptimizePlacement=”false” jsonLd=”true” key=”ls9j7facingw9rgylqoz” ratio=”16:9″ thumbnail=”https://mediavine-res.cloudinary.com/v1617049498/ixuyirjaro5puf1w6rfp.jpg” title=”Seed Starting Soil Mix” volume=”70″]
** I may receive a commission at no additional cost to you from purchases made through links in this article. Full Disclosure Link **
Benefits of using a seed starting soil mix:
- Reduced chance of introducing fungal spores (since there is no soil in the mix)
- Reduced chance of introducing weed seeds (since there is no soil in the mix)
- Fine particles make it easy to sow small seeds and for seedlings to push through the soil when they germinate
- The fluffiness and airiness of the mixture reduces compaction which can hinder seed germination and early root formation.
- A light, fluffy soil mix also encourage good moisture distribution and drainage.
- Amendments and nutrients can be added to the mixture that will gently nourish seedlings and not be too high in nitrogen, which can burn them.
Commercial Seed Starting Mixes Versus Homemade:
If you aren’t able to make your own soil mix, or if you just aren’t ready to dive into soil mixes yet, that’s okay! Commercial seed starting mixes are widely available on the market. Below are some mixes that I would trust to use:
While it’s easy to buy a seed starting soil mix, it’s equally easy to make your own! The advantages of making your own mix is that you can make a custom amount, whether you need a little or a lot! It’s also incredibly easy and affordable to make your own seedling soil mix! You can also customize the mix by altering the ingredients and amendments that you include.
You will find a wide variety of recipes online for making a seed starting soil mix. My recipe is a basic one to get you started. It contains minimal ingredients that most gardeners already have on hand. However, feel free to customize it into your own special mix! Just remember that the goal is to have a light, fluffy mix for your seedlings!
Ingredients:
Peat moss:
Peat moss is a light and fluffy organic matter. It improves the aeration of the soil by allowing lots of oxygen pockets. It also does a great job at maintaining moisture. Peat moss really doesn’t contain any nutrients to feed seedlings, which is why we add nutrient amendments to the soil mix.
There is a lot of discussion about whether peat moss is a sustainable product or not. Peat moss is definitely a renewable resource, but the way that it’s harvested could be problematic. It’s harvested from peat moss bogs where over-harvesting could damage those wetland ecosystems. However, many companies are adapting sustainable harvesting methods, which you can read more about on the Canadian Sphagnum Peat Moss Association website.
It should also be noted that peat moss has a pH of 4.4, making it acidic. This means that it will also increase the acidity of your soil mix. Most vegetables prefer soils that are slightly-acidic to near-neutral (about 5.5 -6.5 on the pH scale). I haven’t noticed any issues from this with my soil mix. However, you can add a small amount of lime to your mix to help balance the pH if needed. There’s no exact measurement, so I would begin by adding about 1 tablespoon of lime to each gallon of soil mix.
Purchase Organic Peat Moss
Coconut Coir or Coconut Peat
Coconut coir can be used in place of peat moss for this recipe. It is a fairly new product that is becoming a very popular replacement for peat moss. Coconut coir is created from the husk material of coconuts. Like peat moss, it’s a light and fluffy material that helps aerate the soil. It also does a great job of holding moisture. Also like peat moss, coconut coir does not offer any nutrients to the growing plants. It is also generally more slightly expensive than peat moss.
Purchase Coco Coir
Compost
Compost is mixed organic material that has been broken down over time. It’s full of living organism that help to feed to soil and add nutrients to our soil mix. It also helps to capture and retain moisture.
Fun fact: Compost doesn’t actually feed your plants! Compost feeds the fungi and micro-organisms in the soil. And it’s those microorganisms and fungi that assist your plants in the uptake of nutrients through the roots!
While I encourage every gardener and homesteader to have their own compost pile, this is the one instance where I encourage the use of commercial compost rather than homemade. Commercial composting facilities are able to ensure that their compost is heated sufficiently to kill weed seeds and certain bacterias. This is very important for seedlings because we don’t want them to have to compete for resources with weeds or to be effected by bacterial or fungal infections. If you aren’t able to ensure that your homemade compost was heated sufficiently, it’s probably in your best interest to buy compost for your seed starting soil mix.
Purchase Compost
Perlite or Vermiculite
For this recipe, you can use either perlite or vermiculate. Both materials provide aeration to the soil to help reduce compaction. They also help by absorbing water and releasing the moisture into the soil. Vermiculite is generally noted as being better at absorbing and holding moisture while perlite is more porous and generally better used to increase soil aeration.
Purchase Organic Perlite or Vermiculite
Kelp Meal
Kelp meal is seaweed that is dried and ground into a powder. And, it’s full of nutrients for your seedlings! Kelp meal is one of my favorite all-around organic amendments because it’s full of minerals and vitamins but it isn’t high in nitrogen, making it gentle for young plants and seedlings. It is a great amendment to use to encourage plant growth. Plus, it’s a renewable resource! Win-win-win!
Purchase Kelp Meal
Bone Meal
No surprise here – bone meal is created from ground bones. While it might seem a little disturbing, bone meal is a good example of a useful item that is produced from resources that would otherwise go to waste. Bone meal is really high in phosphorous but it also contains calcium and a very small amount of nitrogen. Phosphorus helps encourage root growth, blooming and fruit production. Phosphorus is a nutrient that can be hard for plants to take up, so it’s important to make sure that it is readily available.
I began adding bone meal to my seed starting soil mix after experiencing a few years of consistent phosphorus deficiency in my older seedlings. After the addition of bone meal to the soil mix, I haven’t had any problems. Phosphorus deficiency can also cause stunted growth in plants, which is one more reason to include it in a seed starting mix! It’s important to note that when large amounts of phosphorus-rich fertilizers are used in the ground, it can create run-off contamination. For this reason, I prefer to add the bone meal to my seed starting mix rather than adding it at a later point (once the plants are in the garden).
Purchase Bone Meal
Mycorrhizae
Mycorrhizae is a fungi that builds a symbiotic relationship with the roots of plants. It basically attaches to the roots to form a “web” which better allows the roots to take up nutrients from the surrounding soil.
There are many mycorrhizae products available on the market. Some are soluble form, meaning that they must be mixed with water, and some are granular. Because of the large variation of products available, it’s important to follow the instructions on your package so that you know how much to use for the amount of potting soil that you are mixing up.
Purchase Mycorrhizae
Other Amendments:
You can add other amendments to your mix to create your own special recipe! Or you can adjust your recipe to use the amendments that you have on hand. Or, if you aren’t feeling creative, you can buy a premixed fertilizer to add to your mix instead. Just follow the directions on the package to add the correct amount to your soil mix. The Down to Earth line of products is one of my favorites! I love their seed starting fertilizer mix and have used it many times over the years!
My Seed Starting Soil Mix Recipe:
About this mix:
This is my basic seed starting soil mix that I’ve developed over a couple of years of starting seeds. I have adapted it slightly over the years and sometimes adapt it based on the ingredients I have on hand. I have had really good luck with it! You can use this as a base mix and get creative by adding your own amendments. Or, you can keep it simple and use the recipe as-is.
Measuring:
Since this recipe uses “parts”, you can use any item that holds soil as your measuring device. If you have a big scoop or shovel, that works great. Or you can use a smaller pot to scoop up your ingredients – which happens to be what I used this year! Whatever you decide to use, just be aware that one “part” is equivalent to one “scoop”.
Mixing Container:
You will need a large container or bin to mix your soil in. You can use a 5-gallon bucket or a large Tupperware container. My favorite container to use is a cement mixing trough. You can purchase them at home improvement stores (in the cement aisle) or buy online. They are affordable, durable, and easy t
o use since they are wide and flat and have low sides.
To make your own seed starting soil mix:
Don’t forget it! Pin it!








Ok, you’ve re-inspired me! I used to make my own all the time but we’ve just moved so often that I don’t buy all the parts in bulk anymore and store them. In fact, we’re moving again this year – but NEXT year, I’ll going to start making my own again.
Congrats on your own move – I hope your gardens fill in quickly!
Oh, I completely understand! It’s hard starting from scratch after each move! Hopefully you guys will be able to settle in for a little bit at your next home! Good luck with the move – I’m sending good vibes your way! 😀
I confess that I had NO idea that seed starting mix did not have soil in it! Wow! I also didn’t know how easy it is to make your own, nor that such nourishing ingredients were in it! Thanks for the infusion of knowledge. I have a feeling that I am going to have a really good gardening season now. 🙂
Wow, so much valuable info in here, I happy to learn how to make my own seed starting mix.
Would you recommend this mix for garden beds as well?
Thank you!
Hi there! This is a soil-free mix that is ideal for seed starting. For garden beds, you will want a mix of soil and organic matter (compost, leaves, etc.). Garden centers will usually have a mix specially designed for garden beds. This is usually a great way to start and then you can continue to build healthy soil by mulching and topdressing your soil in the spring and fall each year.