
A family backyard isn’t just about grass and a couple of flower beds. It’s where you run barefoot for mint in the morning, play ball between the garden beds during the day, and grill veggies under string lights at night.
⠀
It’s not about the number of square feet — it’s about how you organize the space. How you balance activity and calm, play and garden, freedom and order.
⠀
In this post, I’m sharing 10 layout ideas that made our backyard simpler, more beautiful, and easier to live in. All tested in real-life: with a kid, dogs, and just two working hands. Let’s go.
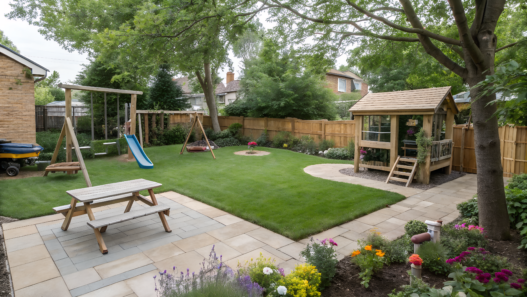
1. Backyard Zones for All Ages – A Layout That Grows with Your Kids
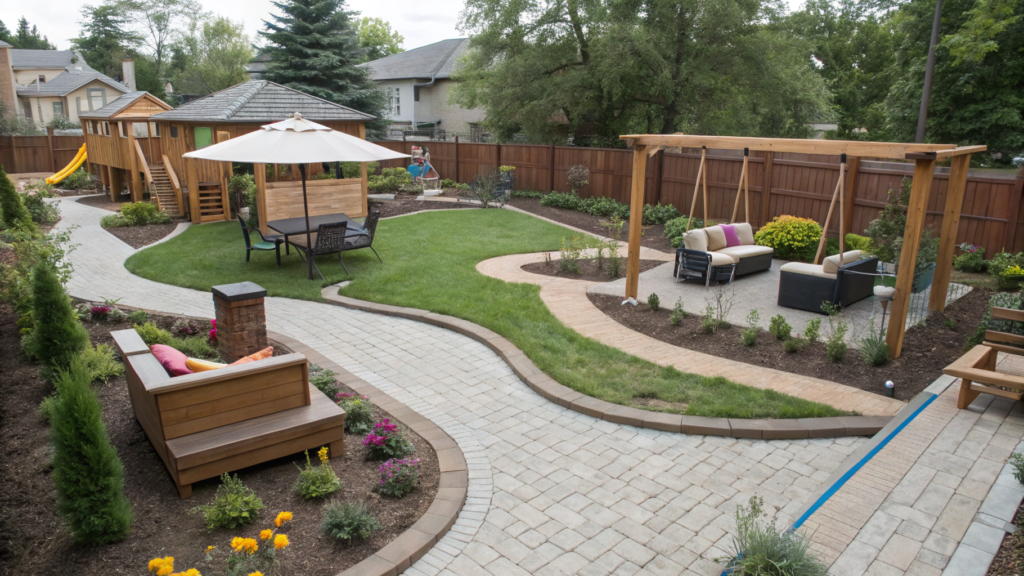
When we plan a family-friendly backyard, we don’t want to redesign it every year. We want it to evolve as the kids grow — and still look beautiful and well-kept. Over time, we’ve rethought a lot and started creating spaces that work for both toddlers and adults.
1. Main Zones That Work for All Ages
Play-Anywhere Lawn Area
Don’t overthink it: an open patch of grass (at least 12×12 ft / about 3.5×3.5 m) is the best thing you can offer for free play, ball games, and imagination-driven fun.
No fancy structures — just a well-kept, soft lawn. We planted low-growing, perennial grass that’s easy on bare feet and holds up to running.
Leave plenty of open sky above — kids love bubbles, kites, and lying back to watch clouds.
Toddler-Friendly Sensory Corner
If you’ve got kids under five, this space should be focused on safety and sensory play.
We built a simple wooden sandbox (with a lid — no chicken poop), added a water table, and hung ribbons and bells on the fence.
The floor is fine mulch, soft and splinter-free.
And yes — shade is a must. Near a tree is great, but a sail shade works too.
As toddlers grow, it easily becomes a container garden or a little quiet play zone.
Raised Beds with a Clear Edge
Raised beds with edging act like a natural barrier for little feet, and keep things tidy.
Ours are 12 inches high (30 cm) and host everything from carrots to strawberries.
As kids get curious, we started planting sunflowers and pole beans together — fast, fun, and forgiving.
Pro tip. Give your kid a personal garden bed, even if it’s just one end of yours.
Quiet Reading & Chill Spot
Everyone needs a quiet place to just be. Ours is by the lilac bush, where birds are always chirping. There’s a hammock, a couple of baskets with books (yep, under a shade), and a little table.
Kids use it not to “do” stuff — but just to sit, look, think, and breathe.
Add a blooming shrub or mint, and it turns into a mini retreat.
All-Family Patio
Probably the most universal zone in our backyard. We replaced plastic chairs with a wooden table and benches, and suddenly we had an outdoor dining room.
Ideally at least 10×10 ft (3×3 m) — but more is better.
We added an outdoor rug and a portable shade. This is where we eat, draw, and hang out at night.
One upgrade we love: a rolling cart — breakfast in the morning, art in the afternoon, snacks in the evening.
At first, we just left a corner empty. Now it’s a playhouse zone. Next year? Maybe a teen lounge. Things change — and that’s a good thing.
General Tips for Zoning a Family-Friendly Backyard
- Use visual markers like raised beds, edging, or garden paths — they help kids understand where zones begin and end.
- Make sure the whole yard is visible from the house, especially for toddlers. Big windows help a lot!
- Don’t be afraid of “temporary” setups. Some zones can change in a single evening — move chairs, lay down a rug, or string a line for drying herbs.
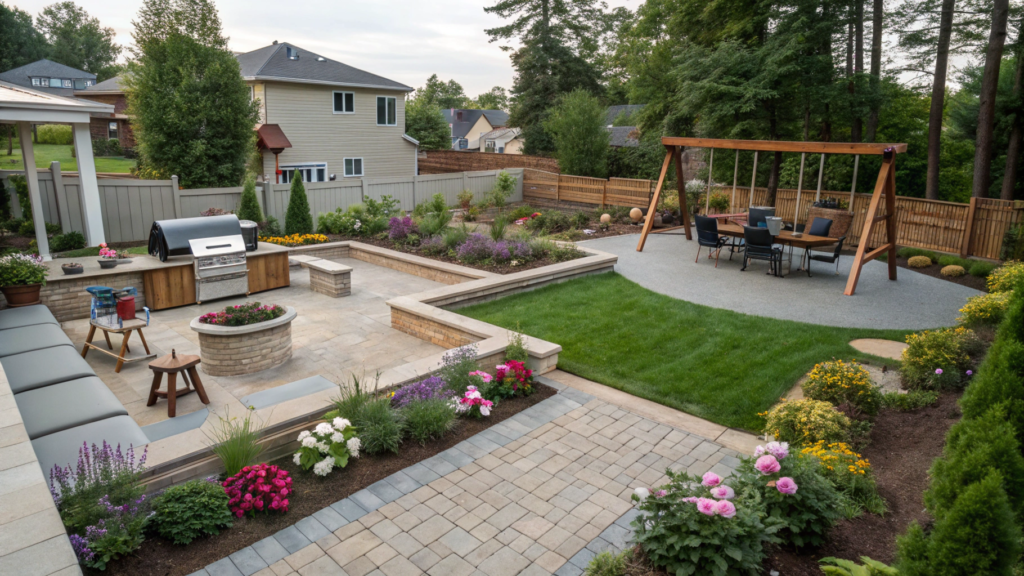
2. The Ultimate Family Backyard Layout for Games, Garden & Grill
Okay. You want:
- A garden, but not one taken over by raised beds.
- A play zone, but not a theme park.
- To be able to cook, host, and relax, but without feeling like you live inside a Lowe’s furniture aisle.
⠀
Yes, it’s all possible. And here’s how we did it.
1. The Center Is a Lawn Oasis
The first thing we planned was the center of the backyard. It needed to stay as open as possible. Not “empty” — free.
⠀
Size: at least 15×15 ft (about 4.5×4.5 m) of flat grass — enough space to throw down a blanket, set up benches, roll out a grill, play lawn games, or toss a frisbee.
⠀
We used TLC Tall Fescue Grass Seed Blend, 25 lb — soft, resistant to foot traffic, grows fast, and doesn’t thin out mid-season.
2. Beds Around the Perimeter (So They’re There, but Not in the Way)
Around the edge of the lawn, we built raised beds from simple 2×10″ boards, treated with natural oil. Later, we added built-in benches to some of them.
⠀
Here’s why it works:
- The beds aren’t just for veggies — we mix basil with dahlias, thyme with asters.
- They visually separate the play area from the garden.
- They’re easy to maintain: access from three sides, mulch paths underfoot, and drip irrigation.
3. A Grill Zone with a Soft Transition
One of our smartest choices was creating a gentle flow from the patio to the grill zone.
We skipped the bulky BBQ stations. Just laid concrete pavers, built a pallet shelf behind them, and added a small rolling table.
⠀
Pro tip. Get a wheeled grill, so you can roll it under cover if it rains. Great option: Weber Original Kettle Premium 22-Inch Charcoal Grill
⠀
Right next to the grill, we planted a strip of thyme and rosemary. Yes — right in the ground. Snip a sprig and drop it straight into the marinade. Beautiful, fragrant, and functional.
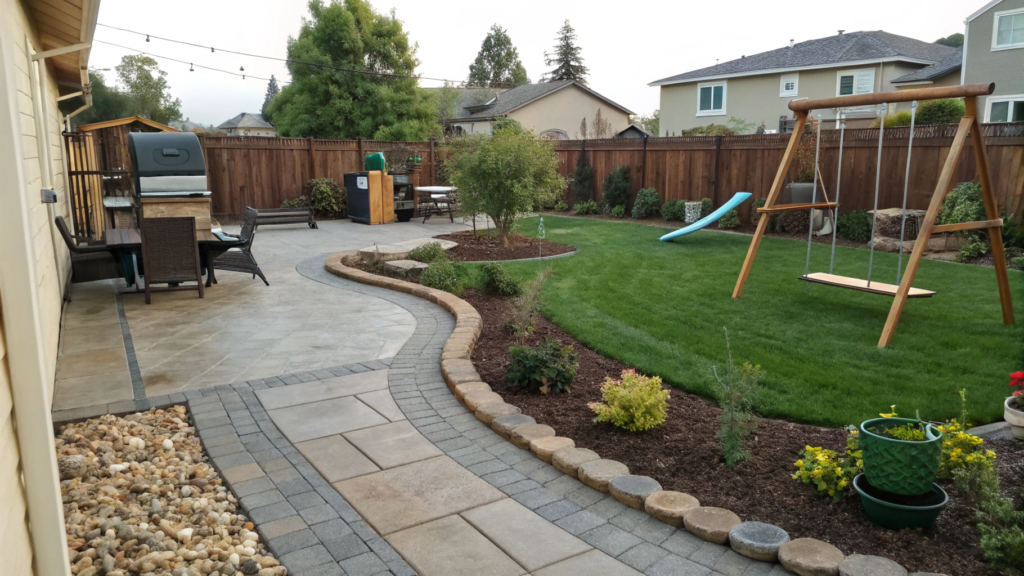
4. Kid Zone — Without the Cartoon Vibes
We thought hard about how to include a kids’ play space without making the backyard look like a festival. Here’s what we did:
- Sandbox built into the edge of a raised bed, with a lid and a built-in seat.
- Swings hung from a sturdy crossbeam between two fence posts.
- Along the back — a tunnel of peas and cucumbers, grown over an arch. In spring it’s a play tunnel, by summer it becomes a shady green fort.
⠀
It’s their favorite spot — and it still looks like part of the garden, not a playground.
5. A Space for the Table
You might be surprised, but we gave up on permanent furniture.
⠀
Now we have:
- A folding table for six that gets stored in the shed for winter.
- Cushions and stools we can bring out or tuck away in one minute.
So How Does It All Come Together?
Here’s the secret — mulch and gravel walkways.
⠀
We laid out 3-foot-wide (about 90 cm) paths from bark chips and pavers. It helps:
- Divide the yard into zones
- Keep mud under control
- Give kids a clear sense of where the lawn ends and the garden begins
On summer nights, the grill is out, kids are racing across the lawn, there’s salad from the beds on the table, and nasturtiums blooming in the back — this, to me, is family life. Cozy, chaotic, but very real.
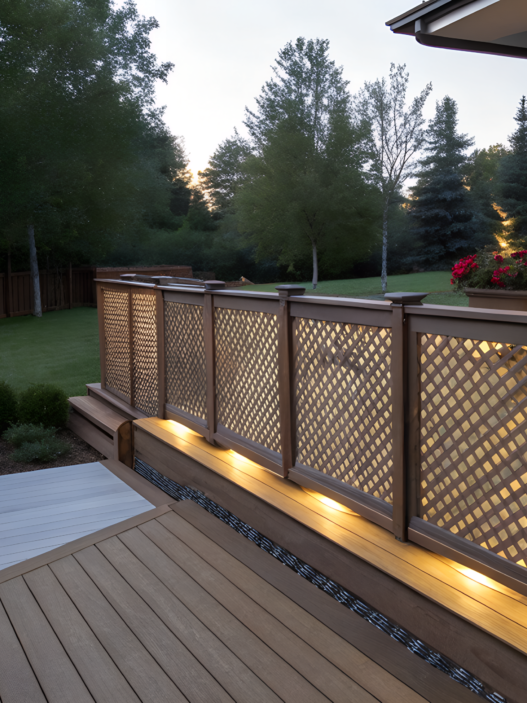
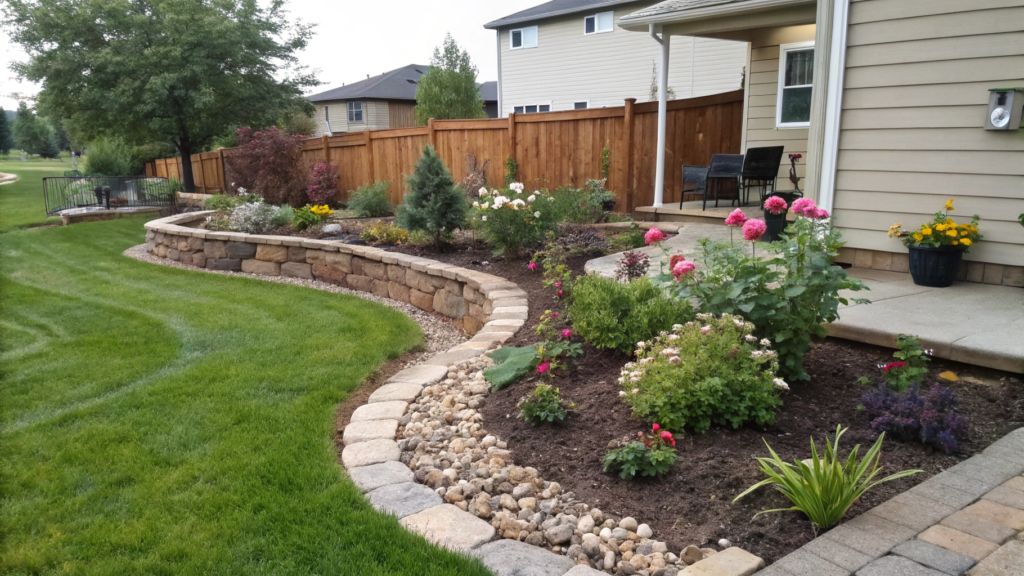
3. Backyard Layout with Built-In Flower Bed Edging – No Tripping, More Bloom
If you’ve ever camped out in the backyard and stepped out at night to hit the bushes, you know exactly what it feels like to trip over the edge of a flower bed. Or to drag a hose over a hidden rock. Or to step into mulch that’s “kind of spilled over.”
⠀
The secret? Proper edging.
But not the cheap plastic kind that curls up after one season.
We’re talking about built-in, long-lasting, visually clean edging that blends both form and function.
1. Where and Why You Need Edging
Edging makes sense anywhere that:
- The lawn touches a flower bed
- Garden beds transition into walkways
- You want to keep grass out of the beds, and soil off the grass
- Your kid might ride straight into the daisies
In our case, we added edging around all the flower beds by the patio, along the path borders, and even between our herb and veggie sections in the garden.
2. Materials That Actually Work
After testing concrete, wood, and store-bought edging, we settled on bricks laid on edge.
⠀
Why it works:
- You can lay them directly on gravel — no concrete base needed
- They look natural, especially as they age and get mossy
- They’re tough against wheels and moisture
Another option: natural stone.
We used leftover granite flagstones from our patio build — just laid them in a line and dug them in slightly.
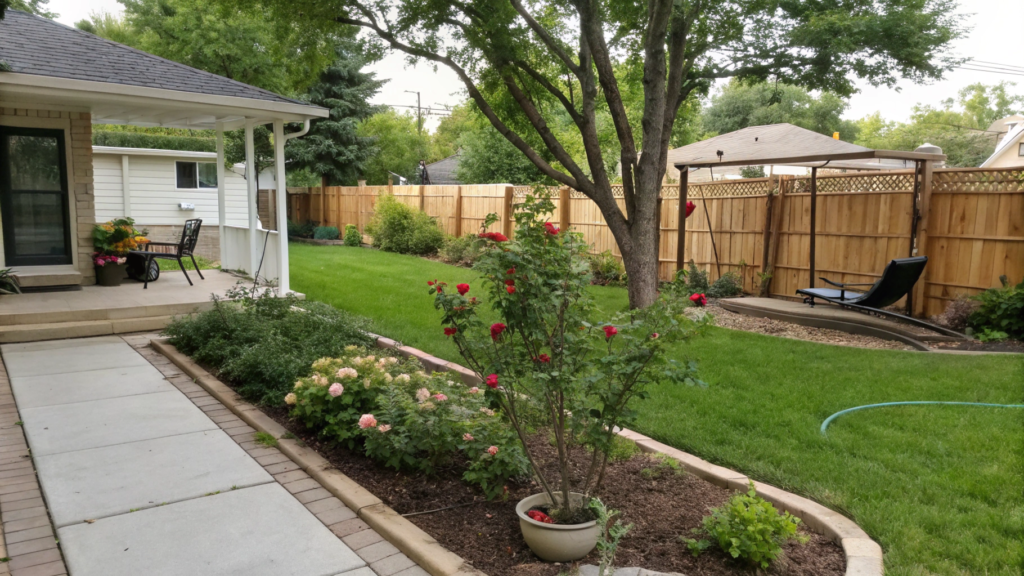
3. Bed Shape: Gentle Curves Are Better
When we started lining everything up with a ruler, it looked… stiff.
⠀
So the new plan: soft, winding bed shapes that wrap around the lawn zone. They invite you to walk the path — not just march along the fence.
In the center of each bed: a tall focal point — like a rose bush, spirea, or cosmos.
Little trick: to sketch the curve of your future bed, use a garden hose! Just lay it down, move it around until you find the right shape.
4. The Secret Function of Edging: Root Protection
No one really thinks about this — until July hits. When the lawn dries out and you’re desperately watering the flower beds — the water ends up soaking into the grass, not feeding the flowers.
Edging solves this. It literally separates moisture and nutrients.
This becomes especially important when your flower beds have plants with different needs — like lavender (loves it dry) and chamomile (loves it moist).
⠀
Along our south-facing side, we’ve got lilies, sage, echinacea, and calendula. All with different watering preferences.
Edging lets the watering can be precise, and keeps the mulch right where it belongs.
5. Safety — Especially for Kids and Grandparents
When grandma visits the yard (or the kids are tearing around with toy cars) — no flower wants to be the last one standing.
⠀
Thanks to edging:
- It’s visually clear where the boundaries are
- A cart won’t roll off the path
- No one ends up falling into a bed during evening picnics
We even have a flower bed set around a tree, with a round brick border and soft wood chips inside.
The kids love sitting there, drawing with chalk, building “nests.”
If you’re like us and want to fight less with grass and soil — it’s better to define the edges once, than to spend all summer with a shovel and gritted teeth.
4. The Quiet Corner Blueprint – A Quiet Spot with a DIY Fountain and Flowering Tree
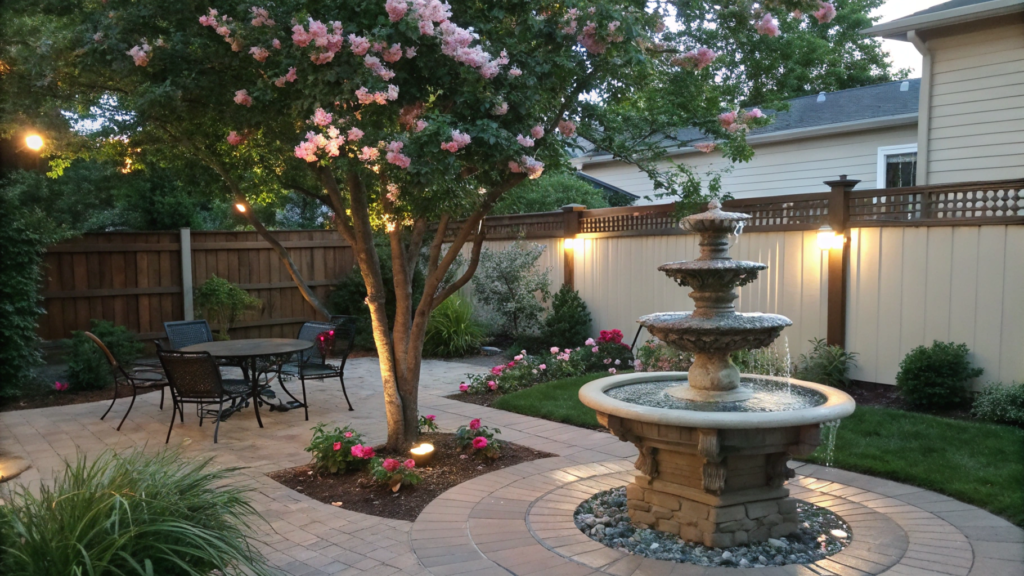
Even the liveliest backyard needs a place to breathe out. A corner with no paved path leading to it — a spot you just wander into one day and decide to stay.
⠀
Our quiet corner didn’t appear right away. It started as a bare spot where garden beds never took root. For a while, it held a shed with shovels. But slowly — little by little — it became a space where we now spend evenings with no agenda. Just talking. Just listening.
1. Where to Create a Spot Like This
It shouldn’t be the center of your layout.
⠀
The best spot is one that no one uses actively — but where it simply feels good to be. We picked the northwest side of the yard — quiet, slightly tucked away, and shaded in the afternoons.
Even a 5×5 ft space (1.5×1.5 m) is more than enough. What matters is that this area stays away from grill smoke, the sound of swing chains, and everyday chaos.
2. A Flowering Tree as the Visual Anchor
This spot needs something alive, tall, and expressive, but not high-maintenance.
⠀
We chose a serviceberry — it blooms in spring, gives berries in summer, and its leaves turn copper and fiery red in fall. The crown is soft and airy — perfect for placing a small bench underneath.
Under the tree, we planted shade-loving perennials: hostas, geraniums, and mint. They fill in quickly, hold moisture, and create the feeling of a natural, slightly “wild” garden.
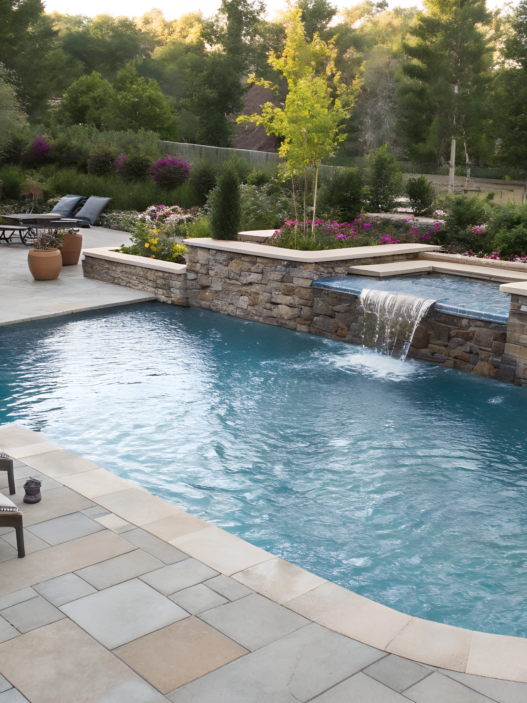
3. A Fountain With No Wires or Hassle
One simple element that changes everything.
⠀
We bought a solar-powered pump, placed it in a deep ceramic bowl, added stones and a few water plants — and that was it. No wiring. No filters. Just gentle bubbling, working better than any guided meditation.
Solar Powered Fountain Pump Kit for Ponds & Gardens — runs from sunrise to sunset, especially well on bright days.
This fountain isn’t just “decor” — it’s acoustic atmosphere. It softens the background noise, relaxes you, but doesn’t distract.
4. Little Details That Bring the Space to Life
So it doesn’t feel staged — but like a real part of your day — we added simple touches:
- Mulch underfoot — warm, woodsy, mess-free, low maintenance
- A plain wooden bench, no extras — just sit and stay
- Moveable pots with sage, nasturtiums, and lavender — arranged by season, mood, or whim
Everything here is easy to shift or just leave as is. This corner lives at its own pace, just like it should.
Sometimes I go there with a cup of coffee. Sometimes I just stand for a minute before dinner. And every time, that space reminds me — not everything in life has to be productive.
Sometimes, it just needs to be quiet.
5. Kid-Proof Pea Trellis Zones – Where Kids and Garden Beds Actually Get Along
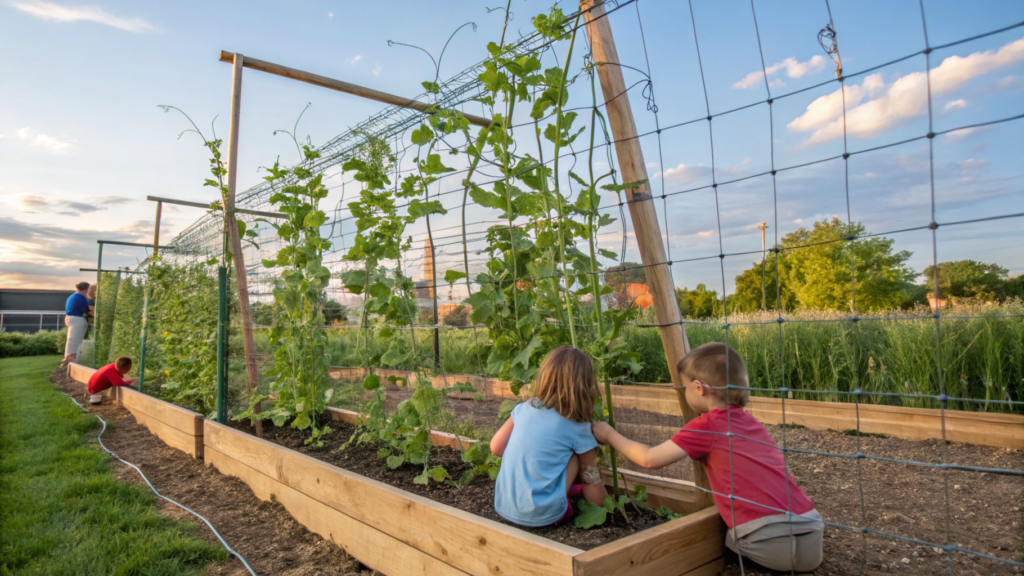
One season, we planted peas three times. First — to enjoy the seedlings. Second — after a toddler ran through them with a shovel. Third — because the cat decided it was his new nap zone.
⠀
We wanted to build a climbing bed that wouldn’t just survive kids, but actually invite them in. A space where they could play, care for plants, and not have to worry about breaking anything.
1. Where to Set Up a Zone Like This
Best location? Along the back or side fence. A spot where kids naturally run around, but the plants get a bit of protection on one side.
⠀
We picked a 6-foot-wide area (about 1.8 m) between the compost pile and the path. Just enough room to:
- Set up a lightweight arch
- Plant peas, beans, cucumbers on both sides
- Let the child step inside, explore, touch — and not destroy anything important
2. A Frame That Can Handle Wind and Kids
We tried mesh on stakes — pretty, but lasted two days. Then we found a better way.
⠀
Now we use an arched frame made of rebar and garden netting. It’s:
- Low enough for a child to see and reach
- Flexible enough to take some pushing and pulling
- And weatherproof — no fear of rain, sun, cats, or chickens
3. What to Grow
The rule: fast-growing, edible, and not spiky. Here’s what worked best for us:
- Sugar snap peas — kids love picking them straight from the vine
- “Royal Burgundy” bush beans — quick and colorful
- Mini cucumbers, like Bush Pickle — they don’t spread sideways
- Nasturtiums — blooming, edible, and bees love them
Always leave a bit of bare soil under the arch. Our kid turns it into a mini market, digs “tunnels,” or parks his toys there.
4. How to Get Kids Involved (Without More Work for You)
The best part of this zone is that it’s naturally interesting. We hung up wooden plant labels, ribbons, and beads on the arch. Nearby? A small watering can and kid-sized tools.
No need to fence it off — better to make it feel like a stage, so the child wants to step in and explore.
5. What About Maintenance?
Here’s the nice part — there’s barely any. The floor is mulch or gravel, the plants are seasonal, and the arch is permanent but low-key.
In winter, we just pull out the stems — and that’s it. Come spring, it’s planting party time again. And every year, it’s a little different.
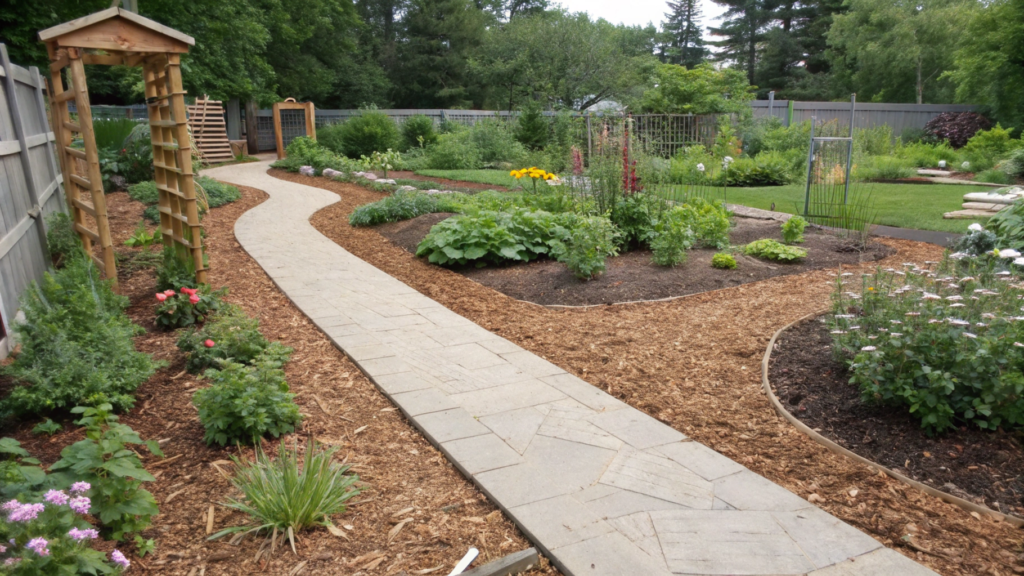
6. Mulch Pathways That Divide Spaces for Family Use (Easy & Elegant)
Some things don’t draw attention — but they hold everything together.
⠀
Mulch pathways are like roots in our yard: they connect, divide, and guide. Thanks to them, our whole space doesn’t turn into one big racetrack through the garden beds. And they’re beautiful, simple, and budget-friendly.
1. Choose the Right Mulch
Not all mulch is good for pathways. For walking, you need larger chunks, with good drainage and some softness underfoot — something that won’t just float away with the first rain.
Best options:
- Hardwood mulch (medium grade)
- Shredded bark
- Playground mulch — especially if kids run on the path
We tried gravel, but it’s noisy, heats up, and doesn’t feel as cozy as wood. So we keep coming back to mulch — always.
To make the path actually divide zones, not just decorate them — it needs to be visible and feel different underfoot.
We make ours at least 3 feet wide (about 90 cm) — so you can walk through with a bucket or wheelbarrow, and a kid can ride a bike on it.
A path from the patio to the garden is like a bridge between activity and care. That’s why we always mark the edges with wood or bricks — to keep the mulch from spilling into everything else.
2. Edging Isn’t Just About “Looks”
It helps:
- Keep mulch in place
- Stop grass from creeping in
- Visually zone your yard
The best we’ve used: 2×4″ wood boards treated with natural oil, laid just slightly above ground level. Subtle — but solid.
3. Transitions Are About Texture, Not Gates
One day it hit us: you don’t need fences between zones — you need changes under your feet.
⠀
For example, our mulch path goes from the kitchen to the garden, but near the flower beds it turns into gravel and pavers. By the kid zone, it turns into softer, deeper mulch — to cushion falls.
⠀
That shift in texture tells your body, “you’re in a new zone now.” No signs or fences needed. Just instinct.
4. Add Forks and “Islands”
The most common mistake? Paths that go straight from A to B. But a backyard isn’t a Google Map — it’s alive.
Helpful ideas:
- Add splits — one path goes to the garden, another to the swings
- Include little islands — with pots, flowers, or a bench, right along the path, so you can stop, sit, smell, or water
- Leave some “dead ends” — where the path seems to stop, but there’s a quiet spot beyond it
These elements make the yard feel layered — not just flat, but emotionally
7. Backyard Layout That Includes a Hidden Mosquito-Repelling Plant Zone
No traps. No sprays. You simply design a plant bed that’s pretty on its own — and just happens to repel mosquitoes. And they don’t like it one bit.
Choose a Spot That’s Breezy, but Not Front and Center
We placed ours near the fence, not far from where we usually sit in the evenings.
The key is airflow — a light breeze helps the plant oils spread better.
Size: even a 3×5 ft bed (about 90×150 cm) is plenty. It’s better to tuck it off to the side, so the scent drifts over, rather than hitting you head-on.
It looks like a pretty flower bed. But it works like a natural bug shield.
1. What to Plant
We tried a lot — and stuck with the ones that actually worked, required almost no care, and still looked good.
- Lavender — classic. Blooms, smells great, loves sun
- Lemon verbena — soft scent, leaves are great for tea
- Mint (peppermint or apple) — aggressive, but great if contained
- Catmint (Nepeta) — almost like lavender, but easier
- Lemon basil — kitchen-ready and effective
- Bee balm (monarda) — brings in bees, keeps away bloodsuckers
2. Make It Multi-Level — Looks Better, Works Better
Plant layout:
- Tall in the back (monarda, lavender)
- Medium in the center
- Ground covers like mint in the front
This creates a rolling scent effect and looks more natural — not like a row of soldiers. Especially nice near a path — the scent follows you as you walk.
3. Don’t Forget About Drainage
The spot should drain well — standing water attracts mosquitoes instead of repelling them.
We added some gravel at the base of the bed so moisture doesn’t pool around the roots.
Also useful: cedar mulch — it holds moisture and adds an extra layer of scent.
4. Make It Part of the Visual Journey
Don’t just stick it in a random corner. Let a flagstone path lead to it, with a small bench nearby, maybe a decorative lantern or pot.
Now your mosquito-repelling zone becomes:
- A fragrant buffer
- A cozy little hideout
- A natural extension of your landscape
Bonus. It attracts butterflies too.
This year, we’re sitting on the patio — no candles, no bug zappers, no slapping our necks.
Just a quiet little bed in the corner, doing its job. No hype. Just beauty.
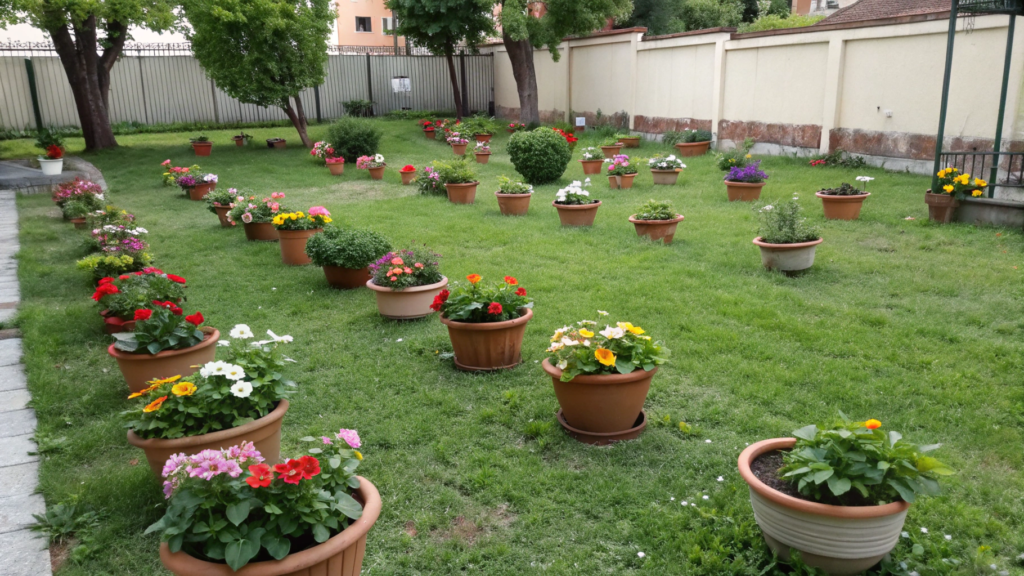
8. Mixing Flower Pots and Lawn Space – A Layout That Sparks Joy
When you have a small yard (or kids who love to kick a ball around), full garden beds aren’t always practical. And not everyone enjoys weeding and replanting.
⠀
That’s where the golden solution comes in — pots. Lots of them. Right on the lawn.
1. Why Pots on the Lawn Just Make Sense
This setup gives you several big advantages:
- You can move them anytime — into the shade, by the fence, closer to the patio
- No digging or soil prep needed
- Easy to change up seasonally
- And most importantly — they don’t get in the way when kids are running across the grass
We arrange our pots in small groups of 2–3, forming visual islands. They bring life and interest without breaking up the lawn space.
When you mix grass and potted plants, the whole yard starts to breathe.
You can roll the nasturtium closer to the table in the morning. Move the tall tomatoes aside in the evening for a picnic. It’s all flexible. And safe: no sharp edges, nothing fragile, and no off-limits zones.
We even created a “summer bed” from a bucket, an old watering can, and a planter on legs. Inside: lavender, calibrachoa, mint, and thyme. Smells in the morning, blooms all day, and by evening — it’s back on the patio.
2. What to Plant If You Want Both Beauty and Scent
Here’s our go-to “lawn pot set” that’s been tested and loved:
- Coreopsis and calendula — for bright color
- Sage and thyme — for fragrance and cooking
- Nasturtium and mint — safe for kids to touch, sniff, and pick
- Zinnias or verbena — for height and volume
Use pots with drainage and wheels, like the Rolling Raised Planter Box with Drainage, so you can move them without effort.
You’re not stuck with a fixed bed. If something fades — switch it out. If you need the lawn for a blanket — roll the pots away. Even in winter, you don’t have to bring them inside: we just fill ours with pine branches and lanterns — instant seasonal decor.
The key is: don’t be afraid to mix textures, heights, colors, scents. That’s the real joy of a yard — not in perfection, but in movement.
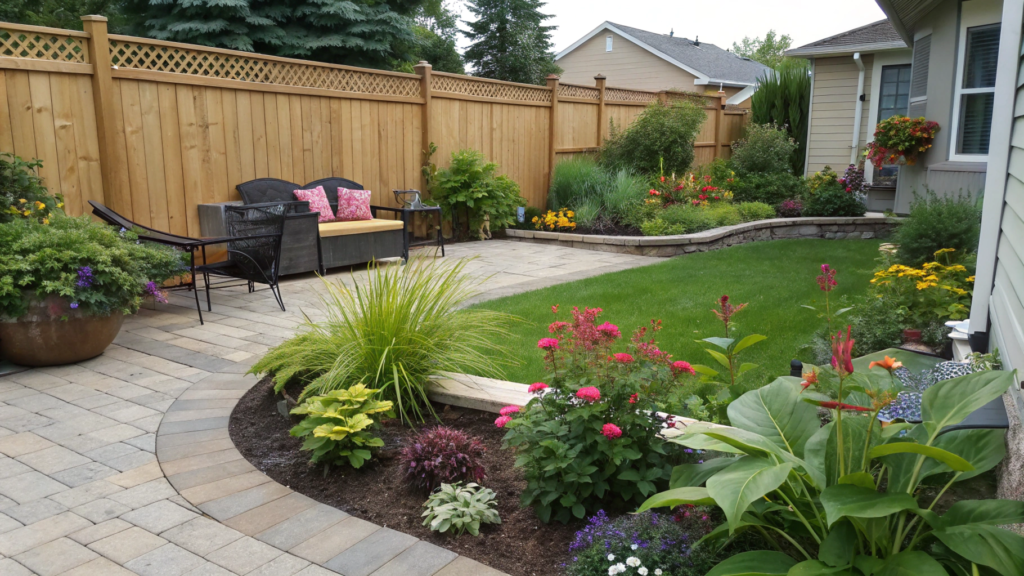
9. How to Edge a Family Backyard So It’s Beautiful and Functional
You can buy the best plants and lay perfect pavers — but if your layout isn’t pulled together, everything still feels temporary.
⠀
When your yard includes a kid, a dog, a swing, and salad greens growing in a bucket near the grill — boundaries start to blur. It all begins with a plan, but within weeks, you’re not sure where the flower bed ends and the scooter parking begins.
That’s when we realized: we don’t need fences. We need structure. Not with signs and walls — but with sensory cues: under your feet, in your sightline, in how you move.
And that’s where real edging comes in — not as a border, but as a mindset. Where one thing ends, and the next begins. Where the yard has soft but clear transitions.
1. Flow and Movement
We started by observing: Where do we usually walk? Where does the kid cut corners on the bike? Where does water collect after rain?
Those answers gave us structure. We didn’t fence things off — we mapped out flow.
Visually — with changes in texture (grass → mulch → wood). Functionally — with shifts in elevation or lighting.
2. Visual Transitions Create Wholeness
Even in a small yard, we avoided doing everything on one level.
- Raised the flower beds by 6 inches
- Sloped one of the paths
- Switched mulch color in one area
These details don’t divide, they shift focus smoothly. Kids and adults both intuitively feel: this is a different space. It has a different pace.
For example, we planted a line of sage along a path. Nobody cuts it — it smells good, and even the dog walks around it. Elsewhere, lavender does the same job — a visual and sensory signal: you’re entering the “rest zone.”
⠀
That’s how you build boundaries — not with borders, but with the feel of space.
3. Changing the Ground Is a Powerful Tool
One of the easiest ways to say “this is a new area” is to change what’s underfoot.
- Lawn to garden → mulch
- Patio to fountain → pavers
- Kids’ zone → wooden decking or soft play chips
These shifts work instinctively. No need to explain — people just sense: “we’re in a different part of the yard now.”
4. Narrowing and Widening Space
When a path narrows slightly — it feels like an entrance. When a flower bed has a ring of pots or lights, your body registers that as “a different zone.”
Often, where functionality ends, beauty begins. And vice versa. Edging connects them — simply, clearly, beautifully.
10. From Chaos to Calm: The Most Balanced Family Backyard Layout of 2025
When we first moved in, everything was scattered. A currant bush in the middle of the lawn.
A swing right next to the roses. The garden hose snaking across the beds. We were always rearranging, patching, placing things “just for now.”
⠀
Only a few seasons later did we realize: we didn’t need more space — we needed stronger connections between elements. That’s what creates peace and comfort, even in a small yard.
1. What Makes a Layout Feel Balanced
Not a perfect lawn or symmetry — but things like:
- Clear transitions: paths, arches, texture changes
- Logical flow: from house → to patio → to garden → to kid zone
- Pause points: a bench, a shady nook, a scent in the air
That’s not “design” — that’s real life. When each family member has a space, without stepping on anyone else’s.
Balance also means flexibility. We don’t have any “forever zones.” Even the flower beds move. Because now, we’re not afraid to shift the layout if something stops working.
For example: the grill used to sit by the fence — pretty, but awkward. Now it’s near the patio.
The kids’ corner was in the middle of the lawn — now it’s near an old tree, where it’s cooler and calmer.
And that’s okay. A garden is like a family — not frozen. It breathes.
2. Our Final Layout – Simple, But Thought-Out
- Center — lawn: for movement, games, and picnics
- Around it — garden beds and flower borders, edged so they don’t spread
- Corners — with purpose: a quiet nook, mosquito-repelling bed, workshop, or potting area
- Links — mulch and wood paths to connect it all
- Background sounds — water, leaves, birds. Everything that makes a space feel alive — without saying a word
When everything found its place, we finally got the feeling of a yard that runs without constant effort.
The kids run — and don’t knock over seedlings. We eat dinner — and don’t carry dishes through the beds. The lawn breathes. The flowers bloom. The paths lead. Everything flows — but nothing falls apart.
Balance isn’t about perfection. It’s about nothing getting in the way of being where you belong — in your yard, with your people, in your rhythm.
What About Your Yard?
You don’t have to do everything at once. We built our space in pieces — one zone per season, one curve in the path, one idea each summer.
And the more we built, the more we understood: you don’t need a “perfect plan” — you need a living, clear rhythm.
The plants will grow. The mulch will settle. The pots can move. What matters is that it all works for your family. For your habit of eating outside. Of playing, talking and being quiet.
If you enjoyed these ideas — leave a comment! I’d love to hear what’s working in your backyard.