In summer, we spend more time outdoors and less time over the stove. And the recipes that might seem too “non-standard” at other times suddenly become exactly what we need: portable, light, filling, and heat-resistant.
These 10 recipes are ones we actually make every summer — for beach days, road trips, backyard hangouts with friends, or simply for when we don’t want to think about food all day. They’re all designed to not go soggy, not leak, not spoil, and not lose flavor even after a few hours on the road or in the heat.
Each one can be made ahead of time, and we’ve tested them more than once in real-life situations: camping, kids’ parties, and just those long days when the only thing you want is to open the fridge and grab something already ready. No oven. No multi-step prep. Everything here is tried, tested, and truly used.
1. Mason Jar Layered Caprese Salads
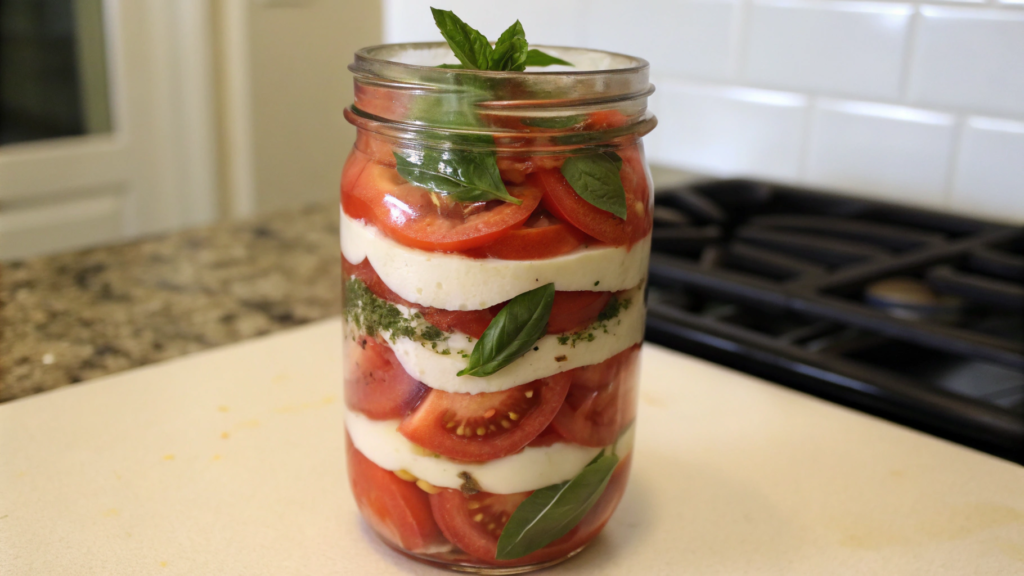
Caprese salad means ripe tomatoes, soft mozzarella, and fragrant basil. Simple? Yes. But when it’s made right — it tastes really good.
The problem: it’s a delicate dish. If you pack it ahead of time, within an hour it turns into a soggy mess in the container. But once we started layering it in a mason jar, it became a truly portable meal. The flavor stayed intact, the juice didn’t leak, and it looked like it was just made.
Ingredients (for 2 servings):
For the salad:
- 1 cup (about 150 g) cherry tomatoes, halved
- ¾ cup (about 110 g) mini mozzarella balls (bocconcini), halved if needed
- 10–15 fresh basil leaves, torn by hand
- Pinch of sea salt and black pepper
- Optional: a bit of arugula or baby spinach for a green touch
For the dressing:
- 2 tbsp balsamic vinegar
- 3 tbsp quality extra virgin olive oil
- ½ tsp Dijon mustard (for a hint of sharpness)
- 1 tsp honey
- Pinch of salt and pepper
Whisk everything with a fork in a jar — and it’s ready. Or pour into a small separate container if you’re not assembling the jars right away.
How to Layer Caprese in a Jar (2 mason jars, 16 oz / ~470 ml each)
A properly layered salad in a jar won’t turn to mush. Not after 2 hours, not after 8.
Step-by-step layering
Bottom layer. Pour 1.5 tbsp of the dressing into each jar. This is your barrier to prevent sogginess.
Next layer. Tomatoes (½ cup per jar) go right on the dressing — they can sit in it without losing texture. Then add the mozzarella (about ¼–⅓ cup per jar).
Greens and extras (on top). Add torn basil and, if you want, a handful of greens like arugula or spinach. You can also throw in 2–3 olives or avocado chunks — but only if you pla to eat it within the next 2–3 hours (avocado browns quickly!).
Seal the jar. Close with a lid and store in the fridge or a cooler bag. Before serving — give it a gentle shake or pour it into a bowl.
We use the Ball Mason Jars 16oz (set of 6) — the size is perfect, the twist lids are secure, and they hold a vacuum seal when needed
One of our favorite memories with this recipe: mid-July, hiking along Lake Pend Oreille. Temps were around 90°F (32°C). In the backpack — a lemonade thermos, a Caprese jar, and two wooden forks. And while everyone else was snacking on bars and bruised apples, I unscrewed that lid — and there was no soggy salad. No oil leaks. No mess. Just ready to eat.
2. Pasta Salad Craze with Peach Vinaigrette & Feta

Cold pasta salad is a go-to for many summer trips. It doesn’t spoil in a few hours, it’s filling, no reheating needed, and it’s easy to tweak to fit any taste. We make it in batches at the beginning of the weekend — it even holds up through beach conditions or a day in the car cooler.
Ingredients (for 4 servings):
For the salad:
- 8 oz (225 g) pasta (penne, fusilli, or farfalle)
- 1 cup (150 g) corn (fresh or canned, drained)
- ¾ cup (100 g) chopped cucumber
- ¾ cup (100 g) peach pieces (fresh or canned, drained)
- ½ cup (75 g) finely chopped red onion
- ½ cup (75 g) crumbled feta cheese
- ¼ cup finely chopped fresh mint or basil
- Salt and pepper to taste
For the peach vinaigrette:
- 3 tbsp white wine vinegar
- 2 tbsp peach purée (made from fresh or canned fruit)
- 1 tbsp Dijon mustard
- 1 tsp honey
- ¼ cup extra virgin olive oil
- Salt and pepper to taste
How to make it:
- Boil the pasta in salted water until al dente. Drain, rinse under cold water, and let it cool completely.
- Chop the cucumber, peaches, and red onion. If using canned corn, make sure it’s drained well.
- In a small bowl, mix peach purée, vinegar, mustard, and honey. Slowly whisk in the olive oil until fully blended. Add salt and pepper to taste.
- In a large bowl, combine the pasta, vegetables, peaches, and herbs.
- Pour the vinaigrette over the salad and toss gently.
- Add the feta last and mix again.
- Transfer to an airtight container and refrigerate for at least 30 minutes before serving.
We take this salad almost every time we head out for a few hours in summer. Especially for farmer’s markets or roadside stops — we don’t want fast food, and this doesn’t need to be reheated. It holds up in the cooler, and after 12 hours it actually gets better — the flavors soak in perfectly.
3. Pesto Chicken Crunch Rolls for Poolside Snacking
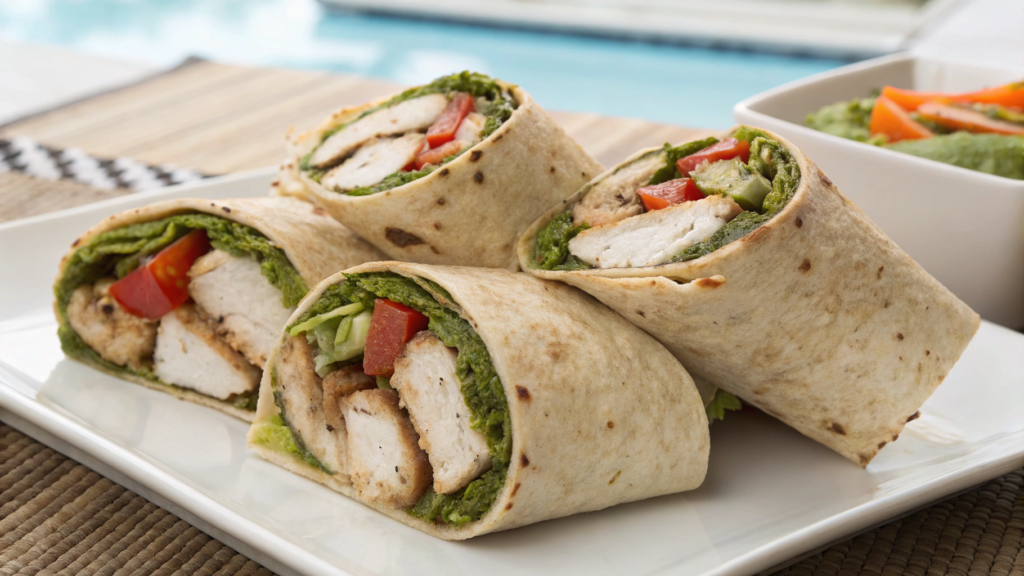
This is our regular choice for beach days, poolside parties, and long weekend outings. It’s easy to put together, holds its shape, packs neatly in foil or containers, and — most importantly — still tastes great cold. The tortilla stays crispy if wrapped and cooked correctly.
Ingredients (makes 4 rolls):
- 2 cups (about 280 g) cooked or roasted chicken, chopped
- 4 flour tortillas (about 8 inches / 20 cm diameter)
- ½ cup (125 ml) pesto (store-bought or homemade)
- ½ cup (75 g) shredded mozzarella cheese
- ½ cup (75 g) chopped sun-dried tomatoes (dry, not oil-packed)
- 1 cup (about 40 g) chopped spinach leaves
- 2 tbsp vegetable oil for frying
- Salt and pepper to taste
How to make it:
- In a large bowl, mix the chicken, pesto, cheese, spinach, and sun-dried tomatoes. Season to taste.
- Lay out the tortillas. Place ¼ of the filling near one edge of each, leaving space around the sides.
- Fold the bottom edge up, then roll the tortilla tightly like a burrito, sealing in the filling.
- Heat a skillet with a bit of oil.
- Fry the rolls on medium heat for 2–3 minutes per side until golden and crispy.
- Place on a paper towel to cool for 5 minutes. Slice in half or serve whole.
We use foil containers with lids to pack these. They don’t squash the rolls and keep the heat in well — perfect for outdoor trips.
Tip. If you’re prepping them in advance, let them cool completely before wrapping. Otherwise, steam builds up inside and turns the crisp into a soggy wrap. We usually cook in the morning, let them cool on a rack, wrap in parchment first, then foil.
4. Frozen Greek Yogurt Bark with Berries & Secret Cereal Crunch

This isn’t ice cream. It’s a frozen yogurt snack you can actually take on the go — as long as you’ve got a cooler bag or a portable fridge. We keep these in the freezer all summer: grab, snap, pack — done.
Ingredients (makes 6–8 snack-size pieces)
- 2 cups (500 ml) plain Greek yogurt
- 2 tbsp honey
- 1 tsp vanilla extract
- ½ cup (75 g) blueberries
- ½ cup (75 g) raspberries or chopped strawberries
- ¼ cup (30 g) granola or crushed cereal (Cheerios, cornflakes, or puffed rice all work)
- 2 tbsp chia seeds or chopped nuts (optional)
How to make it
- In a bowl, mix the Greek yogurt, honey, and vanilla until smooth.
- Line a baking sheet (around 9×13 inches / 23×33 cm) with parchment paper.
- Spread the yogurt mixture evenly on the sheet, about ½ inch (1–1.5 cm) thick.
- Sprinkle the berries over the top and gently press them into the yogurt.
- Top with granola or cereal, and add nuts or chia if using.
- Freeze for at least 4 hours — ideally overnight.
- Once frozen, lift it from the paper and break into pieces by hand or cut with a knife.
- Store in an airtight container in the freezer.
We use OXO containers with snap lids — they’re leak-proof, great for freezer storage, and fit well in compact spaces.
Real-life use
When we’ve got a big raspberry harvest, this recipe saves us. Instead of letting berries go soft in a couple of days, we turn them into bark. One evening of prep, and we’ve got snack backup for a whole week. It’s especially useful on hot days when no one wants to cook, but you still need something in your system.
5. Camping Chili Packets Made with Ground Hamburger Magic
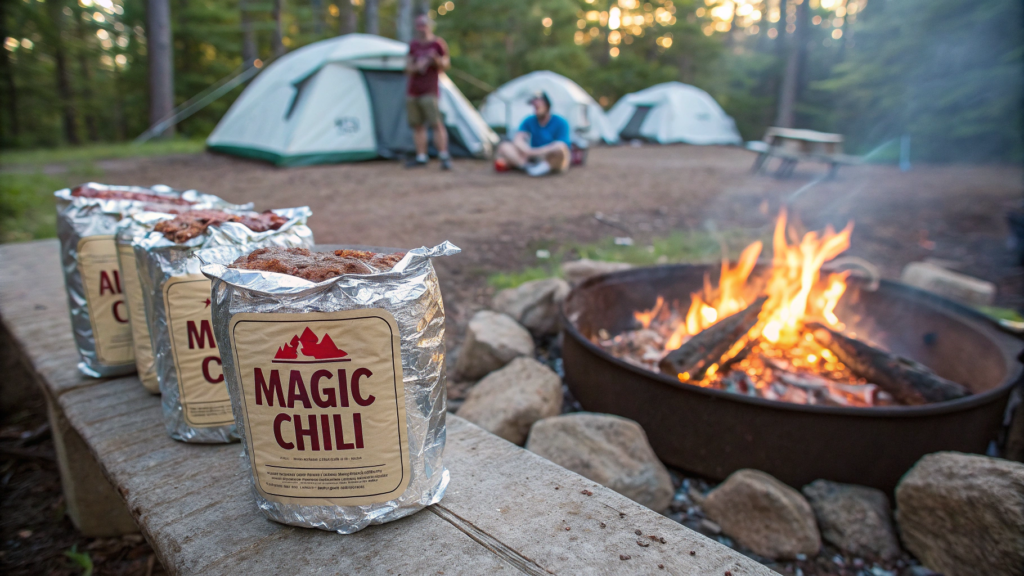
These grilled chili foil packets are one of the few meals you can prep in advance, freeze, and then toss right into the fire. They’re built specifically for camping, road trips, or backyard grill days. You can also bake them at home if needed.
Ingredients (serves 4)
- 1 lb (450 g) ground beef (preferably 80/20)
- 1 can (15 oz / 425 g) red kidney beans, rinsed and drained
- 1 can (14.5 oz / 410 g) diced tomatoes in juice
- ½ cup (75 g) corn
- 1 small red onion, finely chopped
- 1 green bell pepper, diced
- 1 tbsp tomato paste
- 2 tsp chili powder
- 1 tsp ground cumin
- Salt and pepper to taste
- Optional toppings: shredded cheese, herbs, sour cream
How to make it
- In a large bowl, mix the beef, beans, tomatoes, corn, pepper, onion, and tomato paste.
- Add the spices: chili powder, cumin, salt, and pepper. Mix thoroughly.
- Tear 4 large sheets of heavy-duty foil (about 12×18 inches / 30×45 cm).
- Divide the mixture into 4 equal parts and place in the center of each sheet.
- Fold into tight packets: fold in the short sides first, then roll up the long sides.
- If cooking right away, place on hot coals or grill for 15–20 minutes per side.
- If packing for later, freeze the packets. You can cook them from frozen — just add 5–7 more minutes.
- Before serving, carefully open the top of the foil, add cheese or sour cream if using.
Real-life experience
We’ve tried chili lots of ways while camping — in a pot, in a pan, in a jar. But only the foil packet version gave us what we needed: portioned, quick, and no dishes. When you prep and freeze them ahead, it’s like solving dinner for two days in a row with zero extra effort.
6. Portable Quesadilla Rolls with Tangy Salsa Dust
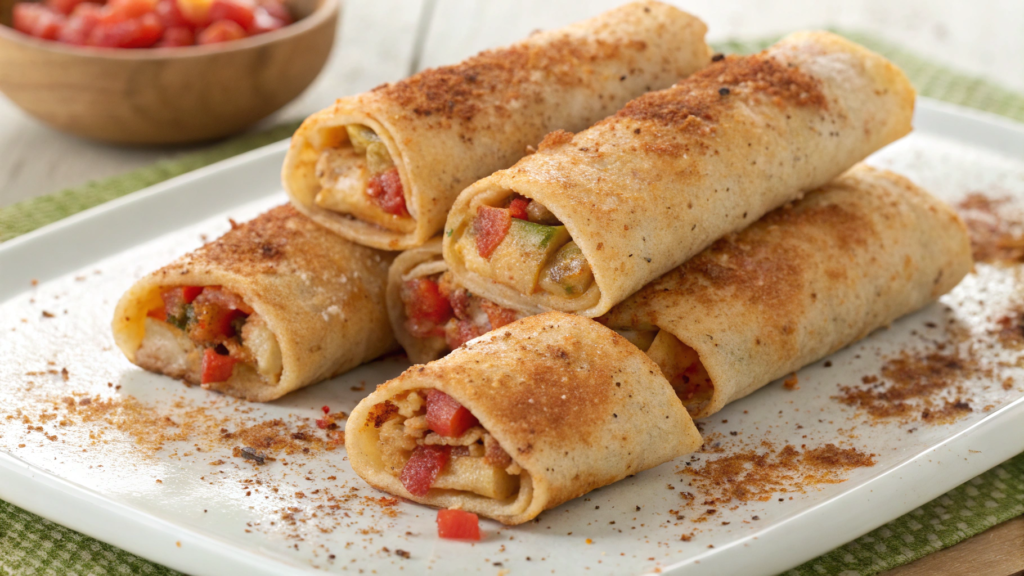
This is a great grab-and-go snack option — it doesn’t fall apart, is easy to hold, and still packs real flavor. Perfect for the beach, road trips, or just lunch on the move. The key is wrapping them tight and finishing with the “dry salsa” seasoning on the outside.
Ingredients (makes 4 rolls)
- 4 flour tortillas (8 inches / 20 cm)
- 1 cup (100 g) shredded cheddar cheese
- 1 cup (100 g) cooked chicken, shredded (or sub with beans)
- ¼ cup (60 g) corn
- ¼ cup (40 g) finely chopped bell pepper
- 2 tbsp finely chopped red onion
- Salt and pepper to taste
- 1–2 tbsp vegetable oil for frying
For the “dry salsa” coating:
- 1 tsp smoked paprika
- ½ tsp lime or lemon powder
- ½ tsp garlic powder
- ½ tsp salt
How to make it
- In a bowl, mix together the chicken, corn, bell pepper, onion, cheese, salt, and pepper.
- Lay out the tortillas. Spread the filling along one edge, leaving about ¾ inch (2 cm) of space from the sides.
- Roll the tortillas tightly like cigars. Press the ends lightly to seal.
- In a small bowl, combine all the dry salsa spices.
- Lightly brush or dip the outside of each roll in oil, then coat in the spice mix.
- Cook the rolls in a dry skillet or grill pan over medium heat for 2–3 minutes per side until crispy and golden.
- Let cool for 5–10 minutes. Slice in half or serve whole.
We use a flat non-stick grill pan to get even browning and prevent the spices from burning. It also gives a cleaner result with less oil.
Field-tested
When wrapped properly, the rolls hold their shape and don’t leak. We pack them in containers wrapped in parchment — the dry crust and seasoning keep them from getting soggy, even after 5–6 hours in a backpack. Especially useful for walks with kids: no drips, no crumbs.
7. Lemonade-Infused Chicken Salad Sandwiches

This chicken salad variation is especially good in the heat. Thanks to the lemon acidity and a touch of sweetness, it’s way more refreshing than classic mayo-based versions. We bring it on the road, use it for garden lunches, or just keep it in the fridge for a quick 2-minute sandwich.
Ingredients (for 4 sandwiches)
- 2 cups (about 280 g) cooked or roasted chicken, finely chopped
- ½ cup (120 ml) Greek yogurt or classic mayonnaise
- 2 tbsp lemon juice
- 1 tbsp lemon zest
- 1 tsp honey
- 1 tsp Dijon mustard
- ¼ cup (35 g) finely chopped celery
- ¼ cup (30 g) chopped red onion
- Salt and black pepper to taste
- 4 buns (brioche, whole wheat, or any firm variety)
- Optional: lettuce leaves, cucumber slices, or apple slices for extra texture
How to make it
- In a large bowl, combine the chopped chicken, celery, and onion. This gives the salad texture.
- In a separate bowl, whisk together the yogurt (or mayo), lemon juice, zest, honey, and mustard. This makes a balanced dressing with acidity, sweetness, and bite.
- Mix the dressing into the chicken base. Stir until evenly combined. Add salt and pepper to taste.
- Cover and refrigerate for at least 30 minutes. This lets the flavors settle and develop.
- Slice the buns. Optionally, toast the inside to avoid sogginess.
- Spoon the chicken salad onto the bottom bun. Add lettuce, cucumber, or apple slices if desired.
- Close with the top bun and wrap in parchment if you’re taking it to go.
We store the salad in Rubbermaid snap-lid containers — they’re airtight and fit well in a cooler bag for transport.
Lemon juice in this recipe is more than just flavor. It acts as a natural preservative, helping prevent quick spoilage. The acidity also balances out any heaviness from the yogurt or mayo. The salad stays light, even after sitting in the fridge for a day. If wrapped in parchment and packed in a cooler, the sandwich holds up for 5–6 hours in summer without any issues.
8. Best Shrimp Tostada Cups
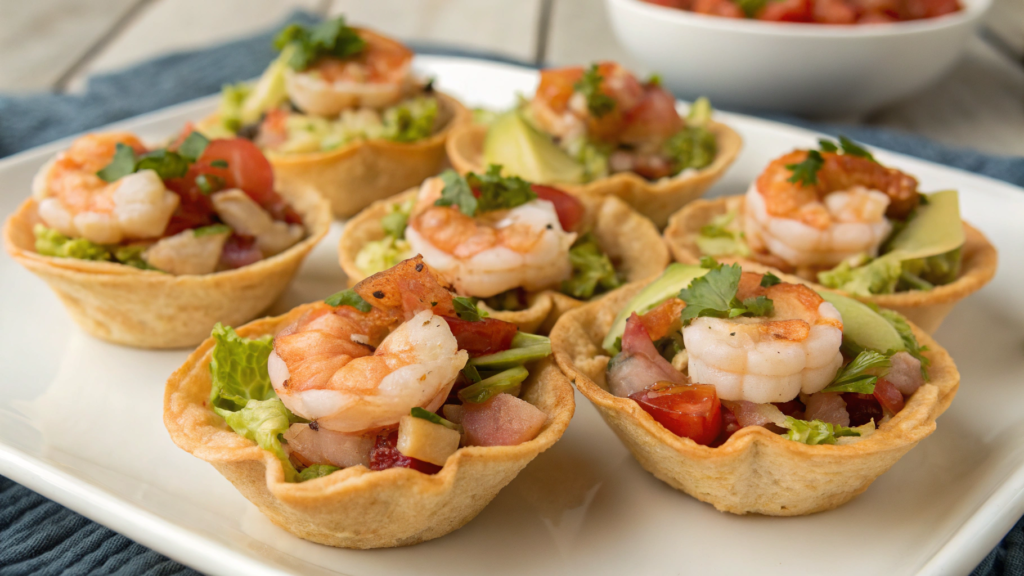
If you need a cold, portioned snack that’s easy to prep ahead, serve, and eat without utensils — these shrimp tostada cups are perfect. You can make them in 30 minutes, and they keep their texture in the fridge for up to 6 hours.
Ingredients (serves 4 – 2 cups per person, total 8)
For the tostada cups:
- 8 small corn tortillas (4–5 inches / ~10–12 cm)
- 1–2 tbsp vegetable oil
For the filling:
- ¾ lb (340 g) cooked and peeled shrimp (small or medium)
- 1 cup (150 g) corn
- 1 medium avocado, diced
- 1 cup (150 g) chopped cherry tomatoes
- ½ cup (70 g) finely chopped red onion
- ¼ cup fresh lime juice
- 2 tbsp olive oil
- 2 tbsp chopped cilantro or parsley
- Salt and black pepper to taste
How to make it
- Preheat oven to 375°F (190°C).
- Lightly brush both sides of the tortillas with oil.
- Gently press each tortilla into a muffin pan to form a cup shape.
- Bake for 10–12 minutes until crisp and golden. Let cool completely.
- While cups cool, mix the shrimp, avocado, corn, tomatoes, onion, and herbs in a large bowl.
- In a separate bowl, combine lime juice, olive oil, salt, and pepper. Pour over the salad and toss.
- Spoon the filling into the tostada cups just before serving, or no more than 1 hour in advance to keep the base from getting soggy.
For baking, we use a 12-cup non-stick muffin pan — the cups hold their shape, come out clean, and don’t stick.
The key to this recipe is not adding the filling too early if you’re heading out. We pack the salad in one container, the cups in another (dry). Just before eating, we fill the cups on the spot. Works great for picnics — no forks needed, no dripping, and it’s all finger food.
9. Watermelon Pizza Wedges with Coconut Whip

This is a simple gluten-free and dairy-free dessert alternative that takes just 15 minutes to prepare. It travels well in a cooler, doesn’t melt like ice cream, and doesn’t require dishes to serve. Just make sure not to add the toppings too early if you’re heading out.
Ingredients (serves 6)
- 1 round, thick slice of watermelon (1.5–2 inches / 4–5 cm thick, from the middle of the fruit)
- 1 can (13.5 oz / 400 ml) chilled coconut milk (refrigerated at least 24 hours)
- 2 tbsp powdered sugar or agave syrup
- ½ tsp vanilla extract
- ½ cup (75 g) berries (blueberries, raspberries, strawberries — any combo)
- 1–2 tbsp coconut flakes or sliced almonds
- Optional: mint for garnish
How to make it
- Cut the watermelon slice into 6–8 wedges, like a pizza.
- Scoop the thick part of the chilled coconut milk (top layer only).
- Whip with sugar and vanilla until it holds shape.
- Spread the coconut whip on top of the watermelon slices.
- Top with berries, coconut flakes, and mint.
- Serve immediately, or store the components separately: watermelon in one container, coconut whip in another airtight one.
We use Bentgo containers with divided sections — coconut cream and toppings stay separate, and watermelon won’t leak onto other items.
Pro tip! If you add the cream too early, it’ll absorb moisture and lose texture. That’s why we always transport the elements separately. Assembly takes 2 minutes on site and the result is clean and easy to serve. Especially handy with kids around — no sticky hands from melting desserts.
10. No-Bake Strawberry Shortcake Jars
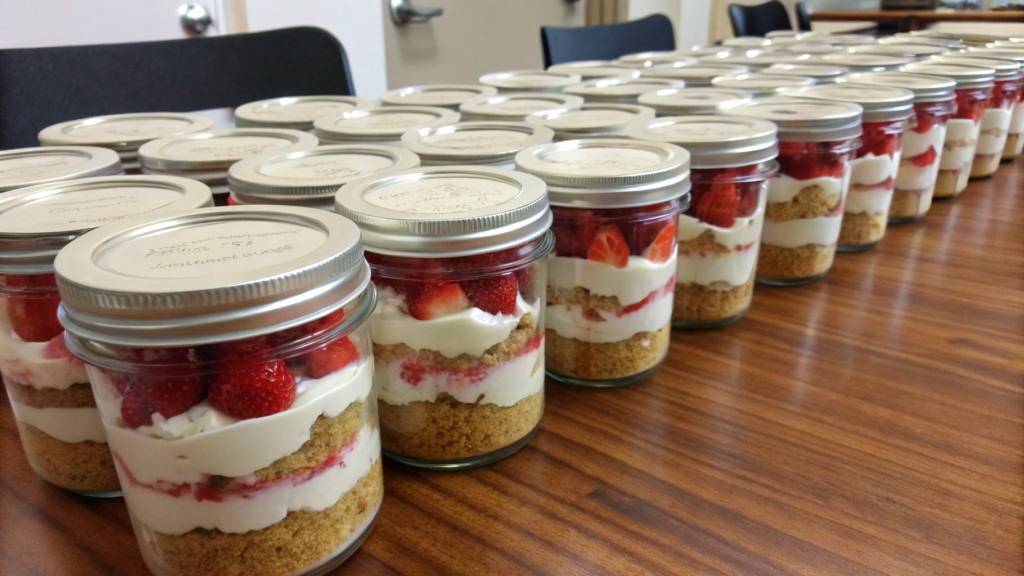
These no-bake jar desserts hold their shape on the go and scale easily for a crowd. If layered properly, they’ll stay fresh in the fridge for up to 24 hours without getting soggy.
Ingredients (makes 4 servings in 8 oz / 240 ml jars)
For the base:
- 8–10 pieces of store-bought pound cake or shortbread-style cookies
- 1.5 cups (225 g) fresh strawberries, chopped
- 1 tbsp sugar
- 1 tsp lemon juice
For the cream:
- 1 cup (240 ml) whipped cream or vegan whipped coconut cream
- 4 oz (110 g) cream cheese, softened
- 2 tbsp powdered sugar
- 1 tsp vanilla extract
How to make it
- Chop the strawberries, mix them with sugar and lemon juice, and let sit for 10 minutes.
- Beat the cream cheese with powdered sugar and vanilla until soft and smooth. Fold in the whipped cream gently.
- Cut the cake into small cubes.
- Start layering in the jars:
bottom: cake
next: cream
next: strawberries
repeat
- Seal the jars and chill for at least 30 minutes before serving.
- Serve directly in the jars or spoon into dessert bowls.
We use Ball 8oz wide-mouth jars for assembling and storing. They’re easy to clean, airtight, and work great for both refrigeration and travel events.
Real-life experience
We usually prep these jars the night before a picnic or party. If you use dry pound cake and go easy on the strawberry juice, the dessert holds its structure perfectly. Just don’t skip the chilling step — that 30–60 minutes in the fridge makes all the difference when transporting them.
Packing Summer To Go
These 10 recipes have survived heat, travel, sand, mood swings, and more than one farm trip. They’re not perfect, not “Instagrammable,” not haute cuisine. But they’re simple, reliable, and tasty.
Everything can be made ahead. Nothing melts into a mess, spills in a bag, or turns into mush halfway through the day.I’d really love for you to try at least one of these recipes. And if something worked, didn’t work, or you found your own twist — leave a comment. I’m genuinely curious how these meals hold up for others.