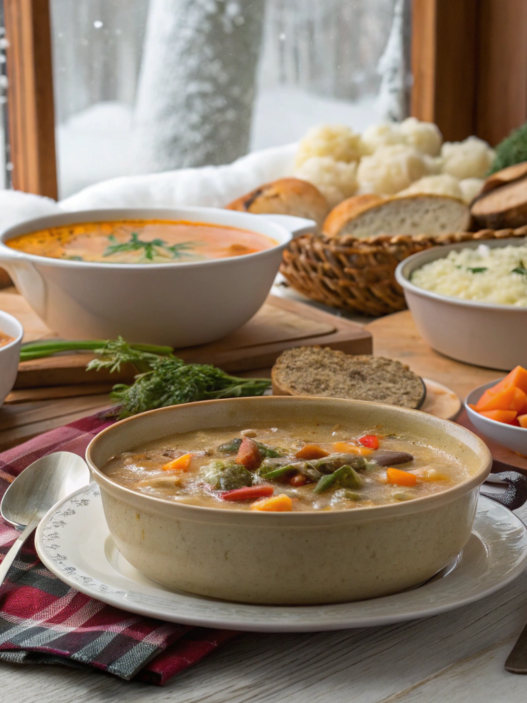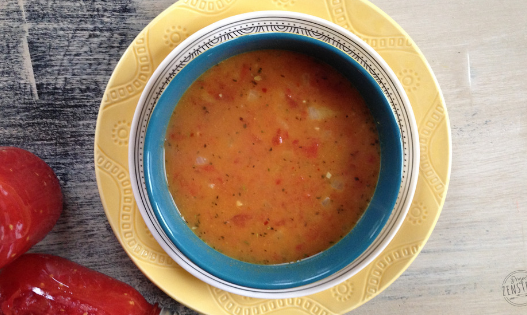

Ideally, gestational diabetes recipes for fast dinners can totally be a normal dinner, not a diet plate. Just a regular dinner you can make quickly and without panic.
These recipes are not a universal guarantee for everyone with gestational diabetes. Everyone reacts to food differently, so follow your meal plan, your doctor’s or dietitian’s recommendations, and your blood sugar readings after meals. I tried to put together recipes that are easier to adjust for gestational diabetes: with a protein base, vegetables, sauces without added sugar, and a controlled carb portion.
During pregnancy, carbs usually are not removed completely. More often, they are spread throughout the day, and portions are chosen together with a doctor or dietitian, based on blood sugar readings after meals. It is also worth checking the ingredients in ready-made sauces, salsa, pesto, and pastes — sugar sometimes hides where you really do not expect it.
1. Tuscan Chicken Skillet with Burst Tomatoes
Tuscan Chicken Skillet with Burst Tomatoes has chicken, cherry tomatoes, spinach, garlic, and a little creamy sauce. Everything cooks in one skillet, with no sugar, no sweet sauces, and no huge carb portion inside the dish itself.
For gestational diabetes (GD), this is convenient specifically as the base of the meal: protein, vegetables, and sauce. And the carb portion can be added separately — in the amount your doctor or dietitian recommended. This matters because during pregnancy, carbs usually are not removed completely, but spread throughout the whole day.
What You’ll Need
For 4 servings:
- 1 1/2 lb boneless, skinless chicken breasts or thighs (about 680 g)
- 1 tablespoon olive oil
- 1 tablespoon butter
- 1 teaspoon salt
- 1/2 teaspoon black pepper
- 1 teaspoon Italian seasoning
- 1/2 teaspoon smoked paprika, optional
- 3 garlic cloves, finely chopped
- 2 cups cherry tomatoes (about 300 g)
- 3 cups fresh baby spinach (about 90 g)
- 1/3–1/2 cup heavy cream (about 80–120 ml)
- 1/4 cup grated Parmesan (about 25 g)
- 1 tablespoon tomato paste with no added sugar, optional
- 1/4 cup low-sodium chicken broth (about 60 ml)
- 1 tablespoon fresh basil
- 1 teaspoon lemon juice
How to Make Tuscan Chicken Skillet with Burst Tomatoes
- Prepare the chicken.
Pat the chicken dry with a paper towel and cut the breast into thinner pieces if it is large. This way, it will cook faster and will not dry out. - Season the meat.
Sprinkle the chicken with salt, pepper, Italian seasoning, and paprika. Rub the spices in with your hands so the flavor is not only on the surface. - Sear the chicken.
Heat the skillet over medium-high heat. Add the olive oil and butter. Place the chicken in a single layer and cook for 4–5 minutes on each side, until golden brown. The chicken should reach 165°F (74°C) inside. Transfer it to a plate. - Cook the tomatoes.
Add the cherry tomatoes to the same skillet. Cook for 5–7 minutes, until they soften and start to burst. You can gently press some of the tomatoes with a spoon so they release more juice. - Add the garlic and tomato paste.
Add the garlic and the tomato paste with no added sugar. Stir for 30–45 seconds, so the garlic releases its aroma but does not darken. - Make the sauce.
Pour in the broth, scrape the bottom of the skillet with a spoon, and add the cream. Start with 1/3 cup if you want a lighter sauce. Add the Parmesan and let the sauce gently simmer for a couple of minutes. - Return the chicken.
Place the chicken back into the skillet, along with the juices from the plate. Cover with a lid for 2–3 minutes, so the meat finishes cooking and soaks up the sauce. - Add the spinach.
Add the spinach, stir, and cook for about a minute. At the end, add the lemon juice and basil. The lemon does not make the dish sour; it just freshens up the creamy sauce.
Serving It with Gestational Diabetes
This chicken can be served with a large portion of non-starchy vegetables: broccoli, cauliflower, zucchini, or green beans. If your meal plan includes a carb portion, add a small serving of quinoa, lentils, brown rice, or whole-grain bread.
It is better not to eat this dish with a large amount of regular pasta or white rice. With GD, these foods raise blood sugar faster for many people. It is better to keep the carb portion separate and watch your numbers after eating.
Reheat leftovers over low heat, adding a spoonful of water or broth. They can be stored for up to 3 days in a container with a lid. If you decide to cook something ahead, store the chicken and the carb portion separately — this makes it easier to build the portion you need.
Why This Dinner Works Well
Well, first of all, it cooks pretty quickly, in about 25–30 minutes, and does not require complicated prep. And it has protein, vegetables, sauce, and the option to add carbs separately — exactly in the portion that fits your meal plan.
With gestational diabetes, food should not turn into a list of restrictions or create anxiety. This dinner does not promise the same blood sugar reaction for everyone — unfortunately, that is not how it works. But it is easy to fit into a GD meal plan: there is no added sugar, there is a protein base, vegetables, and control over the carb portion.
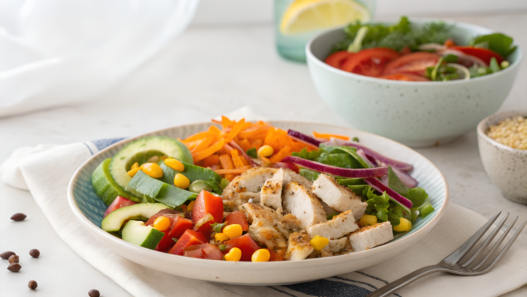
2. Crockpot Salsa Verde Chicken Bowls
Crockpot Salsa Verde Chicken Bowls are a good format for gestational diabetes. You put chicken, salsa, spices, and a little broth into the pot, and then the chicken becomes soft, juicy, and easy to shred with a fork.
Pay attention to choosing green salsa with no added sugar. Rice, quinoa, or beans can be added, but in the portion that fits your meal plan.
What You’ll Need
For 4 servings:
- 1 1/2 lb boneless, skinless chicken breasts or thighs (about 680 g)
- 1 cup green salsa with no added sugar (about 240 ml)
- 1/4 cup low-sodium chicken broth (about 60 ml)
- 1 teaspoon ground cumin
- 1/2 teaspoon garlic powder
- 1/2 teaspoon onion powder
- 1/2 teaspoon salt, if the salsa is not too salty
- 1 tablespoon lime juice
- 1/4 cup fresh cilantro, finely chopped
- 1 avocado, sliced
- 2 cups shredded romaine lettuce or cabbage (about 100–120 g)
- 1 cup cherry tomatoes, halved
- 1/2 cup cooked quinoa, brown rice, or black beans per serving, if that carb portion fits your meal plan
I like the Crock-Pot 6 Quart Cook and Carry Slow Cooker on Amazon. It has saved me more than once.
How to Make Crockpot Salsa Verde Chicken Bowls
- Put the chicken in the slow cooker.
Place the chicken on the bottom of the pot in a single layer. If you are using chicken breast, do not cut it too small — this helps it stay juicier. Thighs also work well; they usually turn out softer after long cooking. - Add the salsa and spices.
Pour in the green salsa and broth. Add cumin, garlic powder, onion powder, and salt. You do not need to stir for long; just spread the sauce over the chicken. Check the salsa ingredients: it is better if it has tomatillos, pepper, onion, salt, and spices — without sugar or syrups. - Cook until soft.
Cook on low for 4–5 hours or on high for 2–3 hours, until the chicken is soft and easily shreds with a fork. The internal temperature of the chicken should reach 165°F (74°C). - Shred the chicken.
Take the chicken out, or shred it right in the pot with two forks. Mix the meat with the sauce so it becomes juicy. If there is too much liquid, leave the lid slightly open for 10–15 minutes, or transfer the chicken to a skillet and let the sauce reduce a little. - Add lime and cilantro.
At the end, stir in the lime juice and fresh cilantro. Lime is really needed here. It makes the flavor brighter, especially if the salsa was mild and not very tangy. - Assemble the portions.
Put romaine lettuce or shredded cabbage on a plate, then add the chicken in green salsa, tomatoes, avocado, cucumber, radish, and the carb portion you chose. It has everything you need: hot chicken, cool salad, soft avocado, and a little lime on top. Simple and tasty.
Serving It with Gestational Diabetes
Add carbs to the chicken and vegetables separately and moderately. You can take a small portion of quinoa, brown rice, or black beans. If your sugar rises faster after rice, try replacing it with quinoa or beans — these options work better for many people, but it is still better to follow your own blood sugar readings.
Do not add sweet corn, sweet ready-made sauces, or a big handful of chips. This recipe already has enough for good flavor: salsa, lime, cilantro, avocado, and juicy chicken. Extra sugar is really not needed here.
When storing leftovers in a container, it is better to keep the carb portion and fresh vegetables separate so the salad does not get wet. Reheat the chicken, then assemble a fresh portion in a couple of minutes.
You put everything in the slow cooker, and by evening you have juicy chicken. At the same time, you control your own portion: more vegetables, enough protein, avocado for satiety, and carbs separately. We are not promising that everyone’s blood sugar will react the same way. But this is a good option as a basic homemade dinner with no added sugar and normal ingredients.
3. Instant Pot Lemon Garlic Chicken and Green Beans
In this recipe, everything is simple: chicken, green beans, lemon, garlic, a little oil, and broth. It turns out fresh, satisfying, and without sweet sauces.
This dinner already has a protein base and non-starchy vegetables, which matters with gestational diabetes. The carb portion can be added separately: a little quinoa, lentils, brown rice, or whole-grain bread — in the amount that fits your meal plan and your readings.
What You’ll Need
For 4 servings:
- 1 1/2 lb chicken breast or boneless, skinless chicken thighs (about 680 g)
- 1 lb green beans (about 450 g), ends trimmed
- 1 tablespoon olive oil
- 1 tablespoon butter, optional
- 4 garlic cloves, finely chopped
- 1/2 cup low-sodium chicken broth (about 120 ml)
- 2 tablespoons lemon juice
- 1 teaspoon lemon zest
- 1 teaspoon salt
- 1/2 teaspoon black pepper
- 1 teaspoon dried oregano
- 1/2 teaspoon paprika
- 1 tablespoon fresh parsley, finely chopped
We often use the Instant Pot Duo 7-in-1 Electric Pressure Cooker on Amazon.
How to Make Instant Pot Lemon Garlic Chicken and Green Beans
- Prepare the chicken.
Pat the chicken dry with a paper towel. If the breast is large, cut it into thinner pieces. This way, it will cook more evenly and will not get dry around the edges. - Season the meat.
Sprinkle the chicken with salt, pepper, oregano, and paprika. Rub the spices in with your hands. It takes a minute, but the flavor will not be only “on the outside” later. - Lightly sear the chicken.
Turn on the sauté mode, add the olive oil, and quickly brown the chicken for 2 minutes on each side. You do not need to cook it all the way through. We only need a light crust on the bottom of the pot. - Add the garlic and broth.
Add the garlic and stir for about 30 seconds. Then pour in the broth and gently scrape the bottom with a spoon to lift the browned bits. This gives the sauce more flavor without sugar or ready-made dressings. - Pressure cook the chicken.
Close the lid and cook for 6–8 minutes on high pressure, depending on the thickness of the pieces. Then let the pressure release naturally for 5 minutes, and after that carefully release the remaining steam. The chicken should reach 165°F (74°C) inside. - Add the green beans.
Open the lid, place the green beans on top, close it again, and turn on sauté or simmer mode for 3–5 minutes. The beans should become bright and tender, but not fall apart. Here, it is better to slightly undercook them than overcook them. - Finish with lemon and butter.
Add the lemon juice, zest, and butter, if using. Stir. The lemon makes the dish fresher, and a small amount of butter softens the garlic and brings the flavor together. - Sprinkle with herbs.
Add the parsley before serving. This makes the plate look fresher right away. And with GD, as you know, the visual side of food matters too.
How to Build a Portion
Chicken and green beans are already a good and solid base: protein plus vegetables. If your meal plan includes a carb portion, add a small serving of quinoa, lentils, brown rice, or whole-grain bread. A cucumber and herb salad, roasted zucchini, or cauliflower will also fit well here.
Avoid sweet sauces, honey dressings, or large portions of white rice. Lemon, garlic, and broth already give enough flavor, and it is better to keep carbs as a separate part of the plate, so it is easier to understand how the dinner affects your sugar.
Why This Recipe Helps in the Evening
As you can see, in this recipe the chicken cooks quickly, the green beans are added almost at the end, and the sauce comes from what is already in the pot: broth, garlic, lemon, spices, and the juices from the chicken.
With gestational diabetes, this dish is easy to adjust for yourself. Want more vegetables — add salad or zucchini. Need a carb portion — put a small serving separately. Blood sugar, as usual, reacts differently for everyone, but in the end, this recipe gives you a good base.
4. Greek Sheet Pan Chicken with Feta and Peppers
I love cooking in the oven, so I often go for Greek Sheet Pan Chicken with Feta and Peppers. I spread everything out on a sheet pan, put it in the oven, and for a little while, I can relax.
Here we have chicken, bell peppers, red onion, tomatoes, feta, lemon, oregano, and olive oil. The flavor turns out bright, but there are no sweet marinades. And that matters with gestational diabetes — lots of protein, lots of non-starchy vegetables, and the carb portion can be added separately, so you do not have to guess how much was hidden in the sauce.
What You’ll Need
For 4 servings:
- 1 1/2 lb chicken thighs or boneless, skinless chicken breast (about 680 g)
- 2 large bell peppers, sliced into strips
- 1 small red onion, cut into wedges
- 1 1/2 cups cherry tomatoes (about 225 g)
- 1/2 cup crumbled feta (about 75 g)
- 2 tablespoons olive oil
- 2 tablespoons lemon juice
- 1 teaspoon lemon zest
- 3 garlic cloves, finely chopped
- 1 1/2 teaspoons dried oregano
- 1 teaspoon salt
- 1/2 teaspoon black pepper
- 1/2 teaspoon paprika
- 1/4 cup pitted olives, optional
- 2 tablespoons fresh parsley, for serving
How to Make Greek Sheet Pan Chicken with Feta and Peppers
- Preheat the oven.
Turn the oven to 425°F (220°C). The high temperature helps the vegetables brown around the edges while the chicken stays juicy inside. - Prepare the chicken.
Pat the chicken dry with a paper towel. If you are using chicken breast, cut it into large even pieces. Thighs can be left whole or cut in half if they are large. - Mix the simple dressing.
In a bowl, combine the olive oil, lemon juice, lemon zest, garlic, oregano, salt, pepper, and paprika. You will get a quick marinade with no sugar. Lemon, garlic, and oregano will do their job. - Season the chicken and vegetables.
Place the chicken, bell peppers, red onion, and tomatoes on the sheet pan. Pour the dressing over everything and mix with your hands or a spatula so everything is coated evenly. Do not pack the ingredients too tightly. Let there be a little space between the pieces. - Bake until done.
Put the sheet pan in the oven for 20–25 minutes, until the chicken is cooked. The internal temperature should be 165°F (74°C). If the chicken pieces are large, they may need another 3–5 minutes. - Add the feta.
Take the sheet pan out, sprinkle the chicken and vegetables with feta, then return it to the oven for another 3–5 minutes. The feta should become warm, a little soft, and browned in places. - Finish with herbs.
Sprinkle everything with fresh parsley. If you are adding olives, it is better to put them in at the very end or during the last few minutes of baking. They add salty flavor, so do not rush to add more salt after them.
How to Make the Plate Satisfying
The chicken and roasted vegetables give a lot of flavor and volume, and the feta adds salty creaminess, so you do not need a separate heavy sauce here. You can add a little cooked quinoa, lentils, brown rice, or whole-grain pita if that fits your meal plan.
And here everything is clear and simple: protein separately, vegetables separately, carbs separately. This makes it easier to see what affects your blood sugar after eating.
Why This Recipe Is Convenient
This recipe works really well for me because it has just one sheet pan, one simple marinade, and familiar ingredients.
For eating with gestational diabetes, this is a convenient option because the dish does not hide sugar in the sauce, and you decide how many carbs you can allow yourself to eat. And the base is already there: protein, vegetables, fats in a moderate amount, and flavor that does not need sweet add-ons.
5. Turkey Taco Lettuce Boats with Avocado Lime
With gestational diabetes, Turkey Taco Lettuce Boats with Avocado Lime always helps: the filling is satisfying because of the turkey and avocado, and the carb portion can be prepared separately — for example, beans, quinoa, or a little brown rice. This way, you can control the portion according to your doctor’s or dietitian’s recommendations.
Everyone reacts to food differently, so with GD, it is better to pay attention not only to the recipe ingredients, but also to your readings after eating.
What You’ll Need
For 4 servings:
- 1 1/2 lb ground turkey (about 680 g)
- 1 tablespoon olive oil
- 1 small onion, finely chopped
- 2 garlic cloves, finely chopped
- 1 teaspoon ground cumin
- 1 teaspoon paprika
- 1/2 teaspoon chili powder
- 1/2 teaspoon dried oregano
- 1/2 teaspoon salt
- 1/4 teaspoon black pepper
- 2 tablespoons tomato paste with no added sugar
- 1/4 cup water or chicken broth (about 60 ml)
- 1 large head of romaine lettuce or butter lettuce
- 1 avocado
- 1 tablespoon lime juice
- 1/2 cup tomatoes, diced
- 1/4 cup red onion, finely chopped, optional
- 2 tablespoons fresh cilantro
- 1/4 cup shredded cheese, optional
How to Make Turkey Taco Lettuce Boats with Avocado Lime
- Prepare the lettuce leaves.
Separate the large leaves, rinse them, and dry them well. This is important: wet leaves get limp quickly, and the filling starts sliding around. Choose the firmest leaves — they will hold the turkey better. - Sauté the onion and garlic.
Heat a skillet over medium heat, add the olive oil and onion. Cook for 3–4 minutes, until the onion softens. Then add the garlic and stir for another 30 seconds. Do not let the garlic get dark; it turns bitter quickly. - Add the ground turkey.
Add the turkey to the skillet and break it into small pieces with a spatula. Cook for 6–8 minutes, until the meat fully changes color. The internal temperature of the turkey should reach 165°F (74°C). - Add the spices and tomato paste.
Add the cumin, paprika, chili powder, oregano, salt, and pepper. Add the tomato paste with no added sugar. Stir so the spices coat all the turkey. - Make the filling juicier.
Pour in the water or broth and cook for another 2–3 minutes, until the turkey becomes softer and juicier. We do not need dry crumbles here. The filling should hold together, but not swim in liquid. - Prepare the avocado with lime.
Mash the avocado with a fork, lime juice, and a pinch of salt. You can leave some pieces; there is no need to turn it into a perfectly smooth cream. Lime makes the flavor brighter and helps the avocado keep from darkening too quickly. - Assemble the boats.
Add a little avocado to each lettuce leaf, then the warm turkey filling, tomatoes, red onion, cilantro, and a little cheese if using. Do not overload the leaves, or they will start to tear. It is better to make two smaller boats than one that falls apart right in your hands.
How to Build a Plate with a Controlled Carb Portion
The lettuce boats already give you protein, vegetables, and fats from avocado. If your meal plan includes a carb portion, add it separately so you can control the amount. This could be 1/3–1/2 cup black beans, a small portion of brown rice, quinoa, roasted bell pepper, cucumbers with lime, or a cabbage salad with no sugar.
Corn, chips, and sweet ready-made sauces add carbs quickly, so we do not overuse them. For a crunchy topping, you can take a little chopped nuts, pumpkin seeds, or thinly sliced radish.
It is better to keep the lettuce leaves, avocado, and tomatoes separate so the boats do not get wet the next day.
Why This Recipe Is Popular
This dinner cooks quickly, and it is easy to adjust for different hunger levels. You can add more vegetables, or you can add beans. But with gestational diabetes, it is important to check that there is no added sugar in the filling. The turkey gives a protein base, the lettuce and tomatoes add freshness, and the carbs can be eaten in a small amount allowed by your doctor.
6. Ginger Soy Salmon with Sesame Broccoli
I like that this dish cooks quickly. The fish is baked or pan-fried, the broccoli stays firm, the sesame gives a nice crunchy topping, and the sauce is made with ginger, garlic, soy sauce, and lemon.
This recipe works for eating with gestational diabetes. The carb portion, as always, is added separately — for example, a little brown rice, quinoa, or buckwheat, if that portion fits your recommendations and your readings after eating.
Keep in mind that soy sauce and ready-made Asian sauces are often very salty, and sometimes they also have sugar in the ingredients. So here it is better to use low-sodium soy sauce or tamari with no sugar, and leave sweet sauces like teriyaki aside.
What You’ll Need
For 4 servings:
- 4 salmon fillets, 5–6 oz each (140–170 g each)
- 1 1/2 lb broccoli (about 680 g), cut into florets
- 2 tablespoons olive oil or avocado oil
- 2 tablespoons low-sodium soy sauce
- 1 tablespoon lemon juice or rice vinegar with no sugar
- 1 teaspoon fresh grated ginger
- 2 garlic cloves, finely chopped
- 1 teaspoon sesame oil
- 1 teaspoon sesame seeds
- 1/2 teaspoon black pepper
- 1/4 teaspoon salt, if needed
- 2 green onions, thinly sliced, optional
How to Make Ginger Soy Salmon with Sesame Broccoli
- Preheat the oven.
Turn the oven to 400°F (200°C). Line a sheet pan with parchment paper. If the broccoli is cut large, make the pieces smaller so they have time to cook with the fish. - Prepare the sauce.
In a small bowl, mix the soy sauce, lemon juice or rice vinegar, grated ginger, garlic, sesame oil, and black pepper. Taste a drop of the sauce. If the soy sauce is already salty, you may not need extra salt. - Start with the broccoli.
Place the broccoli on the sheet pan, drizzle with olive oil, and add a little salt if needed. Mix with your hands or a spatula. Bake for 8–10 minutes before adding the fish. The broccoli needs a head start, otherwise the salmon will be ready while the broccoli is still too firm. - Add the salmon.
Take the sheet pan out, move the broccoli aside, and place the salmon fillets skin-side down, if they have skin. Spoon the sauce over the fish. You can spread some of the sauce lightly over the broccoli too, but do not cover it completely — this helps it brown better around the edges. - Bake until done.
Return the sheet pan to the oven for 10–12 minutes, depending on the thickness of the fillets. The salmon is ready when the flesh turns opaque, flakes easily with a fork, and the internal temperature in the thickest part of the fish reaches 145°F (63°C). This is the temperature inside the fish, not the oven temperature. - Add sesame seeds and green onion.
Sprinkle the fish and broccoli with sesame seeds. Add the green onion right before serving. It gives freshness and does not overpower the ginger. - Let the fish rest for a minute.
Do not rush to move the salmon to the plate right away. Let it sit on the sheet pan for a minute. This helps the fillet fall apart less, and the juices settle a little inside.
How to Build the Portion Properly
Start with the salmon and broccoli. You already have protein, healthy fats from the fish, and non-starchy vegetables. If your meal plan includes a carb portion, add it separately and in a moderate amount. This can be 1/3–1/2 cup brown rice, cooked quinoa, buckwheat, a little lentils, or cucumbers with lemon.
It is better not to add sweet teriyaki, honey glaze, or a large portion of white rice to this dinner. They quickly increase the carb portion, and with GD, it is easier to keep that part under control. The flavor here already comes from ginger, garlic, sesame oil, and lemon, so green onion, a little sesame, or fresh cucumbers on the side are enough.
If you have dinner leftovers, it is better to reheat the salmon over low heat or in short intervals in the microwave so it does not become dry. The carb portion is easier to store separately.
Meal Plan Control
As always, I want to remind you that this is not a recipe with a guaranteed same blood sugar response for everyone. With GD, that is not how it works. But it is easier to fit into eating with gestational diabetes: there is no added sugar, the ingredient list is controlled, and the portion can be built around your meal plan and your readings after eating.
7. Coconut Curry Chickpeas with Spinach
There is no meat in Coconut Curry Chickpeas with Spinach, but this dish has chickpeas, spinach, tomatoes, curry, garlic, ginger, and a little coconut milk. It turns out thick, warm, and very tasty.
It already has a built-in carb portion — chickpeas. This is important to remember if you have GD. Everyone reacts differently, so here you definitely need to follow your meal plan and your readings after eating.
What You’ll Need
For 4 servings:
- 2 cans chickpeas, 15 oz each (425 g each), rinsed and drained
- 1 tablespoon olive oil or avocado oil
- 1 small onion, finely chopped
- 3 garlic cloves, finely chopped
- 1 tablespoon fresh grated ginger
- 1 tablespoon curry powder
- 1/2 teaspoon ground cumin
- 1/2 teaspoon turmeric
- 1/4 teaspoon red pepper flakes, optional
- 1 can diced tomatoes with no added sugar, 14.5 oz (about 410 g)
- 1/2 cup light coconut milk with no sugar (about 120 ml)
- 4 cups fresh spinach (about 120 g)
- 1/2 teaspoon salt, or to taste
- 1 tablespoon lemon juice or lime juice
- 2 tablespoons fresh cilantro, optional
For dishes like this, it is helpful to have a deep skillet or sauté pan. After all, the chickpeas and sauce need to be mixed properly, not chased all over the stove.
How to Make Coconut Curry Chickpeas with Spinach
- Rinse the chickpeas.
Drain the liquid from the cans and rinse the chickpeas well under cold water. This makes the flavor cleaner, and there will be less extra salt in the dish. Let the chickpeas drain a little. - Start with the onion.
Heat the oil in a deep skillet over medium heat. Add the onion and cook for 4–5 minutes, until it softens. You do not need to fry it until dark; we want soft sweetness, not bitterness. - Add the garlic, ginger, and spices.
Add the garlic, ginger, curry, cumin, turmeric, and red pepper flakes, if using. Stir for about 30–45 seconds. The spices should release their aroma in the oil. - Add the tomatoes and chickpeas.
Pour in the diced tomatoes with no added sugar and add the chickpeas. Stir, lower the heat, and let the mixture gently simmer for 8–10 minutes. The chickpeas should warm through, and the tomato base should get a little thicker. - Pour in the coconut milk.
Add the light coconut milk with no sugar and the salt. Stir and cook for another 3–4 minutes. I would not use too much coconut milk here: it is tasty, yes, but we need a sauce, not coconut soup. - Add the spinach.
Add the spinach and stir. It will shrink in volume in a minute or two. If it seems like too much spinach, just wait. It always looks huge at first, and then disappears almost dramatically. - Finish with lemon or lime.
Take the skillet off the heat and add the lemon juice or lime juice. This makes the flavor fresher. If you are using cilantro, sprinkle it over the dish already on the plate.
How to Serve It When Chickpeas Already Give You Carbs
In this recipe, chickpeas are the main carb portion, so I would not add extra carbs to them or something else “just in case.” It is better to build the plate like this: chickpea curry, lots of spinach, and extra vegetables on the side, for example, cucumbers with lemon, roasted cauliflower, or zucchini.
Why This Dish
It cooks quickly, does not require meat, and still stays satisfying. But chickpeas contain carbs, so it is better to count them as part of the carb portion, not just as “plant protein.”
There is no added sugar in Coconut Curry Chickpeas with Spinach, and the vegetable part is easy to increase with spinach, cauliflower, broccoli, or zucchini. This is not a universally safe dish for everyone with gestational diabetes — recipes like that do not really exist. But it can be carefully fit into a GD meal plan if you keep the chickpea portion under control and follow your readings after eating.
8. Vegetarian Cauliflower Fried Rice with Shrimp Option
In this recipe, cauliflower becomes the base instead of regular rice. The carb portion turns out lighter, which is helpful for eating with gestational diabetes.
But this does not mean the dish is guaranteed to work for everyone, because everyone reacts differently. If your meal plan includes a carb portion, you can add it separately — for example, a little brown rice, quinoa, or edamame in the allowed amount.
And if you want to make the dinner more satisfying, add shrimp: they cook quickly and give more protein.
What You’ll Need
For 4 servings:
- 1 large head of cauliflower or 4 cups cauliflower rice (about 450–500 g)
- 2 tablespoons avocado oil or olive oil
- 3 eggs, lightly beaten
- 1 small onion, finely chopped
- 2 garlic cloves, finely chopped
- 1 teaspoon fresh grated ginger
- 1 cup chopped carrots (about 130 g), in small cubes
- 1 cup frozen peas, optional
- 1 cup chopped bell pepper (about 150 g)
- 2 tablespoons low-sodium soy sauce
- 1 teaspoon sesame oil
- 2 green onions, thinly sliced
- 1 teaspoon sesame seeds, optional
- 1/4 teaspoon black pepper
For the shrimp version:
- 1 lb peeled shrimp (about 450 g)
- 1 teaspoon oil
- a pinch of salt and pepper
How to Make Vegetarian Cauliflower Fried Rice with Shrimp Option
- Prepare the cauliflower.
If you are using a whole head, break it into florets and pulse it in a food processor until the pieces are about the size of rice. Do not turn the cauliflower into purée. We need small grains, not a wet mush. If you are using ready-made frozen cauliflower rice, squeeze out the extra moisture well after thawing. - Quickly cook the eggs.
Heat a large skillet over medium heat, add a little oil, and pour in the eggs. Stir until they set into soft pieces. Transfer the eggs to a plate. They will go back into the dish at the end. - Sauté the onion, garlic, and ginger.
Add a little more oil to the same skillet. Add the onion and cook for 2–3 minutes, until it softens. Then add the garlic and ginger and stir for 30 seconds. It is important not to get distracted here: garlic darkens quickly, and we need aroma, not bitterness. - Add the vegetables.
Add the carrots, bell pepper, and peas, if using. Cook for 4–5 minutes, until the vegetables soften but still keep some texture. If you are watching the carb portion especially carefully, you can reduce the peas or replace them with more pepper, zucchini, or broccoli. - Add the cauliflower rice.
Add the cauliflower to the skillet and cook for 5–6 minutes, stirring often. Do not cover with a lid. Under a lid, the cauliflower quickly releases water, and the dish becomes too soft. And we want it closer to fried rice, not stewed cauliflower. - Return the eggs and add the sauce.
Add the eggs back to the skillet. Pour in the soy sauce and sesame oil. Stir. Taste before adding salt: soy sauce is already salty, even if it is low-sodium. - If you are adding shrimp, cook them separately.
Heat a teaspoon of oil in a separate skillet. Add the shrimp, lightly season with salt and pepper. Cook for 1–2 minutes on each side, until they turn pink and firm. Then add them to the finished dish or place them on top in the plate. Shrimp cook quickly, and if you overcook them, they become rubbery. - Sprinkle with green onion and sesame seeds.
Sprinkle the finished dish with green onion and sesame seeds. Sesame is not required here, but it gives a nice crunchy topping and makes the plate a little more interesting.
How to Build a Portion When There Is Almost No Rice Here
In this recipe, cauliflower replaces most of the regular rice, so the carb portion becomes easier to control. But there can still be carbs from carrots, peas, and sauce, so it is better not to forget about that.
It is better to be careful with ready-made sauces here. Many bottled sauces add sugar quickly, even if they do not taste like dessert. In this recipe, soy sauce, ginger, garlic, and sesame oil are enough. That is enough for a rich flavor, even with simple ingredients.
I’ll remind you that for eating with GD, this is not a “universally safe” recipe, but a flexible base. You can keep it vegetarian with egg, add shrimp for a more satisfying protein part, or add a small portion of carbs separately if your meal plan needs it. The main thing is to keep the ingredients under control: vegetables, protein, sauce with no added sugar, and the carb portion you control yourself.
9. Meal Prep Chicken Shawarma Salad Jars
This is a dinner or lunch you assemble ahead of time in jars, and then just take out of the fridge. And you do not need to think all over again about what to eat when you are already hungry, tired, and want to grab the first thing that is closest.
This jar has chicken, fresh vegetables, herbs, yogurt dressing with no sugar, and the carb portion can be added separately or placed in the jar in a small allowed portion. Let’s not forget that with GD, everyone reacts to food differently. But this salad is easier to assemble in a way where you can see where the protein is, where the vegetables are, and where the carbs are.
What You’ll Need
4 jars:
- 1 1/2 lb chicken breast or boneless, skinless thighs (about 680 g)
- 1 tablespoon olive oil
- 2 tablespoons lemon juice
- 3 garlic cloves, finely chopped
- 1 teaspoon ground cumin
- 1 teaspoon paprika
- 1/2 teaspoon turmeric
- 1/2 teaspoon ground coriander
- 1/2 teaspoon salt
- 1/4 teaspoon black pepper
- 1/4 teaspoon cinnamon, optional
- 4 cups chopped romaine lettuce (about 200 g)
- 1 cup cucumbers, diced
- 1 cup cherry tomatoes, halved
- 1/2 cup red onion, thinly sliced
- 1/2 cup crumbled feta, optional
- 1/4 cup fresh parsley
- 1/4 cup cooked chickpeas or quinoa per jar, if that carb portion fits your meal plan
Yogurt dressing:
- 3/4 cup Greek yogurt with no sugar (about 180 g)
- 1 tablespoon lemon juice
- 1 tablespoon olive oil
- 1 small garlic clove, grated
- 1–2 tablespoons water, to make the dressing softer
- a pinch of salt
- a pinch of black pepper
For storage, it is convenient to use wide glass jars, for example Ball Wide Mouth Mason Jars 32 oz on Amazon. In a wide jar, it is easier to layer everything and take the salad out.
How to Make Meal Prep Chicken Shawarma Salad Jars
- Season the chicken.
Mix the olive oil, lemon juice, garlic, cumin, paprika, turmeric, coriander, salt, pepper, and cinnamon, if using. Coat the chicken with this mixture. If you have time, leave it for 20–30 minutes. If you do not have time, cook it right away. The spices will still do their job. - Cook the chicken.
Heat a skillet over medium-high heat. Cook the chicken for 5–6 minutes on each side, if the pieces are not too thick. The chicken is ready when the internal temperature in the thickest part reaches 165°F (74°C). If you are using thighs, they may need a couple more minutes. - Let the chicken cool.
Transfer the meat to a cutting board and leave it for 5–10 minutes. Do not slice it right away, or the juices will run onto the board and the chicken will be drier. Then cut it into strips or cubes. - Mix the dressing.
In a bowl, combine the Greek yogurt, lemon juice, olive oil, garlic, water, salt, and pepper. The dressing should be thick, but not so thick that you have to dig it out with a spoon. Add a little more water if needed. - Prepare the vegetables.
Chop the romaine, cucumbers, tomatoes, and red onion. It is better not to cut the tomatoes too small, or they will release a lot of juice. The cucumbers should also stay in pieces, not turn into wet tiny bits. - Assemble the jars in the right layers.
Put the dressing at the bottom of each jar. Then add the chicken, chickpeas or quinoa if using, then cucumbers, tomatoes, red onion, feta, and parsley. Put the romaine as the top layer. This way, the leaves stay fresh longer and do not sink into the dressing. - Close and refrigerate.
Close the jars tightly and store them in the fridge for up to 3 days. Before serving, you can dump the salad into a bowl or shake the jar well if there is enough room inside. I usually leave a little space on top, otherwise everything mixes reluctantly.
How Not to Lose Control of the Carb Portion
In this salad, the base is chicken, vegetables, and yogurt dressing with no sugar. The carbs can come from chickpeas, quinoa, or a small piece of whole-grain pita on the side. But it is better not to add everything at once: chickpeas, quinoa, pita, and then “just a little something else.” Choose one thing — either 1/4 cup cooked chickpeas, or 1/4 cup cooked quinoa, or extra vegetables if the carb portion has already been covered in another meal.
Ready-made shawarma sauces may contain sugar, syrups, or starch. Here, the dressing is made from Greek yogurt, lemon, garlic, and oil, so the ingredient list stays clear.
Why These Jars Are Convenient to Make Ahead
Of course, it is convenient because you chop once, cook the chicken, assemble the portions — and the food question is solved for a couple of days. Especially with GD, when spontaneous snacks and “I’ll just eat something quick” can easily throw off the whole plan.
This is not a universal recipe, but it is easier to fit into eating with gestational diabetes: the protein base is already inside, there are plenty of vegetables, the dressing has no added sugar, and the carb portion can stay separate and clear. From there — your recommendations, your portions, and your readings after eating.
10. Zucchini Noodles with Pesto Chicken and Walnuts
In this recipe, there are zucchini noodles, topped with chicken and pesto, a little walnuts, Parmesan, and lemon. Sounds tasty, right?
Zucchini gives volume, but does not become the main carb portion, which matters when building a menu for gestational diabetes. If your meal plan includes a carb portion for dinner, you can add it separately: a little whole-grain pasta, quinoa, lentils, or a piece of whole-grain bread. Everyone reacts to food differently, so follow your recommendations and your readings after eating.
What You’ll Need
For 4 servings:
- 1 1/2 lb chicken breast or boneless, skinless thighs (about 680 g)
- 4 medium zucchini
- 1 tablespoon olive oil
- 1/2 teaspoon salt
- 1/2 teaspoon black pepper
- 1/2 teaspoon garlic powder
- 1/3 cup pesto with no added sugar (about 80 g)
- 1/4 cup walnuts, roughly chopped
- 1/4 cup grated Parmesan (about 25 g), optional
- 1 tablespoon lemon juice
- 1 teaspoon lemon zest
- 1 cup cherry tomatoes, halved, optional
- fresh basil, for serving
For zucchini noodles, it is convenient to use a spiralizer, for example OXO Good Grips 3-Blade Tabletop Spiralizer on Amazon. You can also buy ready-made zucchini noodles at the store, but at home they often turn out fresher and not as wet.
How to Make Zucchini Noodles with Pesto Chicken and Walnuts
- Prepare the zucchini.
Make zucchini noodles with a spiralizer. If the strips are very long, cut them into more convenient pieces with scissors or a knife. Sprinkle the zucchini noodles with a pinch of salt and leave them for 10 minutes, then blot them with a paper towel. Zucchini releases a lot of water, and if you skip this step, the sauce will quickly become watery. - Season the chicken.
Pat the chicken dry with a paper towel. Sprinkle with salt, pepper, and garlic powder. If you are using chicken breast, cut it into thin pieces so it cooks faster and does not dry out. - Sear the chicken.
Heat a skillet over medium-high heat. Add the olive oil and place the chicken in a single layer. Cook for 4–5 minutes on each side, until the meat browns and reaches 165°F (74°C) inside. Transfer the chicken to a board and let it rest for a couple of minutes. - Slice the chicken and mix it with pesto.
Cut the chicken into strips or cubes. Mix it with pesto with no added sugar. If the pesto is very thick, add 1–2 teaspoons of lemon juice or warm water. You do not need to cover the chicken completely with sauce — pesto is bright, so a little is enough. - Quickly warm the zucchini noodles.
In the same skillet, warm the zucchini noodles for 1–2 minutes. Do not cook them longer. We do not need a soft, watery mass. The zucchini should become warm but still keep a nice texture. - Assemble the dish.
Add the chicken with pesto, lemon zest, a little lemon juice, and cherry tomatoes, if using, to the zucchini noodles. Gently mix. If there is extra liquid in the skillet, you can leave the dish on the heat for another minute without a lid. - Add the nuts and cheese.
Sprinkle the dish with walnuts and Parmesan. It is better to add the nuts at the very end so they do not get soggy. They give the crunchy topping that soft zucchini dishes often miss.
How to Build a Plate with a Clear Carb Portion
In this recipe, zucchini noodles replace most of the regular pasta, so the carb portion becomes easier to manage. But if your meal plan includes carbs for dinner, add them separately and in the portion your specialist recommended.
In this case, you can serve 1/3 cup whole-grain pasta, a small portion of quinoa, 1/2 cup lentils, a piece of whole-grain bread, or an extra cucumber and herb salad if the carb portion has already been covered in another meal.
Use pesto with no added sugar. Before buying, check the ingredients: good pesto usually has basil, oil, nuts, cheese, garlic, and salt — without sugar or syrups. This way, the sauce gives flavor but does not add extra sugar to the recipe.
Your Fast Dinners with GD
Gestational diabetes already makes you think a lot about food, so fast dinners should not make life harder, but make it a little easier. Protein, vegetables, a clear sauce, carbs separately — that is already a good base you can adjust to your blood sugar readings after eating.
If you have a favorite fast dinner with GD or a dish you want to adapt for gestational diabetes, write it in the comments. I am really curious what helps you most often in the evening.