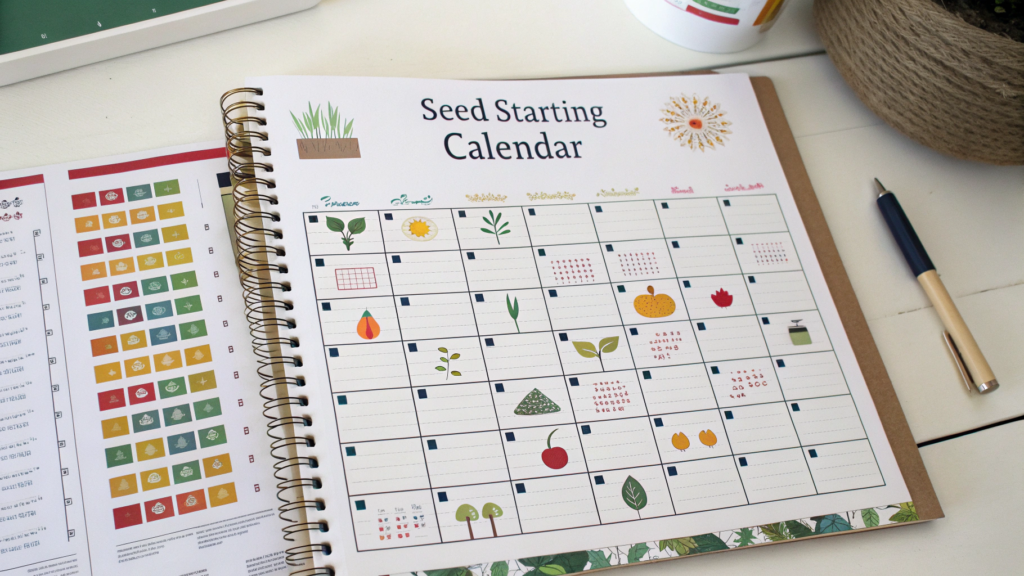
10 Seed Starting Soil Recipes And Calendars is a system that helps remove guesswork from your spring start. When seedlings don’t emerge or start stretching, the problem usually isn’t the seeds. It’s the substrate, the moisture, and the wrong timing calculation.
Here we’ll talk about which mixes work for different crops, when to skip compost, how to achieve even moisture, how to count weeks from your last frost date, and how to prepare soil for transplanting. There’s no universal “one recipe for everything.”; logic; adjustment for indoor conditions. There are practical week-by-week and temperature-based guidelines.
So this article gives you a clear structure to follow.
1. Classic Seed Starting Mix Recipe With Coconut Coir And Perlite
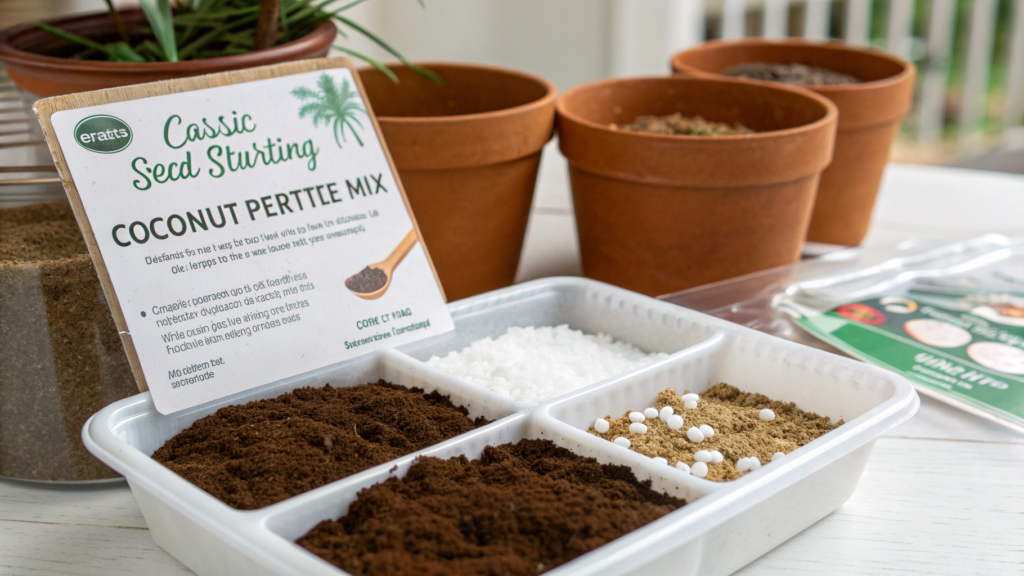
Regular garden soil for seedlings is a bad idea. And we’re starting with the exact mix that helps you get strong, even sprouts indoors without unnecessary losses. It works in Idaho, and it works here in our damp Pacific Northwest climate.
For fast and even germination, seeds need three things:
- stable moisture
- air at the roots
- absence of pathogens
And that’s exactly where a seed starting mix with coconut coir and perlite comes in.
Why Coconut Coir And Perlite
Coconut coir is a sterile, lightweight, moisture-retentive base.
Perlite is expanded volcanic glass that creates air pockets.
Coir holds moisture well and keeps its structure, while perlite improves aeration and reduces the risk of compaction.
This isn’t just “what people do.” It’s seed physiology.
What I Use
Before mixing anything, I always prepare everything in advance:
- compressed coconut coir, for example Burpee Eco-Friendly Coconut Coir Concentrated Seed Starting Mix Brick (Amazon)
- medium perlite, #2 grade
- a wide plastic container for mixing
- measuring cups
- garden gloves
I don’t cut corners on coir. Cheaper brands sometimes contain too much salt. It’s better to use a reliable one.
Classic Recipe (Base Formula)
Here are the proportions I use every February:
- 8 cups hydrated coconut coir (about 1.9 liters of moistened substrate)
- 2 cups perlite (about 470 ml)
- 1 tablespoon worm castings (optional, 15 ml)
- 1 tablespoon garden lime — if your coir has lower pH (15 ml)
If scaling up:
- 4 quarts coir
- 1 quart perlite
This creates a light, airy seed starting soil mix that doesn’t turn into cement after three waterings.
Step-by-Step Preparation
- Soak the coconut coir in warm water.
Place the compressed block in a large container and gradually add water instead of pouring it all in at once. After 20–30 minutes, it should fully expand. If dense chunks remain inside, break them apart by hand so the texture becomes uniform. - Loosen the structure thoroughly.
Even after expanding, coir can stay compacted. Run it through your fingers and break up any clumps. The mixture should feel light and airy before you add perlite. - Add perlite and mix evenly.
Sprinkle the perlite in gradually rather than dumping it in all at once. This helps distribute it evenly. In the finished seed starting mix, white particles should be visible throughout, not collected at the bottom. - Check moisture using the squeeze method.
Take a handful and squeeze it firmly. The clump should hold its shape but crumble with light pressure. If water appears on the surface, add a little more dry perlite or let the mixture sit for 15–20 minutes to balance moisture.
Why This Mix Speeds Up Germination
Tomato, pepper, and basil seeds in this environment consistently sprout 1–2 days earlier for me compared to universal potting soil.
This happens because of:
- even moisture distribution
- absence of large particles
- minimal fungal spores
When Not To Add Compost
Many people want to “improve” the mix with compost. I understand. We make our own compost, and I love it.
But for a classic indoor seed starting mix, compost isn’t necessary. Young seedlings need nutrients in micro-doses. What increases instead is the risk of fungus gnats and mold.
Especially if your kitchen runs warm. If you’re just starting out, keep the mix simple. Later, at the transplant stage, you can move into a more nutrient-rich substrate.
2. Compost Free Seed Starting Soil For Fungus Gnat Prevention
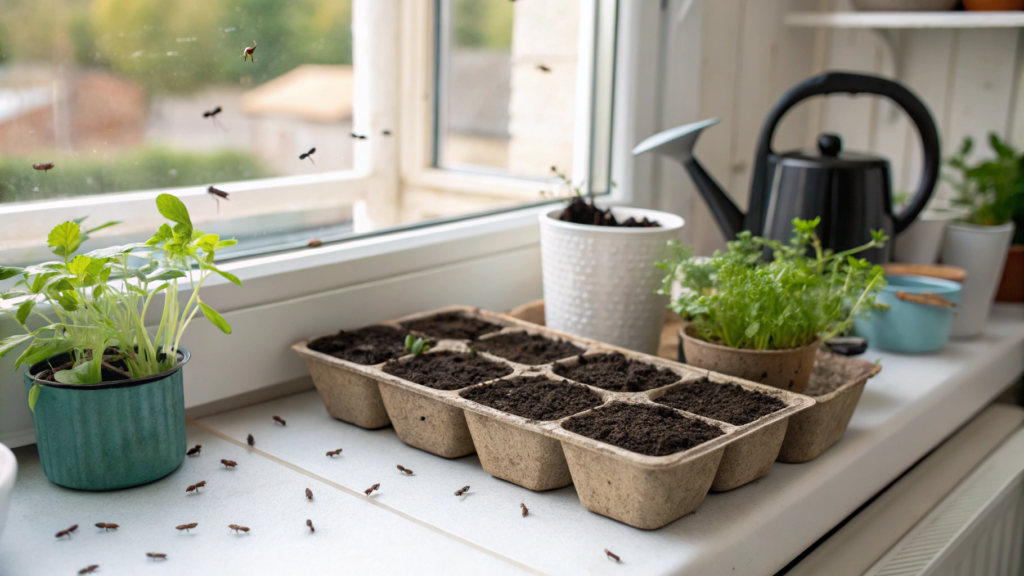
If you’ve ever started seedlings on a kitchen windowsill, you know this picture. A few days after watering, tiny black flies start circling around the containers. Everything looks clean. Everything looks tidy. And yet they’re there.
For a long time, I was convinced it was the open window. Turns out, the real cause was compost in the soil.
Fungus gnats love organic matter. And seed trays are the perfect environment for them.
Why Compost Attracts Fungus Gnats
Fungus gnat larvae feed on decomposing organic matter and fungal mycelium. They don’t damage mature plants as much as they damage young seedlings. They feed on root hairs. And for seedlings, roots are everything.
That’s why when you’re growing seeds indoors, especially in February and March, it’s better to completely exclude compost.
Basic Compost Free Seed Starting Soil Recipe
This is the mix I use every time I start early tomatoes, peppers, and basil indoors.
At first glance, the mix may look too simple. But that’s exactly its strength.
Ingredients:
- 8 cups hydrated coconut coir (about 1.9 liters)
- 3 cups perlite (about 700 ml)
- 1 tablespoon horticultural sand, optional (15 ml)
No compost. No worm castings. No “improving” additives.
After mixing, the structure is light and crumbly, with plenty of air pockets. And most importantly — no organic food source for larvae.
Why I Increase The Amount Of Perlite
In this version, there’s more perlite than in the classic mix. I do that intentionally.
More perlite means:
- the top layer dries faster
- less moisture buildup
- lower fungal risk
And a damp top layer is exactly where fungus gnats prefer to lay their eggs.
When we moved to the Pacific Northwest, I noticed our standard mix was drying much slower. The gnats came back. Only after increasing the perlite ratio did things stabilize.
Sometimes the difference is just one extra cup of perlite.
Step-By-Step Preparation Of Compost Free Mix
The mix comes together quickly, but there are small details that matter.
- Soak the coconut coir and loosen it completely.
Inside the compressed block there are often dense, wet chunks. Break them apart. Otherwise, you’ll create pockets of excess moisture inside your containers. - Add perlite gradually while mixing by hand.
Don’t just flip the mixture once or twice. Really incorporate it evenly. The white particles should be distributed throughout the entire seed starting soil, not sitting in one layer. - Check moisture before planting.
The mix should feel slightly moist, but the surface should not look shiny. I always smooth the surface lightly with my fingers before sowing. - Fill the cells without compacting.
Don’t press the mix down firmly. A light structure is your protection against fungus gnats.
After filling, the cells should remain airy, not dense.
Additional Fungus Gnat Prevention Indoors
Even when using a compost free seed starting soil, I follow a few extra habits. Small things. But they protect the seedlings.
- I water from the bottom using a tray.
- I allow the top layer to dry slightly between waterings.
- I place yellow sticky traps near the trays.
- I never store open soil bags inside the house.
Once I switched to bottom watering only, the problem almost disappeared. No chemicals.
From Personal Experience
One spring was especially damp. We had several full trays of seedlings growing in the living room. The fungus gnats appeared within a week. I was irritated. Lindy laughed and called it “part of the process.” But when they started landing on the rim of my tea mug, that was it.
I repotted every single tray into a compost free seed starting soil for fungus gnat prevention. It took an entire day. Yes. But two weeks later — not a single adult insect.
That’s when I wrote in my notebook: “Compost — later. Not at the sprouting stage.”
If you’ve had issues with gnats before, try one season without compost. Just as an experiment. A compost free seed starting soil for fungus gnat prevention isn’t a “poor” mix. It’s a clean start. You’ll add nutrition later, during transplanting. Experience taught me that early seedlings need structure and moisture control, not richness.
3. Fine Texture Seed Starting Soil For Tiny Seeds Like Basil
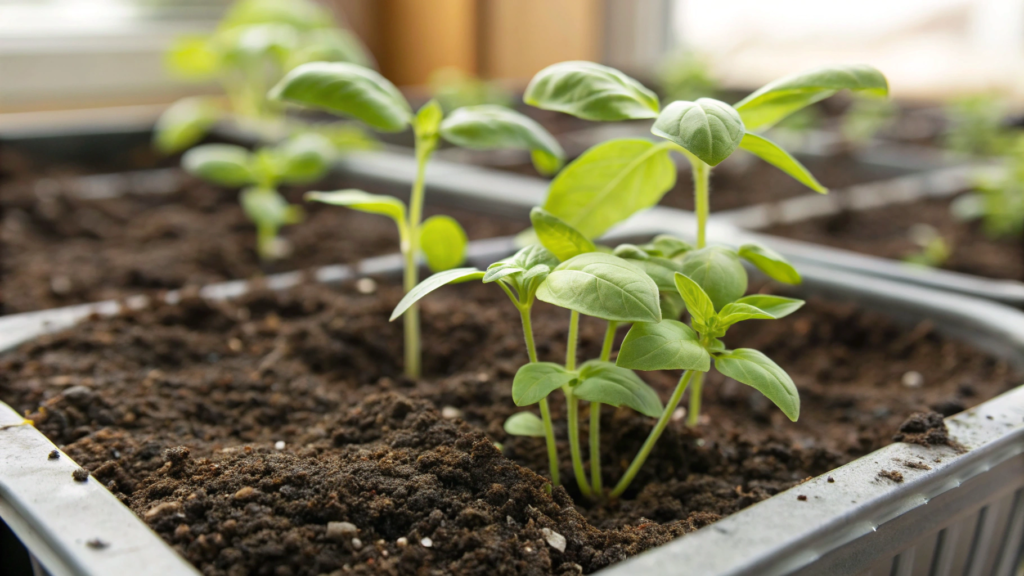
Basil seeds are tiny. Light. Almost like dust. And a regular seed starting mix isn’t enough. Even a good one. Even a trusted one.
In this case, you need a finer, almost silky texture. Otherwise seeds fall too deep between particles or sit on top without proper contact with moisture. And basil prefers precision.
Why Tiny Seeds Need A Different Texture
Seeds like basil, thyme, lettuce, and lobelia don’t need deep planting. They need firm contact with a moist surface.
If the substrate is too coarse:
- seeds slip between larger particles
- moisture distributes unevenly
- empty cells appear
Tiny seeds germinate better in a fine, uniform seed starting soil with stable surface moisture. This helps produce more even sprouts, which becomes noticeable within the first days of germination.
My Fine Texture Seed Starting Mix Recipe
Before giving proportions, one thing. I don’t buy a separate “special” mix for small seeds. I simply adjust my base recipe.
Ingredients:
- 8 cups sifted, moistened coconut coir (1.9 liters)
- 1 cup very fine perlite (about 240 ml)
- 1 cup fine-grade vermiculite (240 ml). I use fine vermiculite such as Espoma Organic Vermiculite 8-Quart Bag (Amazon) — the particle size is consistent without large chunks.
Notice that perlite is reduced compared to the classic mix. Vermiculite helps maintain even moisture and makes the structure more delicate.
If the perlite is coarse, I lightly crush it by hand. Not into dust, just into smaller particles.
What To Do Before Mixing
One small detail many people skip.
- I always sift the coconut coir through a coarse screen.
- I remove rough fibers.
- I break apart dense clumps.
After sifting, the structure becomes softer and more uniform. That directly affects seed-to-soil contact.
Sometimes this takes me 10–15 minutes. But basil emerges in an even green layer. And that matters.
Step-By-Step Preparation Of Fine Texture Mix
- Prepare the sifted coir.
It should be slightly moist and crumbly. If squeezing forms a tight clump, loosen it further. - Add fine perlite and mix gently.
Perlite provides air, but the amount is limited. In the finished mix, it should be barely noticeable. - Add vermiculite for surface moisture retention.
Vermiculite helps hold moisture near the top layer, which is essential for tiny seeds that are not buried deeply. - Final mix and leveling.
The texture should be fine, without large particles or visible fibers.
The finished mix should feel like light damp sand. Not sticky. Not clumpy.
How I Sow Basil In This Mix
Before the steps, one clarification. I do not bury basil seeds.
- I place them directly on the surface.
- I press them lightly with a finger.
- Sometimes I dust a very thin layer of vermiculite on top.
- I water only with a spray bottle.
In the first days, moisture control is critical. The surface should stay moist but not glossy. In about 4–6 days, I see even germination.
If you grow basil, thyme, or lobelia, try adjusting the texture at least once. Tiny seeds don’t need heavy fertilization. They need a careful environment.
4. Seed Starting Mix Recipe With Vermiculite For Even Moisture
Sometimes my seedlings look uneven. Some cells already have strong sprouts, others show nothing. I water the same. Temperature is the same. Light is the same. And the reason can be just one thing — uneven moisture.
That’s why I often use a seed starting mix recipe with vermiculite for even moisture, especially for crops that are sensitive to drying out in the first days.
Vermiculite works differently than perlite. It doesn’t just create air space. It holds moisture inside its structure and slowly releases it back to the roots. This matters when you can’t check your trays several times a day.
Why Vermiculite Helps Stabilize Moisture
Vermiculite is a mineral that becomes lightweight and porous after processing. It absorbs water and gradually releases it back into the soil.
For germination, seeds need stable moisture. If the top layer dries out, the swelling process stops.
This is where vermiculite helps keep moisture more even across the surface.
My Seed Starting Mix Recipe With Vermiculite
I use this version when I know spring will be dry or when indoor heating is drying out the air.
Ingredients:
- 6 cups hydrated coconut coir (about 1.4 liters)
- 2 cups fine vermiculite (about 470 ml)
- 2 cups perlite (about 470 ml)
The 3:1:1 ratio balances moisture retention and aeration.
If the vermiculite is coarse, it’s better to use fine grade. It distributes more evenly and doesn’t create empty gaps.
Step-By-Step Preparation Of Seed Starting Mix With Vermiculite
The mix comes together quickly, but small details make it stable.
- Prepare the coir and adjust its moisture.
The coir should be slightly damp, not wet. If it releases water when squeezed, let it air dry for 10–15 minutes before continuing. - Add vermiculite and mix until evenly distributed.
Vermiculite is very light and can “float” in the mix. I fold the mixture from bottom to top with my hands to avoid layers forming. - Incorporate perlite for structural balance.
Perlite offsets excess moisture retention. It needs to be distributed evenly so the seed starting mix doesn’t become too dense. - Check the texture before filling trays.
The mix should feel soft, crumbly, and slightly springy. If it feels heavy, add a bit more perlite. - Fill cells without firm compaction.
I gently shake the tray after filling so the mix settles naturally, then lightly level the surface.
This creates a stable structure without “wet pockets.”
When I Choose This Recipe
I don’t use it all the time. But it’s especially useful when:
- indoor air is dry because of heating
- you can’t check moisture frequently
- you’re growing tomatoes and peppers with longer germination time
- you’re using bottom heat
After I started adding vermiculite in these conditions, the number of empty cells almost disappeared. I also noticed the surface cracks less after watering.
If you see the top layer turning pale and drying quickly, try adding vermiculite to your next batch. Sometimes seedlings aren’t being difficult. They’re reacting to microclimate. A seed starting mix recipe with vermiculite for even moisture can give seeds a more stable start and smooth out those fluctuations.
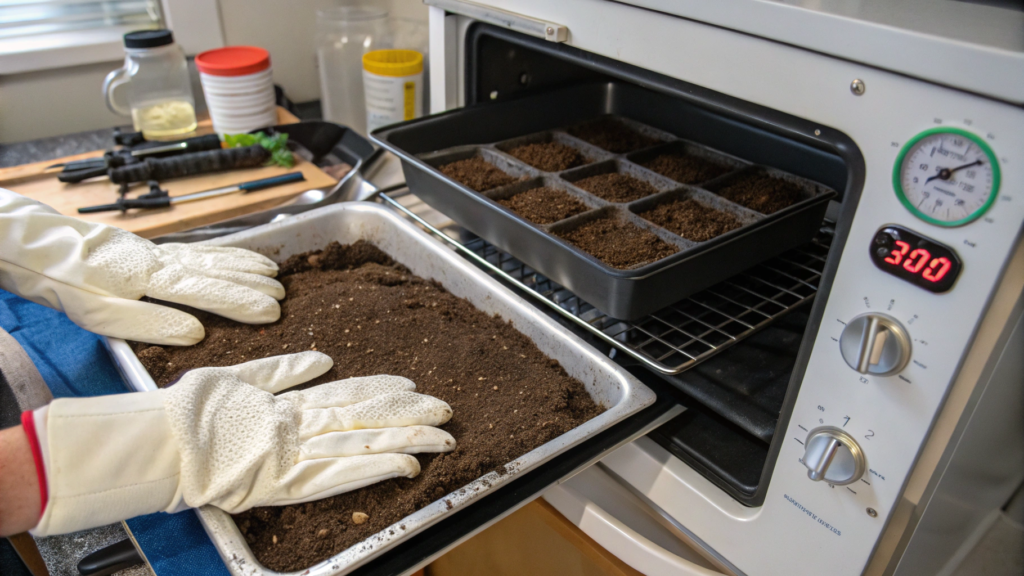
5. Sterile Seed Starting Soil Method Using Oven Pasteurization
Have you ever noticed that sometimes a mix already contains fungal spores, larvae, or pathogens? Especially if you’re using garden soil or your own compost.
The idea of sterilizing soil always felt too “laboratory-like” to me. But after one spring ended with a full outbreak of damping off in my cabbage seedlings, I had to rethink that attitude.
That’s when I started using a sterile seed starting soil method using oven pasteurization — carefully, without going overboard, and only for early indoor sowings.
What’s The Difference Between Sterilization And Pasteurization
Full sterilization destroys everything — harmful and beneficial organisms alike.
Pasteurization works more gently. It reduces pathogen levels without turning the substrate into a completely sterile medium. At around 160–180°F (71–82°C) for approximately 30 minutes, most soil-borne pathogens are suppressed.
That’s the range we use.
When I Use Oven Pasteurization
To be honest, I don’t do this every season. But pasteurization makes sense if:
- you’re using homemade compost
- you’re incorporating garden soil
- you’ve dealt with damping off before
- you’re growing a large batch of seedlings
In other cases, a quality sterile base made from coconut coir is usually enough.
Step-By-Step Soil Pasteurization Method In The Oven
The process is simple, but precision matters.
- Moisten the soil mix in advance.
The substrate should be slightly damp, not wet. Soil that’s too dry heats unevenly. - Spread the mix 2–3 inches (5–7 cm) thick on a baking tray.
Don’t make the layer too deep. Even depth ensures even heating. - Cover with foil and insert an oven thermometer.
The internal temperature should reach approximately 160–180°F (71–82°C). Avoid overheating beyond this range — excessive heat can damage soil structure and quality. - Maintain that temperature for 30 minutes.
Start timing only once the internal soil temperature reaches the target range. - Allow the mix to cool completely before use.
I leave it for several hours. Never use it while warm.
Once cooled, the structure stays intact, but the risk of fungal diseases is significantly lower.
Important Details People Rarely Mention
A small but important note before you begin.
- Don’t overheat the soil.
- Don’t use plastic containers in the oven.
- Don’t try to pasteurize large volumes at once.
I always work in small batches. It’s easier to control. And yes — there will be a smell. Not overwhelming, but noticeable. I turn on the vent hood every time.
Before You Turn On The Oven
If you’re using pre-sterilized coconut coir, pasteurization probably isn’t necessary. But if your mix includes compost or garden soil and you’re growing dozens of plants indoors, it’s better to be cautious.
Sometimes prevention saves an entire tray of seedlings.
6. Seed Starting Calendar For Tomatoes Peppers And Eggplant Indoors
There’s no need to rush and sow tomatoes in February only to keep overgrown seedlings on the windowsill until the end of May.
You already know this. Sow too early — plants stretch. Sow too late — you lose part of the season.
We once started tomatoes 12 weeks before transplanting. They looked beautiful. Strong. But by the time we moved them outside, they were already flowering in their cups. And that’s not what you want.
What The Sowing Date Actually Depends On
Before looking at the table, understand one thing: your calendar is always tied to your last frost date. Not to March. Not to “spring.” To a specific date in your region.
In Idaho, ours was around May 10–15. In Oregon, slightly earlier. And from that date, we count backwards.
Tomatoes, Peppers & Eggplant Indoor Calendar
| Crop | Weeks Before Last Frost | Germination Temperature | Average Germination Time | Seedling Age At Transplant |
| Tomatoes | 6–8 weeks | 70–80°F (21–27°C) | 5–10 days | 6–8 weeks |
| Peppers | 8–10 weeks | 75–85°F (24–29°C) | 7–14 days | 8–10 weeks |
| Eggplant | 8–10 weeks | 75–85°F (24–29°C) | 7–14 days | 8–10 weeks |
These numbers are practical benchmarks. They help you avoid overgrowing seedlings and avoid rushing.
How To Use This Table
Let’s say your last frost date is May 15. Now follow this simple structure.
1. Count backwards from your transplant date.
- Tomatoes (6–8 weeks) → sow roughly between March 20 and April 1.
- Peppers and eggplants (8–10 weeks) → sow from early to mid-March.
That’s it. We’re not sowing “when it feels right.” We’re counting back from the planting date.
2. Adjust for indoor conditions.
If you don’t have supplemental lighting, if your windowsill is cold, if indoor temperatures fluctuate — choose the later end of the range.
For example:
Tomatoes → closer to 6–7 weeks.
Peppers → closer to 8–9 weeks.
3. Consider soil temperature.
Peppers and eggplants are especially heat-sensitive. If substrate temperature drops below 70°F (21°C), germination can stretch to two weeks.
I always use bottom heat for peppers. Without it, they really do “think” longer — and the whole calendar shifts.
Common Planning Mistakes
We’ve made all of these.
- Sowing too early “just in case.”
- Ignoring the actual last frost date.
- Skipping supplemental light.
- Letting seedlings overgrow before transplanting.
Overgrown plants adapt more slowly after transplanting. They focus on flowering instead of root development.
Look at your last frost date. Count backwards. Don’t rush. An early start doesn’t always mean an early harvest. A correct start makes it far more likely.
7. Seed Starting Schedule For Cool Season Greens And Brassicas
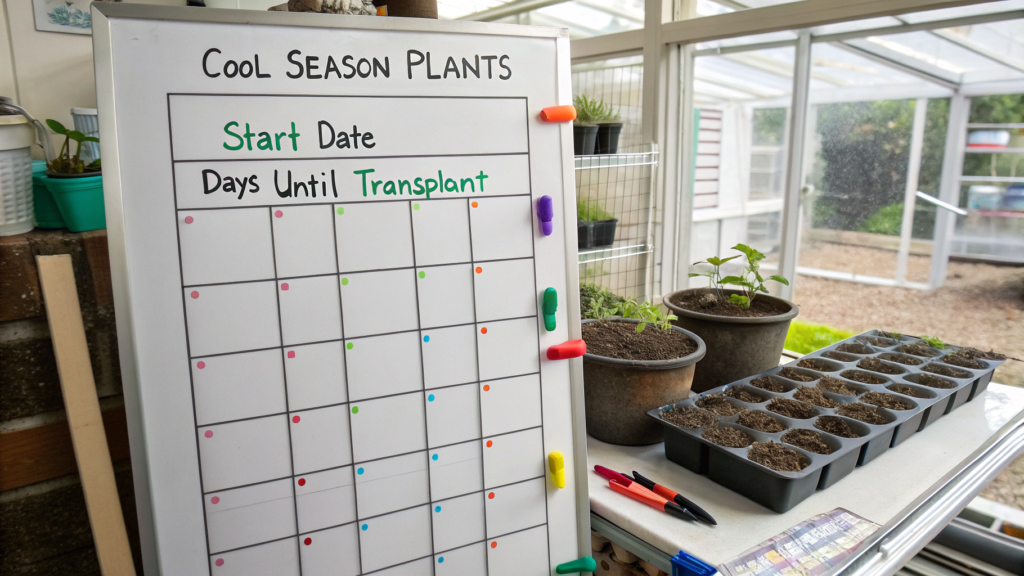
With cold-hardy crops, everything works the opposite way. You don’t need to “push” them in a warm room. They can be planted earlier. And they do not like heat.
A proper Seed Starting Schedule For Cool Season Greens And Brassicas helps you avoid planting too late and avoid keeping seedlings indoors for too long.
If tomatoes fear frost, broccoli and lettuce handle light cold without stress. And that completely changes the schedule.
Seed Starting Schedule For Cool Season Greens And Brassicas
| Crop | Weeks Before Last Frost | Minimum Transplant Temperature | Time To Germination | Special Note |
| Broccoli | 4–6 weeks | 40°F (4°C) | 5–10 days | Tolerates light frost |
| Cauliflower | 4–6 weeks | 40°F (4°C) | 5–10 days | Dislikes heat |
| Cabbage | 4–6 weeks | 40°F (4°C) | 5–10 days | Very cold-hardy |
| Kale | 3–5 weeks | 35–40°F (2–4°C) | 5–8 days | Flavor improves after cold |
| Lettuce | 3–4 weeks | 35–40°F (2–4°C) | 4–7 days | Overgrows quickly |
| Spinach | 3–4 weeks | 35°F (2°C) | 7–14 days | Can be direct sown |
This table already shows one key point: greens do not need a long indoor period.
How To Read This Schedule
Now let’s see how this works in real conditions. If your last frost date is May 15:
- Broccoli and cabbage should be started in early April.
- Kale and lettuce — around mid-April.
Transplanting can begin as soon as the soil has thawed and temperatures consistently stay above 35–40°F (2–4°C). That is often 2–3 weeks earlier than tomato planting.
There is one important rule.
Brassicas should not stay in seed trays longer than 6 weeks. Leafy greens should not stay longer than 4 weeks. Overgrown seedlings adapt poorly and bolt faster.
And this is where a common mistake happens. Many people wait for stable warmth. They keep broccoli indoors until late May. Then they transplant into already warm soil.
As a result:
- small, loose heads form
- plants bolt prematurely
- yields are weaker
These crops are built for cool conditions. The sooner they reach open ground at stable temperatures above 35–40°F (2–4°C), the better they perform.
I usually sow broccoli in two waves with a 10–14 day gap. The first batch goes out as early as possible. The second follows slightly later.
That gives insurance against a long cold spring — or a sudden heat spike.
A Seed Starting Schedule For Cool Season Greens And Brassicas is built around cool weather, not summer heat. Once you start thinking in terms of cool-season timing, the schedule becomes much easier to understand.
8. Indoor Seed Starting Calendar Based On Last Frost Date
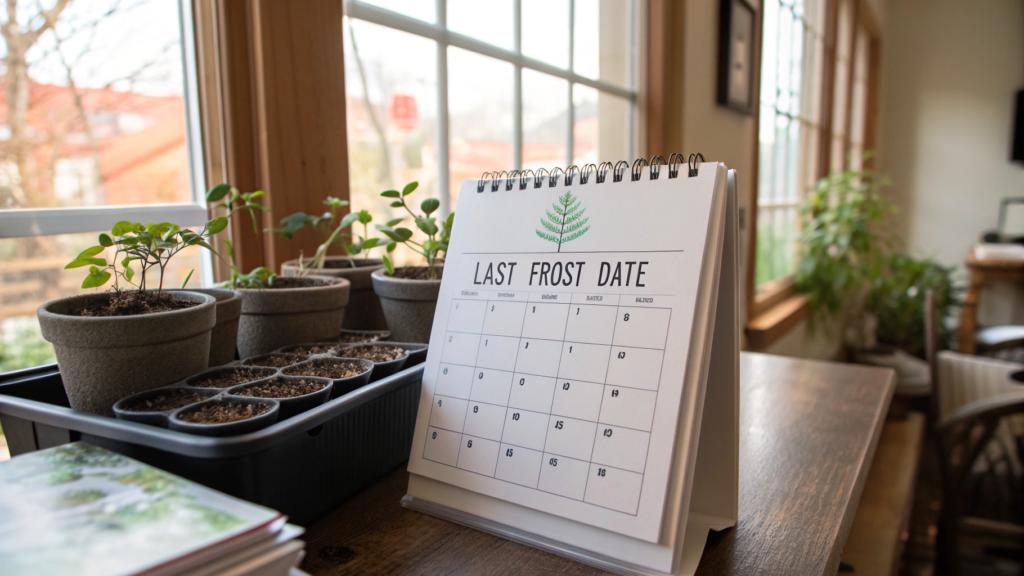
Spring can get confusing fast. It feels like everything needs to be sown at once. Especially when seed packets have been sitting on the table since February.
But a solid Indoor Seed Starting Calendar Based On Last Frost Date is not built on feelings. It’s built on one specific point — your region’s last spring frost date. That is your anchor. Everything is calculated from it.
Step 1. Identify Your Last Frost Date
This is a statistical date based on long-term weather records. It shows when the probability of nighttime frost becomes minimal.
Let’s say in your area the last frost date is May 15.
It’s important to understand: this is a probability marker, not a guarantee. Weather can still surprise you. Many gardeners build in a 5–7 day buffer before transplanting warm-season crops.
That date becomes your base reference point.
Step 2. Divide Crops Into Groups
To prevent the calendar from turning into chaos, I always divide plants into three simple categories. It immediately makes timing clearer.
Here’s what that looks like:
- Warm season crops — tomatoes, peppers, eggplant
- Cool season crops — broccoli, cabbage, kale
- Leafy greens — lettuce, spinach
Once you separate them like this, it becomes obvious: they do not start at the same time.
Indoor Seed Starting Calendar Based On Last Frost Date
(Example with a May 15 last frost date)
| Crop Group | When To Start Indoors | When To Transplant Outdoors |
| Peppers, Eggplant | 8–10 weeks before (early–mid March) | After last frost, when nights stay above 50°F (10°C) |
| Tomatoes | 6–8 weeks before (late March–early April) | After last frost, once soil is warmed |
| Broccoli, Cabbage | 4–6 weeks before (early April) | 2–3 weeks before last frost, if soil is thawed |
| Lettuce, Kale | 3–4 weeks before (mid-April) | 2–3 weeks before last frost or direct sow |
This table shows the key principle: different crops respond differently to cold.
How To Apply This Without Confusion
Let’s go back to our example — May 15 as the last frost date.
Now we count backwards:
- Peppers and eggplants → around March 15–20.
- Tomatoes → around April 1.
- Broccoli → early April.
- Lettuce → mid-April.
But transplanting will not be the same.
Warm season crops don’t just wait for frost to end. They need:
- nighttime temperatures consistently above 50°F (10°C)
- warmed soil
Peppers are especially sensitive to cold soil. Even if frost risk has passed, cold ground can slow growth for weeks.
Cool season crops behave differently. They can go out earlier — once the soil has thawed and extreme frost is gone. Short dips to 35–40°F (2–4°C) are usually tolerated. For active growth, though, daytime temperatures should already be moderate.
One Important Detail That’s Often Missed
An Indoor Seed Starting Calendar Based On Last Frost Date is not just one sowing date.
It’s a structure:
- one anchor point — the last frost date
- different crop groups
- different temperature requirements
When you think this way, it becomes obvious why you can’t sow everything “on the same day.”
I used to do exactly that. In February I’d start everything at once. Some seedlings overgrew; lagged behind; struggled after transplanting.Now I follow a defined set of dates. Each crop moves to the garden in its own rhythm.And that makes spring planting much simpler.
9. Seed Starting Soil Moisture Test Using The Squeeze Method
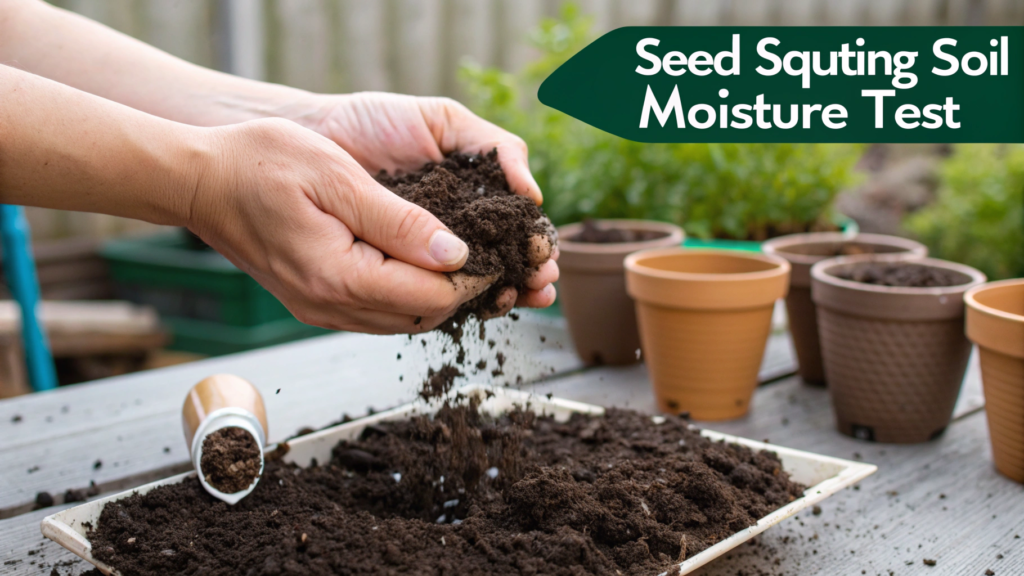
Most seedling problems don’t start with seeds. Not with light either. They start with water.
Too wet — mold appears, fungus gnats show up, and roots begin to rot.
Too dry — seeds don’t fully absorb moisture and germination stops.
A simple Seed Starting Soil Moisture Test Using The Squeeze Method solves this without tools. Just your hands and attention.
Why Check Moisture Before Sowing
I see the same mistake again and again. The mix is prepared, poured into cells, and then watered from the top.
The result:
- the top layer is wet
- the middle becomes oversaturated
- the bottom stays dry
Seeds end up in an unstable environment. That’s why I always check moisture before filling trays.
How The Squeeze Method Works
Before the steps, one rule. The soil for sowing should be evenly moist — not soggy.
Now the test:
- Take a handful of the prepared mix.
- Squeeze it firmly in your fist.
- Observe what happens.
There are three possible outcomes:
- If water drips out — the mix is too wet.
- If the clump holds its shape but crumbles with light pressure — moisture is ideal.
- If the mix immediately falls apart and won’t hold — it’s too dry.
After checking, adjust:
- Too wet → add dry substrate or perlite.
- Too dry → add water gradually while mixing.
Always add water in small amounts. It’s very easy to overdo it.
What The Ideal Texture Should Feel Like
After using the Seed Starting Soil Moisture Test Using The Squeeze Method, the mix should resemble damp sand used for building a sandcastle.
It holds its shape when squeezed but doesn’t stick to your fingers. The surface looks matte, not shiny.
If it looks glossy, there’s already too much moisture.
Why This Matters For Germination
Before a sprout appears, a seed goes through an imbibition phase — it absorbs water and swells. That process requires stable moisture.
If the mix is:
- too wet → oxygen availability decreases
- too dry → the swelling process stops
Small seeds are especially sensitive — basil, lettuce, celery.
Before covering the tray with a lid or plastic wrap, check moisture with your hand, not by guessing. Seed Starting Soil Moisture Test Using The Squeeze Method is a simple way to prevent overwatering during the first days of seedling life.
And sometimes this small step determines whether you get even germination — or you reseed two weeks later.
10. Seed Starting Soil Amendment Plan For Transplant Week
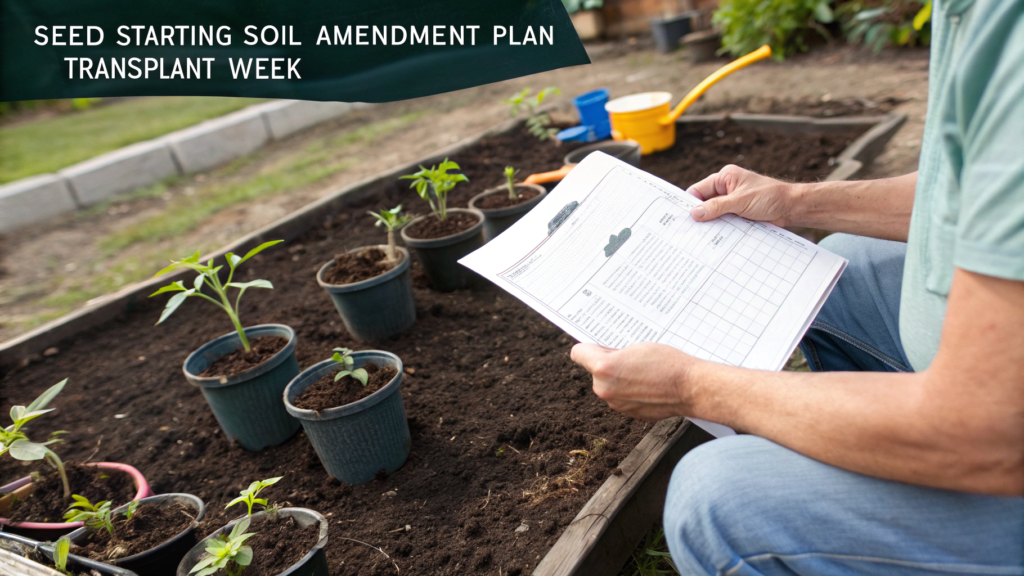
Transplant week is the moment when seedlings move into their adult phase. During germination we keep the mix light and almost neutral. Before planting out, the approach shifts.
A Seed Starting Soil Amendment Plan For Transplant Week is about creating a smooth transition from a sterile starting substrate to more nutrient-rich soil.
I once skipped this step. I transplanted tomatoes straight from a light indoor mix into the garden without preparation. They survived, but growth slowed for 7–10 days. In spring, that delay matters.
What Happens To Seedlings Before Transplanting
After 6–8 weeks in containers, a plant:
- uses up its initial micronutrients
- forms a dense root ball
- adapts to stable indoor moisture
If you suddenly move it into heavy or overly rich soil, the roots can experience stress. That’s why transplant week is about preparation, not intensity.
Basic Amendment Plan
We don’t use complicated systems here. The key is moderation.
Here’s what I do 5–7 days before transplanting:
- Add a thin layer of sifted compost to each cup (1–2 tablespoons, about 15–30 ml).
- Or water with a diluted organic liquid fertilizer (half the recommended strength on the label).
- Check drainage and gently loosen the top layer if needed.
This gives the plant a soft signal: nutrients are available, growth is about to accelerate.
If You’re Transplanting Into Open Ground
Here, preparation includes both the seedling and the planting hole.
I usually:
- Add 1–2 cups of compost (240–470 ml) into the hole.
- Mix it with native soil.
- Water the hole before planting.
For tomatoes, you can add a small amount of bone meal (1 tablespoon / 15 ml) to support root development.
The key rule: don’t place concentrated fertilizers directly under the root ball. Young roots are sensitive and can burn.
One Important Step Before Transplanting
Hardening off starts about a week before planting.
- Move seedlings outdoors for 1–2 hours.
- Gradually increase exposure time.
- Monitor wind and direct sunlight.
The soil can be perfect, but if the plant isn’t adapted to outdoor conditions, stress will be greater than any soil adjustment could cause.
Before Moving Seedlings Into The Ground
A proper Seed Starting Soil Amendment Plan For Transplant Week is about preparation, not overfeeding.
- Don’t over-fertilize.
- Don’t overwhelm the roots.
- Don’t transplant into dry soil.
A gentle transition, a modest amount of organic matter, and gradual exposure to outdoor conditions. That’s when seedlings don’t just survive — they continue growing.
The Right Soil Recipe Matters
Indoor seed starting requires precision. A light starter mix, proper texture, controlled moisture, and a calendar built around your last frost date all work together.
When one of those elements is missing, problems begin — delayed germination, fungal disease, overgrown seedlings, or slow establishment after transplant.
When you use the right soil mix, check moisture before sowing, and adjust timing to real conditions, the results become predictable. Plants don’t struggle to survive. They develop.If you’ve used any of these methods, share in the comments what worked best in your climate.
I’d like to hear what adjustments you make and what results you’ve seen this season.