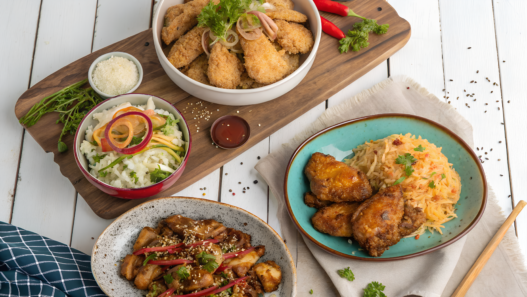
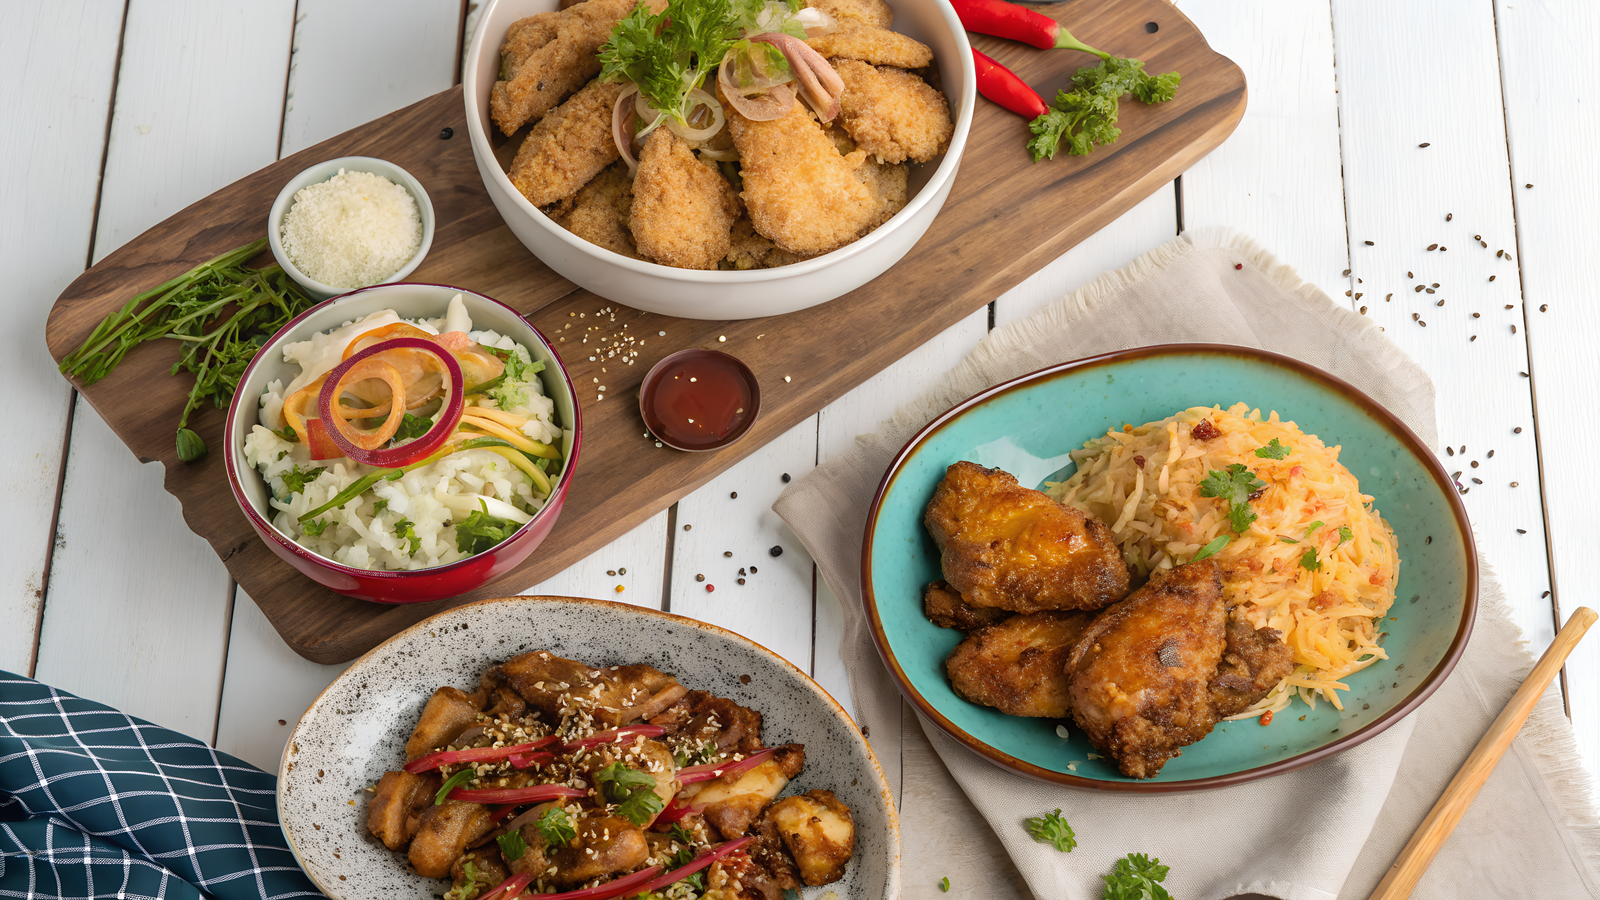
Familiar dishes often hide small homemade tricks that rarely make it into short recipes. Someone adds an unusual coating, someone uses leftovers from the fridge, and someone changes the cooking order so everything turns out better and faster.
I love ideas like these most of all. They come from ordinary home kitchens, where people spend years adjusting recipes to suit their families. An air fryer is perfect for these experiments because it lets you quickly test a new method without making dinner more complicated.
Here you will find chicken dishes with simple ideas borrowed from those same “hidden kitchens.” They are easy to recreate at home, even if you have only ever cooked air fryer chicken with salt and pepper.
1. Air Fryer Chicken Breast With French Bistro Mustard Pan Drip Sauce
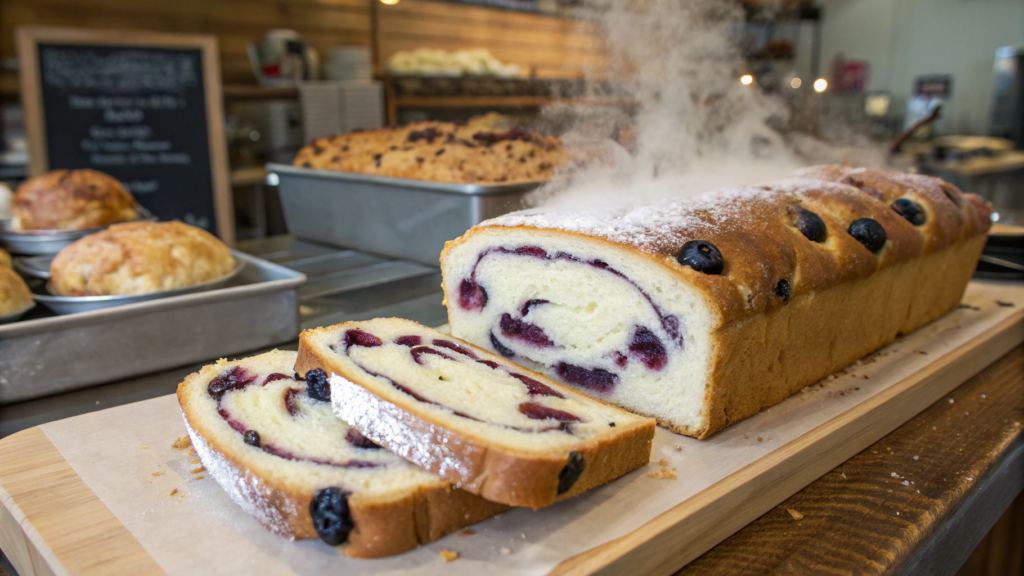
Air fryer chicken breast can turn out browned on the outside and juicy inside, and after cooking, there is almost always a little chicken juice left at the bottom of the basket. Usually, it just gets poured away. In this dish, it becomes the base for a quick mustard sauce with shallot, cream, and butter.
In French home cooking, chicken is often served with sauces made with Dijon mustard. While the chicken breast rests after cooking in the air fryer, the sauce comes together in just a few minutes.
One day, I poured the chicken juices from the bottom of the air fryer into a small skillet, added mustard, a little cream, and a piece of butter. What can I say? Lindy tasted the sauce from a spoon and then grabbed some bread to wipe up everything left in the pan. That says it all.
Ingredients
For 4 servings:
- 2 large boneless, skinless chicken breasts, about 1½ pounds (680 g);
- 1 tablespoon olive oil;
- ¾ teaspoon fine salt;
- ½ teaspoon black pepper;
- ½ teaspoon dried thyme;
- ¼ teaspoon garlic powder;
- 1 small shallot;
- ⅓ cup chicken broth (80 ml);
- ¼ cup heavy cream (60 ml);
- 1½ tablespoons Dijon mustard;
- 1 teaspoon whole-grain mustard;
- 1 teaspoon lemon juice;
- 1 tablespoon cold butter;
- 1 teaspoon finely chopped parsley.
The whole-grain mustard is optional here. If you only have Dijon mustard at home, use two full tablespoons. The recipe will still turn out just fine.
How to make chicken breast with mustard sauce
- Even out the chicken breasts. Place them between two sheets of parchment paper and gently pound the thickest parts. You do not need to turn them into thin cutlets. Just even the meat out to about ¾ inch (2 cm) thick so the chicken cooks evenly.
- Season the chicken. Pat the breasts dry with a paper towel. Brush them with olive oil, then rub with salt, black pepper, thyme, and garlic powder. Leave them on the counter for 10–15 minutes while the air fryer heats up.
- Preheat the air fryer. Set it to 375°F (190°C). Do not cover the entire basket with a solid sheet of foil, or the hot air will not circulate properly around the chicken.
- Cook the chicken. Place the breasts in the basket with a little space between them. Cook for 7 minutes, then flip and cook for another 5–8 minutes. Air fryer chicken breast cooking time may vary slightly depending on the thickness of the meat and the power of your appliance.
- Check the temperature. Measure it in the thickest part of the breast. The internal temperature of the chicken should reach 165°F (74°C). A digital meat thermometer is useful here, such as the ThermoPro TP19H Digital Meat Thermometer for Cooking.
- Let the chicken rest. Transfer the cooked chicken to a plate and loosely cover it with foil. Leave it for 5–7 minutes. If you cut into the breast right away, the juices will quickly run out onto the cutting board.
- Start the sauce. Carefully pour the liquid from the bottom of the air fryer into a small skillet. Add the chicken broth and finely chopped shallot. Cook over medium heat for 2–3 minutes, stirring and scraping up the browned bits from the bottom.
- Add the mustard and cream. Lower the heat. Add the Dijon and whole-grain mustard, then pour in the cream. Stir for about 2 minutes, until the creamy mustard sauce thickens slightly. If it becomes too thick, add another spoonful of broth.
- Finish the sauce. Remove the skillet from the heat. Add the lemon juice and cold butter. Stir until the butter melts into the sauce. Taste it before adding any salt, because the broth and chicken juices may already be salty enough.
Tip. If the chicken breasts are different sizes, check each one separately. The smaller one may cook sooner. Remove it from the air fryer as soon as the internal temperature reaches 165°F (74°C), and leave the larger one in for a few more minutes.
How to serve the chicken breast
After the chicken has rested for 5–7 minutes, slice it across the grain and spoon the warm French mustard sauce over the top. Finish with parsley and a little freshly ground black pepper. It is so good.
You can serve this chicken with mashed potatoes, green beans, or a simple salad. We usually choose mashed potatoes because they go well with the sauce. Bread is also useful here—Lindy has already tested that.
In French cooking, the juices left behind after cooking chicken are often used as the base for a sauce. Broth or wine, cream, butter, and Dijon mustard are usually added. In this recipe, the same technique is simply adapted for the air fryer.
2. Air Fryer Chicken Wings With Thai Sticky Tamarind Glaze
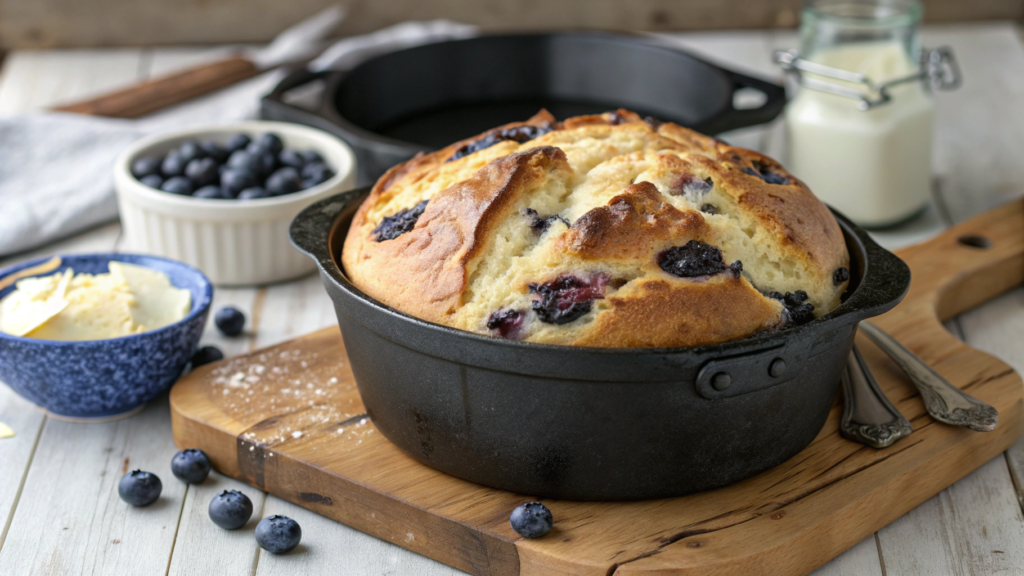
Air fryer chicken wings are good on their own, but the main part of this recipe happens right at the end. The hot wings are coated in a Thai glaze made with tamarind, fish sauce, honey, and lime. It turns out sticky, sweet and sour, and slightly spicy, and only takes a few minutes to make.
Tamarind is often used in Thai cooking when a dish needs noticeable acidity without a lot of citrus juice. It is added to sauces, soups, noodles, and meat glazes. Tamarind paste has a fairly sharp flavor if you taste it straight from the jar. That is why I add it gradually and always taste the glaze before tossing in the whole batch of wings.
Ingredients
For 4 servings:
- 2 pounds chicken wings (about 900 g);
- 1 tablespoon neutral vegetable oil;
- 1 teaspoon baking powder;
- ¾ teaspoon fine salt;
- ½ teaspoon garlic powder;
- ¼ teaspoon black pepper;
- 2 tablespoons tamarind paste;
- 2½ tablespoons honey;
- 1½ tablespoons fish sauce;
- 1 tablespoon lime juice;
- 1 teaspoon soy sauce;
- 1 small garlic clove;
- ½ teaspoon red pepper flakes;
- 1 teaspoon cornstarch;
- 1 tablespoon water;
- 2 tablespoons chopped green onions;
- 1 teaspoon sesame seeds.
For this recipe, you need unsweetened tamarind paste, not a ready-made sweet sauce. The level of acidity can vary quite a bit between brands, so be sure to taste the glaze while it cooks.
Baking powder helps dry out the surface of the skin and creates a more noticeable crust. Do not replace it with baking soda, because it will leave an unpleasant taste.
How to make chicken wings with tamarind glaze
- Prepare the wings. Separate whole wings at the joints if the store has not already done it. You can remove the tips and save them for broth. Pat the meat very dry with paper towels. The less moisture left on the skin, the better it will brown.
- Season the wings. Toss them with vegetable oil, baking powder, salt, garlic powder, and black pepper. The baking powder should form a thin, even coating without any white clumps.
- Preheat the air fryer. Set it to 380°F (193°C). Arrange the wings in a single layer, leaving a little space between them. If the basket is small, cook them in two batches. Do not pack the wings too tightly, or they will steam instead of browning.
- Cook the wings. Air fry for 12 minutes, then turn them over. Cook for another 10 minutes, then increase the temperature to 400°F (204°C) and cook for 3–5 more minutes. The skin should be well browned, and the internal temperature of the meat should reach 165°F (74°C).
- Start the glaze. While the wings cook, add the tamarind paste, honey, fish sauce, and soy sauce to a small saucepan. Add the lime juice, minced garlic, and red pepper flakes.
- Adjust the flavor. Set the saucepan over low heat and stir for 2–3 minutes. Taste the glaze before thickening it. If the tamarind is too sour, add another ½ tablespoon of honey. If it is too sweet, add a little more lime juice or fish sauce.
- Thicken the glaze. Mix the cornstarch with one tablespoon of cold water. Pour it into the saucepan and keep stirring for about one minute. The tamarind glaze should become glossy and thick enough to coat a spoon.
- Coat the wings. Transfer the cooked wings to a large bowl. Pour in about two-thirds of the hot glaze and toss quickly. Do not add all the sauce at once. It is better to save a little for serving.
- Finish the wings. Return the glazed wings to the air fryer for 1–2 minutes at 400°F (204°C). Watch them closely because the honey darkens quickly and can burn. Transfer the wings to a plate and add the remaining glaze, green onions, and sesame seeds.
Tip. Before tossing the wings with the glaze, transfer them to a clean, dry bowl. If there is water or rendered fat at the bottom, the glaze will become thinner and will not cling to the skin as well.
How to serve the chicken wings
Serve the tamarind-glazed wings right away, while the coating is still sticky and the skin has not had time to soften. Add lime wedges, sliced cucumber, or a simple cabbage salad.
We usually put a small bowl for the bones on the table and grab extra napkins right away. No one bothers with a fork for long, and everyone ends up eating the wings with their hands anyway.
Tamarind glaze has long been familiar to Thai home cooks, but it does not appear as often in everyday air fryer recipes. I like discoveries like this, when you take familiar chicken wings, add one less familiar ingredient, and end up with a dish people cook at home in another part of the world.
3. Air Fryer Chicken Thighs With Spanish Smoked Paprika Citrus Rub
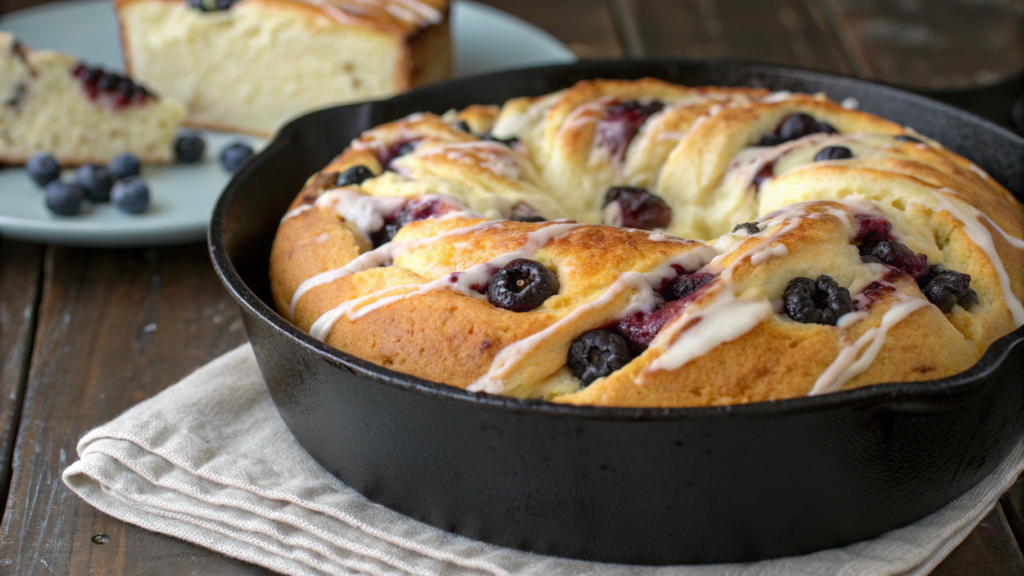
Chicken thighs work well with a dry spice blend in the air fryer. They have enough natural fat, so the seasonings do not fall off or dry out while cooking. For this recipe, we mix smoked paprika, orange zest, garlic, and a little lemon juice.
Smoked paprika is made from peppers that are slowly dried over oak smoke. In Spain, it is called pimentón and is used in sausages, stews, sauces, and marinades. Even a small spoonful of this spice changes the flavor of familiar chicken, so there is no need to add paprika by the handful.
One time, Lindy mixed paprika with orange zest for chicken. The combination turned out so well that the jar of paprika suddenly started running out much faster.
Ingredients
For 4 servings:
- 2 pounds bone-in, skin-on chicken thighs (about 900 g);
- 1 tablespoon olive oil;
- 2 teaspoons smoked paprika;
- 1 teaspoon sweet paprika;
- 1 teaspoon finely grated orange zest;
- 1 teaspoon lemon juice;
- ¾ teaspoon fine salt;
- ½ teaspoon garlic powder;
- ½ teaspoon dried oregano;
- ¼ teaspoon ground cumin;
- ¼ teaspoon black pepper;
- a pinch of cayenne pepper, optional;
- orange or lemon wedges for serving;
- 1 tablespoon chopped parsley.
Look for Spanish smoked paprika, not regular sweet paprika. The label may say sweet, medium-hot, or hot. The sweet version is easier to use for this recipe, such as La Dalia Pimentón de la Vera Sweet Smoked Paprika, especially if children will be eating the chicken.
Remove the zest only from the bright outer part of the peel. The white layer underneath is bitter and is not needed in the chicken seasoning.
How to make chicken thighs with smoked paprika
- Dry the chicken thighs. Pat them with paper towels, paying special attention to the skin. If it stays wet, the spices will coat it unevenly and the surface will not brown as well.
- Mix the spices. In a small bowl, combine the smoked and sweet paprika, orange zest, salt, garlic powder, oregano, cumin, black pepper, and cayenne pepper.
- Season the chicken. Rub the thighs with olive oil and lemon juice. Sprinkle the spice blend over all sides. Carefully lift the skin and apply a little of the mixture directly to the meat. Do not remove the skin completely.
- Let the chicken rest. Leave it for 15 minutes. During this time, the salt will begin to dissolve and the spices will stick to the surface better. There is no need to leave the thighs in the citrus mixture for several hours.
- Preheat the air fryer. Set it to 380°F (193°C). Arrange the thighs in a single layer in the basket, leaving space between the pieces.
- Cook the chicken thighs. Air fry for 12 minutes, then turn them over and cook for another 10 minutes. After that, turn them skin side up again and increase the temperature to 400°F (204°C).
- Brown the skin. Cook for another 3–5 minutes, until the skin is browned. Check the temperature in the thickest part of the meat without touching the bone with the probe. It should be at least 165°F (74°C). For thighs, the temperature can rise a little higher. Dark meat stays juicy and becomes more tender.
- Let the chicken rest. Transfer the cooked thighs to a plate and leave them for 5 minutes. Do not cover them tightly with foil, or the steam will quickly soften the skin.
Tip. Smoked paprika darkens faster than regular spices, so the color of the crust can be misleading. If the thighs are already dark but still not cooked through, reduce the temperature to 360°F (182°C) and give them a few more minutes.
How to serve the chicken thighs
I usually roast potatoes or cook rice to go with these thighs. Sometimes I open a can of white beans and warm them with garlic and olive oil for a quick side dish. Sliced tomatoes and cucumbers also go on the table.
I always put two extra thighs in the air fryer. The next day, I remove the meat from the bones, slice it, and wrap it in a tortilla with some greens. Lindy usually takes the second portion for lunch, so the leftovers rarely make it into a salad.
In Spanish families, pimentón is added to the most ordinary dishes, including potatoes, beans, meat, and homemade sausages. I like taking these everyday cooking tricks and trying them in my own kitchen. Not trying to recreate a restaurant dish, but seeing how familiar chicken dishes are prepared in other home kitchens.
4. Air Fryer Chicken Shawarma With Garlic Sauce and Quick Pickles
Air fryer chicken shawarma starts with a good marinade. The chicken spends at least half an hour in the spices, then goes into the air fryer, where the edges quickly brown. While it cooks, you can make the garlic sauce and quick pickled vegetables.
Shawarma usually uses a mix of cumin, coriander, paprika, garlic, and warm spices. Everyone makes it differently, and the proportions vary. Some people add cinnamon, some use allspice, and some cannot imagine the marinade without cardamom.
Lindy and I, for example, argued about cinnamon for a long time. I was afraid the chicken would start tasting like baked goods, so I added only a few tiny pinches. It turned out that was more than enough, and the spice mix became more interesting. Now Lindy checks every time to make sure I do not forget it.
Ingredients
For 4 servings:
- 2 pounds boneless, skinless chicken thighs (about 900 g);
- 2 tablespoons olive oil;
- 2 tablespoons lemon juice;
- 3 garlic cloves;
- 2 teaspoons ground cumin;
- 1½ teaspoons ground coriander;
- 1 teaspoon sweet paprika;
- ½ teaspoon turmeric;
- ½ teaspoon garlic powder;
- ¼ teaspoon ground cinnamon;
- ⅛ teaspoon ground cardamom;
- 1 teaspoon fine salt;
- ½ teaspoon black pepper.
The garlic sauce
- ½ cup thick plain yogurt (120 ml);
- 2 tablespoons mayonnaise;
- 1 small garlic clove;
- 1 tablespoon lemon juice;
- 1 tablespoon olive oil;
- ¼ teaspoon salt.
For the quick pickled vegetables
- ½ small red onion;
- 1 small cucumber;
- ¼ cup white wine vinegar (60 ml);
- ¼ cup water (60 ml);
- 1 tablespoon sugar;
- ½ teaspoon salt.
How to make chicken shawarma in the air fryer
- Cut the chicken thighs. Slice them into large strips of roughly the same size. Pieces that are too small will dry out quickly, so do not try to make them too thin.
- Mix the marinade. In a large bowl, combine the olive oil, lemon juice, minced garlic, cumin, coriander, paprika, turmeric, garlic powder, cinnamon, cardamom, salt, and black pepper.
- Marinate the chicken. Add the meat to the bowl and mix well. The spices should coat every piece. Refrigerate the chicken for at least 30 minutes. You can leave it for 4–6 hours, but I do not leave it overnight. Lemon juice gradually changes the surface of the meat, and after marinating too long, it can become soft and loose.
- Prepare the vegetables. While the chicken marinates, thinly slice the red onion and cucumber. Transfer them to a small bowl or jar.
- Make the quick pickle brine. Mix the vinegar, water, sugar, and salt. Stir until the grains are almost dissolved. Pour it over the vegetables and leave them on the counter for 20–30 minutes. During this time, the onion will soften, while the cucumber will keep a light crunch.
- Mix the garlic sauce. Combine the yogurt, mayonnaise, minced garlic, lemon juice, olive oil, and salt. Taste the sauce. If the garlic is very sharp, let it sit in the refrigerator for 15 minutes. The flavor will become milder.
- Preheat the air fryer. Set the temperature to 390°F (199°C). Shake off the excess marinade and arrange the chicken pieces in a single layer in the basket. Leave a little space for air to move between them.
- Cook the chicken. Cook for 7 minutes, then turn the pieces or shake the basket well. Cook for another 5–7 minutes. The internal temperature should reach 165°F (74°C).
- Brown the edges. Increase the temperature to 400°F (204°C) and cook the chicken for another 1–2 minutes. Keep an eye on the smaller pieces. They may brown before the others.
Tip. After cooking, do not put all the chicken straight into a deep bowl. Hot steam will quickly soften the browned edges. It is better to spread the pieces on a wide plate and let them rest for 3–4 minutes.
How to assemble the shawarma
I warm the flatbreads only briefly. A few seconds in a dry skillet is enough to make them soft and keep them from tearing when rolled.I s
pread a little garlic sauce in the center, then add the chicken, tomatoes, greens, and quick pickled vegetables. It is better not to add too much filling. Otherwise, half of it will end up on the plate after the first bite.
Sometimes I add another spoonful of sauce on top, while Lindy keeps it on the side and dips the edges of the flatbread into it. We still do not agree on which version is better. I do not think we ever will.
Shawarma originated in the Middle East but has long become familiar food in many countries around the world. At home, people rarely cook it on a large vertical spit, so the chicken is fried in a skillet, baked in the oven, or put on the grill. The air fryer works too. It quickly browns the marinated pieces, while the garlic sauce and pickled vegetables finish the dish inside the flatbread.
5. Air Fryer Chicken Parmesan Bites With Crispy Garlic Crumbs
Chicken Parmesan usually comes to the table as large cutlets covered generously with tomato sauce and cheese. But smaller pieces are much easier to share, pick up by hand, and serve as a hot appetizer. Especially when people are gathered around the table and no one wants to deal with a knife.
Tomato sauce and melted cheese quickly soften the coating. That is why, before serving, I sprinkle the chicken with separately toasted garlic Parmesan crumbs. They add crunch after the sauce and cheese are already on the chicken.
Ingredients
For 4 servings:
- 1½ pounds boneless, skinless chicken breasts (about 680 g);
- 1 tablespoon olive oil;
- ¾ teaspoon fine salt;
- ½ teaspoon black pepper;
- ½ teaspoon dried oregano;
- ½ teaspoon garlic powder;
- ½ cup panko breadcrumbs (about 30 g);
- ⅓ cup finely grated Parmesan (about 30 g);
- 1 large egg;
- ½ cup thick tomato pasta sauce (120 ml);
- ¾ cup grated mozzarella (about 85 g);
- 1 tablespoon chopped basil or parsley.
For the garlic crumbs
- ⅓ cup panko breadcrumbs (about 20 g);
- 1 tablespoon olive oil;
- 1 small garlic clove;
- 2 tablespoons finely grated Parmesan;
- a pinch of salt.
Tip. For this recipe, it is better to use coarse panko breadcrumbs. They create a more noticeable crust and do not turn into a dense layer around the chicken. Choose a thick tomato sauce without too much water. A sauce that is too thin will quickly soften the coating and drip to the bottom of the basket.
How to make chicken parmesan bites
- Cut and season the chicken. Cut the breasts into pieces about 1½ inches (4 cm) wide. Try to make them the same size so the smaller pieces do not dry out before the larger ones are ready. Transfer the chicken to a bowl, add the olive oil, salt, black pepper, oregano, and garlic powder, and mix well.
- Prepare the coating. Lightly beat the egg in one shallow bowl. In another, combine ½ cup panko and ⅓ cup Parmesan. It is better to grate the cheese finely so it mixes evenly with the breadcrumbs and does not form large clumps.
- Coat the chicken. Dip each piece into the egg, let the excess drip off, then roll it in the panko and Parmesan mixture. Gently press the crumbs on with your fingers so they stick, but do not compress the coating too firmly.
- Preheat the air fryer and arrange the chicken. Set the temperature to 390°F (199°C). Lightly grease the basket or line it with perforated air fryer parchment. Arrange the pieces in a single layer, leaving space between them. If the basket is small, it is better to cook two batches.
- Cook the chicken on both sides. Cook the pieces for 6 minutes. Carefully turn them with tongs, then cook for another 4–6 minutes. Do not shake the basket too hard, or some of the coating may fall off. The internal temperature of the chicken should reach 165°F (74°C).
- Add the tomato sauce and mozzarella. Spoon about one teaspoon of thick sauce onto each piece, then add a little cheese on top. Do not cover the chicken completely. The exposed edges will keep some of their crust. Return the basket to the air fryer for 1–2 minutes at 375°F (190°C) and remove it as soon as the mozzarella melts.
- Start the garlic crumbs. While the chicken is in the air fryer, heat the olive oil in a small skillet over medium heat. Add the finely grated garlic and stir for about 20 seconds. The garlic should not darken, or it may become bitter.
- Toast the breadcrumbs with Parmesan. Add the panko and a pinch of salt right away. Cook for 2–3 minutes, stirring constantly. Once the crumbs turn golden, remove the skillet from the heat and add the Parmesan. The leftover heat will melt the cheese slightly and help it blend with the breadcrumbs.
- Finish the dish. Transfer the chicken bites to a plate and sprinkle them with the garlic crumbs. Add basil or parsley. Spoon the crumbs over the chicken right before serving so they do not have time to absorb the tomato sauce and moisture from the cheese.
Tip. If the mozzarella is very wet, gently blot it with a paper towel. An even easier option is to use low-moisture shredded mozzarella. Extra liquid will make the coating soften quickly.
How to serve the chicken bites
I bring them to the table on a large plate and leave a little extra warm tomato sauce on the side. It is easy to dip the uncovered edges into it.
For dinner, you can add pasta, salad, or roasted vegetables. For a small group, I serve them without a side dish as a hot appetizer and place wooden skewers nearby. In that case, it is worth making extra garlic crumbs. They disappear before the chicken does.
The separate garlic Parmesan crumbs are not there just for decoration. They bring back the crunch right before serving, after the sauce and cheese have already softened the main coating. That small addition makes every bite more interesting.
6. Air Fryer Chicken Tacos With Chipotle Pineapple Salsa
Chicken tacos with pineapple salsa bring together ingredients that may seem too different at first. There is smoky chipotle, sweet pineapple, lime, red onion, and hot chicken. Combinations like these often move from small home kitchens into recipes that are later cooked far beyond their country of origin.
Chipotle is a ripe jalapeño pepper that has been dried and smoked. In Mexican cooking, it is added to marinades, soups, stewed meat, and sauces. For these tacos, I use chipotle in adobo sauce. The can usually contains whole peppers and a thick, spicy sauce. We will use both.
Ingredients
For 4 servings:
- 1½ pounds boneless, skinless chicken thighs (about 680 g);
- 1 tablespoon olive oil;
- 1 tablespoon adobo sauce from a can of chipotle peppers;
- 1 chipotle pepper in adobo sauce;
- 1 tablespoon lime juice;
- 1 teaspoon honey;
- 1 teaspoon ground cumin;
- ½ teaspoon garlic powder;
- ½ teaspoon dried oregano;
- ¾ teaspoon fine salt;
- ¼ teaspoon black pepper;
- 8 small corn or flour tortillas.
The pineapple salsa
- 1½ cups fresh pineapple, cut into small cubes (about 250 g);
- ¼ cup finely chopped red onion;
- 1 small jalapeño pepper;
- ¼ cup chopped cilantro;
- 1½ tablespoons lime juice;
- ¼ teaspoon salt.
For this recipe, you need chipotle peppers in adobo sauce, such as La Costeña Chipotle Peppers in Adobo Sauce, not dry chipotle powder. The canned pepper adds heat, smoky flavor, and a thick base for the marinade at the same time.
Tip. Divide the leftover peppers into small portions in an ice cube tray and freeze them. Once frozen, transfer the cubes to a bag. This way, you will not have to throw away an almost full can after using only one spoonful of sauce.
How to make chicken tacos with pineapple salsa
- Prepare the marinade. Finely chop one chipotle pepper and mix it with the adobo sauce, olive oil, lime juice, honey, cumin, garlic powder, oregano, salt, and black pepper. Start with one pepper. It is much easier to add more heat later than to remove it from a finished marinade.
- Marinate the chicken. Cut the chicken thighs into large strips and place them in the bowl with the marinade. Mix well so the sauce coats every piece. Refrigerate the chicken for at least 30 minutes. You can leave it for 3–4 hours. I usually do not leave it longer because the lime gradually changes the surface of the meat.
- Mix the pineapple salsa. Cut the pineapple into small cubes. Add the finely chopped red onion, jalapeño, and cilantro. Pour in the lime juice, add the salt, and mix. Leave the salsa for 15–20 minutes so the onion softens a little and the juice collects at the bottom of the bowl.
- Remove the extra liquid. Before assembling the tacos, stir the salsa again and drain some of the juice from the bottom. Pineapple continues to release moisture after it is cut. If you add everything from the bowl to the tortillas, they will quickly become soggy and start to tear.
- Preheat the air fryer. Set the temperature to 390°F (199°C). Arrange the chicken in a single layer in the basket. Do not pour all the remaining marinade over the top. A thin coating on the meat is enough, and extra liquid will stop the edges from browning.
- Cook the chicken. Cook the pieces for 7 minutes, then turn them with tongs or shake the basket. Cook for another 5–7 minutes. The internal temperature of the chicken should reach 165°F (74°C). Check the smaller pieces earlier so they do not dry out.
- Brown the edges. Increase the temperature to 400°F (204°C) and cook the chicken for another 1–2 minutes. Honey and adobo sauce darken quickly, so do not move too far away from the air fryer. You want a lightly browned surface, not a black crust.
- Let the chicken rest. Transfer it to a wide plate and leave it for 3–4 minutes. Then cut the larger strips into more convenient pieces. Do not pile the hot chicken into a deep bowl. The steam will soften the browned edges.
- Warm the tortillas and assemble the tacos. Heat them in a dry skillet for 15–20 seconds per side or place them in the air fryer for a few seconds. Add the chicken, pineapple salsa, cabbage, or avocado. It is better to serve the sour cream and lime on the side so everyone can add as much as they like.
Tip. If the pineapple is very ripe and sweet, add a little more lime and salt to the salsa. If it turns out sour, do not rush to add more juice. Mix all the ingredients first and let them sit for 10 minutes, then adjust the flavor.
How to serve the chicken tacos
I put the chicken, tortillas, and salsa on the table in separate bowls. Everyone assembles their own tacos. Lindy adds so much pineapple salsa that the tortilla barely closes. I start more carefully, then still add another spoonful on top.
I usually serve thinly sliced cabbage too. It does not need a separate dressing and helps hold the juice from the salsa. Avocado also works, but I slice it right before eating.
This is not an attempt to make the tacos unusual just for the sake of it. Sweet pineapple, spicy chipotle, and tart lime balance one another, while the chicken brings all these flavors together in one dish. That is why pineapple salsa is not just a topping here, but an important part of the tacos.
7. Air Fryer Chicken Drumsticks With Korean Gochujang Honey Shine
Chicken drumsticks with gochujang and honey are a good way to get familiar with this Korean paste. Gochujang is made from red pepper, fermented soybeans, and rice. It is added to soups, marinades, sauces, and rice dishes.
The paste already contains salt and a little sweetness, so I always taste it on its own before cooking. The level of heat can vary quite a bit between brands.
Ingredients
For 4 servings:
- 2 pounds chicken drumsticks (about 900 g);
- 1 tablespoon neutral vegetable oil;
- ¾ teaspoon fine salt;
- ½ teaspoon garlic powder;
- ¼ teaspoon black pepper;
- 2 tablespoons gochujang paste;
- 2 tablespoons honey;
- 1 tablespoon soy sauce;
- 2 teaspoons rice vinegar;
- 1 teaspoon sesame oil;
- 1 small garlic clove;
- ½ teaspoon finely grated ginger;
- 1 teaspoon water;
- 1 teaspoon sesame seeds;
- 2 tablespoons chopped green onions.
Tip. For this recipe, you need Korean gochujang paste, not dried pepper flakes or a ready-made dipping sauce. Different brands vary in heat. Taste a little paste from the tip of a spoon first. If it seems very spicy, use 1½ tablespoons and add a little more honey.
How to make chicken drumsticks with gochujang
- Dry the chicken. Pat the drumsticks dry on all sides with paper towels. Damp skin browns less evenly, and the oil and spices do not cling to it as well.
- Season the drumsticks. Toss the chicken with vegetable oil, salt, garlic powder, and black pepper. Gochujang and soy sauce also contain salt, so you only need a small amount at this stage.
- Cook the drumsticks. Preheat the air fryer to 380°F (193°C). Arrange the chicken in a single layer, leaving a little space between the pieces. Cook for 12 minutes, then turn the drumsticks with tongs and cook for another 10–12 minutes. If the basket is small, cook the chicken in two batches. Do not add the glaze yet.
- Mix the glaze. While the drumsticks cook, combine the gochujang, honey, soy sauce, rice vinegar, sesame oil, minced garlic, ginger, and water. Stir well until the thick paste is fully mixed in.
- Check the chicken. Measure the temperature in the thickest part of the drumstick without touching the bone. It should be close to 165°F (74°C). If the meat is not ready yet, leave it in the air fryer for a few more minutes without the glaze.
- Add the first layer. Brush the drumsticks with glaze on all sides using a pastry brush. Do not pour the sauce into the basket. You need a thin layer on the chicken itself, not a puddle at the bottom.
- Set the glaze. Return the drumsticks to the air fryer at 375°F (190°C) for 2 minutes. Then turn them over, brush on a little more glaze, and cook for another 1–2 minutes. Honey darkens quickly, so check the chicken often.
- Add sesame seeds and green onions. Transfer the finished drumsticks to a plate and let them rest for 3–4 minutes. Sprinkle with sesame seeds and green onions. You can warm the remaining glaze in a small saucepan and serve it on the side, but do not use any sauce that came into contact with raw chicken.
Tip. Dip the brush into the glaze a little at a time and apply several thin layers. One thick layer will run to the bottom and start to burn, while thin layers cling to the drumsticks better.
How to serve the chicken drumsticks
We make plain white rice with these drumsticks and quickly slice some cucumbers. Sometimes I mix the cucumbers with rice vinegar and a pinch of salt while the chicken is in the air fryer. Nothing more complicated is needed on the plate.
Lindy pulls the meat from the bone and puts it over the rice so all the glaze ends up there. I eat the drumsticks with my hands and always take too few napkins. You would think I would remember by now, but… no.
In Korean cooking, gochujang is as familiar a seasoning as mustard or ketchup is to many of us. A couple of spoonfuls of this paste give ordinary chicken drumsticks a completely different flavor, while the cooking does not become any more complicated.
8. Air Fryer Chicken Nuggets With Pretzel Crust and Ranch Dust
One day, there was an open bag of salted pretzels left in the pantry that no one wanted to finish. Lindy suggested crushing them and using them instead of regular breadcrumbs for chicken nuggets. The crust turned out saltier and more flavorful, and the bag was finally empty.
Since then, I sometimes save a few pretzels on purpose for the coating. The main thing is not to crush them too finely and to sprinkle the finished nuggets with a mix of dill, garlic, and onion as soon as they come out of the air fryer, while the seasoning still sticks well to the hot crust.
Ingredients
For 4 servings:
- 1½ pounds boneless, skinless chicken breasts (about 680 g);
- 2 cups small salted pretzels (about 100 g);
- ½ cup all-purpose flour (about 60 g);
- 2 large eggs;
- 1 tablespoon water;
- ½ teaspoon garlic powder;
- ½ teaspoon sweet paprika;
- ¼ teaspoon black pepper;
- 1 tablespoon neutral vegetable oil or cooking spray.
For the dry seasoning
- 1 teaspoon dried dill;
- ¾ teaspoon garlic powder;
- ¾ teaspoon onion powder;
- ½ teaspoon dried parsley;
- ¼ teaspoon fine salt;
- a pinch of black pepper;
- 1 tablespoon powdered buttermilk, optional.
Powdered buttermilk makes the seasoning taste more like familiar ranch dressing, but the recipe will still work without it. Once opened, keep the package tightly sealed and store it in a dry place.
Tip. Pretzels already contain salt, so there is no need to salt the chicken separately before coating it. Cook one test piece first. If it needs more salt, you can add some to the dry seasoning.
How to make pretzel-crusted chicken nuggets
- Cut the chicken. Cut the breasts into pieces about 1½ inches (4 cm) wide. Keep them similar in size, or the smaller nuggets will cook before the larger ones. Pat the meat dry with paper towels.
- Crush the pretzels. Put them in a sturdy bag and roll over them several times with a rolling pin. You can use a food processor, but do not turn the pretzels into flour. The mixture should still contain small pieces that will create a noticeably crunchy crust.
- Prepare three bowls. Add the flour to the first bowl and mix it with the garlic powder, paprika, and black pepper. In the second, whisk the eggs with one tablespoon of water. Pour the crushed pretzels into the third.
- Coat the nuggets. First, roll a piece of chicken in the flour and shake off the excess. Then dip it into the egg, let the extra drip off, and press it firmly into the pretzel crumbs. The coating should cover the meat on all sides.
- Cook the nuggets. Preheat the air fryer to 390°F (199°C) and lightly grease the basket. Arrange the nuggets in a single layer, leaving space between them, and lightly spray the tops with oil. Cook for 6 minutes, then carefully turn them with tongs. Do not shake the basket too hard, or the larger pretzel pieces may fall off.
- Finish cooking the nuggets. Cook for another 4–6 minutes. The internal temperature of the chicken should reach 165°F (74°C). If the coating is already dark enough but the meat is not done, reduce the temperature to 370°F (188°C) and add another couple of minutes.
- Mix the dry seasoning. While the chicken cooks, combine the dill, garlic powder, onion powder, parsley, salt, black pepper, and powdered buttermilk. Rub any larger pieces of dill between your fingers so the seasoning spreads more evenly over the nuggets.
- Season the hot nuggets. Transfer them to a wide bowl as soon as they come out of the air fryer. Add half of the dry mixture and toss gently. Taste one piece, then decide whether you need the rest of the seasoning. Pretzels from different brands vary in saltiness.
Tip. If the crumbs do not stick well, leave the coated nuggets on a board for 5 minutes before cooking. During this time, the egg will soak into the flour slightly, and the crust will be less likely to fall off when you turn the nuggets.
How to serve the chicken nuggets
I serve them with cucumbers, carrot sticks, and a simple yogurt sauce. Sometimes I just mix yogurt with lemon juice and a pinch of the remaining seasoning. Lindy prefers honey mustard and insists every time that it goes better with them. We still have not agreed.
You can refrigerate the cooled nuggets and reheat them the next day in the air fryer at 350°F (177°C) for about 4 minutes. The crust quickly becomes soggy in the microwave.
A pretzel coating is not a restaurant trick. It is something people make in ordinary American kitchens when there are no breadcrumbs around or they want to use up pantry leftovers. Sometimes the best recipe comes from ingredients you simply do not want to throw away.
9. Air Fryer Chicken Caesar Wrap Filling With Crispy Cheese Chips
Lindy especially loves the Parmesan pieces in Caesar salad and always picks out the ones that browned more than the others. That is why, for these wraps, I decided not to stop at grated cheese and made separate Parmesan chips instead.
Inside the tortilla, they stand out more than regular croutons. You can leave them in large pieces or break them down almost into crumbs. I usually do both, although a few whole chips rarely make it to dinner.
For the filling, you can use boneless, skinless chicken thighs or breasts. Thighs are juicier, while breasts cook a little faster. Choose the meat you usually buy for family dinners.
Ingredients
For 4 servings:
- 1½ pounds boneless, skinless chicken thighs or breasts (about 680 g);
- 1 tablespoon olive oil;
- 1 teaspoon garlic powder;
- ½ teaspoon sweet paprika;
- ½ teaspoon fine salt;
- ¼ teaspoon black pepper;
- 8 small flour tortillas;
- 1 small head of romaine lettuce;
- ½ cup Caesar dressing (about 120 ml);
- ½ cup finely grated Parmesan (about 45 g);
- 1 teaspoon lemon juice;
- extra Parmesan, optional.
For the cheese chips, you need finely grated Parmesan. Larger pieces melt unevenly, so it is better to grate the cheese yourself or use a pre-grated version without additives.
To keep the cheese from sticking to the basket, you will need perforated air fryer parchment, such as Air Fryer Disposable Paper Liners. Do not place an empty sheet in a running air fryer. It must be weighed down by cheese or another ingredient.
Ready-made Caesar dressing cuts down the prep time. If it is too thick, add a teaspoon of lemon juice or water and stir.
How to make chicken caesar wrap filling
- Prepare the chicken. Cut the meat into small, evenly sized pieces. Mix it with olive oil, garlic powder, paprika, salt, and black pepper.
- Cook the chicken. Preheat the air fryer to 390°F (199°C). Arrange the pieces in a single layer and cook for 9–11 minutes, stirring about halfway through. The internal temperature should reach 165°F (74°C). Transfer the chicken to a bowl.
- Prepare the parchment. Cut a sheet to fit the air fryer basket. If you are using regular parchment, make a few holes in it so the hot air can circulate.
- Make the cheese chips. Place the Parmesan in small piles, leaving space between them, and gently flatten them with a spoon. Cook at 350°F (177°C) for 4–6 minutes, until the cheese melts and turns golden around the edges. Check it more often toward the end because thin chips darken quickly.
- Cool the chips. Remove the parchment from the basket and leave the cheese for 5 minutes. The chips will be soft while hot but will firm up as they cool. Peel them off the paper and break a few into pieces for the filling.
- Prepare the salad. Slice the romaine into thin strips and dry it well. Mix it with the Caesar dressing and lemon juice right before assembling the wraps so the leaves do not become soggy.
- Warm the tortillas. Stack them and wrap them in foil. Place them in the air fryer at 320°F (160°C) for 3–4 minutes. Warm tortillas are easier to roll and less likely to tear.
- Prepare everything for assembling. Transfer the chicken, salad, and cheese chips to separate bowls. Place the extra dressing and Parmesan nearby.
How to serve the wraps
We usually place all the bowls on the table and assemble the wraps during dinner. I add more salad, while Lindy adds more chicken and a few large pieces of cheese chips. We leave the whole chips on a shared plate, although they never stay there for long.
You can cook the chicken ahead of time and keep it in the refrigerator for up to three days. Store the salad, dressing, and chips separately and combine them right before eating.
The cheese chips take only a few extra minutes, but they are the first thing everyone notices. Sometimes all it takes to find a new favorite dinner is changing one familiar detail.
10. Air Fryer Chicken Fried Rice Style Meal With Frozen Veg Shortcut
For this kind of dish, rice that has been cooked ahead of time and fully cooled works best. Fresh hot rice contains more moisture, so it quickly sticks together and becomes soft. I usually cook a little extra for dinner and keep the leftovers in the refrigerator until the next day.
There is no need to thaw the frozen vegetables in advance either. I warm them in the air fryer first to remove the extra moisture, then add the cold rice. This keeps the vegetables from making it soggy, and the prep still takes very little time.
Ingredients
For 4 servings:
- 1 pound boneless, skinless chicken thighs (about 450 g);
- 3 cups cold cooked rice (about 500 g);
- 2 cups frozen peas, carrots, and corn mix (about 300 g);
- 2 large eggs;
- 2 tablespoons neutral vegetable oil;
- 2½ tablespoons soy sauce;
- 1 teaspoon sesame oil;
- 1 teaspoon rice vinegar;
- 1 small garlic clove;
- ½ teaspoon finely grated ginger;
- ¼ teaspoon black pepper;
- 2 tablespoons chopped green onions.
For the eggs, you will need a small, shallow metal baking pan that fits inside the air fryer basket. It should not have any plastic or wooden parts. Before cooking, make sure there is enough space around the pan for the hot air to circulate.
A regular frozen vegetable mix without sauce or seasoning will work. There is no need to thaw it first. If the mix contains large pieces of broccoli or green beans, it is better to chop them a little after warming.
How to make chicken with rice and frozen vegetables
- Prepare the chicken. Cut the meat into small, evenly sized pieces. Mix it with one tablespoon of vegetable oil, one tablespoon of soy sauce, and black pepper.
- Cook the chicken. Preheat the air fryer to 390°F (199°C). Arrange the chicken in a single layer and cook for 8–10 minutes, stirring about halfway through. The internal temperature should reach 165°F (74°C). Transfer the cooked chicken to a large bowl.
- Warm the vegetables. Add the frozen vegetables to the empty basket and cook at 380°F (193°C) for about 5 minutes. Stir once so the extra moisture evaporates faster. Transfer the vegetables to the bowl with the chicken.
- Prepare the rice. Cold rice often sticks together in large clumps. Break them up with your hands or a fork so the grains separate more easily and heat evenly.
- Mix the seasoning. Combine the remaining soy sauce, sesame oil, rice vinegar, minced garlic, and ginger.
- Warm the rice. Mix the rice with the remaining tablespoon of vegetable oil and half of the seasoning. Transfer it to the air fryer basket and cook at 380°F (193°C) for about 6 minutes. Stir after 3 minutes. Then transfer the hot rice to the bowl with the chicken and vegetables.
- Cook the eggs. Lightly grease a small metal pan with oil. Crack in the eggs and stir them with a fork. Place the pan in the empty air fryer basket and cook for 3–4 minutes, stirring the eggs once halfway through.
- Combine everything. Break the cooked eggs into small pieces and add them to the bowl with the rice, chicken, and vegetables. Pour in the remaining seasoning and mix well.
- Warm the finished dish. Return the entire mixture from the bowl to the air fryer basket and cook for another 2–3 minutes at 380°F (193°C). Transfer it to plates, add the green onions, and only then taste it to see whether it needs more soy sauce.
Tip. Do not fill the basket with a thick layer. If your air fryer is small, it is better to warm the rice in two batches, then combine all the ingredients in a large bowl.
How to serve the dish
This rice can be served without a separate side dish. Sometimes I add a little green onion, sesame seeds, or a few drops of hot sauce on top. Lindy likes to put cucumber slices on the side, especially when I have added a little more soy sauce than usual.
The most important step in this dish is warming the frozen vegetables separately first so the extra moisture can escape. After that, you can mix them with the cold rice, chicken, and eggs without turning the whole dish into a soft, soggy mixture.
Share Your Own Finds
Over time, every family comes up with its own small tricks that make familiar food taste better or make cooking easier whenever possible. And often, those tricks turn out to be more useful than a long list of rules.
In our house, ideas like these usually come up on their own. We try a different sauce, cook the cheese separately, or use leftovers from the night before, and then we keep making that version again. That is how a real home kitchen comes together: not perfect, but completely your own.
Tell us in the comments which recipe you liked most, and share your favorite trick for cooking chicken in the air fryer. Your idea may become a useful discovery for other readers.