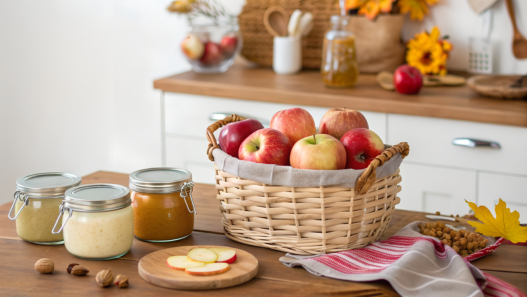

Fall is not just about golden leaves and cozy evenings, but also about baskets of apples that simply demand to be used right away. Recipes with apples have completely changed the game for me. And if before I thought that half of them would definitely end up in the compost, now I have a whole arsenal of tricks.
In this article, I’ll show you how to turn a fresh harvest into preserves, treats, and even drinks so that not a single apple goes to waste. We’ll prepare freezer pie fillings, apple peel syrup, and much more. I’ll share how I do it at home, the mistakes I’ve made, and the discoveries that worked out the best. And if you, like me, hate throwing food away — stay tuned, there will be plenty of ideas.
1. Freezer Pie Filling Prep (Ready in Under 20 Min)
Fall is the season of fresh apples and homemade baking. Our apple trees are always generous, and we simply can’t keep up with the harvest. And throwing food away is absolutely a no-go for me. So I came up with a little trick: I prep pie filling in advance and freeze it. When, a month or two later, I want to bake a pie, everything is ready — just roll out the dough and grab a bag from the freezer.
How I Make the Prep
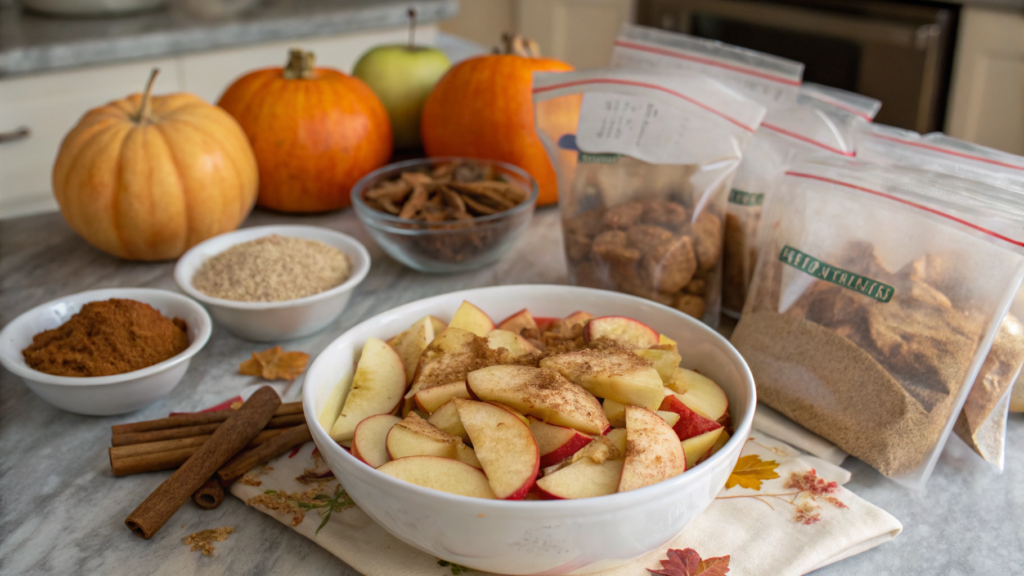
- Apple prep. I use about 8–10 medium apples (around 3 pounds / 1.3 kg). I peel, core, and slice them thinly. It’s important that the slices are about the same thickness so they cook evenly.
- Caramel-style mix. In a large bowl, I mix together:
-¾ cup sugar (150 g)
-2 tablespoons cornstarch
-1 teaspoon cinnamon
-a pinch of nutmeg
-2 tablespoons lemon juice (freshly squeezed!)
I coat the apple slices with this mix so that every piece is lightly covered.
- Quick heat treatment. I transfer the apples to a pot, add ½ cup water (120 ml), and bring it to a light boil. I cook them for 5–7 minutes, until the apples are just slightly softened but not falling apart.
- Cooling and freezing. I let the mixture cool completely, then transfer it into sturdy freezer bags with zip closure. I press out the air and lay the bags flat in the freezer — they take up less space and thaw much faster.
I’ve tested this: after 3 months the filling is almost indistinguishable from fresh. No brown color, and the flavor stays bright. One bag is the perfect amount for a standard 9-inch (23 cm) pie.
And this prep isn’t just for pies. It’s perfect for strudels, galettes, mini tarts, or even puff pastry hand pies — just pull the dough, add the filling, and bake.
Sometimes I simply put it in a baking dish, top with a crumbly mix of oats, butter, and sugar — and get a quick apple crumble that disappears from the table in no time.
2. Apple Peel Syrup for Pancakes & Cocktails
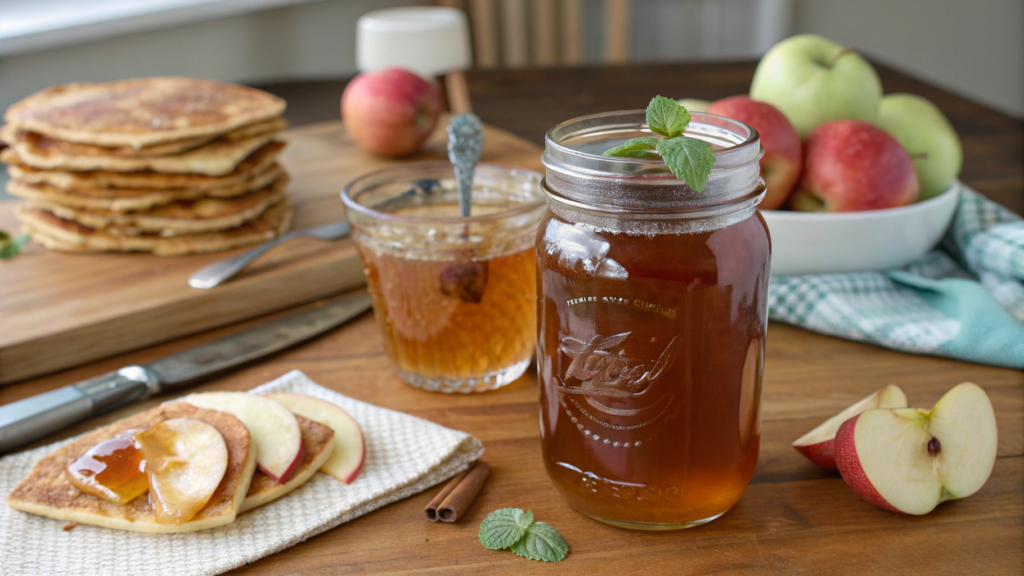
At first, I thought — what could you possibly make from apple peels? But then I stumbled upon an old American recipe for “peel syrup” and decided to give it a try. And now every time I peel apples for pie or preserves, I hear a little alarm in my head: syrup!
How to Make Syrup from Apple Peels
- Collect the scraps. After peeling, I usually end up with about 4–5 cups of apple peels (from around 8–10 apples). I also add the cores — just make sure to remove the seeds, since they add bitterness.
- Cook the base. I toss everything into a pot, pour in 5 cups of water (1.2 L), add a cinnamon stick, and bring it to a boil. Then I lower the heat and let it simmer for about 30 minutes, until the water is infused with the apple flavor.
- Add sweetness. I strain the liquid, send the pulp to the compost, and stir 2 cups of sugar (400 g) into the broth. I cook it another 10–15 minutes until the liquid thickens into a syrup.
- Final touch. For more depth, I add 1–2 tablespoons of lemon juice and sometimes a drop of vanilla extract. That’s it. I pour it into clean bottles.
This syrup is truly a keeper! I drizzle it over morning pancakes and oatmeal. Lindy loves to add a splash to fall bourbon cocktails. And if you mix it with sparkling water — you get an apple “soda” that even guests who aren’t into sweet drinks enjoy.
I store the syrup in swing-top glass bottles with airtight caps — the kind that can handle both heat and cold. Here’s the one I use: Estilo Swing Bottles Bonus Gaskets on Amazon. It keeps in the fridge for about a month, but honestly, it usually disappears much faster — especially in winter, when something warm and sweet with pancakes feels just right.
3. Core-to-Jelly Hack for Zero-Waste Preserving

It turns out that apple cores and peels hold the most pectin — and that’s the best friend of any jam or jelly. That’s how my favorite core-to-jelly hack was born — a way to turn scraps into a real delicacy.
Pectin is a natural thickener found in apples. The highest concentration is in the peels and the seed membranes. When you simmer them, you get a thick liquid that becomes the perfect base for jelly.
Step-by-Step Recipe
- Collect the cores and peels. I usually save them for a couple of days in the fridge in a container. You’ll need about 8–10 apple cores and the same number of cups of peels.
- Cook the extract. I place everything into a large pot, pour in just enough water to cover (about 6–7 cups / 1.5 L), and add the juice of half a lemon. I simmer it for 30–40 minutes, until the liquid starts to get slightly gel-like.
- Strain. The pulp goes to the compost (the chickens are happy with it too!), and I keep the liquid.
- Add sugar. For every cup of liquid, I add about ¾ cup sugar (150 g). Then I cook it over medium heat for 20–25 minutes.
- Finish. The jelly should “set” on a cold spoon. Once ready, I pour it into sterilized jars.
The flavor is light, the jelly is translucent and amber-colored. You can spread it on toast, stir it into oatmeal, or use it as a cake layer. Lindy loves to put a spoonful into hot tea — it tastes almost like a honey drink.
If you want brighter flavor and aroma, add a couple strips of orange peel or a cinnamon stick while cooking. For storage, I recommend jars with screw-top lids so the jelly keeps well.
4. 5 Ways I Used a Giant Apple Batch in 2 Days
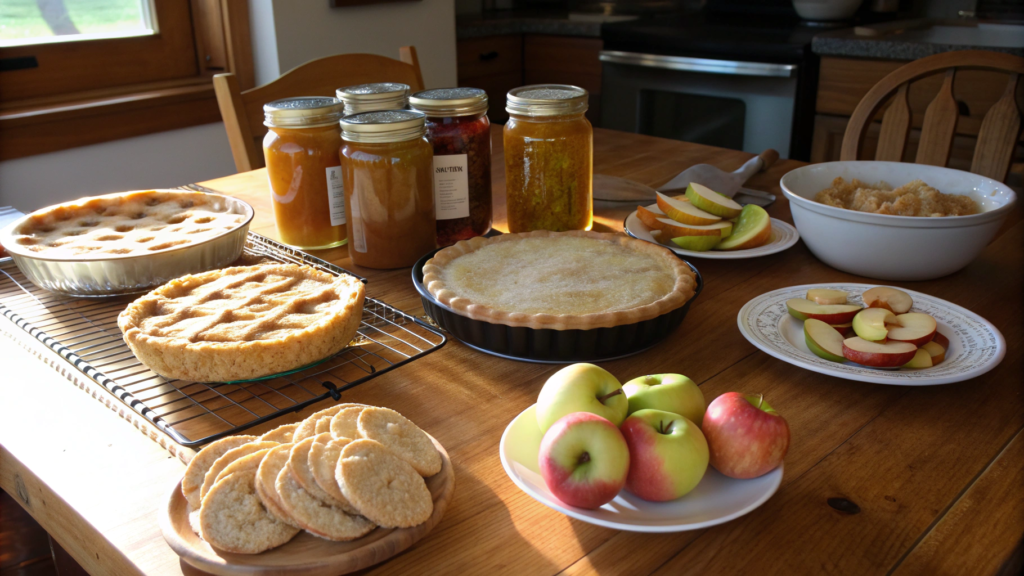
Sometimes apple trees decide to drop half their harvest in just one day. That’s exactly what happened to us last fall — and suddenly, under the tree, there was a real “apple meadow.” That’s when I challenged myself: how do you deal with that many apples in only two days? Here are my five tried-and-true ways.
1. Freezer pie filling bags
First, I tackled the prettiest apples. From them, I made several batches of frozen pie filling — the one I described earlier. It’s the perfect option when you don’t have time to bake right away but still want to save the flavor.
2. A giant pot of applesauce
The bruised apples went straight into applesauce. I peeled, chopped, and simmered them with a little water until soft. Then I blended them smooth — and ended up with a whole bucket of applesauce. We ate some by the spoonful (especially the neighbor’s kid who popped by), and I froze the rest in containers.
3. Dehydrated apple slices
Our dehydrator works full-time every fall. I sliced the apples thin, gave them a quick spritz of lemon juice, and let them dry. The result — a huge jar of apple chips for winter snacks and school lunches. If you don’t have a dehydrator, you can easily use the oven on a low setting.
4. Fresh-pressed juice
We dusted off the old juicer (honestly, that purchase proves its worth every year!). We got about 2 liters of pure apple juice. Some we drank right away, and the rest became the base for cider.
5. Baking experiments
Of course, I couldn’t resist baking. I made apple bread and a few trays of muffins. They disappeared first — Lindy laughed that I should’ve doubled the recipe from the start.
Those two days flew by in a blur. The kitchen turned into an apple lab, and the freezer into a mini storage unit. But the best part was knowing nothing went to waste and everything found a purpose.
If you want to try something similar, I recommend stocking up on storage containers and freezer bags. I use these Hefty Slider Freezer Gallon Count on Amazon.
5. How I Blanched and Froze Apple Slices for Later
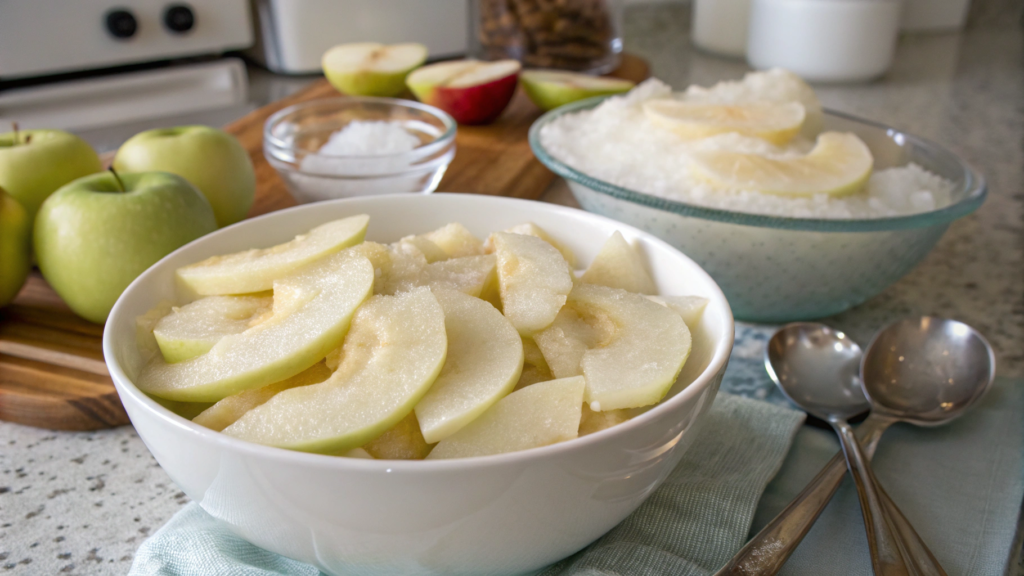
After one failed attempt at freezing fruit (and I was really upset then), I learned the golden rule: apples must be blanched before freezing. And now I’ll share exactly how I do it right.
Why blanch?
A short heat treatment helps “lock in” the flavor, preserve the texture, and stop the enzymes that make apples turn brown. After blanching, the slices stay bright and tasty even after six months in the freezer.
My step-by-step process
- Apple prep. I peel and slice apples into wedges about ½ inch thick (1–1.3 cm). Then I place them in a bowl of water with lemon juice (2 tablespoons lemon per 1 liter of water) to prevent browning.
- Boiling bath. I set a big pot of water on the stove. Once it boils, I drop in batches of apple slices (about 3–4 cups at a time) for just 2 minutes.
- Immediate cooling. I quickly move the apples into a bowl of ice water to stop the cooking process. This step is crucial — otherwise the apples will get soft.
- Drying and freezing. I lay the slices on a towel, gently pat them dry, then spread them out on a baking sheet in a single layer and freeze for 2–3 hours. After that, I transfer them into zip-lock freezer bags for storage.
One time, I got distracted and left the apples in boiling water for almost 10 minutes. They turned into half-puree and only worked for sauce. That’s why a timer is my best friend now. I always set it for 2 minutes, and no conversation can throw me off!
In winter, I pull out these slices for apple cake, crumble, or quick smoothies. Sometimes I just sauté them in butter with cinnamon and serve them over pancakes.
6. Fall Smoothie Packs with Fresh Orchard Apples
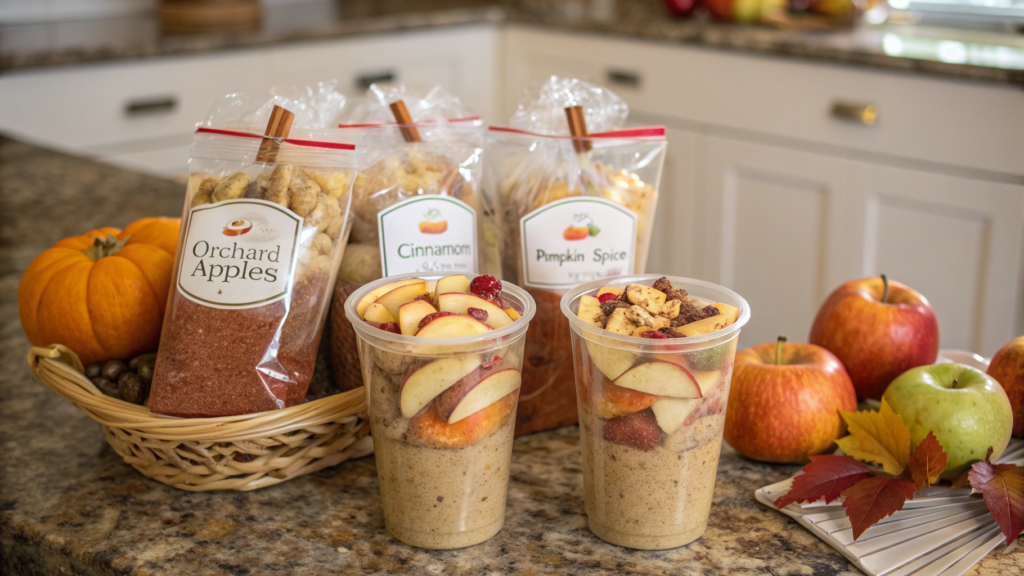
Apples in a smoothie? At first, it sounded strange to me too. But one day I tried it — and that was it, no turning back. They add a light sweetness, a creamy texture, and pair perfectly with fall spices. And the best part — if you prep smoothie packs in advance, mornings get so much easier.
How I Assemble Smoothie Packs
1. Base. In each pack, I add 1 cup of blanched apple slices (about 120 g). This is the foundation that holds the flavor.
2. Combinations. I love to play with mixes. Here are a few of my favorites:
- Apple + carrot + ginger. Refreshing and energizing! I add a pinch of cinnamon, and it turns into a “liquid pie.”
- Apple + banana + spinach. Yes, this is a green smoothie that even kids drink without fuss.
- Apple + pumpkin + cinnamon. I use roasted pumpkin cubes, and it gives such a cozy fall taste.
- Apple + pear + rolled oats. A perfect option for a hearty breakfast.
3. Extras. Sometimes I toss in a tablespoon of flax or chia seeds — they boost both texture and nutrition.
I store the packs in sturdy freezer containers or zip-top bags. In the morning, I grab one, pour in 1 cup of oat milk (my favorite) or yogurt, and blend. Done.
One time, I prepped a dozen of these packs and forgot about them until mid-winter. When I finally pulled one out and blended apple with carrot, the whole kitchen instantly smelled like fall. Lindy said: “Looks like we have a little time machine in the freezer.” And she was right — just one sip brought us straight back to those sunny autumn days in the garden.
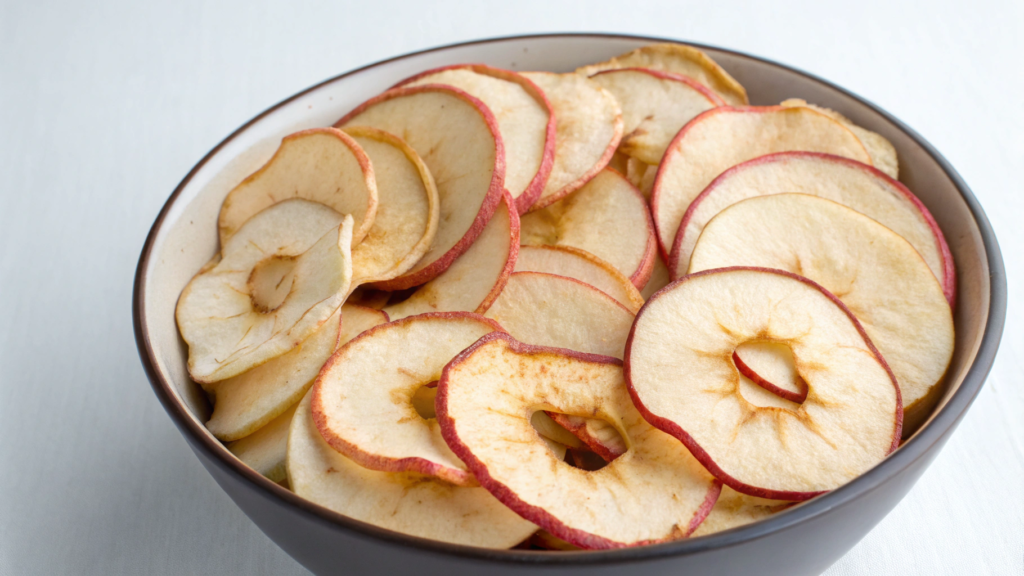
7. Dehydrated Apple Snacks for School Lunches
This is the kind of prep that’s perfect for school lunches, road trip snacks, or even as a topping for oatmeal. And the best part — it’s simple to make, no complicated recipes required.
How I Make Apple Chips
- Prep. I take 6–8 medium apples. I peel them (though leaving the skin on is even healthier!) and slice them into thin rounds, about ⅛ inch (3 mm) thick. To keep them from browning, I dip the slices quickly into water with lemon juice: 2 tablespoons per liter of water.
- Seasoning. Sometimes I leave them plain, but more often I sprinkle them with a mix of 1 teaspoon cinnamon + 2 tablespoons sugar. It tastes just like childhood.
- Drying. In the dehydrator, I set 135°F (57°C) and dry for 8–10 hours, until the slices turn crisp. You can also use the oven: set it to the lowest temp, leave the door slightly open, and dry for 5–6 hours.
- Storage. I keep them in airtight jars or bags. These jars work great: Ball Mouth Half Pint Mason on Amazon.
How We Use Them
- In school lunchboxes — instead of store-bought bars.
- On hikes and road trips — light, easy to pack.
- In oatmeal or granola — just a few slices, and breakfast already tastes like fall.
Last year, I made a big batch, filled up a jar, and left it on the shelf. A week later, it was already half empty. Turns out Lindy was sneaking them at night while watching a show. She admitted: “They crunch just like chips, only without the guilt.”
8. Cinnamon Apple Meal Prep Oatmeal Packs
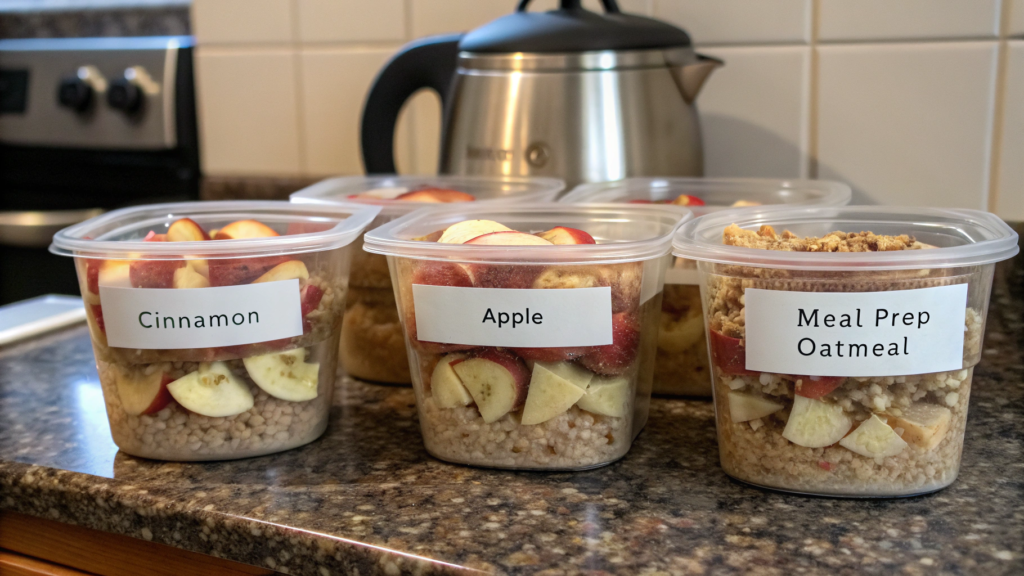
Mornings in our house are always a blur: coffee is bubbling, the dog needs to go out, Lindy is looking for her keys, and I’m wondering how to squeeze in breakfast. That’s when my apple cinnamon oatmeal packs save the day. I prep them for the whole week — usually in the evening with a cup of tea. And in the morning, all that’s left is to boil the kettle.
How to Assemble the Packs
1. Dry base. In each pack I add:
- ½ cup quick oats (40 g)
- 1 teaspoon cinnamon
- 1 tablespoon brown sugar (can swap for honey when cooking)
- a pinch of salt
2. Fruit accent. I toss in a handful of finely chopped dried apple pieces. You can use homemade ones from the dehydrator, or store-bought — for example: Brothers All Natural Fuji Apple Crisps on Amazon.
3. Extra touches. Sometimes I add walnuts or pecans, chia seeds, or raisins — all depending on my mood. I make sure not to pack everything too tightly, leaving a bit of air so the mix shakes together easily.
In the morning, just pour the contents into a mug or bowl, add 1 cup of hot milk or water (240 ml), cover with a plate for five minutes, and breakfast is ready. If I want a real fall vibe, I top it with a couple slices of fresh apple or a drizzle of honey.
9. Quick Apple Cider Base with Scraps Only
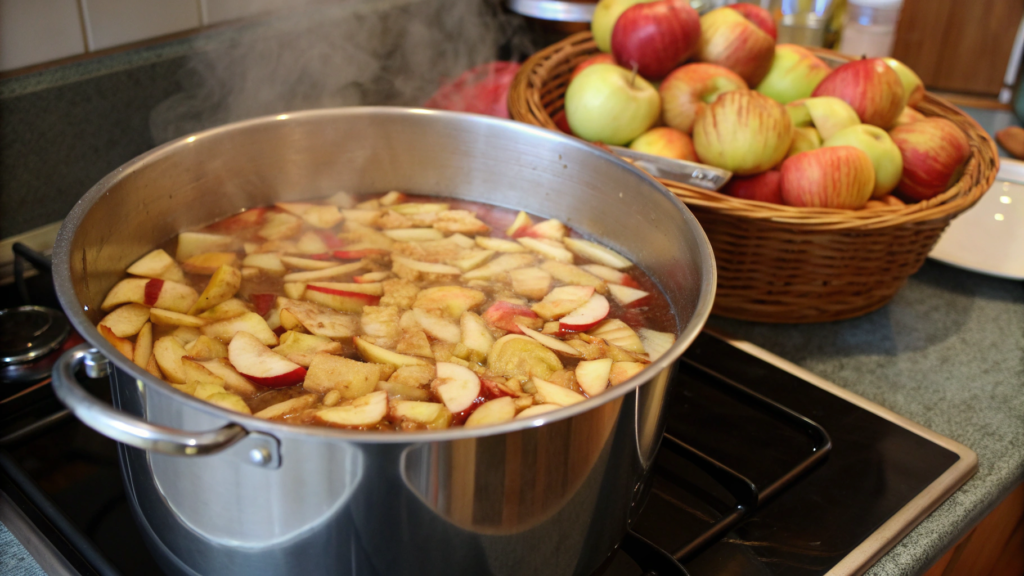
After processing a whole basket of apples, you’re left with mountains of peels and cores. But those scraps are exactly what I use to make the base for my “quick cider.” This isn’t the kind of cider that ferments for months, but rather a concentrated apple brew that you can use in many ways: as a hot drink, a sauce base, or even in cocktails.
How I Make the Base from Scraps
- Collect the apple scraps. I usually keep a container in the fridge and toss in everything: peels, cores (without seeds!), and even chunks of “ugly” apples. You’ll need about 8–10 cups of scraps (around 1.5 kg).
- Cook the base. I move everything into a large pot, add 10 cups of water (2.3 L). Then I throw in 2 cinnamon sticks, 3–4 cloves, and ½ teaspoon ground ginger.
- Simmer. I bring it to a boil, then reduce the heat and cook covered for 45 minutes. The house fills with such an aroma that it makes your head spin!
- Strain. I send the pulp to the compost, and pour the liquid into a jar. You can add sugar or honey to taste, but I usually leave it plain — it’s more versatile this way.
How to Use It
- Heat it up, add an orange slice and a cinnamon stick — and you’ve got a warming “tea.”
- Mix with sparkling water and a drop of honey — and there’s your homemade apple soda.
- Use it as a base for cocktails or marinades.
If I make a big batch, I pour the base into jars with airtight lids and keep them in the fridge for up to a week. I also freeze part of it in ice cube trays — super handy to add to tea or smoothies later.
10. Slow Cooker Applesauce Using Just Ugly Apples
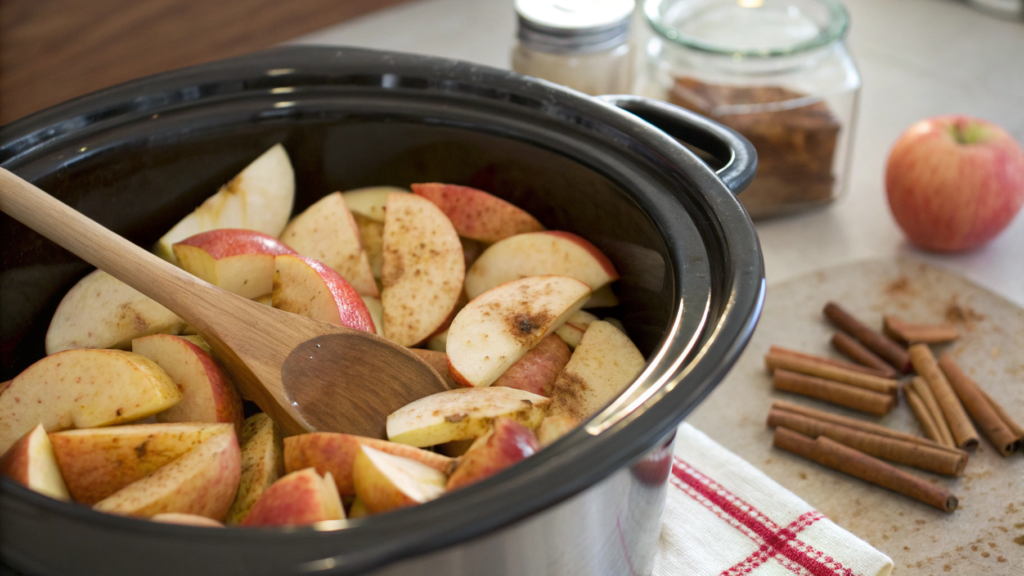
We all have those “ugly” apples. The ones with spots, bruises, crooked sides. Usually, they’re left until the very end — and then half of them sadly end up in the compost. But that’s a mistake! These apples are actually the best for making homemade applesauce. In the slow cooker, they soften slowly and turn into the creamiest puree.
How I Make Applesauce in the Slow Cooker
1. Prep. I take about 5–6 pounds of apples (around 2.5–3 kg). I peel them, core them (sometimes I even leave the skin on since it blends in easily later), and cut them into large chunks.
2. Cooking. I place the apples into the slow cooker and add:
- ½ cup water (120 ml)
- 2–3 tablespoons lemon juice
- 1–2 teaspoons cinnamon (to taste)
- a pinch of salt
I cover with the lid and cook on low for about 6 hours or on high for 3 hours.
3. Finish. Once the apples are soft, I blend them until smooth. You can also leave it chunky — that’s delicious too. If the apples are sweet, no sugar is needed. But sometimes I stir in 2–3 tablespoons of honey or brown sugar.
You don’t need to stand at the stove or stir constantly. You can make a large batch at once, and the applesauce stores beautifully — up to a week in the fridge, or up to 6 months in the freezer.
How We Use It
- Spread on toast instead of jam.
- Stirred into oatmeal or yogurt.
- Used as a natural fat substitute in baking (replaces part of the oil and sugar).
I usually divide the sauce into freezer containers or jars.
Share Your Apple Ideas!
I’ve shared how we handle the flood of apples on our homestead — from turning “ugly” apples into sauce to making elegant peel syrup for cocktails.
But every garden and every kitchen is different. I’d love to hear what you do with your apples after harvest.
Do you have a family recipe that’s been passed down for generations? Or maybe a simple trick that saves you from apple overload? Drop it in the comments — let’s build a whole collection of ideas so that this year, not a single apple goes to waste.