When you don’t have any beds, a greenhouse, or even a patch of normal land, it seems that planting vegetables and greens “isn’t for me.” But with a DIY Bucket Gardening, it absolutely can be.
And if you’ve long wanted to try growing something, but didn’t know where to start, a bucket can be a great start. It’s simple, accessible, and doesn’t require much experience or space.
In this article, I’ve collected 10 ideas that we actually use on our plot. Everything has been tested in practice — and works even in difficult conditions.
No romance — just a real, proven, and cheap way to grow food with your own hands.
1. 5-Gallon Bucket Garden That Grows 3x More Veggies
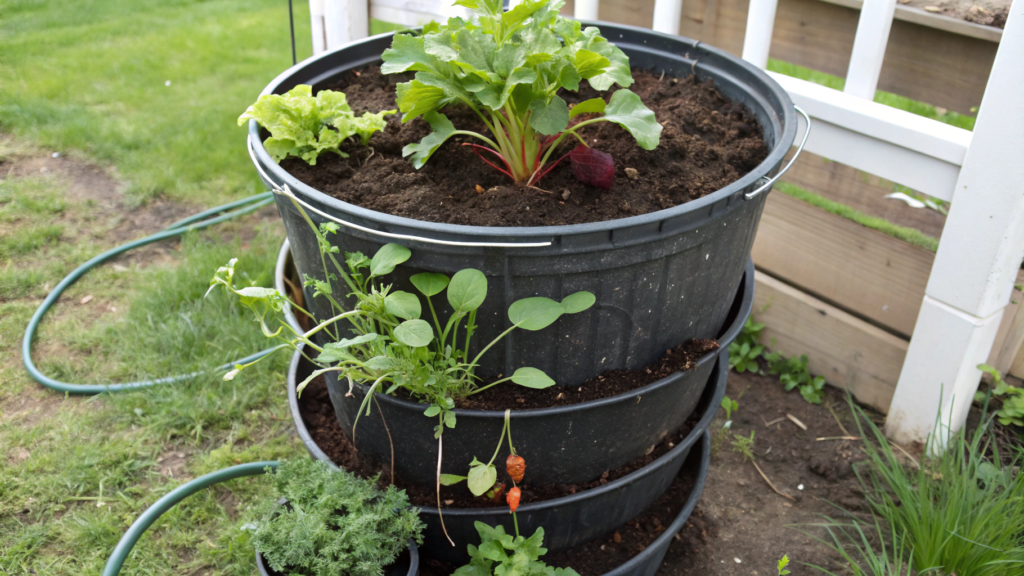
Well, it’s a regular construction bucket, and three times the yield, and it really works. It’s not some magical fertilizer or a state-of-the-art greenhouse. It’s all about how you use the space, the soil layers, and the proximity of the plants.
Why it works: the principle of triple harvest
- Root vegetables (carrots, radishes, beets) feel great on the bottom level of the bucket.
- Greens (spinach, arugula, lettuce) grow on the top layer.
- Climbing or climbing plants (nasturtium, beans) hang down the sides or climb up the support.
And all this is in one bucket. These are, in fact, three tiers of the ecosystem in one container.
How to make (our personal tried and tested method)
You will need:
- 5-Gallon food-grade plastic bucket with a lid.
- A screwdriver with a 6 mm attachment
- Small crushed rock or gravel
- Compost, peat moss and vermiculite (or just high-quality garden soil)
- Seeds or seedlings: Root crop (carrot, beetroot), Greens (spinach, lettuce), Climbing or hanging plant (nasturtium, bush beans)
- Optional: a small support or ring for tomatoes
Step by step
- Make drainage. Turn the bucket over and drill 10-15 holes at the bottom and on the sides from the bottom. Without drainage – there are no normal roots.
- Fill the bucket completely with soil. The mixture should be loose and breathable. Don’t forget to put 5 cm of drainage (crushed rock or pebbles) on the bottom of the bucket and drill holes at the bottom.
- Plant in layers. Make holes for:
the bottom layer (root crops). Use your finger, a peg or a spoon and make holes about 8-10 cm deep – this will be your “first floor“. Put carrot or beetroot seeds there and carefully fill them with the same loose soil.
On the surface – plant greens (spinach, lettuce, arugula). Just scatter the seeds and lightly sprinkle with soil by 1 cm.
Along the edges of the bucket – plant something cascading or climbing. For example: nasturtium, beans, mini-pumpkin. They will either go up the support or hang down.
- Water wisely. Water until water appears from the drainage holes – and that’s it, that’s enough. We water every other day, but it all depends on the weather.
- Sun + care. Put the bucket where it gets at least 6 hours of direct sun. We have it by the chicken coop – there’s enough light, and the chickens help with pests.
Advice. Don’t flood the bucket with water! Seriously. My first bucket turned into a salad swamp because I watered it “with love” every day. Let the drainage do its job.
Also – turn the bucket every couple of days so that all the plants get light, especially if you have climbing plants – they like to dominate.
The idea of vertical and multi-layered sowing is not a handmade idea based on intuition. Research shows that joint planting and vertical gardening actually increase yields and reduce the risk of pests (Sustainable Agriculture magazine, 2018).
2. Turn a Single Bucket into a Raised Bed for Herbs

A simple 19-liter bucket turns into a mini-bed that doesn’t require crawling on your knees, doesn’t get overgrown with weeds, and can be placed anywhere – even on the porch, even near the kitchen. It is she who gives you all the greens you want – basil, dill, cilantro, thyme, mint …
What you will need
- 5-gallon food-grade plastic bucket (about 19 liters)
(you can take a ready-made bucket on Amazon – proven, durable)
- Screwdriver and 6 mm nozzle
- Crushed rock or gravel – for drainage
- Soil mixture:
- 1 part compost
- 1 part peat
- 1 part vermiculite or coconut fiber
- Seedlings or herb seeds to taste
- Optional: decorative edging, paint or signs with plant names
How to do it step by step – simple and without unnecessary things
- Make drainage. Turn the bucket over and drill 10-12 holes at the bottom. Without this, the roots will rot.
- Do not skip: drainage is like insurance for plants.
- Add gravel. Pour a 5 cm layer of fine gravel or expanded clay on the bottom. This is necessary to prevent water from stagnating.
- Fill with soil. Mix compost, peat and vermiculite (or use ready-made soil for seedlings). Fill to the very top – the bucket will act as a raised bed.
- Plant herbs. Make holes with your finger or a spoon and place the seedlings. If you sow seeds, spread them over the surface and sprinkle a little.
Combine herbs with similar requirements:
- Love the sun: basil, rosemary, thyme
- Love moisture: mint, dill, cilantro
- Love partial shade: parsley, lemon balm
- Put in the right place. The best place is closer to the kitchen: you’ll be surprised how often you’ll cut a bunch of greens right before dinner.
This improvised bed works great because the bucket is a closed environment where you can easily control humidity, acidity, and light.
Herbs don’t need a deep root system, so the height of the bucket is more than enough for them. It also heats up faster than the bed, which is especially valuable in the spring and fall.
Tips from us
- Don’t plant mint with other herbs – it’s an aggressor, quickly taking over all the space. Plant it separately.
- Water in the morning – the herb likes moisture, but not dampness. The bucket can overheat in the sun, and watering in the morning is ideal.
- Fertilize – once every 2 weeks with a weak solution of compost tea or fish emulsion.
By the way, you can paint the bucket, wrap it in jute or add chalk inscriptions – you get cute and useful “pots” that will liven up any area.
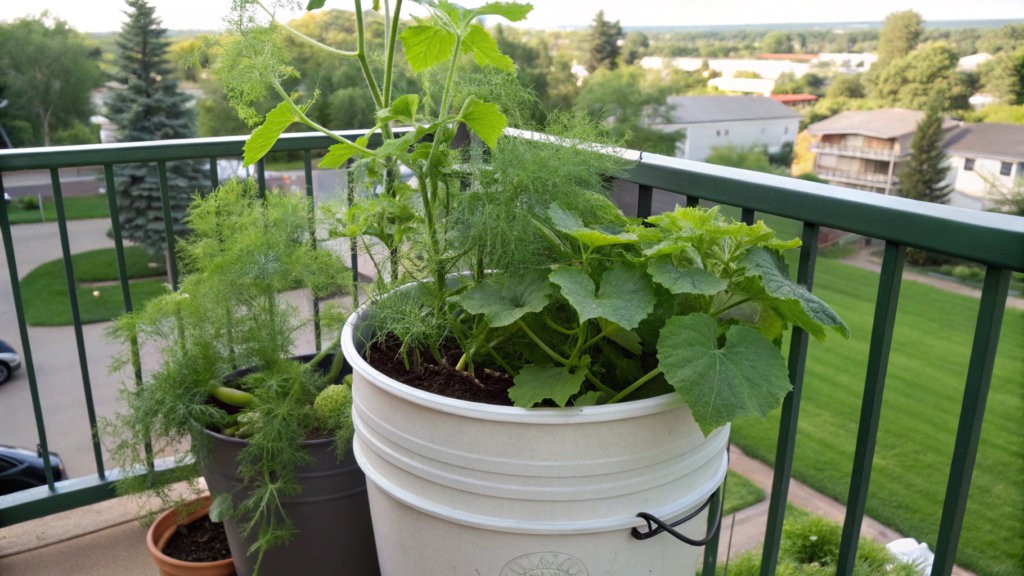
3. The Easiest Vertical 5-Gallon Garden Tower

When you only have a couple of square meters, a vertical tower made from an ordinary bucket becomes a real salvation. And it looks cool!
What is this anyway? It’s a 5-gallon bucket (about 19 liters) with pockets in the walls, and plants growing not only on top, but also on the sides.
It looks like a strawberry tower or a vertical organizer. Only instead of socks – basil, lettuce and even peppers.
What you will need
- 5 gallon plastic food bucket
- Plastic knife or heat gun (or just a soldering iron)
- Drill and 6-8 mm drill bit
- Scissors, gloves
- Gravel, soil (mixture: compost + peat + vermiculite)
- Seeds or seedlings (lettuce, spinach, strawberries, basil, dill, parsley)
- Optional: watering tube (I will explain below)
How to make
- Prepare the bucket. Rinse, remove all stickers. Turn it upside down and drill 10-12 drainage holes.
- Make side pockets. This can be done in two ways:
Method 1 (pretty, but you need a heat gun or soldering iron)
- Mark 3 pockets in a row on the walls of the bucket, a total of 3-4 rows in height.
- Heat the plastic sections with a hair dryer or soldering iron, and then press something round (like a ball) inward — you’ll get a “tongue” that will bend back and become a shelf for the plant.
Method 2 (easy). Make pocket-shaped slits with a knife, about 7–8 cm long and slightly tilted upward.
- Bend the plastic outward, forming a small pocket. You can reinforce it from the inside with a plastic lid or corner.
Important! Do not make pockets lower than 10 cm from the bottom — otherwise they will suffer from stagnant water.
- (Optional) Install an internal watering tube. Take a PVC pipe or a bottle with holes and place it in the center of the bucket. This will help to evenly water the entire tower from top to bottom.
- Fill with drainage and soil. At the bottom – gravel (5 cm), then – soil to the very top.
- Plant the plants. At the top edge – bush or voluminous herbs: basil, lettuce, mint. In the side pockets – greens, strawberries, dill, spinach.
What can be planted in such a tower?
| Plan | Where is it better to place |
| Lettuce, spinach | On the sides, in the lower pockets |
| Basil, dill | At the top of the bucket |
| Strawberries | Sides + top – loves the sun |
| Parsley | Anywhere, it grows everywhere |
Pros of such a tower. It takes up little space, but produces a lot of greenery. Very easy watering and looks aesthetically pleasing – you can even paint the bucket white or terracotta.
Care tips. Water every day in the heat, because the soil in the bucket dries out quickly. Especially if the plant is in a side pocket. Feed once every 2 weeks – liquid compost tea or a weak solution of fish emulsion.
Do not plant strawberries in the very bottom part, they need a lot of light!
4. How to Grow Potatoes in a 10-Gallon Bucket

I grew up in a family where potatoes were planted exclusively in rows – as expected. But potatoes grow just fine in a bucket too, if you do everything right.
What you need
- 10-gallon bucket (about 38 liters)
- Seed potatoes (not from the supermarket – get specialized ones)
- Garden shovel or just your hands 🙂
- Drainage: gravel or broken brick
- Soil:
1 part compost
1 part coconut substrate or peat
1 part sand or loose garden soil
- Mulch: straw, grass clippings or hay
How to plant
- Make drainage. Drill several holes in the bottom of the bucket (don’t be stingy – at least 10 of them). Pour 5 cm of gravel on the bottom. This will protect the tubers from rotting.
- Fill the bucket a third with soil. Not to the brim! We need space for “backfilling” later – this is important.
- Prepare the potatoes. If you have a large tuber, cut it into pieces with 2-3 eyes (let it dry for a couple of hours). If it is small, plant it whole.
- Put the tubers. Put 2-3 pieces of the tuber on the ground (eyes up) and cover with a layer of soil 8-10 cm.
- Water and wait for sprouts. In 1-2 weeks, sprouts will appear. When they grow to 15-20 cm, cover them with soil again, leaving only the top. This is the main trick!
Why? Because potatoes form on a stem, which you cover a little each time. The higher you “mound” – the more potatoes.
You will add soil 3-4 times per season until the bucket is full.
Taking care of potatoes in a bucket
| What to do? | How often/when? |
| Watering | Regular, but without waterlogging |
| Adding soil | When the sprouts grow to 15-20 cm |
| Feeding | Once every 2-3 weeks (ash, compost tea) |
| Mulching | After the last adding — straw/grass |
| Protection from the sun | In hot weather — slightly shade |
Tips. Don’t overdo it with watering. Potatoes love moisture, but hate standing water. If it rains in the middle of summer — cover the bucket so as not to rot the crop. You can insert a vertical marker (sticks with marks) — and see how much more to add.
When to harvest? As soon as the tops start to turn yellow and wither, it’s time to dig! Just turn the bucket upside down like a cake and collect the tubers straight from the surface.
Research shows that container growing potatoes increases yields by 30–50% if you properly add extra soil and regulate watering (Agronomy Journal, 2020).
Controlling moisture and air in the container creates ideal conditions — especially if you don’t have a traditional garden bed or just want to try a mini version.
5. DIY Self-Watering Bucket Planter

If you’ve ever forgotten to water your plants in the heat, you know how it ends.
That’s why I decided to make a homemade auto watering system based on a regular 5 gallon bucket (about 19 liters).
And, believe me, it really works. I no longer run around with a watering can every night. And yes, the plants water themselves, and don’t flood.
It’s a simple system where you have a reservoir of water at the bottom of the bucket, a layer of soil above it, into which the water rises through wicks or capillary contact and the plant gets moisture from below as needed.
What you need
- 2 plastic 5 gallon buckets (one slides into the other)
- Plastic cup, net or can (for support inside)
- PVC pipe or any irrigation tubing (about 1.5-2 cm diameter)
- Drill and drill bit
- Knife or soldering iron
- Soil mix and plant
How to assemble an auto irrigation bucket
- Prepare the “reservoir”. Take the bottom bucket – you don’t need to drill the bottom in it. This will be the water reservoir.
- Prepare the second bucket (plug-in bucket). Drill several holes in it in the bottom and on the sides at a height of 5-6 cm (so that excess water can escape).
- Cut one hole in the side (at the bottom) – there you will insert a tube for pouring water.
- Install the wick. In the center of the bottom (inner bucket) put a plastic jar or net with holes (this will be the “support”), wrap with cloth or add strips of cloth inside as wicks.
- You can use old cotton rags, jute cord, or felt strips – they’re great for pulling moisture upward.
- Insert the tube. Insert the PVC pipe into the hole on the side – you’ll use it to refill the tank without removing the top bucket.
- Put it all together. Insert the “soil bucket” into the reservoir bucket. Make sure the wicks touch the water at the bottom. Fill the top with soil, planting the plants as usual.
How it works
- You pour water through a tube into the bottom bucket.
- The water rises through the wicks to the roots of the plant, giving just the right amount of water.
- The roots don’t get flooded as they would with regular watering because they take up the moisture themselves.
- Plants are less likely to get sick, less stressed from drying out, and in general – they seem to be calmer, honestly.
What can be planted in such a bucket?
| Plant | Commentary |
| Tomatoes | They like even moisture, ideal for |
| Basil | Humidity + heat = a riot of flavor |
| Sweet peppers | Perfectly grows with auto irrigation |
| Salads | Without overdrying not bitter |
| Cucumbers | Especially in the heat – the bucket saves the harvest |
Checked. In hot summers, the water is kept 3-4 days without refilling. A fully filled tank is about 3 liters of water. Plants get less root rot because they are not flooded from above.
We made such buckets both for the greenhouse and outdoors – it always works.
6. Lowe’s Bucket Hack: Build a Raised Bucket Garden for Under $10
One day we went into Lowe’s “just for screws”… and came out with 4 buckets at $2 each.
That’s when I first made the most budget-friendly raised bed on our porch – no boards, no screws, and no fuss.
You end up making a simple, durable, knee-high raised bed out of a regular 5-gallon bucket (19 liters) and all for $10 or less – including soil and a couple of little things.
Suitable for herbs, bush tomatoes, peppers, onions and garlic,flowers and medicinal herbs.
What to buy
| Material | Where to get / Price (approx.) |
| 5 gallon food bucket | $3 at Lowe’s or Walmart |
| Gravel or small rocks (1 liter) | Free or $1 |
| Soil mix (2-3 kg) | $3-4 |
| Compost/fertilizer (optional) | $1-2 |
| Permanent marker or name sticker | $0.5 (optional) |
Or use what you already have: an old bucket, bags of soil, ashes from a campfire – you know the drill.
How to assemble – step by step
- 1. Make drainage holes. You turn the bucket upside down. With a drill or nail make 10-15 holes at the bottom and 4-5 more on the sides at the bottom.
This is critical: without water drainage – a swamp, not a bed. - 2. At the bottom – gravel. A layer of 3-5 cm. This creates an air cushion and does not let the water stagnate at the roots.
- 3. Backfill the soil. A mix of:
- 50% compost
- 30% coconut fiber or peat
- 20% garden soil or perlite
Fill almost to the top, leaving 3-5 cm to the edge – to water comfortably.
- 4. Plant your favorite plants. We had: basil, cherry tomatoes, thyme. You can plant seedlings or sow seeds at once.
What is good about this method:
- Mobility – you can move it anywhere. Need more sun? Move it to a sunny window.
- Control – you can see how it’s growing, you can easily change the soil.
- Cheap and surly – especially if you compare it to store-bought beds on legs.
- You can make several at once and assemble your microgarden in an evening.
Lifehack. Cut a piece of soil bag and stick it on the side like a sign. Write down what is planted.
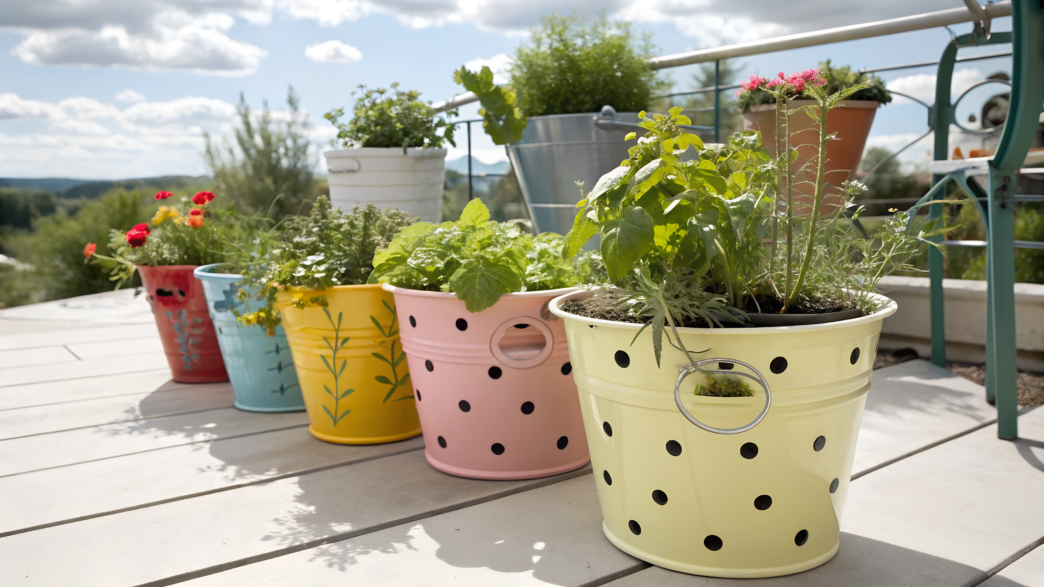
7. Create a Galvanized Bucket Herb Garden

This project was born by accident. I bought a nice galvanized bucket “for decoration”, and the next morning I was transplanting basil into it. And then mint, parsley, dill... settled there. And now this bucket garden has become our favorite mini vegetable garden by the porch.
What you need
- Galvanized bucket (5-10 liters)
We take 10-liter – they hold 2-3 types of herbs. - Gravel or crushed stone
- Soil mix
- Herb seeds or seedlings
- Drill or nail
- Marker, twine, signs (optional)
How to assemble
- 1. Make drainage holes. From the bottom of the bucket, make 5-6 holes 5-6 mm in diameter.
- 2. At the bottom – gravel. A layer of about 3-5 cm. This is drainage. You can use: broken bricks, coarse sand, expanded clay, pebbles.
- 3. Backfill the soil. The usual soil mixture for vegetables or universal garden soil is suitable. It is better if it will be with compost. Do not fill to the edges of 3-4 cm – so that water does not overflow over the top.
- 4 Plant herbs – but not all of them!
Here’s how we do it so that the plants do not interfere with each other:
- Basil + dill + parsley
– the classic three, get along perfectly. You can plant in sectors in the same bucket. The key: cut back the basil regularly – it grows upwards quickly and shades out the others.
- Thyme + rosemary
– two sun-loving guys. They love warmth, they love dryness. If you have a sunny spot, this is their corner.
- We always plant mint separately!
I kid you not, it’s aggressive, puts roots out to the sides and takes over everything.
- Cilantro (if you like)
Plant in the penumbra, water regularly. And be prepared for it to “go into bloom” quickly. But what a flavor!
Tips. Do not transplant plants too densely – they need space. Don’t forget that most herbs like sun for at least 5-6 hours a day. Regular harvesting gives you more fresh herbs.
Care:
| What to do? | How often |
| Watering | Every day in the heat, otherwise – according to the situation |
| Fertilizing | Once every 2 weeks with compost tea |
| Cutting / harvesting | Regularly, especially basil and dill |
| Shading | Only in the heat (mint does not like the heat) |
We, for example, put buckets like this along the barbecue area – with basil, thyme and parsley. Now you don’t have to go anywhere when cooking. You just lean over …
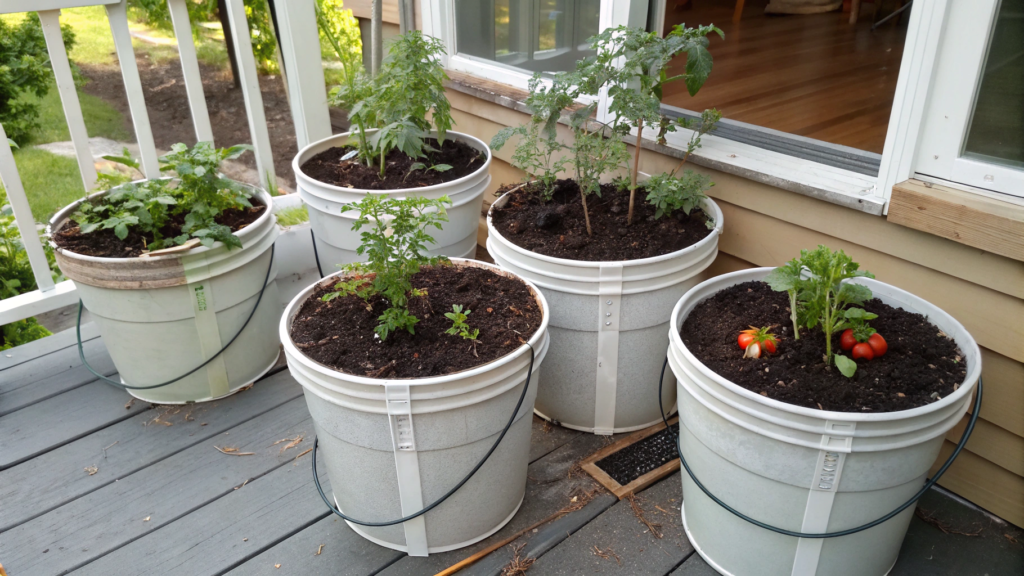
8. Backyard Depot Bucket Garden Plans

Sometimes you just want to take a ready-made plan, make it work, and have it all work. This is exactly what this bucket garden plan turned out to be, which I spied on Backyard Depot and adapted for our site.
What is a bucket garden anyway?
It’s not just one bucket of lettuce. It’s a group of 5-10 buckets, placed and organized so that:
- it’s convenient to water (water doesn’t run onto the paths)
- each bucket gets enough light
- they don’t get in each other’s way (and kids, and chickens)
- and so that everything looks neat, and not like it’s been renovated.
Where to place it?
You’re not building a separate bed – you’re creating a garden right on concrete, on boards, on gravel, on a patio, in a former parking lot – anywhere!
The main thing is to choose a place with at least 6 hours of sun per day.
In our case, it was a place near the barn where there used to be boxes of firewood. Now it’s a mini-farm.
Don’t put them close together, like dumplings. Leave 30-40 cm between each one so that:
- it’s convenient to water
- there’s no shadow between the buckets
- you can walk and take care of each plant
For example, we laid out 3 buckets in rows and made a path of boards between them. Cheap and very convenient.
How many buckets and what kind?
It’s best to start with 5. Here’s how we distributed them:
- A bucket of cherry tomatoes
- A bucket of cucumbers (on a support)
- A bucket of herbs (basil, dill)
- A bucket of lettuce and spinach
- A bucket of peppers (hot or sweet – your choice)
All buckets are the same, 5-gallon (about 19 liters), with drilled drainage holes and a gravel base.
Watering
At the start, you can simply buy a large watering can with a long spout – and water in the morning while everyone is sleeping. Water once a day in the heat, once every 2-3 days in the cool.
Tricks from experience. Buckets can be raised on bricks or boxes – less bending, better drainage, warmer for the roots. And it’s good when each bucket has a tag with the name of the crop, handwritten.
9. Grow Tomatoes in 5-Gallon Buckets Without a Cage

You take a regular 5-gallon bucket (about 19 liters), it is mobile, convenient and you grow one tomato bush in it, which does not creep to the sides, does not break, without a bulky cage.
Yes, everything is possible.
What do you need?
- A bucket with holes in the bottom – a regular 5-gallon plastic, food-grade bucket.
- Gravel or expanded clay on the bottom.
- Soil: loose, nutritious, with good drainage. We usually mix compost + coconut + a little ash.
- One bush of a low-growing tomato variety. For example: Bush Early Girl, Roma, Tiny Tim.
- And most importantly – the right support, instead of a cage.
What is the secret of cage-free growing? The fact that the cage is just a way to hold the stem in an upright position.
But it can easily be replaced with other, more flexible and beautiful solutions:
1. One central stake
The simplest.
Stick a wooden stick or bamboo pole about 1 meter high directly into the bucket, next to the seedlings, while the soil is still loose.
As it grows, tie the stem with soft fabric or twine, not too tightly.
We use old T-shirts – cut into strips and tie them like grapes.
2. Hanging from above
If the bucket is near a wall, fence or pergola – pull the cord from top to bottom and let the tomato go along the cord. It wraps itself – you just need to guide it a little.
This is how our cherry tomatoes grew last year – without any cages, only on a rope. And it looked very neat.
3. Triangular support made of three branches
Stick three wooden sticks or branches into the ground along the edge of the bucket and tie them together at the top like a “tent”. You get a mini-support that holds the tomato, even if it is spreading.
The main thing is not to overload the plant. One bush – one bucket.
A few observations from experience
- Water in the morning to avoid fungus.
- Don’t be stingy with compost – tomatoes like it “fatter”.
- Cut off the side shoots so that the bush does not run wild and turn into a jungle.
- Mulch is a must. We use straw, hay, shredded paper. Without it, the bucket dries out quickly.
There are three buckets on our veranda now: one with tomatoes, another with basil, and the third with pepper.
The tomato grows along a bamboo stick, and every morning we “smooth” it — tie up a fresh branch, remove the lower leaves. And when the first fruits start to turn red… wow. All the fatigue disappears as if by magic.
10. The Ultimate Bucket Garden for Beginners
When we were just thinking about gardening, all I knew about it was the smell of a cucumber from the market and how dill looked at my grandmother’s. But you have to start somewhere.
And I started with one simple 5-gallon bucket.
Why is a bucket the perfect start?
- It’s cheap (you can buy one for a couple of dollars or even find it somewhere in the corner of a barn).
- It’s mobile – you can move it if the sun suddenly “went away”.
- It’s easy to control watering and soil composition.
- You don’t need a plot, a garden bed, special equipment. Even a balcony will do.
- And also… when you see the first sprout coming out of the ground – it’s exciting. Seriously.
Start with one or two simple and grateful plants. Here are some really proven ones:
- Lettuce or spinach – they grow quickly, are not capricious.
- Basil or dill — the result is immediately visible, plus it smells nice.
- Radish or green onions — grow in 3-4 weeks.
- Low-growing cherry tomatoes — a little more difficult, but so much joy!
Important! Do not plant everything at once. One bucket — one type of plant.
How to make your first bucket
- Take a bucket (about 19 liters) — a regular food bucket. You can paint it, decorate it — it’s all up to you.
- Drill holes in the bottom to let the water drain. This is protection against rotting.
- Pour some crushed stone, expanded clay or pebbles on the bottom — drainage.
- Pour in loose, nutritious soil (you can buy ready-made soil in a bag).
- Plant seeds or seedlings.
- Water — and put in the sun.
- Wait. Observe. Smile every time you see a little sprout.
Things to remember:
Water in the morning, don’t overwater, just moisten
If the sun is scorching – shade, move.
Watch the leaves. If they are wilting – this is not a reason to panic, but a reason to try to slightly change the care.
Gardening is not a hobby “for grandmothers”. This is life. Joyful, simple, a little dirty and very tasty. And when the first greenery grows – you will understand why we love it so much.
Where to start — and what to try first
If you want to try a bucket garden, you don’t have to do everything at once. Start with one idea that is closer to you — maybe with lettuce, with tomatoes, or just with herbs.
One good experience will give more than ten articles read. And then you yourself will understand what you want to plant in the next bucket.
Share your successes in the comments, I’m glad to know how things are going for you!