
Sometimes, your Back Patio Ideas start to feel a little too familiar. The table, chairs, and potted plants are all in their usual places, but the space hasn’t changed in ages. You’re ready for something fresh and exciting—just without the hassle or expense of a major renovation!
I’ve put together 10 unexpected patio makeover ideas that will help you see your familiar outdoor space in a whole new way. Some will take a little work, while others can be done in just a weekend.
Lindy and I spend so much time in the garden that our patio has long felt like an extension of our home. We can have breakfast here, relax after work, or invite friends over for dinner. And I’m always interested in finding new ways to make this space more comfortable and beautiful.
1. Budget-Friendly Farmhouse Patio Upgrade

A farmhouse-style patio feels like the backyard of an old country home, where wooden furniture sits alongside flowers in clay pots, galvanized watering cans, and woven baskets. You don’t need anything expensive, perfectly painted surfaces, or matching furniture sets. In fact, plenty of old things can be put to good use!
You can give your patio a makeover on a small budget. Lindy and I always have some old wooden piece that we hate to throw away. And sometimes all it takes is a little restoration to make it useful again.
1. How to set up your patio
Picture a small patio with a wooden table, a few chairs, and a long bench against the wall. Clay pots filled with flowers line the fence, old wooden crates holding plants sit near the door, and a ceramic pitcher with a bouquet of garden flowers stands on the table.
Start with the dining area, since this is where family and friends can gather. For a medium-sized patio, a rectangular wooden table about 4–5 feet (120–150 cm) long is a good choice. If space is limited, place the table closer to the wall, with a bench on one side and chairs on the other. This will leave more room to walk around.
Set aside one corner for plants and gardening supplies. Place a few wooden crates of different heights against the wall, arrange flowers in terracotta pots on top, and put an old galvanized watering can nearby. You can also attach hooks to the wall for gardening tools you actually use.
Don’t crowd the walls and walkways with too many pots, crates, and other things. Leave some open space so you can bring out an extra chair or set down a basket of vegetables you’ve picked from the garden.
2. What details to add
Start with the furniture. If an old wooden table or bench looks worn, check the fasteners, sand down the surface, and apply a protective finish suitable for outdoor use. You can keep the natural wood color or paint the furniture white, gray, or a muted green.
Then bring in a few details you’d typically find around a farmhouse.
- Galvanized watering cans and metal buckets. You can keep an old watering can next to the flowers so it’s always handy when you need to water them. A metal bucket can also work as a vase for a bouquet of garden flowers. Sunflowers, dahlias, or daisies would look especially beautiful. You can place the bouquet near the bench or by the patio entrance.
- Wooden crates. Two or three old crates can make a low plant stand against the wall. It’s better to place plants in separate pots with drainage holes inside the crates rather than fill the crates directly with soil. That way, the wood has less contact with damp soil. Make sure to secure the crates if you’re stacking them.
- Terracotta pots. Choose a few different sizes and plant pelargoniums, rosemary, thyme, or lavender in them. These plants love sunny spots, although their exact growing requirements depend on your climate.
- A woven basket with a lid. You can place it next to the bench to store a small throw blanket or cushions. For an uncovered patio, it’s better to get a synthetic rattan basket with a water-resistant inner container. A regular woven basket with a lid won’t protect fabrics from rain, so you’ll need to bring it indoors.
- Plaid or striped cushions. These are a great choice for a wooden bench and chairs. Look for cushions made with fabric designed for outdoor use.
- And don’t forget the lighting. String lights with warm white bulbs above the dining area and a couple of metal lanterns with LED candles near the bench will let you enjoy pleasant evenings on the patio.
Check your shed or garage, or visit a nearby flea market. Maybe an old wooden bench or galvanized watering can that someone was about to throw away will turn out to be exactly what your patio was missing.
Lindy and I love inviting friends over for dinner and spending time outdoors. We often stay at the table long after we’ve finished eating, drinking tea and chatting about anything and everything. That’s why it’s important to us to have comfortable seating for all our guests on the patio and enough light when it starts getting dark.
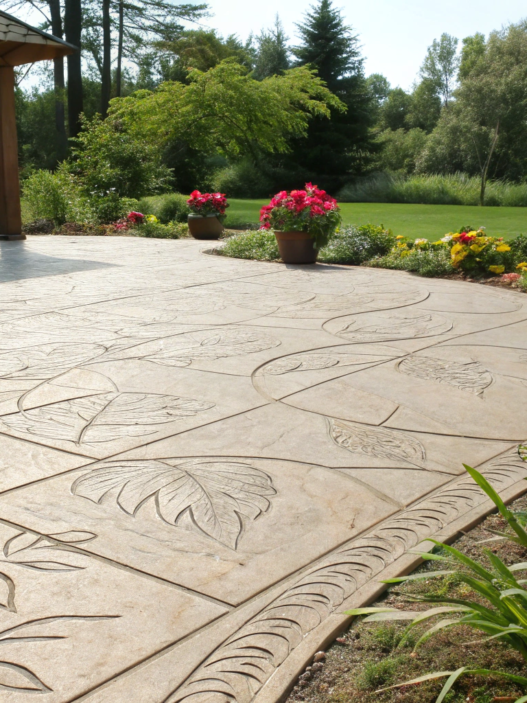
2. Concrete Chic: Minimalist Patio Surfaces

A minimalist patio with concrete flooring can look very modern without expensive furniture or lots of decorative details. Picture a smooth, light gray patio, a low outdoor sofa, a couple of armchairs, and a few large plants around the edges. Simple shapes, minimal colors, and plenty of open space.
When properly installed, concrete flooring works well for outdoor patios, stands up to rain and temperature changes, and usually only needs occasional cleaning for everyday maintenance.
There are special outdoor concrete stains and coloring products if you want to change the color, but they won’t fix cracks or other serious damage. When choosing a finish, make sure the surface won’t become slippery after rain.
How to design a minimalist patio
For this look, light gray concrete with a matte, slightly textured surface is a great choice. Straight joints can divide the patio into large squares or rectangles, creating a simple geometric pattern.
The key to minimalism is not filling every inch of the patio with furniture and flowerpots. It’s better to choose a few things you really need and decide where they’ll go from the start.
- Simple outdoor furniture. A low sofa with a black metal frame, two armchairs, and a rectangular coffee table. Choose pieces with straight lines, without carved details or bright patterns.
- A limited color palette. Two or three main shades are enough. For example, gray concrete, black metal, and light beige cushions. Natural wood also looks beautiful with this style.
- Large plants instead of lots of small pots. You can place two or three large planters with ornamental grasses or shrubs around the edges of the patio. Large rectangular outdoor planters work well for this. Choose sturdy ones with drainage holes.
- Open space. Arrange the sofa and armchairs around the coffee table, leaving enough room to walk around. There’s no need to fill every empty corner with furniture.
- Patio lighting. Lights with simple geometric shapes work well here. If the patio is next to the house, you can install wall lights with warm lighting. For a separate patio in the garden, choose sturdy outdoor lights near the seating area and low pathway lights along the walkway.
- Concrete flooring pairs beautifully with a green lawn and flower beds. For example, you can plant ornamental grasses or low-growing shrubs along one side of the patio. Green plants will stand out beautifully against the gray concrete.
By the way, you don’t have to stick to light gray. Dark gray concrete or a surface with a subtle stone texture also works for a minimalist patio. Light-colored furniture looks beautiful against dark concrete, while simple, solid-colored armchairs and tables pair nicely with textured surfaces.
Smooth concrete flooring, furniture with simple geometric shapes, and a restrained color palette — that’s exactly how I picture a modern minimalist patio. Lindy and I love spending time outdoors and inviting friends over, so comfort matters just as much to us as appearance. And there’s no reason you can’t have both.
3. Covered Pergola Comfort Zone

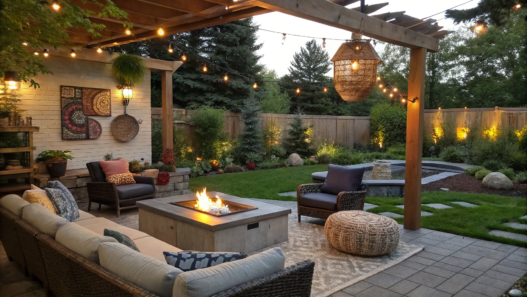
A patio with a covered pergola lets you create a real living room right in your garden. You can put a comfy sofa, a couple of armchairs, and a small table under the cover and relax in the shade even on a hot summer day. And with a roof that keeps the rain out, you won’t have to head inside because of a little rain.
Lindy and I spend a lot of time in the garden, and in summer, we sometimes wish we had a shady spot where we could sit down with a cup of coffee or a book. A covered pergola is perfect for that, especially if you set up the space underneath almost like a regular living room.
How to set up a patio under a covered pergola
First, decide how you want to use this space. Comfortable lounge furniture is great for relaxing, while a large table and chairs work better for family meals.
- Choose a pergola with the right roof. If you don’t have a pergola yet, you can buy a ready-made wooden or metal structure. If you already have one, choose a suitable roof covering.
- Polycarbonate panels let daylight through and protect against rain. On the sunny side, tinted panels can provide more shade.
- A retractable fabric canopy lets you control how much shade you get. If you want protection from rain, you’ll need a waterproof model, and you should retract the canopy in strong winds.
- A metal roof provides permanent shade and protection from rain.
- Adjustable aluminum louvers let you control how much sunlight comes through. Some systems also keep rain out when the louvers are closed.
If you’re adding a roof to an existing pergola, make sure the frame and fasteners can handle the extra weight.
- Create a comfortable seating area. Under the pergola, you can place a comfy two- or three-seater sofa, a couple of armchairs across from it, and a small coffee table in the middle. There’ll be enough room for evening tea and hanging out with friends. Choose furniture made for outdoor use and cushions with removable covers you can wash.
The floor under the pergola can be concrete, pavers, or wooden decking. The important thing is that water doesn’t pool on it after rain and the surface isn’t slippery. - Hang outdoor curtains on the sides. These are helpful if the afternoon sun shines directly under the pergola roof. They’ll also give you a little privacy from the neighbors. You can hang light-colored curtains on tracks between the posts and pull them open whenever you want more sunlight and fresh air.
Outdoor Pergola Curtains are a good option. Just choose fabric that can handle moisture, and make sure there are ties or other fasteners to secure the curtains at the sides. Otherwise, they’ll keep blowing around in strong winds. - Think about lighting. For evenings under the pergola, string lights with warm white LED bulbs are a great choice. You can run them along the beams and secure them with special hooks or clips.
The main thing is to choose string lights rated for outdoor use and make sure the outlet has a weatherproof cover and GFCI protection. If there’s no electricity nearby, battery-powered lights are another option. Solar-powered lights can work too, as long as they get enough sunlight to charge during the day. - Plant flowers around the pergola. You can place a few large flowerpots next to the posts and plant climbing plants in the ground nearby. For example, clematis with its large flowers. It’ll need a trellis or another support for the vines to climb.
You don’t have to let climbing plants cover the entire pergola. A few flowering shrubs near the posts and some pots of flowers are enough to surround the seating area with greenery.
Lindy and I love having friends over for dinner, and we often end up staying up late together. Under a covered pergola, you can keep enjoying the evening even if it starts raining a little. And with comfortable furniture and good lighting, you really don’t feel like going back inside…
4. Small Space Lounge Layout

Even on a small patio, you can create a complete lounge area with comfortable seating, a table, and plants. The key is arranging the furniture so you don’t have to squeeze between chairs and flowerpots.
How to set up a small patio
First, measure your patio and mark where the entrance, steps, and path to the garden are. Then decide how many people will usually spend time here. There’s no point trying to fit a large dining table, a sofa, and several armchairs if there simply isn’t enough space.
- Choose your main seating area. Place a compact two-seater sofa or a wooden bench with soft cushions along one side of the patio. If the space is square, you can use a small corner sofa to seat more guests without taking up the middle of the patio.
A great option is a storage bench with a compartment under the seat. You can keep gardening supplies inside, and models with a water-resistant compartment can also hold cushions and throw blankets. Just make sure the lid opens easily without hitting other furniture. - Choose a small table. For a two-seater sofa, a round coffee table about 18–24 inches (46–61 cm) in diameter works well. You can place it in front of the seating area while leaving enough legroom.
If you don’t have guests over very often, you can get Outdoor Nesting Tables. One table usually fits underneath the other, and when you need extra space for cups or plates, you can pull them apart. - Keep a clear walkway. Arrange the furniture so you can easily walk from the house to the garden or reach the pathway. Ideally, leave about 3 feet (90 cm) for the main walkway if the patio is large enough.
Remember to consider not just the size of the furniture, but also the space in front of the sofa where people stretch their legs or stand up. So check the dimensions of each piece before buying. - Use walls and railings for plants. On a small patio, flowerpots can quickly take up all the available space. Instead of placing several large containers on the ground, you can attach planters to the railing or put a narrow plant stand against the wall.
For example, you can grow thyme, oregano, or other herbs in a sunny spot. Lindy and I often use fresh herbs in our cooking, so I especially love plants we can pick straight from the patio for dinner. - Think about lighting. A wall light near the door or a few small solar-powered lanterns around the edges will let you use the patio in the evening. If you have suitable supports, you can also hang outdoor string lights without taking up any floor space.
A few things to keep in mind
Don’t buy a matching furniture set until you know your patio’s measurements. Even a sofa that looks small might be too deep, and armchairs with wide armrests can take up more room than you expected.
Folding outdoor chairs can be a good option for a narrow patio. You can bring them out when friends come over and store them in the shed or house the rest of the time. But I wouldn’t replace all your furniture with folding chairs if you plan to relax here every day. For longer evenings, comfortable seats with backrests and cushions are still much nicer.
When Lindy and I invite friends over, we want everyone to have a comfortable place to sit, even on a small patio. That’s why a little corner with a comfy sofa and table can easily become our favorite spot for evening conversations. A small patio may have less furniture, but every piece can be genuinely comfortable.
5. Paver Patterns That Wow

Simple patio pavers can completely change the look of your patio if you choose an interesting laying pattern. For example, you can lay rectangular pavers in a herringbone pattern, alternate horizontal and vertical rows, or create a geometric design using pavers of different sizes.
I love the classic herringbone pattern made with rectangular concrete pavers in gray or sandy shades. This pattern looks beautiful both on a small patio next to the house and on a spacious patio with a dining table.
How to design a patio with patterned pavers
Start by choosing a pattern. It will affect not only how your patio looks but also how many pavers you’ll need to cut during installation.
- Choose a laying pattern. There are several popular options for patios.
- Herringbone. Rectangular pavers are laid at right angles to each other, creating a repeating zigzag pattern. You can use pavers in two similar shades or stick to a single color.
- Basketweave. Pavers are laid in pairs, alternating between horizontal and vertical directions. The result is a pattern that looks like a woven basket. Terracotta or sandy beige pavers look beautiful in this pattern.
- Running bond. Pavers are arranged in rows, with each row offset from the one before it, just like traditional brickwork. This is one of the simplest patterns.
- Mixed-size paver pattern. By alternating square and rectangular pavers, you can create an interesting geometric design. It’s easier to use ready-made sets of different-sized pavers designed to fit together.
To be honest, the herringbone pattern is my favorite. Any furniture looks great on it.
- Choose your paver color. Gray pavers work well for a modern or minimalist patio, while sandy, beige, and terracotta shades are often used in Mediterranean and rustic designs.
- You can combine two similar shades to highlight the paving pattern. But it’s better not to use too many colors, or the surface will look too busy.
- Create a border around the patio. You can lay a row of pavers in a different shade around the perimeter. For example, add a dark gray border around a light gray herringbone pattern. It will highlight the laying pattern and visually separate the patio from the lawn or flower bed.
During installation, make sure to use edge restraints as well so the pavers don’t shift apart over time. - Choose patio furniture. A wooden table and chairs work well for a dining area, while a small sofa and a couple of armchairs with a coffee table are great for relaxing. Arrange the furniture so everyone can sit comfortably and move around the patio easily. It’s better to skip a large outdoor rug so you don’t cover up the beautiful paver pattern.
What to consider before laying pavers
Before laying the pavers, try arranging a few rows of your chosen pattern on a flat surface. This will help you see how the pattern looks, check the color combination, and figure out where you’ll need to cut the pavers.
If you’re planning a complex geometric pattern, it’s best to calculate how many pavers you’ll need in advance, with a little extra for cutting.
Lindy and I love having dinner outside, inviting friends over, and relaxing after working in the garden. So for us, the patio is first and foremost a place where we spend a lot of time. And it’s great when even the paving becomes part of the garden’s design. A beautiful paver pattern can completely change the look of a familiar patio, don’t you agree?
6. Apartment Balcony Patio Glow-Up

For many people, the balcony gradually turns into a storage space, even though it could be a place to have breakfast outdoors, read, or relax after work. You don’t need to completely redo the space to make that happen. A small table, a couple of comfortable chairs, flowers, and some nice evening lighting can already make a big difference. The main thing is not to overcrowd the balcony and to leave enough room to move around.
How to transform your balcony
I’ve seen small balconies where the owners had put so many flowerpots and pieces of furniture that it was almost impossible to step outside. So it’s better to start with a simple plan. Measure your balcony, check how the door opens, and choose a spot for a small seating area.
- Update the flooring. If the old floor makes your balcony look worn out, you can cover it with interlocking wood or wood-plastic composite deck tiles, which can be installed without glue if the balcony’s construction allows it. Just make sure you don’t block the rainwater drainage.
And if the flooring is in good condition, a small outdoor rug is enough. It can freshen up the space without much work. - Choose compact furniture. A small round table and two folding chairs work well for a little balcony. A table about 24 inches (61 cm) in diameter gives you enough room for two cups of coffee and breakfast plates without taking up too much space.
If the balcony is narrow, you can use a wall-mounted folding table instead, with the apartment owner’s permission. For reading, one comfortable armchair and a small side table are enough. There’s no need to try to fit both setups at once. - Decorate your balcony with plants. Vertical gardening lets you grow more plants even on a small balcony without taking up much floor space. For example, you can place a narrow shelving unit with several shelves for flowerpots against a wall or attach a wall trellis with hanging planters.
You can also attach special balcony planters to the railing and put one tall pot in an empty corner. All mounts should be suitable for your type of railing and strong enough to hold the plants securely in windy weather. It’s safer to place planters on the inside of the railing.
For a sunny balcony, pelargoniums, petunias, or thyme are good choices, while begonias and some types of ferns that grow well in containers are better for a shaded balcony.
Lindy and I often grow herbs near the house so they’re close by when we’re cooking. You can also create a little herb garden on your balcony with parsley, chives, and mint. It’s best to plant mint in its own pot because it spreads quickly. - Make your balcony a little more private. If neighboring balconies are close together, you can install a privacy screen made of bamboo or sturdy outdoor fabric. Place it along the railing or on the side, depending on which direction people can see into your balcony from.
Before installing it, check your building’s rules and make sure the screen can be securely attached. Wind is especially important to consider, since solid fabric creates extra pressure on the mounts. - Set up evening lighting. You can hang a small string of warm white LED lights along the inside of the railing or under the balcony ceiling if there are suitable places to attach it. Choose lights rated for outdoor use.
If there’s no outlet on the balcony, you’ll need a rechargeable table lamp or battery-powered string lights. For a small space, that’s plenty of light to sit outside with a book or a cup of tea in the evening.
A few details for extra comfort
Put soft cushions on the chairs, and keep a small throw blanket close by for chilly evenings. They’ll make relaxing on the balcony much more comfortable. Just choose cushions made from outdoor fabric that can handle moisture. And bring the blanket inside after you’re done so it doesn’t get damp.
By the way, as I’ve mentioned more than once, check your building’s rules before buying furniture, floor tiles, or large planters. Balconies may have restrictions on weight limits, attaching items to railings, and changing the building’s exterior appearance. Be especially careful with heavy pots filled with soil and large pieces of furniture.
In a small space, every item should have its own place. That’s why it’s important to think ahead about what you’ll actually use each thing on the balcony for, so it doesn’t end up being unnecessary later.
A balcony, even the smallest one, seems like a wonderful way to feel a little closer to nature. You can grow your favorite herbs, have breakfast outdoors, or simply enjoy the view from your balcony.
7. DIY String Light Canopy Project

A few rows of string lights above the dining table or seating area can beautifully light up your patio in the evening. And the best part is that you don’t need to build a pergola or install a roof for this setup.
String lights with large round bulbs and warm white light look especially nice. They remind me of the lighting on outdoor patios at small cafés.
How to create a string light canopy over your patio
First, decide which part of your patio you want to light up. You can hang string lights in parallel rows or in a zigzag pattern — both options work above a dining table or seating area. Choose the layout based on the shape of your patio and where you can securely attach the lights.
- Choose outdoor string lights. It’s best to use a model with warm white LED bulbs and a sturdy cable. LEDs use less electricity than traditional incandescent bulbs and usually last longer.
Outdoor LED string lights with large bulbs work well for this project. Before buying, measure the distance between the attachment points and calculate the total length you’ll need, allowing for your chosen pattern and a little sag. - Prepare the attachment points. If your patio is next to the house, you can attach one side of the string lights to sturdy parts of the wall or roof structure and the other side to stable wooden or metal posts. If your patio is separate from the house, you’ll need posts around its edges.
Special metal eye hooks work well for attaching the lights. The posts need to be securely installed and strong enough to handle cable tension and wind loads. Ordinary thin garden stakes won’t work for this. - Install a support cable. For longer spans between posts, use stainless steel or galvanized steel cable. Run it between the attachment points and tighten it with a cable tensioner.
Then attach the string lights to the support cable using outdoor-rated cable ties or fasteners recommended by the manufacturer. This way, the support cable carries the weight of the lights instead of the electrical cord. Make sure the bulbs hang high enough so nobody bumps their head on them. - Arrange the string lights above the patio. For a rectangular patio, you can hang several parallel rows of string lights, spacing them evenly apart. Another option is a zigzag pattern, where the lights run from one side of the patio to the other in a series of diagonal lines.
Both methods let you create a string light canopy above the seating area, so your choice depends on the patio’s shape and the position of the supports.
Don’t pull the electrical cord too tight. Leave a little sag between attachment points, following the manufacturer’s instructions. - Connect the lighting. Only use string lights rated for outdoor use. You’ll need a weatherproof outdoor outlet with GFCI protection.
If you need an extension cord, choose one rated for outdoor use and suitable for the electrical load. Electrical connections should be kept in weatherproof enclosures designed for them rather than left lying on the ground.
I love evenings when Lindy and I cook something for dinner and stay outside with friends until dark. String lights mean we don’t have to end our get-togethers just because the sun has gone down. And they look much nicer than a single bright floodlight next to the house.
The main thing is to attach the lights securely, choose materials suitable for outdoor use, and plan the electrical connections in advance. That way, your string light canopy over the patio will last for more than one season.
8. Poolside Patio Luxury Setup

Picture a patio by the pool with light stone flooring, a few comfortable lounge chairs with soft cushions, large white umbrellas, and tall planters filled with greenery. And a little farther away, a dining area where you can gather with family or friends after swimming. Just as nice as the terrace of an expensive resort hotel, right?
For this kind of setup, it’s important to choose the right materials, use a few colors that go well together, and think carefully about where everything will go. That way, you can do more than just sunbathe — you can spend an entire day relaxing outdoors.
How to set up a poolside patio
Start with the flooring and furniture layout, then move on to plants, lighting, and small details.
- Choose the right patio flooring. For a luxurious look, large slabs of light-colored travertine, outdoor porcelain pavers, or concrete pavers with a natural stone texture are great options.
Beige or cream-colored travertine looks beautiful. It’s often used around pools because of its natural stone texture. But make sure to choose flooring designed for wet areas, with a slip-resistant surface. Light colors also generally get less hot in the sun than dark ones.
If the flooring around your pool is already in good condition, you don’t necessarily need to replace it. New furniture and a few large plants might be all it takes to give your patio a fresh look. - Set up an area for lounge chairs. Place two to four matching lounge chairs in a row along the pool, leaving a clear path to the water. Look for models with adjustable backrests, aluminum frames, and cushions made from outdoor fabric.
White or light beige cushions look especially beautiful with stone flooring. You can place a small table between each pair of lounge chairs for drinks, a book, and sunscreen. - Provide some shade. You can place a large cantilever umbrella next to the lounge chairs, with its pole off to the side rather than in the middle. This lets you shade several seats at once.
For a spacious patio, a pergola with a fabric canopy is another option. You can put a dining table or a small sofa with armchairs underneath it. Just make sure the umbrella has a stable base and can be closed in strong winds. - Set up a dining area. If your patio is spacious enough, you can place a table for four to six people with teak or aluminum chairs a little farther away from the pool. It’s best to put it under a canopy or large umbrella so you can enjoy meals even on sunny days.
Lindy and I love inviting friends over for a homemade lunch. And in summer, it’s especially nice to set the table outside, grill something, and spend the whole day together, alternating between swimming and relaxing at the table. - Choose plants and lighting. You can install small garden lights along the walkways and place rechargeable lanterns with soft, warm light on the dining table. That way, you can still enjoy spending time on the patio after sunset. Just be especially careful with lighting near the pool: choose fixtures rated for use near water, and have a qualified electrician install any permanent electrical lighting.
A few important details
There are always plenty of wet towels around the pool, so you’ll need a towel rack. You can place it near the lounge chairs, but away from the water.
Don’t forget about safety! Don’t place furniture near steps, ladders, or other pool entry points. If you have young children, the pool should have a proper safety fence with a self-closing gate. And children must always be supervised by an adult while swimming.
To me, a luxurious patio is all about quality materials, comfortable furniture, and thoughtful design. Light-colored flooring, matching lounge chairs, large umbrellas, and a few green plants already make it feel like you’re relaxing on the terrace of a beautiful resort.
9. Natural Stone & Greenery Mix

Natural stone and green plants are a combination many people love for a garden patio. The main features are the shapes of the stones, their natural colors, and the plants that gradually grow around the patio.
Gardening has always been an important part of our family life, so I much prefer a patio surrounded by living plants to a large, empty paved area. And this is a great opportunity to use some permaculture principles, including growing ornamental and useful plants together.
How to design a patio with stone and plants
Flat natural stone slabs in different sizes work well for this style. You can lay them with small gaps between them and leave room for planting around the edges of the patio.
- Choose natural stone. Sandstone, flagstone, and slate are often used for patio paving. Stone with irregular natural edges looks especially beautiful, but make sure the surface doesn’t become slippery after rain.
I prefer sandstone in warm beige or gray-brown shades. It goes well with garden greenery and wooden furniture. And if you already have stone pathways near the house, you can use the same material for the patio.
Choose slabs specifically designed for paving, with the right thickness and a fairly even upper surface. That way, you can comfortably place a table and chairs on the patio. - Plan the layout of the stone slabs. You can lay irregularly shaped stones with gaps of different widths between them. It’s best to lay the slabs closer together around the dining table and along main walkways so the furniture stays stable and it’s easy to walk around.
Closer to the patio edges, you can intentionally leave wider gaps between some slabs for planting. Just make sure all the stones sit level, without raised edges that someone could trip over. - Fill the gaps between the stones with greenery. Low-growing groundcover plants work well in these small spaces. For example, creeping thyme loves sunshine and well-drained soil. It gradually spreads between the slabs and produces tiny pink or purple flowers in summer.
If part of the patio is shaded, choose other plants suited to your climate. It’s important to leave enough soil in the gaps for the roots to grow. Regular narrow joints filled with construction sand aren’t suitable for planting. - Add greenery around the patio edges. You can plant lavender, sage, catmint, or ornamental grasses if the growing conditions in your area suit them. For example, plant a few lavender bushes along the sunny side and low-growing perennials near the pathway.
It’s better to plant taller varieties farther away from the patio so they don’t block the walkway. You can also set aside part of the flower bed for aromatic herbs you can use in the kitchen.
Lindy loves growing plants that have a practical use. For example, it’s lovely to pick some fresh thyme or a few sage leaves for a homemade dinner without having to walk all the way across the garden. - Choose furniture made from natural materials. A wooden table with simple chairs or a bench with soft outdoor cushions is a good choice for this kind of patio. If the space is small, you can place two armchairs and a round table.
It’s best to match the furniture color to the stone. For example, light sandstone pairs beautifully with natural wood, while gray slabs look good with dark brown furniture. The plants around the patio already provide plenty of color, so bright fabrics aren’t necessary.
What to consider when building this type of patio
Stone slabs need a stable base. How it’s built depends on the type of stone, the soil, and your local climate. You also need to plan for rainwater drainage so moisture doesn’t collect beneath the paving.
If you’re planning to grow plants between the slabs, decide in advance where you’ll have wider soil-filled gaps and where you’ll use regular paving joints. The planted areas will need watering and occasional weeding, especially while the greenery is still growing in.
Don’t forget to take care of the stone itself. In damp, shaded spots, algae and moss can eventually grow on the surface and make it slippery. These areas need regular cleaning.
For us, it’s a comfortable place to put a table, invite friends over, and spend an evening surrounded by plants we’ve grown and cared for ourselves. Natural stone and greenery complement each other beautifully, and this kind of patio only gets prettier over time.
10. Retro Patio Bar Corner
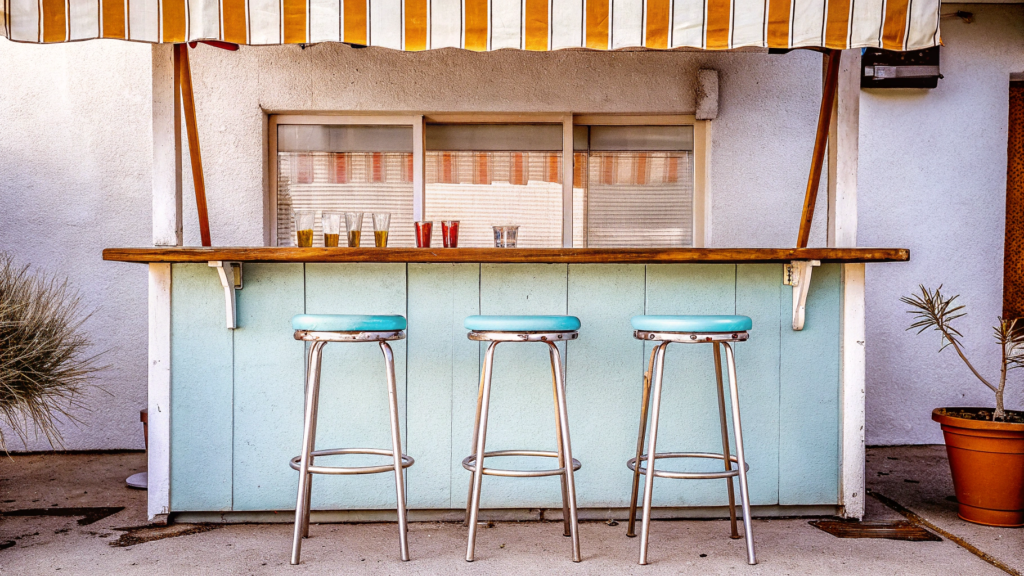
A small retro-style bar could become the most unusual spot on your patio. A turquoise bar counter, tall stools with metal legs, a striped awning, and a shelf with colorful glasses — and you’ve got a little corner that looks like an American café or bar from the 1950s–1960s.
This style is known for bright colors, rounded shapes, chrome details, and furniture with thin metal legs. You don’t have to use everything at once. For example, a turquoise counter, two red bar stools, and a few vintage details are enough to capture the feel of that era.
How to set up a retro bar corner on your patio
First, choose a spot near a wall, fence, or under an existing canopy. It’s best to position the bar so guests can easily walk up to the counter and the person behind it has room to prepare and serve drinks.
- Install a bar counter. You can buy a ready-made outdoor model or build one yourself using wood suitable for outdoor structures. For a retro look, a counter with a rectangular countertop and rounded front corners works well.
Paint the base turquoise, mint green, or cream, and leave the countertop wooden or use a smooth, water-resistant finish. For an uncovered patio, choose materials that can handle rain and sunlight.
If you want to sit directly at the counter, aim for a height of around 40–42 inches (102–107 cm). Bar stools with seat heights of 28–30 inches (71–76 cm) usually work well with a counter this height. - Choose retro-style bar stools. Models with round seats, metal frames, and footrests are a good choice. Combinations of red, turquoise, and white with shiny metal details have a particularly recognizable retro look.
Just make sure the model you like is designed for outdoor use. Regular stools with chrome details and soft vinyl upholstery can quickly get damaged in the rain. - Decorate the space behind the counter. If your bar is next to a wall, hang one or two shelves for glasses, pitchers, and other supplies. Above them, you can put up a vintage metal advertising sign for drinks — signs like these were common in American cafés in the middle of the last century.
On the counter itself, a colorful metal tray with colored glass drinking glasses and a pitcher of homemade lemonade would look lovely.
By the way, it’s worth looking for things like these at flea markets. I love finding old dishes and home decorations there. Sometimes you come across real treasures that fit perfectly with retro decor. - Put up an awning for shade. You can install a small striped fabric awning above the bar counter. Red-and-white or turquoise-and-white stripes work well for the style of American cafés from the middle of the last century.
If your patio is already covered, you don’t need a separate awning. For an open patio, you can use a sturdy outdoor umbrella with a striped canopy. - Set up lighting. Under a roof, you can hang a light fixture with a round metal shade above the counter. Another option is outdoor string lights with large warm white bulbs.
Light fixtures and electrical connections must be rated for outdoor use. If there’s no outlet nearby, battery-powered LED lights are a good alternative.
A few practical details
You don’t necessarily need to equip your bar corner with a refrigerator, sink, or running water. To serve cold drinks, all you really need is an ice bucket, a tray, glasses, and a place to prepare drinks. Food and drinks that need refrigeration are best kept in a refrigerator or a suitable portable cooler.
I think you don’t have to decorate your entire patio in retro style. Let the colorful bar counter and stools stand out against regular wooden furniture, a green lawn, or stone paving. That way, even a small corner will remind you of an old American café, while the rest of your backyard can stay just the way you like it.
Your updated patio
Which of these ideas did you like the most? Maybe you’ve been thinking about changing something on your patio for a while but haven’t decided where to start.
Tell us in the comments what your patio looks like right now and what you’d like to change about it. And if you’ve already tried an unusual patio design, be sure to share your experience. Lindy and I love reading your stories and are always happy to hear new ideas.