If you already have a pergola — or just dream of one — you know it’s more than just four posts and a couple of beams. It’s a stage for life, for all your warm-weather ideas: outdoor dinners, morning coffee under climbing vines, string lights in the evening, and a soft fabric swaying in the breeze.
We’ve put together a collection of practical, affordable, and seriously stylish ideas to upgrade your pergola — from lighting and hanging planters to privacy walls and fabric roofs. Everything here is either something we’ve done ourselves or spotted in real-life setups. And yep, you can pull this off on your own, even without a workshop, a power tool collection, or a big budget.
1. Building a DIY pergola frame with no power tools

Building a DIY pergola frame with no power tools isn’t just for people who avoid drills. It’s a legit way to build a good-looking, sturdy, clean-lined pergola — without noise, dust, or expensive gear.
If you want a chill shaded spot to relax but don’t want to mess with tools, this is one of the easiest setups. You can actually put it together by hand, using pre-cut boards and simple hardware.
What you’ll need:
- 4 posts, 4×4 and 8 feet long (2.4 m) — about 25 lbs each (11 kg), easy for one person to carry
- 4 beams, 2×6 and 8 feet long (2.4 m) — cedar or pressure-treated pine works great
- Metal L-brackets
- Bolts, washers, and nuts (3–4″ long), around 16–20 total
- Wrench or adjustable spanner (basic one is fine)
- Post bases like the Simpson Strong-Tie ZMAX
- Wood waterproofer
How to do it:
- Mark the layout and install the anchors. If you’re building on concrete or decking — screw in the anchors. If it’s going on bare soil — we’ll cover that in another section.
- Set the 4×4 vertical posts into the anchors. Use a level to keep them upright and temporarily support them with stakes or rope if needed.
- Attach the side beams (2×6). Secure the horizontal beams to both sides using L-brackets and bolts.
Slip the bolt into the bracket hole and tighten it by hand using the washer and nut. - Add the top cross beams. Lay the remaining beams across the top — either parallel or crisscrossed, however you like. Secure them with the same brackets and bolts.
- Seal the wood with waterproofer. Focus on the ends and all connection points. Two coats is best. Use a soft brush or roller — it’s a quick job.
If you’re after shade — hold off on building a full roof. Sometimes a simple stretch of UV-resistant fabric is all you need. You can choose the color and size you like. It’s super easy to install: just use rope, clips, or carabiners, stretch it between the beams — and that’s it.
It looks great, filters the sun just right, and most importantly — you don’t need a single power tool to make it happen.
2. Using budget lights to style a pergola

A pergola without lighting is like a pie without a crust. Tasty, sure — but something’s missing.
Using budget lights to style a pergola is one of the easiest and fastest upgrades you can make. And no — it’s not just “adding bulbs.” It’s about finishing the space, giving yourself an excuse to hang out on the patio just to admire the setup you built yourself.
And yes — you can make it look good, sturdy, and long-lasting without dropping money on luxury string lights.
What you’ll need:
- Outdoor solar string lights, ideally with durable insulation
Example: Brightown 48FT Outdoor Solar String Lights — waterproof, warm glow, holds charge for 6–8 hours - Metal hooks or cable clips (if you don’t want to drill)
- Zip ties — to attach the lights to the beams
- Light specs: 48 ft (14.6 m) in length, weighs about 2 lbs (900 g) — which means it’s safe even for lightweight setups
How to do it:
- Choose the layout — zigzag, arches, or straight lines. It helps to map out where the wire will run, especially if there’s a solar panel involved.
- Attach hooks or clips along the beams. If you don’t want to drill — use removable clips. They hold well as long as the surface is clean and dry.
- Hang the lights with a bit of slack. Don’t pull them tight like a guitar string — some slack prevents sagging over time and puts less stress on the beams.
- Secure each section with zip ties. This keeps the lights from swinging in the wind or hitting the wood.
- Place the solar panel where it gets at least 6 hours of sun daily. You can even extend it further from the pergola if needed.
Style tips:
- Warm white (2700K) gives off a cozy glow — not like a Christmas fair
- Black wire blends in beautifully with wood
- Want a designer vibe? Hang a couple of bulbs lower on individual cords — it looks intentional, not like a $20 Amazon setup.
A quick word on safety:
- Always use outdoor-rated string lights — look for waterproof (IP65 or IP67) on the label
- No indoor “holiday” lights — they can’t handle moisture and may short out
- Never wrap cords in fabric, plants, or insulation — even LED bulbs generate some heat, especially in summer
- Solar-powered lights are the safest bet, especially if you don’t want to run extension cords across the yard
- If you do use plug-in lights — only connect them through outdoor weatherproof outlets with covers
A hanging light setup weighing under 3 lbs is totally safe for any standard pergola. Just don’t hang the entire string from a single hook — spread out the load evenly
3. Attaching a fold-out bar shelf to a pergola

Attaching a fold-out bar shelf to a pergola is one of those little things that ends up changing everything. Picture this: you walk out with an iced tea or a glass of wine, flip down a compact shelf — and boom, it’s an instant mini bar. Cute, handy, and honestly, you can build the whole thing in just a few hours.
Yeah, we once spotted one of these on a couple’s backyard in Utah. At first, it looked purely decorative — until they started placing glasses, a vase of flowers, a bowl of guac… Safe to say, it’s been down ever since.
What you’ll need:
- Folding shelf brackets, ideally with locking arms
Example: Domisl 12-Inch Heavy Duty Folding Brackets — supports up to 160 lbs (72 kg) per pair - A wooden board for the shelf — roughly 30–36 inches long (75–90 cm) and 10–12 inches deep (25–30 cm)
Best to go with a 1″ (2.5 cm) thick board — strong and looks solid - Bolts, washers, and nuts — for mounting the brackets to the pergola beam
- Wrench or socket driver — no power tools needed again
How to do it:
- Pick the pergola side that’s easy to access or walk up to. A side beam works best so the shelf doesn’t block walkways.
- Measure the height — usually 36–38 inches (91–96 cm) off the ground, like a standard bar top.
- Mount the folding brackets to the inside of the beam, spaced 20–24 inches (50–60 cm) apart.
Use bolts through the wood, with washers for stability. - Place the shelf board on top, align it, and screw or bolt it in place — depending on the bracket’s holes.
- Test the lock and level. The shelf should fold up and down smoothly, with no wobble.
Build notes:
This kind of shelf doesn’t add dangerous weight to your pergola — as long as the beam is 2×6 or thicker and well anchored.
Snacks, glasses, and a pitcher of lemonade? That’s 20–30 lbs at most — totally fine.
Just don’t hang heavy planters or dishware on it — that’s a whole different conversation.
Style tips:
- Paint the shelf a contrasting color or finish it with oil to make it a standout detail
- Instead of a basic board, use a reclaimed stair tread or a live-edge slab — for a rustic vintage look
- Worried about glass rings? Toss a narrow table runner across the top
4. Creating a living roof with climbing plants

Creating a living roof with climbing plants is more than just a design choice — it’s a functional upgrade. This kind of “green roof” provides shade, keeps things cooler, adds humidity, and gives your pergola that lush, garden feel. It’s stunning when vines start to hang down softly and light filters through the leaves.
We once saw a setup like this at a guy’s place in Arizona — his pergola stood next to a brick wall, and the grapevines covered the top so densely, it created a full roof. Not a single piece of fabric involved.
What you’ll need:
- Natural or metal trellis lines (wire, rope, or cable)
- A set of hooks or brackets to hold those lines in place
- Wire cutters or snips — to trim the cable or rope
- Compost or fertilizer — if planting right next to the base
- Climbing plants (see list below)
- A watering can. Some patience. Maybe a cup of tea.
Good climbing plants (for the U.S.):
- Grapevine (Vitis spp.) — fast grower, thick shade, edible
- Wisteria — gorgeous but heavy (only for strong pergolas)
- Honeysuckle (Lonicera) — quick grower, smells amazing
- Clematis — delicate, needs guidance, but the blooms are worth it
- Trumpet vine (Campsis radicans) — covers well, but aggressive — needs pruning
How to do it:
- Run trellis lines between the top beams — 2–3 parallel cables or ropes every 12–16 inches (30–40 cm).
This gives the plants something to grab onto as they climb up and spread into a living roof.
Without these guides, the vines will just dangle or grow sideways — you won’t get even coverage. - Prep the soil at the base of each pergola post. Dig a small hole and mix in compost and organic matter.
- Plant the climbers right next to the posts. Make sure they’ll get at least 6 hours of sun a day — otherwise your green roof will be patchy.
- Start training the growth — gently guide the vines toward the beams, and tie them loosely with soft twine.
In 3–4 weeks, they’ll start climbing on their own. - Trim the side shoots regularly, so the plant grows upward instead of sprawling out.
The first two months matter the most — after that, it kind of builds itself.
Construction notes:
The weight of the plants can be significant — especially after rain. If you’re planting grapevines or trumpet vine, your pergola should be built with at least 2×6 beams and have solid joints.
Avoid using a green roof on temporary or lightweight pergolas. Also, don’t combine a fabric roof with vines — the plants will tear the fabric, especially in strong winds.
Care tips:
- Feed the plants every 3–4 weeks during the first season to help them fill in fast
- Prune in the fall — otherwise you’ll have a tangle of dead vines the next year
- Keep the vines on the outside of the structure — don’t let them grow inside, or you won’t be able to reach the fasteners later
5. Installing a pergola over gravel without cement

Installing a pergola over gravel without cement might sound like a quick fix — but with the right anchors and a well-packed base, it can actually be a solid, lasting setup. This method is great for lightweight pergolas: no swings, no roof panels, no heavy gear. Just a cozy shade zone with lights and fabric.
What you’ll need:
- 4×4 posts (8 ft / 2.4 m long)
- Metal anchors with ground spikes — for example: Titan Post Anchor Ground Spike 24″
- Compacted gravel (fine or medium grade)
- Sledgehammer or heavy mallet (to drive the anchors)
- Level
- Bolts or screws to attach posts to anchors
- Gloves, tape measure, string for marking out your layout
How to do it:
- Mark out the space. Use string and a tape measure to map out the rectangle for your pergola. Check the diagonals to make sure it’s square.
- Prepare the base. At each post location, remove the topsoil and dig down about 4–6 inches (10–15 cm).
Fill with fine gravel (up to 1/4″) and compact it well — this creates a stable, draining base. - Install the anchor. Drive the anchor straight through the gravel into the dense soil below. Use a sledgehammer or mallet.
Gravel doesn’t hold the anchor by itself, but it creates resistance and stability around it.
Once it’s in, add more gravel around the sides and compact again. - Check for level. Use a builder’s level — each anchor needs to be perfectly vertical, or your pergola will end up crooked.
- Install the 4×4 posts. Drop the posts into the anchors and secure them with bolts — preferably two bolts per side, in a crisscross pattern for better rigidity.
If there’s a gap, shim with a thin washer or spacer.
What can this setup handle?
A pergola with string lights, fabric, or climbing plants — no problem
Handles wind up to 25–30 mph (40–50 km/h) — if the anchors are deep enough and gravel is well packed
Not suitable for swings, hammocks, polycarbonate roofs, or heavy fixtures
Tips:
- If the soil is soft, add 2–3 extra bags of gravel around the anchor after it’s driven in — this boosts stability
- Want to move the pergola next season? This method is way easier than concrete — just pull out the anchors and reassemble
- Before winter, check for looseness — if anything wiggles, just tamp the gravel down again
6. Decorating a pergola using only Dollar Tree items

Decorating a pergola using only Dollar Tree items isn’t a joke or a last-resort hack. It’s a real way to create something charming for barely any money.
Sure, those $1.25 string lights won’t last ten years, and faux flowers won’t smell like jasmine.
But if you want to quickly decorate a space for a party, a photo zone, or just add some soul without overspending — this totally works.
What can you find at Dollar Tree and use on your pergola?
- Solar garden lights — lightweight, on stakes, and give off a soft glow
- Plastic garlands with leaves, grapes, or flowers
- Fabric pennants and ribbons (especially in summer or for holidays)
- Mesh and decorative polyester curtains
- Containers and hanging planters
- Plastic hooks, tape, zip ties
- LED candles and mini battery lanterns
How to do it:
- Pick a theme or vibe. Do you want “Mediterranean café” or “backyard BBQ hangout”? That decision helps guide your color and decor choices.
- Hang garlands and greenery. Leaf garlands can run along the beams or perimeter, or hang like green curtains.
Attach them with zip ties or soft wire — no drilling needed. - Add fabric accents. A light curtain or mesh from Dollar Tree can be tacked to one side and instantly gives a feeling of a defined “zone.”
Works great with just 1–2 panels — more than that can feel heavy. - Light up key spots. Stick those mini solar lights in the ground at the corners, and hang small lanterns from the top.
They weigh nothing, so they’re safe even for light pergolas. - Create hanging planters. Combine plastic planters and faux greenery to make hanging arrangements that are featherlight but surprisingly cute.
Things to know:
Everything from Dollar Tree is great for seasonal or temporary decor only
These items won’t handle snow, wind, or long rain — after a few weeks, most will fade or lose shape
But for 1–2 months, it’s perfect — parties, birthdays, summer setups, photo shoots
Tips:
- Mix it up: greenery + fabric + one strong accent (like a lantern or centerpiece)
- Don’t go overboard — 2–3 decorated areas (like the entrance, one corner, and the main beam) work better than wrapping everything
- Stick to neutral or natural tones — white, green, beige look much more upscale than neon colors
7. Painting a pergola to look like aged wood

Painting a pergola to look like aged wood isn’t about faking vintage — it’s about giving your structure that timeless, “been-here-for-years” charm that blends with your garden.
You don’t need to be an artist or buy fancy brushes. It’s all about layering textures, playing with contrast, and using stain or paint in two passes.
We saw a pergola like this in a rustic backyard — and the wood looked nothing like new lumber. It looked like an old farmhouse beam. Beautiful — and easy to pull off.
What you’ll need:
- Base stain or paint in a light tone (gray, “natural oak,” “driftwood”)
- Medium bristle brush + a dry rag
- Darker stain or paint (like “walnut” or “espresso”)
- Wire brush or rough sponge (even sandpaper works)
- Clear finish oil or sealer (optional)
How to do it:
- Prep the surface. If the wood’s already treated, lightly sand it to remove any gloss.
For new boards, just make sure they’re dry — no need for primer. - Apply a light base coat. Use a wide brush and go with the grain. Don’t aim for solid coverage — let some bare spots show through. That’s what creates the worn look.
- Wait 1–2 hours until dry.
- Go over the most visible areas with a wire brush or rough sponge.
This adds little scratches that mimic sun-faded or weathered wood. - Dab on dark stain in select areas. Use a dry brush or rag to touch up knots, cracks, and edges.
Then blend it in, and you’ll get that natural aged depth like an old timber beam. - Add a finish (optional) — if your pergola gets rained on. Water-based oil is best: no gloss, but great protection.
This method is perfect for cedar, pine, or fir — especially wood with a strong grain.
Smooth wood (like engineered lumber) needs more effort, and the aging effect might not be as striking.
Avoid glossy paints — they ruin the depth and age effect.
Tips:
- For a “European-style” finish, go with gray-brown tones instead of red-browns
- Instead of a wire brush, you can use a dry brush with a little leftover black paint to add depth in cracks
- Don’t want to paint the whole thing? Just focus on the top beams and corners — that’s often enough.
8. Building a Privacy Wall for a Patio Pergola

This kind of wall isn’t just for “hiding from the neighbors.”
It’s about creating a space where you can sip your coffee in pajamas and not feel awkward.
It’s cozy here, with a breeze that doesn’t blow napkins off the table.
The wall can be semi-transparent, fabric-based, wooden, vertical or corner-style — and all of these options can be DIY.
The key is knowing what you want: full coverage, light filtering, or just a design accent.
What Can You Use?
- Wooden slats (1×2 or 1×3)
- Ready-made trellis panels (wood or plastic)
- Tension fabric (canvas, tarp, or heavy curtains)
- Metal hardware: brackets, anchors, corner plates
- Bolts or screws + a drill (yes, you’ll probably need it here)
- Cable or rod — if you want a “curtain-style” wall
- Wood stain or sealant to protect against moisture
How to Build It
- Pick the side that needs coverage. It can be one side of the pergola or a corner, if you want to “visually block off the space.”
- Choose the style: rigid or soft.
Rigid — wood or trellis
Soft — fabric on rings, hooks, or cable - If you’re building a wooden screen:
- Measure the height (usually 6 feet / 1.8 meters)
- Screw in vertical posts (use 2×2 or 2×4) to the existing pergola beams
- Nail the slats horizontally or at an angle
- Leave 1–2 inches of space between slats so it’s not a solid wall
- Coat everything with stain or sealant
- Measure the height (usually 6 feet / 1.8 meters)
- If you’re building a fabric screen:
- Stretch a cable or curtain rod between beams
- Hang the fabric using grommets, rings, or just tie the corners
- Use dense outdoor canvas — it holds its shape and doesn’t soak through
- Stretch a cable or curtain rod between beams
A wooden wall creates wind load, especially if it is solid or almost solid. To keep everything in place:
- the posts must be secured with at least two bolts to the beam
- it is advisable to reinforce the lower fastening to the base or anchors
Fabric is a safer option, does not require rigid fastening, but it can flap in the wind.
Tips
- Want it to look nice? Use slats with different spacing (like 2-1-2 inches) to create a rhythm.
- You can replace the fabric with a bamboo roll-up screen — it’s lightweight, semi-transparent, and looks natural.
- If you want to zone off the pergola, set up two walls at a 90° angle and add a low planter at the base.
9. Making a Retractable Fabric Cover for a Pergola

This is one of the most practical upgrades you can do.
You get shade, light rain protection, and that cozy “roof” feeling — which you can open or close whenever you want.
You can build it yourself without any fancy mechanisms. And if the fabric fades or tears, it’s easy to replace.
What You’ll Need
- Outdoor fabric — preferably dense with UV protection
- Stainless steel cable or a strong, non-stretch rope
- Curtain clips with rings
- Hooks, screw anchors, carabiners or tension blocks
- Sewing machine (optional) or pre-hemmed fabric
How to Build It
- Run two parallel cables along the long sides of the pergola — from beam to beam.
One cable goes near one edge, the second one near the opposite side. The space between them should match the width of the fabric. - Secure the cables tightly using screw anchors or strong hooks.
Use a carabiner with tension or a block system to avoid sagging. - Prep your fabric. You can use a panel that’s about 4–6 feet wide (1.2–1.8 m) and 1.5 times longer than the pergola.
- Create loops at the edges or use clip-on curtain rings to attach the fabric to the cables.
- Slide the rings onto the cables to get a curtain-like effect. The rings will slide back and forth, letting you open or close the fabric like an accordion.
You literally pull the edge — and the roof opens or shuts. - Add stoppers so the fabric doesn’t move around in the wind — simple side hooks will do the trick.
A canopy like this works best if your pergola is solidly built, with beams at least 2×6 and a sturdy perimeter.
The fabric’s weight (even when wet) gets evenly distributed across the cables, so it doesn’t stress the structure.
In strong winds, the fabric can act like a sail — it’s best to take it down in storms or winter. Takes 2 minutes.
Tips
- Want it super easy? Use pre-made fabric with grommets, like tent covers.
- Space the rings every 12 inches to keep the folds tight and avoid sagging.
- For a softer look, pick semi-transparent fabric — it won’t block all the sun but gives a nice visual effect.
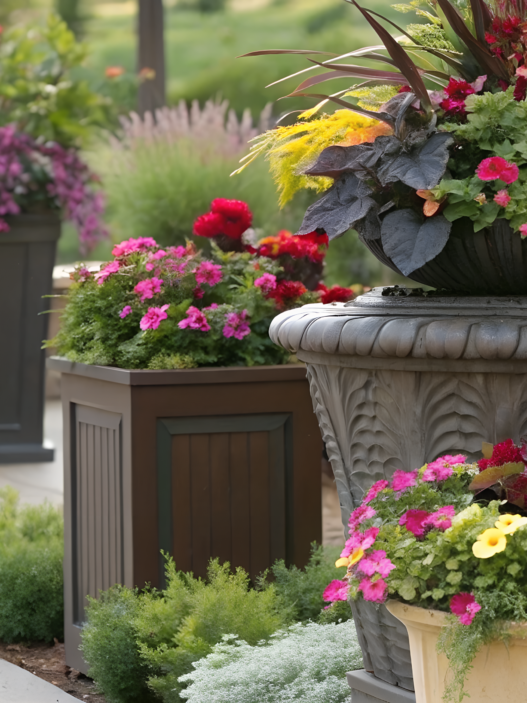
10. Hanging Planters from a Small Garden Pergola

Hanging planters from a small garden pergola sounds cute…
Until you hang five pots full of wet soil and, well… you know.
That’s why the approach is simple: weigh it out, hang it right, know your structure — and you’re good to go.
What You’ll Need
- Hooks with self-tapping threads or bolt-style rings
- Chains or ropes for hanging (adjustable length is ideal)
- Plastic planters with coco liners or self-watering systems — they’re lighter
- Lightweight soil mixes (like coco coir or vermiculite-based blends)
- Reliable plant varieties — see list below
How to Build It
- Choose a beam that can handle weight. The safest option is a central cross beam that’s 2×6 or thicker, especially if it’s supported on both ends.
Don’t hang anything from the edge of the pergola or decorative trim. - Think about load. A single 10” hanging planter with soil and water weighs around 8–12 lbs (3.5–5.5 kg).
It’s safe to hang no more than 2–3 pots per 8-foot beam, with at least 2 feet of space between them. - Screw in the hooks by hand or with a wrench. Do this right into the center of the beam to avoid splitting the wood.
If needed, pre-drill a small pilot hole first. - Hang your planters using chains or strong rope. Ideal height? Around eye level or slightly below, so you can water and remove them easily.
- Use a backup safety line. If your planter is hanging above a seating area or table, run a thin safety cable alongside the chain to catch the pot if it falls.
Best Plants for Hanging Baskets
- Petunias — colorful, low-maintenance, beautiful trailing
- Silver Dichondra — creates a leafy waterfall effect
- Verbena, Bacopa, Alyssum — sun-loving and light
- Strawberries — pretty and tasty
- Succulents in hanging baskets — perfect if you forget to water often
A small pergola (like 4 posts with 2×6 beams) can handle 30–40 lbs (13–18 kg) of hanging weight if everything is installed properly and evenly.
Don’t overload a single point. Spread hooks across different beams.
Remember the wet weight — soil gets 1.5 to 2 times heavier after watering.
Tips
- Hang your planters asymmetrically, so the arrangement doesn’t look “too perfect.”
- Nervous about the weight? Hang pots in the corners, where the beams intersect — those are the strongest spots.
- For metal pergolas, use magnetic hangers if you like to rearrange your setup often.
My pergola
A pergola isn’t just an object — it’s a process. You don’t just build it — you keep filling it with life: ideas, little details, light, and form. Each of these alterations is a step toward making your yard not “like in the photo,” but a place you want to return to.
If you’ve tried any of these ideas — tell me.What worked? What turned out to be surprisingly useful — or useless?
Got a Dollar Tree hack? Or a clever way to hang a planter without cracking a beam?I do read the comments, and I love when people share. So don’t be shy — leave a note. Who knows, your idea might end up in the next roundup.