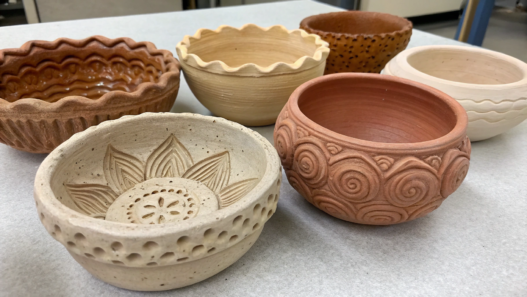
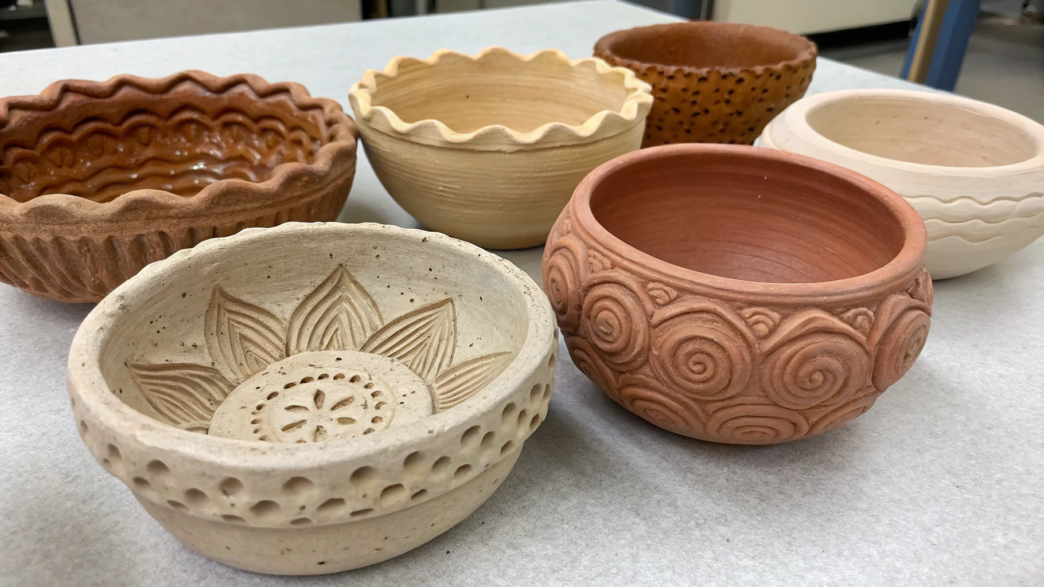
You don’t need a pottery wheel at home to make a beautiful clay craft. All you need is a small piece of clay, your hands, and a couple of simple tools.
I’ll walk you through 10 pinch pot ideas you can try even if you have no experience. I’ll also explain what materials you’ll need and how to properly dry and decorate your finished pieces.
I love and appreciate handmade things, and we have quite a few of these little crafts around our home. And working with clay is so much fun! Of course, things don’t always turn out the way you planned on the first try. But that’s no reason to throw your work away. While the clay is still soft, there’s a lot you can fix.
So pick an idea you like and give it a try!
1. Footed Lemon Pinch Pot Bowl
A small lemon-shaped clay bowl looks really cute, especially with three short feet underneath. It’s perfect for keeping rings, earrings, and other little things on a vanity or dresser. And that bright yellow color will remind you of summer, even in the middle of winter.
You don’t need a pottery wheel to make this little bowl. Everything is shaped by hand, and the bowl doesn’t have to be perfectly even. In fact, a few small imperfections are more than welcome.
What you’ll need
- Air-dry clay, such as DAS Air Dry Modeling Clay.
- A small bowl of water for moistening the clay.
- A soft sponge for smoothing the surface.
- A toothpick for attaching the pieces.
- Yellow and green acrylic paints for painting the bowl.
- A thin paintbrush for small details.
- Clear acrylic varnish for decorative crafts.
How to make a footed lemon pinch pot bowl
- Start with the base.
Take about 5–6 oz (140–170 g) of clay, knead it well, and roll it into a ball. Stretch it slightly into an oval. Now press your thumb into the center to make an indentation, then gradually widen it while turning the clay in your hands.
Pinch the clay between your thumb and index finger until you have a small bowl with walls about ¼ inch (6 mm) thick. - Shape the lemon.
Gently pull out two opposite edges of the bowl so they resemble the ends of a lemon. Don’t try to make them too pointy, since real lemons aren’t perfectly shaped either. Smooth the top rim a little with damp fingers to remove any small cracks. - Make and attach the feet.
Roll the remaining clay into three small balls about ½ inch (1.3 cm) in diameter and flatten them slightly. Turn the bowl upside down and mark three spots on the bottom where the feet will go. Use a toothpick to lightly scratch the surfaces where the pieces will connect, moisten them with a mixture of clay and water, and press the feet firmly into place.
Smooth the joints with your fingers, then place the bowl on the table. If it wobbles, carefully adjust the feet while the clay is still soft. - Let the bowl dry.
Go over the surface with a slightly damp sponge to remove any noticeable fingerprints. Then leave the piece at room temperature for 24–72 hours, or for however long the clay manufacturer recommends. Don’t try to speed up drying with a hair dryer or by placing it near a heater. Drying too quickly can cause the clay to crack. And be sure to check the feet before painting, since they take longer to dry than the thin walls. - Paint the lemon.
I choose a rich yellow for the outside and a lighter shade for the inside. It’s best to apply the paint in two thin coats, letting each one dry before adding the next. You can paint a couple of small green leaves near one of the ends. Once the paint is completely dry, coat the bowl with clear acrylic varnish.
It’s important to remember that air-dry clay isn’t suitable for dishes that come into contact with food or water. This little bowl is better used for jewelry and other small items, not for food. If you want to serve nuts, berries, or sauces, you’ll need actual pottery that’s fired in a kiln and coated with a food-safe ceramic glaze.
I think Lindy would immediately find a spot for this little bowl on our bedroom dresser, where we could keep rings, earrings, and other useful little things. And I’d try making a couple more shaped like an orange and a lime. A few fruit-shaped pinch pot bowls in different shapes and shades could make a cute little collection to decorate any table or shelf.
2. Strawberry Ring Dish Pinch Pot
A small strawberry-shaped clay ring dish is another cute idea for storing jewelry and other little things. Its bright red surface, tiny yellow seeds, and green leaves around the edge make it look like a real strawberry. This little strawberry dish will fit perfectly on a nightstand or vanity.
And the nice thing is that you don’t need any special tools or experience working with clay for this craft. You just need a little patience, especially when it’s time to paint the seeds, because there are quite a lot of them.
What you’ll need
- Air-dry clay.
- A small bowl of water for moistening your fingers.
- A toothpick for making patterns and attaching pieces.
- Red, green, and yellow acrylic paints for painting the strawberry.
- A thin paintbrush for small details.
- Clear acrylic varnish to protect the paint.
How to make a strawberry ring dish
- Make the base.
Take about 3–4 oz (85–115 g) of clay, knead it well, and roll it into a ball. Flatten it slightly with your palm, then use your thumb to make a shallow indentation in the center. Gradually widen it by turning the clay and pinching it with your fingers. You should end up with a dish about 4 inches (10 cm) wide, with low sides around ½ inch (1.3 cm) high. Try to keep the bottom and walls about ¼ inch (6 mm) thick. - Shape the strawberry.
Gently stretch and point one end of the dish, leaving the opposite end wide and rounded. Adjust the sides a little to give it a recognizable strawberry shape. Smooth the surface with damp fingers. Just don’t make the sides too high! It’s much easier to pick up rings and small earrings from a shallow dish. - Make the green leaves.
Use the remaining clay to make four or five small, flat leaves, each about ½ inch (1.3 cm) long. Point the tips and use a toothpick to draw thin veins. Bring the bases of the leaves together and arrange them at the rounded end of the dish, opposite the pointed tip of the strawberry, so they fan out and extend slightly beyond the edge.
Lightly scratch the surfaces where the pieces will connect, moisten them with a mixture of clay and water, and gently press the leaves into place. Smooth the joints with your fingers so the pieces stay securely attached after drying. - Let the dish dry.
Place it on a flat surface lined with parchment paper and leave it at room temperature for 24–72 hours, or for however long the clay manufacturer recommends. Don’t rush to paint it! If the dish is still damp inside, the paint may go on unevenly. Once the top has hardened, carefully turn the piece over so the bottom can dry completely too. - Paint the strawberry.
Cover the dish with two thin coats of red acrylic paint and paint the leaves green. Once the paint has dried, use a thin brush to paint tiny yellow seeds. Arrange them in rows across the inside surface, leaving small gaps between them. You can make each seed slightly elongated, just like on a real strawberry. Finally, coat the piece with clear acrylic varnish for decorative crafts.
This strawberry ring dish is meant for storing rings, earrings, and other small items, not for food. Air-dry clay isn’t suitable for food contact, and regular acrylic varnish doesn’t change that.
For Lindy and me, strawberries always remind us of summer and homemade desserts. That’s why I really like the idea of making a little strawberry ring dish. It could make a cute gift, especially if you put a ring or a small pair of earrings inside. And you won’t even need a pretty gift box — the dish itself will already be part of the present.
3. Wavy Salt Cellar Pinch Pot
A small salt cellar with wavy edges is a pleasure to use every day. You can keep it next to the stove or on the dining table so your salt is always within reach. And the uneven edges give this little salt cellar a pretty distinctive look.
I think keeping coarse salt in an open ceramic container is a great idea. When you’re cooking, it’s much easier to grab a pinch with your fingers or a small spoon than to keep shaking a salt shaker. But to make a salt cellar you can actually use, you’ll need pottery clay that can be fired in a kiln. Air-dry clay isn’t suitable for storing salt.
What you’ll need
- Pottery clay for hand building — Pottery Clay for Hand Building.
- A small bowl of water for moistening your fingers.
- A sponge for smoothing the surface.
- A wooden clay modeling tool.
- Food-safe ceramic glaze compatible with your chosen clay and firing temperature.
- Access to a pottery kiln for firing the piece.
How to make a wavy salt cellar
- Make the base.
Take about 5–6 oz (140–170 g) of clay, knead it, and roll it into a ball. Press your thumb into the center to make an indentation without pushing all the way through the bottom. Gradually widen the opening, turning the clay in your hands and pinching the walls. A salt cellar about 3–4 inches (7.5–10 cm) in diameter and roughly 1½ inches (4 cm) tall should be enough. Keep the walls about ¼ inch (6 mm) thick. - Make the base.
Take about 10–12 oz (280–340 g) of pottery clay, knead it, and roll it into a ball. Press your thumb into the center to make an indentation without pushing all the way through the bottom. Gradually widen it, turning the clay in your hands and pinching the walls.
You can make your salt cellar about 4½ inches (11.5 cm) in diameter and roughly 2¼ inches (5.7 cm) tall, but feel free to choose whatever size works best for you. Try to keep the walls and bottom about ¼ inch (6 mm) thick.
Keep in mind that the clay will shrink during firing, so your salt cellar will end up a little smaller. For now, leave the top rim even. We’ll shape the waves in the next step. - Shape the wavy edges.
While the clay is still soft, gently lift a few sections of the top rim with your fingers and lower the spaces between them a little. Try to make five or six smooth waves around the rim. They don’t have to be exactly the same height. The main thing is to keep the transitions smooth, without sharp points or areas that are too thin. - Even out the bottom and surface.
Place the salt cellar on a flat table and check that it stands steadily. If the bottom is rounded, gently press it against the surface while supporting the walls from the inside. Then use a slightly damp sponge to smooth out fingerprints and small cracks. Pay special attention to the wavy rim so it feels comfortable to touch. - Prepare the salt cellar for firing.
Leave the piece to dry slowly until it’s completely dry. This usually takes several days, sometimes longer. After the first firing, apply a suitable food-safe glaze to the inside surface and rim, then fire it a second time following the manufacturer’s instructions.
If you don’t have a pottery kiln at home, you can contact a local pottery studio. They can help you choose clay and glaze that are compatible with their equipment. - Fill the salt cellar.
Once the finished pottery has cooled completely after firing, wash and dry it. Now you can fill it with coarse sea salt. I think natural glaze shades like cream, light beige, or pale blue would look really pretty here. And leaving a little of the clay’s natural texture visible on the outside could make the piece even more interesting.
By the way, it’s best to keep an open salt cellar away from water splashes and steam, especially near the stove. Moisture can make the salt clump together. And be sure to choose a glaze that’s suitable for food contact after proper firing, not one that’s meant only for decorative pieces.
Lindy and I do a lot of cooking at home, so a small container of coarse salt near our work surface would definitely come in handy. Especially when our hands are busy and there’s no time to go looking for the salt shaker in a cabinet. A ceramic salt cellar like this can last for years, and you can even make a little spoon from the same clay if you like.
4. Japanese Style Footed Tea Bowl
A Japanese tea bowl with a small ring-shaped foot looks quite different from a regular cup. It has no handle, the sides gradually widen toward the top, and the bowl itself is wide enough to whisk tea comfortably. In Japan, these bowls are called chawan and are traditionally used to prepare and drink matcha.
In Japanese pottery, perfectly even shapes aren’t the only ones appreciated. For example, traditional tea ceremony bowls often have slight asymmetry, visible signs of handwork, and unusual glaze textures. So beginners don’t need to aim for a perfectly round shape.
A Japanese tea bowl has a low ring-shaped foot underneath the base, which helps it stand steadily on the table. It’s called a kōdai, and its shape gets special attention in traditional Japanese pottery. We’re going to try making one too.
What you’ll need
- Pottery clay for hand building.
- A small bowl of water for moistening your fingers.
- A sponge for smoothing the surface.
- A wooden clay modeling tool.
- A toothpick for preparing the joining surfaces.
- Food-safe ceramic glaze.
- Access to a pottery kiln for firing the piece.
How to make a Japanese tea bowl
- Make the base.
Take about 1–1½ lb (450–680 g) of pottery clay and knead it well. Roll it into a ball, press your thumb into the center to make an indentation, and gradually widen it by pinching the walls. You can use traditional tea bowl dimensions as a guide. Just remember that clay shrinks during firing. Try to keep the walls roughly the same thickness, about ¼ inch (6 mm), and leave the bottom a little thicker. - Shape the bowl.
Gradually widen the upper part while supporting the bottom with your palm. The bowl should be fairly deep, with a smooth transition from the bottom to the sides. Gently smooth the top rim with damp fingers. You can leave a few small imperfections, but make sure the rim is smooth and comfortable to drink from. - Make the ring-shaped foot.
Let the bowl dry a little so it holds its shape when turned upside down, but the clay should still be damp enough to join the pieces.
Take a separate piece of clay and roll it into an even clay coil about ½ inch (1.3 cm) thick. Shape it into a ring about 2½–3 inches (6–7.5 cm) in diameter, join the ends, and smooth the seam. Place the ring in the center of the upside-down bowl, mark where it will attach, and lightly score both surfaces. Apply a watery mixture of clay and water, press the ring onto the bottom, and smooth the joint. Once the clay has firmed up a little, check that the bowl stands evenly. - Prepare the bowl for firing.
Let the piece dry slowly until it’s completely dry, then have it fired for the first time. After that, apply a suitable food-safe glaze to the inside and sides of the bowl. I like natural shades such as creamy white, gray-green, or warm brown. The underside of the ring-shaped foot is usually left unglazed so it doesn’t stick to the kiln shelf. Then fire the bowl a second time at a temperature suitable for the clay and glaze.
If you don’t have experience firing pottery, it’s best to arrange things with a local pottery studio in advance. They can tell you which clay works with their kiln, which glaze to choose, and how much shrinkage to expect. You can absolutely shape the bowl at home, but firing requires special equipment.
By the way, experienced potters can tell quite a bit about a ceramicist’s work just by looking at the shape of the ring-shaped foot (kōdai). That’s why some collectors even turn a tea bowl upside down to take a closer look at its base.
Lindy and I usually enjoy tea in a much simpler way, without any special ceremonies. But I really like the idea of drinking tea from a bowl I’ve made with my own hands. Especially on chilly evenings, when it’s nice to sit at home with a hot bowl of tea after working in the garden. And there’s no need for an expensive tea ceremony set. A handmade tea bowl would mean much more to me.
5. Painted Kids Pinch Pot
Making little clay pinch pot bowls is a great activity for kids, especially when they get to choose the colors and come up with their own designs. Some decorate their creations with flowers, while others paint colorful stripes, dots, or funny faces. And sometimes a child just grabs a few paints and starts painting everything in sight. Why not?
Of course, there’s no need to aim for a perfectly even shape here. Every little bowl will turn out differently, and that’s part of the fun. You can also split the shaping and painting into two separate activities so the kids don’t get tired and have time to enjoy the process.
What you’ll need
- Air-dry clay for kids’ crafts — Crayola Air Dry Clay.
- A small bowl of water for moistening your fingers.
- A soft sponge for smoothing the clay.
- Washable kids’ paints.
- Paintbrushes in different sizes for painting.
- A tablecloth or paper to protect the table.
How to make a painted kids pinch pot
- Prepare the clay.
You’ll need about 3–4 oz (85–115 g) of clay for one small bowl. Let the child knead it a little with their hands, then help them roll it into a ball. If the clay has dried out slightly, you can moisten your fingers with water, but don’t get the clay too wet. - Shape the bowl.
Ask the child to press their thumb into the center of the clay ball to make an indentation. Then slowly turn the clay and gently pinch the sides between two fingers, gradually widening the opening.
For a first project, a diameter of about 3–4 inches (7.5–10 cm) is enough. Try to keep the walls and bottom around ¼ inch (6 mm) thick so they don’t become too fragile. - Fix the edges.
Place the bowl on the table and check whether it stands steadily. If the bottom is a little rounded, gently press it against a flat surface. You can smooth the edges with damp fingers or a sponge. But don’t fix every little imperfection for the child! Let them decide what shape their creation should have. - Let the clay dry.
Leave the bowl in a dry, well-ventilated place at room temperature. The air-dry clay from the brand mentioned above usually feels dry to the touch after about 24 hours and dries completely in approximately 72 hours. Thicker pieces may take longer.
Only paint the clay once it’s completely dry. For kids’ crafts, the nontoxic washable paints we chose in the materials list are a good option. - Paint the bowl.
Set out the paints, give the child a few brushes, and encourage them to come up with their own design. They can paint the bowl one color, then add flowers, stripes, or colorful dots once it dries. Younger kids can make simple marks with a paintbrush, while older children can try more detailed patterns. Let the kids use their imagination! Wait until the paint is completely dry before handling the bowl.
These little bowls are great for storing pencil erasers, large beads, or small toys, but not for food or water. Air-dry clay isn’t meant to come into contact with food. If you’re crafting with young children, check the age recommendations on the materials’ packaging and make sure little ones don’t put clay in their mouths.
These little creations could make a lovely collection at home, even if some have crooked edges or the paint accidentally goes outside the lines. A few years from now, it’ll be especially nice to look back at these little projects, remembering how the kids learned to make their first clay creations.
6. Fruit Shaped Clay Bowl
Fruit-shaped clay bowls can add a bright touch to your home. Apples, pears, oranges, peaches — there are so many options that it’s hard to pick just one. You can make several bowls in different colors and sizes and create a whole set of fruit-shaped bowls. Sounds great, right?
To start, I suggest trying an apple-shaped bowl. It has rounded sides, a small indentation near the stem, and one green leaf. This shape is easy to make even without a pottery wheel, and once it’s painted, it’ll look like a real red apple from our garden.
What you’ll need
- Air-dry clay.
- A small bowl of water for moistening your fingers.
- A soft sponge for smoothing the clay.
- A toothpick for small details and joining pieces.
- Red, green, and brown acrylic paints for painting the apple.
- Paintbrushes in different sizes for painting.
- Clear acrylic varnish for decorative crafts.
How to make a fruit-shaped clay bowl
- Make the base.
Take about 6–8 oz (170–225 g) of clay, knead it, and roll it into a ball. Press your thumb into the center to make an indentation, then gradually widen it while turning the clay and pinching the walls. For a small decorative bowl, you can aim for a diameter of about 4–5 inches (10–13 cm). Keep the walls around ¼ inch (6 mm) thick and leave the bottom a little thicker. - Shape the apple.
Gently widen the sides of the bowl, keeping its rounded shape. Then use your fingers to make a small notch on one side of the top rim, where the apple’s stem would normally be. You can lift the edges on either side of the notch a little to make the shape more recognizable.
Don’t worry if one side ends up a little wider than the other. Real apples aren’t always perfectly round either. - Make the stem and leaf.
Take a small piece of clay and roll it into a short coil about ½ inch (1.3 cm) long. For the leaf, flatten a small clay ball, pull out one end, and use a toothpick to draw the veins. Attach the stem to the outside of the bowl near the notch in the top rim, and place the leaf next to it, pointing slightly to one side.
To keep the pieces attached, lightly score the joining surfaces, apply a little mixture of clay and water, and gently press them onto the bowl. Smooth the joints with damp fingers. - Let the bowl dry.
Place it on a flat surface and leave it at room temperature until it’s completely dry. Depending on the thickness of the piece and the type of clay, this may take several days. Pay special attention to the bottom, stem, and where the leaf is attached.
Don’t try to speed up drying with a hair dryer or by placing the bowl near a heater, since drying too quickly can cause the clay to crack. - Paint the apple.
Paint the bowl with red acrylic paint, then apply a second coat once the first one has dried. To make our “apple” look more natural, you can add a little yellow or orange paint to the sides, gently blending the colors together. Paint the stem brown and the leaf green. Once the paint is completely dry, apply clear acrylic varnish for decorative crafts.
Air-dry clay is only suitable for decorative dishes, so you can use this bowl to store jewelry, keys, or other little things. You shouldn’t put real fruit in it or use it to serve food. For food-safe dishes, you’ll need pottery clay, a suitable glaze, and firing in a pottery kiln.
Well, we never stop at just one project. Using the same technique, you can make a pear by stretching one side of the bowl a little, or a peach with its distinctive groove. Lindy and I have plenty of fruit in our garden, so we definitely won’t run out of examples to use for our clay projects. And you can arrange the finished bowls on a shelf or give them to friends. Several different little “fruits” look especially cute together.
7. Textured Beginner Pinch Pot
You can decorate a simple clay pinch pot with a beautiful textured pattern, even if you’re trying pottery for the very first time. No special stamps or expensive tools needed. Leaves with prominent veins, a piece of lace, a wooden stick, or even an ordinary fork will do!
But I’ve always preferred making impressions of real plants in clay. We can always find a few pretty leaves in our garden, so finding a suitable pattern won’t be a problem. For your first attempt, choose one leaf with clearly visible veins that fits on the outside of your bowl, and try making an impression with it.
What you’ll need
- Air-dry clay.
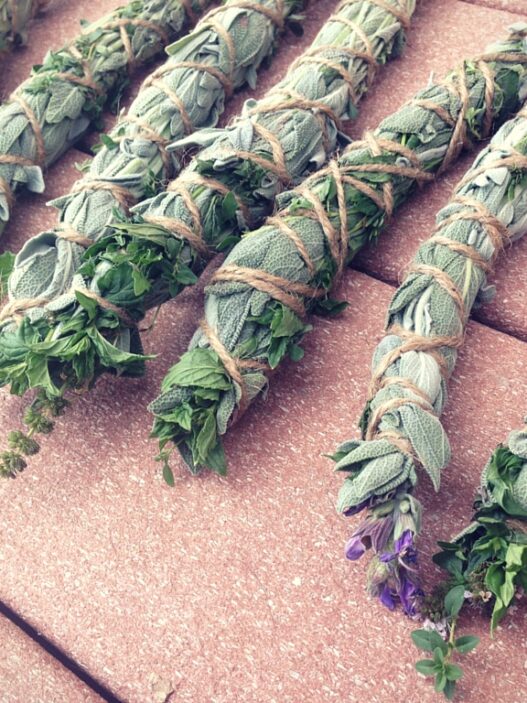
- Leaves with clearly visible veins, such as sage or mint leaves.
- A piece of lace for additional patterns.
- A toothpick or wooden stick for making dots and lines.
- A small bowl of water for moistening your fingers.
- A soft sponge for smoothing the surface.
- Acrylic paint and a paintbrush for painting.
- Clear acrylic varnish for decorative crafts.
How to make a textured pinch pot
- Make the base.
Take about 5–6 oz (140–170 g) of clay, knead it, and roll it into a ball. Press your thumb into the center to make an indentation, then gradually widen it while turning the clay in your hands and pinching the walls. For your first bowl, I recommend a diameter of about 4 inches (10 cm), but you can choose the size yourself. Keep the walls around ¼ inch (6 mm) thick and leave the bottom a little thicker. - Prepare the surface for the pattern.
Place the bowl on a flat table, gently flatten the bottom, and check that it doesn’t wobble. If the surface is too wet and sticky, let the clay dry a little.
It should still be soft enough to make an impression, but firm enough that the walls won’t lose their shape when you press lightly. - Make leaf impressions.
Take your prepared leaf and place its underside against the outside wall of the bowl. That’s usually the side where the veins stand out more. Gently press the leaf with your fingers while supporting the wall from the inside, then carefully peel it away. The veins will leave an impression in the clay.
If you’d like to repeat the pattern in several places, use leaves of a similar size, leaving small gaps between the impressions. - Add other textured details.
For example, place a piece of lace against an empty section of the bowl and gently press it with your fingers. When you remove the fabric, a delicate pattern will remain in the clay. You can also use a toothpick to make little dots along the top rim or draw a few short lines. Just don’t press too hard, or you might push right through the thin wall. I think one or two types of patterns are enough for a first project. - Dry and paint the bowl.
Leave the piece at room temperature until it’s completely dry, following the clay manufacturer’s instructions. After that, you can paint the bowl with acrylic paint.
The texture looks more interesting if you first cover the surface with a light color, then use an almost dry brush to add a little darker paint to the raised areas. This will make the leaf veins and other details stand out more. Once the paint has dried, apply clear varnish for decorative crafts.
As you’ve probably figured out by now, leaves aren’t the only things you can use to make textured patterns. You can press linen fabric, a seashell, a wooden stamp, or a small flower into soft clay. Just make sure the object is clean and won’t stick to the surface.
Like other air-dry clay projects, this little bowl can be used to hold small items, but not food or water. It’s great for storing rings, earrings, or simply decorating a shelf.
You can also use several leaves from different plants for this project. Lindy would probably pick something from our herbs, while I’d be interested in trying fern leaves. Even the simplest impressions can turn an ordinary clay pinch pot into a pretty little piece that’s nice to keep or give to friends.
8. Mediterranean Inspired Clay Dish
A clay dish with blue and white painted designs reminds me of traditional pottery from Spain and other Mediterranean countries. I find pieces decorated with hand-painted flowers, leaves, and geometric patterns incredibly beautiful and distinctive. We can borrow this idea for our project and paint a few branches, flowers, or geometric patterns.
Even a simple dish with a few blue branches painted around the edges can decorate your home.
You won’t need a pottery wheel for this project. We’ll make a shallow oval dish with painted rims, using regular air-dry clay.
What you’ll need
- Air-dry clay.
- A small bowl of water for moistening your fingers.
- A soft sponge for smoothing the clay.
- A toothpick for fixing small imperfections.
- White and blue acrylic paints for painting the design.
- Thin and wide paintbrushes for the background and patterns.
- Clear glossy acrylic varnish for decorative crafts.
How to make a Mediterranean-inspired clay dish
- Make the base.
Take about 8–10 oz (225–285 g) of clay, knead it well, and roll it into a ball. Use your thumbs to make an indentation in the center, then gradually widen it by pinching the sides and stretching the clay into an oval shape.
For a small decorative dish, you can aim for a length of about 6 inches (15 cm) and a width of 4 inches (10 cm), but feel free to choose your own dimensions. Keep the bottom about ¼ inch (6 mm) thick. - Shape the low sides.
Gradually widen the indentation, leaving sides about ½ inch (1.3 cm) high. Use your fingers to gently bend them outward so the dish becomes wide and shallow. Then place it on a flat surface and check that it stands steadily. If you notice any small cracks, smooth them out with damp fingers or a sponge. - Prepare the surface for painting.
Leave the dish at room temperature until it’s completely dry. Depending on the thickness of the clay, this may take several days.
Once the piece has dried, cover it with white acrylic paint. Two thin coats are usually enough for an even background, and each coat should dry thoroughly before you apply the next one. - Paint the Mediterranean-inspired pattern.
Using a thin paintbrush, draw a blue line along the inside edge of the dish, about ¼ inch (6 mm) from the rim. Then paint several small branches with leaves around the dish. In the center, you can add a simple flower with six petals. The elements don’t have to look exactly the same! Traditional hand-painted pottery often has small differences in line thickness and the shapes of details. Just make sure the paint has dried before applying the clear protective coating. - Finish decorating.
Once the blue design has dried completely, coat the dish with clear glossy acrylic varnish for decorative crafts, following the instructions on the packaging. The glossy varnish will give the surface a beautiful shine, similar to the finish on traditional painted pottery, while also helping protect the design from minor scuffs.
Of course, this will be a decorative dish, not something you can use to serve food. Air-dry clay and acrylic paints aren’t suitable for contact with food or water. But you can use the dish to store jewelry, keys, and other small items. Or simply place it on a shelf where the painted design is easy to see.
I like the idea that you can try recreating Mediterranean-inspired patterns without much painting experience. Start with a few blue lines and simple leaves, and once you get the hang of it, try more detailed floral designs. Maybe over time you’ll end up with a whole collection of decorative dishes featuring different patterns.
9. Wheel Look Pinch Pot Bowl
If you want to make a little bowl that looks like it was made on a pottery wheel, but without actually using one, give this method a try. First, we’ll shape the bowl by hand, then gradually smooth out the imperfections to get a rounded surface and neat edges.
Of course, getting perfect symmetry on your first try isn’t easy. But you won’t need any expensive equipment for this project, and all the basic techniques are beginner-friendly.
What you’ll need
- Air-dry clay.
- A flexible rubber pottery rib
- A wooden stick with a rounded tip for making decorative lines.
- A small bowl of water for moistening your fingers.
- A soft sponge for smoothing the surface.
- Acrylic paint and a paintbrush for painting.
- Clear acrylic varnish for decorative crafts.
How to make a wheel-look pinch pot bowl
- Make the base.
Take about 6–8 oz (170–225 g) of clay, knead it well, and roll it into a ball. Press your thumb into the center to make an indentation, then gradually widen it by turning the clay in your hands and pinching the walls.
For your first bowl, I recommend a diameter of about 4–5 inches (10–13 cm), but you can choose the size yourself. Try to keep the walls an even thickness, around ¼ inch (6 mm), and leave the bottom a little thicker. - Even out the shape.
Place the bowl on the table and gently press the bottom so it stands steadily. Now take the flexible rubber pottery rib and carefully smooth the outside walls, supporting them from the inside with your fingers. Gradually turn the bowl, removing noticeable bumps and fingerprints.
Then smooth the inside surface and go over the top rim with a slightly damp sponge. Try to get a smooth, rounded shape that resembles a bowl made on a pottery wheel. - Make the decorative lines.
While the clay is still soft, take a wooden stick with a rounded tip. Place the bowl on the table and hold it steady with one hand. With your other hand, carefully draw a shallow line along the outside wall, about ½ inch (1.3 cm) below the top rim. Then turn the bowl slightly on the table and continue the line from where you stopped.
Keep going until the line meets itself all the way around the bowl. You can make another parallel line a little lower down. Don’t press too hard, or you might damage the walls. Small imperfections are fine, since we’re making the pattern by hand, without a pottery wheel. - Dry and paint the bowl.
Leave the piece at room temperature until it’s completely dry, following the clay manufacturer’s instructions.
Don’t place it near a heater or in direct sunlight. Once the bowl is completely dry, paint it with acrylic paint. Cream, sandy beige, or light brown shades would work well for this design.
Apply the paint in thin coats so the decorative lines remain visible. Once the paint has dried, coat the bowl with clear acrylic varnish for decorative crafts.
As I’ve mentioned several times already, there’s no need to aim for a perfectly smooth surface. Real handmade pottery can have small imperfections too. The main thing is that the bowl stands steadily and its walls and edges look neat.
Since we’re using air-dry clay, the finished bowl will be suitable for storing jewelry, keys, and other small items, but not for food or water. For actual kitchenware, you’ll need pottery clay, a special glaze, and firing in a kiln.
I think this is a good way to get familiar with some pottery techniques, even without access to a studio. And once your first bowl is finished, you can try making a second one, a little deeper or wider. With each new attempt, smoothing the clay will get easier, and the results will keep getting better and better.
10. Simple Painted Pinch Pot
Even the simplest clay pinch pot can look great when you decorate it with a painted design. And you don’t need to be an artist to do it. A few stripes, dots, or simple geometric shapes are more than enough. And combining two or three colors gives you dozens of ways to decorate it.
I like pinch pots with contrasting painted designs, like a white interior with blue stripes on the outside. You can make this little craft in one evening and paint it as soon as the clay has dried completely. But it’s better not to rush the drying process.
What you’ll need
- Air-dry clay.
- A small bowl of water for moistening your fingers.
- A soft sponge for smoothing the surface.
- White and blue acrylic paints for painting the design.
- A wide and a thin paintbrush for painting and adding patterns.
- A regular pencil for sketching the design beforehand.
- Clear acrylic varnish for decorative crafts.
How to make a simple painted pinch pot
- Make the base.
Take about 5–6 oz (140–170 g) of clay, knead it, and roll it into a ball. Press your thumb into the center to make an indentation, gradually widening it and pinching the walls.
For a small bowl, a diameter of about 4 inches (10 cm) is enough, but you can choose a different size. Try to keep the walls about ¼ inch (6 mm) thick and leave the bottom a little thicker. - Adjust the shape.
Place the bowl on a flat surface and check that it stands steadily. If the bottom is too rounded, gently press it against the table while supporting the walls. Then smooth the top rim with damp fingers and use a sponge to remove any noticeable small cracks.
The bowl doesn’t have to be perfectly symmetrical. A few small imperfections are perfectly fine, especially for your first clay project. - Dry the bowl and prepare it for painting.
Leave the bowl at room temperature until it’s completely dry. Depending on the thickness of the clay and the humidity, this may take several days. Don’t place it near a heater or in direct sunlight.
Once the clay has dried completely, use a wide brush to cover the entire bowl with white acrylic paint. If the first coat looks a little patchy, apply a second one after the first has dried. - Paint the design.
For our version, I suggest painting a few vertical blue stripes on the outside of the bowl. You can lightly sketch them with a pencil first so the spacing between the lines is roughly even. Then use a thin paintbrush to draw the stripes from the top rim downward, stopping a little before the bottom. If your brush slips and a line comes out uneven, no big deal! Once the paint dries, you can fix small mistakes with white paint. - Coat the bowl with varnish.
Once the design has dried completely, apply a thin coat of clear acrylic varnish for decorative crafts. It’ll help protect the paint from minor scuffs.
Choose a matte or glossy finish depending on which look you prefer, and be sure to follow the manufacturer’s instructions.
By the way, you don’t have to stick to just stripes and dots. You can paint little flowers, leafy branches, strawberries, cherries, or even funny animals. Love geometric patterns? Try a checkerboard pattern, waves, or colorful triangles. And if you make several bowls of the same size and paint each one differently, you’ll have a whole collection for your shelf or dresser. Have fun experimenting!
Like the other air-dry clay crafts, this bowl isn’t meant for food or water. But it’s great for holding rings, earrings, hair clips, or other small items.
I’m always interested in seeing how much a simple object changes once it’s painted. It seems like nothing complicated — a white background and a few blue stripes — but the bowl already looks completely different. You don’t need to come up with complicated patterns to make something beautiful with your own hands. A couple of your favorite colors and a little free time are enough.
Which pinch pot will you make?
So, are you feeling like getting out some clay and clearing a spot on your worktable yet? I think you’ll start with one little bowl, then probably want to try another shape or a new design. You’ll see, you’ll end up looking for places to put all your finished creations!
Have you ever tried shaping clay by hand before? Tell us in the comments what you made and which idea from this collection you liked the most. I’m curious whether you managed to get even walls on your first try or had to reshape your clay a few times too.
We can’t wait to read your comments!