
There are backyard spaces where it’s really nice to be. Calm, neat, you want to stay there longer. And it’s not about the budget or even the size of the yard.
Most often, the difference is in the details: somewhere the boundaries are set right, somewhere light is added, somewhere the space is not overloaded with extra elements. And from this, a feeling of thoughtfulness gradually builds up. Not perfection, but logic — when everything is in its place and nothing clashes with each other.
After a lot of thinking, I put together 10 ideas that really change how space feels. Only the ones that give a noticeable effect. Let’s go through them step by step.
1. Backyard Landscaping on a Budget That Looks Expensive

Backyard landscaping on a budget that looks expensive sounds contradictory, but in practice it’s just smart decisions. Visual value doesn’t come from the number of elements, but from how they are combined.
Here’s what almost always works:
- Clear lines (paths, zone borders)
- Repetition of materials (same stone, one color palette)
- Contrast (light with dark, soft with hard)
- Accent points — 1–2, no more
Repetition of elements and a limited palette make the space visually more harmonious and “expensive,” even with a minimal budget.
What You’ll Need
- Gravel or decorative stone (pea gravel, 3/8 inch / ~1 cm)
- Border edging tape
- 2–3 large plants (better in containers)
- Mulch (2–3 inches / 5–7 cm)
- Solar garden lights
- Pruners
You can also add concrete stepping stones and one accent piece — a bench or a planter.
How to Make a Backyard Look “Expensive”
- Remove everything unnecessary and set the shape. Remove everything unnecessary and set the shape. First, clean the area: old boards, extra plants, uneven lawn edges. Then immediately mark zones — passage, rest, planting. Even simple geometry already makes the yard look cleaner and more structured.
- Make a gravel area. Make a gravel area. Remove the top layer of soil (2–3 inches / 5–7 cm), lay geotextile, pour gravel, and lightly compact it. Fix the edges with a border, otherwise everything will spread out in a couple of months and lose its clean look.
- Add large plants instead of many small ones. Add large plants instead of many small ones. It’s better to place 2–3 strong visual elements than to fill everything randomly. Containers give flexibility — you can change the layout and keep a balanced composition.
- Cover the ground with mulch. Cover the ground with mulch. A 2–3 inch layer (5–7 cm) makes plantings look neat, removes the feeling of “emptiness,” and helps retain moisture, while giving the space a more finished appearance.
- Add lighting. Add lighting. A couple of lights along the path and one accent on a plant — and in the evening the space looks completely different. Soft lighting creates a more inviting atmosphere without extra effort.
- Place one accent and stop. Place one accent and stop. It can be a bench, a planter, or a small table. One item works better than several scattered details, helping the space feel intentional and calm.
Common Mistakes
When you start doing your yard yourself, it’s very easy to get carried away and start adding everything, and the space just gets overloaded, the effect is lost. It’s better to stay focused and not spread yourself thin. What not to do:
- Mix too many materials
- Do everything at once, without a plan
- Ignore boundaries (edging really makes a difference)
- Plant many small plants instead of a few large ones
If you keep a simple rule in mind — less, but more precise, the result turns out predictable and pleasant.
How to Get the Most Out of a Minimal Budget
There is a simple approach we use in almost every project: invest in the base first, not the details. The base is the shape, покрытия, and 1–2 strong elements.
In short:
- first build the structure of the space
- then add покрытия (gravel, mulch)
- and only after that — plants and decor
This way the budget doesn’t spread out, and the result already looks finished at an early stage. Moreover, if you stop at this stage, the yard already looks complete and well thought out.
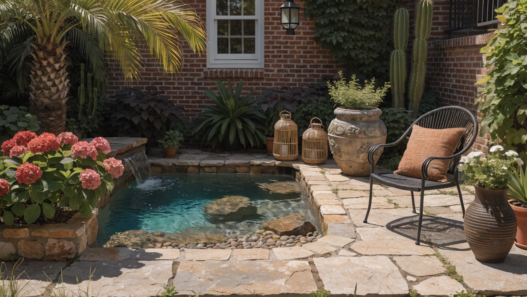
2. Poolside Landscaping Without the Maintenance Headache

In poolside landscaping without the maintenance headache, the logic is a bit different than in the rest of the yard. Around a pool, it’s important not only how it looks, but how it behaves every day.
Main principles:
- Minimum debris (leaves, petals, needles)
- Surfaces that are easy to clean
- Plants that don’t require constant care
- Good drainage
Drought-tolerant plants really require less watering and care, especially in hot areas where surfaces heat up a lot — exactly like next to a swimming pool.
What You’ll Need
- Tile or stone покрытия (porcelain pavers or concrete pavers)
- Decorative gravel (pea gravel or crushed stone)
- Geotextile
- 3–5 low-maintenance plants (for example, ornamental grasses)
- Mulch or stone покрытия
- Garden hose with a sprayer
It also helps to add one large planter or a lounge chair.
How to Set Up a Pool Area Without Extra Maintenance
- Choose the right surface. Choose the right surface. Around the pool, it’s better to use hard materials — tile or stone. They are easy to clean, don’t create dirt, and don’t get into the water. Wood looks nice, but requires regular maintenance.
- Remove soil and grass near the water. Remove soil and grass near the water. The less exposed soil near the pool, the less dirt ends up in the water. It’s better to replace it with gravel or tile for a cleaner environment.
- Use gravel as a transition zone. Use gravel as a transition zone. A strip 1–2 ft (30–60 cm) around the pool works as a buffer — it traps debris and makes the space look more organized and neat.
- Choose plants with “clean behavior”. Choose plants with “clean behavior.” Ornamental grasses, succulents, lavender — good options. They don’t shed much and handle heat well, making them low-maintenance choices.
- Place plants at a distance. Place plants at a distance. Don’t plant right next to the pool. It’s better to leave 2–3 ft (60–90 cm) between the water and plantings — this significantly reduces unwanted debris.
- Use stone mulch instead of organic. Use stone mulch instead of organic. Wood chips and bark scatter easily and end up in the water. Stone stays in place and looks more consistent and clean.
How It’s Usually Done
This approach is often seen in private yards and small hotels. They don’t overcomplicate — they create a simple, working base. First, they remove grass and exposed soil near the water, because that’s what creates the most daily mess.
Then they add a 1–2 ft (30–60 cm) gravel strip around the perimeter — it separates the pool area and immediately simplifies maintenance.
Next, they place 2–3 container plants as accents, without dense planting, and leave some space between water and greenery. This small detail actually reduces debris and makes everything look more refined.
Minimum elements — and the area starts to look well-kept without extra effort.
Common Mistakes in Poolside Landscaping
Of course, dense planting, soft lawns, and decorative elements look great. But in real life, this often turns into constant cleaning. So it’s not recommended to:
- Plant too close to the water
- Use trees with heavy leaf drop
- Leave exposed soil near the pool
- Create complex plantings that need frequent trimming
That’s how you end up with a space that requires more maintenance than enjoyment.
Balance Between Beauty and Simplicity
It becomes clear that if an element requires constant attention — it doesn’t belong in a pool area. It’s better to make the space a bit simpler, but something you actually want to use every day. A place where you don’t have to think about cleaning or fixing something again.
And that’s when the pool area starts to work as a true relaxation space, not another project you have to maintain.
3. Dog-Friendly Backyard Zones That Still Look Chic

You got a dog, and the lawn starts getting worn out, muddy paths appear, plants suffer… it’s not about the dog. It’s about the fact that the space wasn’t adapted for it.
What to Consider in Advance
Dogs move along clear routes. They have favorite paths, resting spots, and areas where they play most often. If you don’t consider this — they will create their own routes.
Here’s what matters:
- Durable surfaces instead of a fragile lawn
- Clear paths that are easy to run on
- Shade and rest zones
- Minimum delicate plants
A safe environment with durable surfaces and non-toxic plants reduces the risk of injuries and stress for dogs. This is not only about appearance, but also about their overall health.
What You’ll Need
- Gravel or chips for paths (pea gravel or wood chips)
- Stepping stones (concrete stepping stones)
- Durable plants (lavender, rosemary, ornamental grasses)
- Strong mulch (2–3 inches / 5–7 cm)
- Border edging for zone separation
- Pruners
It also helps to add a dog bed or an outdoor mat.
How to Organize Space for a Dog Without Ruining the Look
- Create clear routes. Create clear routes. Look at where your dog already runs most often, and reinforce those lines. Add gravel or stones there — this way you’re not fighting habits, but working with them, creating a more functional layout.
- Replace vulnerable areas. Replace vulnerable areas. Where the lawn gets worn out quickly, it’s better to switch to gravel or mulch right away. This reduces mud and keeps a clean appearance.
- Divide the space. Divide the space. Use edging to separate planting areas from activity zones. This helps protect plants and makes the yard more visually structured.
- Choose durable plants. Choose durable plants. Lavender, rosemary, ornamental grasses — they handle movement well and don’t look flattened after every run, staying resilient over time.
- Add a rest zone. Add a rest zone. A small shaded spot where the dog can lie down reduces chaotic movement across the yard and creates a more balanced environment.
- Avoid overloading the design. Avoid overloading the design. The simpler the composition, the easier it is to maintain order and keep everything looking neat and intentional.
How Smart Dog Owners Do It
If you look at well-designed yards with dogs, no one tries to keep a “perfect lawn” at all costs. Instead, they create a comfortable base and build everything else around it.
Usually, they leave 1–2 main paths where the dog runs most often and reinforce them with gravel or stones. This immediately removes mud and worn trails, making the space more practical and durable.
Plants don’t disappear, but they move to the sides — along fences, in corners, or into containers where they are harder to damage, keeping the yard both functional and stylish.
Mistakes to Avoid
When trying to combine a beautiful yard with an active dog, it’s easy to overestimate the durability of a regular lawn and decorative plants. As a result, it turns into constant maintenance. Common mistakes:
- Leaving large areas of regular lawn
- Planting delicate plants in high-traffic zones
- Ignoring the dog’s natural routes
- Creating complex flower beds without protection
If you consider the dog’s behavior in advance, you can avoid constant fixes and keep the yard looking consistent and clean.
If any element can’t handle activity — it doesn’t belong in this zone. It’s better to choose a more durable solution right away than to constantly repair and replace things.
When the space is adapted to real-life scenarios — for both people and the dog — it works efficiently and still looks well-designed, not like a compromise.
4. Small Deck Additions That Expand Space Visually

Small deck additions that expand space visually — this is a way to “expand” a yard without actually increasing its size. What matters here is how exactly you add this zone.
When a raised or defined area appears, the brain starts to read it as a separate layer. And that means the space feels more complex and deep.
What enhances this effect:
- Clear boundaries between different levels
- Repetition of materials
- Lines that guide the eye
- Open space around
Zoning and different levels really help make a space feel more voluminous, even if the area doesn’t change. This is a technique often used in the design of small backyards.
What You’ll Need
- Deck boards (pressure-treated wood or composite decking)
- Base (concrete blocks or deck blocks)
- Exterior screws
- Level and measuring tape
- Protective coating for wood
- Drill
How to Add a Deck Without “Eating” the Space
- Choose the right size. Choose the right size. The deck shouldn’t take up more than 30–40% of the area, otherwise it starts to feel overwhelming. For example, in a small yard, an 8×10 ft (2.4×3 m) format works well and keeps the space visually balanced.
- Make it slightly raised. Make it slightly raised. Even a height of 6–12 inches (15–30 cm) already creates a level effect. This adds depth without complex construction and makes the space feel more layered.
- Leave “air” around it. Leave “air” around it. Don’t squeeze the deck on all sides. Let at least one side stay open — gravel, lawn, or mulch. This keeps the space feeling light and open.
- Use board direction intentionally. Use board direction intentionally. Laying boards along the longer side of the yard visually “stretches” the space. It’s a simple trick, but it really works to make the area feel longer and wider.
- Repeat materials. Repeat materials. If there is already wood or a similar color somewhere, use it again. Repetition creates a sense of visual cohesion.
- Don’t overload with furniture. Don’t overload with furniture. A deck looks better with 1–2 items — a bench, a couple of chairs, or a compact table. This keeps the area clean and intentional.
Where This Works Best
Most often, small decks like this are used in areas where you need to add function but don’t have space for a large terrace. It can be a corner of the yard, a space near the house, or a transition between zones — all helping create a more functional layout.
A combination of deck and gravel around it works especially well. The deck becomes the focal point, while the rest of the space supports it without competing, keeping the design simple and elegant.
And one more thing — shape. A rectangle or square almost always looks better than complex shapes. Simpler means cleaner and more refined, without adding unnecessary visual noise.
How to Create a “Bigger Space” Effect Without Increasing Size
The deck should create a feeling that the space continues, not ends at it. For this:
- leave open zones nearby
- don’t overload with details
- work with lines and direction
As a result, you’re not adding square meters, but the perception of space changes. The yard starts to “breathe” and feels much more spacious and open than it actually is.
5. Creative Fence Planting for Privacy and Color

A fence itself rarely decorates a yard. But once you add a few thoughtful plantings — it stops standing out. There’s a simple logic here that reads instantly and creates a more intentional design.
Key principles:
- Layers by height
When there is a tall background and lower plants in front, the line becomes deeper. Even a small height difference already creates this effect, and the fence visually moves back, adding a sense of depth and dimension. - Repetition
If the same plants appear at equal intervals, the eye reads it as order. The line looks intentional, not random, creating a more cohesive layout. - A bit of open space
When there is “air” between groups, each planting reads better. If you fill everything at once, after a season it all blends into one mass and loses its visual clarity.
What You’ll Need
- 2–3 tall plants for the background
- 3–4 medium shrubs or perennials
- 1 plant with color or interesting foliage
- Mulch (2–3 inches / 5–7 cm)
- Compost or ready soil
- Pruners
How to Arrange Plantings Along a Fence
- Define where privacy is needed. Define where privacy is needed. You don’t have to cover the entire fence. Usually, it’s enough to strengthen one area — for example, near a seating spot. This saves effort and makes the result more visually impactful.
- Set a proper width. Set a proper width. If you have at least 2–3 ft (60–90 cm), you can already create a full composition. A narrow strip almost always looks random and doesn’t give the desired effect.
- Create a tall background. Create a tall background. A few taller plants placed in groups immediately set structure. They shouldn’t stand in a straight line — a slight shift and rhythm make the composition feel more natural and dynamic.
- Add a middle layer. Add a middle layer. This is where softness appears. Shrubs or perennials fill the space between main accents and make the line feel alive instead of rigid, adding a more balanced look.
- Add color carefully. Add color carefully. The same shade repeated in several places looks better than many different colors. This keeps the line from breaking apart and maintains a harmonious palette.
- Cover the ground. Cover the ground. Mulch immediately removes the feeling of incompleteness. It also helps retain moisture and reduce weeds, giving the area a more finished appearance.
Mistakes to Avoid
When working with a fence, it’s easy to ruin the result. So it’s not recommended to:
- Plant too densely — over time plants interfere with each other and lose their shape, reducing long-term structure
- Use too many different species — it may seem interesting at first, but later looks overloaded and creates visual chaos
- Make identical planting along the entire length — the fence still feels long and boring, just with plants, lacking variation and rhythm
- Ignore growth — after a season, shrubs can take up twice as much space, leading to unnecessary rework and effort
If you leave some space and don’t try to fill everything at once, the composition will stay neat for longer and feel more controlled and clean.
It makes sense to choose one section — the one that is most visible. Create a proper planting there and see how it behaves after a season. Usually, that’s enough to understand what works and what doesn’t.
Then you can repeat the same principle without complicating things or redoing everything from scratch, keeping the whole yard consistent and easy to maintain.
6. Transforming Corners Into Mini Lounge Nooks

Corners in a yard often stay “empty” or turn into storage. But they can actually become the coziest spots on the property.
When a space is limited from two sides (fence, wall, hedge), it automatically feels more protected and turns into a comfortable retreat zone.
What enhances this effect:
- Partial enclosure from two sides for a sense of privacy
- A soft background (plants or textures) that feels visually calm
- Compact furniture that doesn’t overwhelm the space
- Local lighting that creates a warm atmosphere
In small-space design, these “pocket zones” are perceived as more уютные and convenient for relaxation than fully open areas, making them a smart use of space.
What You’ll Need
- A compact bench or 2 chairs, for example, Best Choice Products Outdoor Wicker Chair Set
- A small table
- 2–3 plants (containers or planted)
- Gravel or mulch (2–3 inches / 5–7 cm)
- Soft lighting (string lights or lanterns)
How to Turn a Corner Into a Lounge Area
- Clean and level the space. Clean and level the space. Corners are often cluttered or uneven. Even basic cleaning and leveling already change how the area feels, making it more inviting and usable.
- Define the ground surface. Define the ground surface. Gravel or mulch creates the feeling of a separate zone. A площадка around 6×6 ft (1.8×1.8 m) already works as a full mini area and gives it a more structured look.
- Add “walls”. Add “walls.” These can be plants, containers, or even a wooden panel. You don’t need to close everything — just a hint of a boundary is enough to create a cozy enclosure.
- Place the furniture. Place the furniture. Keep it compact. A bench along one side or two chairs are enough to make the space functional while maintaining a balanced layout.
- Add lighting. Add lighting. One light source — string lights or a lantern — and in the evening the space becomes much more comfortable and creates a relaxed evening vibe.
- Don’t overload with decor. Don’t overload with decor. One textile element or a couple of pillows already set the mood. More is not needed if you want to keep the space simple and cohesive.
Mistakes to Avoid
What not to do in these zones:
- Use furniture that is too large, which breaks the proportions of the space
- Add too much decor, creating visual clutter
- Skip defining clear boundaries, making the area feel unfinished
- Leave exposed, “raw” soil, which reduces the overall neatness
If you keep everything simple, the corner starts working as a separate place, not just a random part of the yard, becoming a functional mini space.
If you personally want to sit in that corner in the evening — it means it worked. You don’t need many elements for that. A comfortable place to sit, a bit of privacy, and soft lighting are enough.
And that’s when a corner stops being just a corner. It becomes a place you go to relax — a true cozy spot.
7. Modern Paving Patterns That Add Instant Character

When we look at a yard, the eye always catches the lines. And they define whether the space feels ordered or chaotic. It’s all about the pattern. The same stone can look either boring or very clean and modern depending on the layout design.
What works best:
- Direction of lines (along or across the yard) for visual flow
- Repeating rhythm that creates structure
- Combination of large and small elements for contrast and balance
- Contrast between pavers and filling (gravel, grass) for texture variation
Guiding lines and repeating patterns make the space more structured and visually neat. Because of this, it feels more “expensive” and well thought out, creating a refined outdoor look.
What You’ll Need
- Pavers or slabs (concrete pavers, 12×12 inch / ~30×30 cm or larger)
- Gravel or sand for the base
- Geotextile
- Level and measuring tape
- Rubber mallet
How to Choose and Lay a Paving Pattern
- Define the direction. Define the direction. If the yard is narrow, lay pavers across — this visually widens the space. If it’s long, lay them lengthwise to enhance depth. This simple trick immediately changes the spatial perception.
- Choose one main pattern. Choose one main pattern. Don’t mix multiple layouts. One clear option — like linear placement or offset pattern — creates order and gives a more cohesive appearance.
- Leave gaps. Leave gaps. Between pavers, you can leave 1–2 inches (2.5–5 cm) and fill them with gravel or grass. This adds texture and makes the surface feel lighter and more natural.
- Use larger elements. Use larger elements. Bigger slabs look more modern and cleaner than small pavers. Fewer lines mean less visual noise and a more minimalist style.
- Keep a consistent rhythm.Keep a consistent rhythm. Spacing and alignment should stay even. Even small inconsistencies are noticeable and break the clean geometry.
- Limit the color palette. Limit the color palette. One or two colors are enough. If you add more, the surface starts to dominate the space and creates visual overload.
Patterns That Look Modern
There are several options that almost always look good and don’t go out of style:
- Linear layout (parallel lines) — the most clean and calm option with a timeless look
- Checker pattern with gaps — adds rhythm and lightness with a dynamic feel
- Offset pattern — classic but still neat and structured, giving a balanced layout
- Slabs with gravel — modern minimalism with a contemporary aesthetic
One clear pattern, without overcomplication, almost always looks better than trying to create something unusual with too many elements. Simplicity keeps the design elegant and intentional.
A common mistake is mixing multiple patterns and using elements that are too small. This creates visual clutter and breaks the overall design consistency.
Even a small section with a well-thought-out layout immediately changes how the whole yard feels, setting the tone for a more polished space.
And the best part — this kind of change doesn’t require big investments, but gives a very noticeable and high-impact result.
8. DIY Water Wall Features for Minimalists

Water always draws attention, but you don’t have to build a pond or a complex fountain. DIY water wall features for minimalists are a much cleaner solution, especially for small spaces.
Horizontal water features take up space. Vertical ones don’t. They use height instead of area, while still remaining noticeable and creating a modern focal point.
What this format gives:
- Space saving — works even for small backyards
- Clean geometry — fits well into a modern style
- Less debris — almost nothing falls into the water, making it low maintenance
- Calm sound without unnecessary noise
What You’ll Need
- Vertical panel (metal, stone, or treated wood)
- Water reservoir (container or hidden tank)
- Submersible pump
- Hose for water circulation
- Decorative stones or gravel
For a simple system, VIVOSUN 800GPH Submersible Pump works well — enough power for a small water flow and a steady circulation.
How to Build a Water Wall Yourself
- Choose the right location. Choose the right location. It works best near a wall or fence where there is a natural background. The surface should be even and stable to ensure a solid foundation.
- Prepare the base. Prepare the base. Place the reservoir (or partially bury it) so it stays stable. This will support the entire structure and keep everything secure and balanced.
- Install the vertical panel. Install the vertical panel. Fix it so that water can flow down the surface. A slight backward tilt helps prevent splashing and keeps a clean water flow.
- Connect the pump. Connect the pump. The pump sits in the reservoir, and the hose brings water to the top. From there, it spreads and flows down the panel, creating a continuous stream.
- Hide the lower part. Hide the lower part. Add stones or gravel to cover the reservoir. This immediately makes the structure look more polished and neat.
- Adjust the water flow. Adjust the water flow. Too strong a flow creates noise and splashes. A gentle, even stream looks better and gives a more relaxing effect.
These water walls are most often placed in lounge areas or near seating. Anywhere you can hear the water without taking up space — near a fence, a wall, in a corner, or next to a lounge zone — making them a perfect accent feature.
It’s important that the element is visible but doesn’t interfere with movement, keeping the space functional and calm.
Mistakes That Ruin the Result
We often want to add more details — and the structure becomes complicated and demanding. Here’s what to avoid:
- Too strong water flow, which creates unnecessary noise
- Complex shapes and materials that break the minimalist feel
- Lack of a stable base, leading to instability and poor durability
- Poor reservoir hiding, which ruins the overall look
When the structure is simple, it looks cleaner and requires less maintenance, making it a practical solution.
A water wall should be a background element. It’s better to choose one material, one shape, and one flow. That’s already enough. When the element fits into the space and doesn’t compete with it, it doesn’t distract — it adds a sense of calm and balance.
9. Outdoor Dining Zones With Lighting Magic

For us, it really matters how a space feels in the evening. During the day, it can be just a regular table. But with the right lighting — it becomes something completely different, turning into a cozy evening setup.
Good lighting shouldn’t blind or feel like a spotlight. It should be soft and directed, creating a more comfortable atmosphere.
What gives the best result:
- Warm light instead of cold for a relaxed mood
- Several light sources instead of one for better light balance
- Light at eye level or lower for a more intimate feel
- Soft diffusion instead of a harsh поток for a gentle glow
Warm diffused light makes the space more comfortable for communication and relaxation. Because of this, you naturally want to spend more time there, creating a welcoming outdoor space.
What You’ll Need
- Table and 2–6 chairs (depending on the size of the area)
- String lights with warm light
- 1–2 additional sources (lanterns or table lamps)
- Extension cord or solar lights
- Hooks or cable for mounting
Brightech Ambience Pro Solar String Lights work great — soft light and no need for wiring, making setup simple and clean.
How to Build a Dining Area That Works in the Evening
- Choose the right location. Choose the right location. It’s better if it’s near the house or kitchen. Even a few steps of distance affect how often you’ll use it, making it more practical and convenient.
- Define the boundaries. Define the boundaries. Gravel, tile, or a deck help “frame” the space. Even a simple 8×10 ft (2.4×3 m) area already works as a separate zone and gives a more organized look.
- Place the main light above. Place the main light above. String lights over the table create a soft dome of light. It’s important not to hang them too high — about 7–9 ft (2.1–2.7 m) from the ground — for a more focused lighting effect.
- Add a second layer of light. Add a second layer of light. A lantern on the table or nearby creates depth. This removes harsh shadows and makes the space feel more dynamic and layered.
- Keep the light even. Keep the light even. There shouldn’t be one bright spot and darkness around it. Several softer sources work better than one strong one, creating a balanced illumination.
- Keep the space simple. Keep the space simple. You don’t need much decor. The lighting already does most of the work, helping maintain a clean and elegant setup.
How These Spaces Usually Look in Real Life
If you look at good examples, they are rarely complicated. Most often it’s just a regular table, a couple of chairs, and well-placed lighting.
String lights are stretched from the house to a fence or between posts. Sometimes one accent is added — a lantern or a candle on the table — and that’s enough to make the space feel inviting and become a natural gathering spot.
Mistakes to Avoid
If you don’t consider some details, it’s easy to get lighting wrong. Often there’s a desire to make it “brighter,” but here’s what not to do:
- Use cold light, which breaks the cozy atmosphere
- Rely on one powerful source, creating harsh contrast
- Hang string lights too high, losing the intimate feeling
- Ignore secondary lighting, which reduces depth and comfort
If you stay at the table longer than you planned — it means it worked. You only need a comfortable place, soft light, and a sense of completeness.
And even a regular outdoor dinner starts to feel different — more relaxed, more meaningful, and truly enjoyable to spend time in.
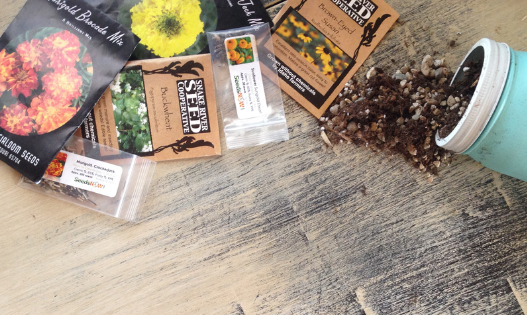
10. Compact Garden Plans for Maximum Impact

I’ve said it many times — you don’t need more space for a garden. You need smart layout logic.
There are a few things that immediately boost the effect:
- Clear zoning for a more organized structure
- Repetition of plants for a cohesive look
- Vertical elements that add visual height
- Density, but without chaos for a balanced composition
What You’ll Need
A minimal starter setup:
- 2–4 beds or containers
- Quality soil (for example, Miracle-Gro Raised Bed Soil)
- 5–7 types of plants
- Mulch (2–3 inches / 5–7 cm)
- Supports or trellises
How to Plan a Compact Garden for Maximum Impact
- Divide the space into zones. Divide the space into zones. Even in a small yard, it feels easier to breathe when there are 2–3 clear blocks instead of one large bed. The garden immediately looks neater and becomes more manageable and clean.
- Group plants together. Group plants together. When the same crops repeat in small groups, everything looks more structured. If you plant them one by one, it creates a sense of randomness and breaks the visual unity.
- Use vertical space. Use vertical space. Trellises, supports, or climbing plants help a lot. They add height, and the garden starts to feel bigger even though the area stays the same, creating a layered effect.
- Keep paths narrow. Keep paths narrow. Wide paths quickly “eat up” useful space. Usually, 18–24 inches (45–60 cm) is enough to walk comfortably without touching plants, preserving usable area.
- Mix plant heights. Mix plant heights. When tall, medium, and low plants are рядом, the garden looks more dynamic. Even a simple combination creates depth and a more natural composition.
- Repeat key plants. Repeat key plants. When the same plant appears in several places, the garden feels like a whole. It’s a simple thing, but it strongly affects the overall harmony.
In compact gardens, there are rarely many zones. Most often, it’s 2–3 clear blocks that are easy to read. For example, a couple of raised beds, one vertical line (trellis or grid), and a small path between them — forming a clean layout.
Because of this, everything looks neat and well thought out, even if the space is small, creating a high-impact result.
Mistakes to Avoid
With small gardens, there is a temptation to use every inch. But if you overload the space, it starts to feel cramped. Avoid:
- Planting too many different crops, which creates visual clutter
- Leaving large empty paths that waste valuable space
- Ignoring vertical space and losing growth potential
- Not planning ahead, leading to a disorganized layout
When there is a simple structure, the garden starts to work as a whole, not as a set of separate plantings, giving a unified look.
A Cozy Backyard
All these ideas work not separately, but together.
Somewhere you add lighting — and you want to spend evenings there; change the surface — and the yard starts to look finished; remove the excess — and suddenly the space feels bigger.
And the best part is that it’s not one big project. It’s more like gradual changes that start coming together into one complete feeling, creating a harmonious outdoor space.Have you tried something like this in your own yard — did it work or not? Write in the comments, it’s really interesting to read.