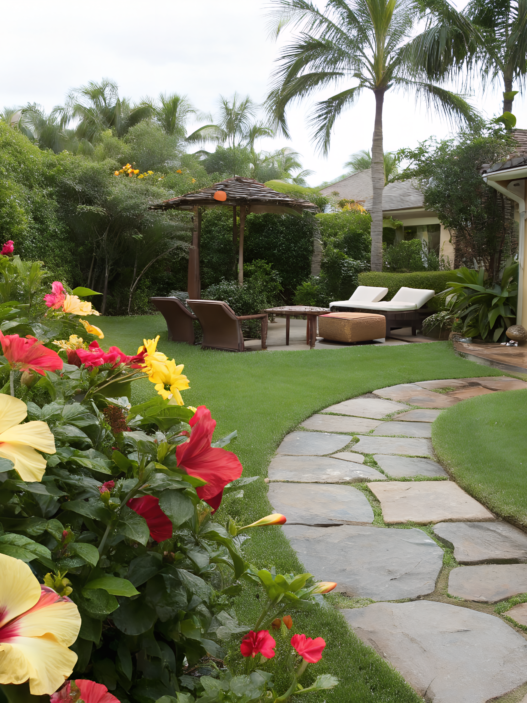
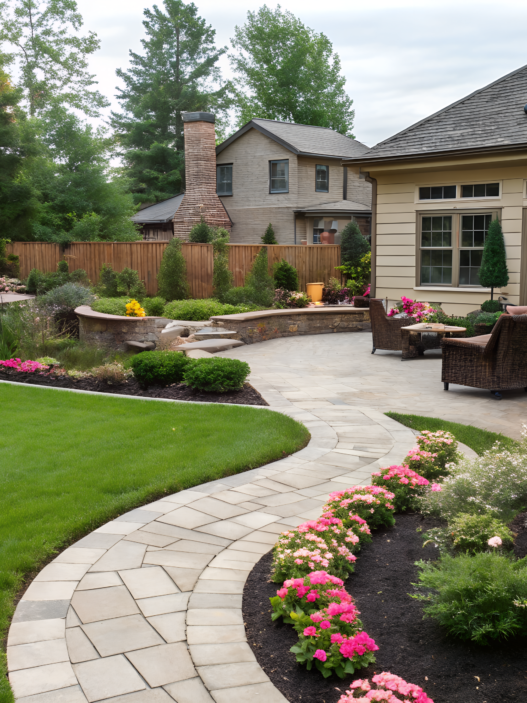
Everything on any yard starts with planning. 10 raised garden bed layouts you’re about to go through are working setups that help make your space easier and more predictable to maintain.
With beds placed randomly, you keep losing time. I’ve been there. And only when you start changing the structure itself — square layouts, fence lines, corners, levels — everything becomes much easier. Not faster on day one, but easier over time.
Here you’ll find different approaches to building beds. In some cases it’s about saving space, in others just about convenience. But the idea is the same everywhere — every foot should work.
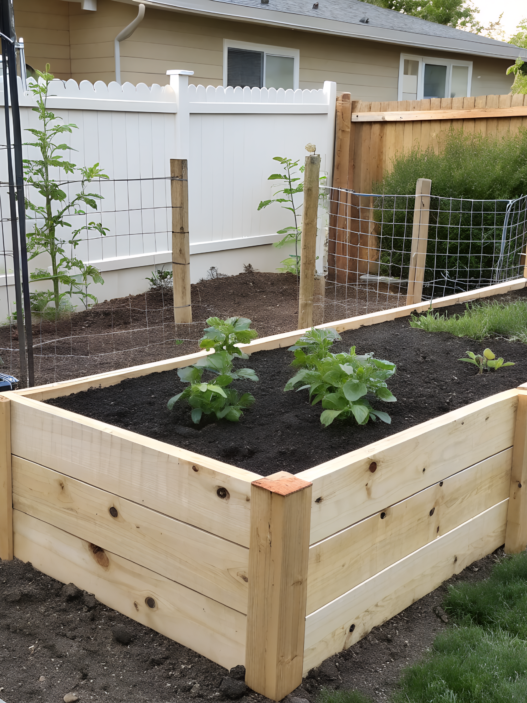
1. Square Layout for Compact Backyards
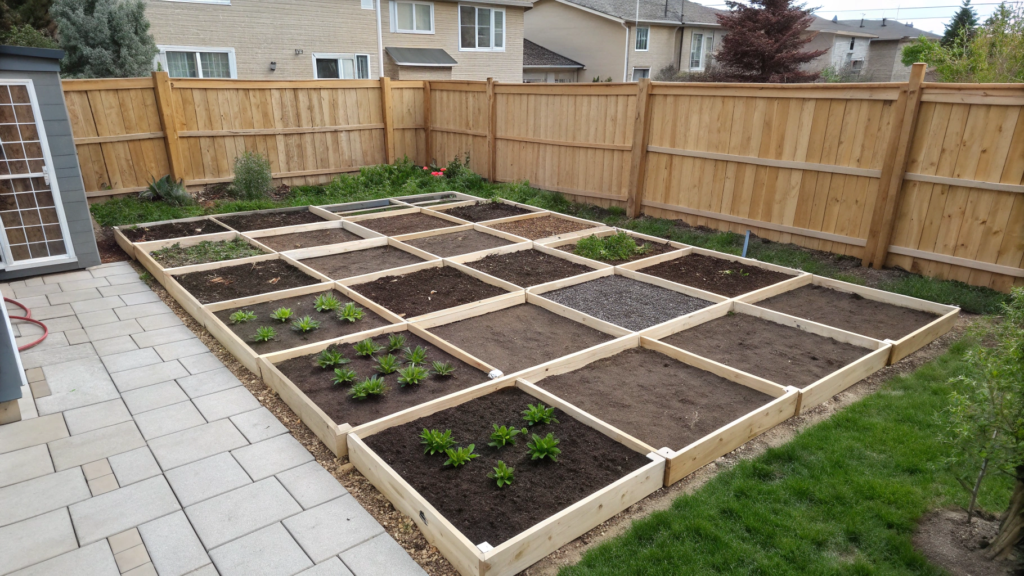
This method is good for a small yard. When space is limited, any planning mistake is felt right away, so let’s try to understand how to build a square bed system so it works clearly.
When the yard is compact, a square layout gives:
- minimal loss of space between beds
- easy access from each side
- clear planting logic
- neat look of the yard
You shouldn’t step on the bed. That’s exactly why bed size matters. When a bed is too wide, sooner or later you start stepping inside — and the soil gets compacted.
After switching to smaller squares (about 4×4 ft / 1.2×1.2 m), we noticed that the soil stays loose much longer, even without constant loosening. It’s logical — less pressure, less compaction, roots grow easier and get more air.
In recommendations of university agricultural programs (including Iowa State Extension), it’s regularly emphasized that limiting walking on beds helps keep soil structure and improves growing conditions.
What you need
- Boards or ready-made beds
- Screws or nails
- Drill or hammer
- Cardboard or geotextile
- Soil mix
- Measuring tape and stakes
We started with whatever we had on hand. And that was enough.
How to build a square layout step by step
The process is simple, but each step matters. If you rush here, you’ll feel it later during planting and maintenance.
- Define the bed size
Make it about 4×4 ft (≈120×120 cm). This lets you reach the center from any side without stepping inside. If the bed is wider, you’ll start stepping in, and the soil will compact over time. - Mark the grid on the ground
Use stakes and string to lay out the structure. Leave paths at least 1.5–2 ft (≈45–60 cm). At first it feels like lost space, but in practice it makes movement much easier. - Assemble the bed frames
Connect boards into square shapes and place them according to your layout. Check corners and level right away so beds don’t shift or tilt later. - Choose the bed height
A standard height is 10–12 inches (≈25–30 cm), which works for most crops. If you want less bending, go up to 18 inches (≈45 cm) — it noticeably reduces strain on your back. - Prepare the base
Lay cardboard or geotextile directly on the ground. This blocks weeds and helps keep the soil structure clean in the early stages. - Fill the beds with soil
Mix garden soil with compost and organic matter. You don’t need a perfect formula — the goal is a loose mix that holds moisture and supports roots. - Plan the internal layout of the bed
Divide the square into sections: 4, 9, or 16 parts. This helps distribute plants evenly and prevents overcrowding.
Tip. If you don’t want to redo planting in a couple of weeks, consider plant height and sun direction from the start. Place taller crops on the north side so they don’t shade others. Lower plants grow better on the south side where they get more consistent light.
When this approach works best
This format isn’t universal, but in many cases it gives strong results.
- small yards up to 0.25 acre
- quick setup without complex planning
- need for a clear system without experiments
- limited time for maintenance
Before making things more complex, it’s better to build a solid base. And this layout handles that well.
Square layout is a way to bring order without extra effort. You plan planting faster and don’t waste energy on unnecessary movement. Most importantly, you start getting stable results from a small space. And it’s one of the simplest ways to make your garden more convenient from the very beginning.
2. Long Linear Beds Along Fences — how to turn a fence into a working garden zone
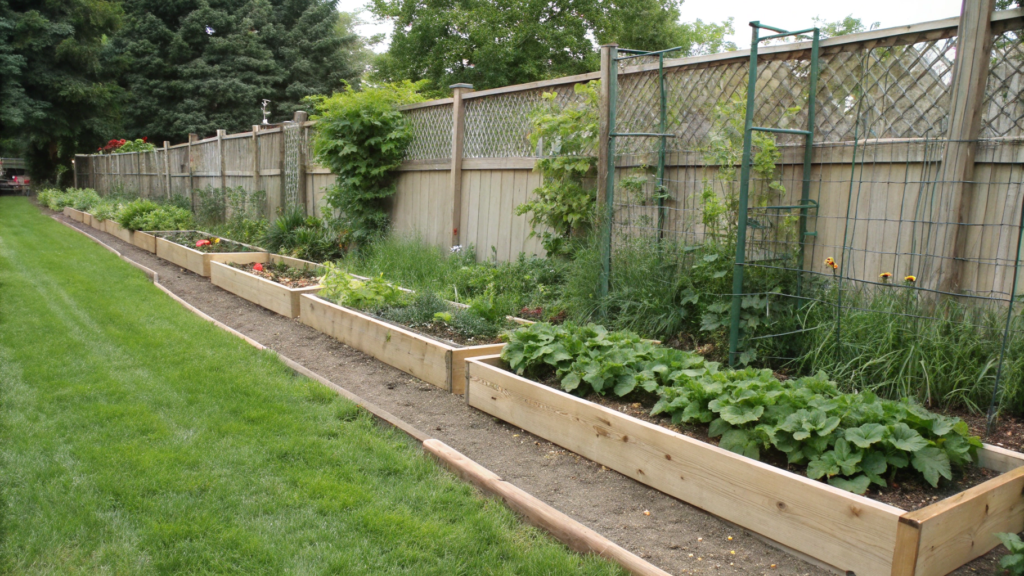
We always forget that a fence is a ready-made support, protection, and extra space that often just sits unused. It took us some time to realize it too — but those spots are actually perfect for a long raised bed.
When you place plantings along the edge of your yard, you automatically free up the center. This approach gives you several clear advantages:
- better use of available space inside the yard
- natural protection from wind
- ability to use vertical growth (supports, trellises)
- easier maintenance — everything is in one line
Even a simple fence or hedge can noticeably reduce wind near your plants. In recommendations from USDA Natural Resources Conservation Service, these types of barriers are described as creating a calmer zone for growing.
This directly affects moisture loss and overall plant health. Less drying out, less stress, more stable growth.
Basic setup for getting started
Before building anything, it’s better to gather everything in one place. This avoids stopping halfway through and makes the process smoother.
- Boards or long ready-made beds, (for example, Land Guard Galvanized Raised Garden Bed Kit 8x2ft)
- Fasteners (screws)
- Drill
- Geotextile or cardboard
- Soil mix
- Level and measuring tape
How to set up and fill long beds along a fence
The main thing here is not to rush. If the base is done properly, you won’t have to fix things later. This is where most long-term problems either start or get avoided.
- Figure out your main viewing point
This can be a kitchen window or the entrance to your yard. Place beds so they look straight and clean from that angle, not scattered or uneven. - Decide how many beds you actually need
Don’t try to fit as many as possible. It’s better to have 2–4 beds with proper spacing than a crowded setup that’s hard to move through. - Mark spacing between beds
Leave at least 2–3 ft (≈60–90 cm) between them. Walk through the space and imagine carrying tools or watering — this quickly shows if it’s comfortable or not. - Test the layout before fixing anything
Place the beds on the ground without attaching them. Look from different angles and walk around them. Even small adjustments can make the whole layout feel more balanced. - Prepare the base
Remove large weeds and roots first. Then lay cardboard in overlapping layers — it blocks light and slows down new weed growth. - Install the beds along the line
Align them carefully with your markings. Metal holds its shape, so if it’s crooked now, it will stay that way all season. - Fill the bottom layer with rough organic material
Use branches, dry stems, or plant leftovers. This reduces the amount of good soil needed and slowly breaks down over time. - Add the main fertile soil layer
On top, create a layer of at least 8–12 inches (≈20–30 cm). This is where roots will grow, so it should be loose and nutrient-rich. - Water the soil and let it settle
After the first watering, the level usually drops a bit. That’s normal — just add more soil if needed.
After these steps, you don’t just have a box with soil — you have a working bed. From there, planting and maintenance become much easier.
Tip. Don’t place the bed directly against the fence. Leave at least 2–4 inches (≈5–10 cm) of space. It seems small, but it prevents moisture buildup, makes fence maintenance easier, and helps materials last longer.
This layout works especially well in specific situations. If you have narrow yards or long rectangular spaces, need to free up the center, grow climbing plants, or want to simplify watering and maintenance — this approach fits naturally.
In practice, you get a clean planting line, better plant protection, and a more efficient workflow. Less wasted space — more usable area without expanding your yard.
3. Metal Raised Beds for Modern Gardens
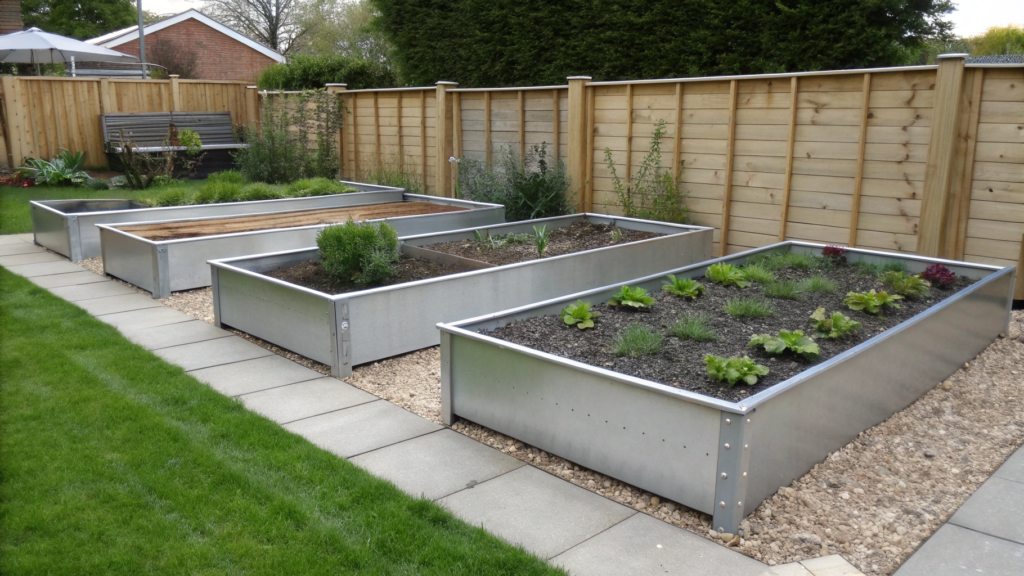
Metal raised beds for modern gardens always look neat and structured. I like this option for its simplicity. You place a few clean shapes, set the spacing, add plantings — and the yard already feels planned.
- the shape stays stable and doesn’t behave like old wood
- the yard looks clean even without complex design
- easy to create symmetry or a clear rhythm
- easier to plan paths and watering
- works well with gravel, lawn, and patios
Before installing, it’s better to decide how many beds you actually need. A common mistake is adding too many. In the end, it becomes crowded and неудобно. When you leave space between beds — the garden looks much better.
What you need
- Metal raised beds
- Measuring tape
- Stakes and string
- Shovel
- Cardboard
- Soil and compost
- Mulch for paths
- Gloves
Tall beds require a lot of soil. It’s better to estimate the volume in advance so you don’t stretch the process for weeks.
How to properly place and fill metal raised beds
Take your time here. If the base is done right, you won’t need to redo things later. This is what makes the whole setup work smoothly.
- Define your main viewing point
This can be a kitchen window or the entrance to your yard. Build the layout from this point so the beds look aligned and logical, not random. - Decide how many beds you really need
Start with 2–4 beds. If you add more than needed, the yard quickly turns into a tight cluster without proper walking space. - Mark spacing between beds
Keep paths at least 2–3 ft (≈60–90 cm) wide. This is not extra — it’s what makes it easy to move, turn, and carry tools or water. - Plan the layout before assembly
Place everything on the ground first using stakes or the frames themselves. Look from different angles. Even a small shift of 1 ft (≈30 cm) can improve the overall balance. - Prepare the base
Remove large weeds and lay cardboard in overlapping layers. This reduces future weed growth and saves time later. - Assemble beds according to the layout
Don’t adjust them “by eye” afterward. Metal creates straight lines, and any uneven placement will be noticeable all season. - Fill beds in layers
Use rough organic material at the bottom, then add a main fertile layer of 8–12 inches (≈20–30 cm). This reduces soil use and still works well for root growth. - Water the soil and let it settle
After the first watering, the level will drop slightly. It’s normal — just add more soil if needed.
What to plant so beds don’t look empty
Plants should soften the look of metal beds. Otherwise, the structure can feel too sharp or cold.
- salads, kale, herbs — for a calm green look
- tomatoes, basil, marigolds — for a more lively feel
- onions, garlic, sage — for a clean structure
- flowers like zinnias or cosmos — to add lightness
Before planting, imagine how it will look in a month. Not right after planting, but when everything grows in.
Tip. If you want everything to look clean, make proper paths between beds. Use gravel, wood chips, bark, or compacted mulch. Without this, even good beds look unfinished. With paths, the whole area becomes more organized and easier to use.
Metal raised beds work especially well when:
- the yard is small
- you want a clean look without complex design
- structure and order matter
- you don’t want to keep rebuilding beds
Sometimes just replacing chaotic planting with a few metal forms changes the whole space. Less chaos, easier maintenance, and better movement around the yard.
4. Curved Layouts for Organic Flow
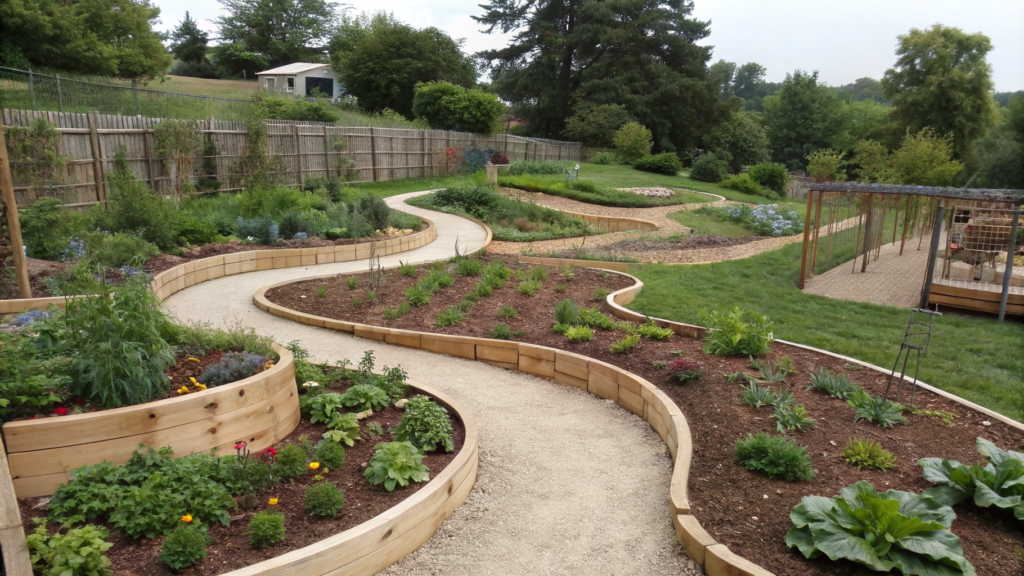
Curved layouts for organic flow help the yard look more natural, like it came together on its own. No one argues that straight lines are convenient. But they create a rigid structure. Smooth curves, on the other hand, make the space feel calmer and more connected.
Here’s what changes when curved lines appear:
- the space looks larger than it actually is
- the feeling of a “broken into pieces” yard disappears
- easier to fit beds into uneven terrain
- movement through the yard becomes more natural
- easier to combine vegetables and flowers
There shouldn’t be perfect symmetry here. The goal is not precision, but a sense of cohesion.
What you need to create the shape
Before starting, it’s better to gather simple tools that help you shape curves directly on the ground.
- Flexible edging materials (thin boards or metal)
- Stakes
- Rope or a garden hose (very useful for curves)
- Shovel
- Cardboard or geotextile
- Soil mix
- Mulch
Using a hose instead of a straight edge makes a big difference. It gives you a natural curve faster and more accurately than measuring. After trying it once, it’s hard to go back to straight lines.
How to form curved beds without overcomplicating things
The main idea here is not to calculate the curve, but to shape it visually. It’s easier to adjust on the ground than on paper.
- Lay out the shape directly on the ground
Take a hose or rope and place it where the bed will go. Move it a few times until the curve feels right. This step helps you see the final form before building anything. - Check how you’ll move through the space
Walk along the future paths and around the curves. If something feels tight or awkward, adjust the line now. It’s much easier than fixing it later. - Fix the shape with stakes
Once the curve looks right, secure it with stakes. This keeps the line stable while you work and prevents losing the shape. - Prepare the base along the curve
Remove grass and large roots. Follow the curve instead of straightening the area — that’s the whole point of this layout. - Install edging along the curve
Use flexible materials or short segments to match the shape. Long rigid boards don’t bend well and can break the flow. - Fill the bed with soil
Start with rough organic material at the bottom, then add a fertile layer on top. Keep the edges clean so the curve stays visible. - Finish paths around the curves
Add mulch, wood chips, or gravel. This highlights the shape and makes movement easier around the beds.
After this, the yard starts to feel different. No sharp edges, no rigid lines — everything connects into one space.
Tip. Don’t overcomplicate the curves. One or two smooth lines work better than many small waves. Complex shapes may look interesting at first, but they are harder to maintain and keep tidy over time.
We tried a very wavy bed once. It looked great for a couple of weeks… then it became inconvenient to work with.
When this layout works best
This approach doesn’t fit every yard, but in the right conditions it makes a big difference.
- uneven or natural terrain
- combining garden and decorative areas
- small spaces where straight lines feel too rigid
- seating or relaxation zones near beds
Before building, lay out the shape with a hose and look at it from a distance. If your eye doesn’t catch sharp angles, the layout is working.
You start moving through the garden naturally, not in straight “corridors”. And the space feels like a single system, not a set of separate beds.
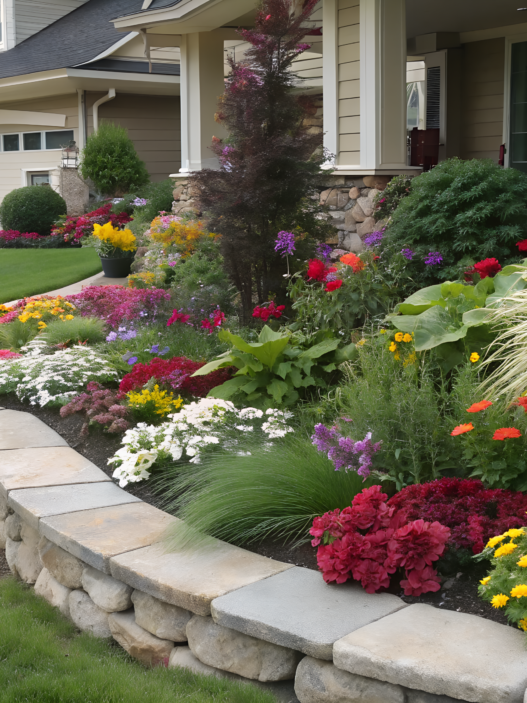
5. Flower-Focused Layouts with Color Balance
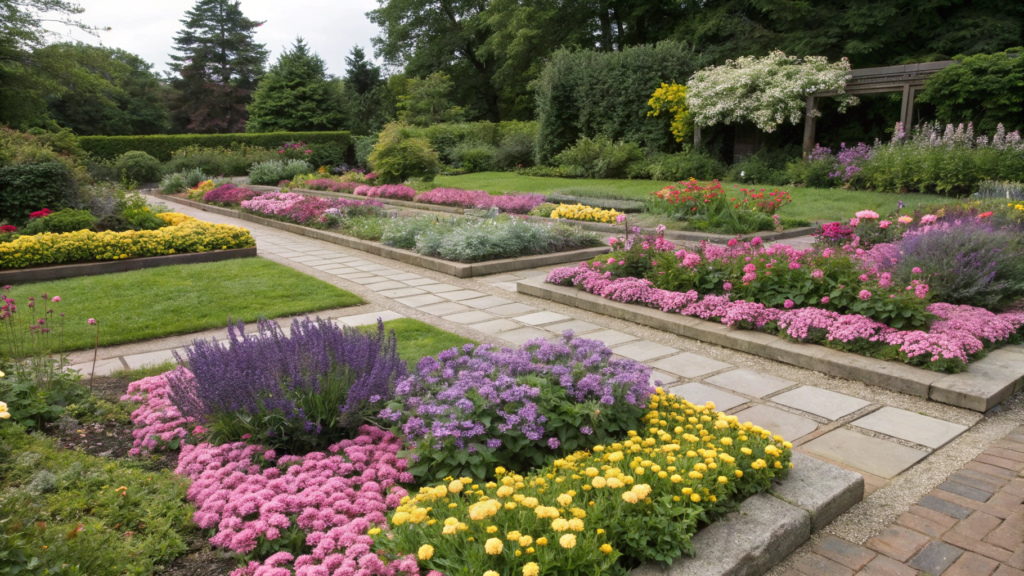
In flower-focused layouts with color balance, what matters is how flowers work together. Because you can pick good plants, spend time… and still end up with a messy mix without structure.
When you look at a yard, you don’t see plants first. You see color blocks. And it’s a problem if they don’t match. Here’s what a well-planned color scheme gives:
- the yard looks cohesive, not scattered
- easier to combine different plant types
- simpler to create visual accents
- the flower bed stays readable through the season
- less feeling of overload
Before planting, it’s important to think through the right combinations. In recommendations from Royal Horticultural Society, it’s often suggested to limit the number of colors so the planting looks more organized and doesn’t overwhelm the eye.
In practice, this usually means 3–5 shades. That’s enough to keep things lively without turning into a chaotic mix.
What to prepare in advance
Here the list is a bit different, because you’re working not only with shape, but also with color. It’s better to think through combinations before you start planting.
- Plant selection by color
- Seeds or seedlings
- Marking tools (stakes, string)
- Soil mix
- Compost
- Mulch
- Planting plan (even a simple one)
- Gloves
How to build a flower bed with balanced color
It’s not just about planting. You need to imagine how everything will look in a month or two. Then follow simple steps without overcomplicating.
- Choose a base color palette
Limit yourself to 3–4 main colors. For example: white, purple, and yellow. This creates a clear base and prevents the layout from falling apart visually. - Define a dominant color
One color should take up more space. The others support it. If all colors are equal, the composition starts to feel noisy. - Mark zones for each color
Don’t mix everything together. Divide the space into patches or strips. This helps the eye read the layout more easily. - Consider plant height in advance
Place taller plants in the back or center (for round beds), and lower ones near the edges. Otherwise, some flowers will get lost. - Repeat key elements
Use the same color or plant in different spots. This connects the whole layout and makes it feel more unified. - Leave some empty space
Don’t fill everything completely. Small areas of greenery or mulch give the eye a break and highlight color accents. - Plant in groups, not individually
Groups of 3–5 plants work better than single ones. The color looks stronger and more intentional.
Tip. If you’re unsure about combinations, start with two colors and greenery. For example: white and blue, or yellow and purple. This almost always looks clean. Then you can add a third color later.
We started this way, and it worked much better than trying to use everything at once.
This approach works well when flowers are the main focus, not just an addition. It’s especially useful if you want a calmer and more organized look, have a seating area nearby, or are working with a smaller space where every element stands out.
Before planting, you can place pots around the area and look at them from a distance. It helps catch mistakes early. In practice, fewer colors give a better result and make maintenance easier without constant rework.
6. Veggie Rows with Companion Planting
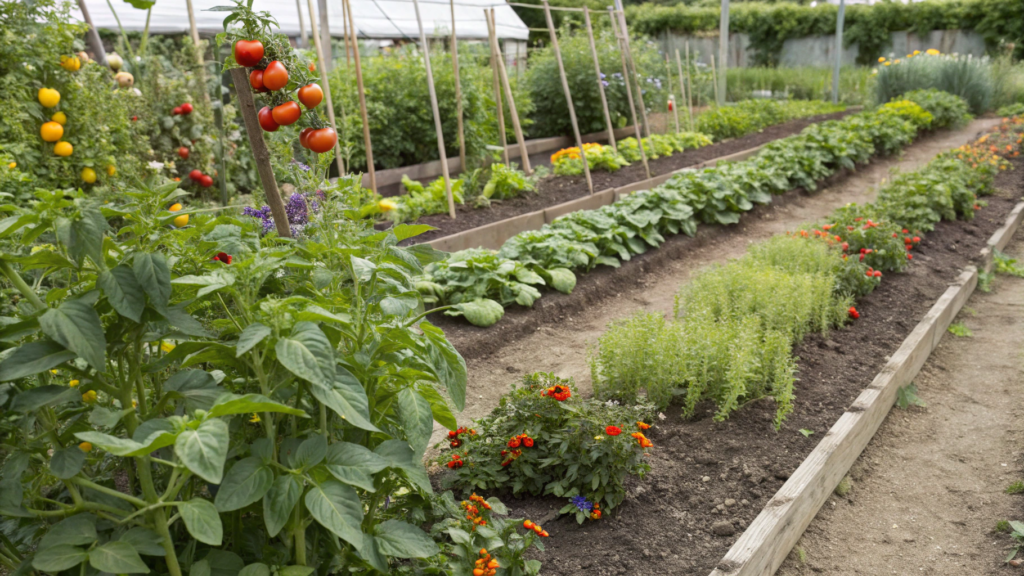
Veggie rows with companion planting help you combine plants the right way so they support each other and reduce problems during the season.
Plants interact all the time. Through roots, smell, and shade. Even if you don’t see it right away, the effect builds up over time. With good combinations:
- fewer pests on beds
- better use of space
- plants grow more evenly
- soil stays “alive” longer
- fewer gaps in harvest
In materials from University of California Agriculture and Natural Resources, it’s noted that different crops can affect each other in different ways — including through scent, root activity, and attracting beneficial insects.
This is not a guarantee that every combination will work perfectly. But overall, these pairings can reduce pest pressure and make growth more stable.
What to prepare before planting
The materials are standard, but the approach is slightly different. You are planning combinations, not just separate crops.
- Seeds or vegetable seedlings
- A simple planting plan
- Row markings
- Soil and compost
- Mulch
- Gloves
You can use sets like Sereniseed Certified Organic Vegetable Seed Collection, but it’s better to know in advance which crops you want to combine.
Quick plant combinations that actually work
Before building your rows, it helps to have a few reliable combinations. You don’t need many — just a few that are proven.
| Main crop | Good companions | Avoid |
| Tomatoes | basil, marigolds, onion | potato |
| Carrots | onion, garlic, radish | dill (in large amounts) |
| Cucumbers | dill, beans, calendula | potato |
| Cabbage | dill, celery, onion | strawberry |
| Peppers | basil, onion, carrot | beans |
| Beans | corn, cucumbers | onion, garlic |
| Lettuce | carrot, radish, strawberry | — |
You don’t need to use everything at once. Pick 2–3 combinations and try them in one season. After that, it becomes easier to see what works in your own garden.
How to build rows with companion planting in mind
The goal here is not just to plant things side by side, but to make them work together.
- Choose the main crops for your bed
Stick to 3–5 crops max. For example: tomatoes, carrots, and lettuce. If you add too many, it becomes harder to track what works and what doesn’t. - Match them with companions from the table
Don’t experiment too much at the start. For example, tomatoes with basil and marigolds is a reliable combination. The idea is simple — plants support each other instead of competing. - Lay out rows with alternating crops
Avoid long single-crop rows. Instead, alternate — a row of tomatoes next to a row of herbs or flowers. This helps limit pest spread and keeps the layout more balanced. - Think about plant height early
Look at how tall plants will grow in a few weeks. Tomatoes can reach 4–6 ft (≈120–180 cm). Place them so they don’t block light for smaller plants. - Keep proper spacing between plants
Don’t overcrowd. Even though mixed planting allows slightly denser spacing, too much competition slows growth. It’s better to keep balance than push for maximum density. - Add herbs and flowers directly into rows
Insert basil, dill, or calendula between vegetables. These are not just decorative — they help manage pests and improve overall bed health. - Mulch after planting
Add a layer of mulch once everything is planted. It keeps moisture in, reduces weeds, and protects the soil from overheating.
Tip. Don’t plant one crop in a large solid block. If you have many tomatoes, split them into smaller groups and mix in other plants. This reduces risk if pests or disease appear.
When this approach works best
This setup works especially well if:
- the yard is small
- you want to avoid extra chemicals
- you need more stable results
- you don’t want to divide everything into separate zones
Before planting, you can lay out crops on the ground and see how it looks. It helps catch mistakes early.
In practice, you depend less on treatments, use space better, and get more predictable results — often already in the first season.
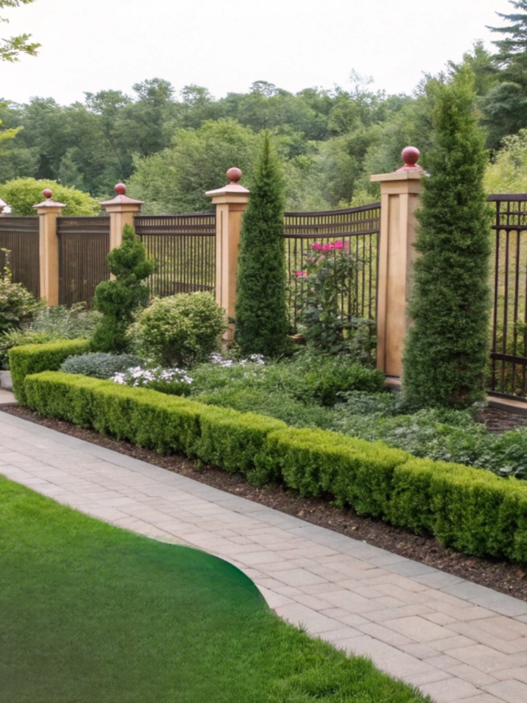
7. Corner Layout Designs to Maximize Space

Yes, we often ignore corners of the yard, but in reality — it’s a fully usable space if you set it up correctly.
Corners feel inconvenient only in one case — when you try to force a straight bed into them. Once you accept the shape, everything becomes easier.
Here’s what a good corner layout gives:
- uses space that usually stays empty
- adds planting area without expanding the yard
- makes it easier to separate crops
- the yard looks more organized
- fewer “dead zones” you never use
You need to treat the corner as a full part of the yard. After that, decisions become much more obvious.
What you need for a corner bed
Before starting, it’s better to decide on the shape and prepare materials. This helps avoid rework later.
- Boards or ready-made modules
- Screws
- Drill
- Stakes and string
- Cardboard or geotextile
- Soil and compost
- Mulch
It’s better to decide the shape right away — triangle, L-shape, or several small sections. This makes the work faster and more predictable.
How to build a corner bed and use the space fully
The goal here is not just to fill the corner, but to make it practical. If it’s hard to reach, it will quickly become unused again.
- Choose the right shape for the corner
Look at the space and decide what works best — a triangle or an L-shape. A triangle is simpler to build, but an L-shape gives more usable area. If the corner is deep, splitting it into two sections often works better than one large structure. - Mark boundaries with access in mind
Don’t place the bed directly against a fence or wall. Leave a small gap so you can reach the back. Walk the path before building — it helps you understand if the access feels natural. - Build the frame to match the shape
Use shorter boards or segments to follow the angle accurately. Long boards often break the geometry and look uneven. Taking extra time here gives a much cleaner result. - Prepare the base properly
Remove weeds and roots, especially in the corner where they tend to be dense. Lay cardboard in overlapping layers to block light and reduce new growth early on. - Fill the bed in layers
Add rough organic material at the bottom, then a fertile top layer. Keep at least 8–12 inches (≈20–30 cm) of good soil for root growth. - Plan planting based on the shape
Use the narrow part for compact crops like greens and herbs. Place larger plants in wider sections. This keeps access simple and prevents overcrowding. - Create a comfortable path to the bed
Add mulch, wood chips, or gravel. Bare soil in corners quickly turns messy, especially after watering or rain.
After this, the corner stops being a problem area. It becomes a functional part of the yard that you actually use.
Tip. Don’t make the bed too wide. If you can’t reach the far edge, you won’t use that space. Over time it becomes overgrown. It’s better to keep it compact with full access.
When corner layouts work best
This approach works especially well if the yard is small and every piece of space matters. It also helps with awkward areas along fences or buildings that were previously unused.
Before building, lay out the shape with boards or a hose and look at it from a distance. This makes it easier to understand if the space will be comfortable to use every day.
8. Deer-Proof Raised Bed Arrangements
Deer don’t choose complicated paths. They go where food is easy to reach. And if your beds are open — they will get there. So the goal is to build a system where plants are simply less accessible and less attractive to them.
Here’s what a well-planned deer protection setup gives:
- fewer crop losses
- less stress from constant visits
- more stable plant growth
- less need for emergency fixes
- ability to plan planting calmly
According to Penn State Extension, fences around 7–8 ft (≈210–240 cm) are considered most effective against deer. They work especially well when the animal cannot clearly see a landing area behind the fence.
This doesn’t guarantee full protection, but it significantly reduces damage and makes your yard less attractive for entry.
What you need to protect your beds
Before starting, it’s better to think of this as a system, not отдельные элементы. That way, everything works together.
- Tall posts or supports
- Netting or fencing, for example Tenax Deer Fence Netting 7.5 x 100 ft
- Fasteners
- Metal or wooden raised beds
- Mulch
- Gate or access point
It’s better to build everything at once instead of adding pieces later. This makes the setup more reliable and easier to manage.
How to build a protected garden zone
The idea is not just to block access, but to make the area inconvenient for deer to enter at all.
- Define the boundaries of the garden area
It’s better to protect the entire zone instead of individual beds. This simplifies the structure and makes it stronger overall. - Choose the right fence height
Go for at least 7 ft (≈210 cm), ideally higher. Lower fences are easy for deer to jump, especially if they see food behind them. - Install posts and stretch the netting
Place posts every 6–8 ft (≈180–240 cm). Keep the net tight — loose sections can be pushed through. - Plan the entrance carefully
Add a simple gate that closes tightly. Even a small gap can become a regular entry point. - Position beds away from the fence
Leave at least 2–3 ft (≈60–90 cm) between the fence and the first bed. This creates an extra barrier and makes reaching plants harder. - Use raised bed height as extra protection
Beds around 18–24 inches (≈45–60 cm) add another layer. It’s not a full barrier, but it helps in combination with fencing. - Add plants deer tend to avoid
Lavender, sage, and onions don’t fully protect the area, but they reduce interest and help discourage entry.
Tip. Don’t leave weak spots. Even a small gap at the bottom or a loose gate can break the whole system. Deer find these openings faster than you expect.
This setup is especially useful if your yard is near a forest, if plants have already been damaged before, if you grow vegetables and greens, and if you don’t want to rely on repellents all the time.
Before building, look at where animals are likely to enter. This helps you understand where protection needs to be stronger.
Deer-proof arrangement is not a 100% guarantee, but it’s a strong reduction of risk. You rely less on chance, plants grow more steadily, and you don’t have to worry about losing results overnight.
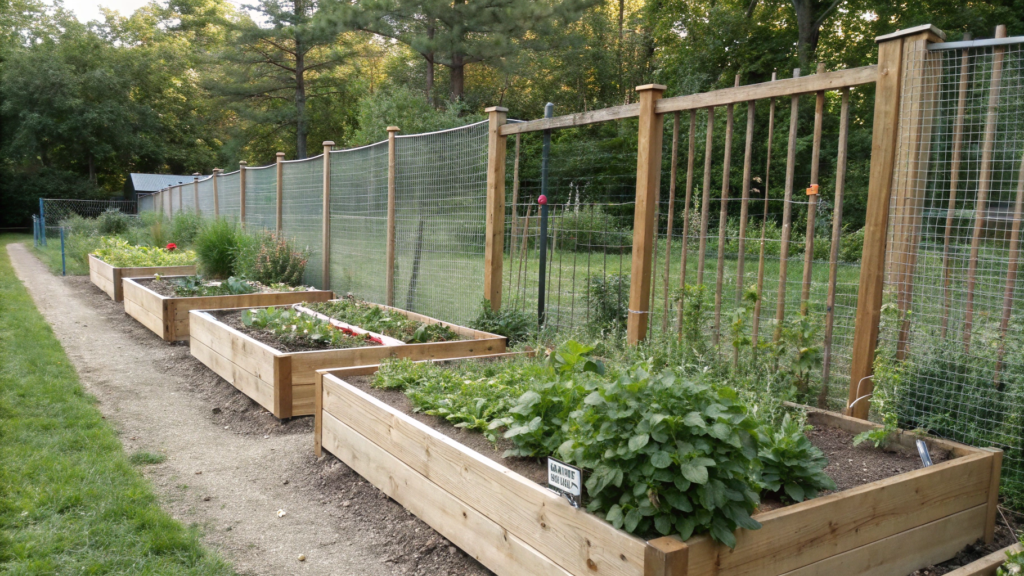
9. Fence-Integrated Bed Systems
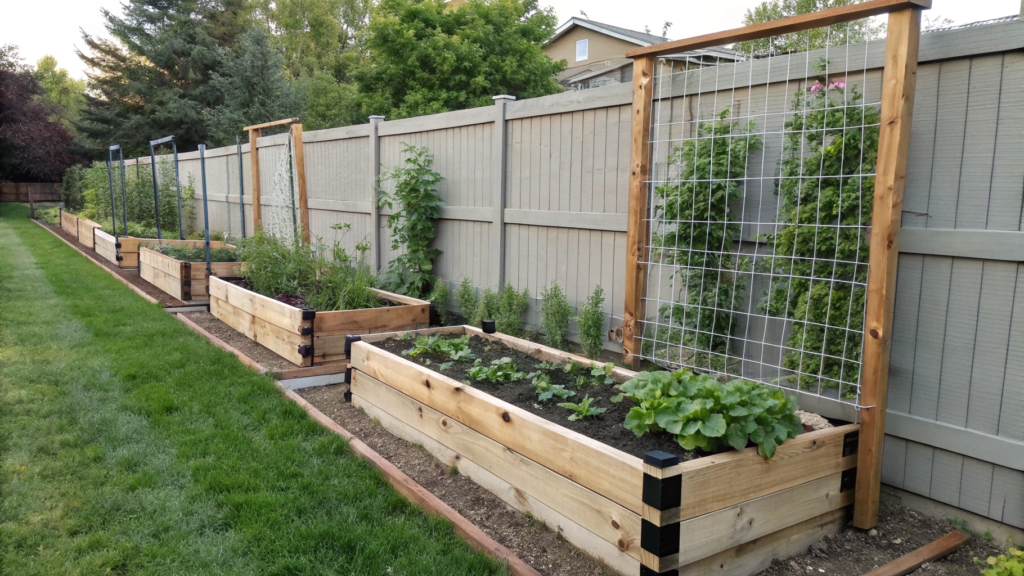
A fence already takes up space. And if it just stands there — that’s a missed opportunity. Fence-integrated bed systems are an approach where the fence starts working together with your beds. Not next to them, but as part of the system.
Here’s what this kind of setup gives:
- vertical space gets used, not just the ground
- fewer separate structures (trellises, supports)
- better use of limited yard space
- extra wind protection for plants
- the area looks more organized
What to prepare for this system
The materials are mostly the same, but here part of the load goes onto the fence itself. It’s important to think about that in advance.
- Raised beds or boards for the frame
- Fasteners or clamps
- Netting or trellis
- Drill
- Cardboard or geotextile
- Soil and compost
- Mulch
Before starting, check the fence. It should be stable. If it moves or feels weak, it’s better to reinforce it first.
How to build beds integrated with a fence
The goal is not just to place a bed near the fence, but to connect it in a way that stays practical over time.
- Check the condition and height of the fence
Make sure it can handle the load. If you plan to grow climbing plants, the structure must support their weight without bending. - Set the distance between the bed and the fence
Don’t place it directly against the fence. Leave at least 4–8 inches (≈10–20 cm) for airflow and easy access for maintenance. - Mark the bed line along the fence
Use string to create a straight guide. Even small misalignments will be visible once everything grows in. - Build and position the bed
Place it according to your markings and check the level. If the bed is uneven, it will stand out against the straight fence line. - Attach supports or netting to the fence
Add a trellis or mesh directly onto the fence. This allows plants to grow upward without extra structures. - Prepare the base and fill the bed
Lay cardboard, then add soil. Make sure the top layer is good quality so plants can establish quickly. - Plant with vertical growth in mind
Cucumbers, beans, and tomatoes are ideal here. They use vertical space and make the setup more efficient.
Tip. Don’t overload the fence. Too many heavy plants, especially on an older structure, can cause it to bend or weaken. It’s better to spread the load evenly.
When this approach works best
This setup works well if:
- the yard is small
- there are long fence lines
- you want to use vertical space
- you don’t want extra trellis systems
Before starting, place a net or support against the fence and imagine how plants will grow. It helps you quickly see if the height and strength are enough.
In practice, you get fewer extra elements, easier maintenance, and better plant distribution. Everything works as one system.
10. Layered Garden Beds for Visual Depth

When plants are arranged at different levels, the garden starts to look deeper and more interesting, while still staying practical to use.
Here’s what layered beds give you:
- the yard looks more spacious and dimensional
- easier to separate different zones
- plants don’t overlap each other randomly
- you can combine vegetables and flowers without overload
- it’s easier to work with different crops
What you need for layered beds
The materials are standard, but height planning is key here.
- Beds of different heights, for example, Best Choice Products Raised Garden Bed Elevated Planter
- Boards or modules
- Fasteners
- Soil and compost
- Mulch
- Measuring tape
It’s better to decide in advance how many levels you’ll have — low, medium, and high. This avoids rebuilding later.
How to build layers that look cohesive
The main idea is not to place things randomly. You need a simple structure so all levels work together.
- Define your main viewing point
Look at where you usually see the yard from. Depth will be read from that angle, so all levels should be arranged relative to it. - Divide beds into 2–3 height levels
For example: low (10–12 inches / ≈25–30 cm), medium, and high (18–24 inches / ≈45–60 cm). This is enough to create depth without making the space feel crowded. - Place the tallest elements further away
This creates a natural depth effect. If tall beds are in front, they block everything behind them. - Add a middle layer between them
This connects the front and back visually. Without it, the transition feels too sharp. - Use different plant heights within each bed
Even one bed can have layers: taller plants in the back, lower ones in front. This strengthens the overall structure. - Leave space between levels
Don’t place everything too close together. Small gaps or mulch zones help the eye read the layout more clearly. - Check the layout from a distance
Step back and look at the yard. If the layers are visible and don’t block each other, the setup works.
Tip. Don’t create too many levels. Two or three are enough. If you add more, the space starts to feel overloaded and loses structure.
If you have a small yard and want to add depth without expanding the space, layered beds make it more readable and visually structured. Maintenance doesn’t get harder if everything is planned logically. You simply start seeing the layout more clearly and move through it more efficiently.
Practical layout ideas that actually work
Each of these layouts solves a specific problem. You don’t need to implement everything at once. It’s enough to pick one approach and test it during the season.
The most effective way is to take a zone that currently works the worst — a corner, a fence line, or an overloaded center — and apply one of these layouts there. After that, it becomes clear what actually improves your space and what doesn’t need changes.Write in the comments which layout feels most useful for you right now and what you’d like to improve on your plot first.