

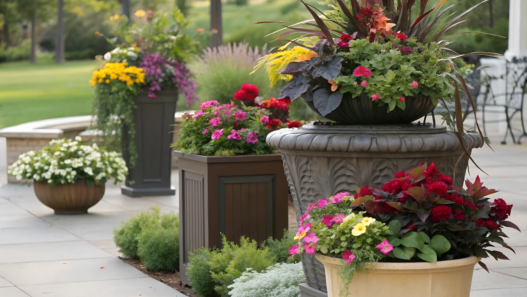
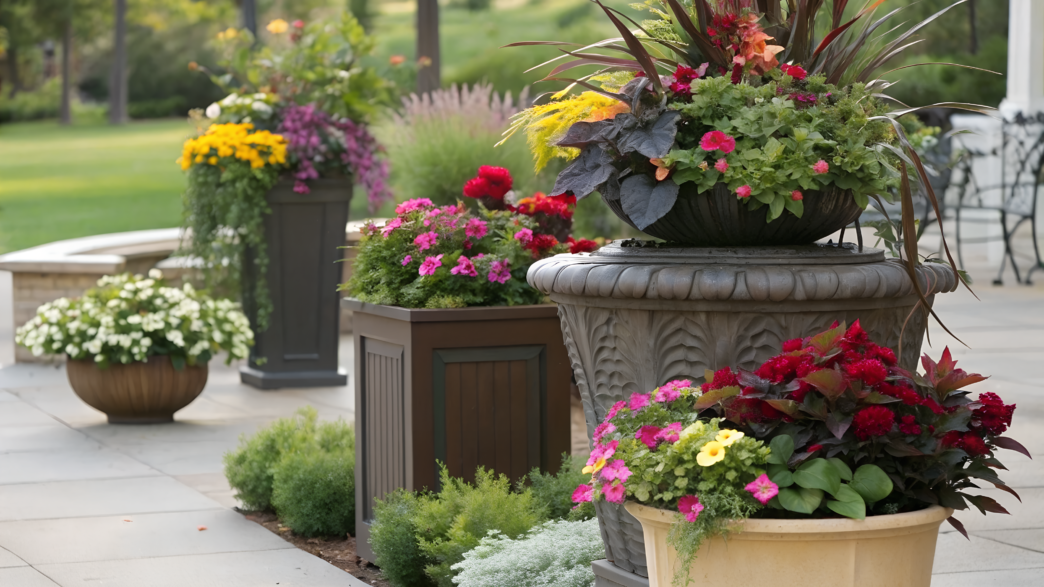
Have you noticed this — you look at a container with plants, everything seems fine… but something is missing. And next to it, there’s a similar container with almost the same flowers, but it looks much better. And it turns out, the difference is not in the plants themselves, but in how they are selected and arranged together. Here we’ll look at exactly these kinds of combinations. Container gardening flowers that always look well thought out. There’s no need to search for rare plants — everything here is built on color, height, shape, and of course, there needs to be logic in placement.
All of these combinations can be repeated at home, because they are already tested in real yards, near houses, in small spaces where it matters that everything looks intentional and natural.
1. Geranium and Sweet Potato Vine Porch Pot
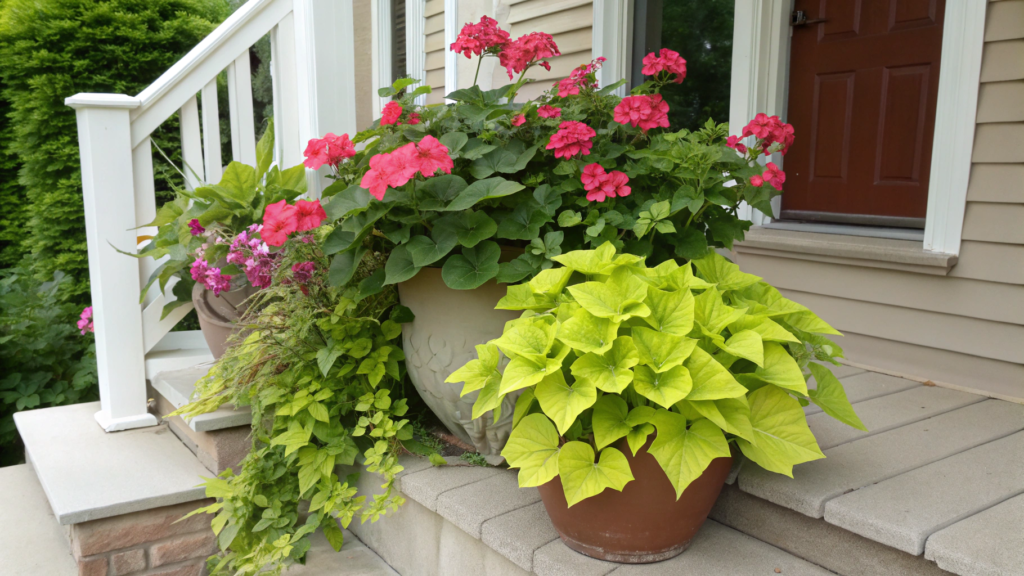
Geranium and Sweet potato vine — this is that pair that never lets you down. I often come back to it when I need to set everything up quickly and without hassle.
Geranium adds color and structure. Sweet potato vine covers the edge, adds volume, and gives the whole composition a sense of completeness.
What You’ll Need
- Container 12–16 inches in diameter (30–40 cm), with drainage holes — for example, Classic Home and Garden Honeysuckle Resin Planter (Amazon)
- 1–2 geranium plants
- 1 sweet potato vine plant
- Quality potting mix with good drainage
- Small shovel
- Watering can
How to Make It
- Prepare the container
Fill the container with soil to about 70–80% of its volume. Not to the edges — leave about 1–2 inches (2–5 cm) so water doesn’t overflow during watering. If the soil is dry, lightly moisten it in advance — this helps the plants adapt faster. - Plant geranium in the center
Make a hole with your hands or a shovel, place the plant, and gently loosen the roots if they are tightly packed. Cover with soil and lightly press so the plant stands stable, but without heavy pressure. - Add sweet potato vine along the edge
Place it closer to the rim of the container. Not too tight, but close enough so the shoots can freely spill over the edge. Guide the first stems downward — this speeds up the trailing effect. - Firm the soil with your hands
Go over the surface and gently press the soil around the plants. The goal is to remove air pockets, but not make the soil dense like clay. - Water thoroughly
Water until it starts draining through the holes. This helps the roots connect with the soil right away and removes empty spaces inside. - Place in a permanent spot
Best in full sun or at least 5–6 hours of light per day. In shade, geranium will bloom weaker, and the whole composition will look less expressive.
There are observations that some varieties of geranium release compounds that can slightly repel insects. Of course, this is not its main function, but a nice bonus, especially if the container is near the entrance.
Practical Tip. If the sweet potato vine starts growing too actively — trim it. After trimming, it becomes fuller and looks neater. I usually do this every couple of weeks, especially in warm weather.
So what we get is color on top and trailing greenery below. All of this comes together into one composition and looks great throughout the season. Try placing two of these containers on both sides of the entrance — you’ll see how it immediately creates a sense of order, even if the rest of the yard is far from perfect.
2. Full Sun Zinnia and Salvia Color Block Pot
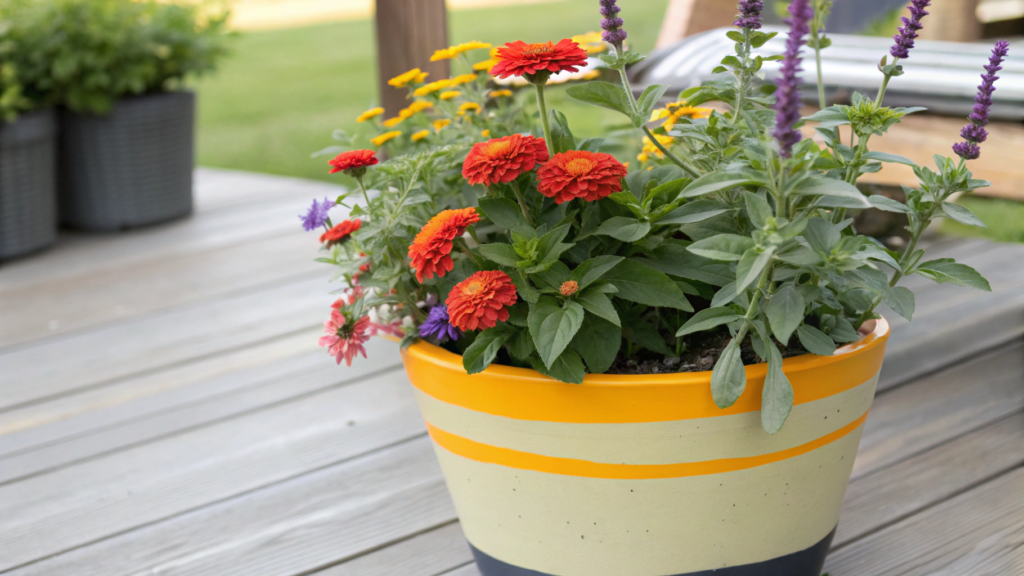
I saw this combination near one house where people clearly didn’t overthink the design. Just two colors. And it was too beautiful to be accidental.
Zinnia and Salvia together create a clear visual contrast that looks expensive and clean.
What You’ll Need
- Container 14–18 inches in diameter (35–45 cm), preferably a bit deeper than usual
- 3–5 zinnia plants — one color
- 2–3 salvia plants — a contrasting color (for example, purple with orange or red)
- Quality potting mix with good drainage
- Shovel
- Watering can
How to Make It
- Prepare the container
Fill it with soil to about 75% of the volume. If you’re using a new dry mix, lightly water it before planting. This helps avoid the situation where water later just runs past the roots. - Mark the color block zones
Before planting, mentally divide the container into 2 parts. Not necessarily perfectly equal — one side can be slightly larger. This creates a more natural look, not something too rigid. - Plant zinnia in the main zone
Make several holes and place the plants fairly close, but leave about 2–3 inches (5–7 cm) between them. Zinnia grows fast, and in a couple of weeks they will fill the space into one dense color layer. - Add salvia in the second zone
Salvia is better planted a bit more spaced out. Its role is not to fill, but to grow upward. Leave more space between plants so each stem reads separately. - Adjust the soil level
After planting, add a bit of soil if there are any dips. The surface should be even, without holes — this affects both watering and how it looks. - Water thoroughly
Water slowly and evenly. It’s important that water soaks through the whole container, not just the top layer. The first watering is very important for adaptation. - Place in the sunniest spot possible
Full sun is required. Zinnia and salvia lose density in shade and the color becomes less saturated. Ideally — 6–8 hours of sun per day.
Zinnia actively attracts pollinators, including bees and butterflies. This is often used even in small decorative plantings to make the space feel more alive. Not just beautiful, but functional.
Practical Tip. Don’t mix too many colors. Two — maximum three. If you add more, the composition starts to feel noisy and loses that clean color block effect.
Don’t be afraid to go strong with contrast. Orange with purple, pink with blue. In a container, this looks better than in open ground. One dense color and one vertical contrasting line make the composition feel complete, even if you put it together in one evening.
3. Partial Sun Petunia and Coleus High Contrast Mix
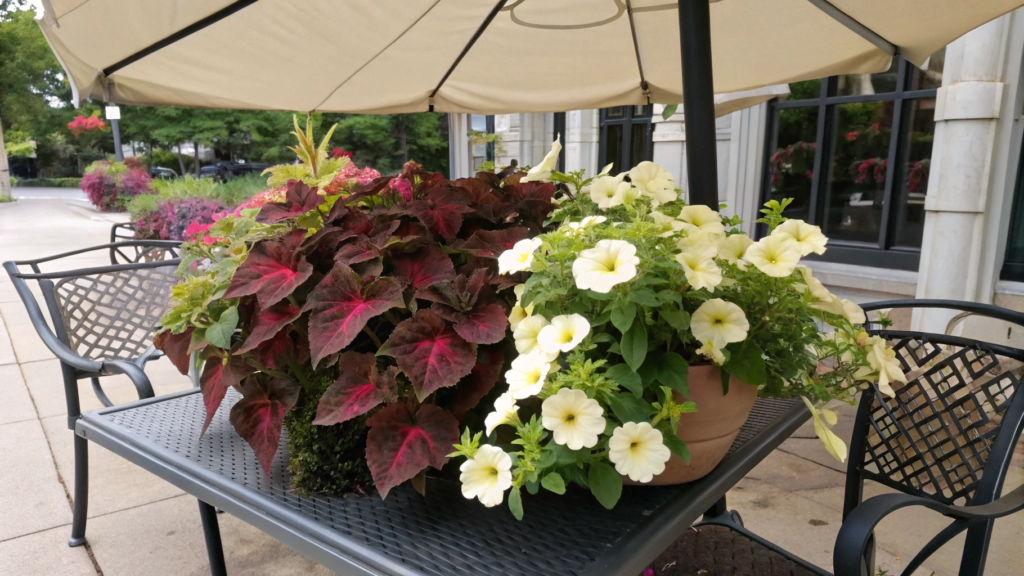
For partial sun, combinations work best where contrast is built not only on flowers, but also on foliage. Here, the pairing of Petunia and Coleus gives a clear result: soft color, strong contrast, and a neat look even without direct sun.
In one small café where the tables stood under a canopy and there was almost no direct sun, I noticed that most plants looked… tired. But the container with dark coleus and light petunia looked very contrasting. The color didn’t fade, and the leaves stayed dense.
What You’ll Need
- Container 12–16 inches in diameter (30–40 cm) with drainage
- 2–3 petunia plants
- 1–2 coleus plants with bright or dark foliage
- Quality potting mix with good moisture retention
- Shovel
- Watering can
How to Make It
- Prepare the container
Fill it with soil to about 70–80%. In partial sun, the soil stays moist longer, so it’s important that it remains loose and doesn’t hold too much water. If the soil is dry — lightly moisten it before planting. - Place coleus as the base of the composition
Make one or two holes closer to the center. Coleus is the visual “anchor.” Its leaves set the tone for the whole composition, so it’s better to give it a bit more space. - Add petunia along the edges
Plant them closer to the rim of the container. Spacing — about 3–4 inches (7–10 cm) between plants. Over time, they will start trailing and cover the edge, creating a soft transition downward. - Balance height and density
If coleus looks too tall compared to petunia — you can lightly pinch the tops. This stimulates growth in width and makes the plant fuller. - Firm the soil
Gently press the soil around the roots. Not too hard, but enough so the plants don’t move after watering. - Water evenly
Water slowly so the entire container is soaked. It’s important not to overwater — in partial sun, excess moisture can stay longer. - Place in the right light
Ideally — morning sun and shade in the afternoon. In full sun, coleus can lose color intensity, and in deep shade, petunia will bloom weaker.
The color of coleus leaves directly depends on light. In partial sun, many varieties become deeper in color and more contrasting than in bright sun. This is one of the reasons why these compositions look better specifically in partial sun conditions.
Practical Tip. If petunia starts stretching and losing shape — just trim the shoots by about one third. In a week, it will become fuller and start blooming more actively.
In this combination, color and foliage work equally. Not only because of the flowers, but also because of form and texture. Choose coleus with burgundy or almost black leaves. Against this background, even a simple light petunia starts to look more saturated.
4. Shade Begonia and Fern Lush Green Pot
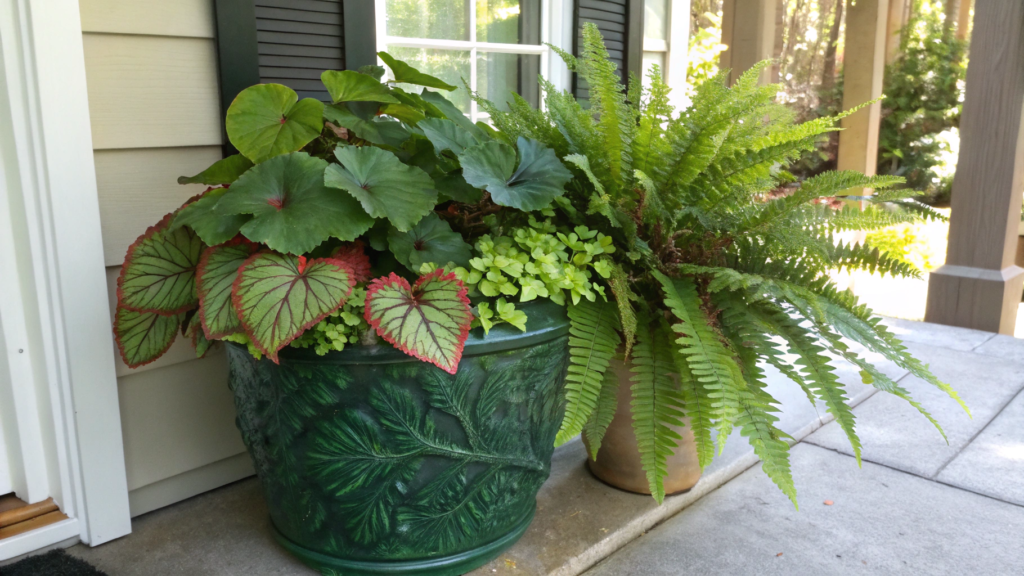
The combination of Begonia and Fern is lush greenery, large leaves, soft texture, and one calm color accent.
This kind of container is easy to imagine near a north-facing wall of the house, on a covered porch, or near an entrance where the sun almost doesn’t reach. There, begonia holds the color, and fern adds volume. The result is a fresh, slightly moist, garden-like look.
What You’ll Need
- Container 14–18 inches in diameter (35–45 cm) with drainage holes
- 2–3 begonia plants
- 1 small fern
- Quality potting mix that holds moisture well but doesn’t turn into mud
- Small shovel
- Watering can with a gentle flow
How to Make It
- Prepare the container
Fill the container with soil to about 70–75%. For a shade pot, it’s better not to use heavy garden soil — it can compact and hold excess moisture for too long. A good potting mix is important here because begonia and fern like even moisture, but don’t like sitting in wet, dense soil. - Check drainage before planting
Before planting, pour some water and see if it drains out from the bottom. In shade, water evaporates more slowly, so poor drainage quickly becomes a problem. If the holes are small or clogged, it’s better to clear them right away. - Plant fern slightly at the back or side
It’s better not to place the fern strictly in the center if the container will stand near a wall or railing. Place it a bit closer to the back — this way it creates a soft green background and doesn’t block the begonias. If the pot is visible from all sides, you can shift the fern slightly to one side for a more natural look. - Add begonia in front and along the sides
Begonia works well as a flowering layer. Plant 2–3 plants closer to the front edge, leaving about 4–5 inches (10–12 cm) between them. Don’t place them too close — the leaves grow fast and need space for air. This is especially important in shade, where moisture stays longer. - Turn plants with their best side outward
Before filling in the soil completely, rotate each plant a bit. Begonia often has a side where flowers and leaves look fuller. Fern can also have a more graceful “falling” line. Position them so the strongest side faces where you usually look at the pot. - Fill gaps with soil
Add soil around the roots and gently press with your fingers. Don’t compact too much. Just remove air pockets so roots connect well with the soil. Keep the top level about 1 inch (2–3 cm) below the rim — this prevents water from overflowing. - Water slowly and gently
For the first watering, don’t use a strong stream. Water around the plants, not directly into the center. Begonia has fleshy stems, and constant water at the base can lead to rot. After watering, check that water drains out from the bottom. - Place in bright shade
The best spot is bright shade or soft morning light without harsh midday sun. In deep shade, begonia may bloom less, while fern still grows well, but the composition becomes less expressive. In direct midday sun, leaves can get burned. - Monitor moisture
In shade, it’s easy to overwater. Check the soil with your finger: if the top 1 inch (2–3 cm) is dry, you can water. If it’s still moist — wait. For this type of container, stable moisture is better than frequent “just in case” watering.
Practical Tip. If you want the container to look richer, choose begonia with large leaves and fern with soft, airy fronds. The contrast between the dense begonia leaves and the delicate fern greenery makes the composition feel deeper.
This kind of container adds freshness, soft volume, and living greenery in places that usually feel empty or dark. For a shaded porch, the north side of the house, or a quiet corner near the entrance — it’s a very reliable idea.
5. Front Yard Thriller Spiller Filler Planter Formula
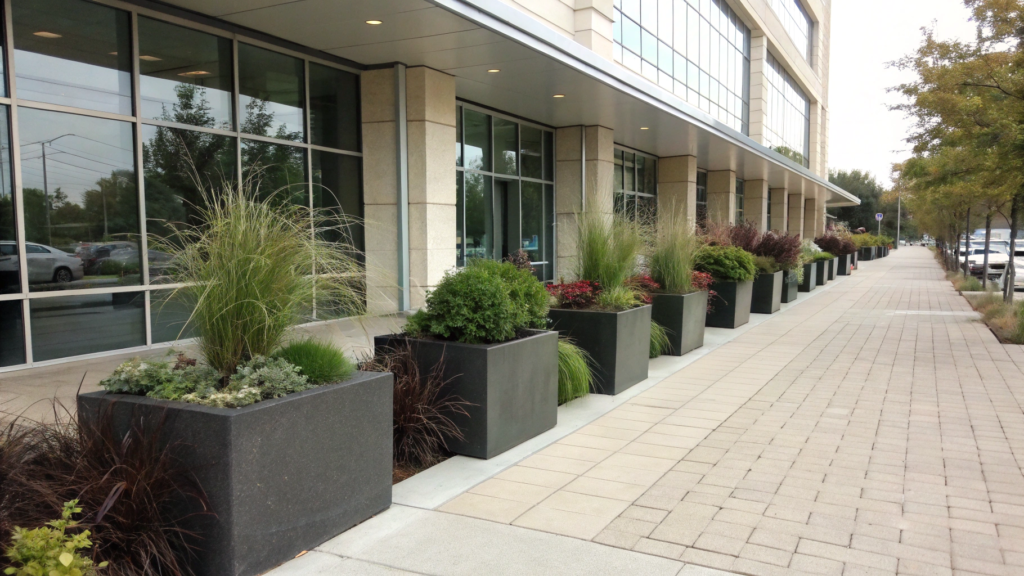
Thriller, spiller, filler — a simple formula that helps you arrange flowers in a container, even if you’re not sure about plant combinations.
Near one office building, identical containers stood along the entrance. And all of them looked organic, even though the plants were different. That’s because each pot had a tall accent, something trailing, and something filling the middle. The logic is clear.
Thriller — the center, the vertical.
Spiller — what spills over the edge.
Filler — what connects everything together.
And because of this, the container always looks well thought out.
What You’ll Need
- Container 16–20 inches in diameter (40–50 cm), stable
- 1 plant for thriller (for example, ornamental grass, canna, or upright salvia)
- 2–3 plants for filler (petunia, geranium, coleus — depending on light)
- 1–2 plants for spiller (sweet potato vine, ivy, bacopa)
- Quality potting mix with good drainage
- Shovel
- Watering can
How to Make It
- Prepare the container
Fill it with soil to about 70–75%. It’s important that the container is deep enough — roots need space, especially for the central plant. Leave about 1–2 inches (2–5 cm) to the edge for easy watering. - Define the viewing side
If the container stands near a wall or entrance, it will be viewed from one side. In that case, move the thriller slightly back. If the pot is visible from all sides — place it closer to the center. - Plant thriller (vertical accent)
Make a hole and carefully place the plant. Check that it stands straight. This is the main element — it sets the height and holds the whole composition. Don’t plant it too deep — keep the same soil level as in the original pot. - Add filler around the center
Place 2–3 plants in a circle around the thriller. Spacing — about 3–5 inches (7–12 cm). They should cover the soil but not crowd each other. Filler creates volume and connects the center with the edges. - Place spiller along the edge
Plant it closer to the rim, with spacing of 4–6 inches (10–15 cm). Guide the shoots outward — this speeds up the trailing effect. In a couple of weeks, they will start covering the edge and visually soften the shape of the pot. - Check the balance of the composition
Step back and look at the container. If one side feels empty — you can slightly rotate the pot or adjust the plants while the soil is not fully settled. - Fill gaps with soil
Add soil into the remaining spaces. Gently press with your hands to remove air pockets. The surface should be even, without dips. - Water evenly
Water slowly so the entire volume is soaked. The first watering is especially important — it helps plants settle into place. - Place in suitable light
Choose plants based on conditions: full sun or partial sun. The formula works everywhere, but the specific plants must match the light.
The visual effect of these compositions depends on how the eye reads different levels of height and texture. When there is vertical height, volume, and a trailing element, the container looks more complex and complete, even with a small number of plants.
Practical Tip. If you’re unsure about combinations — start with one color and different forms. For example, a green thriller, a green spiller, and one bright filler. This makes it easier to control the result.
And you don’t have to change all the plants every time. You can keep a good thriller and spiller, and just update the filler depending on the season.
You don’t guess if it will look good — you just build the composition using a clear logic. Even with simple plants, the container looks designed because of different heights, density, and direction of growth. Then you can play with color, change the mix by season, or adapt it to a specific spot near the entrance.
6. White Garden Container With Hydrangea and Ivy
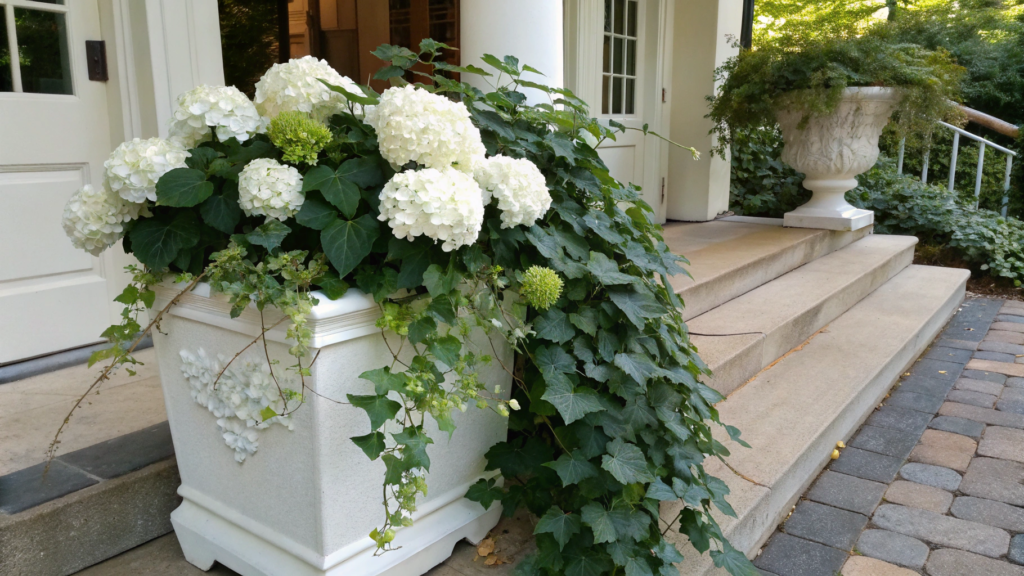
A white garden container with Hydrangea and Ivy calms the eye and looks good near an entrance, along a walkway, or on a terrace.
Hydrangea adds volume and large blooms. Ivy adds movement and ties everything together.
What You’ll Need
- Container 16–20 inches in diameter (40–50 cm), preferably light or neutral
- 1 hydrangea plant, a compact variety for containers
- 1–2 ivy plants
- Quality potting mix that holds moisture but has good drainage
- Shovel
- Watering can
How to Make It
- Prepare the container
Fill it with soil to about 70–75%. For hydrangea, it’s important that the soil holds moisture but isn’t heavy. If the mix is too light and dries out quickly, you can add a bit of compost. - Check the planting depth of hydrangea
Before planting, place the plant in the container and see what level it sits at. The top of the root ball should be about level with the future soil surface. Don’t plant it too deep — this affects growth. - Plant hydrangea as the main element
Place it in the center or slightly toward the back if the container stands near a wall. Gently loosen the roots if they are compacted, and fill with soil, pressing lightly. - Add ivy along the edges
Plant it closer to the rim, leaving about 4–6 inches (10–15 cm) between plants. Guide the first shoots outward. Over time, they will trail and cover the edge of the container. - Balance the composition
Step back and look at the pot. If one side feels “empty,” you can slightly rotate the container or adjust the ivy. - Fill gaps with soil
Add soil into the spaces between plants. Gently press with your hands to remove air pockets, but don’t make the soil too dense. - Water evenly
Water slowly until it starts draining from the bottom. Hydrangea is sensitive to drying out, so the first watering should soak the entire volume well. - Place in the right spot
Best in partial sun: morning sun and shade during the day. In full sun, hydrangea can lose moisture faster, and in deep shade, blooming will be weaker.
The color of hydrangea partly depends on soil acidity — in more acidic soil, tones can shift toward blue, in neutral and alkaline — toward pink. But white varieties stay white, which makes them more predictable for calm compositions.
Practical Tip. If you want to enhance the effect, choose a container slightly larger than it seems necessary. Hydrangea likes space, and in a larger pot it looks more proportional and natural.
This container works because of volume, soft color, and calm form. It doesn’t pull too much attention, but makes the entrance or terrace feel more cohesive. That’s why these setups often look clean and “expensive,” even when made with simple plants.
7. Mediterranean Look Pot With Lavender and Rosemary
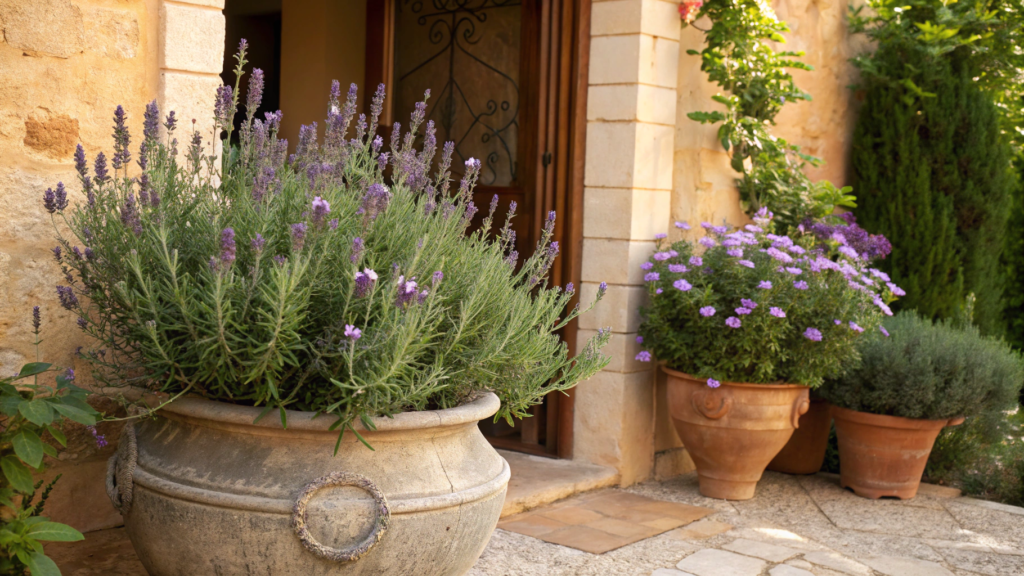
Even one container with Lavender and Rosemary already brings a southern feel: dry air, warm stone, a bit of wind, and the scent of herbs.
I once saw a similar container near a small guest house. Just a large pot at the entrance and two plants. But because of form, color, and texture, everything looked very cohesive.
What You’ll Need
- Container 14–18 inches in diameter (35–45 cm), preferably terracotta or neutral — for example, Tusco Products Cosmo Planter (Amazon)
- 1 lavender plant
- 1 rosemary plant
- Light potting mix with good drainage (you can add a bit of sand)
- Shovel
- Watering can
How to Make It
- Prepare the container
Fill it with soil to about 70%. For Mediterranean plants, it’s important that the soil is light and drains quickly. If the mix feels too dense — add a bit of sand or perlite. - Check drainage
Before planting, pour some water. It should flow out freely from the bottom. Lavender and rosemary don’t tolerate standing water, so drainage is critical here. - Place rosemary as the main element
Make a hole slightly off-center. Rosemary can be placed a bit closer to the back if the container stands near a wall. It sets the shape and height. - Plant lavender nearby
Place it about 5–6 inches (12–15 cm) from rosemary. Don’t plant too close — both plants need air around roots and leaves. - Leave space between plants
Don’t fill the container completely. Small areas of open soil look natural here and even enhance the feeling of a dry southern garden. - Firm the soil gently
Press the soil around the roots, but don’t make it dense. It’s important to keep the mix airy. - Water moderately
The first watering should be enough to moisten the soil, but without overwatering. After that, let the soil dry slightly between watering. - Place in a sunny spot
At least 6–8 hours of sun. In shade, plants stretch and lose their shape.
Both lavender and rosemary naturally grow in regions with poor, well-drained soil. Excess watering or overly rich soil can harm them more than light drought.
Practical Tip. If you want to enhance the effect, choose a container with a slightly rough surface or a warm tone — this adds depth to the whole composition. And don’t prune too aggressively. Light shaping is fine, but it’s important to keep their natural form.
8. Cottage Style Pot With Snapdragons and Lobelia
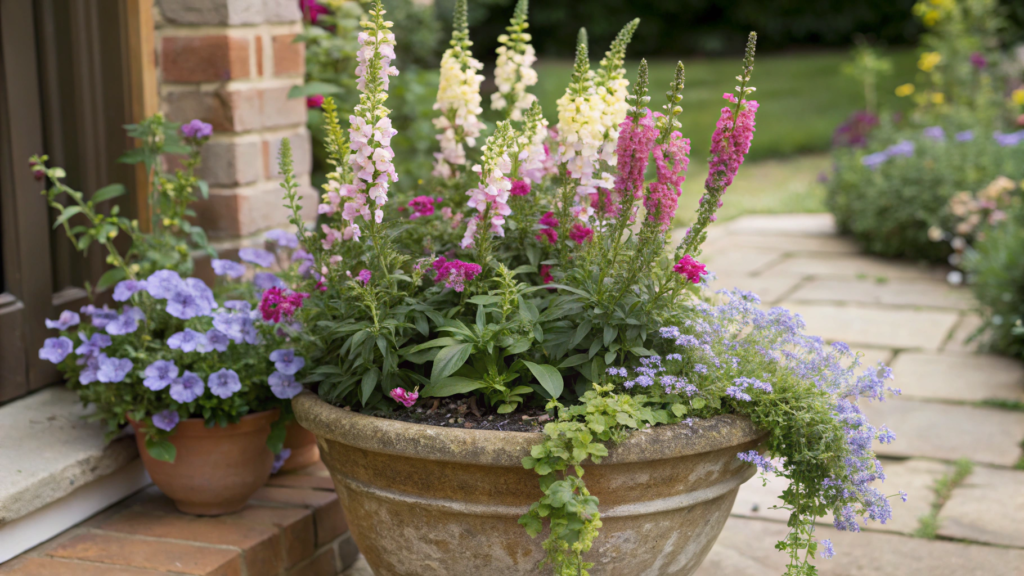
A cottage style pot with Snapdragon and Lobelia is not about strict form, but the opposite — it creates the feeling that everything grew on its own. A living, slightly imperfect space, but very pleasant to look at.
Snapdragons add vertical height and a light variation in levels. Lobelia is a soft, almost flowing layer that covers the edge of the container and adds movement.
What You’ll Need
- Container 12–16 inches in diameter (30–40 cm), preferably a simple shape
- 3–4 snapdragon plants
- 2–3 lobelia plants
- Quality potting mix with good moisture retention
- Shovel
- Watering can
How to Make It
- Prepare the container
Fill it with soil to about 70–75%. The soil should stay loose and hold some moisture — in this style, plants shouldn’t dry out too fast, otherwise the whole volume is lost. - Place snapdragons as the base
Plant them not strictly in the center, but slightly off to one side, in a group of 2–3 plants. You can add one a bit apart. Spacing — about 3–4 inches (7–10 cm). This creates a more natural shape, without a symmetrical feel. - Add lobelia along the edges
Plant closer to the rim. Spacing — about 3–5 inches (7–12 cm). Guide the shoots outward. Over time, lobelia will trail and cover the edge with a soft layer. - Leave some “air” between plants
Don’t fill the container too densely. In cottage style, small gaps between plants look natural and create a sense of lightness. - Slightly rotate plants before final placement
Look at each plant and find the fuller side, then turn it toward the front. This helps make the composition more expressive without extra effort. - Fill gaps with soil
Add soil between plants and gently press with your hands. Don’t compact too much — roots need air. - Water evenly
Water slowly so the entire container is soaked. It’s important not to let it dry out — lobelia is especially sensitive to lack of moisture. - Place in partial sun
Best in soft morning sun and light shade during the day. In full sun, lobelia can lose its fresh look faster, and in deep shade, snapdragons will stretch.
Lobelia gives more saturated color and keeps its shape longer in cooler conditions. That’s why these containers look especially good in spring and early summer.
Practical Tip. If snapdragons start stretching upward and look too rigid, you can lightly pinch the tops. This makes the plant fuller. And if lobelia starts thinning in the center, you can trim it slightly — it will regrow volume over time.
The container doesn’t look strict or perfectly structured — and that’s exactly what creates the feeling of a real, lived-in garden near the entrance.
9. Tropical Vibe Pot With Cannas and Caladiums
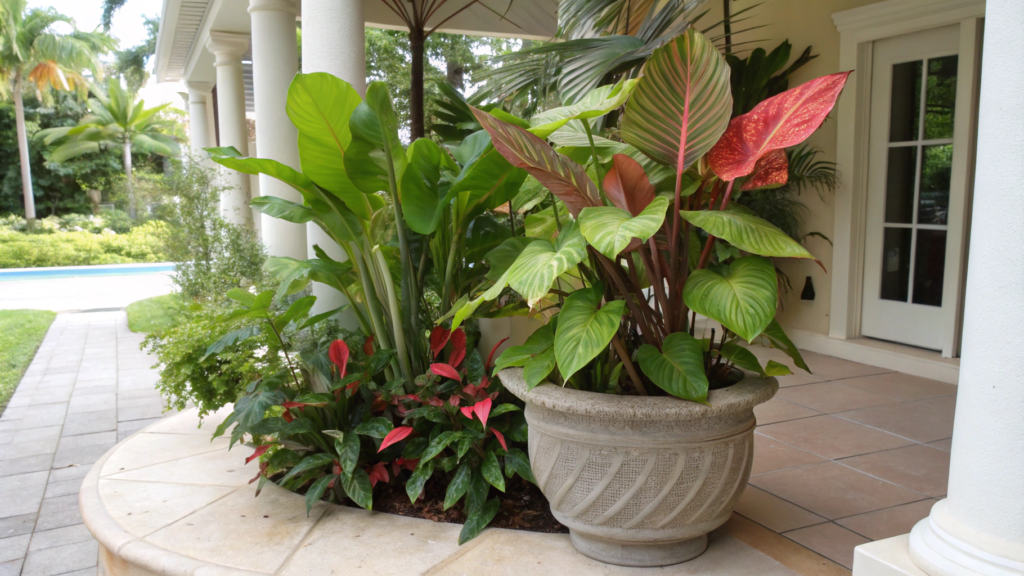
Canna and Caladium — large leaves, contrast of shapes, and the feeling like a piece of a tropical garden moved closer to the house.
This kind of composition is easy to imagine near a pool, on a terrace, or in a sunny corner of the yard. Cannas add height and a strong vertical. Caladiums — bright, wide leaves that fill the middle and add contrast.
What You’ll Need
- Container 16–20 inches in diameter (40–50 cm), deep enough
- 1–2 canna plants
- 2–3 caladium plants
- Rich potting mix with good moisture retention
- Shovel
- Watering can
How to Make It
- Prepare the container
Fill it with soil to about 70–75%. For cannas, it’s important that the soil is rich and holds moisture but doesn’t become heavy. If the mix is too light, you can add a bit of compost. - Check drainage
Pour some water and make sure it drains freely from the bottom. Even though they like moisture, cannas don’t tolerate standing water around the roots. - Plant cannas as the base
Place them closer to the center or slightly toward the back if the container stands near a wall. Leave about 6–8 inches (15–20 cm) between plants if using two. This gives them space to grow. - Add caladiums around
Plant them in a circle around the cannas, spacing about 4–6 inches (10–15 cm). They should fill the middle layer without completely blocking the central plants. - Turn leaves before final placement
Caladiums often have a more expressive side. Turn it toward the main viewing angle. This makes the composition feel more visually rich. - Fill gaps with soil
Add soil between plants and gently press with your hands. The surface should be even, without dips. - Water generously
The first watering should fully soak the soil. After that, keep the soil slightly moist — these plants don’t like drying out. - Place in suitable light
Best in full sun or light partial shade. Cannas love sun, while caladiums may feel more comfortable with a bit of shade during the hottest hours.
Practical Tip. If you want to enhance the tropical feel, choose caladiums with contrasting veins — white-green or red-green. And pay attention to spacing. If planted too tightly, large leaves will start to block each other and the composition will look worse.
This composition draws attention not because of flower color, but because of form and scale. And that’s what makes it a strong accent in a seating area or near an entrance.
10. Pollinator Pot With Lantana and Verbena
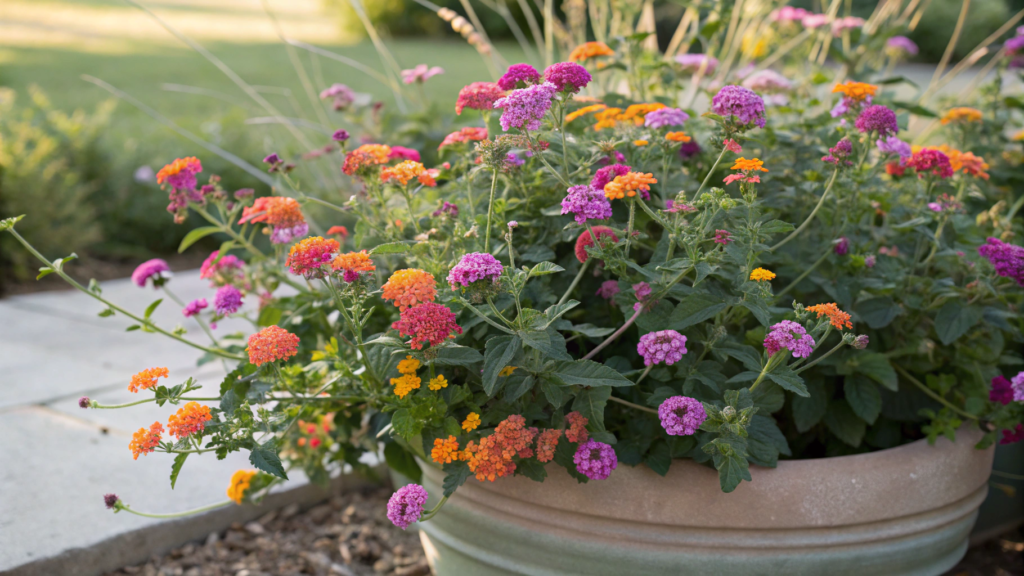
A pollinator pot with Lantana and Verbena attracts not only the eye, but also bees, butterflies, and sometimes even small hummingbirds (if the climate allows).
Lantana creates dense color clusters and holds its shape even in heat. Verbena is lighter, with thin stems, creating an airy layer and slightly spilling over the edge.
What You’ll Need
- Container 14–18 inches in diameter (35–45 cm), stable
- 2–3 lantana plants
- 2–3 verbena plants
- Light potting mix with good drainage
- Shovel
- Watering can
How to Make It
- Prepare the container
Fill it with soil to about 70–75%. The soil should be light and not hold excess moisture. If the mix feels dense, you can add a bit of perlite or sand. - Check drainage before planting
Pour some water and see how it drains. For lantana and verbena, it’s important that water doesn’t stay — this affects roots and overall plant health. - Place lantana as the base
Plant 2–3 plants closer to the center, leaving about 4–6 inches (10–15 cm) between them. They will form the main volume and color. - Add verbena around
Plant it along the edges of the container, spacing about 3–5 inches (7–12 cm). You can guide the shoots slightly outward so they start softly spilling over the edge. - Balance the density
Don’t plant too densely. Leave space between plants for air. This matters for both growth and health, especially in warm weather. - Fill gaps with soil
Add soil between plants and gently press with your hands. Keep the soil level about 1–2 inches (2–5 cm) below the rim. - Water evenly
Water slowly so the entire volume is soaked. Once established, these plants handle light drought better than constant moisture. - Place in a sunny spot
Full sun is required. With good light, flowering will be more active and plants will stay compact.
Lantana and verbena are known as pollinator-friendly plants. Their nectar is accessible to bees and butterflies, so even one container can noticeably bring life into the space.
Practical Tip. If lantana starts stretching and losing shape, you can lightly trim it. This stimulates denser growth and new blooms. Verbena can send out long shoots — you can guide or trim them to keep the container looking neat.
Color, movement, insects — all of this creates the feeling that the space is not static, but constantly changing, becoming more lively and inviting. Even a small container can give this effect.
Smart Combinations
As mentioned earlier, it’s not about specific plants, but about how they combine in height, shape, and color. One adds volume, another covers the edge, a third creates an accent. Because of this, even a simple container starts to look more intentional.
Sometimes it’s enough to replace one plant — and the whole pot feels different. Keep the structure, but refresh the color. Or наоборот, keep the color and change the form. You don’t need to start from scratch every time — and that makes it much easier.Write in the comments which option you liked the most, what you’ll try first — or what you’ve already done yourself.



