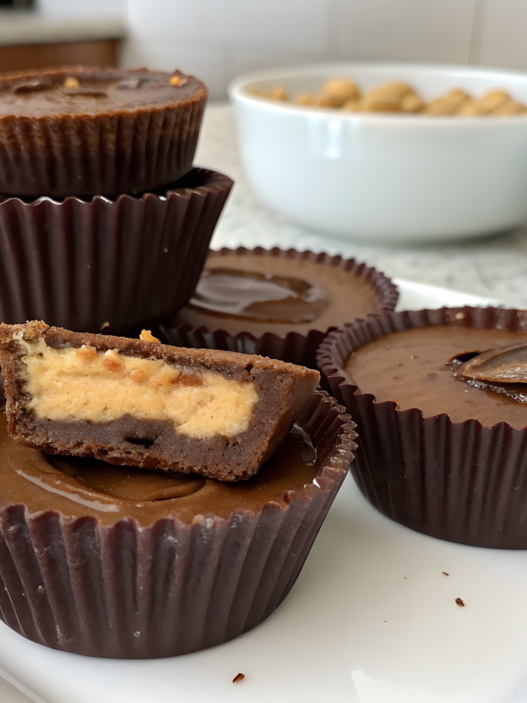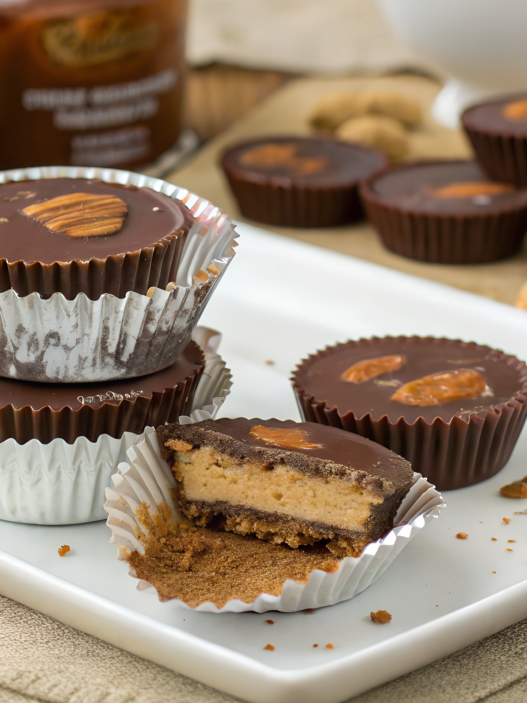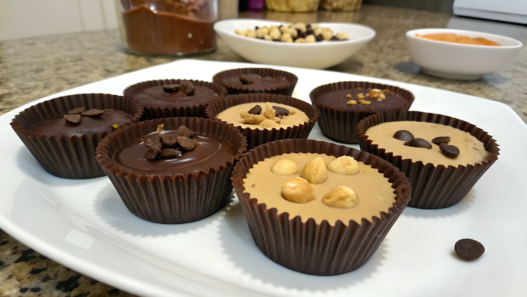
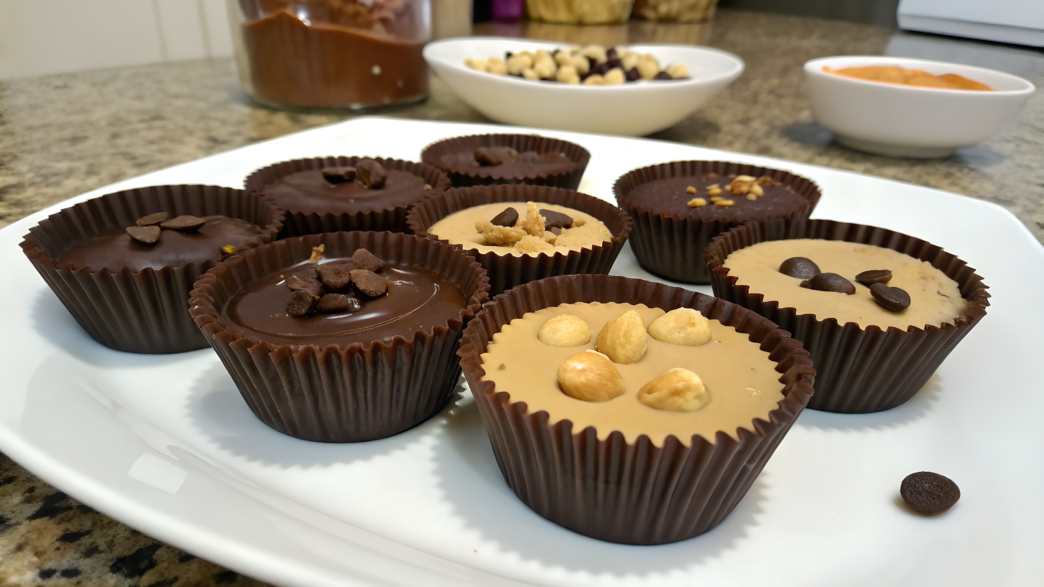
With homemade Reese’s cups, you can adjust the filling exactly the way you like it. Stores do not give you that kind of choice, but at home, you can calmly try different combinations and decide which one you like best.
Lindy and I rarely make a large batch of just one kind. It is much more interesting to fill some of the molds with one filling and the rest with another. Then we cut a few cups in half and compare them. Sometimes the favorite is obvious right away, and sometimes our opinions change after the second cup of coffee.
In this article, I will try to show you both very simple options and fillings with unexpected textures. But all of them are made with simple ingredients and do not require any special candy-making skills.
1. 3 ingredient homemade Reese’s cups with microwave chocolate
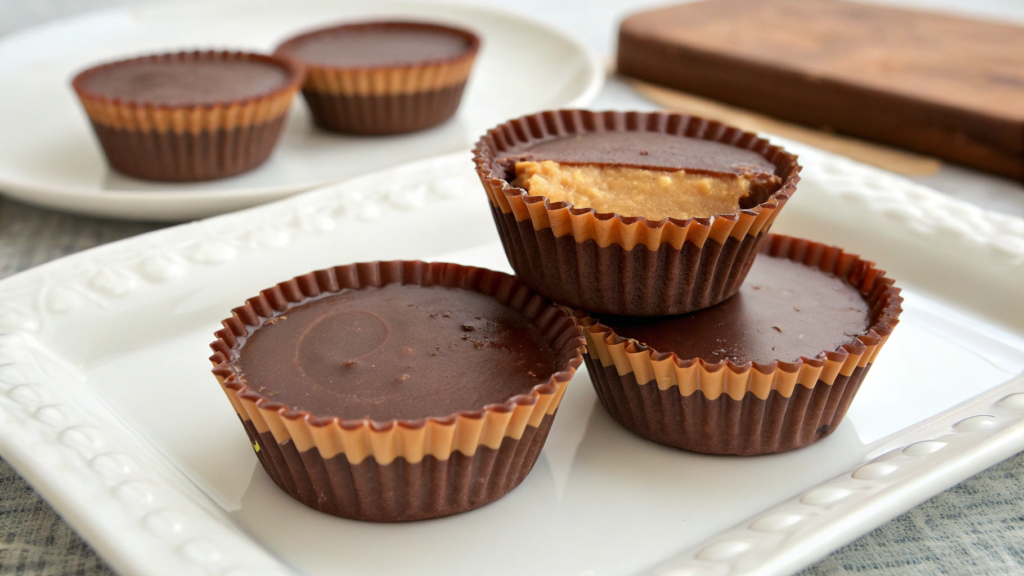
Lindy and I have different ideas about the ideal ratio of chocolate to peanut filling. She likes a thin chocolate layer, while I always try to add a little more peanut butter inside. With homemade cups, the disagreement is easy to solve because each of us makes a few her own way.
This version needs only three ingredients, and you can melt the chocolate in the microwave. The cups turn out small, with a firm peanut center and a thin shell, and you can choose the thickness yourself.
Ingredients
For 10–12 small cups:
- 1½ cups milk or semisweet chocolate chips — about 9 ounces (255 g);
- ½ cup smooth peanut butter — about 4½ ounces (125 g);
- ¼ cup powdered sugar — about 1 ounce (30 g).
For this recipe, smooth peanut butter without a separated layer of oil works best. A filling that is too runny will spread and mix with the chocolate.
The easiest way to assemble the cups is in paper mini muffin liners. You can place them in a metal pan so the edges do not unfold while you fill them.
How to make homemade Reese’s cups
- Prepare the pan. Place the paper liners in a mini muffin pan. If you do not have a metal pan, you can use a small silicone mold with round cavities.
- Melt the first half of the chocolate. Put half of the chocolate chips in a dry bowl. Microwave them in 20-second intervals, stirring after each one. Do not wait for every piece to disappear on its own. The residual heat will help them melt while you stir.
- Make the chocolate base. Spoon about 1–1½ teaspoons of chocolate into each liner. Spread it slightly across the bottom and up the lower part of the sides. Place the pan in the freezer for 5 minutes.
- Prepare the peanut filling. Mix the peanut butter with the powdered sugar. The filling should hold its shape easily without crumbling. Divide it into small portions, roll them into balls, and press them down gently with your fingers.
- Add the filling. Place the peanut butter rounds on top of the set chocolate. Do not press them against the sides of the liners because you need to leave space around the edges for the top layer.
- Cover the cups with chocolate. Melt the remaining chocolate chips in short intervals. Pour the chocolate over the filling and smooth it gently with a spoon. Then tap the pan lightly on the counter to make the surface more even.
- Chill. Place the cups in the refrigerator for about 20–30 minutes. Once the chocolate has completely set, the paper liners will peel away easily.
Tip
Do not replace powdered sugar with regular sugar. The crystals will not dissolve in the peanut butter, so the filling will turn out grainy. If the mixture seems too soft, add powdered sugar one teaspoon at a time until it starts to hold its shape.
Storage. Transfer the finished cups to a container and keep them in the refrigerator for up to one week. Before eating, let them sit at room temperature for a little while. This will soften the peanut layer and make the chocolate flavor more noticeable.
As you can see, three ordinary ingredients turn into neat homemade cups, and the whole process takes less time than a trip to the store. Lindy usually has one with strong coffee, while I prefer them with cold milk. Unsweetened black tea also works well, especially if you used milk chocolate.
2. Sugar free homemade Reese’s cups with allulose and dark chocolate
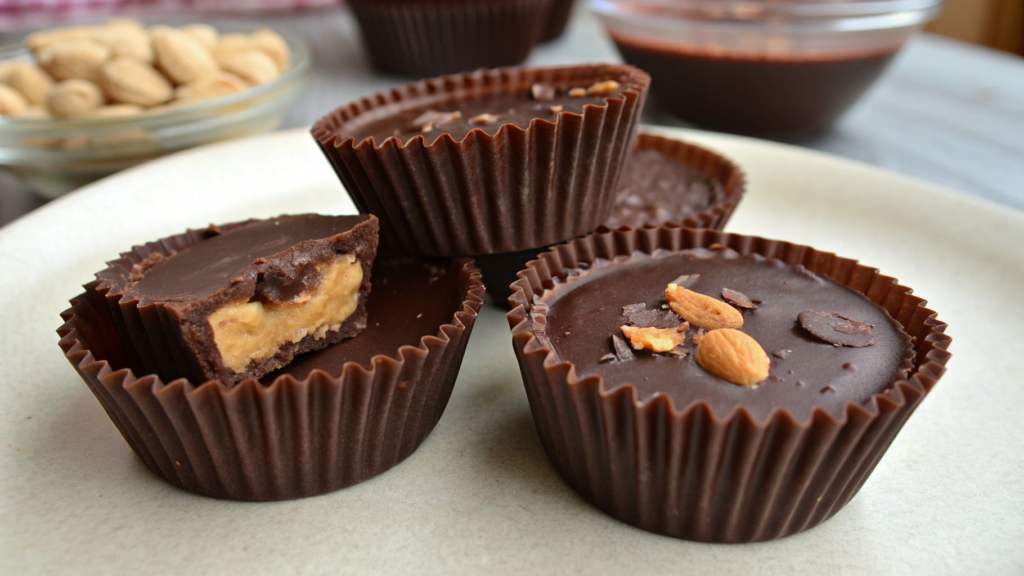
Lindy prefers milk chocolate, while I usually choose dark chocolate with a high cocoa content. So sometimes we divide the homemade cups before we even start assembling them. Her molds go on one side of the table, and mine go on the other. In this version, the sweetness of dark chocolate is balanced by a soft peanut filling with allulose, so regular sugar is not needed.
Allulose tastes similar to sugar, but it is less sweet. That actually works well in the filling because the peanut butter does not get lost behind too much sweetness. Just make sure to use powdered allulose. Large crystals can remain in the filling and add an unwanted crunch.
Ingredients
For 10–12 small cups:
- 8 ounces sugar-free dark chocolate (225 g);
- ½ cup smooth peanut butter (125 g);
- ¼ cup powdered allulose (35 g);
- 1 tablespoon melted butter or coconut oil;
- ½ teaspoon vanilla extract;
- a small pinch of salt.
Check the ingredients in the chocolate before buying it. Some bars labeled “sugar free” are sweetened with maltitol, which can cause stomach discomfort for some people. For this recipe, it is better to choose chocolate sweetened with allulose, erythritol, or stevia.
If you only have a granulated sweetener at home, you can grind it in a small coffee grinder. Granulated allulose, such as Wholesome Yum Besti Allulose Sweetener, works well for both the filling and other homemade desserts.
How to make sugar free cups
- Prepare the molds. Place paper liners in a mini muffin pan. For larger cups, you can use a standard muffin pan, but you will get about six.
- Melt half of the chocolate. Break it into small pieces and place them in a dry bowl. Microwave in 15–20 second intervals, stirring thoroughly each time. Dark chocolate is easy to overheat, so it is better to let the last pieces melt from the heat already in the bowl.
- Make the bottom layer. Spoon about one teaspoon of chocolate into each liner. Spread it across the bottom and slightly up the sides. Place the pan in the freezer for 5 minutes.
- Prepare the peanut filling. Mix the peanut butter, powdered allulose, oil, vanilla, and salt. The filling should be soft but firm enough to shape into small rounds. If the mixture is still runny, add one more tablespoon of allulose.
- Add the filling. Divide the peanut mixture into small portions and flatten each one slightly with your fingers. Place the rounds on top of the set chocolate, leaving some open space around the edges.
- Add the top layer. Melt the remaining chocolate and pour it into the liners. The filling should be completely covered, including around the edges. Tap the pan lightly on the counter a few times so the chocolate spreads more evenly.
- Chill the cups. Leave them in the refrigerator for 25–30 minutes. Do not remove the cups from the paper liners too early, or the soft chocolate may crack or stick to the paper.
How to avoid a grainy filling
Allulose dissolves better than regular erythritol, but large crystals can still be noticeable in the peanut butter. Grind it into a very fine powder and mix the filling for at least one minute. If the peanut butter was cold, leave it on the counter for 15–20 minutes first. The sweetener blends much more easily into a softer mixture.
Storage. These cups will keep well in the refrigerator for about one week. I stack them in a container with parchment paper between the layers so the chocolate does not stick. Do not leave them on the counter for too long because dark chocolate softens quickly, especially if your home is warm.
These cups have a rich cocoa flavor, while the peanut filling stays moderately sweet. You can serve them with coffee and cream, cold milk, or unsweetened tea. Lindy usually chooses black tea because it does not overpower the flavor of the dark chocolate.
3. Keto homemade Reese’s cups with a coconut oil chocolate shell
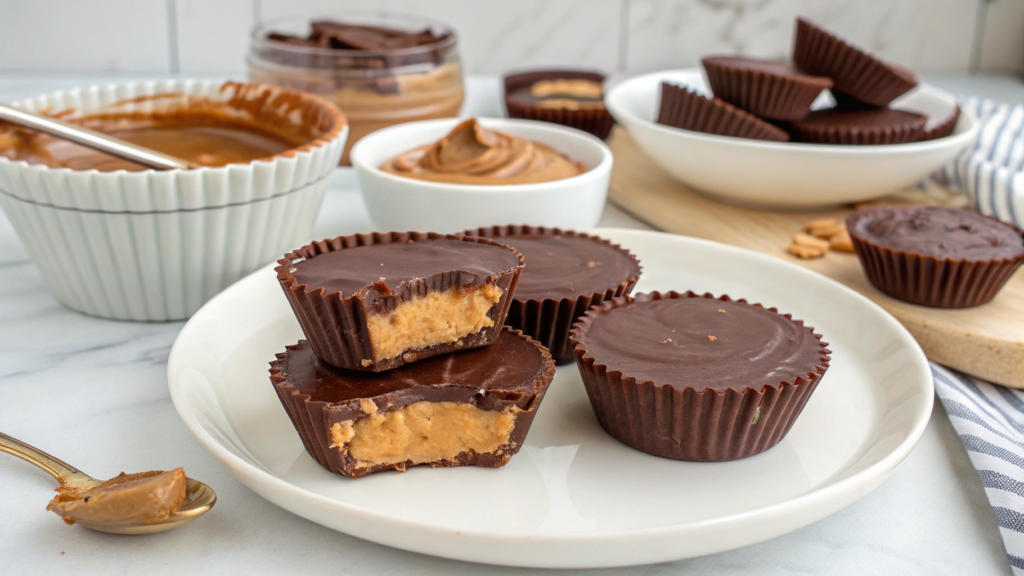
Coconut oil is very convenient for making a homemade chocolate shell. You only need to mix it with cocoa and sweetener, pour it into the molds, and place it in the refrigerator. After a few minutes, the mixture becomes firm and holds the peanut filling well. There is no need to temper chocolate here.
Lindy usually helps me add the filling to the molds because this part goes faster when we do it together. While I mix the chocolate mixture, she divides the peanut butter into small portions. A few minutes later, the pan is already filled and the cups can go in to chill.
This version works for a low-carb diet if you use peanut butter and sweetener without added sugar. The shell is more delicate than one made with regular chocolate, so the cups need to be stored in the cold.
Ingredients
For 10–12 small cups:
- ½ cup coconut oil (115 g);
- ½ cup unsweetened cocoa powder (45 g);
- 3 tablespoons powdered erythritol or another keto sweetener;
- ½ cup smooth sugar-free peanut butter (125 g);
- 1 tablespoon coconut flour;
- ½ teaspoon vanilla extract;
- a small pinch of salt.
For the shell, it is better to use refined coconut oil if you do not want a noticeable coconut flavor. Unrefined coconut oil will also work, but its aroma will be stronger.
It is best to grind the sweetener into a powder beforehand. Erythritol crystals do not dissolve well in oil and may still be noticeable in the finished chocolate.
How to make keto Reese’s cups
- Prepare the molds. Place paper liners in a mini muffin pan. A silicone mold will also work, and the chilled cups are usually even easier to remove from it.
- Mix the chocolate base. Melt the coconut oil in short intervals in the microwave. It should become liquid but not hot. Add the cocoa powder, sweetener, and half of the vanilla extract. Mix well with a whisk until no dry lumps remain.
- Make the bottom layer. Pour about one teaspoon of the chocolate mixture into each liner. Gently move the pan around so the mixture covers the bottom in an even layer. Place it in the freezer for 5–7 minutes.
- Prepare the filling. Mix the peanut butter, coconut flour, remaining vanilla, and a pinch of salt. Coconut flour absorbs moisture quickly and makes the filling firmer, so do not add more right away. Let the mixture sit for a couple of minutes, then check the texture.
- Add the peanut layer. Divide the filling into small portions and shape them into flat rounds. Place one in the center of each mold without pressing it against the edges.
- Cover the cups with chocolate. Stir the remaining chocolate mixture again. If it has started to thicken, warm it slightly. Pour it over the filling and gently spread it to the edges.
- Chill. Place the pan in the refrigerator for about 30 minutes or in the freezer for 10–15 minutes. The cups are ready when the shell is completely firm.
Tip
Do not leave these cups at room temperature for too long. Coconut oil starts to soften in a warm room, so the shell can quickly lose its shape. Take only as many cups out of the refrigerator as you plan to eat right away.
Storage. These cups will keep in the refrigerator for about one week. I simply place them in a container and keep them on the top shelf, away from foods with strong smells.
These cups have a soft peanut filling and a thin shell with a rich cocoa flavor. I really like this combination, even though I am not a big fan of sweets. Lindy likes eating them with hot coffee without sugar, and they also go well with unsweetened almond milk. Just make sure to let them set completely. Then the shell breaks nicely while the filling stays soft.
4. Protein homemade Reese’s cups with Greek yogurt peanut filling
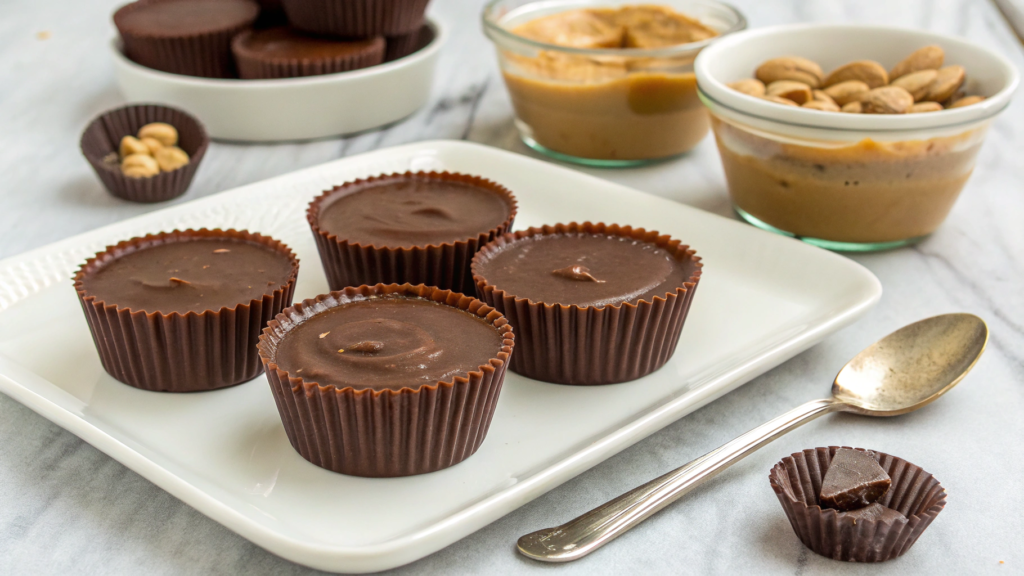
Greek yogurt makes the peanut filling lighter and adds protein, but you need to handle it a little differently from regular peanut butter. It stays soft even after chilling, so it is better to freeze these cups well first. Then the chocolate goes on evenly, and the filling does not squeeze out around the edges.
Lindy and I sometimes make this version in small batches for a few days. The yogurt and peanut butter mixture takes just a couple of minutes to prepare, and after that, the cups spend most of the time sitting in the freezer. The hardest part is not checking them every five minutes.
Ingredients
For 10 small cups:
- 8 ounces semisweet or dark chocolate (225 g);
- ½ cup thick Greek yogurt (120 g);
- ⅓ cup smooth peanut butter (85 g);
- ¼ cup vanilla protein powder (25–30 g);
- 1–2 tablespoons honey or maple syrup;
- ½ teaspoon vanilla extract;
- a small pinch of salt.
Choose thick Greek yogurt, not regular drinkable yogurt. The less extra liquid it contains, the better the filling will hold its shape. I like yogurt with 2 to 5 percent fat. Fat-free yogurt will also work, but the filling will taste a little more tart.
The protein powder does more than increase the protein content. It also absorbs some of the moisture and helps the yogurt mixture come together.
How to make protein Reese’s cups
- Prepare the filling. Mix the Greek yogurt, peanut butter, protein powder, one tablespoon of honey, vanilla, and salt. Taste the mixture. If you want a little more sweetness, add the remaining honey.
- Check the thickness. The filling should slowly fall from the spoon instead of spreading across the bowl. If it is too runny, add one more tablespoon of protein powder. Do not add too much at once, or the center will become dry after freezing.
- Freeze the portions. Line a small board with parchment paper. Spoon out ten portions of filling and gently shape them into round discs. Place them in the freezer for about 45–60 minutes. They should become firm on the outside.
- Melt the chocolate. Break the chocolate into pieces and microwave it in 20-second intervals. Stir after each one. Stop when only a few small pieces remain in the bowl, and let them melt from the residual heat.
- Assemble the cups. Add one teaspoon of chocolate to the bottom of each silicone mold. Place the frozen yogurt filling on top and press it down gently. Leave a little space between the filling and the sides.
- Cover the filling. Pour the remaining chocolate over the top and run a spoon around the edges so it connects with the bottom layer. A silicone mini muffin mold is convenient for this.
- Chill. Return the cups to the freezer for 20–30 minutes. Once the chocolate has fully set, carefully remove them from the mold.
Why the filling needs to be frozen
Do not try to cover the soft yogurt mixture with warm chocolate right away. It will start to spread, and the chocolate may set in uneven pieces. Freezing the filling first solves both problems. The portions keep their shape, and making neat cups becomes much easier.
Storage. These cups are best kept in the freezer and taken out about 5–10 minutes before eating. During that time, the yogurt filling softens slightly and becomes similar to soft peanut butter ice cream. It will soften more in the refrigerator, so only keep the portion there that you plan to eat within the next few hours.
Lindy likes adding a few fresh berries to these cups, especially strawberries or raspberries. Their light tartness goes well with the sweet peanut filling. I am not a big fan of very sweet desserts myself, but the cool yogurt center balances the chocolate nicely here. Coffee, cold milk, or unsweetened cocoa all work well with these cups.
5. Homemade Reese’s cups with PB2 and maple syrup filling
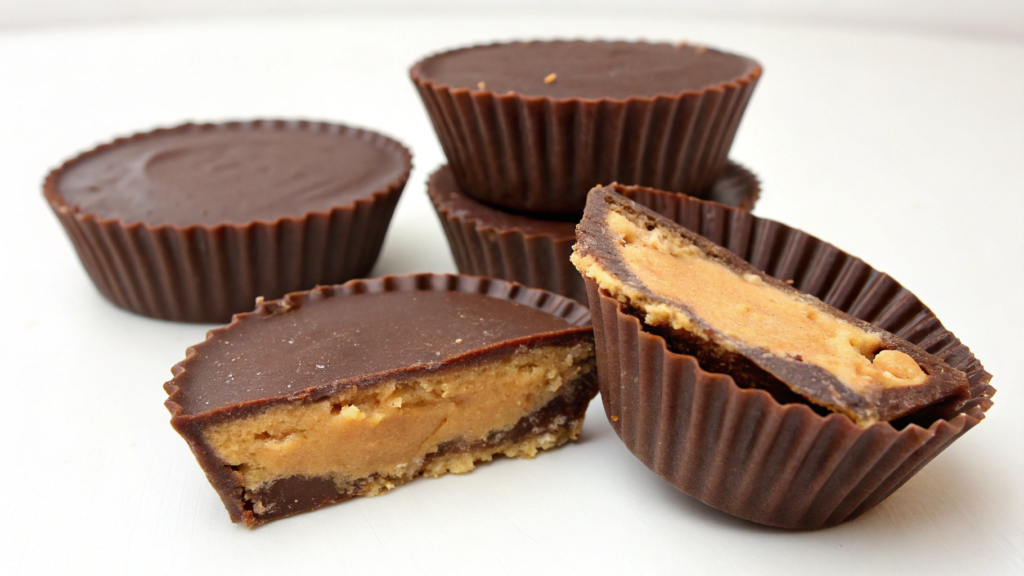
Powdered peanut butter behaves very differently from regular peanut butter. At first, the mixture may seem dry, but after a couple of spoonfuls of liquid, it suddenly becomes smooth and pliable. That is why it is better to add the water gradually. One extra spoonful, and the filling already starts trying to spread into the chocolate.
In this recipe, I mix powdered peanut butter with maple syrup. The filling turns out soft, with a noticeable nutty flavor and a light caramel note. It contains less fat than a filling made with regular peanut butter, but the cups still taste rich thanks to the chocolate shell.
Ingredients
For 10–12 small cups, you will need:
- 8 ounces milk, semisweet, or dark chocolate (225 g);
- ¾ cup powdered peanut butter (about 75 g);
- 3 tablespoons pure maple syrup;
- 1–3 tablespoons water;
- ½ teaspoon vanilla extract;
- a small pinch of salt.
For the filling, choose powdered peanut butter with only a few added ingredients. It is better to use real maple syrup rather than thick pancake syrup with flavorings. It has a cleaner taste, and the filling does not become overly sweet.
How to make cups with powdered peanut butter
- Melt half of the chocolate. Break it into small pieces and place them in a dry bowl. Microwave in 20-second intervals and stir well after each one. Even if you can still see a few pieces, stir the chocolate first. They are often already soft enough to melt without any more heating.
- Make the bottom shell. Place paper liners in a mini muffin pan. Pour about one teaspoon of chocolate into each one and spread it slightly up the sides. Place the pan in the freezer for 5 minutes.
- Mix the filling. Combine the powdered peanut butter, maple syrup, vanilla, and salt. Add one tablespoon of water and mix thoroughly. Then add more water one teaspoon at a time until the mixture becomes soft and pliable.
- Let the mixture rest. Leave the filling for 3–5 minutes. The powdered peanut butter will continue absorbing the liquid, and the mixture will become firmer. If it still crumbles after that, add a little more water. If it is too soft, mix in one spoonful of powdered peanut butter.
- Add the peanut layer. Divide the filling into small portions and shape them into flat rounds. Place them on top of the set chocolate, leaving an open edge around each portion.
- Add the remaining chocolate. Melt the second half and pour it over the filling. Check the edges. The chocolate should connect with the bottom layer and completely cover the peanut center.
- Chill the cups. Place the pan in the refrigerator for about 25–30 minutes. Once the top is firm, carefully remove the paper liners.
Watch the amount of water
Different brands of powdered peanut butter have slightly different grinds, so the exact amount of water may vary. Do not pour in all the water at once. A good filling comes together easily between your fingers, does not stick to them, and does not crack around the edges when pressed.
If the mixture still turns out too runny, do not rush to start over. Add a little more powdered peanut butter and let it sit for a couple of minutes. That is usually enough to bring it back to the right consistency.
Storage. Place the cups in a sealed container and keep them in the refrigerator for about one week. I put pieces of parchment paper between the layers, otherwise the chocolate tops sometimes stick together. A few minutes on the counter before serving is enough to soften the filling.
Maple syrup does not cover up the peanut flavor. It only adds a light sweetness. These cups go well with black coffee, milk, or regular unsweetened tea. It is better to make the cups small. One is usually enough with a drink, especially if the chocolate layer on top turned out generous.
6. Homemade Reese’s cups with almond flour peanut butter dough
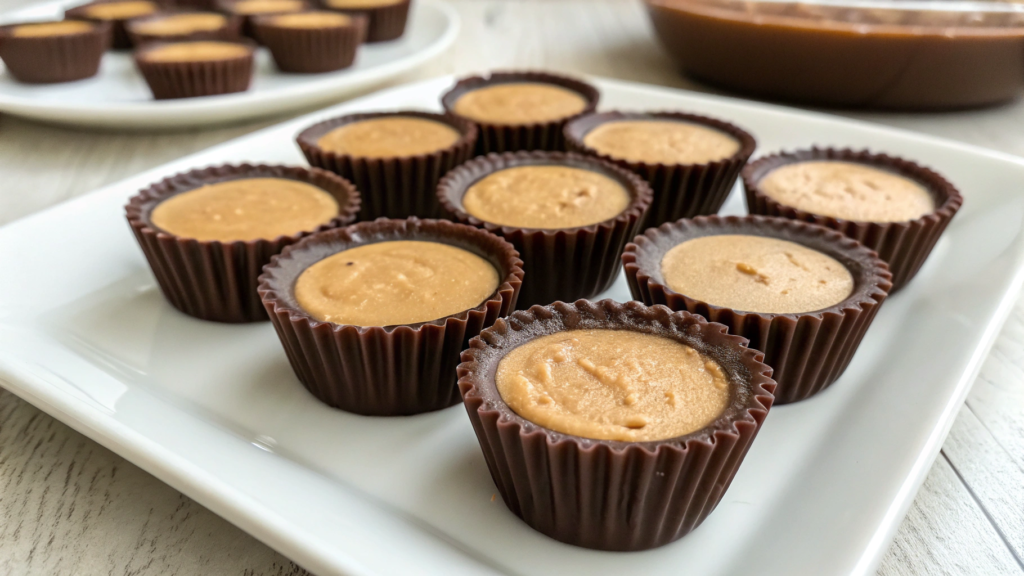
Almond flour gives the filling a completely different texture. It stays soft but holds its shape, so the rounds are easy to make even and place neatly inside the chocolate. I like that the mixture barely sticks to my fingers. You can easily fix the edges instead of scraping half the filling off the spoon and your hands.
In these cups, almond flour absorbs the extra oil from the peanut butter and helps the filling hold its shape. It stays soft inside but does not squeeze out of the chocolate shell with the first bite.
Ingredients
For 10–12 small cups, you will need:
- 8 ounces milk or semisweet chocolate (225 g);
- ½ cup smooth peanut butter (125 g);
- ⅓ cup finely ground almond flour (35 g);
- 3 tablespoons powdered sugar;
- ½ teaspoon vanilla extract;
- a small pinch of salt.
Choose finely ground blanched almond flour. Coarser flour with small pieces of skin will also work, but the filling will be grainier and more likely to crumble. One option is Blue Diamond Almonds Finely Sifted Almond Flour.
If the peanut butter is very thick, stir it well in the jar first. The oil should be evenly distributed, otherwise one part of the filling may turn out dry while another stays too soft.
How to make cups with almond flour dough
- Prepare the chocolate. Break half of the chocolate into small pieces and place them in a dry bowl. Microwave in 20-second intervals, stirring after each one. The last pieces will usually melt from the heat of the chocolate that is already melted.
- Make the bottom layer. Place paper liners in a mini muffin pan. Pour a little chocolate into each one and spread it across the bottom. Place the pan in the freezer for 5 minutes.
- Mix the peanut butter dough. Combine the peanut butter, powdered sugar, vanilla, and salt. Add the almond flour and work the mixture well with a spoon. After about a minute, it will become noticeably firmer.
- Check the filling. Take a small piece and roll it between your fingers. It should easily form a ball without leaving much oil on your hands. If the mixture is sticky, add one more tablespoon of almond flour. If it crumbles, mix in one teaspoon of peanut butter.
- Shape the rounds. Divide the dough into 10–12 pieces. Roll each one into a ball, then flatten it slightly. Make the rounds a little smaller than the bottom of the liners so there is room for chocolate around the edges.
- Assemble the cups. Place the filling on top of the set bottom layer. Melt the remaining chocolate and pour it over the top. Run the tip of a spoon around the edges so the top and bottom layers connect.
- Let the chocolate set. Place the pan in the refrigerator for 25–30 minutes. Once the top is no longer shiny and feels firm, the cups are ready to remove.
Do not add too much flour
Almond flour continues absorbing oil after it is mixed in. So do not try to make the filling very firm right away. Let it sit for 2–3 minutes, then check it again. Sometimes the soft mixture reaches the right texture on its own during that time.
If you add too much flour, the center will turn dry and start crumbling when cut. You can fix it with a small amount of peanut butter, but add only one teaspoon at a time.
Storage. I transfer the leftovers to a container and keep them in the refrigerator. The cups will hold their shape there for about one week. It is better to place parchment paper between the rows, especially if the chocolate layer is thin.
These cups have a firm, almost dough-like filling, so they are a little more filling than versions with a soft cream center. Unsweetened tea or coffee works well with them, and Lindy sometimes cuts one cup in half and adds a few apple slices. Peanut butter, chocolate, and fresh apple really do go well together.
7. Homemade Reese’s cups with no powdered sugar creamy filling
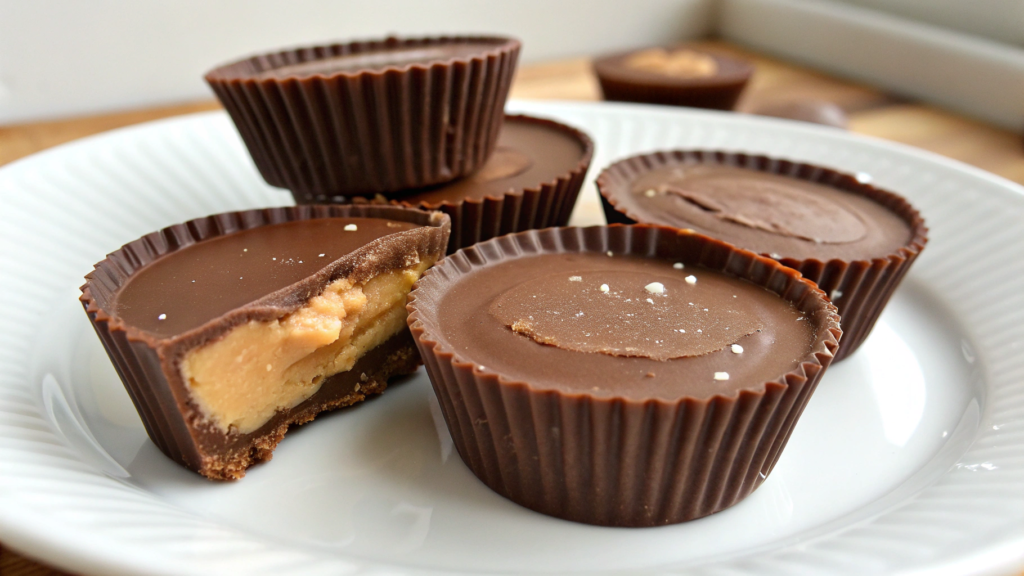
Powdered sugar makes the peanut filling firmer, but the cups still turn out great without it. The center just will not have a dough-like texture. It stays soft, smooth, and creamy, almost like a thick peanut cream inside a chocolate shell.
By the way, I like this version even more than the classic one. The filling does not crumble or taste too sweet, and a small pinch of salt makes the peanut flavor more noticeable. You will not be able to shape it into rounds, though. But it is easier to spoon the cream into the molds and let it chill well.
Ingredients
For 10–12 small cups, you will need:
- 8 ounces milk or semisweet chocolate (225 g);
- ½ cup smooth peanut butter (125 g);
- 2 tablespoons softened butter;
- 1½ tablespoons maple syrup or honey;
- ½ teaspoon vanilla extract;
- ¼ teaspoon salt.
For the filling, use thick, smooth peanut butter. Natural peanut butter with a lot of separated oil can make the cream too runny. If you are using that kind, stir the jar well first and place the amount you need in the refrigerator for 15 minutes.
How to make cups with a creamy filling
- Prepare the pan. Place paper liners in a mini muffin pan. If you are using a silicone mold, chill it slightly beforehand. The first chocolate layer sets faster on a cool surface.
- Melt half of the chocolate. Microwave it in short 20-second intervals. Stir thoroughly each time. Once only a few soft pieces remain, stop heating and keep stirring until the chocolate is smooth.
- Make the base. Add about one teaspoon of chocolate to each liner. Spread it slightly across the bottom and up the sides, then place the pan in the freezer for 5 minutes.
- Mix the filling. Beat the peanut butter with the softened butter. Add the maple syrup, vanilla, and salt. Stir for about one minute until the cream is completely smooth.
- Chill the peanut cream. Place the bowl in the refrigerator for 10–15 minutes. The filling will thicken slightly and become easier to spoon in without smearing the chocolate edges.
- Fill the molds. Spoon a small amount of cream into the center of each chocolate cup. Do not fill them all the way to the top, and leave some space around the edges. This allows the top chocolate layer to connect with the bottom one.
- Cover the cups. Melt the remaining chocolate and spread it over the filling. Gently tap the pan on the counter. The chocolate will flow around the edges and cover small uneven spots.
- Chill well. Place the cups in the refrigerator for at least 30 minutes. The creamy filling sets more slowly than a firm one, so do not rush to remove the paper liners.
If the filling is too soft
First, simply let it sit in the refrigerator. The butter and peanut butter will thicken as they chill, and that is usually enough.
If the cream still spreads, the peanut butter was probably too runny or there was a little too much syrup. Add one tablespoon of thick peanut butter and chill the mixture again. Do not try to fix it with sugar. That would defeat the whole purpose of this recipe.
Storage. These cups are best kept in the refrigerator. I leave them in the paper liners and transfer them to a container only after the chocolate has fully set. This keeps the soft center from pressing against the shell, and the cups stay neat for about five to seven days. Well, we eat them much faster than that.
After a few minutes at room temperature, the filling becomes even softer. Lindy likes that texture and usually chooses the cup with the thinnest chocolate layer. I would serve them with unsweetened coffee or black tea. The drink balances the creamy peanut center a little, and one small cup is enough for dessert.
8. Healthy homemade Reese’s cups with dates and sea salt
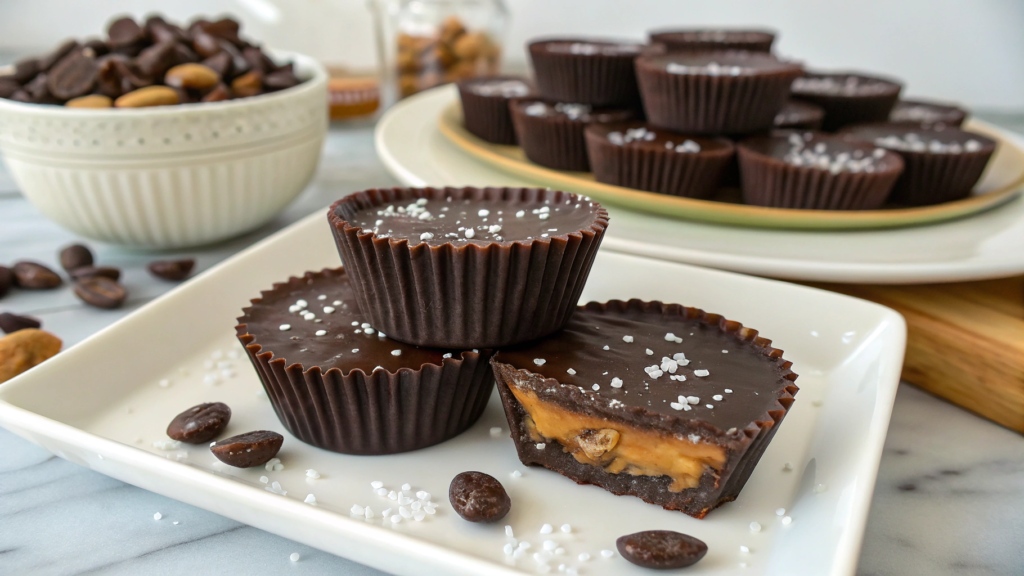
For a long time, dates made me think only of a snack for the road. Too sweet, a little sticky, you eat one and close the package. But they work differently in the filling for chocolate cups. If you blend them with peanut butter and a pinch of salt, you get a thick mixture with a light caramel flavor.
I would not say these cups taste exactly like store-bought Reese’s. The date filling is denser and richer, and its sweetness comes from fruit, without powdered sugar or syrup. Sea salt is not just for decoration here. A few flakes make the chocolate and peanut flavor much more noticeable.
Ingredients
For 10–12 small cups, you will need:
- 8 ounces dark or semisweet chocolate (225 g);
- 1 cup soft pitted dates, about 6 ounces (170 g);
- ⅓ cup smooth peanut butter (85 g);
- ½ teaspoon vanilla extract;
- ¼ teaspoon fine sea salt;
- a little flaky sea salt for the top.
Large, soft Medjool dates work best here. They blend easily and give the filling a smooth texture. If the dates are a little dry, soak them in hot water for 10 minutes, then dry them well.
How to make cups with date filling
- Prepare the dates. Remove the pits if needed and check the inside of each date. Even packages of pitted dates can sometimes contain small hard pieces. Soak dry dates first, but make sure to pat them dry with a towel before blending.
- Make the filling. Add the dates, peanut butter, vanilla, and fine salt to a food processor. Blend in short bursts, stopping from time to time to scrape the mixture from the sides. At first, it will break into small pieces, then it will come together into a sticky dough.
- Chill the mixture. Transfer the filling to a bowl and place it in the refrigerator for 15 minutes. After chilling, it will become firmer and less sticky on your fingers.
- Melt half of the chocolate. Break it into small pieces and microwave it in 20-second intervals. Stir after each one. Do not overheat the chocolate, or it will become thick and spread unevenly.
- Make the chocolate base. Place paper liners in a mini muffin pan. Pour about one teaspoon of chocolate into each one and spread it across the bottom. Place the pan in the freezer for 5 minutes.
- Add the filling. Wet your fingers with water and divide the date mixture into small portions. Shape them into flat rounds slightly smaller than the liners. Place them on top of the set chocolate, leaving some room around the edges.
- Cover the cups. Melt the remaining chocolate and pour it over the filling. Immediately sprinkle each cup with a few flakes of sea salt while the surface is still soft.
- Chill. Place the pan in the refrigerator for 25–30 minutes. Once the chocolate has fully set, carefully remove the paper liners.
How to get a smooth filling
The dates may keep breaking into small pieces for a while, and at that point, it is easy to think nothing is working. Keep blending them in short bursts. After a couple of minutes, the natural sugar and moisture will help the pieces come together.
If the mixture is still too dry, add one teaspoon of warm water. Do not add more right away. Too much moisture will make the filling soft, and the chocolate shell may start to separate.
Storage. These cups will keep well in the refrigerator for about one week. I leave them in the paper liners and place them in a container in a single layer. If space is tight, you can make two layers and place a sheet of parchment paper between them.
The date center does not become hard, even after chilling well. It stays firm and slightly chewy, almost like soft caramel. The sea salt hits your tongue first, followed by the flavor of dark chocolate and peanut butter. A cup of unsweetened tea or coffee is enough with these cups. They definitely do not need any extra sweetness. These are my favorite cups, even though I am not that attached to sweets.
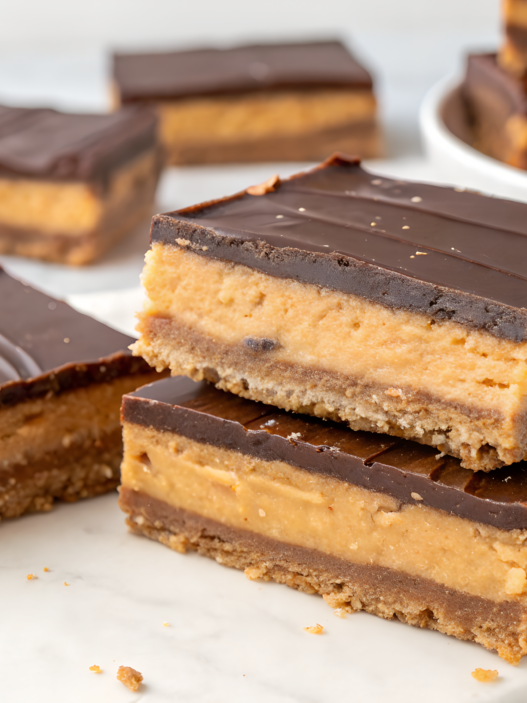
9. Homemade Reese’s cups bars with press-in crust and sheet pan
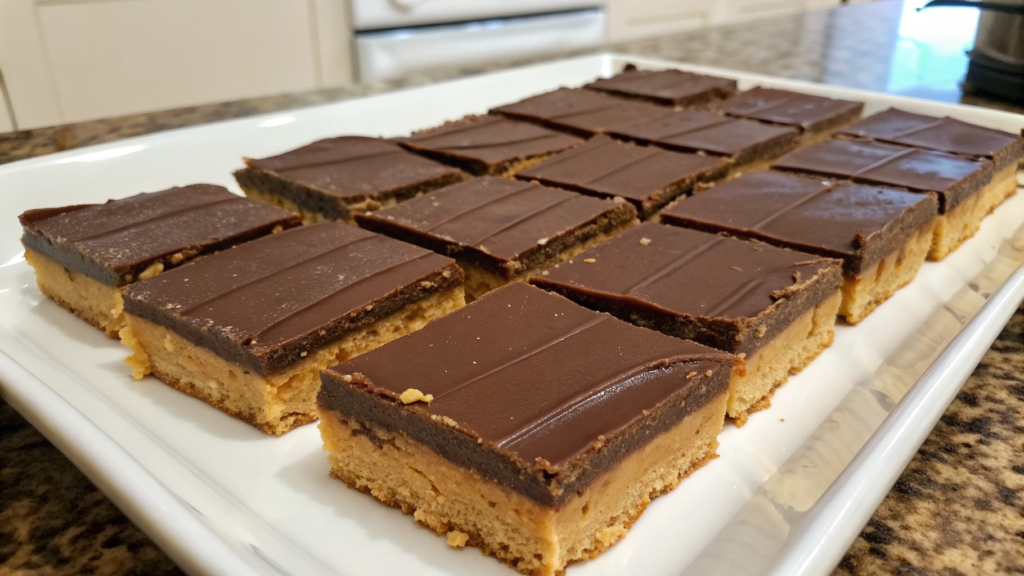
After making a few batches of small cups, I usually want to put the molds away and make everything as one large slab. There is no need to fill every cavity separately or make sure the chocolate reaches the edges evenly. You can simply press the peanut butter base into the bottom of the pan with your palm, cover it with chocolate, and cut it into pieces later.
These bars are a little denser than regular Reese’s cups. There is a soft peanut butter crust on the bottom and a thin chocolate layer on top. You also choose the portion size yourself. You can cut small squares to serve with coffee or make long bars for a more filling dessert.
Ingredients
For a 9 × 13-inch (23 × 33 cm) pan, you will need:
- 2 cups smooth peanut butter (500 g);
- 1 cup melted butter (225 g);
- 2 cups cracker crumbs (about 200 g);
- 1½ cups powdered sugar (180 g);
- ½ teaspoon vanilla extract;
- 12 ounces milk or semisweet chocolate (340 g);
- 1 tablespoon coconut oil or butter;
- a small pinch of salt.
The easiest way to make the crumbs is with simple, slightly sweet crackers. Put them in a sturdy bag and roll over them several times with a rolling pin. A few small pieces are fine, but it is better not to leave large chunks, or the crust may crumble when you cut it.
How to make Reese’s bars on a sheet pan
- Prepare the pan. Line it with parchment paper, leaving extra paper along the long sides. Later, it will be easier to lift the whole chilled slab by these edges and move it to a cutting board.
- Mix the peanut butter base. Combine the peanut butter with the melted butter and vanilla. Add the powdered sugar, salt, and cracker crumbs. Mix everything with a spoon first, then use your hands if that feels easier. The mixture should be thick and come together easily.
- Spread the crust. Transfer the peanut butter mixture to the pan and level it out. Then cover it with a second sheet of parchment and press it down firmly with your palms or the flat bottom of a measuring cup. Try to keep the layer the same thickness, especially around the edges.
- Chill the base. Place the pan in the refrigerator for 20 minutes. During this time, the butter will firm up, and the chocolate will be easier to spread without pulling up the crumbs.
- Melt the chocolate. Mix it with one tablespoon of coconut oil or butter. Microwave it in 20-second intervals, stirring each time. The oil will make the top layer a little softer, so it will not crack as much under the knife.
- Cover the crust. Pour the chocolate over the chilled base and quickly spread it to the edges with a spatula. Do not make the layer too thick. A thin top is easier to cut and does not overpower the peanut flavor.
- Let the bars set. Return the pan to the refrigerator for about 45 minutes. The chocolate should become firm but not ice-cold.
- Cut the bars. Lift the slab by the parchment edges and transfer it to a cutting board. Leave it on the counter for 5–10 minutes, then cut it with a sharp knife. Wipe the blade after each cut to keep the edges neat.
How to press the crust into an even layer
It is difficult to smooth such a thick mixture with a spoon. It sticks to the metal and leaves bumps. I place a piece of parchment on top and press the base down with the flat bottom of a measuring cup. This keeps my hands clean and makes the crust almost the same thickness throughout.
Pay a little extra attention to the corners. The mixture often stays loose there, and those pieces are the first to break after cutting. A few firm presses around the edges solve the problem.
How to keep the chocolate from cracking when cutting
Do not leave the slab in the refrigerator for several hours before picking up the knife. Very cold chocolate breaks and separates from the peanut butter base. If the bars have already become too firm, leave them at room temperature for about 10 minutes.
You can also warm the knife under hot water, dry it well, and make one cut. Repeat before the next cut. Yes, it takes a little more time, but the top stays smooth.
Storage. I place the cut bars in a container with parchment between the rows. They will keep in the refrigerator for up to one week. You can also freeze them for about two months. Before serving, simply move the amount you need to the refrigerator for a few hours.
This format is convenient when you need more dessert but do not want to deal with individual molds. The peanut layer is firm but not dry, and the thin chocolate top has a nice crunch after chilling. I cut part of the slab into very small squares. They go perfectly with coffee and do not feel too heavy after a meal.
10. Homemade Reese’s cups with crunchy pretzel layer and flaky salt
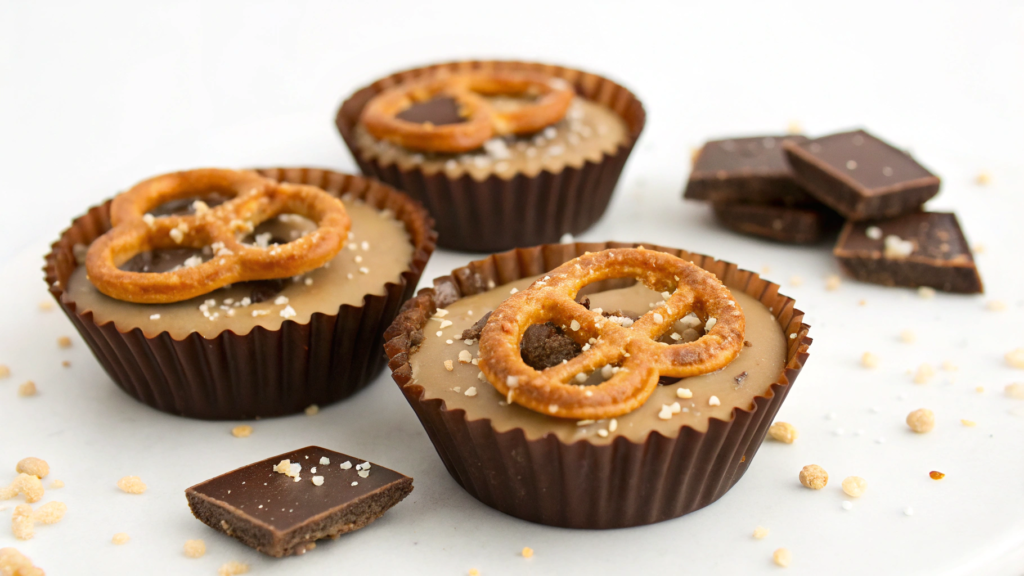
In these cups, the soft peanut filling is followed by a crunchy pretzel layer. A few flakes of salt on top make the flavor stand out even more.
It is better not to crush the pretzels into fine crumbs. I leave small pieces that you can really feel inside the cup. Crumbs that are too fine will quickly absorb oil from the filling and lose the crunch we added them for.
Ingredients
For 10–12 small cups, you will need:
- 8 ounces milk or semisweet chocolate (225 g);
- ½ cup smooth peanut butter (125 g);
- ¼ cup powdered sugar (30 g);
- ½ cup mini pretzels;
- ½ teaspoon vanilla extract;
- a small pinch of fine salt;
- flaky sea salt for the top.
Small, firm pretzels without added flavors work best for this recipe. Break them by hand or lightly roll over them with a rolling pin while they are inside a bag. You need pieces about the size of a lentil, not dust.
How to make cups with a crunchy layer
- Prepare the pretzels. Place them in a sturdy bag and press them a few times with a rolling pin. Remove any very large pieces that could push through the chocolate shell.
- Melt half of the chocolate. Microwave it in 20-second intervals and stir after each one. When only a few soft pieces remain, keep stirring without heating it again.
- Make the bottom layer. Place paper liners in a mini muffin pan. Add about one teaspoon of chocolate to each one and spread it across the bottom. Place the pan in the freezer for 5 minutes.
- Mix the peanut filling. Combine the peanut butter, powdered sugar, vanilla, and a small pinch of salt. Stir until smooth. The mixture should stay on the spoon but remain soft.
- Fill the molds. Add a small portion of the peanut mixture on top of the chocolate. Do not spread the filling all the way to the sides. Sprinkle a few pretzel pieces on top and press them down lightly with a spoon.
- Cover with chocolate. Melt the remaining chocolate and spread it over the pretzels. Make sure it flows around the edges and connects with the bottom layer.
- Add the salt. While the chocolate is still soft, place a few flakes of sea salt on top. Do not overdo it here. Two or three large flakes per cup are enough.
- Chill. Place the pan in the refrigerator for 25–30 minutes. Wait until the chocolate has fully set before removing the paper liners.
How to keep the crunch
Pretzels gradually absorb moisture from the peanut filling, so do not mix them into the peanut butter ahead of time. Keeping them as a separate layer helps them stay crunchy longer. If the top layer is too thin and some pretzel pieces are still visible, add a little more melted chocolate on top.
Storage. The cups will keep in the refrigerator for up to five days, but the crunch will be strongest during the first two or three days. I place them in a container only after the chocolate has fully set and try not to store them next to foods with strong smells.
What I like most about these cups is the contrast of textures. The chocolate sets, the peanut filling stays soft, and the salty pretzels crunch inside. A few flakes of sea salt on top bring everything together, but add them gradually.
I usually take the cups out of the refrigerator a few minutes before serving. A cup of black coffee or a glass of cold milk goes well with them, and you can simply eat one without rushing. Although stopping at one does not always happen.
Favorite filling
Homemade cups rarely turn out completely identical. And that is perfectly normal. We are making them at home, not on a factory line.
I usually start with a small batch myself and then make a larger one later. This makes it easier to judge the sweetness, the thickness of the chocolate, and the texture of the center, then adjust everything a little to your taste the next time.
Tell me in the comments which filling you have already tried making. And share what you usually add to chocolate and peanut butter at home. Maybe we will try your idea in our kitchen one day too.