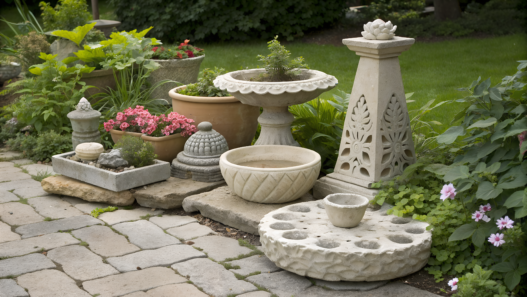
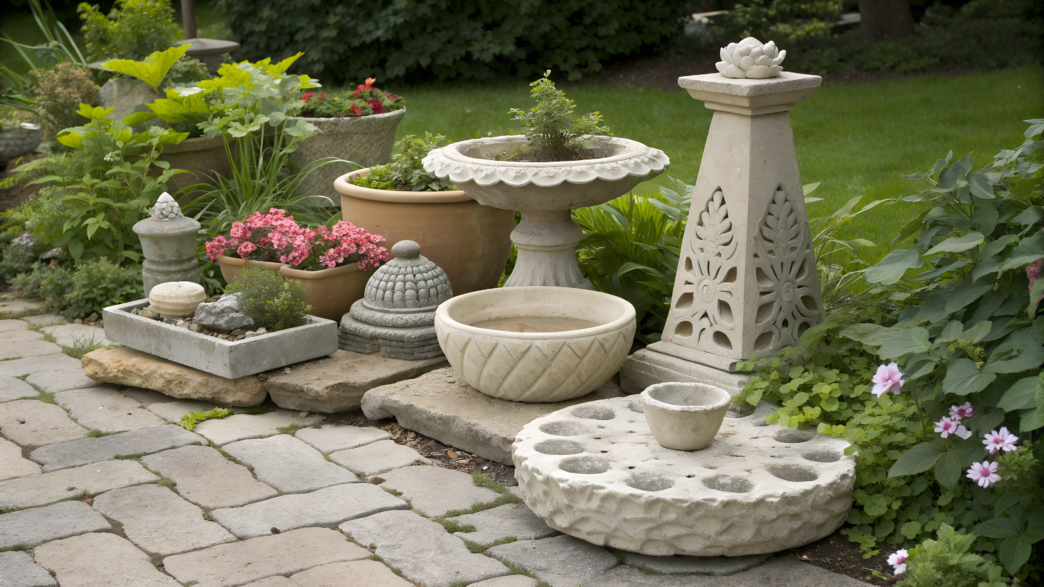
You do not need to buy special molds to work with hypertufa. Old bowls, containers, kitchenware, and other things you already have at home will work.
I like to look at a mold from every side first and imagine what could eventually come out of it. Sometimes something you were planning to throw away turns out to be exactly what was missing for a new garden project.
Hypertufa looks like stone but is lighter than regular concrete. It is easy to work with in small batches, change the shape, and add texture. The main thing is not to rush and to give it enough time to become strong.
1. Colander Mold Hypertufa Hanging Basket
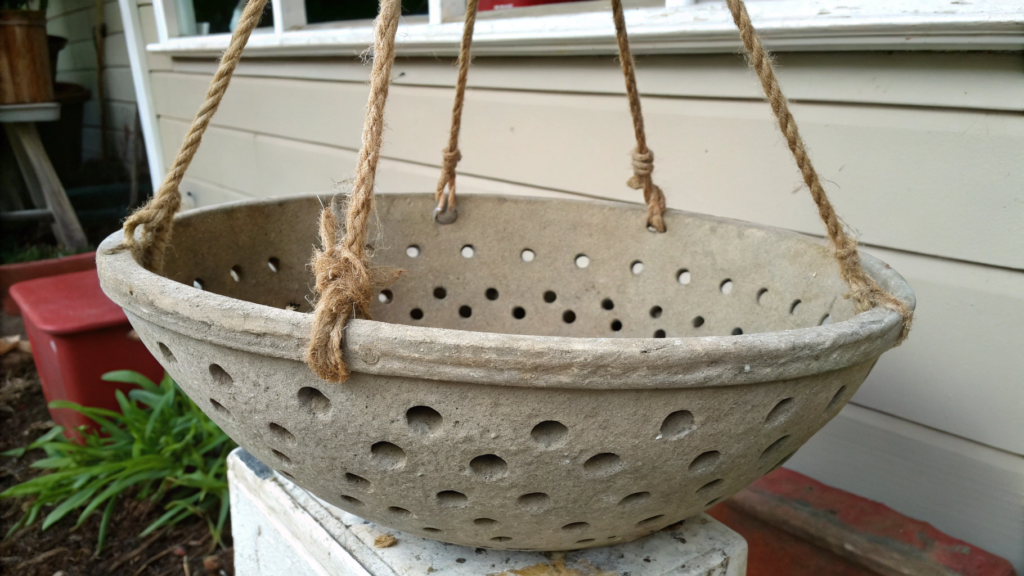
An old colander can be used as a ready-made mold for a hypertufa hanging basket. It creates the shape of a rounded bowl, while the holes leave a noticeable dotted pattern on the surface.
We found two almost identical colanders, even though we only used one of them. So we decided to experiment with molds a little.
It is better to use a colander that is 10–12 inches (25–30 cm) wide. A larger container will become quite heavy after adding moist soil.
What you will need
- A colander about 11 inches (28 cm) wide
- A smaller bowl
- Portland cement
- Coconut coir or sifted peat moss
- Perlite
- Water
- Plastic wrap and vegetable oil
- Four short pins or pieces of plastic tubing
- Three matching chains, hooks, and a connecting ring
- Gloves, safety glasses, and a mask
For the mix, combine 2 parts Portland cement, 3 parts coconut coir, and 3 parts perlite. A regular metal colander, such as a Stainless Steel Colander, will work.
Dry cement and perlite create a lot of dust, so it is better to mix everything outside while wearing a mask and gloves.
How to make a hanging basket
- Prepare the colander. Line the inside with plastic wrap and lightly coat it with vegetable oil. The plastic will cover the colander holes and help you remove the basket carefully after the initial curing.
- Prepare the inner bowl. Wrap the outside with plastic and apply a little oil as well. Place the bowl inside the colander in the usual position, bottom side down. There should be an even gap of about 1–1¼ inches (2.5–3 cm) between the two molds. This is the space we will later fill with the mixture.
- Mix the hypertufa. First, combine all the dry ingredients and break up any lumps with your gloved hands. Then gradually add water. The finished mixture should form a firm ball and hold its shape when squeezed, but no water should run out of it.
- Form the bottom. Remove the inner bowl and place a layer of hypertufa about 1–1½ inches (2.5–4 cm) thick on the bottom of the colander. Press the mixture down firmly with your hands. Place a vertical pin or a piece of plastic tubing about ½ inch (1.3 cm) thick in the center. Once it is removed, a drainage hole will remain.
- Set the bowl in place. Return the inner bowl to the center of the colander, placing it bottom side down on top of the fresh layer of hypertufa. Do not push it all the way to the base. There should be enough mixture under the bowl to create a strong bottom. Place a few stones inside so it does not move.
- Form the lower part of the walls. Fill the gap between the colander and the bowl with small portions of hypertufa. Press each portion down firmly with your fingers, especially near the bottom. When the walls reach about half their full height, check that the bowl is still sitting evenly.
- Build the walls to the top. Continue adding the mixture all the way around. Try to keep the walls the same thickness and avoid leaving large empty spaces inside. Stop when the mixture sits slightly below the top edge of the colander.
- Make the hanging holes. Take three matching pins and insert them from the outside through the colander holes and plastic wrap into the soft hypertufa. Position them at equal distances from one another, about 1½ inches (4 cm) below the top edge. Each pin should pass through the full thickness of the wall without touching the inner bowl.
- Finish the top edge. Add a little more hypertufa around the pins and level the top of the basket. It is better to make the rim slightly thicker than the walls and gently round it with your fingers. Thin, sharp sections may chip after curing.
- Leave the basket in the mold. Cover the colander with plastic and move it to a shaded place protected from wind and direct sunlight. Do not try to remove the bowl or pins right away. The mixture needs several days before it can hold its shape.
When to remove the molds
I usually leave the basket in the colander for three to five days. I check it very simply by pressing lightly on the top edge. If it no longer gives under pressure, the inner bowl and pins can be removed carefully.
At this stage, the hypertufa is still fragile, so I do not pull the mold sharply or lift the basket by the edge. If the surface is too rough in some places, I go over it with a stiff brush. I also clear the drainage hole and the chain holes before the material becomes completely hard.
The work is not finished after removing the mold. The hypertufa needs time to gain strength. I cover the basket with plastic again and leave it in the shade for another two to three weeks.
Preparing it for planting
Fill the basket with water several times and let it drain completely. You can also leave it out in the rain for one to two weeks. This rinsing helps remove some of the lime compounds from the fresh cement.
After that, attach three matching chains and first test the empty basket at a low height. Then add soil and inspect the holes again. A hanging planter chain will work for attaching it.
You can plant sedums, hens and chicks, thyme, or small trailing succulents in this basket. Keep in mind that a hanging container dries out faster than a regular pot.
My first basket hung near the shed for several seasons. The surface gradually darkened, and moss settled into the small uneven areas. I did not do anything special to it. Rain, dust, and time finished the decoration for me, which was very convenient.
2. Bubble Wrap Texture Hypertufa Pots
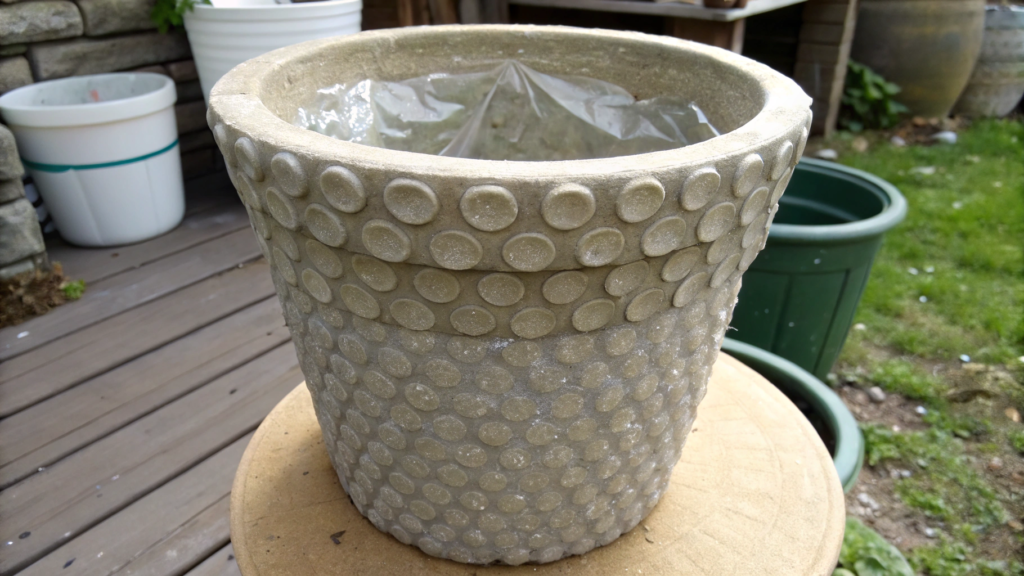
Bubble wrap leaves an even pattern of small rounded indentations on a hypertufa pot. To create it, secure the wrap inside the outer mold with the bubbles facing the future pot. Once the wrap is removed, a clear repeating texture remains on the surface.
I first noticed this technique on a finished tall planter in a store and assumed the pattern had been made with a special mold. Then I looked more closely and realized it was just regular packing wrap. The main thing is to use bubbles that are intact and the same size.
This method works for both round and rectangular containers. I find it more convenient to use a plastic bucket about 10–12 inches (25–30 cm) wide and a second, smaller container. The pattern can be placed on either the outside or the inside of the finished piece.
What you will need
- A large plastic bucket or container for the outer mold
- A smaller container with similar proportions for the inside
- Bubble wrap
- Adhesive tape
- Portland cement
- Coconut coir or sifted peat moss
- Perlite
- Water
- A short pin for the drainage hole
- Plastic wrap and vegetable oil
- Stones to weigh down the inner mold
- Gloves, safety glasses, and a mask
For the mix, combine 2 parts Portland cement, 3 parts coconut coir, and 3 parts perlite. The perlite and fiber make the finished piece lighter than a similar one made from regular concrete.
How to make a textured pot
- Prepare the outer mold. Wash and dry the large bucket. Cut a strip of bubble wrap to match the height of the inside walls. It should be long enough to cover the entire inside of the bucket with a slight overlap.
- Position the wrap correctly. Place it along the inside walls of the bucket with the bubbles facing the center of the mold. The bubbles should touch the fresh hypertufa. The smooth side should rest against the bucket walls.
- Secure the seam and top edge with a few small pieces of adhesive tape. Do not cover a large section of the bubbles with tape, or smooth strips will appear on the finished pot.
- Cover the bottom. Cut a separate circle of bubble wrap to fit the bottom of the bucket. Place it with the bubbles facing up. If you only want texture on the side walls, you can line the bottom with regular plastic wrap instead.
- Prepare the inner mold. Wrap the outside of the smaller bucket with regular plastic wrap and lightly coat it with vegetable oil. Bubble wrap is not needed here if you want a smooth inner surface.
- Check the size before mixing. There should be a gap of about 1–1¼ inches (2.5–3 cm) between the two containers.
- Mix the hypertufa. Combine the dry ingredients first, then gradually add water. Squeeze the mixture with a gloved hand. It is ready when it holds together in a firm ball without releasing water.
- Form the bottom. Place a layer of mixture about 1–1½ inches (2.5–4 cm) thick in the bottom of the outer mold. Press it down carefully so the bubble wrap does not shift.
Place a vertical pin about ½ inch (1.3 cm) thick in the center. Once it is removed, a drainage hole will remain.
- Set the inner mold in place. Position the smaller bucket normally, bottom side down. Place it exactly in the center and add a few stones inside. A layer of hypertufa should remain under the bucket to form the bottom of the finished pot.
- Fill the walls. Add the mixture to the gap between the two containers in small portions. After each portion, press it down with your fingers or a wooden stick.
Do not press too hard against the bubble wrap. It needs to hold its shape rather than burst or collapse. Build the walls gradually all the way around so the inner mold does not shift to one side.
- Finish the top edge. Once the mixture reaches the top, check the wall thickness and the position of the inner bucket. Level the rim and gently round it with your fingers. It is better to leave the top smooth so the pattern does not get in the way of creating a neat edge.
- Leave the pot in the mold. Cover everything with plastic and move it to a shaded place. Do not try to remove the inner bucket or check the pattern right away. The hypertufa needs several days before it can hold its shape.
How to remove the wrap and preserve the pattern
Leave the pot in the mold for three to five days. First, carefully remove the inner bucket, then lift the pot out of the outer mold.
Remove the bubble wrap slowly, starting at the seam. If it sticks in any area, do not pull it sharply. Carefully separate one section at a time. While the hypertufa is still slightly soft, you can smooth the top edge with a brush, but it is better not to touch the textured surface.
Let the pot become stronger
Once the molds have been removed, place the pot back under plastic and leave it in a shaded area for another two to three weeks. During this time, the material becomes noticeably harder, and the edges are less likely to be damaged.
Before planting, rinse the container with water several times and check the drainage hole. Hens and chicks, sedums, thyme, and other small plants that do not need constantly moist soil look good in this type of pot. Hypertufa remains porous and works well for plants that need good drainage.
There is one small detail to keep in mind with bubble wrap. A few bubbles may still burst while the mold is being filled, leaving smooth spots in those areas. Of course, they are not very noticeable. Still, avoid packing the mixture down with too much force, and use a fresh piece of undamaged wrap. It is much easier that way.
3. Loaf pan hypertufa window box
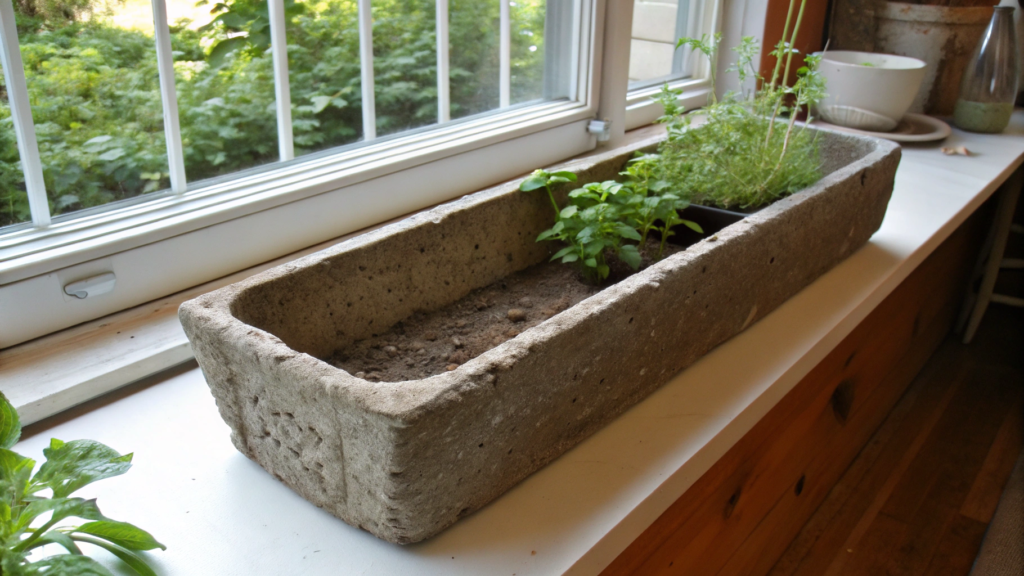
A long loaf pan works well for a small hypertufa window box. It naturally creates straight, even walls and neatly rounded corners. The finished container can be placed on a wide windowsill, a step, a garden shelf, or a low wall.
It is important to check the size in advance. A regular 9-inch (23 cm) loaf pan will make a very small box. For a roomier version, it is better to use a pan that is 12–14 inches (30–36 cm) long.
These narrow containers work well for growing herbs that are often used in the kitchen. Not an entire bed of basil, but a few small plants that you can quickly trim before dinner.
What you will need
- A large metal loaf pan
- A smaller rectangular container
- Portland cement
- Coconut coir or sifted peat moss
- Perlite
- Water
- Plastic wrap
- Vegetable oil
- Two short pins for the drainage holes
- Stones to weigh down the inner mold
- Gloves, safety glasses, and a mask
The inner container should be shorter and narrower than the loaf pan. Once it is in place, there should be a gap of about 1–1¼ inches (2.5–3 cm) on all four sides.
Prepare the mixture using 2 parts Portland cement, 3 parts coconut coir, and 3 parts perlite. Hypertufa is lighter than natural stone but keeps the porous structure that works well for outdoor containers.
How to make a hypertufa window box
- Line the large pan. Cover the bottom and walls with plastic wrap. Leave the edges hanging over the outside so you can carefully lift the box by them later. Lightly coat the inside with vegetable oil.
- Prepare the smaller container. Wrap the outside with plastic and apply a thin layer of oil as well. Place the container inside the large pan and check the gaps. It should not touch the walls or the bottom.
- Mix the hypertufa. Combine the dry ingredients, breaking up large lumps with your gloved hands. Add water in small amounts. The mixture should hold together in a ball when squeezed without becoming runny.
- Make the base. Remove the inner container and place a layer of hypertufa about 1–1½ inches (2.5–4 cm) thick on the bottom of the pan. Press the mixture down firmly, especially in the corners.
- Prepare the drainage. Insert two vertical pins about ½ inch (1.3 cm) thick into the base. Position them at equal distances from the center. For a long box, two holes are more practical than one because water can drain from both sides.
- Set the inner container in place. Place it bottom side down on top of the fresh base and center it. A layer of hypertufa should remain underneath. Put a few stones inside so the container does not rise or shift.
- Form the walls. Fill the space between the two molds in small portions. Start with the corners because it is easier to leave empty spaces there. After each portion, press the mixture down with your fingers or a wooden stick.
- Work around the entire perimeter. Do not fill one long wall all the way to the top first. Build all four sides gradually, alternating between them. This will keep the inner container centered and make the walls roughly the same thickness.
- Finish the top. Bring the mixture up to the edge of the outer pan and make the top rim slightly thicker. Level it and round the corners with your fingers. Thin edges are not useful here, especially if the box will need to be moved.
- Leave everything in place. Cover the pan with plastic and move it to the shade. Do not remove the inner container right away, even if the surface feels firm. The middle sections of the walls and the corners need more time to set.
How to remove the box from the mold
After three to five days, first remove the stones and carefully take out the inner container. Then remove the drainage pins and lift the box using the edges of the plastic wrap.
The hypertufa is still fragile, especially along the long walls. Support the piece from underneath and do not try to shake it out of the mold. Uneven areas can be removed with a stiff brush while the surface is still easy to work with.
When you can start planting
After removing the mold, leave the box in the shade for another two to three weeks so it can fully strengthen. If the surface dries too quickly, lightly moisten it. Then rinse the container several times with clean water and check both drainage holes.
You can plant thyme, chives, small sedums, or compact lettuce varieties in this box. Place it on small supports if it sits on a wooden windowsill so water can drain freely underneath.
Before casting, it is worth inspecting the pan carefully, especially the corners. Any dent or scratch will be transferred to the hypertufa. Small imperfections usually do not bother me, but once one corner came out noticeably dented. Since then, I always check the pan in advance because it is much easier to fix than a finished box.
4. Hypertufa Bird Bath Made in a Bundt Pan
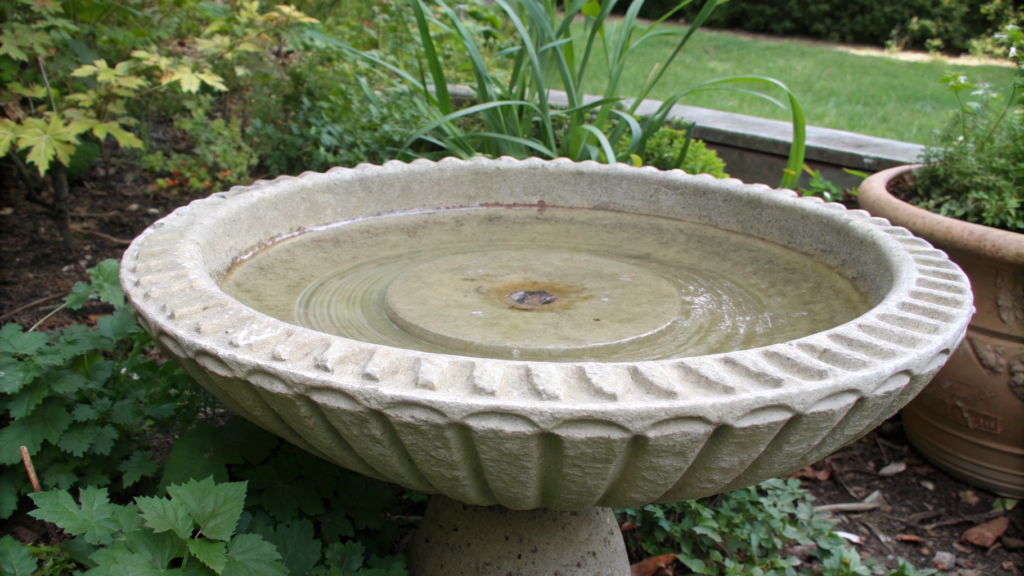
A pan with a hole in the middle works well for a small hypertufa bird bath. The textured sides will leave an imprint on the outside, while the inside will form a shallow circular bowl. The center will remain open, so the finished piece will look like a stone ring.
For this project, it is better to choose a wide pan 10–12 inches (25–30 cm) in diameter with shallow, smooth curves. Narrow, tall ridges are harder to fill evenly with the mixture.
I place small bird baths between the garden beds. On hot days, birds quickly find the water, and I also get to see who visits the garden. I often pay more attention to the birds arguing over the same spot along the edge than to the vegetables.
What you will need
- A metal or silicone Bundt pan
- Portland cement
- Coconut coir or sifted peat moss
- Perlite
- Water
- Plastic wrap
- Vegetable oil
- A stiff brush
- Gloves, safety glasses, and a mask
For the mix, combine 2 parts Portland cement, 3 parts coconut coir, and 3 parts perlite. A Bundt pan will work.
How to make a bird bath
- Prepare the pan. Wash it and dry it well. Line the inside with plastic wrap, pressing it into all the curves as closely as possible. Then lightly coat the plastic with vegetable oil.
- Check the folds. The plastic will not sit completely flat inside a textured pan, and that is fine. However, it is better to smooth out large folds, or deep lines will remain on the outside of the bird bath.
- Mix the hypertufa. Combine the dry ingredients first, then gradually add water. The mixture should hold together in a firm ball when squeezed. If water runs out of it, the mixture is too wet.
- Fill the lower grooves. Start with the deepest sections of the pan. Press in small portions of hypertufa so the mixture reaches every curve and no empty spaces remain around the center column.
- Form the bowl. Continue covering the inside of the pan with a layer about 1½ inches (4 cm) thick. Do not fill the pan completely. The center should remain empty because this hollow area will hold water after the piece is turned over.
- Create a stable base. The open top edge of the mixture will become the bottom of the finished bird bath. Level it with your palm and check that it sits at roughly the same height all the way around. Otherwise, the piece will wobble.
- Smooth the inside surface. Go over the future bowl with damp fingers. Do not make it completely smooth. A little texture helps birds keep a firmer grip with their feet.
- Check the depth. The distance from the edge to the deepest point of the bowl should be no more than 2 inches (5 cm). If the hollow is deeper, add a little more mixture to the lower section and level it again. Birds are more likely to use shallow baths with a gentle slope into the water.
- Leave the piece in the pan. Cover everything with plastic and place it in the shade for three to five days. Do not turn the pan over too early. Thin areas near the center opening may break.
How to remove the bird bath
After three to five days, I cover the pan with a folded towel and carefully turn it over. Then I slowly lift the metal pan while supporting the hypertufa from underneath. If it does not release right away, I gently move it from side to side, but I do not try to shake the piece out.
Once the pan is removed, I carefully peel away the plastic wrap, starting from the edge. While the hypertufa is still not completely hard, I use a stiff brush to remove sharp bumps and check the base. The bird bath should stand evenly without wobbling.
Before adding water
Leave the piece under plastic for another two to three weeks so it can become stronger. After that, rinse the bowl with clean water for several days. Hypertufa is porous, so at first the water may drain away faster than expected.
If the bowl continues to leak noticeably, the inside can be coated with a product that the manufacturer specifically approves for ponds and contact with wildlife. It must dry and cure completely before use.
Place the bird bath on a stable base near shrubs where birds can quickly take cover. It is better to change the water every day or every other day and clean the bowl regularly.
A pan with a hole in the middle leaves a narrow ring of water, so there is not much room for a large group. Still, small birds can stand comfortably along the edges without going too deep. I usually place a couple of flat stones on the bottom. They make convenient places to perch and also make the water depth easier to see.
5. Chicken Wire Hypertufa Boulder Cover
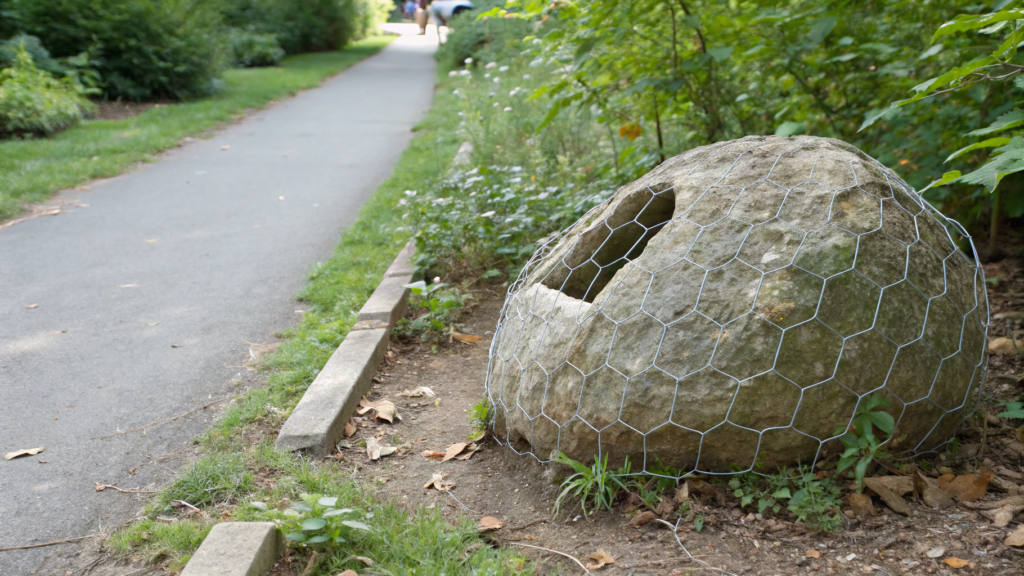
Using chicken wire, you can make a hollow hypertufa boulder that looks massive but weighs much less than a real stone. It is useful for covering a small stump, an irrigation pipe, or another unattractive spot in the garden.
The wire mesh stays inside the hypertufa and helps it hold its shape. The temporary base made from bags or crumpled paper is only needed while you work. Later, it is removed through the open bottom.
Our neighbors had a small empty spot beside the path where they wanted to place a stone. But suitable boulders were either too heavy or completely wrong in shape. Hypertufa turned out to be much more convenient. You can set the exact height, make one side wider, and flatten the top slightly.
What you will need
- Galvanized chicken wire
- Wire cutters and pliers
- Thin galvanized wire
- Old bags or crumpled paper
- Plastic wrap
- Portland cement
- Coconut coir or sifted peat moss
- Perlite
- Water
- A small trowel
- A stiff brush
- Heavy-duty gloves, safety glasses, and a mask
Galvanized Chicken Wire Mesh will work for the frame. Always wear heavy-duty gloves. The cut wire ends are extremely sharp.
Combine 2 parts Portland cement, 3 parts coconut coir, and 3 parts perlite. For a large structure, it is better to prepare the mixture in small batches, or it may start setting before you have time to use it.
How to make a hollow hypertufa boulder
- Choose the size. Decide in advance where the finished boulder will sit and estimate its proportions. For your first project, it is better to make a small structure that can be moved without unnecessary risk after it hardens.
- Build the temporary base. Pack several large bags tightly with crumpled paper and stack them on top of one another. Shape the base into an uneven rounded form by adding or removing paper. Do not make the boulder perfectly symmetrical. Small bumps and sides of different heights will look more natural.
Rigid boxes are better avoided here. They will be difficult to break apart and remove from the finished shell.
- Cover the base with plastic. Wrap the entire structure in plastic wrap and secure the loose edges with adhesive tape. The plastic will keep the paper dry and separate the temporary base from the hypertufa.
- Form the wire frame. Wrap the temporary base with chicken wire and press it against the surface. The mesh should cover the top and sides without extending far underneath the base. Leave the bottom open so the filling can be removed through it later.
If one piece of mesh is not enough, connect the sections with thin wire. Bend all sharp ends inward with pliers.
- Strengthen the shape. Check whether the mesh keeps its outline when pressed lightly. You can add a second layer over large flat areas. The temporary base stays inside for now and supports the frame while you work.
- Mix the hypertufa. Combine the dry ingredients and gradually add water. For this project, the mixture should be firm enough to stay on the mesh without sliding down.
- Apply the first layer. Start at the lower edge and press the mixture into the openings in the mesh. First, cover the entire frame with a layer about ¾ inch (2 cm) thick.
If the mixture falls through, support that area from the inside through the plastic while pressing the hypertufa from the outside.
- Add the main layer. Apply another ¾ inch (2 cm) of mixture on top. The shell should have a total thickness of about 1½ inches (4 cm). Cover the mesh joints especially carefully. No wire should remain visible on the surface.
Do not close the bottom opening. Apply the hypertufa only to the top, sides, and the rim left around the base.
- Create a rocky surface. Do not smooth the mixture until it is perfectly even. Make a few shallow indentations with the trowel, then lightly press the surface with a damp sponge or crumpled plastic wrap.
Look at the boulder from different sides and immediately correct any overly smooth dome or unnaturally sharp bumps. Cover the structure with plastic and leave it in the shade for three to five days. It is better not to move the boulder until the temporary base has been removed.
How to remove the temporary base
Once the hypertufa is firm enough, carefully turn the boulder onto its side with an old blanket underneath. Through the wide open bottom, untie or cut the bags and gradually pull out the crumpled paper. As the filling is removed, the temporary base will shrink in size.
Once the paper and bags have been removed, the plastic wrap will sag and separate from the inner walls. You can then gather it inward and carefully pull it out through the bottom opening.
Check the frame from the inside. If any mesh is still exposed, cover it with a small amount of fresh mixture. Remove any protruding wire ends along the bottom edge.
Before placing it in the garden
The boulder should remain under plastic in a shaded area for another two to three weeks. Do not keep moving it around until the walls have fully strengthened.
Before installation, place the shell on level ground and check whether it rocks. If one edge is longer, you can trim it slightly with a coarse file or add a little fine gravel underneath.
When shaping a boulder like this, it is easy to get carried away and add too many bumps. It is better to stop in time, because a couple of uneven areas and one wider side usually look more natural than an overly complicated shape.
6. Tiered Hypertufa Fountain With Salad Bowls
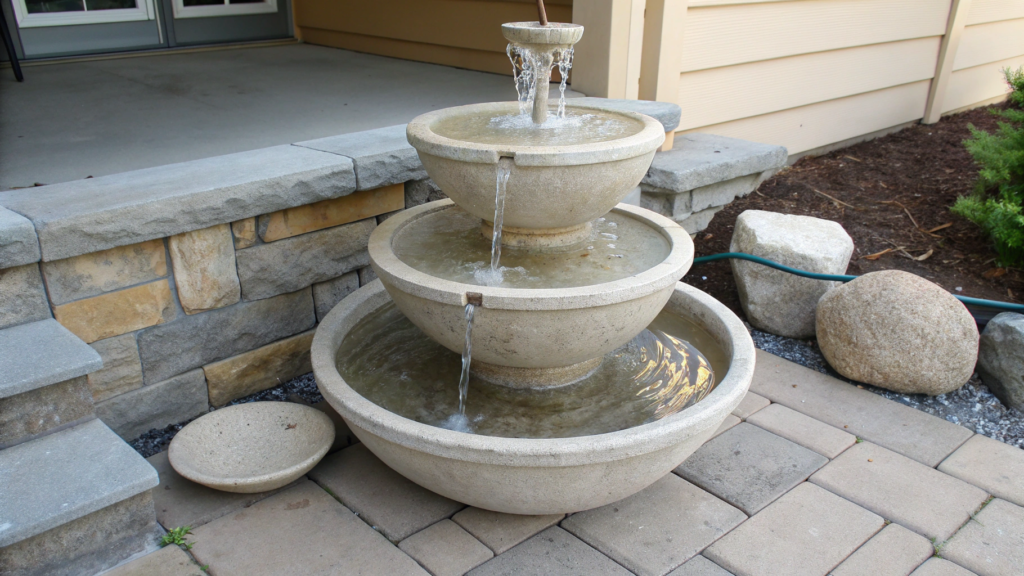
For a tiered hypertufa fountain, you will need three wide, shallow salad bowls in different sizes. They are used only as molds. After casting, you will have three separate bowls that we will install above a hidden reservoir with a pump.
I saw a similar fountain near our neighbors’ patio. From the outside, only the stone bowls and water were visible, while the pump and water supply were hidden under the grate. It is better to use salad bowls about 16, 11, and 7 inches (41, 28, and 18 cm) in diameter. Choose wide molds with low sides. This way, the water will flow gently over the edges instead of falling in a narrow stream past the next bowl.
What you will need
- Three wide plastic salad bowls in different sizes
- A waterproof container holding at least 7–10 gallons (26–38 L)
- A strong metal or plastic grate for the top of the reservoir
- Three short pieces of tubing for forming the holes
- Two stable hollow supports for the upper tiers, with holes in the center
- A small adjustable submersible pump
- Flexible tubing about ½ inch (1.3 cm) in diameter
- Sealant or epoxy made for garden ponds
- Portland cement
- Coconut coir or sifted peat moss
- Perlite and water
- Plastic wrap and vegetable oil
- Gloves, safety glasses, and a mask
The reservoir should be wider than the fountain base and deep enough for the pump to remain underwater at all times. A pump rated above 250 gallons per hour is usually not needed for a small fountain, so it is better to choose a compact model with adjustable flow.
For the hypertufa, combine 2 parts Portland cement, 3 parts coconut coir, and 3 parts perlite.
How to cast the three bowls
- Prepare the molds. Turn the salad bowls upside down. Cover each one with plastic wrap, smooth out any large folds, and lightly coat the surface with vegetable oil.
- Form the center holes. Place a short piece of tubing vertically in the center of each upside-down mold. The hole should be slightly wider than the flexible tubing from the pump.
In this design, all three bowls need holes because the tubing runs from the hidden reservoir through the entire fountain.
- Mix the hypertufa. Combine the dry ingredients and add water in small amounts. The mixture should hold together in a firm ball and stay on the sloped sides of the salad bowl without sliding down.
- Start in the center. Press the hypertufa around the piece of tubing, making sure it stays upright. Then gradually work from the center toward the edges of the mold.
- Cover the entire salad bowl. Make the layer about 1–1½ inches (2.5–4 cm) thick. Do not leave thin areas near the hole or around the edges of the bowl.
- Finish the rim. Level the lower edge of the mixture all the way around and gently round it with your fingers. After the piece is turned over, this will become the top edge of the bowl.
- Leave the bowls on the molds. Cover the pieces with plastic and move them to the shade for three to five days. Do not move them too soon because the wide edges can still break easily.
How to remove the molds
Place the piece on a folded towel, carefully turn it bowl side up, and remove the plastic salad bowl. Then slowly peel away the plastic wrap and remove the tubing from the center hole.
While the hypertufa is still slightly workable, remove sharp bumps with a stiff brush and clear the hole. After that, cover the bowls with plastic again and leave them in the shade for another two to three weeks so the material can become stronger.
Before assembly, rinse the bowls several times, let them dry, and coat the inside with a product approved for garden ponds. Hypertufa is porous, so without protection, some of the water will seep through the walls.
How to prepare the fountain base
- Install the reservoir. Place the waterproof container in a shallow hole, or leave it above ground if the edges will later be covered with stones. Use a level to make sure it sits evenly.
- Set up the pump. Lower it to the bottom of the reservoir and connect the flexible tubing. The pump should remain accessible for cleaning and stay fully underwater while running.
- Cover the reservoir with the grate. It must support the weight of all three bowls, the hollow supports, and the water. Leave an opening in the center for the flexible tubing, and create a removable section on the side so the pump can be reached.
The hidden reservoir, pump, and strong support above them form the usual base of a garden fountain. The grate holds the decorative structure while the water flows freely back into the container below.
How to assemble the three tiers
- Dry assemble the fountain. Place the bottom bowl on the grate, then add the first support, the middle bowl, the second support, and the top bowl. Run the flexible tubing through the center holes in every piece, but do not glue or seal anything yet.
- Check the position of the tiers. Make sure the supports are centered, the bowls do not wobble, and each one sits level. The end of the tubing should extend about ½–1 inch (1.3–2.5 cm) above the bottom of the top bowl.
- Test the overflow. Pour water into the top bowl by hand. It should spill into the middle bowl, then into the bottom bowl, and return through the grate into the reservoir. Adjust the position of the bowls or supports if needed.
- Mark the position of the pieces. Make small pencil marks so you can return every tier to the tested position during final assembly.
- Secure the supports. Take the structure apart and attach the supports to the bowls with a suitable pond-safe epoxy. Reassemble the tiers according to the marks and check them again with a level.
- Seal the holes. Once the tubing is in place, seal the gaps around it in the bottom and middle bowls with waterproof sealant. The water should collect in the bowls and flow over the edges instead of draining through the center holes.
- Wait for everything to cure completely. Do not fill the fountain with water until the epoxy and sealant have fully cured according to the manufacturer’s instructions.
- Start the pump. Fill the reservoir, turn the pump on at the lowest setting, and gradually increase the flow. Too much pressure will throw water over the edges and quickly empty the reservoir.
After starting the fountain
Make sure the pump always remains underwater. In hot weather, you will need to refill the reservoir more often. It is better to remove leaves and small debris before they fall through the grate and clog the pump.
At first, our neighbors’ fountain spilled water from only one side. It turned out that the middle bowl had a slight tilt. They placed a thin plastic shim under one edge, and the flow immediately became more even. That is why I would check the level more than once, especially after installing each bowl.
7. Hypertufa Lantern Shell With Cutout Pattern
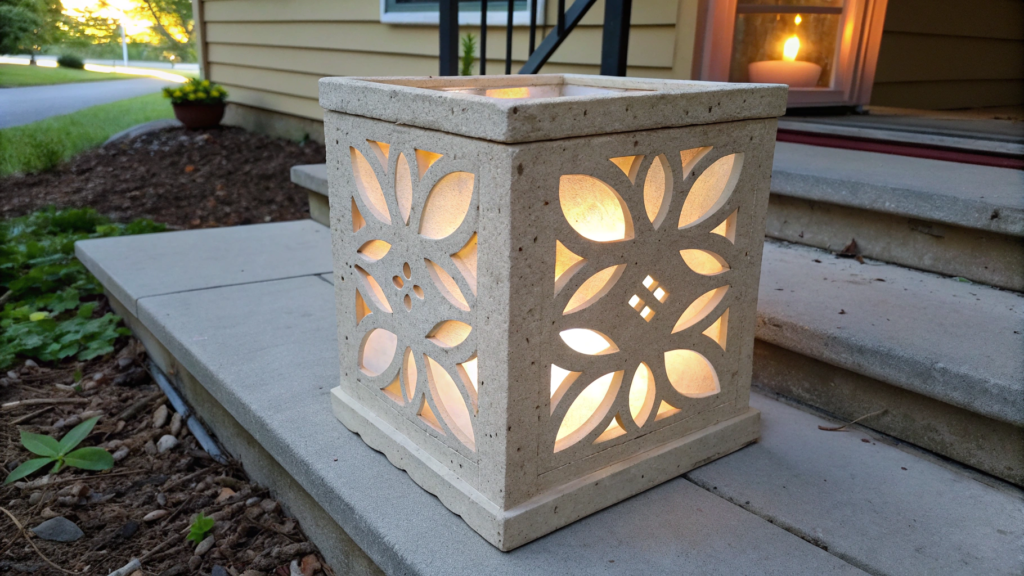
For a hypertufa lantern, you will need two square plastic containers that fit inside one another. The mixture fills the space between them, while small pieces of rigid foam create openings that go all the way through the walls.
Light will shine through them in the evening. It is better to keep the pattern simple, with a few circles, leaves, or small diamonds. Very thin sections between the openings may break when the molds are removed.
I saw a similar lantern on the steps outside a friend’s house. There was a regular LED candle inside. No wires running across the entire yard, which I especially liked.
What you will need
- Two square plastic containers in different sizes
- A sheet of rigid foam 1–1¼ inches (2.5–3 cm) thick
- A utility knife
- Adhesive tape
- Plastic wrap and vegetable oil
- Portland cement
- Coconut coir or sifted peat moss
- Perlite and water
- Stones to weigh down the inner mold
- A stiff brush
- An LED candle
- Gloves, safety glasses, and a mask
Once the containers are placed together, there should be a gap of about 1–1¼ inches (2.5–3 cm) on all four sides. Cut the pieces for the future pattern from foam of the same thickness.
For lighting, you can use an LED candle, such as an Outdoor Flameless LED Candle. Do not place a real candle inside. The enclosed structure can heat up, and dry plant fibers are part of the hypertufa mixture.
How to make a lantern with a cutout pattern
- Plan the pattern. Draw it on paper and check the spacing between the openings. Leave at least 1½–2 inches (4–5 cm) of hypertufa between them. The corners and top edge should not be weakened with cutouts either.
- Prepare the foam pieces. Cut out circles, leaves, or other simple shapes. The thickness of each piece should match the distance between the two molds. This way, the foam will pass through the entire future wall and leave a real opening instead of a shallow imprint.
- Attach the pattern. Tape the foam pieces to the outer walls of the smaller container, keeping them away from the top and bottom edges. Place the smaller container inside the larger one and make sure each piece touches its inner wall firmly. This way, the foam will completely block the gap between the molds and leave an opening through the hypertufa.
- Prepare the molds. Line the inside of the larger container with plastic wrap and lightly coat it with oil. Wrap the outside of the smaller mold with plastic as well, without covering the foam pieces.
- Mix the hypertufa. Combine 2 parts Portland cement, 3 parts coconut coir, and 3 parts perlite. Gradually add water. The mixture should hold together in a ball without becoming runny.
- Form the top of the lantern. Turn the larger container upside down and place a layer of mixture about 1–1½ inches (2.5–4 cm) thick on its bottom. Once the mold is removed, this section will become the lantern roof.
If you want to leave the top open, this layer is not needed. In that case, the lantern will have only walls and an open top.
- Set the inner mold in place. Position the smaller container in the center, bottom side down. The foam pieces should press against the outer walls. Place a few stones inside so the mold does not rise.
- Fill the walls. Add the mixture in small portions between the two containers. Start with the corners and the areas around the foam shapes. Press the hypertufa down with your fingers without shifting the pattern pieces.
Build all four walls gradually. If you fill one side completely first, the inner mold may shift.
- Finish the bottom edge. Bring the mixture up to the edge of the mold, level it, and gently round it with your fingers. This side will remain open so the lantern can be placed over an LED candle.
- Leave the lantern in the mold. Cover it with plastic and place it in the shade for three to five days. Do not remove the molds too early. The sections between the openings are especially fragile at this stage.
How to clear the openings
First, remove the stones and carefully take out the inner container. Then remove the outer mold and the plastic wrap. The foam pieces may remain inside the walls, which is normal.
It is easier to remove them one at a time by lifting them from the edge. If one of the shapes is stuck too tightly, cut the foam with a knife and remove it in pieces. It is better not to move the hypertufa itself back and forth.
While the material is still not completely hard, you can refine the edges of the openings with a small file or a stiff brush. Hypertufa is much easier to work with during the first few days after removing the mold than after it has fully hardened.
When you can turn on the light
After removing the molds, leave the lantern under plastic for another two to three weeks so the hypertufa can fully strengthen. Then remove the plastic and place an LED candle inside.
Check the lantern in the dark and choose which side should face the path or seating area. The pattern may look brighter in some sections than in others, so it is easier to choose the final position with the light already turned on.
8. Rocky River Hypertufa Water Feature Channel
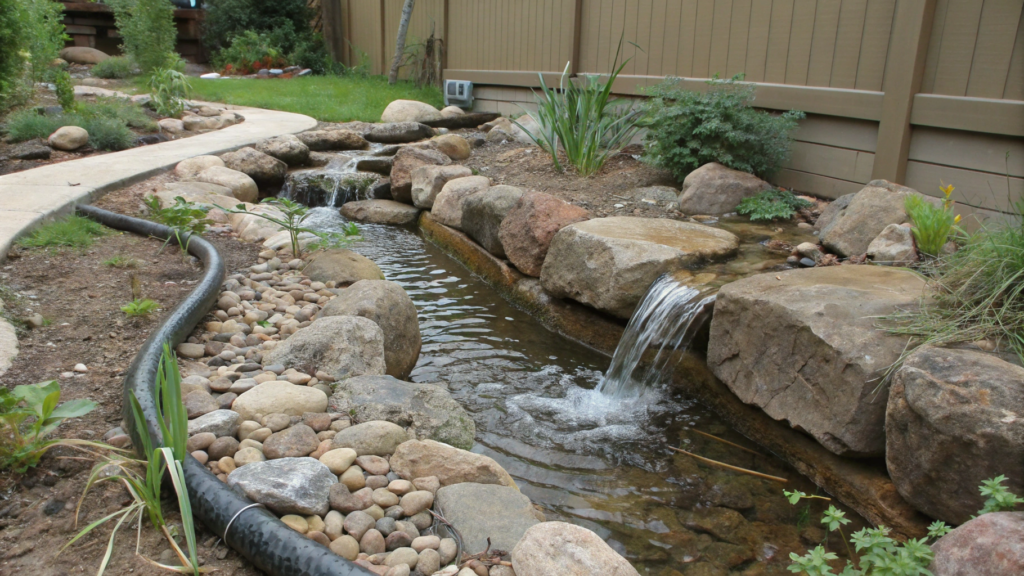
A hypertufa water channel looks like a small section of a rocky stream. Water comes out at the upper end, flows through a shallow winding channel, and falls into a hidden reservoir. A pump in the reservoir sends it back to the top through flexible tubing.
I saw a channel like this at our neighbors’ place, and at first I thought there was a real flat stone between the plants with a groove washed into it by water. Only the hose hidden behind the grasses gave away the whole setup.
I think a channel 24–36 inches (60–90 cm) long and about 8–12 inches (20–30 cm) wide is enough. A longer piece is harder to move, and if it is installed unevenly, the water will quickly find a way over one of the side edges.
What you will need
- Damp sand for creating the mold
- A shallow plastic container or a sheet of plywood with raised edges
- Plastic wrap
- Portland cement
- Coconut coir or sifted peat moss
- Perlite and water
- Flat stones and pebbles for making impressions
- A stiff brush
- A coating made for garden ponds
- A hidden waterproof reservoir
- A submersible pump and flexible tubing
- A strong grate for the reservoir
- Gloves, safety glasses, and a mask
For the mixture, combine 2 parts Portland cement, 3 parts coconut coir, and 3 parts perlite. Hypertufa is easy to shape by hand, but it remains porous, so any surface that stays in constant contact with water will need to be protected with a suitable coating.
How to make the water channel
- Prepare the sand mold. Add a layer of damp sand about 4–5 inches (10–13 cm) deep to a shallow container and pack it down firmly. Shape a winding groove about 2–3 inches (5–8 cm) deep through the middle. This will become the channel.
Do not make sharp turns. Water hits the outside edge of a bend, so gentle curves are easier to adjust after installation.
- Shape the banks. Raise the sand along both sides of the groove. One bank can be slightly wider, while the other can be lower and more uneven. However, continuous raised edges should remain along the entire channel, or the finished piece will not be able to hold the flow.
- Cover the mold with plastic. Lay plastic wrap over the sand and carefully press it into the channel. Smooth out the large folds, but do not try to create a perfectly even surface. Small creases will add a rocky texture.
- Mix the hypertufa. Combine the dry ingredients first, then gradually add water. The finished mixture should hold together in a firm ball without spreading across the plastic.
- Lay the bottom of the channel. Start at the deepest part of the groove. Press down small portions of the mixture to create a layer about 1½ inches (4 cm) thick. Then gradually work toward the sides.
The entire channel should be made as one solid piece. Do not leave thin areas around the bends or near the future water outlet.
- Shape the edges. Build the hypertufa up along the sand banks and make the upper edges slightly thicker. Press a few flat stones or pebbles into the fresh surface to leave impressions. The stones can be removed immediately or left in the mixture as part of the design.
- Prepare the beginning and end. Make a small hollow at the upper end where the water from the tubing will later come out. Leave the lower end open and make it slightly narrower. Water should flow freely from it into the reservoir instead of collecting inside the channel.
- Let the piece set. Cover the mold with plastic and leave it in the shade for three to five days. Then carefully lift the channel together with the plastic underneath, turn it over onto a soft surface, and remove the sand.
While the material can still be worked, remove sharp edges with a brush and check the channel. There should be no raised areas that completely block the path of the water.
Preparing it for constant water flow
After removing the mold, leave the channel under plastic for another two to three weeks, occasionally checking that the surface is not drying too quickly. Before installation, rinse it, let it dry, and coat the inside with a product made for garden ponds. Without protection, the porous hypertufa will absorb and slowly leak water.
How to install the channel
- Place a waterproof reservoir with a pump at the lowest point and cover it with a strong grate. Position the channel so its lower edge extends over the grate and the water falls back into the container. Stones placed on the grate will hide the equipment.
- Run the flexible tubing from the pump beside the channel and bring it into the hollow near the upper edge. The channel itself should have a slight, consistent slope toward the reservoir. With water troughs, a base that is too flat can cause standing water, while a steep slope increases splashing, so it is better to adjust the position gradually during a test run.
- Start the pump at its lowest setting. If the water moves toward one side, raise the opposite side slightly with a flat stone. If the flow jumps over a bend, reduce the pressure or place a small pebble in the channel.
Our neighbors’ channel did not work properly on the first try either. At first, the water came out of the tubing too sharply and immediately hit one side of the channel. They shortened the tubing slightly, pointed it closer to the center, and reduced the pump pressure. After that, the flow became calmer and moved evenly along the entire channel.
9. Emoji Stamp Hypertufa Garden Marker Stones
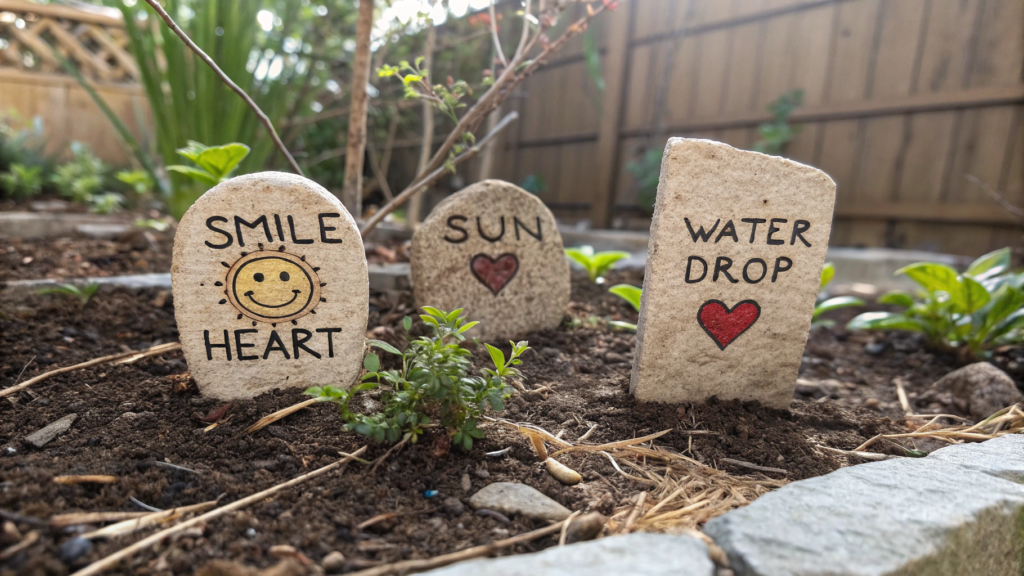
Small hypertufa garden marker stones help label garden beds without turning the garden into a row of identical plastic signs. Each stone can include the name of a plant and a cute symbol, such as a smile, sun, water drop, or heart.
The emojis make it easy to tell plants apart from a distance. A sun can mark plants for an open, sunny spot, a drop can show plants that need more frequent watering, and a heart can identify favorite varieties whose seeds you want to save.
For the stamp, it is better to choose simple images with thick lines.
What you will need
- Small plastic lids, food containers, or silicone molds
- Portland cement
- Sifted coconut coir or peat moss
- Fine perlite
- Water
- Plastic wrap
- Vegetable oil
- Emoji stamps
- Letter stamps, if desired
- A wooden stick
- A stiff brush
- Gloves, safety glasses, and a mask
For small markers, combine 2 parts Portland cement, 3 parts sifted coconut coir, and 3 parts fine perlite. It is better to remove large fibers and bigger pieces of perlite, or they may spoil the fine lines of the design. Mixtures with coarse filler do not capture small details as well on decorative concrete pieces.
How to make garden marker stones
- Choose the molds. A lid or shallow container about 3–4 inches (8–10 cm) wide will work for one stone. A depth of 1–1½ inches (2.5–4 cm) is enough to keep the marker from breaking when moved.
- Prepare the molds. Line them with plastic wrap or lightly coat them with vegetable oil. The plastic will leave small folds around the edges, while the oil will create a smoother surface.
- Mix the hypertufa. Combine the dry ingredients first, then gradually add water. The mixture should hold together in a firm ball without releasing water when squeezed.
- Fill the molds. Add the mixture in small portions and press it down firmly with your fingers. Pay special attention to the edges, where empty spaces are most likely to form.
- Level the top. Smooth the surface with damp fingers or a flat wooden stick. The design will appear on this side, so it is better to remove any large bumps right away.
- Wait before stamping. Do not press the emoji into the surface immediately after filling the mold. A mixture that is too wet will stick to the stamp, and the outlines will blur. Leave the pieces for about 30–60 minutes, then lightly touch the surface with your finger. It should give slightly without sticking to your hand.
The exact time depends on the temperature and humidity, so the condition of the surface matters more than the clock.
- Make the impression. Position the stamp evenly and press it down with one firm movement. Do not rock it from side to side. Then lift it straight up.
The impression should be visible without reaching almost to the bottom. A depth of about ⅛–¼ inch (3–6 mm) is usually enough.
- Add the plant name. Next to the emoji, you can press in a short name with letter stamps or write it with the blunt end of a wooden stick. Before adding the letters, it helps to arrange them in the correct order above the mold, especially if the name is long.
- Fix the edges of the design. If a small ridge of mixture rises around the stamp, gently smooth it with a damp finger. Do not press the design again, or the lines may become doubled.
- Leave the stones in the molds. Cover them with plastic and keep them in a shaded place for two to three days. Then carefully remove the markers while supporting them from underneath. While the material is still not completely hard, you can lightly brush the edges with a stiff brush.
When the markers can go into the garden
After removing the molds, the stones need another two to three weeks to become stronger. Keep them under plastic in the shade during this time and lightly moisten them if needed.
Rinse the finished markers with water several times, then place them beside the plants or press them slightly into the soil. It is better not to put them where people may step on them. Hypertufa works well for decorative garden pieces, but it is not as strong as regular heavy concrete.
If the writing becomes less visible over time, the simple symbol will still help you recognize the marker quickly. A smile beside the strawberries, a sun near the thyme, or a drop beside the mint makes the right plant easy to find even without a clear label.
10. Concrete Look Hypertufa Pedestal for Small Pots
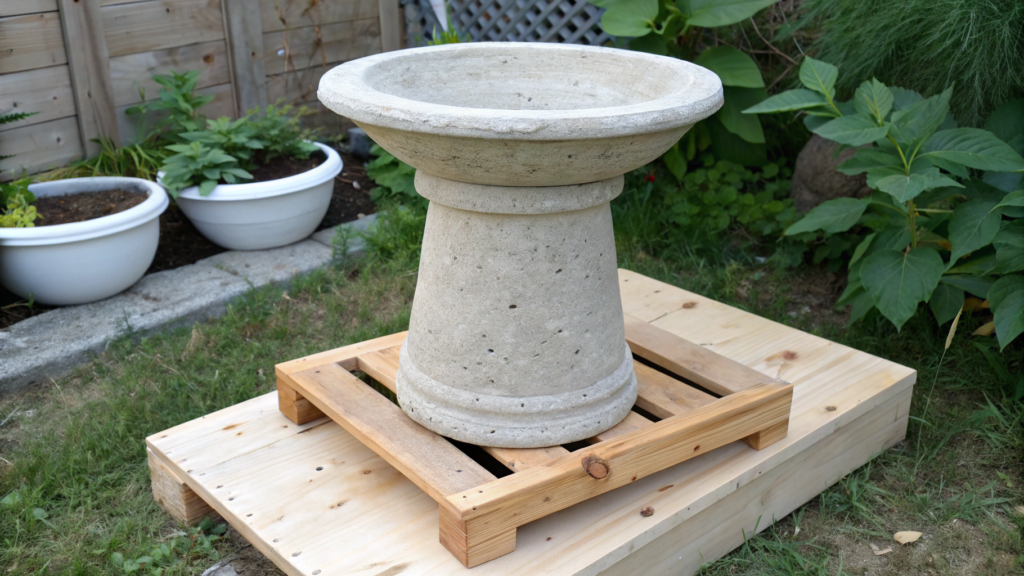
A low hypertufa pedestal helps raise a small pot above the ground and add height to the arrangement. It is better to make a stable hollow pedestal about 12–16 inches (30–40 cm) tall with a wide enough base so it does not tip over under the weight of the pot.
Hypertufa works well for garden decorations and small containers, but it is more fragile than regular concrete, so you should not place a heavy planter on this pedestal.
A pot up to 8–10 inches (20–25 cm) wide will work for the top. Before starting, it is better to place it on the future outer mold and check the proportions.
What you will need
- A tall plastic bucket or rectangular container for the outer mold
- A second, smaller container
- Two flat plastic containers for the top and bottom sections
- Galvanized mesh with small openings
- Portland cement
- Coconut coir or sifted peat moss
- Perlite and water
- Plastic wrap
- Vegetable oil
- Adhesive tape
- A stiff brush
- Gloves, safety glasses, and a mask
For the mixture, combine 2 parts Portland cement, 3 parts coconut coir, and 3 parts perlite. Smooth plastic molds will create a more even surface, so the pedestal will look more like cast concrete. If you line the mold with wrinkled plastic, the surface will turn out rougher.
How to make a pedestal for a pot
- Check the mold sizes. Place the smaller container inside the larger one. There should be a gap of about 1½–2 inches (4–5 cm) between their walls. This space will become the walls of the hollow column.
- Prepare the outer mold. Line the inside of the large bucket with plastic wrap and lightly coat it with vegetable oil. Wrap the outside of the smaller container with plastic and apply a little oil as well.
- Mix the hypertufa. Combine the dry ingredients first, then add water in small amounts. The mixture should form a firm ball and hold its shape when squeezed.
- Form the bottom section. Place a layer of mixture about 2 inches (5 cm) thick on the bottom of the outer mold. Press it down firmly and level it. This will become the bottom of the pedestal.
- Set the inner mold in place. Position the smaller container bottom side down in the center of the base. It should not reach all the way to the bottom. Place a few stones inside so the mold does not rise while you work.
- Start filling the walls. Add the mixture between the two containers in small portions. Press each layer down firmly with your fingers, especially in the corners, so no large empty spaces remain inside.
- Continue to the top. Build all sides gradually so the inner mold does not shift. The walls should remain roughly the same thickness along the entire height.
- Form the top. Stop the hollow walls about 2 inches (5 cm) below the top edge of the outer mold and cover them with a solid layer of mixture. Level the top and gently round the edges.
The top should be even, or the pot placed on it will wobble. You can set a flat board on top and check the surface with a small level.
- Leave the pedestal in the mold. Cover it with plastic and place it somewhere protected from direct sunlight for three to five days. A tall piece should not be removed too early, even if the top already feels firm.
How to remove the molds
First, remove the stones and carefully take out the inner container. Then place the outer mold on its side on an old blanket and slowly release the pedestal while supporting it along its entire length.
While the hypertufa is still slightly workable, remove sharp edges with a brush and check the top and bottom. The bottom should stand evenly, and the top should hold an empty pot without wobbling.
Before placing it in the garden
The pedestal needs another two to three weeks to become stronger. Keep it under plastic in the shade during this time and do not place any weight on it. After that, rinse the stand with water and place it on a firm, level surface.
First, set an empty pot on top and press it gently from different sides. If the pedestal wobbles, you can add a little fine gravel under the bottom edge. Heavy ceramic planters and large pots filled with wet soil are not suitable for this stand.
I like the idea of using different heights in the garden. A plant in a small pot can easily disappear among larger plants. Raise it by just a foot, and it is already much easier to notice. The pedestal should not be taller or more noticeable than the plant itself. It is better to stop at the right moment.
Garden Decor With Simple Molds
Now you will not rush to buy new molds. It is worth checking the cupboards, shed, and boxes that have been waiting to be sorted out. A future pot, lantern, or garden stone may already be sitting there, even if it still looks like an old kitchen item.
Have you ever used an unexpected mold for garden decor? Maybe you have already made a successful hypertufa project, or perhaps something did not work at all.
Share in the comments what you made and which item you used as the mold. These discoveries are usually more useful than any perfect set of instructions.