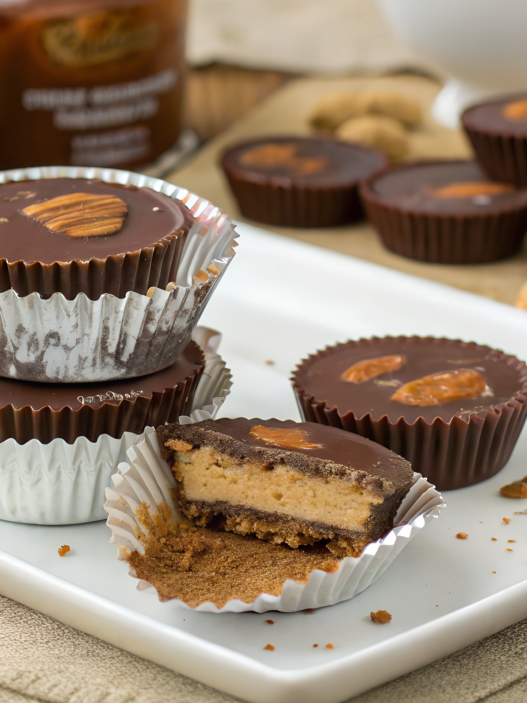
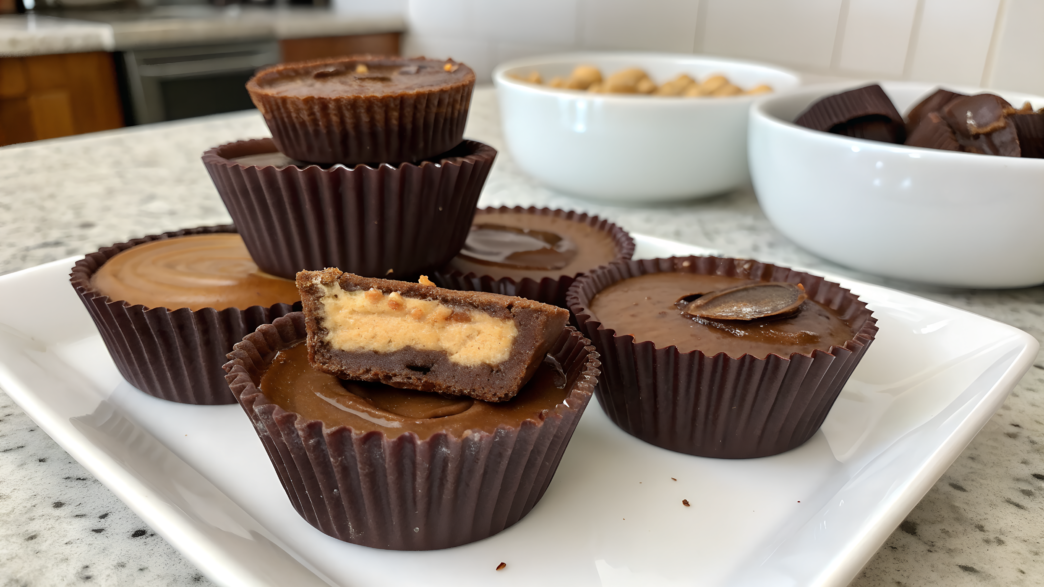
Reese’s Cups were just regular store-bought candy to me for a long time. One day, I decided to make them at home. I had always wondered whether it was possible to make a familiar candy without making it overly sweet or losing its recognizable flavor.
One successful version led to another, and it soon became clear just how many different ways there were to play with the same idea.
Gradually, I collected so many good versions that I wanted to bring them all together in one place. Here are 10 homemade Reese’s Cups variations, from recipes close to the classic version to more unusual combinations.
I hope you’ll take a chance too and try making your own version.
1. Healthy homemade Reese’s Cups with oat flour peanut butter center
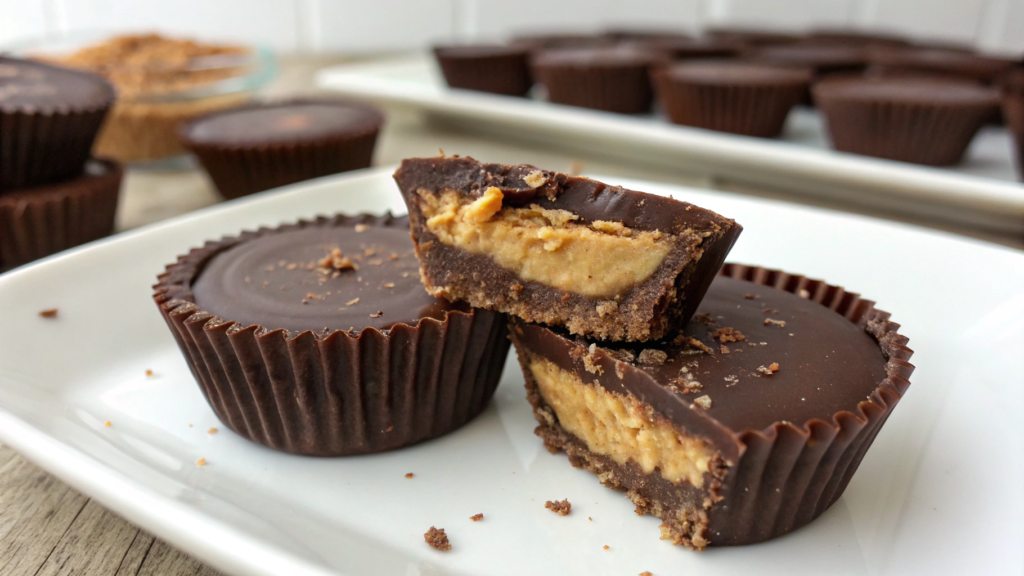
To make homemade chocolate cups a little healthier, try adding oat flour to the peanut butter filling. It replaces powdered sugar, helps the filling hold its shape, and slightly reduces the overall sweetness. The chocolate and peanut butter flavor is still right there. And that’s why we’re all here!
The filling doesn’t take much work. Everything is mixed in one bowl, and the consistency is easy to adjust as you go. Lindy and I usually taste it before I even manage to take out the liners. We have to make sure everything turned out right.
For a smoother filling, it’s better to use finely ground oat flour. You can also grind regular rolled oats, but you’ll need to let the blender run a little longer. Larger oat pieces will remain noticeable and make the filling slightly coarser.
Ingredients
For 10–12 small cups, you’ll need:
- 8 ounces dark or semisweet chocolate (225 g);
- ½ cup smooth peanut butter (125 g);
- ⅓ cup oat flour (about 35 g);
- 2 tablespoons maple syrup;
- ½ teaspoon vanilla extract;
- a small pinch of salt;
- 1 teaspoon coconut oil, optional.
I usually use peanut butter made with just peanuts and salt. If it’s very runny, you may need a little more oat flour. With thick peanut butter, it can be the opposite, and I add a little more maple syrup. It’s better to watch the consistency here instead of trying to measure everything down to the last drop.
How to make chocolate cups
- Melt the chocolate. I heat it in the microwave in short 15–20-second intervals, stirring after each one. Don’t wait for every piece to disappear on its own. Sometimes the chocolate is already hot enough, and the last few pieces will melt as you stir. Add coconut oil if you like. It will make the chocolate easier to spread inside the liners.
- Make the bottom layer. Place paper liners in a mini muffin pan and add about a teaspoon of chocolate to each one. Tilt the pan slightly or spread the chocolate with a spoon so it covers the bottom and comes a little way up the sides. Then place the pan in the freezer for 8–10 minutes.
- Mix the peanut butter filling. Combine the peanut butter, oat flour, maple syrup, vanilla, and salt. The mixture may seem soft right after mixing. Don’t rush to add more flour. Let it sit for 3–4 minutes so the oat flour has time to absorb some of the moisture.
- Check the consistency. The filling should hold together on a spoon and keep its shape. If it is still spreading, add another tablespoon of oat flour. If it becomes too thick, mix in a little maple syrup or peanut butter. And be sure to taste it. Sometimes you’ll want to add another pinch of salt.
- Add the filling. Roll the filling into small balls, flatten them slightly with your fingers, and place them on top of the set chocolate. Don’t press the filling against the edges of the liners. Leave a little space around it so the top chocolate layer can connect with the bottom one.
- Cover the cups with chocolate. Spoon the remaining chocolate over the filling. If it has thickened, warm it slightly again. Then gently tap the pan on the counter. The surface will become smoother, and the chocolate will fill the gaps around the filling.
- Chill the candy. Place the pan in the refrigerator for about 30–40 minutes or in the freezer for 15 minutes. Before serving, let the cups sit at room temperature for 5–10 minutes. This keeps the chocolate from being too hard and makes the peanut flavor more noticeable.
The cups can be stored in a sealed container in the refrigerator for up to a week. We like eating them with freshly brewed coffee and a little milk. Strong black tea works too, and children can have the candy with a glass of cold milk. If the chocolate is very dark, the milk helps soften its bitterness.
These little desserts come together quickly. Sometimes all you need is a couple of bowls, a spoon covered in chocolate, and half an hour together in the kitchen. Then you can make coffee, sit down at the table with Lindy, and decide who gets the last Reese’s Cup.
2. Homemade Reese’s Cups with protein powder and peanut butter swirl
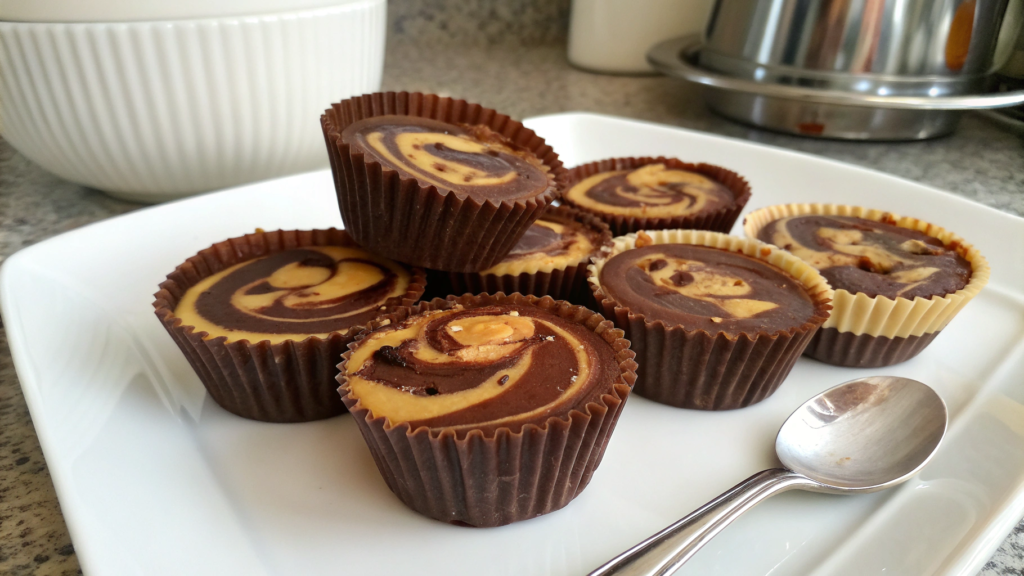
In this version of homemade Reese’s Cups, I add protein powder directly to the peanut butter filling. It makes the filling thicker and slightly less sweet, but be careful—one extra spoonful, and instead of a soft center, you’ll end up with a dry mixture that needs to be rescued with more peanut butter.
This has happened to me before. I poured in the powder “more or less by eye,” then spent a long time trying to figure out why the filling looked more like dough. Since then, I’ve added it in small amounts. It’s much easier to mix in one more spoonful than to fix a mixture that’s too dry.
Vanilla or unflavored protein powder works best. You can use chocolate protein powder too, but the peanut butter flavor will be less noticeable.
Ingredients
For 10–12 small Reese’s Cups, you’ll need:
- 8 ounces dark or semisweet chocolate (225 g);
- ½ cup smooth peanut butter (125 g);
- ¼ cup vanilla protein powder (about 25–30 g);
- 1½ tablespoons maple syrup or honey;
- ½ teaspoon vanilla extract;
- a small pinch of salt;
- 2 tablespoons peanut butter for the swirl;
- 1 teaspoon coconut oil, optional.
If the protein powder is already quite sweet, start with just one tablespoon of syrup. You can always taste the filling and decide whether it needs the remaining half tablespoon. The flavor of the powder matters a lot here because some options are almost neutral, while others taste like a ready-made vanilla dessert.
How to make homemade Reese’s Cups
- Melt the chocolate. Microwave it in 15–20-second intervals and stir well after each one. Add coconut oil if you like. The chocolate will become more fluid and easier to spread inside the paper liners.
- Prepare the bottom layer. Place the liners in a mini muffin pan and pour about one teaspoon of chocolate into each one. Use the back of a spoon to bring it slightly up the sides. Place the pan in the freezer for 8–10 minutes.
- Mix the filling. Combine ½ cup peanut butter, protein powder, syrup, vanilla, and salt. Don’t add all the powder at once. Start with about three-quarters, mix, and only then decide whether you need the rest.
- Check the texture. The filling should be soft but not runny. If it crumbles, add another teaspoon of peanut butter or syrup. If it sticks to your fingers and spreads, mix in a little more protein powder. Add one teaspoon at a time, no more.
- Fill the liners. Roll the filling into small balls, flatten them slightly, and place them on top of the set chocolate. Leave a little space around the edges so the top layer can completely cover the filling.
- Add the chocolate on top. Spoon the remaining chocolate into the liners. Don’t try to make the surface perfectly smooth right away—it will change again when we add the peanut butter swirl.
- Make the peanut butter swirl. Warm the remaining 2 tablespoons of peanut butter slightly so it becomes more fluid. Add a few small drops to each cup and drag a toothpick through the surface. Two or three movements are enough. If you swirl it for too long, the pattern will simply blend into the chocolate.
- Chill the Reese’s Cups. Place the pan in the refrigerator for 30–40 minutes. Before serving, let the candy sit on the counter for about 5 minutes, especially if you used dark chocolate.
I like eating these Reese’s Cups with coffee and a little milk, or simply with a glass of cold milk. Chocolate and peanut butter are already quite rich, so there’s no need to add anything sweet to the drink.
think unsweetened cinnamon tea could work too, but I wouldn’t add cinnamon to the filling itself. It can easily overpower the peanut butter flavor here.
After chilling, I save a few Reese’s Cups for my morning coffee and put the rest in a container. Somehow, there are usually fewer of them the next day than I remember. Lindy insists she has no idea where they went.
3. Sugar-free homemade Reese’s Cups with stevia and unsweetened cocoa
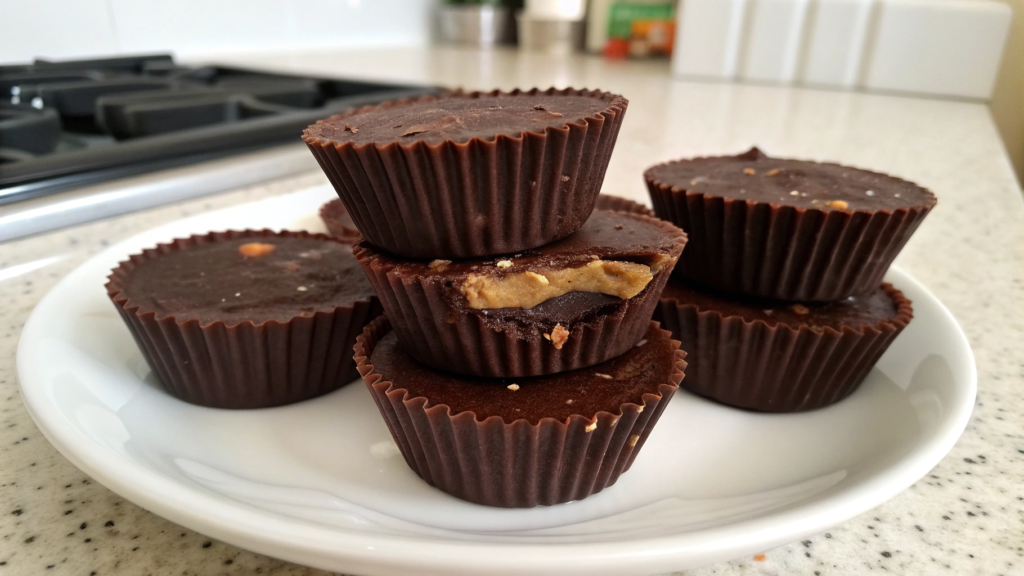
These homemade Reese’s Cups have a more pronounced cocoa flavor than the classic candy. This version reminds me of dark chocolate with nuts, only with a soft peanut butter layer hidden inside.
Lindy and I sometimes make a small batch after a weekend when there has already been plenty of baking in the house, but no one is ready to give up sweets completely. The main thing here is to use the amount of stevia that works for you. Different brands vary in concentration, so one universal number of drops would only make things more confusing.
For the chocolate layer, you can use unsweetened cocoa such as Ghirardelli Unsweetened Cocoa Powder on Amazon. Good cocoa should have a clean chocolate aroma without sweet additives. It’s also better to choose peanut butter without sugar or syrups, otherwise the recipe will no longer be completely sugar-free.
Ingredients
For 10–12 small Reese’s Cups, you’ll need:
- ½ cup coconut oil (about 110 g);
- ½ cup unsweetened cocoa powder (about 45 g);
- liquid or powdered stevia to taste;
- ½ teaspoon vanilla extract;
- a small pinch of salt;
- ½ cup smooth sugar-free peanut butter (125 g);
- 2 tablespoons almond flour or 1 tablespoon coconut flour;
- 1–2 teaspoons melted coconut oil, if needed.
Coconut flour absorbs much more moisture than almond flour. Don’t replace two tablespoons of almond flour with two tablespoons of coconut flour. The filling will turn out dry.
How to make sugar-free homemade Reese’s Cups
- Prepare the chocolate layer. Melt the coconut oil over low heat or in short intervals in the microwave. Whisk in the cocoa, vanilla, salt, and a little stevia. Keep whisking until the mixture is smooth.
- Adjust the sweetness. Taste the chocolate mixture with the tip of a spoon. Add the stevia little by little, stirring each time. It’s difficult to fix the mixture once too much stevia has been added.
- Fill the bottoms of the liners. Place paper liners in a mini muffin pan and add about one teaspoon of the chocolate mixture to each one. Put the pan in the freezer for 8–10 minutes.
- Mix the filling. Combine the peanut butter with the almond or coconut flour. The filling should hold its shape but still be easy to press with your fingers. If it seems a little dry, add some melted coconut oil.
- Add the peanut butter center. Roll the filling into small balls, flatten them slightly, and place them on top of the set bottom layer. Leave a little space around the edges for the chocolate.
- Cover the filling. Spoon the remaining chocolate mixture over the top. Gently tap the pan on the counter a few times so the chocolate flows around the edges.
- Chill the Reese’s Cups. Refrigerate them for 40–50 minutes or freeze them for about 20 minutes. Keep the candy in the refrigerator until serving because the coconut oil layer softens quickly in a warm room.
I would serve these Reese’s Cups with strong coffee and add a little milk. It works especially well with dark chocolate. But if you prefer tea, have tea—there are no strict rules here.
You barely notice the absence of sugar. First you taste the chocolate and peanut butter, followed by a light salty note. It tastes like a regular delicious candy, not a compromise version of dessert.
4. Keto homemade Reese’s Cups with almond flour and MCT oil
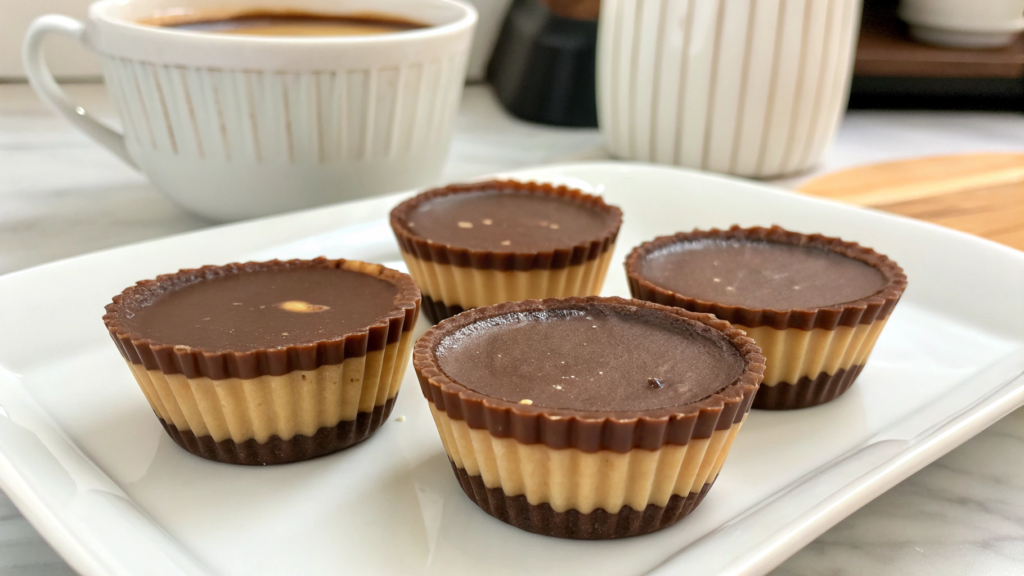
The keto version of Reese’s Cups has a softer filling and a pleasant nutty flavor. You can barely taste the almond flour, while MCT oil helps keep the center tender after chilling. The result is a candy that is firm on the outside and soft inside, without heavy sweetness.
Lindy and I prefer to make these candies small. Keto desserts with nuts and oils are quite filling, so there is no need to make them large. One small candy is usually enough with coffee, although a second one somehow still ends up nearby.
Finely ground blanched almond flour works best for this recipe. Coarser flour will also bind the filling, but you will notice small pieces of nuts inside. That is not a mistake; the texture will just be different.
Add the MCT oil little by little. It is liquid and almost flavorless, so one extra spoonful can easily make the peanut butter center too soft. Start with one teaspoon. Add more only after mixing the filling and checking its actual consistency.
Ingredients
For 10–12 small Reese’s Cups, you’ll need:
- 8 ounces sugar-free chocolate with a high cocoa content (225 g);
- ½ cup smooth sugar-free peanut butter (125 g);
- ¼ cup finely ground almond flour (about 25 g);
- 1–2 teaspoons MCT oil;
- 1–2 tablespoons powdered keto sweetener;
- ½ teaspoon vanilla extract;
- a small pinch of salt;
- 1 teaspoon coconut oil for the chocolate, optional.
Powdered sweetener is easier to use than granulated sweetener. The crystals may not dissolve and can feel crunchy in the soft filling. If you only have granulated erythritol or a monk fruit blend at home, quickly grind it in a coffee grinder until it becomes a fine powder.
How to make keto Reese’s Cups
- Melt the chocolate. Break it into small pieces and microwave it in 15–20-second intervals. Stir after each interval. If the chocolate is thick and does not flow easily from the spoon, add one teaspoon of coconut oil.
- Prepare the liners. Place paper liners in a mini muffin pan. Pour about one teaspoon of chocolate into the bottom of each one and spread it slightly up the lower part of the sides. Put the pan in the freezer for 8–10 minutes.
- Mix the peanut butter filling. Combine the peanut butter, almond flour, powdered sweetener, vanilla, salt, and one teaspoon of MCT oil. Stir with a spoon, then let the mixture sit for 2–3 minutes. The almond flour needs a little time to absorb some of the oil from the peanut butter.
- Check the consistency. The filling should come together easily into a soft ball. If it crumbles, add another ½ teaspoon of MCT oil. If the mixture is too soft and sticks to your fingers, mix in ½ tablespoon of almond flour. Do not add too much at once, or the peanut butter flavor will become less noticeable.
- Divide the filling among the liners. Roll the filling into small balls and flatten them slightly between your fingers. Place each round on top of the set chocolate. Leave a narrow strip of space around the edges so the top and bottom layers can connect.
- Cover the peanut butter center. Pour the remaining chocolate over the top. If it has cooled and become thick, warm it slightly. Gently tap the pan on the counter so the surface levels out and the chocolate flows down the sides of the filling.
- Let the cups set. Refrigerate them for about 30–40 minutes. It is better to remove the paper liners only after the cups have chilled completely. Soft chocolate cracks easily around the edges, especially if the filling is still warm.
- Let them sit at room temperature before serving. Five minutes is usually enough. The filling will soften slightly, and the chocolate will no longer crack with the first bite. Do not leave the cups in a warm room for too long, especially if coconut oil was added to the chocolate.
Storage. They keep well in the refrigerator for about a week. I place the Reese’s Cups in a container and put a piece of parchment between the layers; otherwise, the tops may stick together. If you know you will not finish the whole batch within a week, you can put some of them in the freezer right away. They will keep there for about a month, and then you only need to move a few into the refrigerator for a couple of hours.
We make strong coffee with a little cream to go with these Reese’s Cups. A sweet coffee drink would be too much here. They also go well with hot tea without any extras, especially after the cups have warmed slightly out of the refrigerator and the peanut butter center has softened.
5. Homemade Reese’s Cups with PB2 and cottage cheese filling
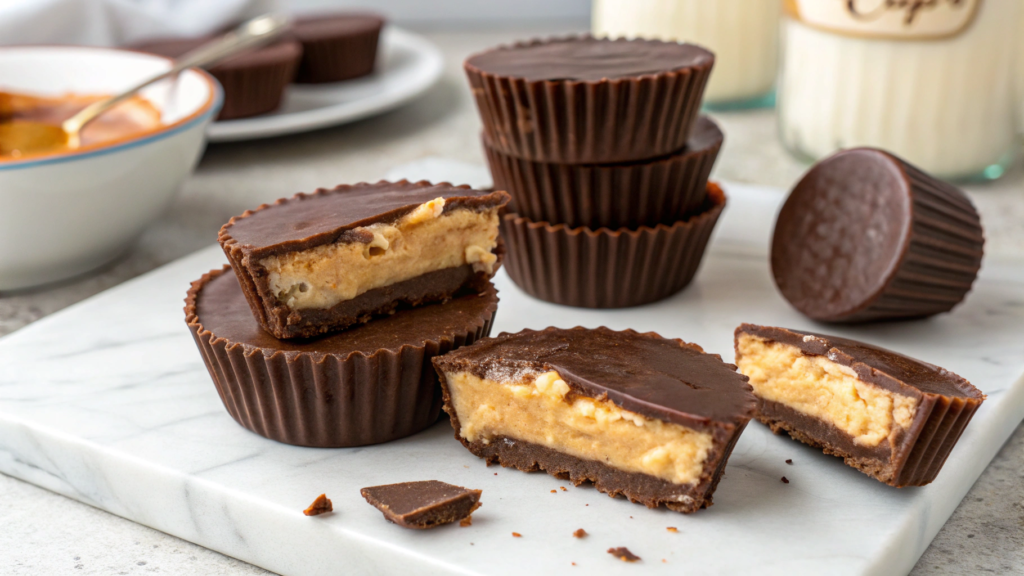
Unlike classic Reese’s Cups, the peanut butter filling here is lighter, a little cooler in taste, and more like a soft cream. You can barely taste the cottage cheese, especially if you blend it well, while PB2 gives you that familiar peanut butter flavor without a lot of oil.
Lindy first tried the filling straight from the blender and forgot about the chocolate for a few minutes. This filling could easily be used as a dip for fruit, for example. But inside Reese’s Cups, it gets much more interesting. There is firm chocolate on the outside and a soft center underneath that almost melts in your mouth.
For this version, you’ll need soft plain cottage cheese. It’s better not to use fat-free cottage cheese because it is often watery and a little sour.
Ingredients
For 10–12 small Reese’s Cups, you’ll need:
- 8 ounces dark or semisweet chocolate (225 g);
- ½ cup soft cottage cheese (about 115 g);
- ⅓ cup PB2 (about 30 g);
- 1½–2 tablespoons maple syrup or honey;
- ½ teaspoon vanilla extract;
- a small pinch of salt;
- 1–2 teaspoons regular peanut butter, optional;
- 1 teaspoon coconut oil for the chocolate, optional.
If the cottage cheese is wet, place it in a fine-mesh strainer for 10–15 minutes first. You don’t need the extra liquid. It will make the filling too soft, and the top chocolate layer may not sit evenly.
Regular peanut butter is optional in this recipe, but one teaspoon gives the PB2 a fuller flavor. I would mix the filling without it first, taste it, and then decide. Sometimes the powder is enough on its own.
How to make Reese’s Cups with PB2 and cottage cheese filling
- Melt the chocolate first. I heat it in short 15–20-second intervals and stir after each one. If the chocolate is thick, add a little coconut oil. It will become more fluid and spread through the liners more easily.
- Make the bottom layer. Place paper liners in a mini muffin pan and pour a little chocolate into each one. About one teaspoon is usually enough. Spread it across the bottom and bring it slightly up the sides, then place the pan in the freezer for 8–10 minutes.
- Blend the cottage cheese. Transfer it to a small blender bowl and blend until the curds have almost completely disappeared. This may take a minute or two. Don’t rush it. The smoother the base, the better the filling will feel.
- Add the PB2 and the remaining ingredients. Add the powdered peanut butter, syrup, vanilla, and salt. Turn the blender on again. For a stronger peanut butter flavor, add one or two teaspoons of regular peanut butter.
- Check the consistency. The filling should be thick, like soft cream cheese. If it spreads, add another spoonful of PB2. If it becomes too thick, mix in a teaspoon of syrup or a little more cottage cheese.
- Fill the liners. Spoon a small amount of cream onto the set chocolate. Don’t go all the way to the edges, or the top layer will not be able to cover the filling completely. I smooth the surface slightly with a spoon, but I don’t try to make it perfect.
- Add the remaining chocolate. If it has thickened, warm it slightly again. Pour the chocolate over the top and gently spread it to the edges. You can tap the pan lightly on the counter a couple of times to make the surface smoother.
- Chill the candy well. Place it in the refrigerator for at least 1 hour. The cottage cheese filling needs more time than a regular peanut butter mixture. You can also put the cups in the freezer, but only briefly, for about 20 minutes, or the center will become too firm.
Storage. Because of the cottage cheese, these Reese’s Cups should not be kept at room temperature for long. I place them in a container and keep them in the refrigerator, where they last for 3–4 days. You can place parchment paper between the layers so the chocolate does not stick.
We usually make coffee with milk to go with them. But one day, Lindy took one after lunch and ate it with strawberries. It turns out that the cottage cheese filling pairs well with berries, so in summer it’s always nice to have raspberries, strawberries, or a few peach slices nearby.
This version is worth trying for the texture alone. It does not copy store-bought Reese’s Cups at all, and that is part of its charm. It becomes a different dessert, lighter and creamier, while the chocolate and peanut butter are still there.
6. Homemade Reese’s Cups without powdered sugar and with vanilla bean
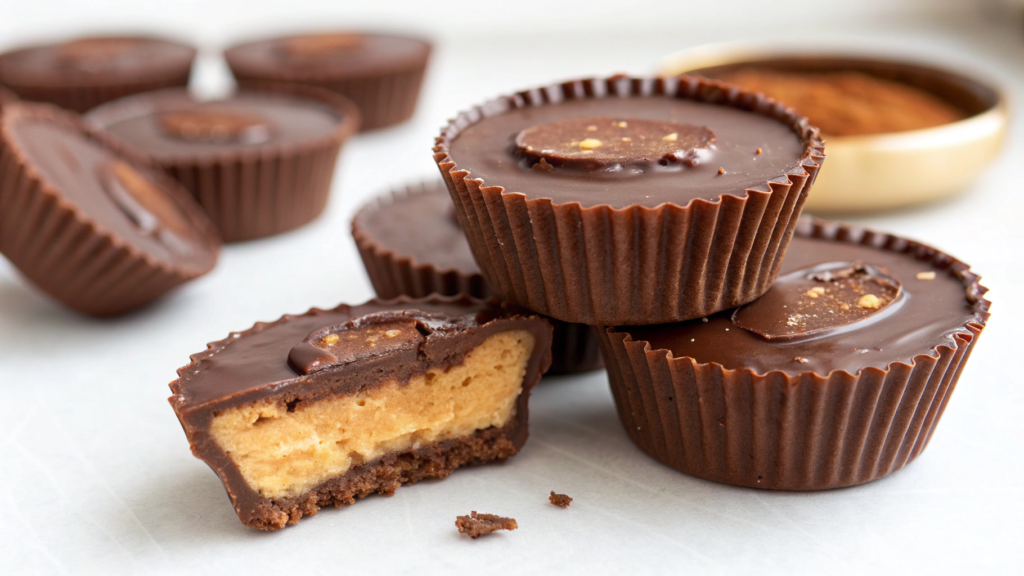
In this version of Reese’s Cups, I use a little maple syrup instead of powdered sugar, and the vanilla comes straight from the bean rather than a bottle. It seems like a small change, but the filling immediately gets a much more pronounced aroma.
The vanilla should not overpower the peanut butter flavor. Half a bean is enough for the whole batch. Lindy once added an entire bean, and the filling tasted much more like vanilla cream. It was good, but the peanut butter disappeared completely.
For this recipe, it is better to use soft, smooth peanut butter. If oil has collected at the top of the jar, stir it well all the way to the bottom.
Ingredients
For 10–12 small Reese’s Cups, you’ll need:
- 8 ounces dark or semisweet chocolate (225 g);
- ½ cup smooth peanut butter (125 g);
- 2 tablespoons maple syrup;
- 2 tablespoons almond flour;
- seeds from ½ vanilla bean;
- a small pinch of salt;
- 1 teaspoon coconut oil for the chocolate, optional.
If the peanut butter is already sweet, start with one tablespoon of syrup. Taste the filling before adding the second one. It is much easier to increase the sweetness than to try to reduce it afterward.
The almond flour is only there to thicken the filling. It should not turn the mixture into dough. Sometimes 1½ tablespoons is enough, especially if the peanut butter is thick.
How to make Reese’s Cups without powdered sugar
- Prepare the vanilla. Slice half of the vanilla bean lengthwise and open it with the tip of a knife. Use the dull side of the blade to scrape out the small black seeds. They are quite sticky, so I add them directly to the bowl with the peanut butter.
- Mix the filling. Add the maple syrup, salt, and almond flour to the peanut butter. Stir with a spoon and leave it for a couple of minutes. During this time, the flour will absorb some of the oil, and the filling will become thicker.
- Check how well it holds its shape. Scoop up a little of the mixture with a spoon. It should slide off slowly rather than drip. If the filling is too soft, add another ½ tablespoon of almond flour. If it becomes a little dry, mix in some more peanut butter.
- Melt the chocolate. Microwave it in 15–20-second intervals, stirring after each one. You can add coconut oil if the chocolate is thick and difficult to spread inside the liners.
- Make the bottom layer. Place paper liners in a mini muffin pan and pour about one teaspoon of chocolate into each one. Spread it slightly up the sides, then place the pan in the freezer for 8–10 minutes.
- Add the peanut butter filling. Roll the filling into small balls and gently flatten them with your fingers. Place each round on top of the set chocolate, leaving some space around the edges.
- Cover the filling with chocolate. Spoon the remaining chocolate over the top. If it has cooled, warm it slightly again. Then gently tap the pan on the counter so the chocolate flows down the sides and the surface becomes smoother.
- Chill the Reese’s Cups. Leave them in the refrigerator for 30–40 minutes. Once the chocolate has set, the paper liners will come off without cracks or crumbs.
Storage. They keep well for a week, although ours rarely last that long. I put them in the refrigerator as soon as they have set and only use parchment paper when I need to stack the Reese’s Cups in two layers.
Regular coffee with milk pairs perfectly with these Reese’s Cups. Lindy sometimes likes having one with black tea, especially when there is a tiny pinch of salt on top.
I usually place the finished Reese’s Cups on the top shelf of the refrigerator so I do not eat them right away. That works until Lindy notices the container. After that, I can only rely on luck.
7. Homemade Reese’s Cups with paper liners that are easy to film
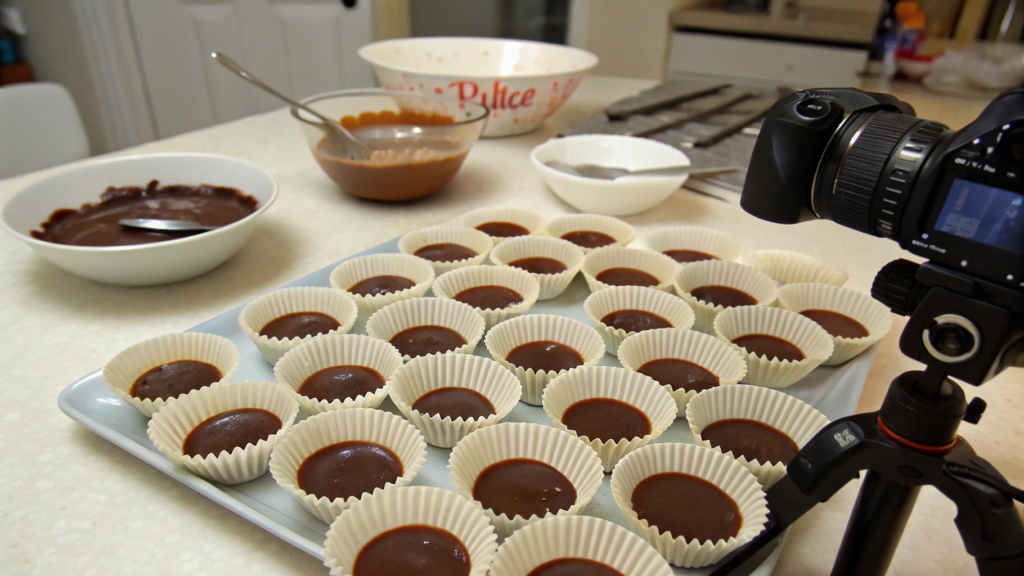
If you film recipes for a blog or short videos, paper liners make things much easier. The Reese’s Cups stay the same size, the chocolate does not spread across the table, and each new layer is easy to see on camera. You can film the whole process from above without stopping the recording after every movement to clean the kitchen.
Lindy helps me lay out all the liners in advance. It only takes a couple of minutes, but then I do not have to touch the paper with fingers covered in chocolate. For filming, I also arrange the filling, melted chocolate, and spoons in the order I will need them. In a regular kitchen, you can move the bowls around however you like. In front of the camera, an extra bowl somehow always ends up right in front of the lens.
It is better to use sturdy paper mini muffin liners, such as Caperci Mini Cupcake Liners на Amazon. Thin paper sometimes absorbs grease from the chocolate and loses its color. If you want to film the moment when the wrapper is removed from the finished candy, choose light or solid-colored liners. The chocolate edges show up better against them.
Ingredients
For 12 small Reese’s Cups, you’ll need:
- 8 ounces milk or semisweet chocolate (225 g);
- ½ cup smooth peanut butter (125 g);
- ¼ cup powdered sugar (30 g);
- ½ teaspoon vanilla extract;
- a small pinch of salt;
- 1 teaspoon coconut oil, optional.
The chocolate should not be too thick. If it stays on the spoon in a heavy lump, add a little coconut oil. You need a fluid mixture that pours slowly and fills the space around the filling neatly.
How to make Reese’s Cups in paper liners
- Prepare the filming area. Place the paper liners in a mini muffin pan and count them right away. Put two clean teaspoons and a toothpick nearby. One spoon is useful for adding the chocolate, while the other can be used to adjust the filling without mixing everything in the same bowl.
- Melt the chocolate. Heat it for 15–20 seconds at a time and stir after each interval. Do not place the bowl of chocolate in the shot while there are smears around the rim. I quickly wipe the edge with a napkin, and the close-up immediately looks much neater.
- Pour the first layer. Add about one teaspoon of chocolate to each liner. It is better to move from left to right or in a circle instead of jumping between the cups. It is easier for the viewer to follow the process, and you will not miss an empty liner.
- Spread the chocolate around the edges. Tilt the pan slightly in different directions or use the back of a spoon to bring the chocolate up the sides. Then place it in the freezer for 8–10 minutes. While the layer sets, you can film the filling in a separate shot.
- Mix the peanut butter center. Combine the peanut butter, powdered sugar, vanilla, and salt. Stir until the mixture becomes smooth and firm. If it clings to the spoon in long streaks, add a little more powdered sugar. If the filling is too dry, mix in one teaspoon of peanut butter.
- Prepare equal portions. Divide the filling into 12 small pieces, roll them into balls, and flatten them slightly. It is convenient to place all the rounds on parchment first and then transfer them to the liners. This makes it easier to compare their size before assembly.
- Place the filling on the chocolate. Leave a narrow free edge around each round. If the filling touches the paper, it may show along the side after chilling, and the top layer will not cover it completely.
- Add the chocolate on top. Pour it into the center and let it spread toward the edges on its own. Use a toothpick to close any small gaps. A few light taps of the pan on the counter will remove air bubbles and make the tops smoother.
- Chill the cups. Place the pan in the refrigerator for 30–40 minutes. For the final shot, remove the paper slowly by pulling it from both sides at once. This helps the wrapper open evenly and keeps fingerprints off the chocolate.
After filming, I usually leave the Reese’s Cups in the paper liners. They are easier to move into a container this way, and the chocolate does not touch the other candies. They keep in the refrigerator for about a week. Remove the paper in advance only from the cups you plan to place on the table right away or break open in front of the camera.
I usually make coffee with milk to go with the finished Reese’s Cups. While it brews, I take the candy out of the refrigerator and let it sit at room temperature for a few minutes. After the final shot, you can put the phone away, sit down next to Lindy, and finally try the Reese’s Cups you had only been looking at through the screen.
Paper liners do not make the recipe more complicated or more interesting on their own. They simply help you avoid rushing, and rushing is exactly what gets in the way when you are cooking and filming at the same time. When your hands are not busy constantly wiping away chocolate, the video is left with exactly what people opened it to see — neat homemade Reese’s Cups.
8. Homemade Reese’s Cups bars with chocolate ganache top layer
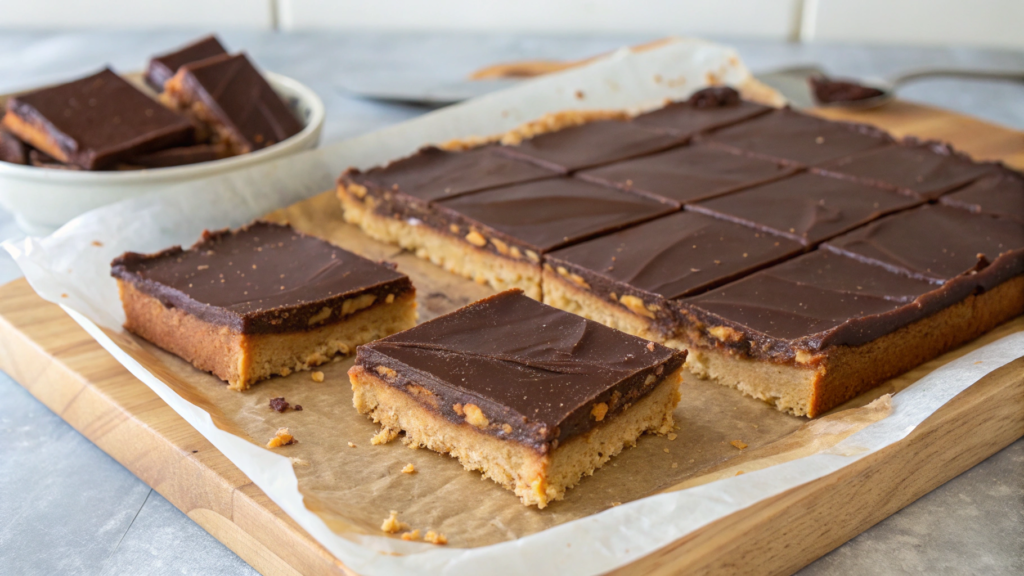
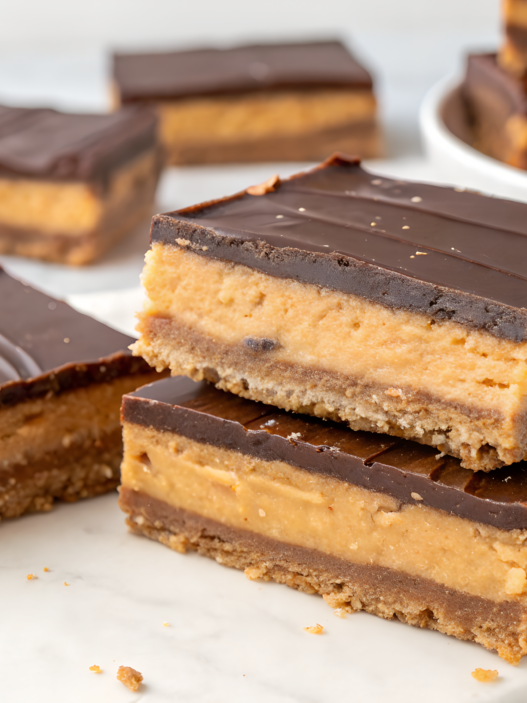
There is no need to fill a dozen small liners here. Everything is assembled in one square pan and cut into bars after chilling. The top ganache layer stays softer than the chocolate base, so the knife passes through without a loud crack or broken edges. It looks a little more polished than regular Reese’s Cups, even though there is less work in the kitchen.
Lindy especially likes the uneven pieces from the edges. I used to trim them before serving, but then I stopped. They get eaten before the rest of the bars are even ready to serve.
An 8 × 8-inch (20 × 20 cm) square pan works well for this recipe. It is better to line it with parchment paper and leave some extra hanging over the sides. Then you can lift the whole slab out by the paper and cut it comfortably on a board.
Ganache is usually made with chocolate and heavy cream. The soft layer helps balance the dense peanut butter center and does not crumble during cutting. You will not need much cream, but it is better to use one with at least 33–36% fat.
Ingredients
For 16 small bars, you’ll need:
The chocolate base
- 6 ounces dark or semisweet chocolate (170 g);
- 1 teaspoon coconut oil, optional.
For the peanut butter layer
- 1 cup smooth peanut butter (250 g);
- ¾ cup powdered sugar (90 g);
- ¼ cup finely ground oat or almond flour (25–30 g);
- ½ teaspoon vanilla extract;
- a small pinch of salt.
For the chocolate ganache
- 6 ounces dark or semisweet chocolate (170 g);
- ½ cup heavy cream (120 ml);
- 1 teaspoon butter, optional.
If the peanut butter is already sweet, you can use a little less powdered sugar. But do not remove it completely. It helps the layer hold together after cutting. You only need a small amount of oat or almond flour so the filling does not stick to the knife or squeeze out of the bar.
How to make Reese’s Cups bars
- Prepare the pan. Line the square pan with parchment paper so the paper hangs over two opposite sides. I press it gently into the corners with my fingers. It will not lie perfectly flat anyway, but the folds along the sides will barely show later.
- Make the chocolate base. Melt 6 ounces of chocolate in short 15–20-second intervals. Stir after each heating. If the chocolate is very thick, add one teaspoon of coconut oil.
- Spread the chocolate across the bottom. Pour it into the pan and smooth it with a spoon or small spatula. Check the corners because the layer often ends up thinner there. Place the pan in the refrigerator for 15 minutes so the chocolate can set.
- Mix the peanut butter layer. Combine the peanut butter, powdered sugar, flour, vanilla, and salt. The mixture will be sticky at first, but it will become thicker after about a minute of stirring. It should spread easily without dripping from the spoon.
- Add the filling to the pan. Place it in small portions over the chilled chocolate. This makes it easier to spread without shifting the bottom layer. I smooth the filling with the back of a spoon lightly dampened with water or with a small spatula.
- Chill the peanut butter layer. Put the pan back in the refrigerator for another 20 minutes. The top should feel firm. If you pour hot ganache over it right away, the peanut butter filling will soften and the layers will blend around the edges.
- Make the ganache. Finely chop the remaining chocolate and place it in a bowl. Heat the cream until it is almost boiling, but do not let it bubble. Pour the hot cream over the chocolate and leave it for 2 minutes. Then stir slowly from the center toward the edges. You can add one teaspoon of butter at the end.
- Cover the bars with ganache. Let it sit for 3–5 minutes so it cools slightly, then pour it into the pan. Tilt the pan in different directions or smooth the ganache with a spatula. Tap the pan lightly on the counter a few times to remove air bubbles.
- Chill the dessert well. Leave the pan in the refrigerator for at least 2 hours. Once all the layers are firm, lift the slab out by the parchment paper and transfer it to a board.
- Cut it into bars. Dip the knife in hot water, wipe it dry, and make the first cut. Repeat this before every cut. A warm blade passes through the ganache more cleanly and does not drag the peanut butter layer with it.
You can make narrow rectangular bars, but I usually cut the slab into 16 squares. Just do not make them too large. There are three dense layers here, and a small portion is enough with a cup of coffee.
Storage. Ganache does not do well in a warm room for long, so it is better to take out only a few bars at a time. I leave the rest in the pan or move them to a container, where they keep for about 5 days. If you stack them, the soft tops will stick together right away, so place a sheet of parchment paper between the layers.
Lindy and I make regular black coffee with a little milk to go with these bars. Tea works too, but the ganache is especially good with coffee. For children, I would simply pour a glass of cold milk and serve one small square.
This dessert is easy to make ahead when several people will be at the table. There is no need to remove paper from each candy or arrange them one by one. You bring out one tray, and everyone chooses a piece for themselves.
9. Homemade Reese’s Cups with a pinch of espresso inspired by Italian cafés
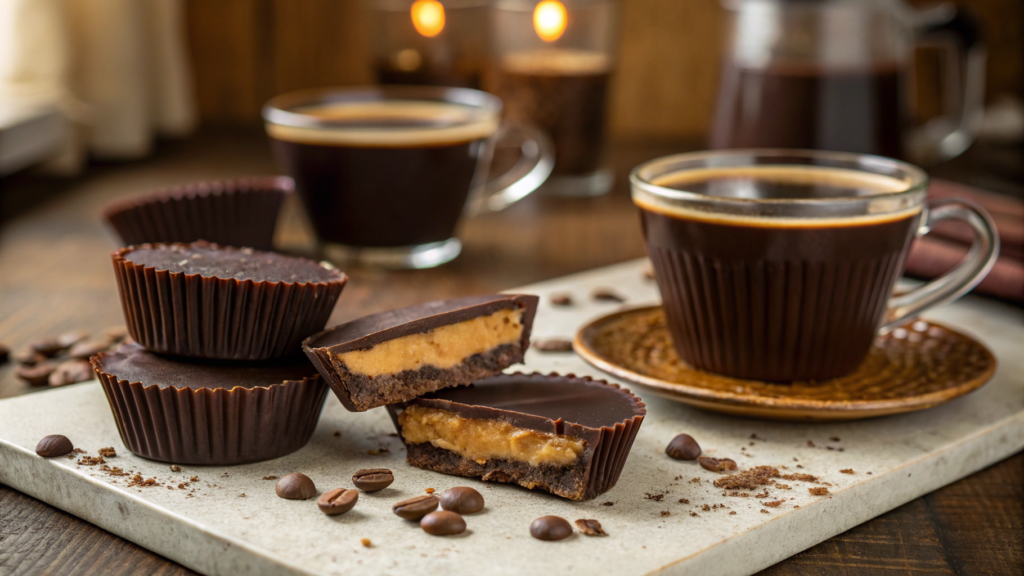
In Italian cafés, espresso is often served with a small cookie or a piece of chocolate. That is why Reese’s Cups with a hint of espresso are better made small. One candy is enough with a cup of strong coffee, and the dessert does not feel too heavy.
For this recipe, you need a very fine instant espresso powder. Regular ground coffee is better left out. It will not dissolve in the chocolate and will feel gritty between your teeth. What you need here is a powder that quickly blends into the warm mixture.
Start with ¼ teaspoon. That is enough to bring out the cocoa without overpowering the peanut butter. If you already know the powder well and like a noticeable coffee flavor, you can increase the amount to ½ teaspoon.
Ingredients
For 10–12 small Reese’s Cups, you’ll need:
- 8 ounces dark or semisweet chocolate with 60–70% cocoa (225 g);
- ¼–½ teaspoon instant espresso powder;
- ½ cup smooth peanut butter (125 g);
- ¼ cup powdered sugar (30 g);
- ½ teaspoon vanilla extract;
- a small pinch of salt;
- 1 teaspoon coconut oil, optional;
- a few flakes of sea salt for the top, optional.
Check how salty the peanut butter is before adding more salt. If the peanut butter is already noticeably salty, you may not need an extra pinch in the filling. You can still leave a few flakes on top.
How to make Reese’s Cups with espresso
- Melt the chocolate. Break it into small pieces and microwave it in 15–20-second intervals. Stir after each interval. It is better to let the last few pieces melt from the heat of the mixture instead of putting the bowl back in the microwave for another 30 seconds.
- Add the espresso. Stir ¼ teaspoon of the powder into the warm chocolate. Taste a small drop after it has cooled slightly. If you can barely taste the coffee, add a little more. I would not add the full ½ teaspoon right away, especially with dark chocolate.
- Make the bottom layer. Place paper liners in a mini muffin pan and pour about one teaspoon of chocolate into each one. Bring some of the mixture slightly up the sides. Then place the pan in the freezer for 8–10 minutes.
- Mix the peanut butter filling. Combine the peanut butter, powdered sugar, vanilla, and salt. Stir until the mixture becomes thick and smooth. If the peanut butter was very runny, add another spoonful of powdered sugar.
- Prepare the peanut butter rounds. Divide the filling into small portions, roll them into balls, and flatten them slightly with your fingers. They should be a little smaller than the bottom of the liners. This allows the chocolate to flow around the edges and completely cover the filling.
- Assemble the Reese’s Cups. Place the peanut butter rounds on the set chocolate layer, then spoon the remaining espresso chocolate over the top. If it has become thick, warm it for just a few seconds and stir again.
- Add the salt. While the chocolate is still soft, place two or three flakes of sea salt on top of each candy. You do not need more than that. The salt should appear in small bursts rather than cover the whole candy.
- Chill the cups. Leave them in the refrigerator for 30–40 minutes. Once the chocolate has fully set, the paper will peel away easily without pulling at the edges.
Lindy and I eat these Reese’s Cups with a small cup of strong coffee. You can add milk or cream, but I would try it without them first. The candy already has sweetness, a rich peanut butter filling, and dark chocolate, so the coffee rounds out the flavor on its own.
Storage. After chilling, I keep the Reese’s Cups in the refrigerator. They will last there for about a week. To soften the chocolate slightly, take out only the amount you need a few minutes before eating.
A pinch of espresso makes the chocolate flavor a little more interesting and adds bitterness where there would otherwise be only sweetness. The result is a small candy to have with coffee, and you will not need another dessert afterward.
10. Homemade Reese’s Cups with peanut butter, tahini, and sesame
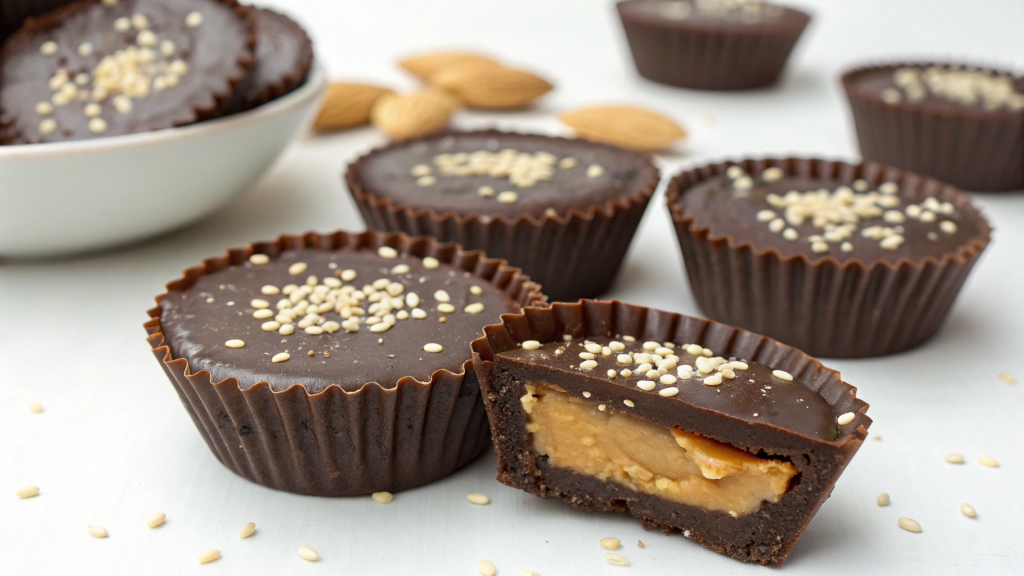
What makes this version different is that part of the peanut butter is replaced with tahini. The filling is less sweet, with a noticeable sesame flavor and a light bitterness. I add toasted sesame seeds on top to give the soft filling a little crunch.
It’s best to start with equal parts peanut butter and tahini. This way, the sesame comes through without overpowering the peanut butter flavor. If you haven’t used tahini much in desserts before, you can use a little less and adjust the proportions in the next batch.
Regular smooth tahini works well for this recipe. Stir it thoroughly before using.
Ingredients
For 10–12 small Reese’s Cups, you’ll need:
- 8 ounces dark or semisweet chocolate with about 60–70% cocoa (225 g);
- ¼ cup smooth peanut butter (65 g);
- ¼ cup tahini (60 g);
- ⅓ cup powdered sugar (40 g);
- ½ teaspoon vanilla extract;
- a small pinch of salt;
- 2 tablespoons sesame seeds;
- 1 teaspoon coconut oil, optional.
For the topping, you can use white sesame seeds, black sesame seeds, or a mix of both. There isn’t much difference in flavor, so use whatever you already have at home. Just be sure to toast the seeds lightly. Raw sesame seeds have very little aroma and can get lost behind the chocolate.
How to make Reese’s Cups with tahini and sesame
- Toast the sesame seeds. Add the seeds to a dry skillet and heat them over medium heat for 2–3 minutes. Stir constantly because sesame seeds darken quickly. As soon as they smell nutty, transfer them to a plate.
- Melt the chocolate. Break it into small pieces and microwave it in 15–20-second intervals. Stir after each interval. Add one teaspoon of coconut oil if needed to make the chocolate easier to spread inside the liners.
- Make the bottom layer. Place paper liners in a mini muffin pan and pour about one teaspoon of chocolate into each one. Bring it slightly up the sides, then put the pan in the freezer for 8–10 minutes.
- Mix the filling. Combine the peanut butter, tahini, powdered sugar, vanilla, and salt. Add half of the toasted sesame seeds and mix well. The mixture should be soft but firm enough to shape into small rounds.
- Check the consistency. If the filling spreads, add another tablespoon of powdered sugar. If it is too dry, mix in one teaspoon of tahini or peanut butter. Different brands of tahini vary quite a bit in thickness, so a small adjustment is completely normal.
- Prepare the portions. Divide the filling into 10–12 pieces, roll them into small balls, and flatten them slightly. Each round should be a little smaller than the liner so the chocolate can cover the filling around the sides.
- Assemble the Reese’s Cups. Place the filling on top of the set chocolate and cover it with the remaining chocolate. Tap the pan lightly on the counter so the chocolate fills the gaps around the filling.
- Add the sesame seeds. While the top layer is still soft, sprinkle each candy with the remaining seeds. A small pinch is enough. A thick layer will fall off with the first bite.
- Chill the candy. Place the pan in the refrigerator for 30–40 minutes. Once the chocolate has fully set, remove the paper liners.
Of course, the candy is better a few minutes after you take it out of the refrigerator rather than straight from the cold. The filling softens, and the tahini flavor becomes more noticeable.
Storage. I keep the remaining candy in a sealed container in the refrigerator for no longer than a week. The sesame seeds on top gradually lose their crunch, so the Reese’s Cups are especially good during the first two or three days.
Tahini doesn’t change the familiar idea of Reese’s Cups beyond recognition. There is still chocolate and peanut butter filling inside, but the sesame adds a new flavor and a little crunch. This is a good option when you already know the classic recipe but don’t want to complicate it with a long ingredient list.
Homemade Reese’s Cups
We don’t chase perfectly shaped candy. It’s completely fine if the chocolate edge is thicker in one spot or the filling shifts slightly somewhere else. It barely affects the flavor. Homemade Reese’s Cups are great because you can make them without worrying about perfect precision and still end up with a delicious dessert.
As with any cooking project, the main thing is to start, and then you can adjust the proportions and additions to suit your own preferences. Over time, you may come up with your own version that you make more often than the others.
Do you already make homemade Reese’s Cups? Share in the comments what you add to the filling and which chocolate you use.