Easy no-bake Halloween desserts seem like a great way to get kids involved in holiday preparations. You don’t need to know how to bake cakes or use complicated kitchen tools to make something tasty and unusual. Sometimes a little chocolate and some kids’ imagination are enough!
It’s wonderful when kids don’t just wait for the treats to be ready but actually help make them. Of course, the kitchen can end up messier than usual afterward. But who said Halloween would be free of chocolate-covered fingers and crumbs on the table?
Here are 10 easy Halloween desserts kids can make without oven help. Some are super simple, while others need a little help from adults. But in almost every recipe, kids can mix ingredients, shape figures, or come up with their own decorations.
1. Pop Rocks ghost bark
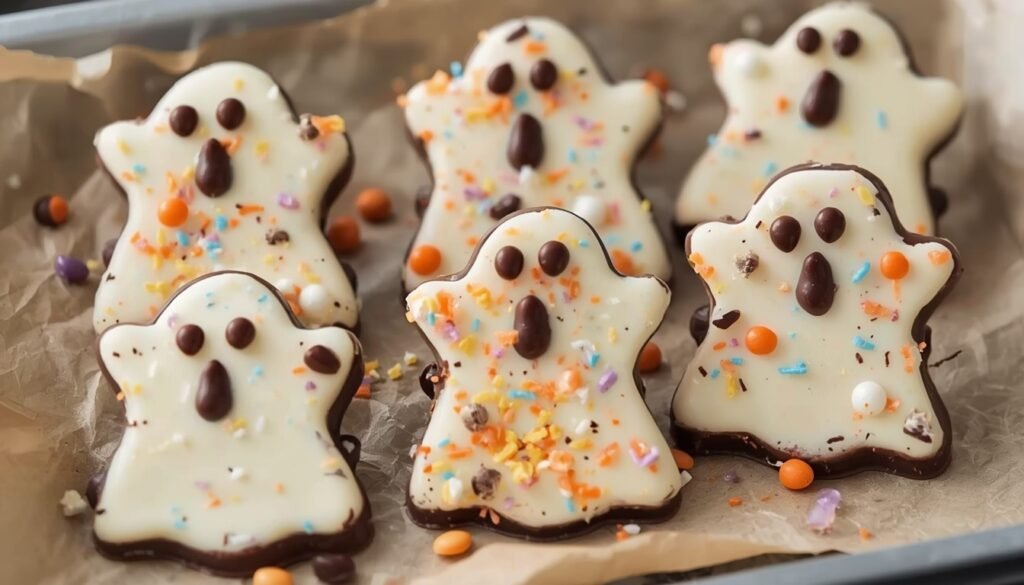
These Halloween chocolate ghosts don’t need any baking, and kids can come up with their own faces and decorate them with colorful candy. We use white chocolate for the base. Melt it and spoon small portions onto parchment paper, shaping each one into a ghost. While the chocolate is still soft, add candy eyes. And sprinkle the ghost shapes with popping candy right before serving so it doesn’t start popping too early.
And when kids start tasting the finished treats, the popping candy crackles in their mouths, turning ordinary chocolate into an unusual holiday dessert.
Ingredients
Makes 10–12 small ghosts.
- 2 cups white chocolate chips (about 340 g)
- 2 packets of popping candy in different colors, such as Pop Rocks Popping Candy
- 20–24 small candy eyes
- 2 tbsp dark chocolate (about 30 g) for drawing mouths, optional
How to make chocolate ghosts
- Melt the white chocolate. Put the chocolate chips in a bowl and microwave for 20 seconds. Stir and continue heating in short 10–15 second intervals until the chocolate is smooth. I think an adult should handle this part, since the bowl can get very hot.
- Shape the ghosts. Line a baking sheet with parchment paper. Spoon small portions of chocolate onto it and gently spread them downward to create shapes with rounded heads and uneven bottoms. Don’t try to make all the ghosts look the same. Let the kids decide what shape each one will have.
- Add the eyes and decorations. While the chocolate is still soft, place two candy eyes on each ghost and gently press them down. If you want to add mouths, melt a little dark chocolate and draw them with a toothpick. You can make surprised, smiling, or angry faces.
- Let the chocolate cool a little. Leave the ghosts at room temperature for about 10–15 minutes. The chocolate should cool down but still have a slightly sticky surface so the candy can stick to it. If the room is warm, this may take a little longer.
- Sprinkle with popping candy. Open the packet right before using it and sprinkle a small amount of popping candy over one ghost. If it starts popping right away, let the chocolate cool for a few more minutes. Then decorate the remaining ghosts and leave them until completely set.
Serve the dessert soon after making it so the candy keeps its popping effect.
It’s wonderful that kids can handle almost all the work here, except for melting the chocolate. Every child ends up with their own ghost, sometimes funny, sometimes pretty angry… Lindy and I love these simple holiday activities where we can make something tasty together and then put a whole plate of the kids’ creations on the table.
One last little tip. Make this dessert with kids who can already safely eat hard candy. For younger children, it’s better to replace the popping candy with soft candy sprinkles.
2. Frozen banana mummies
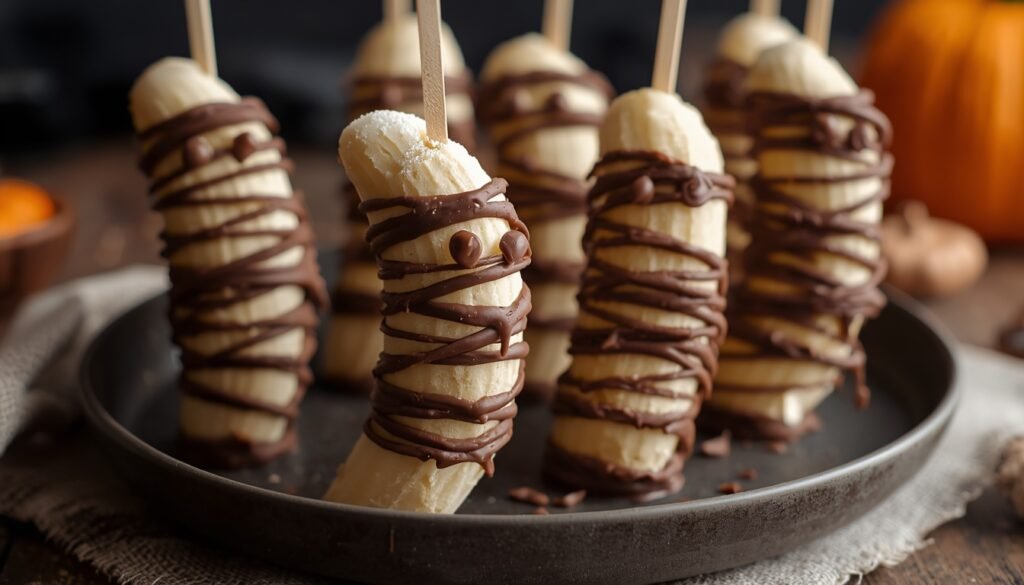
Frozen banana mummies are a great way to add some fruit to the holiday table, which is usually full of candy, cookies, and other sweets. Kids love helping make them, especially when it’s time to decorate. You end up with funny little mummies on sticks, covered in chocolate stripes that look like bandages.
And it’s great that you don’t need to make them look perfect, because even the most crooked mummies look funny.
For this dessert, you’ll need ripe but still fairly firm bananas. They hold their shape well, and once frozen, they taste a lot like fruity ice cream. And there’s absolutely no need to add sugar here!
Ingredients
Makes 8 small mummies.
- 4 medium bananas
- 1½ cups white chocolate chips (about 255 g)
- 16 candy eyes suitable for freezing (so they don’t get soggy after thawing)
- 2 tsp coconut oil (about 10 ml), optional
- 8 wooden popsicle sticks
How to make frozen banana mummies
- Prepare the bananas. Peel the bananas and cut each one lengthwise into two equal halves. Carefully insert a wooden popsicle stick into the bottom of each half. Try not to push it all the way through the banana, or it might slide off the stick.
- Freeze the bananas. Line a small baking sheet with parchment paper, arrange the bananas so they don’t touch, and put them in the freezer for 1–2 hours. They should be firm enough not to break when you coat them with chocolate.
- Melt the white chocolate. Put the chocolate chips in a deep bowl and microwave in short 15–20 second intervals, stirring after each one. If the chocolate is too thick, add a little coconut oil. An adult should help with the heating and make sure the chocolate isn’t too hot.
- Coat the bananas with chocolate. Take a few bananas out of the freezer at a time. Holding each one by the stick, dip it into the melted white chocolate or use a spoon to spread the chocolate over the surface. Then place the bananas back on the parchment paper. Chocolate sets quickly on frozen fruit, so it’s best to work without taking long breaks.
- Make the bandages and eyes. Transfer the remaining white chocolate to a small bag, snip off a corner, and drizzle thin stripes across the bananas. While the chocolate is still soft, attach two candy eyes to each mummy, leaving a little space for them between the stripes.
- Freeze the dessert again. Put the finished mummies back in the freezer for another 20–30 minutes. Before serving, leave them at room temperature for 3–5 minutes so the bananas soften a little and are easier to bite into.
You can make this dessert ahead of time and keep it in the freezer until the party. And if the kids want to make a few mummies just for themselves, there’s no need to wait until Halloween.
I absolutely love watching kids decorate their own mummies. Some make neat chocolate stripes, while others have bandages going in every direction. And that’s totally fine, because every kid is different! Sometimes there’s more chocolate on their hands than on the bananas themselves. But the main thing is that everyone has fun, and afterward, you can all enjoy the finished mummies together.
3. Cookie dough witch hats

Cookie dough witch hats look really cute and funny, especially when you decorate them with colorful candies. Kids can shape the hats themselves, make the brims, and choose the decorations. And if one of the hats turns out a little crooked, that’s totally fine. Witches don’t have to wear perfect hats!
For this dessert, we use ready-to-eat edible cookie dough that doesn’t need to be baked. Unlike regular cookie dough, it doesn’t contain raw eggs, and the flour is specially heat-treated to kill harmful bacteria. Always check the packaging before buying, because regular raw cookie dough isn’t safe to eat without baking.
Ingredients
Makes 10 witch hats.
- 1½ cups ready-to-eat edible cookie dough (about 340 g)
- 10 ready-made round chocolate cookies, about 2 inches (5 cm) in diameter
- 1 cup dark chocolate chips (about 170 g)
- ¼ cup colorful candy sprinkles (about 40 g)
- 10 small candies for decorating the buckles
How to make witch hats
- Prepare the dough. Take the edible cookie dough out of the refrigerator and divide it into 10 equal pieces. If it’s too soft and sticks to your hands, put it back in the refrigerator for 10–15 minutes. This will make it much easier for kids to shape the hats.
- Shape the tops of the hats. Roll each piece of edible cookie dough into a ball, then shape it into a small cone about 1½ inches (4 cm) tall. You can bend the tip slightly to one side to make it look more like a witch’s hat. Place the finished cones on a plate and refrigerate for 15 minutes.
- Make the hat brims. Arrange the chocolate cookies on a baking sheet lined with parchment paper. They’ll serve as the round bases for the hats. Try to choose cookies wide enough so the cones don’t extend beyond their edges.
- Melt the chocolate. Put the chocolate chips in a small bowl and microwave in 15–20 second intervals, stirring after each one. Once the chocolate is smooth, let it cool a little. An adult should handle the hot bowl and chocolate.
- Assemble the witch hats. Add a little melted chocolate to the center of each cookie and place a chilled cookie dough cone on top. Press it down gently, then use a small spoon to carefully cover the cone with chocolate on all sides. Work on one hat at a time, since the chocolate can set quickly on the chilled dough.
- Decorate the hats. Right after coating each cone with chocolate, sprinkle colorful candy sprinkles around its lower part while the surface is still sticky. Carefully attach a small candy to the front to represent the buckle.
Repeat with the remaining hats. Once they’re all decorated, put the baking sheet with the cookies in the refrigerator for about 10–15 minutes, until the chocolate is completely set.
Just a reminder that this recipe requires cookie dough specifically labeled as safe to eat raw. Regular cookie dough may contain raw flour and eggs that can cause food poisoning. The Centers for Disease Control and Prevention (CDC) specifically warns about this.
Using the exact same ingredients, kids end up making completely different hats. Some make tall, pointy tops, while others add so many sprinkles that you can barely see the chocolate. And another nice thing is that you don’t even need to turn on the oven for this dessert.
These witch hats are great for a kids’ Halloween party. You can make them a day ahead and keep them in the refrigerator, then arrange them on a large tray right before serving.
4. Cereal square monster bars
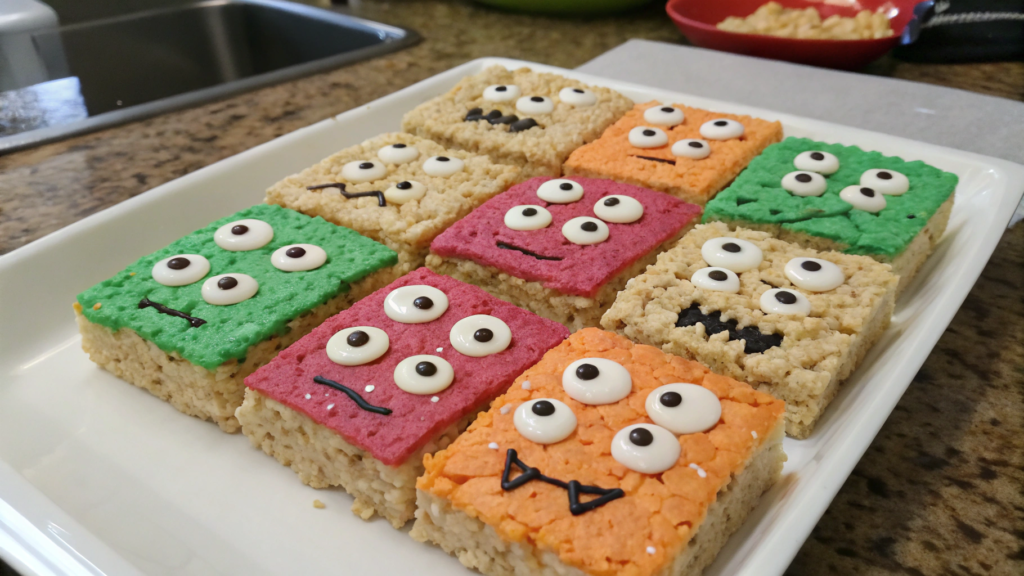
Lots of kids love crispy rice cereal monster bars at Halloween parties. They’re soft inside, a little chewy thanks to the marshmallows, and crispy on the outside. And the colorful faces with candy eyes make them especially funny.
You won’t need any complicated molds or special baking tools to make these. Just prepare the base, cut it into squares, and let the kids handle the decorating. Every little monster can have its own facial expression, because kids have such great imaginations!
Ingredients
Makes 18 small bars.
- 10 tbsp unsalted butter (about 142 g)
- 2 packages of mini marshmallows, 10 oz each (about 567 g total)
- 10 cups crispy rice cereal (about 280 g).
- ½ tsp vanilla extract
- ¼ tsp salt
- 1 cup each of colored candy melts in three different colors (about 510 g total)
- 3 tsp canola oil (about 15 ml)
- 36–54 candy eyes in different sizes
How to make monster bars
- Prepare the pan. Lightly grease a 9 × 13-inch (23 × 33 cm) rectangular pan with butter. You can also line it with parchment paper, leaving some hanging over the sides so it’s easier to lift out the finished mixture later.
- Melt the marshmallows. Melt the butter in a large saucepan over low to medium heat. Add the mini marshmallows, vanilla extract, and salt. Stir constantly until the mixture is smooth. An adult should handle this part because melted marshmallows are very hot and sticky.
- Add the rice cereal. Remove the saucepan from the heat and pour in the crispy rice cereal. Quickly stir with a spatula until the cereal is evenly coated with the sweet mixture. Transfer everything to the prepared pan and gently spread it out. Don’t press down too hard, or the bars will turn out dense and hard.
- Cool and cut. Leave the mixture at room temperature until completely cool. Then lift it out of the pan and cut it into 18 rectangles. A large, sharp knife works best for this, so it’s better to let an adult handle the cutting.
- Prepare the colorful coating. Put the three colors of candy melts into separate microwave-safe bowls. Heat each one at half power in short intervals, stirring until completely melted. Add 1 tsp of canola oil to each bowl to make the coating thinner. Let it cool a little before decorating.
- Make the little monsters. Take one bar and dip about half of it into the colored coating. Place it on parchment paper and immediately attach two or three candy eyes while the coating is still soft. Repeat with the remaining bars, switching up the colors and number of eyes. Leave the treats at room temperature until the coating is completely set.
You can arrange the finished monster bars on a large tray, alternating the colors. They look really cute next to other Halloween sweets. A good idea is to prepare the base ahead of time and leave the decorating for the kids on the day of the party.
Let each child make their own little monster, choosing its color and how many eyes it gets. It’s great when kids can use their imagination and then proudly show everyone what they’ve made. By the way, you can wrap the bars individually and hand them out to little guests after the party.
5. Peanut butter spider cookies
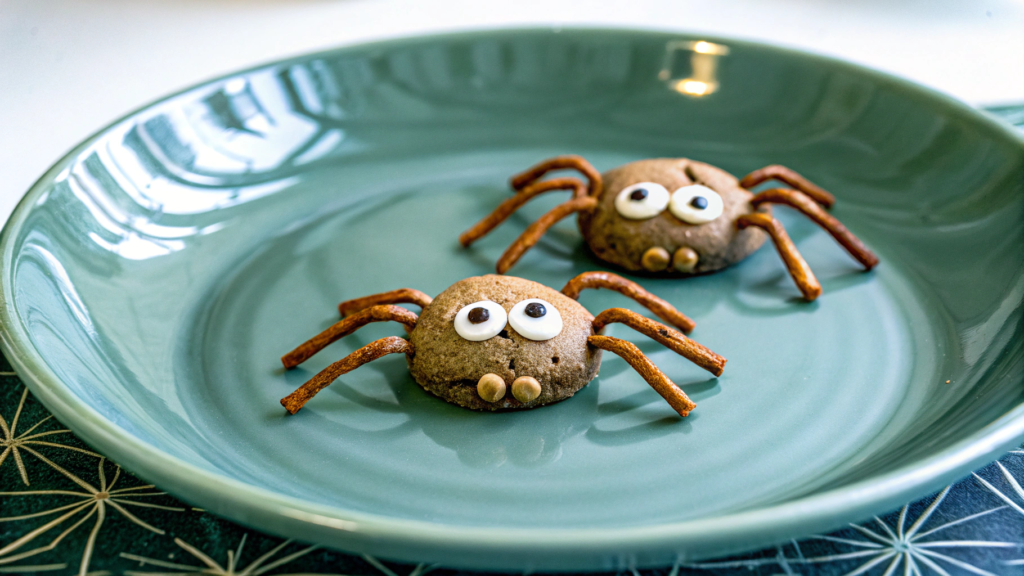
Peanut butter spider cookies are a fun Halloween dessert that we’ll make ourselves, without store-bought cookies or an oven. The base is made with peanut butter, oats, and cocoa powder. The cookies turn out soft, with a rich chocolate flavor, while the crispy legs made from salted pretzels add a nice combination of sweet and salty.
Of course, what kids will love most is making the little spiders themselves. Once the base is ready, you can let them handle the shaping and decorating. Just make sure the chocolate mixture has cooled down enough first.
Ingredients
Makes 24 small spiders.
- ½ cup butter (about 113 g)
- 2 cups sugar (about 400 g)
- ½ cup milk (120 ml)
- ⅓ cup unsweetened cocoa powder (about 30 g)
- ½ cup smooth peanut butter (about 125 g), such as Peanut Butter & Co. Smooth Operator
- 2 tsp vanilla extract
- 3 cups quick-cooking oats (about 240 g)
- 1 package of small salted pretzels
- 2 tbsp peanut butter for attaching the legs
How to make peanut butter spider cookies
- Prepare the legs. Carefully break the small salted pretzels into curved pieces that will look like spider legs. Each spider will need four legs on each side. It’s totally fine if some pieces end up shorter than others.
- Make the chocolate mixture. Put the butter, sugar, milk, and cocoa powder in a large saucepan. Heat over medium heat, stirring until the butter melts and the ingredients come together. Bring the mixture to a full boil and let it boil for 3 minutes. An adult must handle this step, since the hot sugar mixture can cause serious burns.
- Add the peanut butter and oats. Remove the saucepan from the heat, then add the peanut butter and vanilla extract. Stir well until smooth, then add the oats. Keep stirring until the oats are completely coated with the chocolate mixture.
- Let the mixture cool. Leave it for a few minutes so it can thicken a little. Before letting kids start working with it, an adult should check that the mixture is no longer hot. Don’t leave it too long, though, or shaping the cookies will become more difficult.
- Shape the spider bodies. Line a large tray with parchment paper. Take about 1 tbsp of the chocolate-peanut butter mixture at a time and roll it into a small ball. Arrange the balls on the parchment paper, leaving enough space between them for the legs. If the mixture sticks to your hands, you can lightly dampen your palms with water.
- Attach the legs. Dip one end of each pretzel piece into a little peanut butter and attach it to a chocolate ball. Repeat with the remaining legs, placing four on each side. Press them in gently so they stay in place without breaking.
- Let the cookies set. Leave the finished spiders on the parchment paper until they’re completely cool and firm. Then carefully transfer them to a serving plate. If the room is too warm, put the tray in the refrigerator for a little while.
In this recipe, kids don’t just decorate ready-made cookies. They actually shape the cookies themselves from the prepared mixture. You can even have a little competition to see who makes the funniest or biggest spider. Kids really love moments like these!
A little tip. If you’re making these cookies for a kids’ party, be sure to check whether any of the guests have a peanut allergy. And don’t replace the quick-cooking oats with regular large rolled oats unless necessary, since they can change the texture of the finished cookies.
6. Candy corn yogurt parfaits
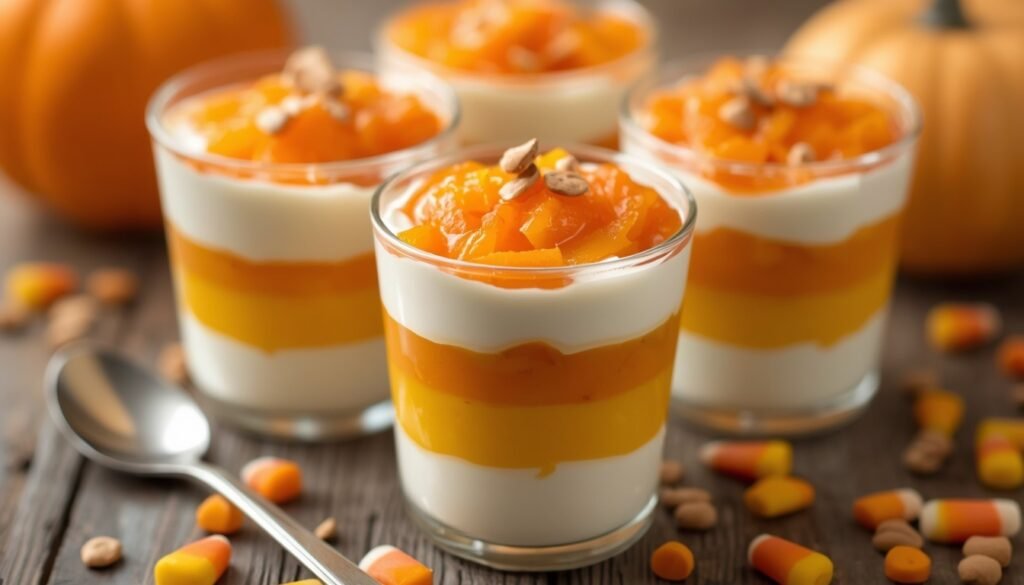
In these candy corn yogurt parfaits, we use real fruit, and the combination of yellow, orange, and white colors looks just like the famous American candies.
The fruit is sweet enough on its own, so there’s no need to add any sugar. You can use plain unsweetened yogurt and canned mandarin oranges in their own juice. And kids can handle almost all the preparation, including arranging the colorful layers in the cups.
Ingredients
Makes 4 servings.
- 1 cup pineapple, cut into small pieces (about 165 g)
- 1 can mandarin oranges in their own juice, 10.5 oz (about 300 g including the liquid)
- 1 cup thick plain or vanilla yogurt (about 245 g)
- 2 tbsp unsweetened shredded coconut (about 10 g), optional
- 4 small candy corn candies for decoration, optional
How to make yogurt parfaits
- Prepare the fruit. Cut fresh pineapple into small pieces, or use canned pineapple chunks without syrup. Drain the liquid from the canned mandarin oranges. If the segments are too large, cut them in half. For younger children, it’s better to cut the fruit into even smaller pieces.
- Make the yellow layer. Take four clear cups or small glass jars, about 6–8 oz (180–240 ml) each. Place ¼ cup of pineapple at the bottom of each one. Try to spread the pieces evenly so the yellow layer is clearly visible through the sides.
- Add the orange layer. Carefully spoon the mandarin orange segments over the pineapple, dividing them evenly between the four cups. It’s better to use a spoon so the fruit layers don’t get mixed together. Now we already have two bright layers.
- Add the yogurt. Spoon ¼ cup of yogurt over the mandarin oranges in each cup. Gently smooth the top with the back of a spoon. Thick Greek yogurt is a good choice because it doesn’t run down between the fruit pieces as quickly.
- Decorate the dessert. If you’d like, sprinkle a little shredded coconut over the yogurt and place one candy corn on top. You’ll have three clearly visible layers — yellow, orange, and white, just like traditional Halloween candy corn. Serve right away or put the cups in the refrigerator for a little while.
We love adding fruit to our holiday menu, especially when we know there will already be plenty of sweets on the table. And this dessert is also fun to make with kids. You can put the ingredients into small bowls ahead of time and let each child assemble their own serving. Just don’t make these parfaits too far in advance, because the fruit gradually releases juice, which mixes with the yogurt and makes the boundaries between the layers less defined.
A little tip. If you’re making this dessert for toddlers, it’s better to skip the hard candy corn and use just fruit and yogurt. They look perfectly festive even without any extra decorations.
7. Chocolate cookie bat pops
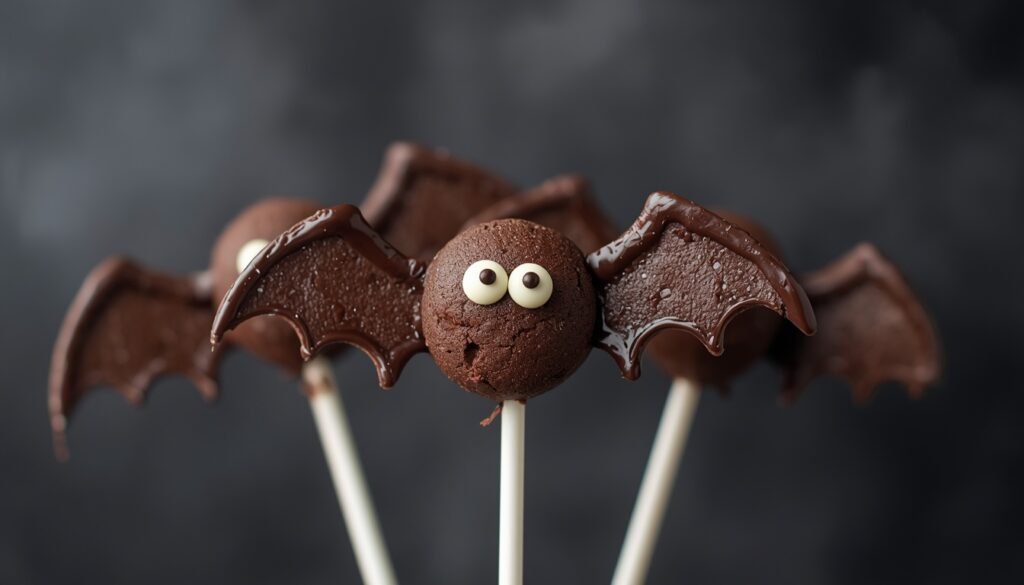
Chocolate cookie bat pops are perfect for a kids’ Halloween party. They look unusual among the other sweets, and thanks to the sticks, they’re easy to eat without getting chocolate all over your hands.
For this recipe, we’re using ready-made chocolate sandwich cookies with cream filling. No oven needed, and kids can do most of the work themselves. Though adults will still need to help with melting the chocolate and cutting the cookies.
Ingredients
Makes 6 bats.
- 9 ready-made round chocolate sandwich cookies with cream filling, such as Oreo Chocolate Sandwich Cookies
- About 1 cup dark chocolate candy melts (about 170 g)
- 12 small candy eyes
- 12 mini chocolate chips for the ears
- 6 wooden popsicle sticks
How to make chocolate cookie bats
- Prepare the wings. Take three cookies, carefully separate each one into two halves, and remove the cream filling. Then an adult should cut each chocolate cookie half in half using a sharp serrated knife. You’ll end up with 12 semicircular pieces that we’ll use as wings for six bats.
- Arrange the wings. Line a tray with parchment paper. For each bat, place two prepared cookie pieces next to each other, with their rounded edges facing outward. Leave a little space between them for the body.
- Melt the chocolate coating. Put the candy melts in a small, deep bowl and microwave according to the package instructions, stirring occasionally. The coating should become smooth and thin enough to cover the cookies. Let it cool a little before decorating with the kids.
- Attach the sticks. Take the remaining six whole cookies. Dip the tip of a wooden popsicle stick into the melted coating and carefully insert it between the chocolate cookie halves, right into the cream filling. Try not to push the cookie halves too far apart, or they might break.
- Make the body. Holding the cookie by the stick, dip it into the melted coating so both sides are covered. Gently shake off any excess and immediately place the cookie on top of the two prepared wings. While the coating is still soft, it will help hold the pieces together.
- Add the eyes and ears. Immediately attach two candy eyes and two mini chocolate chips to the top of each bat, with the pointed ends of the chocolate chips facing upward to make the ears. Repeat with the remaining cookies. Work on one bat at a time so the coating doesn’t set before you add the decorations.
- Let the treats set. Leave the finished bats on the parchment paper until the chocolate coating has completely hardened. Don’t lift them by the sticks too soon, or the wings might come off. Once set, you can serve the cookies on a large platter or stand them upright in a suitable holder with the sticks pointing down.
These chocolate cookie bats can also make a fun part of your Halloween table decorations. I usually arrange them on a large platter next to other Halloween desserts, and Lindy always comes up with a way to make the whole arrangement look beautiful! Just don’t stack the cookies on top of each other, so the delicate wings stay intact until serving.
8. Fruit filled monster cups

Fruit filled monster cups are another way to make Halloween treats without an oven. This time, we won’t even need chocolate, icing, or other sweet extras. Just fresh fruit and a little imagination!
You can turn clear cups into a green Frankenstein, a white ghost, or an orange pumpkin. Kids love coming up with their faces, since every monster can have its own mood. And the fruit inside serves as both a treat and a colorful background for the drawings.
Ingredients
Makes 6 fruit cups, 2 of each kind.
- 2 cups seedless green grapes (about 300 g)
- ½ cup seedless dark grapes (about 75 g)
- 2 medium bananas
- 1½ cups peeled mandarin orange segments (about 225 g), fresh or canned without syrup
- 6 clear food-safe cups, 9 oz (about 270 ml) each
- 1 black permanent marker for drawing on the outside of the cups
How to make fruit filled monster cups
- Prepare the cups. Take six clean, dry cups and divide them into three pairs. We’ll draw Frankenstein on two, ghosts on another two, and turn the remaining ones into pumpkins. Use the marker only on the outside of the cups, without touching the inside or the rims.
- Draw the faces. For Frankenstein, draw black hair along the top edge of the cup, thick eyebrows, eyes, and a mouth with scars on the sides. For the ghosts, two oval eyes and a round mouth are enough. On the pumpkin cups, draw triangular eyes and a big toothy grin. Let the drawings dry completely before filling the cups with fruit.
- Prepare the fruit. Thoroughly wash the seedless green and dark grapes and remove them from the stems. For adults and older kids, you can leave the grapes whole, but for younger children, cut each grape lengthwise into four pieces.
Peel the fresh mandarin oranges and separate them into segments. If you’re using canned ones, simply drain the liquid. Don’t slice the bananas yet so they don’t turn brown. - Make the Frankenstein cups. Take the two cups with Frankenstein faces drawn on them. Fill them almost to the top with green grapes, leaving a little room for the dark ones. Add the dark grapes on top to create the monster’s hair. Through the clear sides, the green grapes will give the face its color, while the black drawings on the cup create its expression.
- Make the ghosts and pumpkins. Peel the bananas, slice them into rounds, and immediately divide them between the two cups with ghost faces. Fill the remaining two cups with mandarin orange segments. Thanks to the orange color of the fruit, the drawn pumpkins will look especially bright.
- Serve the dessert. Arrange all six cups on a large tray, alternating the different faces. The banana ghosts are best served right after making them. You can prepare the grape and mandarin orange cups a little earlier and keep them in the refrigerator until serving.
It’s great that kids can help not only with making these fruit treats but also with decorating them. You can let each child come up with their own monster face and then choose the right fruit from the prepared ingredients. For example, they could make a surprised ghost or a Frankenstein with huge eyebrows. I think kids will enjoy this Halloween preparation just as much as the treats themselves.
A little tip. Use only seedless grapes. For children under five, always cut each grape lengthwise into four pieces so they don’t accidentally choke. For older children, also consider their age and ability to chew food safely.
9. Marshmallow mummy brownies
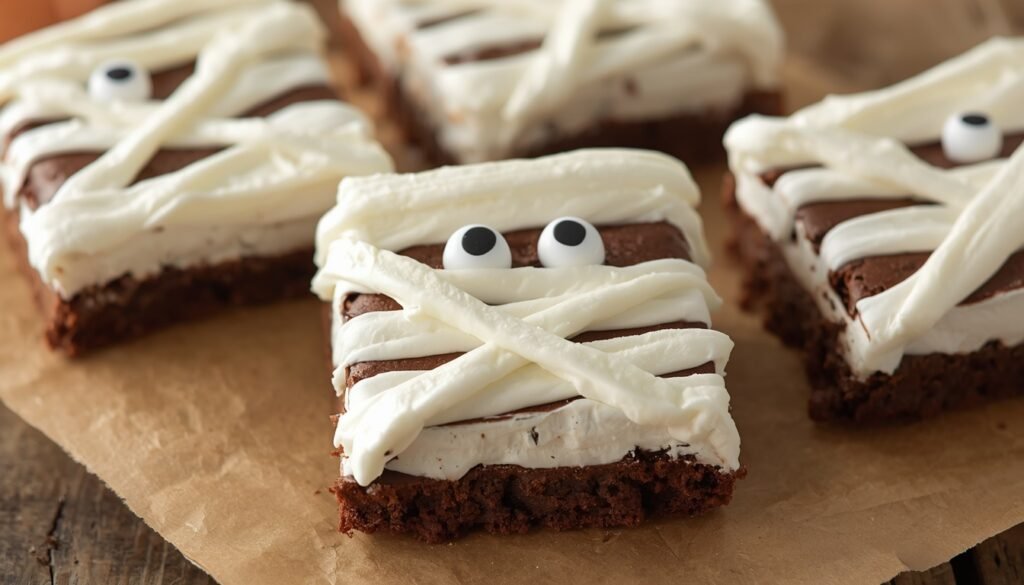
Chocolate mummy brownies with white marshmallow stripes make a wonderful addition to the Halloween dessert table. They have a dense chocolate base that tastes a little like nutty chocolate candy, with a sweet cream on top that we’ll use to make bandages for our mummies.
In this recipe, we’ll make no-bake brownies using chocolate, cocoa powder, cookies, and sweetened condensed milk. And once the base has set, kids can decorate the dessert themselves, pipe the bandages, and attach the candy eyes.
Ingredients
Makes 16 small brownies.
For the chocolate base
- 1 cup crushed graham crackers (about 110 g)
- ½ cup finely chopped roasted hazelnuts (about 65 g)
- ¼ cup unsweetened cocoa powder (about 25 g)
- ½ tsp salt
- ¾ cup sweetened condensed milk (about 230 g)
- 4 oz dark chocolate (about 113 g)
For decorating
- 4 tbsp marshmallow fluff (about 60 g)
- 4 tbsp powdered sugar (about 30 g)
- 1 tbsp milk (15 ml)
- 32 small candy eyes
How to make chocolate mummy brownies
- Prepare the pan. Take an 8 × 8-inch (20 × 20 cm) square pan and line it with parchment paper. Leave the edges of the parchment hanging over the sides so you can easily lift out the chocolate base later.
- Mix the dry ingredients. Crush the graham crackers into fine crumbs using a rolling pin or food processor. Transfer them to a large bowl, then add the chopped hazelnuts, cocoa powder, and salt. Mix well so the cocoa is evenly distributed among the other ingredients.
- Add the condensed milk and chocolate. Pour the sweetened condensed milk into the dry mixture. Separately, melt the dark chocolate in the microwave in short 15–20 second intervals, stirring each time. An adult should help with the heating.
Add the melted chocolate to the bowl and mix everything thoroughly with a spoon until you have a thick, sticky mixture. - Shape the brownie base. Transfer the chocolate mixture directly onto the parchment paper lining the pan. Spread it evenly across the bottom, cover it with a second sheet of parchment, and gently press down with your hands to create a firm layer of even thickness. Then remove the top sheet of paper.
- Chill and cut the brownies. Place the pan in the refrigerator for at least 1 hour, until the chocolate base becomes firm. Then lift it out by pulling on the edges of the parchment and cut it into 16 small squares.
It’s better to let an adult handle the cutting. - Make the marshmallow cream. Mix the powdered sugar with the milk, then add the marshmallow fluff. Whisk until smooth. The mixture should be thick enough to pipe into stripes.
If it’s too runny, add a little more powdered sugar. Transfer the finished cream to a sturdy food-safe bag and snip off a small corner. - Decorate the brownies as mummies. Arrange the chocolate squares on a tray. Pipe thin stripes of cream across each brownie, moving from side to side as if you’re wrapping a mummy in bandages. Leave a small open space near the top edge and attach two candy eyes there using a little dab of cream.
The stripes don’t have to be perfectly straight. Slightly overlapping bandages will look completely natural. - Let the decorations set. Leave the finished brownies in a cool place for a little while so the cream can thicken slightly. Then carefully transfer the mummies to a serving plate. Until serving, store the dessert in a covered container in the refrigerator, preferably in a single layer so the decorations don’t get damaged.
You can give the finished brownies to the kids to decorate, with small bags of cream and candy eyes prepared ahead of time. There’s no need to worry about how straight the bandage stripes turn out. Even if they cross over each other and cover half the eyes, the mummies still look funny. And most importantly, kids are actually involved in making the dessert instead of just watching the adults.
A little tip. These brownies contain hazelnuts, dairy, and wheat, so be sure to consider your guests’ food allergies. If you’re making this dessert for young children, chop the hazelnuts as finely as possible so they don’t accidentally choke on large nut pieces.
10. Japanese candy shop spider truffles
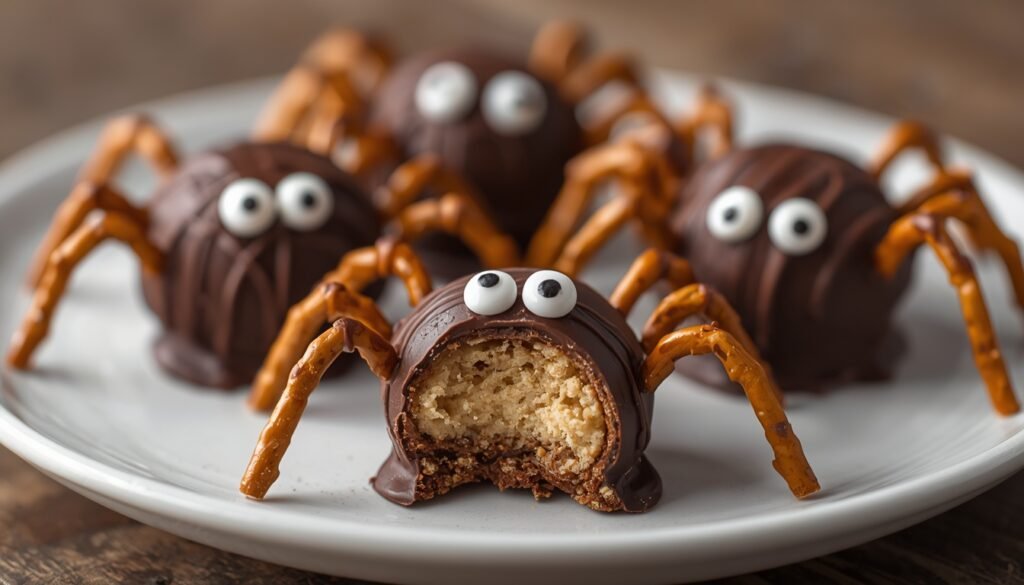
Japanese-style chocolate spider truffles make an interesting ending to our collection of Halloween desserts. Inside, they have a soft chocolate mixture made with cookies and cream cheese, while the outside has a chocolate coating, crunchy legs, and funny little candy eyes.
What makes these spiders different is that instead of regular salted pretzels, we use Japanese chocolate-covered biscuit sticks. They add an extra crunch to the dessert. And there’s plenty for little helpers to do here, especially when it’s time to shape the truffles and decorate them.
Ingredients
Makes 15–18 small truffles.
- 22 chocolate sandwich cookies with cream filling
- ½ cup cream cheese, at room temperature (about 115 g)
- 12 oz semisweet melting chocolate (about 340 g)
- 1 package of Japanese chocolate-covered biscuit sticks
- 30–36 small candy eyes
- 1–2 tbsp chocolate sprinkles, optional
How to make chocolate spider truffles
- Crush the cookies. Put the chocolate sandwich cookies, including the cream filling, into a food processor and blend them into fine crumbs. You can also place them in a sturdy bag and crush them with a rolling pin. Set aside about 1 tbsp of the crumbs to decorate the finished truffles.
- Make the chocolate mixture. Add the softened cream cheese to the crushed cookies and mix thoroughly. You should have a thick, smooth mixture that easily holds together in a ball without falling apart. If you’re using a food processor, just keep mixing until the ingredients are fully combined.
- Shape the truffles. Line a large tray with parchment paper. Take small portions of the chocolate mixture, about a tablespoon each, and roll them into balls. Arrange them on the parchment, leaving enough space between them for the legs.
- Attach the legs. Carefully break the Japanese biscuit sticks in half. Insert two short pieces into each side of every chocolate ball. Do this gently so the sticks don’t break. Then put the tray in the freezer for about 10 minutes to help the truffles firm up.
- Melt the chocolate. Put the chocolate into a microwave-safe bowl and heat it in short 20–30 second intervals, stirring each time. Once the chocolate has completely melted, let it cool a little. An adult should handle the heating.
- Coat the spiders with chocolate. Take the chilled truffles out of the freezer. Carefully dip each one into the melted chocolate, using a fork or spoon to help coat the body and the bases of the legs. Let the excess chocolate drip off, then transfer the spider to the parchment paper.
- Add the eyes and sprinkles. While the chocolate is still soft, attach two candy eyes to each spider. You can sprinkle a little of the reserved cookie crumbs or some chocolate sprinkles on top. Decorate the truffles one at a time, since the chocolate sets quickly on the cold base.
- Chill the dessert. Put the finished truffles in the refrigerator until the chocolate coating has completely set. Then carefully transfer them to a serving platter, trying not to damage the thin legs.
A little tip. Store the finished truffles in a covered container in the refrigerator because they contain cream cheese. Don’t stack the spiders on top of each other, since the biscuit legs are quite fragile and can break.
Kids love rolling the chocolate mixture into balls and then turning them into little spiders with biscuit sticks and candy eyes. You can put a bowl of the chocolate mixture on the table and arrange all the decorations next to it. We usually try to get kids involved in the preparation from the very beginning, leaving only the work with hot ingredients to adults. And I’m almost sure some of the chocolate biscuit sticks will disappear before the spiders are even finished!
Let the kids cook!
Yes, these desserts really don’t require any special cooking skills. Of course, you’ll need to help melt the chocolate or cut some ingredients, but there’s plenty of the preparation you can leave to the kids. And there’s no need to aim for perfection. After all, we’re making treats for Halloween!
And holiday preparations aren’t just about food. They’re also a chance to spend time together. And I want kids to remember those moments too, not just the sweets on the table.
What Halloween desserts do your kids love making? Tell us in the comments if you’ve tried anything from our collection or if your family has its own favorite recipe.