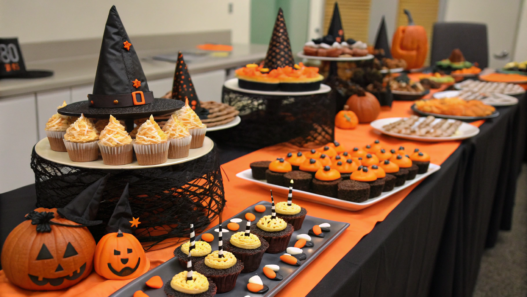
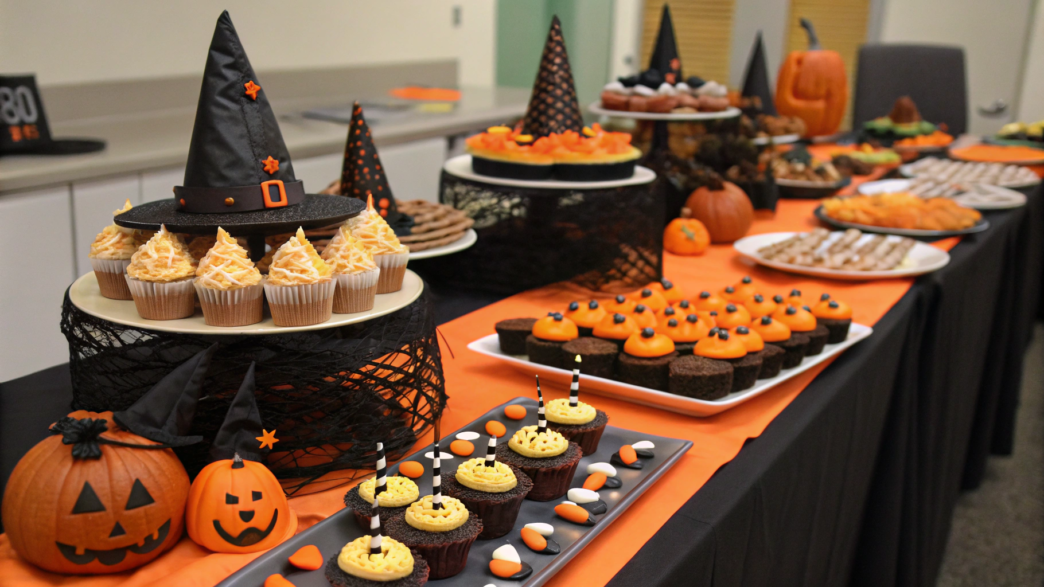
I love experimenting with homemade desserts for Halloween. And I’m not just talking about pumpkin-shaped cookies or candies with funny little eyes. I’ve put together 10 Halloween dessert recipes for you, where interesting ingredient combinations and little pastry tricks turn familiar sweets into party treats.
We’ll borrow some ideas from French pastry traditions and others from regional American recipes. And for most of these desserts, you’ll only need regular ingredients and tools you probably already have in your kitchen.
I always try to plan the dessert menu so that some of the treats can be made ahead of time. There’s already plenty to do on the day of the party! Below, I’ll share not only the recipes but also a few little tricks that’ll help with the fillings, textures, and decorations.
1. Espresso Pumpkin Mousse Cups
Espresso pumpkin mousse kicks off our collection of Halloween desserts with little culinary tricks from secret supper clubs. Here, we’re using a restaurant-style individual dessert presentation. There’ll be chocolate cookie crumbs at the bottom, then fluffy pumpkin mousse with coffee, and a little more chocolate on top.
Espresso gives the pumpkin a slight bitterness and makes it taste less sweet. You can taste the cinnamon and ginger too, but they don’t overpower the coffee.
Ingredients
Makes 6 small servings.
- 1 cup pumpkin puree (245 g)
- 1 cup heavy whipping cream (240 ml)
- 4 oz cream cheese (115 g)
- ⅓ cup powdered sugar (40 g)
- 2 tbsp strong espresso (30 ml)
- ½ tsp ground cinnamon
- ¼ tsp ground ginger
- ½ tsp vanilla extract
- 6–8 chocolate cookies
- 6 small white chocolate ghosts for decorating
- A pinch of salt
How to make espresso pumpkin mousse
- First, make the pumpkin base. I put the softened cream cheese in a deep bowl, add the powdered sugar, and beat until smooth. Then I add the pumpkin puree, cinnamon, ginger, vanilla, and a pinch of salt. It’s important to use plain, unsweetened pumpkin puree here, otherwise the mousse will turn out too sweet.
- Add the espresso. The coffee needs to be brewed and cooled ahead of time. Two tablespoons are plenty to give the mousse a coffee flavor. I add one tablespoon first, mix, and taste the base. Then I gradually add the second one so the pumpkin and spices still come through.
- Whip the cream. Whip the cold cream until soft peaks form. It should hold its shape but still be soft. First, fold about a third of the whipped cream into the pumpkin mixture, then carefully add the rest. I use a silicone spatula and fold from the bottom up. This keeps the mousse light and airy.
Now let’s assemble the cups. The secret to neat layers is not packing down the cookies or spreading the mousse with a spoon. Just gently level the crumbs, then pipe the mousse from a piping bag, keeping the tip slightly above the previous layer. Start in the center and gradually work your way toward the sides. This way, the chocolate crumbs won’t mix with the pumpkin mousse, and the line between the layers stays nice and clear.
- Assemble the layers. Crush the chocolate cookies into crumbs and add about a tablespoon to the bottom of each of the six small cups. Then add the pumpkin mousse. I transfer it to a piping bag and pipe it right into the center of each cup, gradually filling it. I leave about half an inch (1.3 cm) at the top for the final layer of crumbs and decorations.
- Chill and decorate. Put the finished cups in the fridge for at least 2 hours. The mousse will firm up during this time. Add the remaining chocolate crumbs right before serving so they stay crunchy.
Then place a small white chocolate ghost in the center of each cup. Against the dark cookie crumbs, this little decoration really stands out!
One useful thing Lindy and I have learned from hosting parties at home is to make some of the treats ahead of time. This mousse can easily spend the night in the fridge with a lid on, and the next day, all that’s left is decorating the cups.
It’s nice that everyone gets their own serving, and nobody has to try cutting a big cake into ten perfectly even pieces. Individual desserts make everything so much easier, and I think you’ll see that for yourself.
2. Black Forest Graveyard Cake Jars
Black Forest cake with cherries and whipped cream turns into an unusual Halloween dessert when you assemble it in small glass jars. Inside, layers of chocolate cake pieces, juicy cherry filling, and whipped cream alternate, and on top, we’ll make a little edible graveyard.
Traditional German Black Forest cake often uses cherry schnapps, but we’re skipping the alcohol. Instead, we soak the cake with cherry juice. It adds a nice tartness to the chocolate, and kids can enjoy this dessert too.
Ingredients
Makes 6 servings in 8 oz (240 ml) jars.
For the chocolate cake
- ¾ cup all-purpose flour (95 g)
- ½ cup sugar (100 g)
- ¼ cup cocoa powder (25 g)
- 1 large egg
- ¼ cup milk (60 ml)
- ¼ cup vegetable oil (60 ml)
- ¼ cup hot water (60 ml)
- ½ tsp baking powder
- ¼ tsp baking soda
- A pinch of salt
For the filling and decorations
- 1½ cups pitted cherries (225 g), fresh or frozen
- 2 tbsp sugar
- 1 tsp cornstarch
- 2 tbsp water
- 1 cup heavy whipping cream (240 ml)
- 2 tbsp powdered sugar
- ½ tsp vanilla extract
- 6 rectangular chocolate cookies for the tombstones
- 3–4 chocolate cookies for the crumbs
- 1 oz dark chocolate (28 g) for writing
How to make Black Forest graveyard cake jars
- Bake the chocolate cake. Preheat the oven to 350°F (175°C). In a bowl, mix the flour, sugar, cocoa powder, baking powder, baking soda, and salt. Add the egg, milk, and oil, then pour in the hot water and mix. The batter will be pretty thin, and that’s exactly how it should be. Pour it into a greased 8 × 8-inch (20 × 20 cm) square baking pan and bake for about 20–25 minutes. Check with a wooden toothpick and let the cake cool completely.
- Make the cherry filling. Put the cherries, sugar, and one tablespoon of water into a small saucepan. Heat over medium heat for about 5 minutes, until the cherries start releasing their juice. Mix the cornstarch with the remaining tablespoon of cold water, pour it into the cherries, and cook for another 1–2 minutes until slightly thickened. Then remove from the heat and let cool. The filling should stay juicy, not turn into a firm jelly.
- Whip the cream. Combine the cold heavy cream with the powdered sugar and vanilla. Whip until stiff peaks form so the cream holds its shape between the cake layers. I try to stop the mixer at the right moment because overwhipped cream gets grainy, and we want a soft, smooth texture.
For assembling, use clear jars with wide openings. Here’s a little trick: cut the cake into cubes about ½ inch (1.3 cm) instead of crushing it into crumbs. This leaves room between the pieces for the cherry juice and cream, and the cake won’t turn into one big soggy mixture.
- Assemble the dessert in layers. Place a few pieces of cake at the bottom of each jar, add some cherries with their juice, and spread whipped cream on top. Then repeat the layers once more, leaving about ½ inch (1.3 cm) at the top. It’s easier to add the cream with a piping bag so it doesn’t mix with the cherry filling along the sides of the jar. Refrigerate the finished desserts for at least an hour.
- Make the chocolate graveyard. Melt the dark chocolate and transfer it to a piping bag with a fine tip. Draw little crosses or short inscriptions on the rectangular cookies, just like on old tombstones. Let the chocolate set. Before serving, sprinkle chocolate cookie crumbs over the top layer of cream to look like dirt, and stick one cookie tombstone into each jar. Add the cookies at the last minute, or they’ll get soggy from the cream.
When we make this dessert, there’s something for everyone to do. Someone arranges the cherries, someone helps with the chocolate decorations. And there’s no need to make all six tombstones look exactly the same! You can decorate one with a cross, write a short “Rest in Peace” on another, and draw a little crack on the third to make the tombstone look old and abandoned.
Desserts with little details like these really add variety to the party table. Under the chocolate cookie crumbs and funny tombstones, there’s a real Black Forest cake with juicy cherries, chocolate cake, and soft whipped cream. And on top, you get a tiny edible graveyard with chocolate dirt and cookie tombstones. Guests will probably take a good look at the decorations before grabbing their spoons.
3. Salted Caramel Apple Nachos
Instead of tortilla chips, these salted caramel apple nachos use thin slices of fresh apples, topped with homemade caramel, melted chocolate, and crunchy pecans. This is probably the easiest dessert in our Halloween collection.
The name of this dessert is pretty funny, but the idea really is similar to regular nachos. We arrange the apple slices on a large platter, drizzle them with sauces, and add different toppings. Each guest can grab whatever piece they like right from the plate.
For this recipe, I choose sweet-tart apples, like Honeycrisp or Granny Smith. They’re firm enough that they won’t fall apart under the caramel. And a little sea salt helps balance the sweetness of the chocolate and caramel.
Ingredients
Makes 6–8 servings.
- 4 large apples (about 700–800 g)
- ½ cup sugar (100 g)
- 3 tbsp butter (42 g)
- ¼ cup heavy cream (60 ml)
- ½ tsp sea salt, plus a little extra for decorating
- ⅓ cup dark chocolate (about 55 g)
- ⅓ cup pecans, roughly chopped (about 35 g)
- 2 tbsp lemon juice
- 2 cups cold water (480 ml)
How to make salted caramel apple nachos
- First, make the caramel. Add the sugar to a small heavy-bottomed saucepan and heat over medium heat. When the sugar starts melting around the edges, carefully stir it with a silicone spatula. Keep heating until it’s completely melted and turns an amber color.
Then remove the saucepan from the heat, add the butter, and stir. Gradually pour in the slightly warmed cream, stirring constantly. The mixture will bubble up quite a bit, so be careful. Finally, add the sea salt and let the caramel cool until it’s warm. - Prepare the apples. Mix the cold water and lemon juice in a large bowl. Remove the apple cores and slice the apples into thin wedges, about ¼ inch (6 mm) thick. I put the slices straight into the lemon water for 3–5 minutes to slow down browning. Then drain them in a colander and pat them thoroughly dry with paper towels. The caramel won’t stick as well to wet apples.
- Prepare the chocolate and nuts. Melt the chocolate in the microwave in short 15–20 second intervals, stirring after each one. You can lightly toast the pecans in a dry skillet for 2–3 minutes, since toasted nuts become more flavorful and have a nicer crunch.
A little serving trick. It’s better to arrange the apples in one wide layer, slightly overlapping, rather than piling them into a tall heap. This way, the caramel and chocolate will reach more of the slices, not just the ones on top. For a large group, it’s easier to prepare two platters right away.
- Assemble the apple nachos. Arrange the dried apple slices on a wide plate or wooden board. Pour the warm caramel into a small container with a spout and drizzle it over the slices in thin lines. Then add the melted chocolate. For the chocolate, it’s convenient to use a piping bag with a fine tip to spread it neatly across the whole platter.
- Add the final toppings. Sprinkle the apples with chopped pecans and a few flakes of sea salt. The caramel should be warm, but not hot, otherwise the chocolate and apples will heat up quickly. Serve the dessert right after assembling it, while the apple slices are still crunchy.
I usually make the caramel ahead of time, sometimes even the day before serving. Before drizzling it over the apples, I warm it up a little so it becomes runny again. But I slice the apples at the last minute so they stay fresh and crunchy.
By the way, you can leave some of the caramel in a small bowl next to the platter. There’s always someone who wants a little extra sauce.
There’s no complicated dough or cream in this dessert, but you get a nice combination of fresh crunchy apples, sweet caramel, chocolate, and salt. And everyone can grab as many pieces as they want without waiting for someone to cut the dessert and serve it on individual plates.
4. New Orleans Praline Spider Bites
These are traditional American candies made with brown sugar, butter, and milk. They’re sweet, with a rich caramel flavor and pieces of crunchy nuts. And for Halloween, we’ll turn them into little spiders with chocolate legs and candy eyes.
This dessert has an interesting history. Pralines originated in France, but the recipe changed in New Orleans. Instead of almonds, people started using local pecans, and the candies developed a softer, crumbly texture.
Our little spiders will have the flavor of real pralines, but they’ll be a bit smaller than regular candies. This makes them easier to decorate and serve to guests.
Ingredients
Makes 16 small spiders.
- 1 cup light brown sugar (200 g)
- ½ cup white sugar (100 g)
- ½ cup evaporated milk (120 ml)
- 2 tbsp butter (28 g)
- 1½ cups pecans, finely chopped (about 165 g)
- ½ tsp vanilla extract
- A pinch of salt
- 64 thin salted pretzel sticks for the legs
- 3 oz dark chocolate (85 g)
- 32 small candy eyes
How to make New Orleans praline spider bites
- Prepare the nuts. I start with the pecans because there won’t be time to chop them once the caramel is cooking. Chop the nuts into small pieces, about ¼ inch (6 mm). You can lightly toast them in a dry skillet for 3–4 minutes. Just remember to stir, since pecans can burn pretty quickly.
- Cook the caramel base. Combine both types of sugar, evaporated milk, and salt in a heavy-bottomed saucepan. Heat over medium heat, stirring until the sugar dissolves.
Keep cooking until the temperature reaches 236°F (113°C). At this temperature, the syrup thickens enough to give the pralines a soft, slightly crumbly texture once they cool.
A candy thermometer will help you check the temperature — Candy Thermometer on Amazon. It makes it much easier to avoid overcooking the sugar. - Add the butter and pecans. Remove the saucepan from the heat, add the butter, vanilla, and prepared nuts. Now stir the mixture vigorously with a wooden spoon for about 1–2 minutes. It will gradually thicken and become less glossy. It’s important to stop at the right moment. If you keep stirring for too long, the caramel will start crumbling before we even shape the candies.
There’s a small difference in how we’ll shape these pralines. Traditional New Orleans pralines are spooned onto parchment paper, where they spread slightly and set into round, flat candies. For our spiders, we need more compact, thicker bases. So I let the mixture thicken a little and spoon it into small mounds instead of flattening them.
- Shape the spider bodies. Line a baking sheet with parchment paper. Using two teaspoons, spoon out 16 small portions of the caramel mixture, leaving a little space between them. While the candies are still soft, use a spoon to give them a rounded shape.
You need to work quickly because pralines start setting within just a few minutes. Leave them at room temperature for about 20–30 minutes. - Make the chocolate legs. Break the salted pretzel sticks into short pieces. Melt the dark chocolate over a double boiler or in the microwave in short intervals. Dip the end of each pretzel piece into the chocolate and attach it to the side of a candy, four legs on each side. Place the spiders on parchment paper and let the chocolate set.
- Attach the eyes. Add a little melted chocolate to the front of each candy and attach two candy eyes. I try to place them close together to make the spiders look funnier. Then leave the candies for about 15–20 minutes until the chocolate has completely hardened.
I usually make these candies the day before Halloween and store them in an airtight container at room temperature. I place parchment paper between the layers so the chocolate legs don’t catch on each other. And I put the spiders out on the table right before the guests arrive.
These candies have a pretty rich, sweet flavor, so the smaller size is actually better than the regular one. You get just a couple of bites of caramel, nuts, and salty, crunchy pretzel sticks. And the little spiders look funny enough to put them next to the other Halloween desserts instead of hiding them away in a candy box.
5. Coffee Filled Chocolate Coffin Truffles
Chocolate coffins with coffee filling are another Halloween dessert where we’ll borrow a little trick from professional chocolatiers. Each candy has a thin dark chocolate shell on the outside and a soft filling made with chocolate, cream, and strong coffee on the inside.
When you take the first bite, the chocolate shell cracks, revealing the soft coffee center. For decoration, we’ll use white chocolate and draw little crosses on top. They’ll stand out nicely against the dark surface of the candies, while the coffee filling adds a slight bitterness to the rich chocolate flavor.
Ingredients
Makes 12 small truffles.
The chocolate shell
- 8 oz dark chocolate (225 g), with 60–70% cocoa content
The coffee filling
- 4 oz dark chocolate (115 g)
- ¼ cup heavy cream (60 ml)
- 1 tsp instant espresso powder
- 1 tsp butter (5 g)
- ½ tsp vanilla extract
- A pinch of salt
Decoration
- 1 oz white chocolate (28 g)
How to make chocolate coffins with coffee filling
- Start with the coffee filling. Finely chop 4 oz of dark chocolate and put it in a small bowl. Heat the cream in a saucepan until it’s almost boiling, dissolve the espresso powder in it, and immediately pour it over the chocolate. Let it sit for a minute, then gently stir until smooth.
Add the butter, vanilla, and a pinch of salt. You’ll get a thick, glossy mixture that chocolatiers call ganache. Let it cool to room temperature. - Prepare the chocolate for the shell. Set aside about a quarter of the chocolate, and melt the rest over a double boiler until it reaches 113–122°F (45–50°C). Remove the bowl from the heat and gradually add the reserved finely chopped chocolate, stirring constantly.
Once the mixture cools to 88–90°F (31–32°C), you can start working with the molds. This tempering process helps the chocolate set with a nice shine and a crisp snap.
For this, we’ll need a silicone candy mold, like the Coffin Chocolate Mold on Amazon. Choose one with deep enough cavities so there’s room for the filling inside.
Important! The chocolate shell needs to be thin but strong enough not to crack when you remove it from the mold. That’s why we apply the chocolate in two thin layers, paying attention to the corners. Once it sets, the shell will keep its coffin shape, with enough room inside for the soft coffee filling.
- Shape the chocolate coffins. Pour a little melted chocolate into each cavity of the mold and spread it over the bottom and sides with a small brush. I pay extra attention to the corners since the coffins have a pretty detailed shape. Put the mold in the fridge for about 5–10 minutes until the chocolate hardens. Then apply a second thin layer so the shell doesn’t crack when removing the candies.
- Add the coffee filling. Once the chocolate shells have completely set, transfer the cooled ganache to a piping bag and fill each cavity. Leave about ⅛ inch (3 mm) of space at the top.
Don’t fill the molds all the way to the top, or you won’t be able to seal the filling with chocolate. Then put the mold in the fridge for about 20 minutes so the ganache firms up a little. - Seal the candies with chocolate. If needed, gently reheat the remaining chocolate to bring it back to its working temperature of 88–90°F (31–32°C). Spread a thin layer over the filling, completely covering each cavity.
Scrape off the excess with a pastry spatula so the bottoms of the coffins are flat. Let the chocolate set, then carefully remove the candies from the mold. - Decorate the coffins. Melt the white chocolate and transfer it to a piping bag with a fine tip. Draw a small cross on top of each coffin. I keep the lines thin so they don’t cover the entire surface of the candy. Let the decorations set, and the dessert is ready to serve.
You can make these truffles ahead of time. I keep them in a covered container in the fridge and take them out about 15–20 minutes before serving so the coffee filling softens.
Lindy arranges the finished coffins on a dark serving plate, leaving a little space between them so you can see their shapes and the white chocolate crosses. They almost look like solid chocolate figures, and guests don’t immediately realize there’s a coffee filling hiding inside. And since they’re small, just one or two candies are enough to enjoy that rich chocolate flavor.
6. Parisian Style Ghost Meringue Tarts
French lemon curd and meringue tarts are easy to turn into a Halloween dessert by making little white ghosts instead of the usual meringue swirls. You get a combination of a crisp pastry crust, sweet-tart lemon filling, and soft, airy meringue.
We’ll use the famous French lemon tart, often found in Parisian pastry shops, as our base. Only our tarts will be small, just a couple of bites each. And we’ll give the ghosts dark chocolate eyes. I think it’s the combination of a pretty elegant French dessert and a funny Halloween decoration that makes this idea interesting.
Ingredients
Makes 12 small tarts.
The pastry crust
- 1¼ cups all-purpose flour (155 g)
- ½ cup cold butter (113 g)
- ¼ cup powdered sugar (30 g)
- 1 egg yolk
- 1–2 tbsp cold water
- A pinch of salt
The lemon curd
- ½ cup fresh lemon juice (120 ml)
- ½ cup sugar (100 g)
- 2 large eggs
- 2 egg yolks
- 4 tbsp butter (56 g)
- 1 tsp finely grated lemon zest
The meringue and decoration
- 2 egg whites (about 60 g)
- ½ cup sugar (100 g)
- ¼ tsp lemon juice
- 1 oz dark chocolate (28 g)
How to make Parisian style ghost meringue tarts
- Make the pastry dough. Mix the flour, powdered sugar, and salt. Add the cold butter, cut into cubes, and rub everything together until you get fine crumbs. Then add the egg yolk and a little cold water, bringing the dough together into a ball.
Don’t knead it for too long, or the crust will turn out tough. Wrap the dough in plastic wrap and refrigerate for 30 minutes
. - Bake the tart shells. Preheat the oven to 350°F (175°C). Roll out the chilled dough to about ⅛ inch (3 mm) thick, cut out circles, and fit them into small metal tart pans. Prick the bottoms with a fork and chill for another 10 minutes. Then line each shell with parchment paper and fill with ceramic pie weights or dried beans. Bake for about 12 minutes, remove the weights and parchment, and return to the oven for another 6–8 minutes until lightly golden. Let cool completely.
For small tarts, mini tart pans with removable bottoms are really convenient. They make it easier to remove the baked shells without breaking their delicate pastry edges.
- Cook the lemon curd. In a saucepan, combine the lemon juice, sugar, eggs, egg yolks, and zest. Place over low heat and stir constantly with a whisk until the mixture thickens. This usually takes about 7–10 minutes.
I keep an eye on the temperature to make sure it doesn’t go above 180°F (82°C), or the eggs might curdle. Remove the curd from the heat, stir in the butter, and strain through a sieve. Then spoon it into the baked tart shells and refrigerate for about an hour.
For the meringue, we’ll use the Swiss meringue method. Unlike simply whipping raw egg whites with sugar, here we heat them over a double boiler first. The sugar dissolves completely, and once whipped, the egg white mixture becomes smooth and firm enough for the ghosts to hold their shape.
- Make the Swiss meringue. Combine the egg whites, sugar, and lemon juice in a heatproof bowl. Place it over a saucepan of gently simmering water, making sure the bottom of the bowl doesn’t touch the water.
Stir constantly and heat the mixture to 160°F (71°C), checking the temperature with a thermometer. Then remove the bowl from the heat and beat with a mixer for about 5–8 minutes until stiff, glossy peaks form. The meringue should cool down and hold its shape well. - Create the ghosts. Transfer the meringue to a piping bag fitted with a round tip. Hold the bag vertically and pipe a wide, rounded base first. Then lift the tip slightly and pipe a second, smaller portion of meringue.
Finally, lift the tip a little higher, reduce the pressure, and form a small pointed top. You’ll get a ghost made of three smoothly connected sections, wide at the bottom and narrow at the top.
I make the figures different heights so they don’t all look exactly the same. Put the finished tarts in the fridge for a little while. - Draw the eyes. Melt the dark chocolate and let it cool slightly. Then use a toothpick to add two little chocolate dots to each ghost. You can add a small mouth too. Don’t press too hard on the meringue, or you might damage its surface. After that, refrigerate the tarts until serving.
A little storage tip. You can bake the pastry shells a day before assembling and keep them in an airtight container at room temperature. The lemon curd can also be made ahead. But it’s better to pipe the meringue closer to serving time because it gradually absorbs moisture from the filling.
These little ghost tarts will definitely catch the kids’ attention. I usually give some of the ghosts just two eyes, while others get a surprised little mouth. You end up with a whole group of ghosts with different facial expressions. And underneath the funny decorations, there’s a proper French dessert with a bright lemon flavor, a crisp crust, and soft meringue.
7. Bourbon Pretzel Caramel Bars
Bourbon pretzel caramel bars combine several flavors and textures. At the bottom, there’s a firm, crunchy pretzel crust, in the middle, thick caramel with a little bourbon, and on top, a layer of dark chocolate with a few flakes of sea salt.
Bourbon gives the caramel vanilla and woody notes, but you’ll only need a little. And the salted pretzels make the dessert less overly sweet. These bars are cut into small rectangles.
Ingredients
Makes 16 small bars. Use an 8 × 8-inch (20 × 20 cm) baking pan.
The crust
- 2 cups salted pretzels (about 100 g)
- 5 tbsp butter, melted (70 g)
- 2 tbsp brown sugar (25 g)
The caramel
- ¾ cup sugar (150 g)
- ¼ cup water (60 ml)
- ½ cup heavy cream (120 ml)
- 3 tbsp butter (42 g)
- 2 tbsp bourbon (30 ml)
- ¼ tsp sea salt
The chocolate layer
- 5 oz dark chocolate (140 g)
- 1 tsp vegetable oil (5 ml)
- ¼ cup salted pretzels for decorating (about 12 g)
- A little coarse sea salt
How to make bourbon pretzel caramel bars
- Make the pretzel crust. Preheat the oven to 350°F (175°C). Crush the pretzels in a food processor into fine crumbs, but not quite into flour. Add the melted butter and brown sugar, and mix well. Line the baking pan with parchment paper, leaving some paper hanging over two sides.
Spread the crumbs across the bottom and press them down firmly with a spoon or the bottom of a glass. Bake for 8–10 minutes, then let cool completely. - Cook the caramel. Combine the sugar and water in a heavy-bottomed saucepan. Heat over medium heat until the sugar dissolves and the syrup turns amber. Once it starts boiling, don’t stir it with a spoon.
If needed, just gently swirl the saucepan. Remove from the heat and gradually pour in the warm cream. The mixture will bubble up a lot! Then add the butter and salt, stirring until smooth. - Add the bourbon and cook the caramel until thick enough. Pour the bourbon into the hot caramel, return the saucepan to medium-low heat, and continue cooking until the temperature reaches 245–248°F (118–120°C).
A candy thermometer is convenient for this. At this temperature, the caramel stays soft enough to cut after cooling, but won’t spread across the plate.
Important! Pour the caramel onto a completely cooled crust, otherwise the butter in the crumbs will soften and the layers might partially mix. I also gently tap the pan on the counter after pouring so the caramel spreads evenly to the edges. Then let it cool and refrigerate for about an hour.
- Add the chocolate. Melt the dark chocolate over a double boiler or in short intervals in the microwave. Stir in a teaspoon of vegetable oil to make the chocolate layer easier to cut after chilling.
Pour the chocolate over the set caramel and gently spread it to the edges with a spatula. - Decorate and cut the bars. While the chocolate is still soft, sprinkle it with pieces of salted pretzels and a few flakes of sea salt. For Halloween, I add some dark chocolate crumbs between the pretzels to make the top look more interesting.
Refrigerate the pan for 20–30 minutes, until the chocolate is almost set. Then lift the dessert out using the parchment paper and cut it into small rectangles with a sharp knife. If the chocolate has completely hardened, let the bars sit at room temperature for a little while before cutting.
These bars are better made ahead of time because the caramel and chocolate need time to set. I keep them in a container in the fridge, placing parchment paper between the layers, and take them out about 15 minutes before serving. This gives the caramel time to soften a little while the crust stays crunchy.
For our Halloween evening, I cut the bars into small pieces so guests can try them along with the other desserts. Just keep in mind that bourbon contains alcohol, and some of it may remain in the caramel even after heating. So this version is intended for adults.
8. Old Salem Apple Hand Pies
Mini apple hand pies with cinnamon and a crispy golden crust remind me of homemade baked treats people used to make long before modern pastry shops existed. Inside, they have a soft apple filling with brown sugar, and outside, a thin buttery pastry crust. For Halloween, we’ll make the pies into little half-moons and decorate them with cuts that look like spooky smiles.
The name of this dessert refers to Old Salem in North Carolina, a historic settlement founded by Moravian settlers in the 18th century. Local bakeries have preserved baking traditions that use plenty of butter, sugar, and spices. We’ll use these familiar ingredients in our recipe, but give the apple hand pies a Halloween look.
Ingredients
Makes 12 small hand pies.
The dough
- 2½ cups all-purpose flour (315 g)
- 1 cup cold butter (225 g)
- 2 tbsp sugar (25 g)
- ½ tsp salt
- 5–7 tbsp ice water (75–105 ml)
The apple filling
- 3 medium apples (about 450 g)
- ⅓ cup brown sugar (65 g)
- 1 tbsp butter (14 g)
- 1 tsp ground cinnamon
- ¼ tsp ground nutmeg
- 1 tsp lemon juice
- 1 tsp cornstarch
- A pinch of salt
Decoration
- 1 egg
- 1 tbsp milk (15 ml)
- 1 tbsp coarse sugar for sprinkling
How to make Old Salem apple hand pies
- Make the pastry dough. Mix the flour, sugar, and salt in a large bowl. Cut the cold butter into small cubes and add it to the dry ingredients. Rub everything together with your hands or use a pastry cutter until you get crumbs with small pea-sized pieces of butter.
Gradually pour in the ice water and bring the dough together into a ball. Divide it into two parts, flatten each one slightly, wrap in plastic wrap, and refrigerate for at least 45 minutes. - Make the apple filling. Peel the apples, remove the cores, and cut the flesh into small cubes, about ¼ inch (6 mm). Melt the butter in a skillet, then add the apples, brown sugar, cinnamon, nutmeg, lemon juice, and a pinch of salt.
Cook over medium heat for about 6–8 minutes, stirring occasionally. The apples should soften a little but not turn into puree. Then add the cornstarch, stir, and cook for another minute until the released juices thicken. Let the filling cool completely.
Here’s an important detail. For small hand pies, I always cook the apples in a skillet first. Raw filling releases a lot of juice in the oven, which can make the dough soggy or cause the edges to come apart. After a quick cooking, the apples become softer, they’re easier to spread over the dough, and the filling stays inside.
- Roll out and cut the dough. Preheat the oven to 400°F (200°C). Take one portion of the chilled dough and roll it out on a lightly floured surface to about ⅛ inch (3 mm) thick. Use a round cutter about 4–5 inches (10–12 cm) in diameter to cut out circles. Gather the scraps and roll them out again. Repeat with the second portion of dough.
- Fill the hand pies. Place about a tablespoon of the cooled apple filling in the center of each circle. Lightly moisten the edges with water, fold the dough in half, and press the edges together with your fingers. Then press along the edges with a fork to seal the pies. Don’t add too much filling, or it’ll start leaking out during baking.
Now let’s add a few Halloween details. You can make small cuts shaped like eyes and a smile on top of the pies, similar to jack-o’-lantern faces. I use the tip of a small sharp knife for this. The cuts should be wide enough for the design to stay visible after baking, but not so big that the filling falls out.
- Brush and bake. Place the hand pies on a baking sheet lined with parchment paper. Beat the egg with the milk and brush the surface of each pie. Sprinkle coarse sugar on top. Put the baking sheet in the fridge for 10–15 minutes, then bake for about 20–25 minutes, until the pastry turns golden.
If a little filling shows through the cuts, that’s fine. The main thing is that the edges stay sealed. - Cool before serving. Transfer the finished pies to a wire rack and let them sit for about 15 minutes. The filling inside is very hot, so don’t try them right away. During this time, the apple juices will thicken a little, and the crust will keep its nice crunch.
I use apples from the fall harvest for this kind of baking. On our homestead, we try to find a use for even small amounts of fruit we’ve harvested, and these hand pies are perfect for that. You don’t need large, perfect-looking apples since we’re cutting them into small pieces anyway.
I arrange the finished hand pies on a wooden board and put a small bowl of extra apple filling next to them if there’s any left after cooking. The combination of cinnamon, baked apples, and buttery pastry is pretty simple, but desserts like these are often the first to disappear. And the little Halloween faces on the crust usually bring some smiles and extra fun.
9. Black Cocoa Cheesecake Cauldrons
Mini black cocoa cheesecakes look like little witch’s cauldrons filled with green potion. Inside, they have a soft chocolate filling made with cream cheese, a crunchy chocolate cookie crust at the bottom, and green cream on top with bubbles made from candy decorations.
The main ingredient here is black cocoa powder, which is different from regular cocoa powder because of its very dark color and mild chocolate flavor. This cocoa goes through a more intensive alkalization process, so the cheesecakes turn out almost black without adding a lot of food coloring.
For our cauldrons, we’ll use a muffin pan with paper liners. Each serving will be its own dessert, and little chocolate handles will make them look even more like real witch’s cauldrons.
Ingredients
Makes 12 mini cheesecakes.
The chocolate crust
- 1¼ cups chocolate cookie crumbs (about 130 g)
- 3 tbsp butter, melted (42 g)
The cheesecake
- 12 oz cream cheese (340 g), at room temperature
- ½ cup sugar (100 g)
- 2 large eggs
- ¼ cup sour cream (60 g)
- 3 tbsp black cocoa powder (about 18 g)
- 1 tsp vanilla extract
- A pinch of salt
The green cream and decorations
- ½ cup heavy whipping cream (120 ml)
- 2 tbsp powdered sugar
- A few drops of green food coloring
- 2 oz dark chocolate (55 g) for the handles
- 2 tbsp green candy pearls for the bubbles
How to make chocolate cheesecake cauldrons
- Prepare the crust. Preheat the oven to 325°F (165°C). Crush the chocolate cookies into fine crumbs and mix them with the melted butter. Place black paper liners in a 12-cup muffin pan and divide the cookie mixture between them, about one heaping tablespoon per liner. Press it down with the bottom of a small glass or a spoon. Bake for 5 minutes and let cool slightly.
- Make the chocolate filling. In a large bowl, beat the cream cheese and sugar until smooth. Add the sour cream, vanilla, salt, and sifted black cocoa powder. Mix until the color is even. Then add the eggs one at a time, mixing on low speed after each one.
I try not to beat the mixture for too long after adding the eggs. Too much air can cause the cheesecakes to rise in the oven and then crack as they cool.
For this recipe, you’ll need black cocoa powder, not regular dark cocoa powder. It gives the filling a very dark color, so we won’t need to add black food coloring.
- Bake the mini cheesecakes. Divide the chocolate mixture between the prepared liners, filling them about ¾ full. Bake for 18–22 minutes. The edges should be set, while the centers may still jiggle slightly when you gently move the pan.
Turn off the oven, leave the door slightly open, and let the cheesecakes sit inside for 10 minutes. Then let them cool completely and refrigerate for at least 3 hours.
Now let’s work on the decorations. To make the cheesecakes look like cauldrons, we’ll need black handles on the sides and green cream on top. It’s better to make the handles ahead of time while the desserts are chilling. We’ll add the cream closer to serving so it holds its shape.
- Make the chocolate handles. Melt the dark chocolate and transfer it to a piping bag with a fine tip. On a sheet of parchment paper, pipe small upside-down U-shaped arches about ¾ inch (2 cm) tall. Each cauldron will need two handles. Make the lines thick enough so the chocolate doesn’t break. Refrigerate the decorations for 10–15 minutes until completely set.
- Whip the green cream. Whip the cold heavy cream with the powdered sugar until soft peaks form, then add a few drops of green food coloring and keep whipping until stiff peaks form.
I add the coloring gradually because a few drops are usually enough for a bright shade. Transfer the cream to a piping bag fitted with a round tip. - Assemble the witch’s cauldrons. Take the chilled cheesecakes out of the fridge and leave them in their black paper liners. Pipe the green cream on top of each one so it rises slightly above the edge.
Then carefully attach two chocolate handles on opposite sides, inserting their bottom ends into the cream near the edge of the cheesecake. Finish with green candy pearls to look like bubbles in a boiling potion.
You need to be careful with the chocolate handles. I usually make a few extras because thin chocolate pieces break easily. And I leave the paper liners on the cheesecakes until serving because they help hold the shape and create the dark sides of our cauldrons.
I arrange these mini cheesecakes on a large serving tray, alternating them with other small desserts. You can make the cheesecakes themselves the day before the party and add the decorations right before serving.
Under the green cream, there’s a real chocolate cheesecake with a soft filling, a pretty rich chocolate flavor, and a crunchy cookie crust. Delicious and unusual!
10. Midnight Mocha Brownie Bites
These brownies get their name, “Midnight,” from their almost black color, thanks to dark chocolate and black cocoa powder. The silver sprinkles on the frosting look like stars in the night sky. And the espresso added to the batter makes the chocolate flavor richer. We’ll bake the brownies in small molds so they’re just one or two bites each.
Ingredients
Makes 24 mini brownies.
For the batter
- ½ cup butter (113 g)
- 5 oz dark chocolate (140 g), with 60–70% cocoa content
- ¾ cup sugar (150 g)
- 2 large eggs
- ½ cup all-purpose flour (65 g)
- 2 tbsp black cocoa powder (12 g)
- 1 tbsp instant espresso powder
- 1 tsp vanilla extract
- ¼ tsp salt
For the chocolate frosting
- 3 oz dark chocolate (85 g)
- ¼ cup heavy cream (60 ml)
- 1 tsp butter (5 g)
- 1–2 tbsp edible silver sprinkles
How to make midnight mocha brownie bites
- Melt the chocolate and butter. Preheat the oven to 350°F (175°C). Combine the butter and finely chopped chocolate in a heatproof bowl. Melt over a double boiler or in the microwave in short intervals, stirring until smooth. Add the instant espresso powder, stir well, and let the mixture cool slightly.
- Make the batter. In a separate bowl, combine the eggs and sugar. Whisk for about a minute until the mixture is smooth and a little lighter in color. Pour in the warm chocolate mixture and add the vanilla. Then sift in the flour, black cocoa powder, and salt.
Gently fold everything together with a spatula until no dry spots remain. Don’t overmix the batter after adding the flour, or the brownies will turn out denser and chewier than we want.
For this recipe, I use a 24-cup mini muffin pan. It helps all the brownies come out about the same size and bake evenly.
- Bake the mini brownies. Lightly grease the muffin cups with butter or use small paper liners. Divide the batter between the cups, filling each about ⅔ full.
Bake for 11–14 minutes. The edges should be set, while the centers should still be a little soft. Check with a wooden toothpick. It should come out with moist chocolate crumbs, but no raw batter.
There’s one thing about brownies that people often forget. They keep cooking for a few minutes after you take them out of the oven, while the pan is still hot. That’s why I don’t wait until the toothpick comes out completely dry. Otherwise, instead of soft chocolate centers, you’ll end up with little dry cakes.
- Cool the brownies. Leave them in the pan for about 10 minutes, then carefully remove them and transfer them to a wire rack. If the brownies stick a little around the edges, gently run a thin knife along the sides. They need to cool completely before adding the frosting, or the chocolate will start running down the sides.
- Make the chocolate frosting. Heat the cream until it’s almost boiling and pour it over the finely chopped dark chocolate. Let it sit for a minute, then stir until smooth. Add the butter for a glossy finish. Let the frosting thicken a little so it slowly drips from a spoon instead of spreading everywhere.
- Decorate the brownies. Spoon about a teaspoon of chocolate frosting onto each cooled brownie and spread it into a small circle, stopping just before the edges. While the chocolate is still soft, add a few silver sugar stars.
I try not to cover the whole surface. Even a few shiny decorations stand out nicely against the dark chocolate. Let the frosting set at room temperature or put the brownies in the fridge for a little while.
For this recipe, it’s important not to confuse black cocoa powder with regular cocoa powder. Black cocoa goes through a more intensive alkalization process, which makes its color much darker. It’s also less acidic than natural cocoa powder, making it a good choice for our batter, which doesn’t use baking soda.
I usually make the brownies the day before the party and add the frosting and decorations right before serving. Overnight, the chocolate centers become firmer but stay moist. The main thing is not to overbake them. Our family loves chocolate treats, so I always set aside a few mini brownies for the next day. Otherwise, there probably won’t be any left by morning.
Your dessert
And that’s all ten ideas! I enjoyed putting together recipes with different cooking methods and decorations in one collection. Some take a little patience, especially when working with chocolate and caramel, while others are easy enough to make with kids.
I don’t worry when the chocolate figures or designs on the baked treats don’t turn out completely perfect. We’re cooking at home, not competing in a pastry contest!
What are you planning to make for Halloween? Which of these ten desserts did you like the most? Or maybe you have your own family recipe? Share it in the comments. I’d love to read your ideas and find out what other families are making for the holiday.