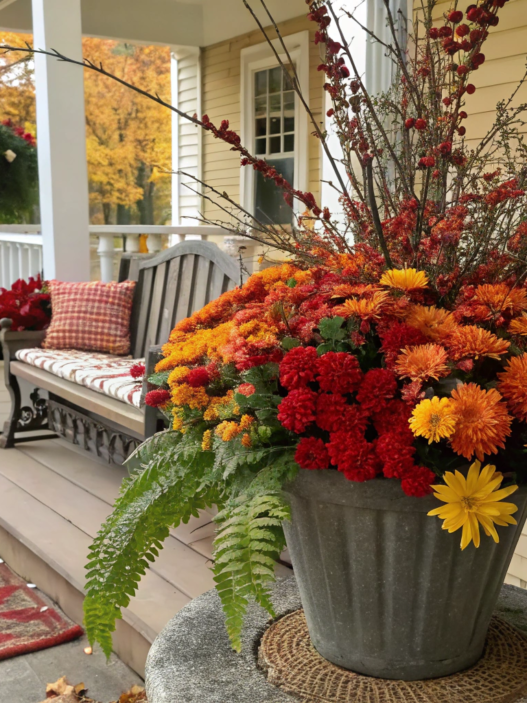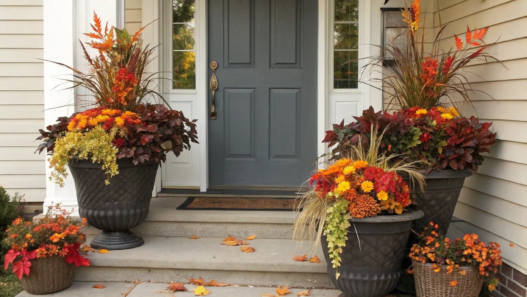
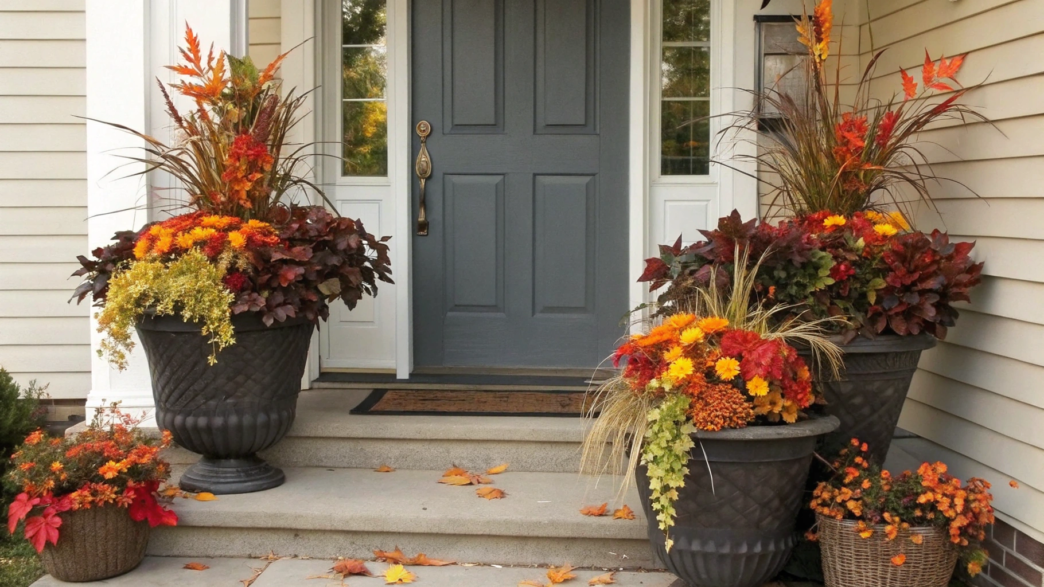
Fall outdoor planters by the front door and on a small porch don’t have to take up much space or include dozens of different plants. One large mum, a few branches, or a low bowl with dried flowers can be enough. And if space is really tight, you can move the arrangement higher and use a hanging basket.
That’s why I always look at how much space I actually have on the porch, how much light the plants get, and how much care I’m ready to give them. Only then do I choose the planter itself and what goes inside it.
Here are 10 Fall Outdoor Planter Ideas for Modern Doors and Small Porches that you can recreate on your own porch. I’ll show you what you’ll need and how to put everything together without adding unnecessary decor.
1. Modern Front Door Planter
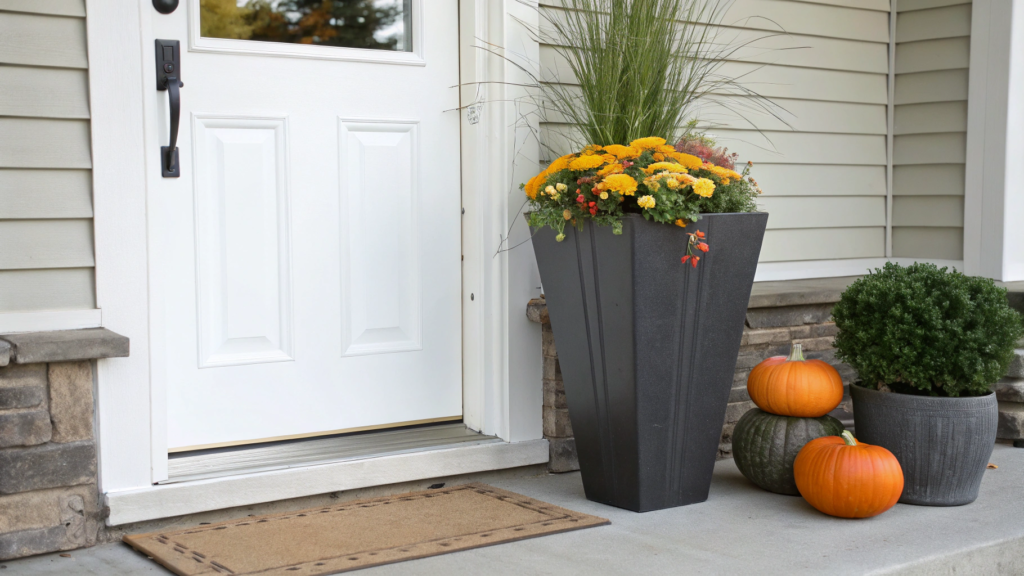
You can create a fall arrangement for a modern front door with just a few details. Instead of using a lot of decor, I go with one tall planter, one large mum, and a few small pumpkins. On a small porch, that’s already enough.
You’ll probably agree that the more pots, baskets, and seasonal decorations you put by the entrance, the less porch space you have left! So it’s better to keep one larger arrangement by the door instead of putting together ten small ones.
For this idea, use a tall matte planter about 20–24 inches (51–61 cm) high. Black, graphite, or dark gray looks especially good next to a white, wooden, or black door.
What you’ll need
- 1 tall planter, about 20–24 inches (51–61 cm) high;
- 1 large mum in a pot about 10–12 inches (25–30 cm) in diameter;
- 2–3 small pumpkins in different sizes;
- potting soil if you’re transplanting the mum directly into the planter.
How to put the arrangement together
1. Place the planter beside the door
Start by placing the planter on one side of the door, leaving enough room for the door to open fully and so no one brushes against the plant when walking past. On a small porch, you usually don’t need a second matching planter.
2. Place the mum in the planter
Transplant the mum into the planter, or simply place it inside while keeping it in its plastic nursery pot if the size works. It’s better to choose a plant with plenty of buds rather than one already completely covered in open flowers. This way, the arrangement will keep changing as more flowers open.
3. Arrange the pumpkins at the base
Place two or three small pumpkins around the base. There’s no need to space them evenly around the planter. You can put two close together and one a little farther away — it looks more natural that way.
4. Keep the palette to two shades
It’s better to stick to two main shades. For example, pair white mums with green and cream pumpkins, or dark burgundy mums with pale pumpkins. You can use orange too, but you definitely don’t need it for the entrance to feel like fall.
Tip. Don’t completely cover the soil with pumpkins. A live mum still needs easy access for watering, because plants in containers can dry out noticeably faster than plants growing in the ground.
Lindy always makes sure extra decor doesn’t get in the way of walking through the porch or taking care of the plants. That’s why, on a small porch, one large planter with a mum and a few pumpkins at the base is much more practical than several separate pots. Everything is easy to water, the pumpkins can be replaced quickly, and there’s still plenty of room around the door.
2. Artificial Fall Planter With Faux Mums
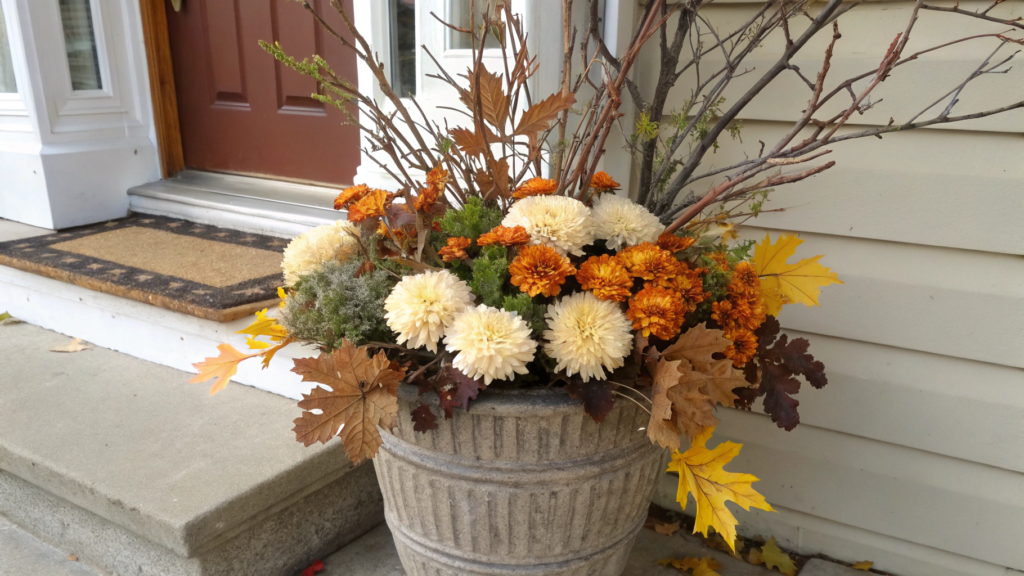
Live mums by the door look great, but in fall they can take quite a bit of work. The soil in containers dries out quickly, the flowers need to be checked and watered regularly, and after a few cold nights the plant may already look very different from the day you bought it. So you can place an artificial fall planter with faux mums on the porch instead.
But you still need to know when to stop and not try to fill the planter with ten different faux plants. Personally, I always choose mums in one color, a little greenery, and a few branches with fall leaves. That’s more than enough for a tall planter, and it looks great too.
What you’ll need
- 1 planter about 18–22 inches (46–56 cm) tall;
- 10–14 faux mum stems for outdoor use, for example, AXYLEX Artificial Fall Flowers Outdoor Fake Mums;
- 3–5 faux greenery stems;
- 2–3 branches with fall leaves about 24–30 inches (61–76 cm) tall;
- a floral foam block or another dense filler that will hold the stems inside the planter;
- a few small rocks to weigh down the planter if it’s very light.
For outdoor use, look for mums that the manufacturer specifically lists as suitable for outdoor use. They usually handle sun and rain better, although I still don’t leave them anywhere water is constantly pouring directly into the planter.
How to put the arrangement together
1. Weigh down the planter first
If the planter is plastic and barely weighs anything, place a few rocks or another heavy filler at the bottom. On a porch protected by walls or a roof, a lightweight planter will usually stay stable. But if the area is exposed and gets strong wind, it’s better to add weight to the base right away.
2. Secure the base for the stems
Place a dense floral foam block or another filler near the top of the planter so it can hold the stems in position. It should fit tightly and not turn or shift inside the planter. If the base moves, the branches can start leaning in different directions after a few days, and the arrangement quickly loses its shape.
3. Arrange the mums first
Start with the faux mums, since they take up most of the volume. Don’t place all the stems in an even circle at exactly the same distance from one another. On a real mum plant, the flowers naturally sit at different heights, so a few blooms can sit higher while others stay closer to the edges of the planter. This makes the arrangement look fuller and less like a bouquet simply pushed into a pot.
4. Fill the gaps with greenery
If there are empty spaces between the mums, add 3–5 greenery stems there. You don’t need to cover every gap — just hide the floral base and break up the solid mass of flowers a little. If you add too much greenery, the mums stop being the main element.
5. Add the branches with fall leaves
Add the branches with fall leaves last, closer to the back of the planter. They should rise about 8–12 inches (20–30 cm) above the mums so the arrangement has more height without turning into an oversized bouquet. Before you finish, step back a few feet and look at the planter from the same direction people usually see it when approaching the door. Adjust the branches if needed.
The faux mums, greenery, and branches with fall leaves can be taken out of the planter, packed carefully into a box, and used again the following year. If they store well and you still like them, they can be reused again and again. The planter itself can stay in use year-round — only what goes inside it changes.
3. Low Maintenance Hanging Fall Planter
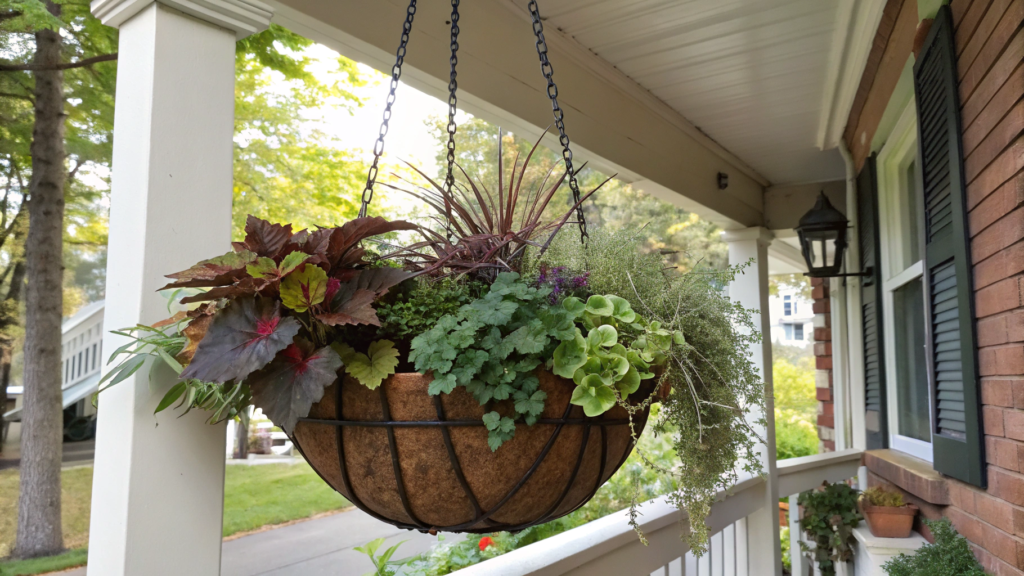
Hanging baskets often make me think of summer petunias that need water almost every day in hot weather. In fall, you can go in a completely different direction and choose heuchera, sedum, and a small ornamental sedge. All three have attractive foliage, look good without constantly removing faded flowers, and later they can be taken out of the basket and planted in the ground.
On a small porch, a hanging basket doesn’t take up any floor space at all. Just don’t make it too large. A basket about 14–16 inches (36–41 cm) in diameter is enough for a few plants and a good amount of soil.
What you’ll need
- 1 hanging basket about 14–16 inches (36–41 cm) in diameter;
- 1 small ornamental sedge;
- 1 heuchera with burgundy, caramel, or yellow-green leaves;
- 2 small sedums, preferably with stems that will gradually trail a little over the edge;
- quality potting soil for container plants;
- a little fine bark or other plant material to cover the soil surface.
The plants won’t crowd each other right away, and after a few weeks the foliage and stems will gradually fill the open spaces.
If the basket has been sitting in the shed for a few years, check the chain, hook, and attachment points first. The soil becomes much heavier after watering, so older hardware is still worth checking.
How to plant it
1. Start with the sedge
Plant the small ornamental sedge closer to the back or slightly off-center. Its narrow leaves add height to the arrangement without taking up too much space. One plant is enough here.
2. Plant the heuchera
Place the heuchera in front of the sedge, slightly off to one side. It will provide the main area of color through its foliage, since burgundy, caramel, and yellow-green varieties stay noticeable even without flowers.
We always use heucheras mainly for their foliage. In fall, when many flowering plants are already finishing their bloom, they still keep their full shape and rich leaf color.
3. Plant two sedums near the edges
Place the sedums closer to the outer edge of the basket, on opposite sides of the heuchera. Over time, some of the stems will start to trail down and partly cover the coco liner. Two plants are enough to fill the lower part of the arrangement without turning the basket into a dense mass of greenery.
4. Don’t fill the basket with soil all the way to the top
After planting, leave about 1 inch (2.5 cm) below the top edge. This keeps water from immediately carrying soil over the rim when you water. You can cover the surface with a thin layer of fine bark to help slow down drying at the top.
5. Hang the basket where it’s easy to water
Even plants with moderate water needs can’t simply be hung up and forgotten until November. Hanging containers lose moisture faster than garden beds, especially in windy spots. Check the soil with your finger and water when the top 1–2 inches (2.5–5 cm) feel dry. In fall, this usually needs to be done much less often than in summer.
This hanging fall planter doesn’t look like temporary decor for just a couple of weeks. You don’t need to keep moving it around or adding things to it — just keep an eye on the soil moisture and remove dry leaves from time to time. For an entry area, I think this is one of the most practical options.
4. Small Porch Harvest Planter
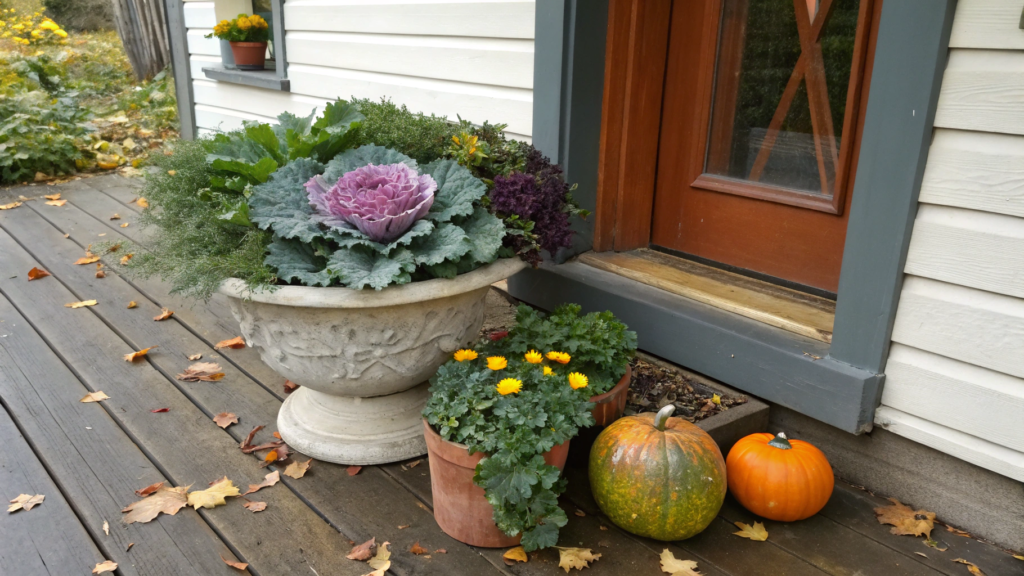
For a fall planter, you don’t need to buy separate decor or put a huge bale of hay and ten pumpkins by the door. A low, wide planter, ornamental cabbage, Swiss chard, and a few small pumpkins already give you what you need for a harvest-themed arrangement, especially when space by the door is limited.
Our neighbor always helps us out by giving us small pumpkins from her harvest. We grow pumpkins too, but ours are larger and don’t work as well for arrangements like this.
What you’ll need
- 1 wide planter about 14–16 inches (36–41 cm) in diameter;
- 1 ornamental cabbage;
- 1 small Swiss chard with bright stems;
- 2–3 mini pumpkins about 3–5 inches (8–13 cm) in diameter;
- potting soil for container plants;
- a little fine bark for the soil surface.
How to put the arrangement together
1. Plant the Swiss chard closer to the back
The Swiss chard is mainly there for height and its bright stems. One plant is enough. Plant it a little closer to the back edge so the broad leaves don’t cover the other parts of the arrangement. Varieties with red, yellow, or orange stalks look especially good in a planter.
2. Place the ornamental cabbage in front
Plant the ornamental cabbage closer to the front of the planter, slightly off-center. Its large rosette takes up a significant part of the surface right away, so there’s no need for a second plant of the same size.
When many flowers are already finishing their bloom, cabbage and Swiss chard still look bright because of their leaves and stems, and I always try to make use of that.
3. Leave room for the small pumpkins
After planting, leave a little open space near the front edge of the planter for the pumpkins. Place two or three mini pumpkins there. There’s no need to press them into the soil or cover them with dirt. Just set them on top so the fruit stays dry.
The pumpkins can be different shapes, but you don’t need too many colors in one small planter. For example, two cream pumpkins and one green one usually look neater than five completely different varieties.
4. Cover the exposed soil with a thin layer of bark
Where the soil is still visible, you can sprinkle on a little fine bark. Keep the layer thin so it doesn’t cover the bases of the plants. It also helps keep soil from splashing onto the pumpkins and the edge of the planter when you water.
5. Place the arrangement where it gets some light
Don’t push the planter into the darkest corner of the porch. Both Swiss chard and ornamental cabbage need light, so choose a spot that gets sun for at least part of the day. Water as the soil starts to dry, and try not to pour water directly onto the pumpkins resting on top.
I think it’s a good idea when porch decor connects with the harvest. Swiss chard, cabbage, and small pumpkins fit this kind of arrangement much better than a random mix of decorations. And if some of the pumpkins came from your own garden or from a neighbor, like ours once did, the planter feels completely different.
5. Faux Mum and Pumpkin Planter
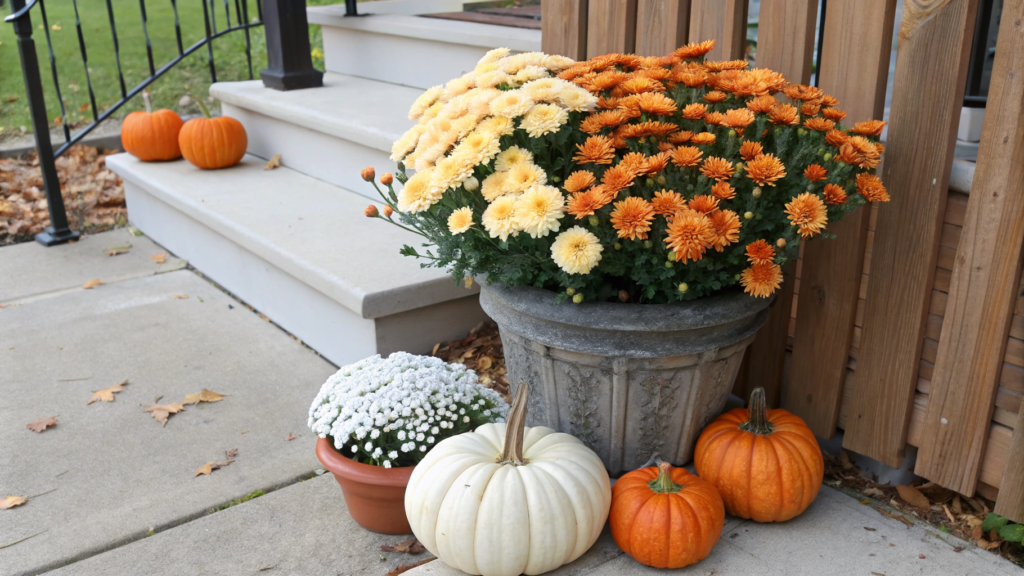
Faux mums and small pumpkins are one of the simplest ways to create a fall-style planter for the porch. There’s no need to mix lots of different branches and flowers. The mums create most of the volume, while the pumpkins bring in the fall feel the whole arrangement is meant to have.
Faux mums don’t need any care, and the pumpkins can be replaced if one starts to go bad. It’s all pretty simple, as you can see.
What you’ll need
- 1 planter about 14–16 inches (36–41 cm) in diameter;
- 12–16 stems of faux mums made for outdoor use;
- 2–3 small pumpkins about 3–5 inches (8–13 cm) in diameter;
- dense filler to hold the faux stems in place;
- a few rocks to weigh down the planter if it’s lightweight.
For outdoor use, choose faux flowers that the manufacturer specifically marks for outdoor use and UV resistance. Even those materials can fade over time in strong sun, so they shouldn’t be considered completely unaffected by the weather.
How to put the arrangement together
1. Prepare the planter
If the planter is lightweight, place a few rocks at the bottom first. Faux flowers weigh almost nothing, but a large, dense top can make a tall container less stable in the wind. Secure the filler for the stems so it doesn’t shift inside.
2. Build the main shape with the mums
Insert the faux mums in small groups, gradually filling the planter. There’s no need to keep the same distance between every stem. On a real mum plant, some flowers sit closer together while others extend a little farther forward or to the sides, so a slight difference in height helps here.
Start with a few stems in the center, then add the rest around the edges. Step back a few feet from time to time — it’s easier to notice empty spots than when you’re looking down at the planter the whole time.
3. Keep the front of the arrangement open
Move the mums slightly toward the back and sides so the front of the planter stays clearly visible. Don’t bring the flowers too low at the front — the pumpkins will go on the porch at the base of the planter.
4. Arrange the pumpkins around the planter
Place two or three small pumpkins directly in front of the planter or slightly to one side. One can sit closer to the planter, with the other two nearby at a little distance. There’s no need to line them up evenly.
For this arrangement, two main shades are enough. For example, orange mums can be paired with cream or green pumpkins, while burgundy mums work with lighter pumpkins.
5. Look at the planter from a distance
When you think everything is finished, step back a few feet and look at the arrangement. If the mums feel unevenly distributed, adjust a few stems. There’s definitely no need to add another type of faux flower just to fill space.
This arrangement adds a little fall color to the porch or near the steps. Faux mums don’t need watering and keep a neat look longer, while real pumpkins keep the whole arrangement from looking completely artificial. It can stay in place for quite a while and work in different spots around the porch.
6. Three Element Outdoor Fall Planter
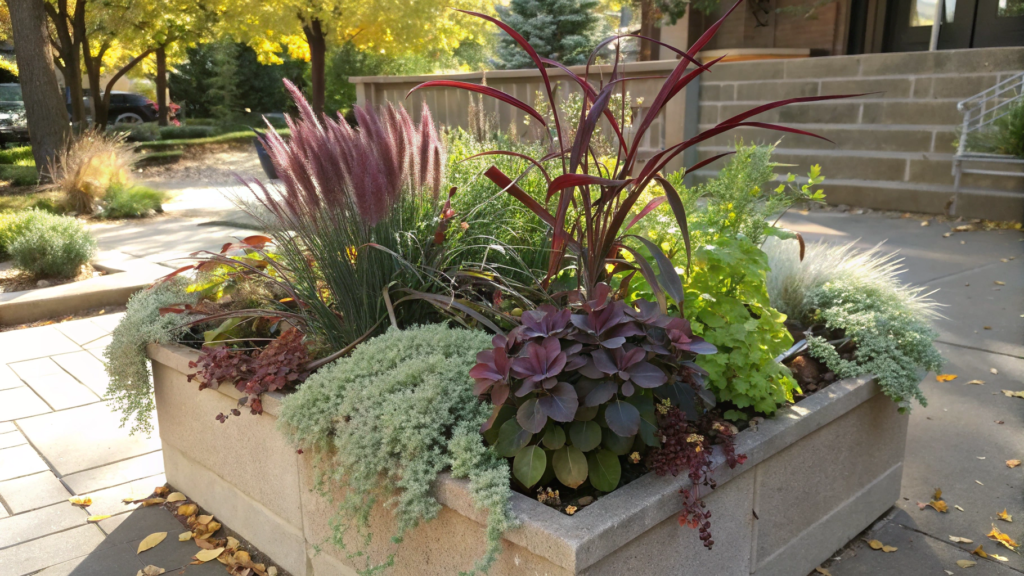
You don’t need to fill one planter with lots of different plants. Here, there are only three — purple millet, purslane, and sedum. The millet adds height, the purslane brings color closer to the edge, and the sedum fills the lower part of the arrangement.
This combination works in a sunny spot or partial shade and is also suitable for fall.
What you’ll need
- 1 planter about 12 inches (30 cm) in diameter with drainage holes;
- 1 purple millet;
- 1 purslane;
- 1 sedum;
- potting soil for container plants.
How to plant it
1. Plant the purple millet first
Millet is the tallest plant in this arrangement, so place it closer to the back of the planter. If the container will be visible from all sides, you can move the millet a little closer to the center. The main thing is to leave enough room in front for the two shorter plants.
Plant it at the same depth it was growing in its nursery pot. After planting, gently firm the soil around the root ball and make sure the plant is standing upright.
2. Place the purslane closer to the edge
Plant the purslane in front of the millet, closer to one side of the planter. It stays much lower and gradually spreads outward, so it doesn’t need to sit in the center of the arrangement. Over time, some of the stems may trail slightly over the edge of the container.
After planting, simply straighten the stems if they’re tangled or pressed together. From there, the purslane will naturally grow toward the edge of the planter. Let the stems lie freely in the direction they’re already growing.
3. Plant the sedum on the other side
Place the sedum in the remaining space near the front edge of the planter. It stays lower than the millet and gradually spreads outward, filling the space around it. In this arrangement, it sits between the taller grass and the edge of the container.
There’s no need to plant the purslane and sedum right up against each other. Leave a little open soil between them — as they grow, they’ll gradually take up more space on their own.
4. Water well after planting
Once all three plants are in place, add soil to the remaining gaps and gently press it down with your hands. Don’t cover the bases of the plants above their previous planting level.
Then water the planter well and let the excess water drain through the drainage holes. After that, place the container in a sunny spot or partial shade — those are the conditions this combination needs.
Around our homestead, we try not to overcrowd plantings without a reason, and we don’t treat plants as just seasonal decoration. We see them as a living part of the space around the house. We’d much rather watch a few well-chosen plants gradually grow and change the arrangement on their own.
7. Matte Black Urn With Faux Branches
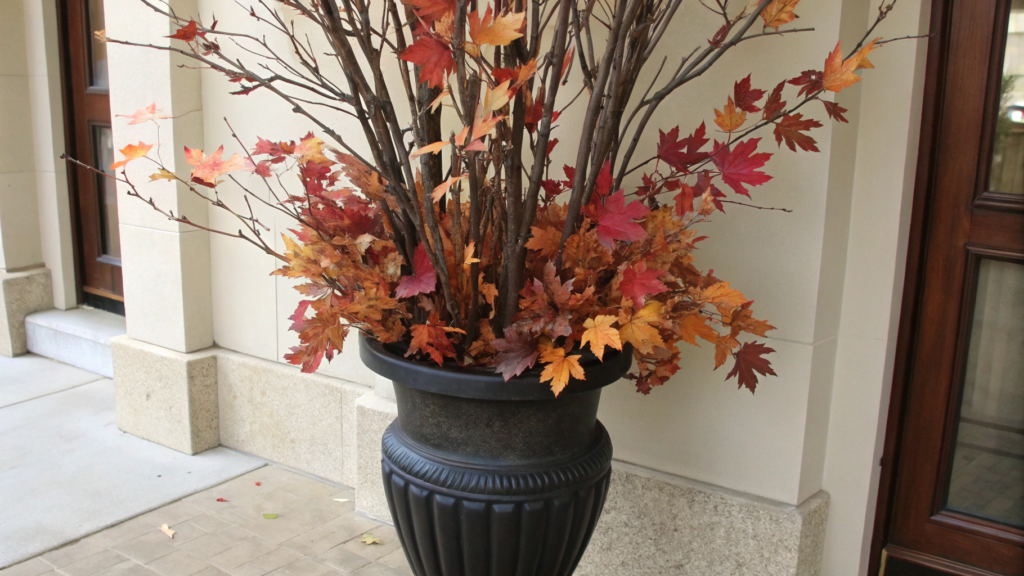
A matte black urn with tall faux branches covered in fall leaves is a very different kind of fall planter. There are no flowers, pumpkins, or layers of plants here. The branches are the main feature, so the arrangement stays tall and takes up very little space around the planter.
The black urn keeps the base neutral, while the leaves bring in fall shades like burgundy, copper, orange, or deep red.
What you’ll need
- 1 matte black urn for outdoor use;
- 5–7 faux branches with fall leaves;
- dense filler that can hold the stems in place;
- rocks or another heavy material for the bottom if the urn is lightweight.
For outdoor use, choose faux branches that the manufacturer specifically says are suitable for outdoor use. If they’re designed only for indoor use or a covered porch, don’t leave them out in the rain or constant direct sun.
How to put the arrangement together
1. Prepare the urn first
If the urn is lightweight, place a few rocks at the bottom. Tall branches increase the overall height of the arrangement, so the base needs to stay stable.
Place dense filler for the stems near the top and secure it well inside the urn. The branches shouldn’t move around freely every time the wind catches them.
2. Start with the tallest branches
Begin with two or three of the longest branches. Keep one almost upright and angle the others slightly to the sides. There’s no need to gather them into one straight bunch, since real branches naturally point in slightly different directions.
At this stage, step back and look at the arrangement from the front. The tallest branches determine most of its overall shape, and adjusting them later becomes harder once the rest are in place.
3. Add the remaining branches lower down
Place the rest of the branches around the ones already in the urn, but slightly lower. They’ll fill the middle of the arrangement and hide part of the stems.
Don’t line them up at the same height or point them all in the same direction. Let some angle outward while a few stay closer to the center — this makes the arrangement look more natural.
4. Adjust the leaves
After storage, faux branches often stay pressed together. Gently spread out the leaves and turn the smaller branches so they don’t sit in one flat mass.
Then step back a few feet and look at the arrangement again. If most of the leaves are gathered at the top, lower one or two branches slightly.
5. Choose the right spot for the urn
A tall arrangement like this can look good against a wall, near the steps, beside the door, or in an open corner of the porch. Just make sure the branches don’t stick into the walkway or interfere with the door opening.
The urn doesn’t have to be used only in fall. Later, you can replace the fall branches with pine or fir branches , add pinecones, and in spring switch them out for fresh greenery or flowering branches. We often use the same good containers for several years and simply change what goes inside.
8. Slim Planter Box With Chartreuse Mums
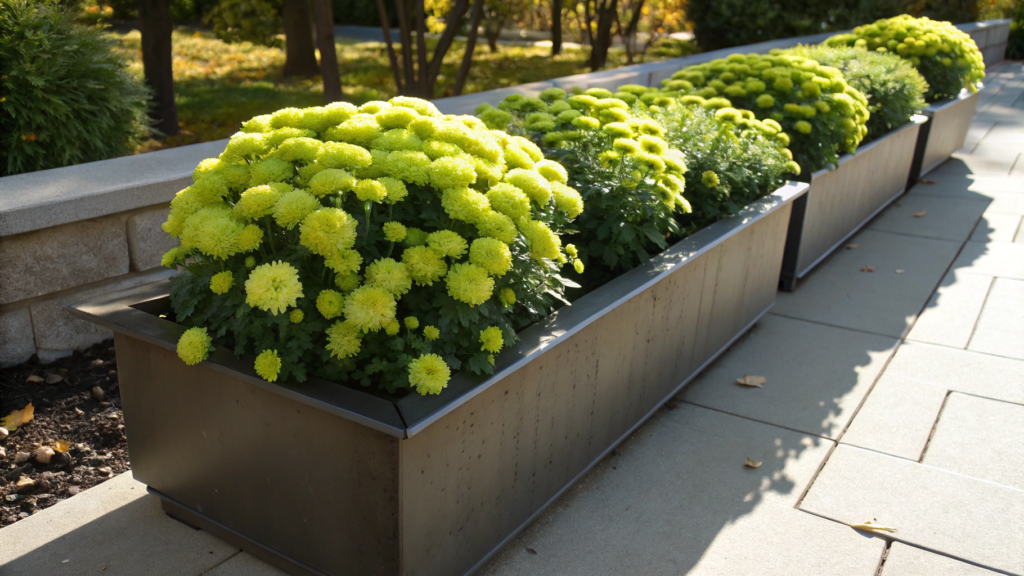
A slim rectangular planter box fits well in places where a regular round planter takes up too much space. In fall, you can fill it with chartreuse mums — their greenish-yellow flowers look noticeably different from the usual burgundy, yellow, and orange varieties.
For this arrangement, look for Key Lime mums. They have the right chartreuse-green flowers, and they bloom from late summer into fall. Just remember that the plant prefers a sunny spot.
What you’ll need
- 1 long slim planter box about 38 × 15 × 16 inches (97 × 38 × 41 cm), for example, Veradek Block Series Long Box Planter, Large;
- 2 Key Lime chartreuse mums;
- potting soil for container plants.
How to plant the mums
1. Check the fit first
Place both mums, still in their nursery pots, inside the planter box and check whether there’s enough room for them side by side. If the plants are already large and the foliage is pressing heavily against each other, it’s better to choose a longer planter box. They shouldn’t already be crowded together on the day you plant them.
2. Plant them at the same depth
Add the soil and transplant the mums. Keep the top of each root ball at roughly the same level it was growing at in its nursery pot. Then fill the space around the roots with soil and gently press it down with your hands.
There’s no need to plant one mum higher than the other just for a decorative effect. The long shape of the planter box already creates a horizontal line, so two plants at the same height look completely natural.
3. Leave a little room below the rim
Don’t fill the soil all the way to the top of the planter box. Leaving a little space below the rim makes it easier to water without washing soil over the edge.
After planting, water the mums well and make sure the excess water drains freely through the drainage holes.
4. Find a sunny spot
Garden mums bloom better in the sun, so don’t push this planter box deep under a dark overhang. The chartreuse color stands out against a dark wall, wooden steps, or a black planter box, but the location should still be chosen based on the amount of light first, and only then on the color of the background.
There are spots on our porch where a wide round planter would simply get in the way or take up too much room near the door. That’s why a long slim planter box solves the problem without reducing the planting itself. And I love that chartreuse mums feel a little unexpected for fall — they immediately stand out among all the usual red and orange tones.
9. Faux Maple Leaf Hanging Basket
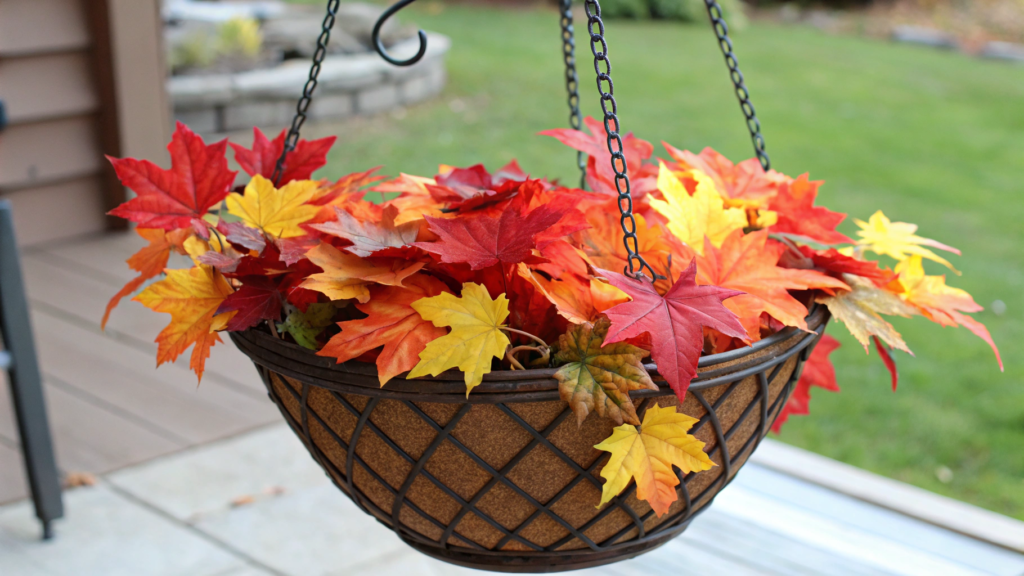
A hanging basket can be styled without any live plants at all. Faux maple leaves bring in the red, orange, and yellow shades you want, and as you can imagine, this arrangement doesn’t need watering.
Because the leaves are up off the floor in a hanging basket, the arrangement doesn’t take up any porch space and is easy to see even from a distance.
What you’ll need
- 1 hanging basket about 14 inches (36 cm) in diameter with a coco liner;
- faux maple leaf branches in red, orange, and yellow shades;
- a dense base to hold the faux stems in place;
- hardware rated for the weight of the basket and everything inside it.
For faux leaves used outdoors, always check the manufacturer’s recommendations. If they’re intended for indoor use only, it’s better to keep the basket under a roof where rain can’t reach it.
How to put the arrangement together
1. Prepare the hanging basket
First, check the basket itself, the chains, and the hook, especially if you’ve been using them for more than a year. Then place the base inside to hold the faux branches in position.
The basket hangs overhead, so secure hardware matters more than trying to make the arrangement as large as possible.
2. Start with a few tall branches
Place two or three of the longest branches in the center first. Angle them slightly in different directions so the arrangement doesn’t look like one straight bunch. Then add the remaining branches one at a time, gradually filling the open spaces.
3. Add branches around the edges
Place the remaining branches lower and closer to the edge of the basket. Some of the leaves can extend slightly past the rim. They help cover the top of the basket and make the transition from the container to the foliage look more natural.
There’s no need to hide the basket completely. Let the coco liner and metal frame stay visible underneath.
4. Spread out the leaves
Faux branches often stay flattened after storage. Gently spread out the leaves and smaller branch sections so they don’t sit in one flat layer.
Then look at the basket from below and slightly from the side. If the leaves are bunched too tightly in one area, separate a couple of branches and adjust their position.
5. Choose a place for the basket
Hang the basket where it won’t block the walkway or interfere with the door opening. If possible, choose a spot under a roof or overhang — the faux leaves will get less wet there and stay neat-looking longer.
In summer, we usually have live flowers growing in our hanging baskets, and in fall I don’t rush to put the baskets away. They can stay part of the porch for a few more weeks, just with different filling. Faux maple leaves make that possible without new planting or extra care.
10. Concrete Bowl With Dried Hydrangeas
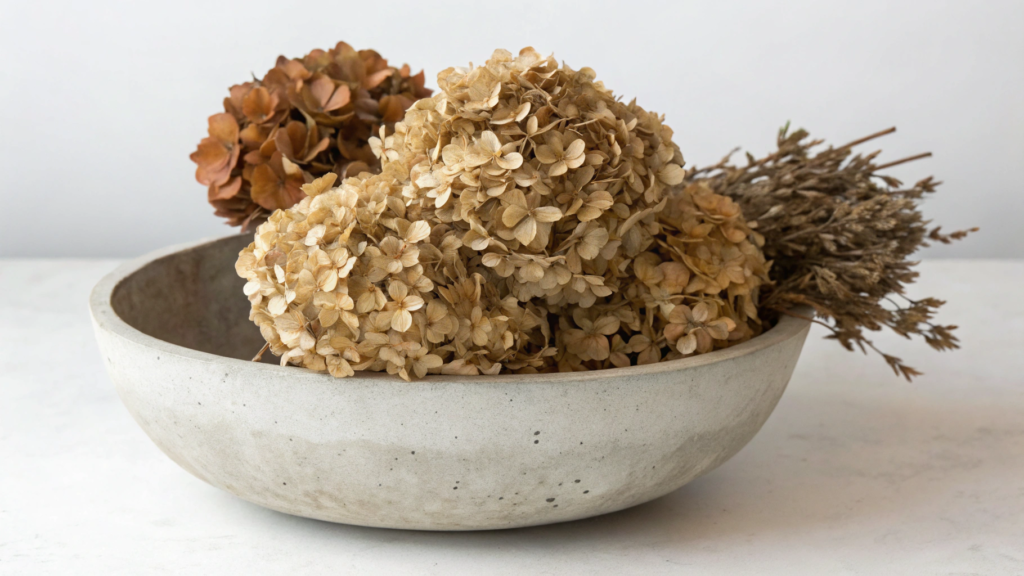
Dried hydrangeas have a very different texture from faux branches or fresh fall flowers. The large flower heads already fill plenty of space on their own, so a low concrete bowl doesn’t need many extra details.
For this arrangement, you’ll need hydrangeas that are already fully dried. After drying, the flower heads feel drier and firmer to the touch, and their color usually becomes a little more muted than when the flowers are fresh.
What you’ll need
- 1 low concrete bowl about 12 inches (30 cm) in diameter;
- 3–5 dried hydrangea flower heads with stems long enough to work with;
- dense dry filler to hold the stems in place.
Keep the finished arrangement somewhere protected from rain and constant dampness. Moisture can damage dried flowers, while direct sun gradually fades the petals.
How to put the arrangement together
1. Secure the base inside the bowl
Place a piece of dry floral foam at the bottom of the bowl and secure it so it doesn’t move with the stems. The base should sit below the rim of the bowl and be completely hidden by the hydrangeas.
Before inserting the flowers, test one flower head and decide how long the stem needs to be. In a low bowl, the hydrangeas shouldn’t stand like a tall bouquet — the flower heads should sit closer to the bowl itself.
2. Place the first hydrangea near the center
Take one large flower head and insert it into the base slightly off-center. If it sits too high, remove the stem and trim it shorter.
Then add the second and third hydrangeas nearby. Try not to push the flower heads through one another — the petals become fragile after drying.
3. Add the remaining flower heads around the edges
If you need a fourth and fifth hydrangea, place them a little lower and closer to the edge of the bowl. Don’t line all the flowers up at the same height. Let one flower head sit slightly forward, another to the side, while the largest stays closer to the middle.
After adding each flower, check whether there are still noticeable gaps. If three large hydrangeas already hide the base and fill the top of the bowl, there’s no need to add two more.
4. Find a dry spot under cover
Place the bowl on a step, bench, or sturdy stand under a roof or overhang, where rain won’t reach the hydrangeas. Keep it slightly away from the main walkway too — dried flower heads can be damaged easily if people keep brushing against them with clothes or bags.
Think of this arrangement as decor for a protected part of the porch, not as a planter that can stay fully exposed outdoors.
Hydrangeas dry well, so I save some flower heads from our own bushes for arrangements like this. After a few weeks in a dry place, they keep their shape and can last much longer indoors or on a protected porch. They do need gentle handling — once dry, the petals become fragile and can start to shed.
Fall changes
As you’ve seen, getting the porch ready for fall doesn’t mean completely redoing it. Usually, it’s enough to look at what you already have and put together one nice arrangement.
Some ideas in this collection need watering, while others require almost no care. Some use live plants, while others work perfectly well with faux branches.
What do you usually put by your door in fall? Live plants, dried branches, or nothing at all? Tell me in the comments — I’d love to see how differently people decorate their porches.