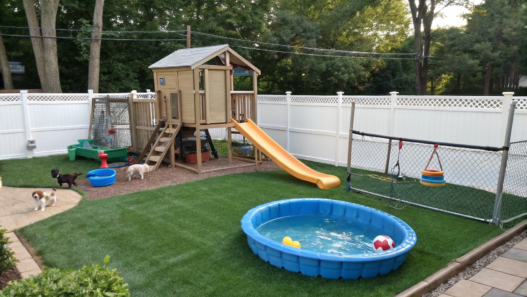
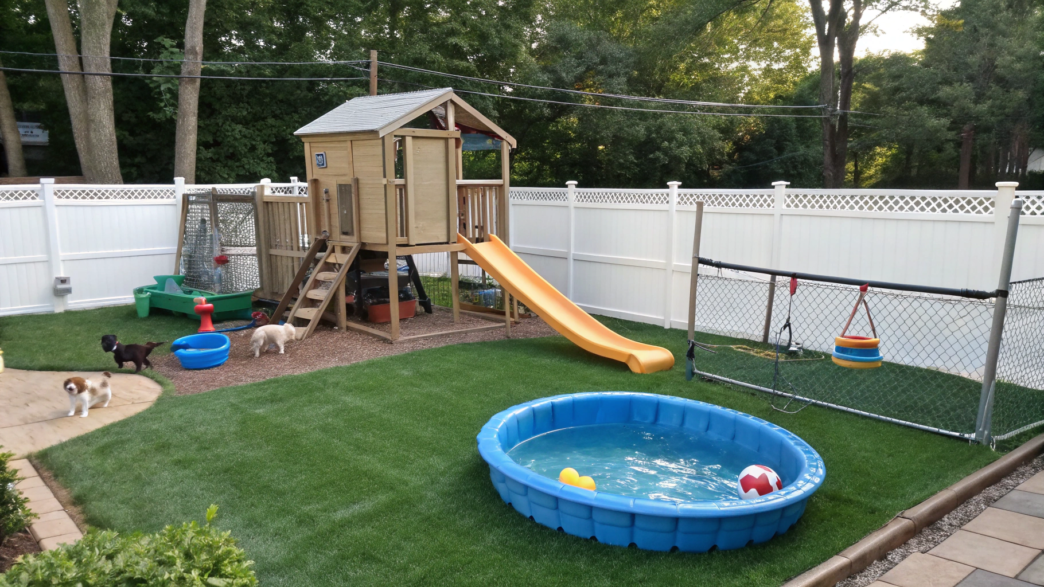
A small yard fills up fast when it needs to fit kids, a dog, a play area, some greenery, and at least a small water zone. Every square foot has to be used wisely, otherwise one large sandbox or pool can suddenly take up half the yard.
It is important to decide what really needs to stay in the yard all the time, what can be folded or put away, and what can serve more than one purpose.
I picked 9 backyard ideas for small yards with kids, dogs, turf, or a pool. Some are very simple solutions, while a few projects will require tools and a free weekend. But they are all designed for the same situation — there is not much space, but you still want to actually enjoy using your yard.
1. Artificial turf play zone
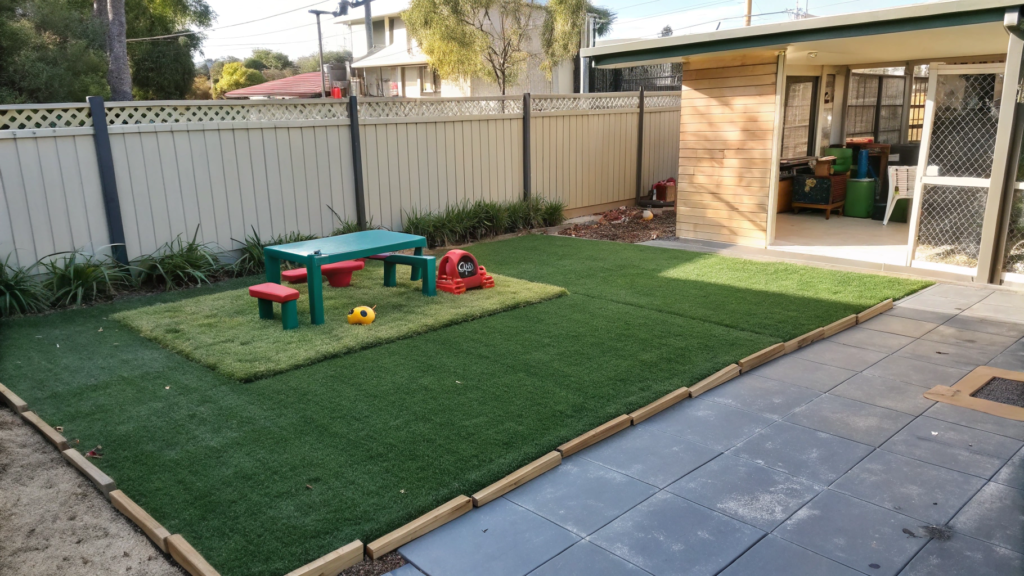
If the yard is small, there is no need to cover the entire space with artificial turf. It makes much more sense to dedicate one specific play zone to it — for example, an 8 × 10 ft (2.4 × 3 m) area near the house. Kids can play barefoot there, set up a small table, or spread out their toys, while the surface can handle active play and dog paws.
In a small yard, it is important to decide in advance what each area will be used for. Not every free square foot needs to become a garden bed or real lawn.
It is also important to remember that artificial turf can get very hot in direct sun. According to research from Pennsylvania State University, the temperature of synthetic turf in summer reached around 129°F (54°C). That is why a play area for kids and dogs is better placed where it gets at least some shade during the day, or under a shade cover.
What you’ll need
For a small area of about 8 × 10 ft, you’ll need
- artificial turf with drainage holes;
- about 3–4 inches (7.5–10 cm) of crushed stone base;
- landscape fabric;
- a tamper;
- a shovel and rake;
- a utility knife for trimming the turf;
- metal or plastic edging;
- galvanized landscape staples about 6 inches (15 cm) long.
How to make an artificial turf play zone
1. Start by marking out the play area. A rectangle is usually the easiest shape for a small yard. There is no need to make it too large. Leave some space nearby for plants, a path, or another functional area.
2. Remove about 3–4 inches of topsoil. Clear out roots, rocks, and anything that could create bumps under the turf later. Then level the base with a slight slope away from the house so water does not collect near the foundation after heavy rain.
3. Next, lay down the landscape fabric and crushed stone base. Level it and compact it well. At this stage it is easy to think, “Well, this is flat enough,” and move on to the turf, but it is better not to rush. Any dip or soft spot will become much more noticeable after kids have been running across the area for a few months.
4. Roll the artificial turf over the prepared base and let it sit for a few hours. Then trim the edges and secure them with staples. Make sure the edges are tucked away or firmly secured so a child or dog cannot catch a foot or paw on a raised corner.
I think it makes sense to keep at least a small area of living plants next to the play zone. Artificial turf creates a durable surface for play, but covering an entire small yard with it can quickly make the space feel too uniform. Even a few shrubs, grasses, or flowering plants nearby can change the way the whole yard feels.
2. Stock tank pool deck
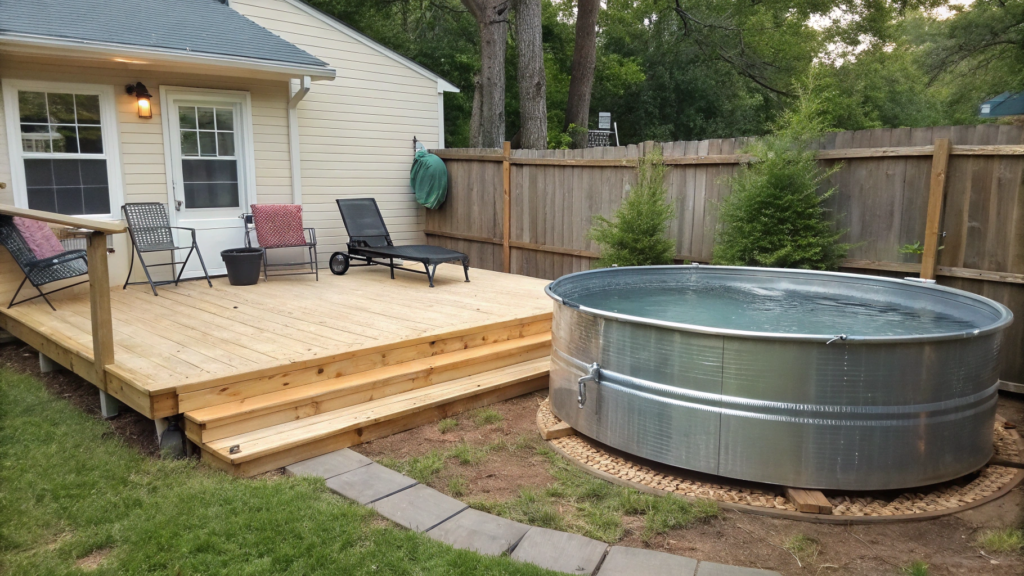
In a small yard, a partial wooden deck next to a metal stock tank pool often looks better than a large deck wrapped all the way around it. A platform on just one side is enough to get in and out of the water comfortably, leave towels, and add a couple of chairs. The pool itself no longer looks like just a metal tank sitting in the middle of the lawn, but instead blends into the yard more naturally.
What you’ll need
For a compact deck, you’ll need
- pressure-treated lumber for the frame;
- deck boards;
- exterior screws;
- concrete blocks or other suitable supports for the frame;
- a tape measure and level;
- a saw;
- sandpaper or a power sander;
- exterior stain or protective deck finish;
- gravel for the open area around the pool;
- a few large planters or plants for nearby planting;
- f needed, a pool step, such as the Confer Plastics Step-1 Above Ground Swimming Pool Ladder.
How to build a deck next to a stock tank pool
1. Build the base and frame. Mark out the area next to the pool, level the supports, and build the frame from pressure-treated lumber. The top of the deck can sit roughly level with the top edge of the pool or slightly lower, leaving a small gap between the wood and the metal wall.
2.Leave access to the equipment from the start. The pump, hoses, and drain should not end up hidden behind the enclosed part of the deck. Plan access before laying the boards so you do not have to take the deck apart later for maintenance.
3. Install the deck boards. Secure them with exterior screws, setting the screw heads flush with the surface. Sand the ends and edges near the pool well, since this is where people will usually be walking barefoot.
4. Finish the surface. After sanding, apply an exterior stain or protective deck finish designed for moisture and outdoor use. A matte or slip-resistant finish is a better choice because the wood around the pool will regularly get wet.
5. Finish the open side of the pool. Add a narrow strip of gravel around the exposed metal wall, then place large planters, ornamental grasses, or perennials a little farther back. Do not plant right up against the pool — leave enough room to reach the wall and access the equipment.
6. Check the whole area before using it. Make sure the boards do not move, the edges are smooth, the screws are not sticking up, and the step or ladder is stable. After that, the deck can work as a small platform for getting into the water, leaving towels, and setting out a couple of chairs.
Lindy and I always try to imagine how the whole setup will look a year later, once everything around it has grown in a little. The combination of decking, gravel, and plants becomes much more noticeable over time — the metal is partly softened and hidden, the area feels less harsh, and the pool no longer looks like a separate object that was simply dropped into the middle of the yard.
3. Sandbox with cover bench
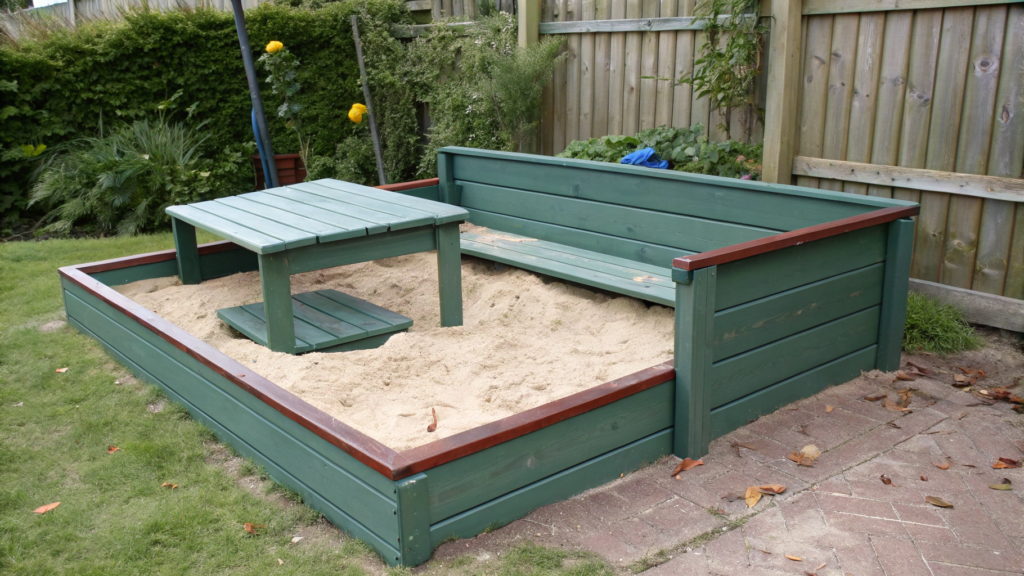
A sandbox can take up quite a bit of space, especially if you also need a separate bench or a large removable cover next to it. This design solves both problems in one structure — the cover folds out into two small benches, and after playtime it closes back over the sand to protect it from leaves, debris, and animals.
I think this kind of setup makes a lot of sense in a small yard. There is no need for a separate bench or a place to store a heavy cover. Everything is already built into the sandbox.
I generally like things that serve more than one purpose. In permaculture, we think the same way all the time — one element should provide several useful functions. The principle is the same here, just in a very simple form.
What you’ll need
For a sandbox about 4 × 6 ft (1.2 × 1.8 m), you’ll need
- 2 2 × 10-inch boards, 6 ft long, for the long sides;
- 2 2 × 10-inch boards, 4 ft long, for the short sides;
- about 12 deck boards, 4 ft long, for the cover, two seats, and backrests;
- 1 2 × 4-inch board, about 12 ft long, for connecting the moving sections and making the supports;
- 8 exterior T-hinges about 4 inches (10 cm) long;
- about 100 exterior screws, 2½ inches (6.4 cm) long;
- 2 handles for the cover;
- landscape fabric for the bottom;
- sand made for children’s sandboxes;
- a tape measure, saw, and drill;
- sandpaper or a power sander;
- a protective finish for outdoor wood.
How to build a sandbox with a bench cover
1. Build a box about 4 × 6 ft. The two 6-foot boards form the long sides, and the two 4-foot boards form the short sides. Join them with exterior screws and check that the box sits level and the corners are square.
2. Prepare the area for the sandbox. Remove the grass, level the ground slightly, and cover the bottom with landscape fabric. Then set the box in place.
3. Lay the cover boards across the sandbox. You’ll need about 12 boards, each 4 ft long. On each side, the first two boards stay fixed in place. The remaining boards form the moving section that turns into the seat and backrest of the bench when opened.
4. Build the two folding benches. Connect the moving boards underneath with short pieces of lumber so each section moves as one piece. Install hinges between the fixed section, the seat, and the backrest. When closed, all the boards should lie flat and cover the sand. When opened, they should fold into two benches along the sides.
5. Add the supports and handles. Short pieces of lumber under the seats and backrests help hold the benches in the correct position. Add a handle to the edge of each half of the cover so it is easier for both kids and adults to open.
6. Finish the wood carefully. Sand the top edges of the box, the seats, the backrests, and every exposed end that kids might touch. Slightly round off sharp corners, then apply a protective finish made for outdoor wood.
7. Test the mechanism before adding the sand. Open and close both halves several times. The hinges should move smoothly, the boards should not catch on each other, and the benches should not wobble. Once everything works properly, fill the sandbox with sand.
After the kids are done playing, the benches fold back down, and the sandbox is covered again from leaves, debris, and animals. There is nothing separate to lift off, carry away, or find storage for until next time.
4. Narrow splash pad strip
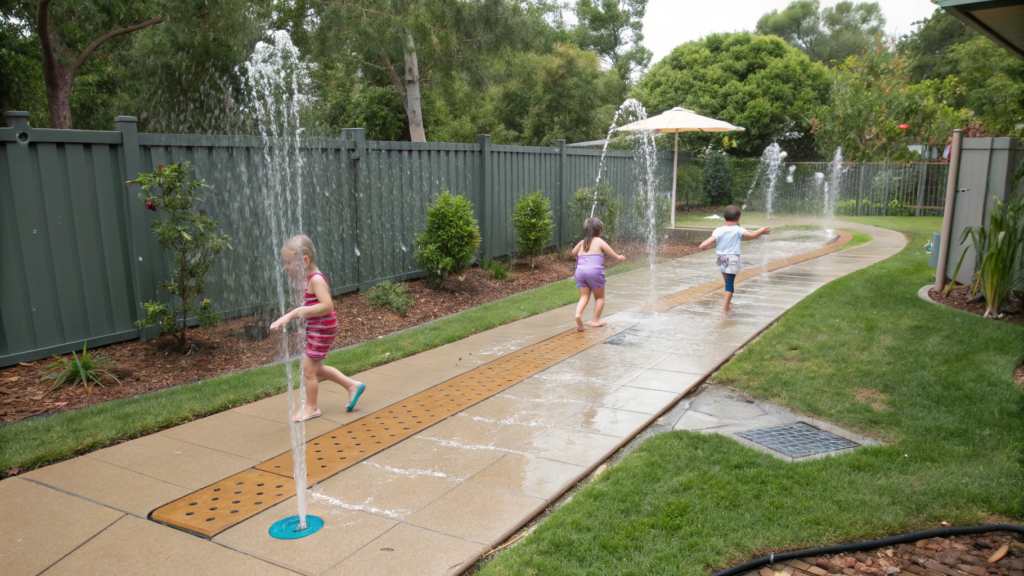
Even a very narrow part of the yard can become a small water play area for kids in summer. For them, it is almost like having a mini water park at home — they can run through the water jets and cool off on hot days without a pool.
Instead of a round fountain area, make a narrow strip with several nozzles built into the surface that spray small vertical jets of water. It can work well along a patio, fence, or an open passage between two parts of the garden.
What you’ll need
For a narrow water play area, you’ll need
- a concrete base or another solid surface designed for constant contact with water;
- 3–5 low spray nozzles, arranged in a single line;
- outdoor water pipe and fittings;
- a shutoff valve;
- a drain or linear drainage channel, such as the NDS Spee-D Channel Drain;
- crushed stone for the drainage base;
- a slip-resistant outdoor finish for wet areas;
- exterior sealant.
How to make a narrow splash pad strip
1. Choose a long, open area. A spot that is easy to see from the seating area and located away from the house foundation works best. The water should be directed somewhere it can drain safely, not toward the house or a neighboring property.
2. Plan the drainage before installing the nozzles. Give the surface a slight slope toward the drain. A splash pad should not have low spots where water constantly collects, so decide where the drain will go before laying out the rest of the elements.
3. Arrange the nozzles in one line. For a narrow strip, a few water points are enough instead of covering the whole area with sprayers. You can vary the height of the jets slightly, but there is no need for strong water pressure in a kids’ play area.
4. Make the surface slip-resistant. Smooth concrete around water is not a good idea. Use a textured finish or an outdoor surface made for wet areas. Before using it, check the area barefoot — there should be no sharp edges, raised parts, or overly slippery spots.
5. Keep the edges clear. Do not place heavy planters, furniture, or other objects right next to the water jets where a child could bump into them. Leave an open strip around the play area and keep plants a little farther back.
6. Check how quickly the water drains. Turn on all the nozzles at the same time and watch the area for a few minutes. If a puddle keeps forming somewhere, fix the slope or drainage before regular use.
This idea works especially well for those strange narrow parts of a yard that are often hard to use. Instead of another pathway, you get a small summer play area for kids, and when the water is off, it goes back to being a simple open part of the yard. And on a hot day, adults will probably end up walking through it barefoot at least once too.
5. Dog washing station
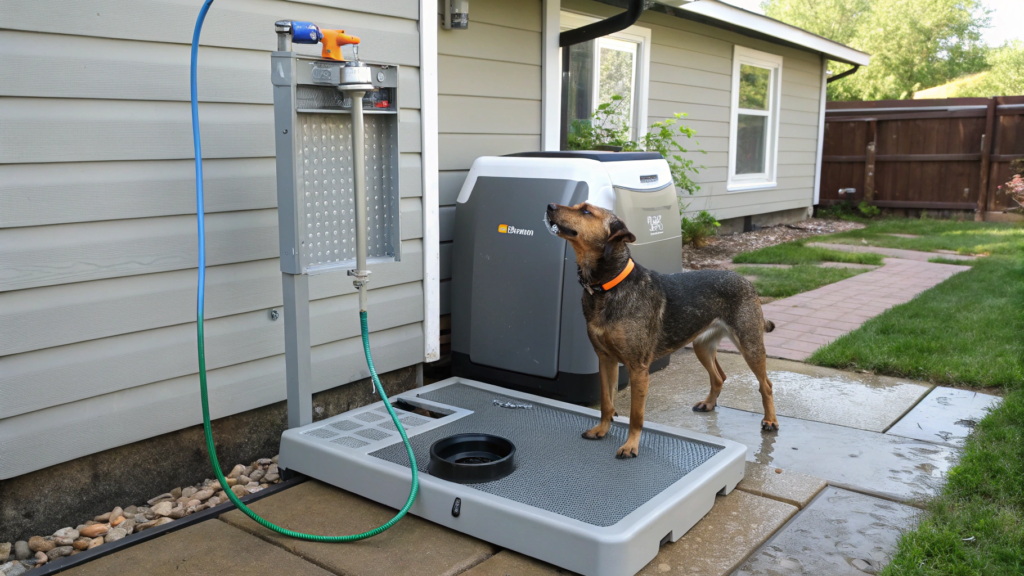
If your dog regularly comes home with muddy paws, a small outdoor washing area will definitely make life easier. Not a full bathtub or a bulky wash station, just a compact spot with a non-slip base, drainage, and a handheld sprayer.
It is convenient to place this station near an outdoor faucet, next to a patio, or in a utility area. After a walk, you can quickly rinse dirt off your dog’s paws and belly without taking a wet dog through the whole house.
What you’ll need
For a compact wash station, you’ll need
- a small concrete or paved area about 3 × 4 ft (90 × 120 cm);
- a non-slip rubber mat;
- an outdoor faucet or water connection;
- a hose;
- a handheld sprayer with several spray settings;
- a drain or a well-draining base;
- a towel hook;
- a small shelf or basket for shampoo;
- if needed, a short leash or grooming loop to keep the dog in place.
How to make an outdoor dog washing station
1. Choose a spot near a water source. An area close to an outdoor faucet works best, so you do not have to run a hose across the whole yard. The space should be large enough for the dog to stand comfortably and turn around.
2. Make a stable base. Concrete, pavers, or another solid surface with a slight slope for drainage will work. Place a non-slip rubber mat on top so wet paws do not slide. The American Kennel Club (AKC) also recommends using warm rather than hot water and a handheld sprayer, which makes it easier to control the direction of the water.
3. Plan the drainage. Water should not collect underfoot or run toward the foundation. If there is no proper drain nearby, the washing area can sit over a drainage layer of crushed stone with the slope directed away from the house.
4. Add a sprayer at a comfortable height. The simplest option is a regular garden hose with a handheld nozzle. It lets you reduce the pressure and gently rinse the paws, belly, and coat. Do not spray water directly into the dog’s ears, eyes, or face.
5. Add a place for the small things. A towel hook and a small shelf for dog shampoo will definitely come in handy. Use shampoo made for dogs, not people — dogs have a different skin pH, and regular human shampoo can dry out and irritate their skin.
6. Check the area before using it. There should be no sharp edges, slippery spots, or places where water collects. If the dog gets nervous during washing, you can secure the leash to a sturdy ring or post, but never leave the dog tied up without supervision.
After rain, one walk is sometimes enough for our dogs’ paws to look like they deliberately found the muddiest part of the property. That is why we made a simple washing station near the entrance. There is no need for a full bath every time — a couple of minutes is enough to rinse the mud off the paws and belly, dry the dog with a towel, and then head inside.
6. Portable shade sail
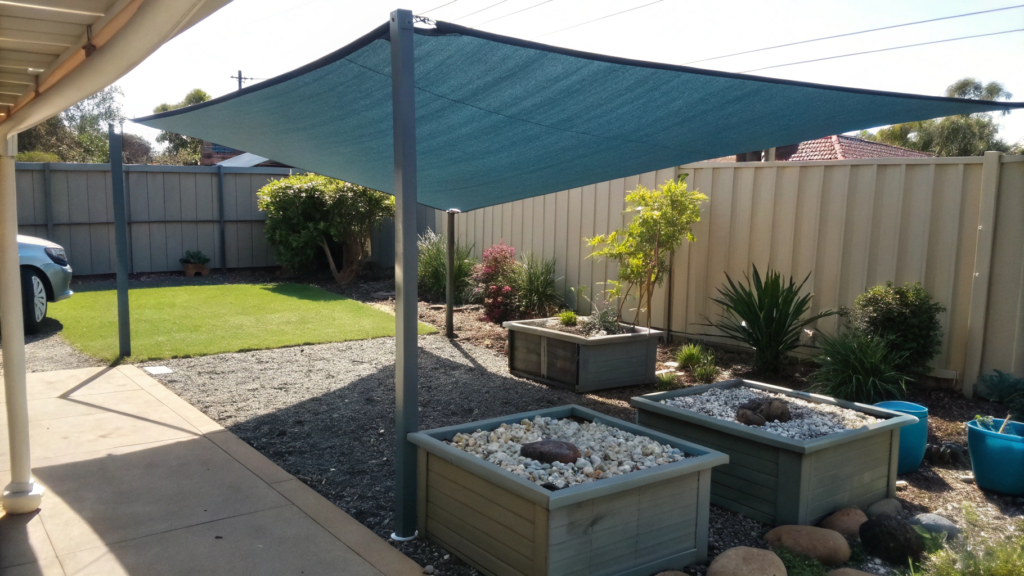
In a small yard, it makes more sense to create shade exactly where you need it. A shade sail on separate posts can go over a kids’ play area, a small table, or the spot where your dog likes to lie in summer, and then come down at the end of the season.
To avoid setting the posts in concrete, place them in large, heavy containers and fill the space around them with crushed stone. The top layer can be covered with decorative stone, with a few plants added around the edges. This keeps the base stable while still looking pretty good.
What you’ll need
For a triangular shade sail, you’ll need
- 3 wooden 4 × 4-inch posts, 8 ft (2.4 m) long;
- 3 large sturdy planters or half-barrels;
- crushed stone to weigh down the bases;
- decorative stone for the top layer;
- wooden pieces to secure the posts inside the containers;
- eye bolts, washers, and nuts;
- carabiners;
- a triangular shade sail;
- a drill, saw, and level;
- if needed, a triangular shade sail, such as the Triangle Sun Shade Sail for Patio Outdoor.
How to install a portable shade sail
1. Start by laying the sail out on the ground. This makes it easier to see where the three supports should go. Leave some space between the corners of the sail and the attachment points for tensioning — the sail should not simply sag between the posts. Standard setups also use tensioning hardware between the fabric and the attachment point.
2. Prepare the posts. Use sturdy wooden 4 × 4-inch posts about 8 ft (2.4 m) long. Install an eye bolt near the top of each post, where the corner of the sail will later be attached.
3. Secure the posts inside the containers. Make a rigid base at the bottom to hold each post in place and add a brace so it stays vertical. Once the post is level, gradually fill the container with crushed stone, leaving about 6 inches (15 cm) at the top for decorative stone.
4. Tension the sail between the three posts. Attach the corners to the eye bolts with carabiners or suitable tensioners. The fabric should be pulled tight without a large sag. For waterproof sails, it also helps to set the attachment points at slightly different heights or create a gentle slope so rainwater does not collect in the center.
5. Finish the bases. Cover the top of the crushed stone with decorative stone, and if the containers are large enough, add a few low-maintenance plants around the edges. Do not fill the planters with lightweight soil instead of a heavy base — the weight of the stone is what helps the posts resist the tension of the sail.
6. Take the sail down in strong wind or bad weather. Heavy portable bases are still not the same as posts set deep in concrete. The sail is easy to unclip from the carabiners, so it is better to remove it before a storm or strong gusts. Manufacturers of portable posts also recommend taking the sail down during strong winds and hail.
This setup does not lock the yard into one layout. The sail can come down, the posts can be moved, and the bases can be finished to look like regular large planters. For a small yard, that is much more practical than having several permanent posts in the middle of the space.
7. Kid friendly raised garden bed
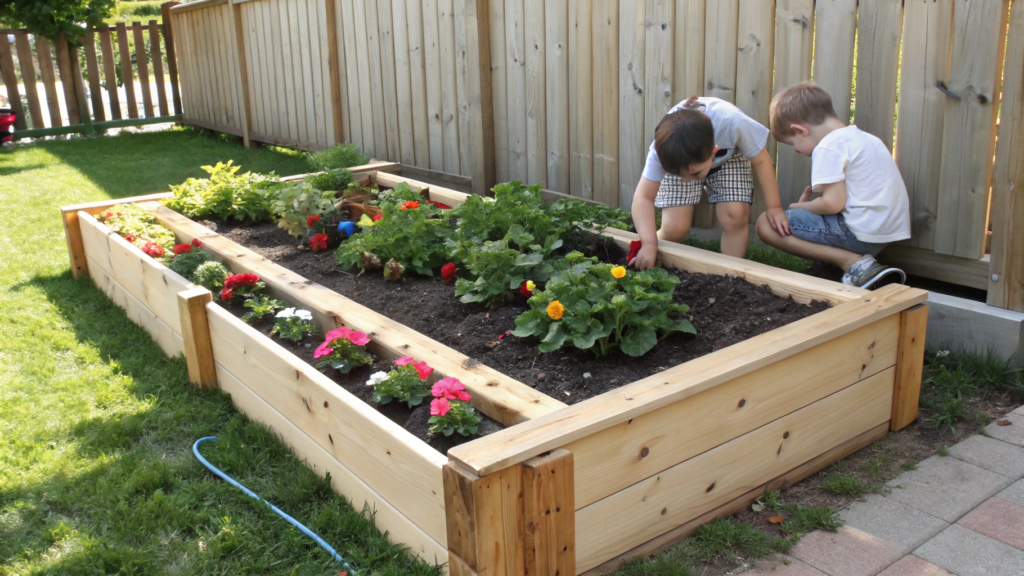
A raised garden bed for kids should be smaller and lower than a regular one. If a child has to stretch across the whole box or climb inside just to reach the strawberries, interest in gardening can disappear pretty fast. The bed should be narrow and low enough so they can easily reach the center from the outside.
Ohio State University recommends beds about 3 ft (90 cm) wide for young children and elementary school students, so they can reach the center from the edge without stepping on the soil.
For preschoolers, a bed around 20 inches (50 cm) high can work well, although a lot depends on the child’s age. The main thing is that they can comfortably reach the plants without the edge sitting somewhere around chest height.
What you’ll need
For a small kids’ garden bed, you’ll need
- boards made from rot-resistant wood;
- galvanized exterior screws;
- corner brackets for the raised bed;
- garden soil and compost;
- a few large garden markers;
- seeds or seedlings that show noticeable results quickly;
- a small kids’ watering can.
How to make a kid-friendly raised garden bed
1. Keep it narrow enough. A bed about 3 ft (90 cm) wide works well for a child if it can be reached from both sides. If the bed sits against a fence, make it narrower — around 18–24 inches (45–60 cm) — so the back edge is still easy to reach. Iowa State University recommends the same general approach.
2. Choose the height based on the child’s age. There is no need to automatically build a box that comes up to an adult’s waist. For younger kids, the sides should stay low enough so they can water, harvest, and work in the soil on their own.
3. Build a simple wooden box. Join the boards with exterior screws, reinforce the corners, and sand the top edges well. It is important to remove splinters and sharp corners because kids will constantly lean their hands against the sides.
4. Fill the bed with good soil. Add a mix of garden soil and compost, leaving a couple of inches below the top edge. Do not compact the soil too much. Loose soil is easier for kids to plant in and easier for roots to grow through.
5. Plant crops that give quick results. Radishes, lettuce, peas, beans, and some herbs sprout quickly and start showing visible growth pretty soon, which makes it easier for kids to stay interested in the garden.
6. Give the child some freedom with their own bed. Let them decide what to plant and where, place the markers, and take care of the plants themselves. There is no need to correct every little thing — it matters much more that the child feels like this really is their own little garden.
I really like watching the way kids treat plants they think of as their own. One tiny sprout can suddenly become more important than the entire rest of the garden. And that is probably the best part — giving a child a place where they planted something themselves, watered it, waited for the first leaves, and then proudly showed everyone what grew in their own little patch.
8. Outdoor toy storage wall
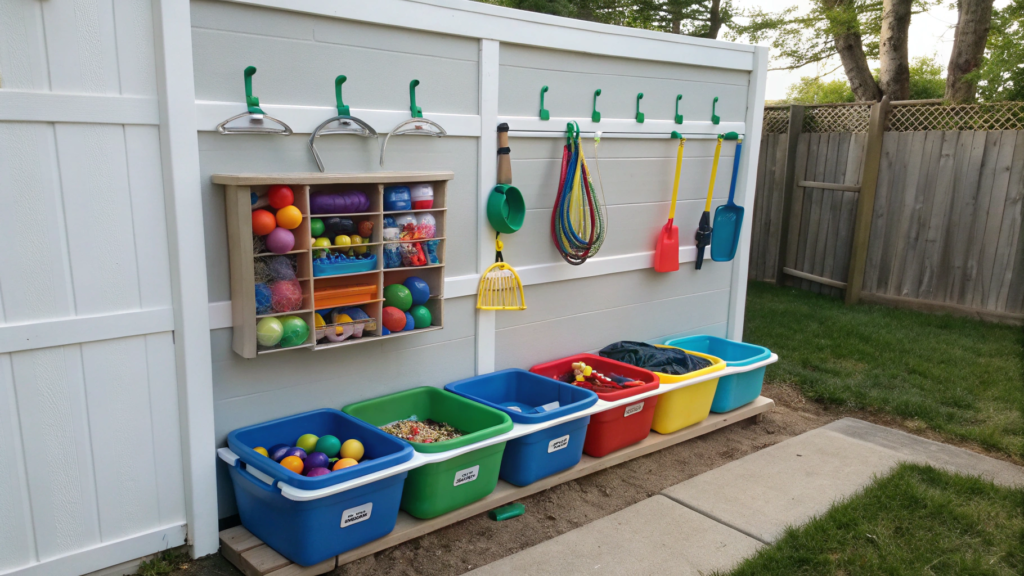
Outdoor toys somehow always end up exactly where someone is going to step on them later. Balls, shovels, chalk, jump ropes, and water toys are much easier to store on a dedicated wall with small bins and hooks instead of one huge storage box.
For a small yard, vertical storage makes a lot of sense. The lower part of the wall can be for the kids, so they can take out and put away their own things, while less-used items can go higher up. Open bins also make it easy to see where everything is instead of dumping the whole box onto the ground every time. The same approach is often used for storing kids’ outdoor gear.
What you’ll need
For a small storage wall, you’ll need
- a sturdy exterior wall, fence, or separate wooden panel;
- 3–4 open-top plastic bins;
- several outdoor hooks in different sizes;
- one mesh bag for balls or wet toys;
- exterior screws and washers;
- a drill and level;
- simple labels or icons for the bins.
How to make an outdoor toy storage wall
1. Choose a spot near the play area. The closer the storage is to where the kids actually play, the better the chances that toys will make it back to their place. Keep the most-used items on the lower part of the wall, around a child’s chest height.
2. Sort the toys by type. One bin can hold shovels and molds, another chalk and small toys, and a third water blasters or rackets. Large deep boxes quickly turn into a pile, so smaller open bins are usually easier for kids to use.
3. Attach the bins and hooks. Plastic bins can be screwed directly to a sturdy fence or panel with exterior screws. Hooks work well for jump ropes, helmets, rackets, and other things that are easier to hang. Before installing anything, make sure the wall or fence section can handle the expected weight.
4. Use mesh for wet toys. Water toys, balls, and pool gear are better off in a mesh bag than sealed inside a solid container while they are still wet. The mesh lets water drain and air move through, which helps reduce musty smells and mold.
5. Keep the heaviest items low. Large balls and heavier toys are better stored at ground level or in a low bin. Keep lighter things on the wall so nothing heavy can fall from above onto a child.
6. Make the system easy to understand. You can label the bins or add simple pictures — a ball, shovel, or chalk. It is much easier for a child to put things away when it is obvious where each item belongs.
With this kind of setup, cleaning up stops being a separate job for the adults. A child can grab a ball from the mesh bag, play with it, and put it back on their own. When every item has a clear place right next to the play area, far fewer toys end up scattered across the yard by the end of the day.
9. Small pool safety fence
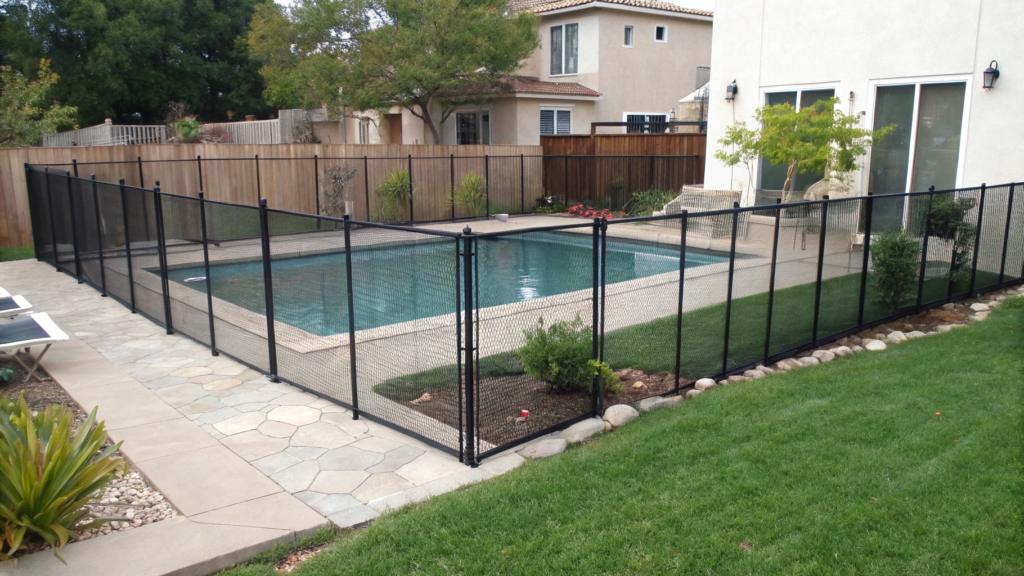
Even a small pool in the yard should be fully separated with a proper safety fence if young kids are around. The size of the pool matters less than whether a child can reach the water without an adult.
The Centers for Disease Control and Prevention (CDC) recommends completely separating the pool from both the house and the rest of the yard. This kind of four-sided fencing can reduce the risk of water-related accidents involving children by about 83% compared with a regular fence around the outer edge of the property.
For a small pool, a removable mesh safety fence works well. It does not feel visually heavy, the water is still easy to see through the mesh, and individual sections can be removed when needed. But this is not the place to improvise with random garden panels — a pool barrier should meet proper safety requirements.
What you’ll need
For a small fenced pool area, you’ll need
- a removable mesh pool fence at least 48 inches (122 cm) high;
- posts and fittings designed for that specific system;
- sleeves for installing the posts into concrete or another solid surface;
- a self-closing, self-latching gate with a latch that young children cannot reach;
- a tape measure;
- a drill and the correct bit for the surface.
Before buying anything, check your local building codes. Pool and fence requirements can vary by state, city, or county.
How to install a safety fence around a small pool
1. Fully separate the pool from the rest of the yard. The fence should surround the pool on all sides, including the side between the pool and the house. A child should not be able to walk out of the house and reach the water directly.
2. Make the fence tall enough. For a residential pool, aim for at least 48 inches (122 cm). The outside of the fence should not have horizontal rails or other features that make it easy to climb.
3. Check every gap. Do not leave openings wider than 4 inches (10 cm) between sections. With removable mesh fencing, keep the space between the bottom of the mesh and the ground to no more than 1 inch (2.5 cm).
4. Install a gate that closes on its own. It should swing outward, away from the pool, and latch automatically after someone walks through. Place the latch high enough that a young child cannot reach it.
5. Keep the area around the fence clear. Do not place chairs, toy boxes, large planters, or anything else nearby that a child could use as a step.
6. Check the whole setup regularly. The gate should close completely every time, the mesh should stay tight, and the posts and fittings should not wobble. It is especially worth checking everything after strong winds and at the beginning of the season.
With a pool, I am definitely in favor of being a little extra careful instead of assuming an adult will always be there at exactly the right second. A good fence does not stop kids from enjoying the water — it simply gives adults one more layer of protection. And in a busy yard, that matters a lot.
What fits in your yard?
You probably will not be able to fit absolutely everything into a small yard. And you do not need to. Lindy and I have changed our plans plenty of times while working on our own property. Some things looked essential on paper and turned out to be completely unnecessary. And sometimes the simplest ideas ended up staying with us the longest.
So what makes life harder in your small yard — kids’ stuff, a dog, a pool, lack of shade, or just the constant battle for open space? Tell me in the comments. And if you already have a solution you are especially happy with, share that too — those real-life ideas are always the most interesting ones to talk about.