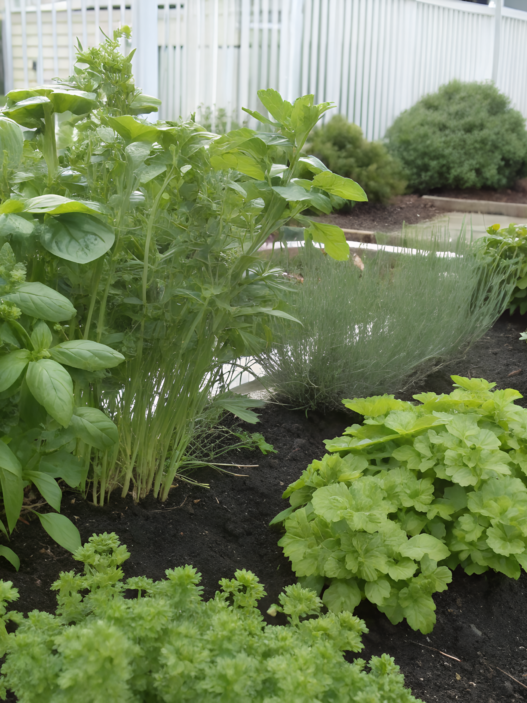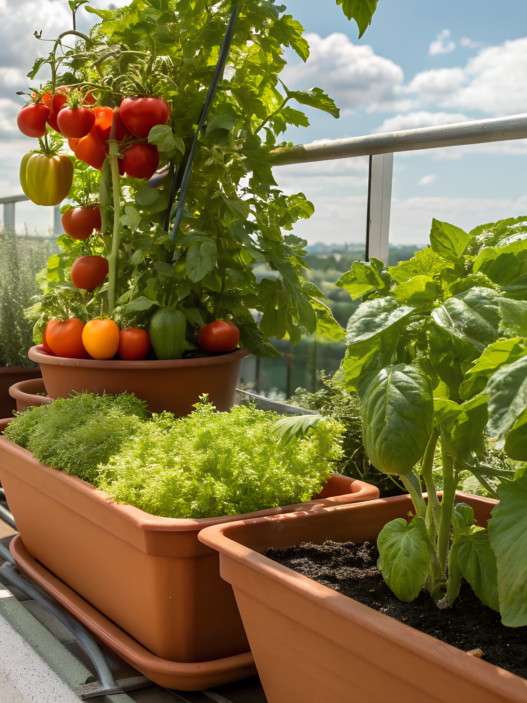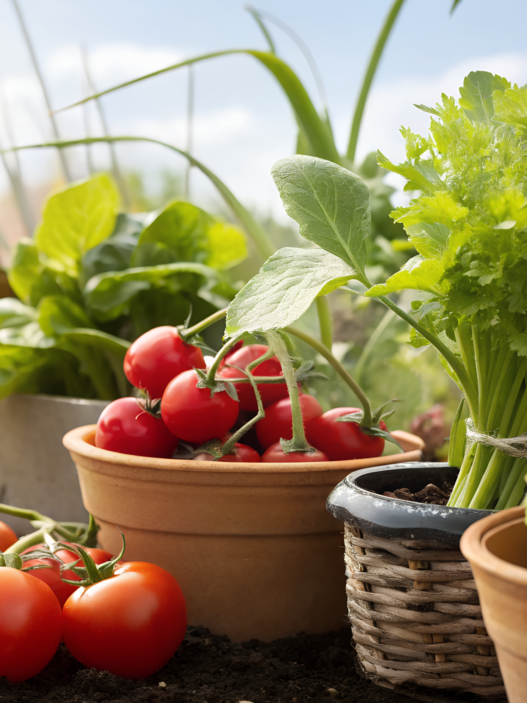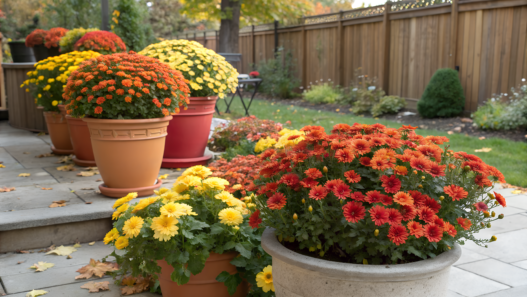
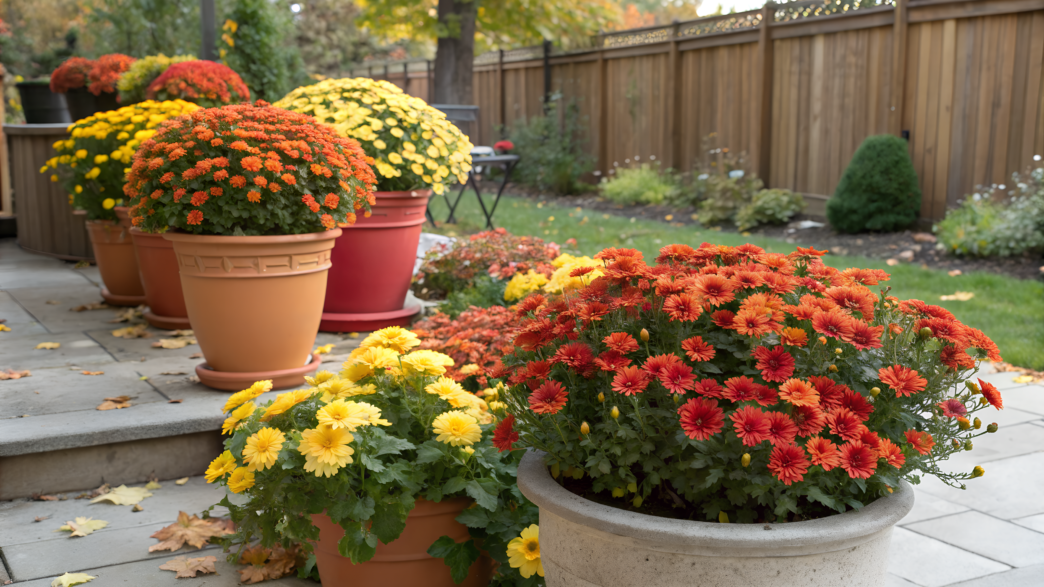
In fall, there is a chance to quickly refresh the yard without complicated work. Container gardening flowers fall pots with wow color fast help achieve the desired effect literally in one evening. You only need a few plants, a suitable pot, and the entrance or terrace already looks different.
All these ideas are not random, but really working and look great in any weather — in the sun, in partial shade, in cool nights. Somewhere color matters, somewhere structure, somewhere minimal maintenance. Everything is up to you — you can repeat one option, or you can try several and compare what looks better specifically for you.
Containers give flexibility and variability. Didn’t like the combination — it’s easy to change it. The weather changed — you moved the pot to another place. That’s why such solutions are not tied to one scenario, but allow you to adapt to the given conditions.
1. Mums and Ornamental Kale Front Porch Pot
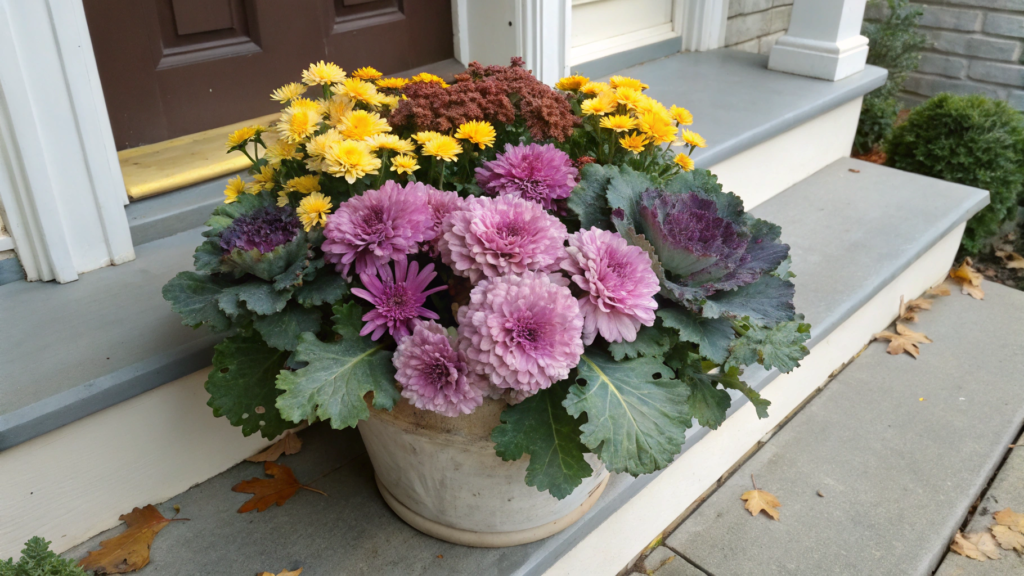
In this combination, chrysanthemums (mums) give color immediately, without waiting, and ornamental kale adds volume and keeps shape even in cold weather. And we get a neat, noticeable pot at the entrance that looks very elegant.
Our first such pot appeared spontaneously. We bought blooming mums, kale was standing nearby — we just added it into one container. That’s it. Already in the evening, the entrance looked different. Not overloaded, not complicated, but it’s nice to come back home.
Chrysanthemums are resistant to cool temperatures and keep color until the first serious frosts.
Ornamental kale works differently. It’s not about flowers, but about structure. Its dense rosettes become brighter when the temperature drops — especially purple and cream shades.
Chrysanthemums and ornamental kale together give:
- quick visual result
- stable shape without “falling apart”
- contrast of color and texture
And this composition does not require constant adjustment.
What you’ll need
- Pot 12–16 inches (30–40 cm) in diameter
- 1–2 bushes of chrysanthemums (mums)
- 1 ornamental kale
- Quality soil with good drainage (for example, Miracle-Gro Potting Mix on Amazon)
- A bit of mulch or bark (optional)
- Watering can
How to make it
- Prepare the pot
Fill it with soil about 2/3 of the volume. Do not compact — the soil should remain loose so roots can breathe. If the pot has no drainage holes, add a layer of expanded clay 1–2 inches (2–5 cm) at the bottom so water does not stagnate. - Plant ornamental kale
Place it in the center. The planting level is slightly below the edge of the pot, about 1 inch (2–3 cm). This gives space for watering and prevents water from overflowing. Make sure the roots are spread out, not twisted into a lump. - Add chrysanthemums
Place them along the edges. If one plant — put it on the side so the composition looks natural. If two — place them on different sides. Do not press tightly — leave some space so plants do not interfere with each other. - Fill empty spaces with soil
Carefully add soil between the plants. Go through with your fingers to remove large air pockets, but do not press too hard. The soil should remain slightly loose. - Water correctly
Water slowly until water starts coming out from the bottom. This is important — this way you understand that the whole volume of soil is moistened. Later maintain moderate moisture, not turning the soil into a wet mass. - Add a finishing layer
A thin layer of mulch (about 1 inch / 2–3 cm) will retain moisture and make the surface look cleaner. Plus, the top layer of soil will dry out less.
Common mistakes
I often see pots that look weak or “blurred”. Usually the reason is in details:
- all plants at the same level → the composition loses depth
- too small pot → plants look cramped
- weak color contrast → everything blends
Try combining, for example, bright yellow mums and dark purple kale — the difference is immediately noticeable. And don’t be afraid to make the center slightly lower — it adds volume.
Tip. Light plays a decisive role. Chrysanthemums need at least 4–6 hours of sun per day. In shade they quickly lose color, and the whole composition becomes less noticeable.
This is one of the fastest ways to get a ready autumn accent at the entrance without much effort. A couple of plants, the right container — and the result is ready. Then you can complicate… or наоборот, make it even simpler.
2. Purple Fountain Grass and Pansy Fall Combo
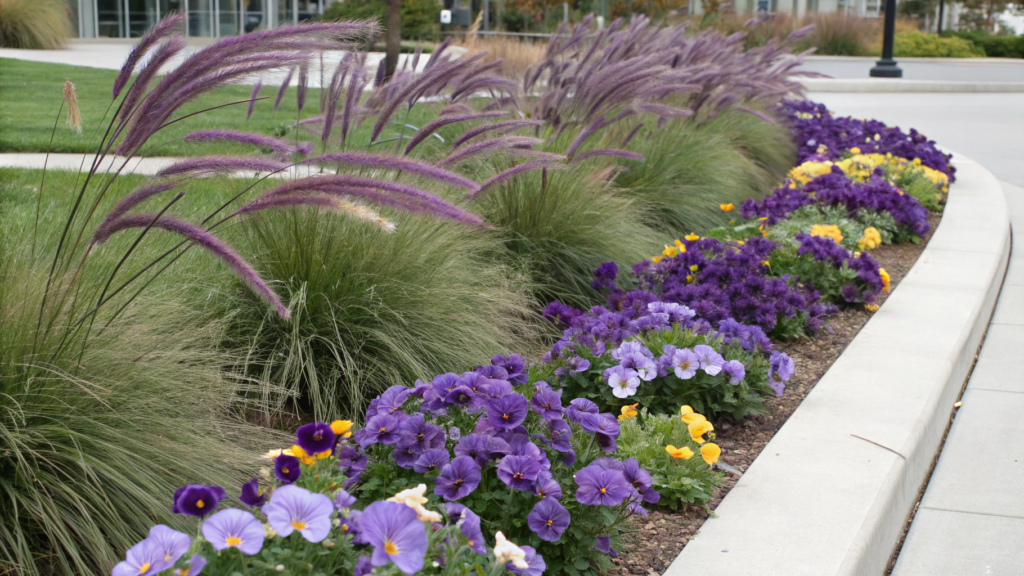
The combination of purple fountain grass and pansies is built on contrast: tall, softly swaying grass and low bright flowers that instantly fill the space.
This looks great because purple fountain grass (pennisetum setaceum) gives verticality and movement — even a light wind makes it noticeable. And pansies — on the contrary, work like a dense colorful carpet at the base.
Together this gives:
- different height → the composition looks deeper
- contrast of textures → soft leaves + dense flowers
- constant visual effect → grass moves, flowers hold color
And another plus — pansies tolerate cool temperatures well, and sometimes even become brighter when it gets colder.
What you’ll need
- Pot 14–18 inches (35–45 cm) in diameter
- 1 plant of purple fountain grass
- 3–5 plants of pansies
- Quality soil
- Mulch or small bark (optional)
- Watering can
How to make it
- Prepare the pot
Fill it with soil about 2/3. If the pot is tall, you can add a drainage layer 1–2 inches (2–5 cm) at the bottom. The soil should be loose — do not compact it in advance. - Plant the ornamental grass
Place purple fountain grass closer to the center, but not exactly in the middle — a slight shift makes the composition more natural. The planting level is slightly below the edge of the pot so it’s easy to water. - Add pansies along the edges
Place them around the grass, evenly or in small groups. Leave 2–3 inches (5–7 cm) between them so the plants can grow and not interfere with each other. - Fill gaps with soil
Carefully add soil, especially around the grass. Make sure there are no empty spaces — but do not compact too tightly. - Water slowly and deeply
Water until it starts coming out from the bottom. This guarantees that all the soil is moist, not just the top layer. - Add mulch
A thin layer (about 1 inch / 2–3 cm) helps retain moisture and protects roots from temperature changes.
Possible mistakes
The composition can look disconnected or “empty” because of simple things:
- too few pansies → the bottom part is not filled
- grass is too small → the main accent is lost
- plants are placed in a strict circle → looks too “by the ruler”
It’s better to slightly shift the center and make small groups of flowers — everything looks more alive this way.
Tip. If strong frosts are expected, pansies usually handle light frost, but ornamental grass may start losing its look. In this case, you can simply replace it later with something more cold-resistant, without touching the rest of the composition.
Place such a pot where there is slight air movement — near the entrance, on a terrace, or next to a pathway. The grass will create constant motion, even when you don’t change anything. Watering — 2–3 times a week depending on the weather, and that’s enough to keep the composition looking neat all season.
3. Sedum and Heuchera Copper Tones Pot
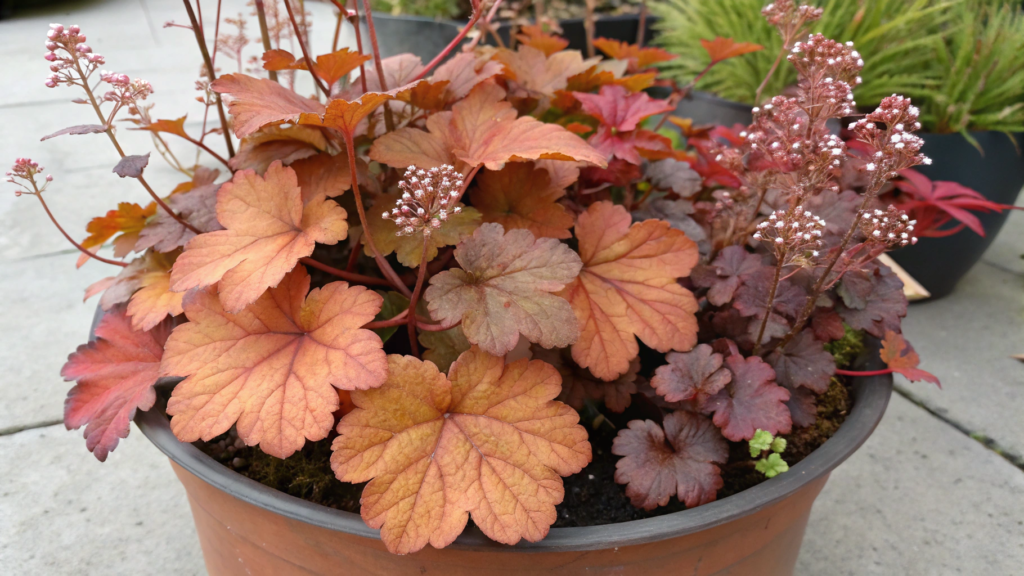
We took heuchera with copper leaves, added sedum — and it turned out unexpectedly deep in color. It doesn’t catch the eye right away, but it holds the взгляд. And all because heuchera gives dense foliage with shades of copper, burgundy, and caramel. It keeps shape and does not lose its look when it gets colder. And sedum adds softness and a bit of “airiness” thanks to its blooms.
Together they give:
- complex but calm color
- good density without a feeling of overload
- resistance to fall weather
It’s convenient that both plants do not require constant care.
What you’ll need
- Pot 12–16 inches (30–40 cm)
- 1–2 plants of heuchera
- 1–2 plants of sedum
- Soil with good drainage
- Mulch or decorative wood chips (for example, Hoffman Decorative Wood Chips on Amazon)
- Watering can
How to make it
- Prepare the pot
Fill it with soil about 2/3. If the pot has no holes — add a drainage layer 1–2 inches (2–5 cm). The soil should be light, not compacted. - Plant heuchera
Place it closer to the center or slightly shifted. This is the base of the composition. Make sure the crown stays at soil level — do not bury it. - Add sedum
Plant it next to it or slightly in front. It will soften the edges and add volume. You can use two smaller plants instead of one — this will make the fill denser. - Fill gaps with soil
Carefully add soil, especially around the heuchera. Make sure the plants stand firmly. - Water evenly
Water until fully moist. Later do not overwater — sedum tolerates slight dryness better than excess water. - Add mulch
A thin layer on top (about 1 inch / 2–3 cm) will help retain moisture and make the surface look cleaner.
Common mistakes
If the composition looks too monotone or “lost”, it means:
- too similar shade is chosen for both plants
- too little sedum → no contrast in shape
- pot is too dark → everything blends
Try combining copper heuchera and a lighter sedum — the difference immediately makes the composition more expressive.
Tip. Do not overwater. Sedum is a succulent, it feels better in slightly dry soil. If the soil is constantly wet, it loses shape faster than it seems.
After a couple of weeks, heuchera gains density, sedum opens up, and the shades start to play deeper — especially in soft fall light. This is not the option that “pops” on the first day, but it lasts longer and looks great without extra effort.
4. Aster and Ivy Trail Planter For Cooler Nights
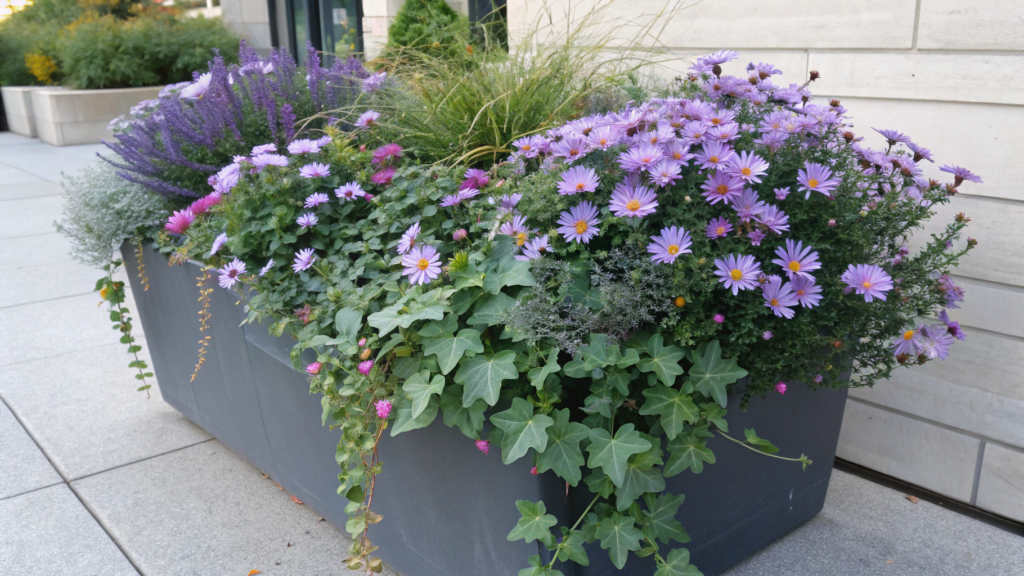
Asters handle cool temperatures well and keep blooming when many others are already finishing the season. Ivy adds a trailing element — it makes the composition feel complete, especially in taller pots.
As a result, the composition looks deeper, has stable color in cool weather, and keeps a neat look without constant trimming.
What you’ll need
- Pot 14–18 inches (35–45 cm)
- 1–2 plants of aster
- 1–2 plants of ivy
- Quality soil with good drainage
- Decorative stones or pebbles
- Watering can
How to make it
- Prepare the pot
Fill it with soil about 2/3. If the pot is tall, add a drainage layer 1–2 inches (2–5 cm) at the bottom. The soil should be loose — this is important for aster roots. - Plant asters
Place them closer to the center or slightly shifted. If there are two plants — do not place them strictly symmetrical. Leave some space between them so they don’t “compress” as they grow. - Add ivy along the edges
Plant it closer to the rim of the pot. The shoots will start falling down over time, creating a soft line. You can guide them with your hands in the direction you want. - Fill gaps with soil
Add soil between the plants and lightly press with your hands so everything stands stable. - Water evenly
Water until fully moist. Asters like stable moisture, but without water stagnation. - Add a decorative layer
A bit of pebbles on top (about 1 inch / 2–3 cm) makes the surface cleaner and helps retain moisture.
Where mistakes usually happen
The composition can visually fall apart. The reason:
- ivy is too short → no trailing effect
- asters are too small → the main accent is lost
- all plants are placed too close to the center → edges stay empty
It’s better to choose ivy with already longer shoots and not be afraid to shift the asters.
Practical tip. If nights get colder, asters keep holding on, but watering should be slightly reduced. In cold soil, water evaporates slower, and overwatering becomes more likely.
After 1–2 weeks, ivy starts clearly falling down, and asters open up more. The whole composition becomes more complete, the lines — softer. You can say this composition gradually “finishes itself” without your involvement.
5. Geraniums and Dusty Miller Late Season Pot
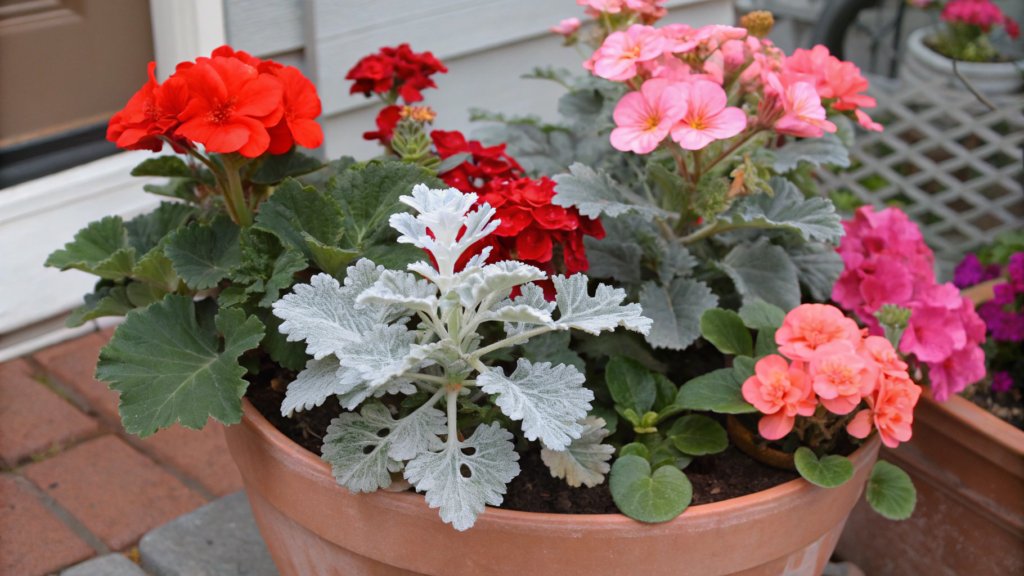
Geraniums and dusty miller are adapted to cooler weather. Geraniums give rich color — red, pink, sometimes coral.
Dusty miller adds contrast with its silvery, almost matte leaves. And together it gives:
- contrast of warm and cool
- clean shape without overload
- stable look even when it gets colder
Dusty miller спокойно handles cool weather and does not lose its декоративность.
What you’ll need
- Pot 12–16 inches (30–40 cm)
- 1–2 plants of geraniums
- 2–3 plants of dusty miller
- Quality soil with good drainage
- Gloves for working with plants
- Watering can
How to make it
- Prepare the pot
Fill it with soil about 2/3. The soil should be light and not compacted. If the pot stands outside, make sure water drains freely — this is important for geraniums. - Plant geraniums
Place them closer to the center or slightly shifted. If you use two plants — do not place them too close, leave 3–4 inches (7–10 cm) so they can develop. - Add dusty miller
Place it around the geraniums. It will create a light outline and highlight the color. You can plant it denser than flowers — dusty miller keeps shape well. - Fill gaps with soil
Add soil between the plants, gently press with your hands so they stand stable, but do not compact too much. - Water evenly
Water until fully moist. Geraniums do not like overwatering, so later keep a moderate режим — the soil should dry slightly between watering. - Check the placement
Before putting the pot in place, look at it from a distance. If one side looks overloaded — better adjust the plants right away.
What often goes wrong
As always, the reasons are simple:
- too many geraniums → the composition “pulls” too much color
- too little dusty miller → no visual balance
- pot is too bright → it competes with the plants
It’s better to give silvery foliage more space — it smooths transitions.
Practical tip. If the temperature starts dropping a lot, geraniums can be moved inside for the night and returned in the morning. This extends their look for a couple more weeks.
Over time, geraniums become a bit calmer in color, and dusty miller stays the same. As a result, the composition does not “fall apart”, but gradually shifts into a more restrained version that still looks neat without extra effort.
6. Shade Fall Pot With Cyclamen and Fern
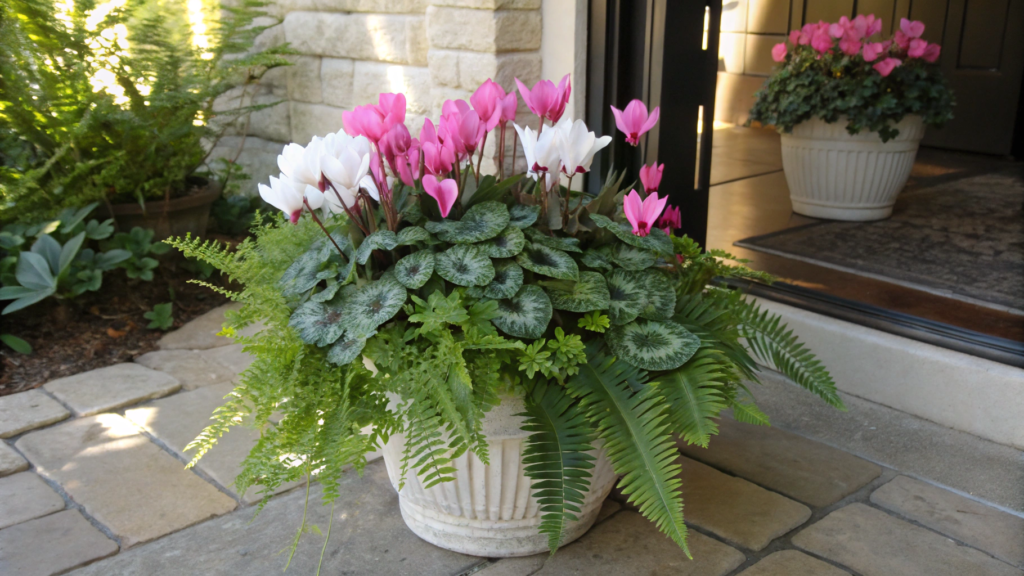
Have you noticed that fall containers in shade can look even more interesting than in bright light? We placed such a pot near the entrance on the north side. There is rarely sun there, and most plants just “get lost”. But cyclamen with fern, on the contrary, look right there.
And all because cyclamen gives color — pink, white, sometimes with a light gradient. And the fern creates a background — soft, dense, with a fine texture.
What you’ll need
- Pot 12–14 inches (30–35 cm)
- 1–2 plants of cyclamen
- 1 compact fern
- Quality soil with good drainage
- Light garden watering can with a narrow spout (for example, Bloem Easy Pour Watering Can on Amazon)
- Mulch (optional)
How to make it
- Prepare the pot
Fill it with soil about 2/3. For shade compositions it’s especially important that the soil does not hold water too long. If in doubt — add some perlite for looseness. - Plant the fern
Place it closer to the center or slightly toward the back. It will set the overall volume. Make sure the roots are spread out and not compressed. - Add cyclamen
Plant it closer to the front edge. The flowers will “come forward” and immediately attract attention. Do not bury the tuber — it should stay at soil level. - Fill gaps with soil
Carefully add soil between the plants. In shade conditions it’s important not to compact the soil too much — this can slow growth. - Water carefully
Water not сверху on the leaves, but closer to the soil. Cyclamen does not like water on the center of the plant. - Add a thin layer of mulch
This is optional, but it helps retain moisture and makes the surface look cleaner.
Where mistakes usually happen
If the composition loses its look, the reasons are often here:
- too dark place → even shade-loving plants need diffused light
- fern is too small → no volume
- too many cyclamen → the composition becomes overloaded
It’s better to have one volumetric element and one accent.
Practical tip. Watch watering. In shade, soil dries slower, so it’s better to check it with your hands before watering, not follow a schedule.
After a week or two, the fern starts filling the space, and cyclamen gradually opens more flowers. As a result, the composition becomes denser and looks complete without needing to change or add anything.
7. Full Sun Fall Pot With Marigolds and Salvia
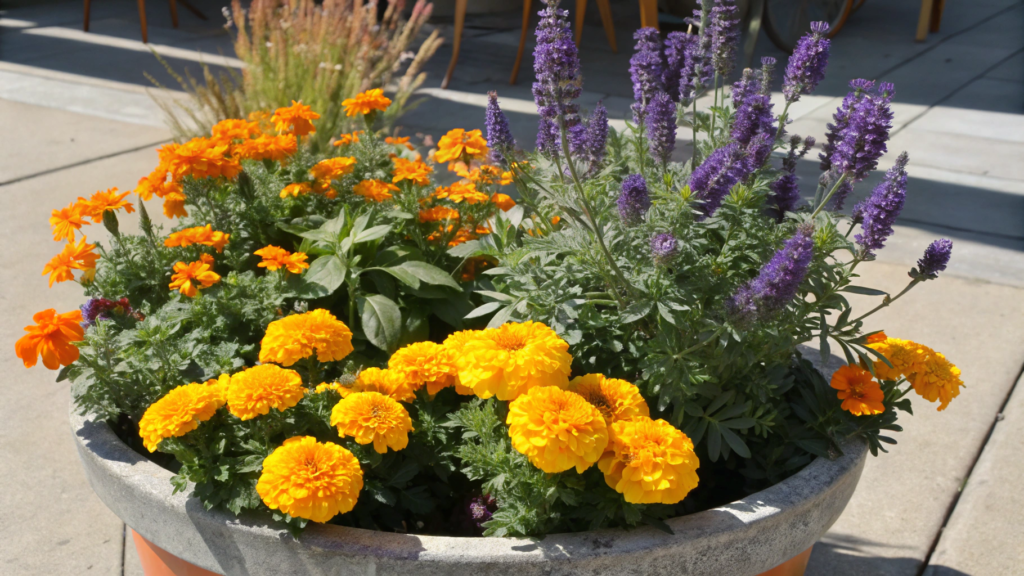
Marigolds and salvia handle bright sun well: marigolds give dense warm color, and salvia adds vertical lines and a cooler оттенок.
I like this combo for its simplicity. There’s no feeling that you need to carefully match shades. You take orange or yellow marigolds, add purple or blue salvia — and a great composition is ready.
Together they give bright color for sunny spots, a strong contrast of yellow, orange, and purple, different height, and good resistance to dry weather.
By the way, marigolds often keep blooming until cold weather if you regularly remove faded flowers.
What you’ll need
- Pot 14–18 inches (35–45 cm)
- 3–5 plants of marigolds
- 1–2 plants of salvia
- Quality soil with good drainage
- Pruners for removing faded flowers
- Watering can
How to make it
- Prepare the pot
Take a pot with drainage holes, because in the sun plants are watered more often, but water should not stay at the bottom. Fill the container with soil about 2/3. Leave 1–2 inches (2–5 cm) to the edge so water does not spill out during watering. Do not compact the soil — just level it slightly with your hands. - Plant salvia as a tall accent
Place salvia closer to the back of the pot if it stands near a wall or porch. If the pot is visible from all sides, shift it slightly off center. This makes the composition look more natural. Plant at the same depth as it was growing before. If the roots are tightly wrapped, gently loosen the bottom layer with your fingers. - Add marigolds around the base
Place them closer to the front edge and sides. Leave about 3–4 inches (7–10 cm) between plants so they don’t crowd each other in a couple of weeks. Larger plants are better closer to salvia, smaller ones closer to the edge. This keeps the pot balanced. - Fill empty spaces with soil
Add soil between the roots in small portions. After each layer, lightly press with your fingers, but without strong compaction. Make sure there are no holes around stems — after watering, water can collect there and damage the base. - Water slowly, not all at once
Make the first watering deep. Pour water in 2–3 rounds: a bit of water, wait until it soaks in, then repeat. This way the soil gets evenly moist, not just along the edges. When water starts coming out from the bottom, stop. Later in sunny spots, check the top 1 inch (2–3 cm) of soil: if it’s dry — it’s time to water. - Remove the first faded flowers
After a few days, check the marigolds. If there are dry heads, cut them with pruners or pinch them off. This helps the plant direct energy to new buds. For salvia, you can remove faded spikes so it looks neater and keeps shape longer.
What can ruin the result
In this composition, problems are usually not in the plants, but in placement:
- pot stands in partial shade → marigolds bloom weaker
- salvia is planted too low or hidden → the vertical accent disappears
- marigolds are planted too tightly → they crowd each other
- watering over leaves in heat → spots and wilting appear
It’s better to give plants some space from the start. In fall they don’t grow as aggressively as in summer, but in a container crowding still becomes noticeable quickly.
Tip. Place this pot where there are at least 6 hours of sun per day. If there is less sun, the color becomes weaker, and salvia may stretch.
Every few days, remove dry flowers from marigolds. It takes less than a minute, but greatly extends the clean look of the pot. And if salvia starts leaning after wind, turn the container toward the sun — often this is enough for it to straighten again.
8. Partial Sun Fall Mix With Violas and Coleus
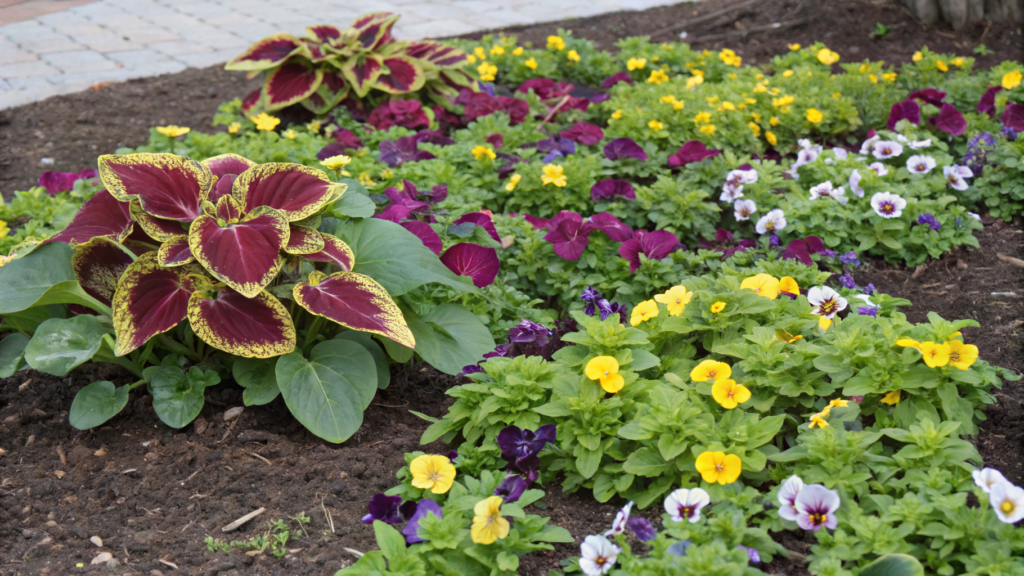
The combination of violas and coleus creates a lively pattern: small flowers below. Violas give constant color — small but noticeable flowers that hold well in cool weather.
Coleus is responsible for the foliage: burgundy, green, lime shades, sometimes with a contrasting edge.
What you’ll need
- Pot 12–16 inches (30–40 cm)
- 3–5 plants of violas
- 1–2 plants of coleus
- Quality soil with good drainage
- Small hand cultivator
- Watering can
How to make it
- Prepare the pot
Fill it with soil about 2/3 of the volume. If the soil feels dense, go over it with your hand or a рыхлитель so it becomes more airy. Leave 1 inch (2–3 cm) to the edge — this makes watering easier. - Plant coleus as the base
Place coleus closer to the center or slightly shifted. This will be the main volume and color “background”. Check the roots: if they are tightly twisted, gently loosen the bottom part. - Add violas along the edges
Place violas closer to the front and sides. Leave 2–3 inches (5–7 cm) between them so they can grow a bit. Try not to line them up in a perfect circle — slight unevenness makes the composition more alive. - Fill gaps with soil
Add soil in small portions, carefully spreading it between the roots. Light pressing with your hands is enough, no need to make the soil dense. - Water evenly
Make the first watering calm, without rushing. Pour water in several rounds so it absorbs evenly. Later check the top layer of soil — if it’s dry, it’s time to water. - Make a light shape adjustment
After planting, step back and look at the pot. If one side feels overloaded with foliage, you can slightly turn the container or gently guide coleus shoots.
Common mistakes
Yes, we also make mistakes. The reasons are usually:
- too similar shades of coleus and violas → no contrast
- violas planted too far apart → empty zones appear
- coleus is too small → does not form the base
It’s better to choose foliage with a clear pattern right away and not save on the number of violas.
Practical tip. Do not place such a pot in deep shade. Violas and coleus love soft light, but without it they start stretching and lose color intensity.
After 1–2 weeks, coleus starts growing and filling the center, and violas produce new flowers. The composition becomes denser, everything comes together into one volume. This is the moment when the pot starts to look “in place”, without needing to add or change anything.
9. Pumpkin Colored Pot With Celosia and Grasses
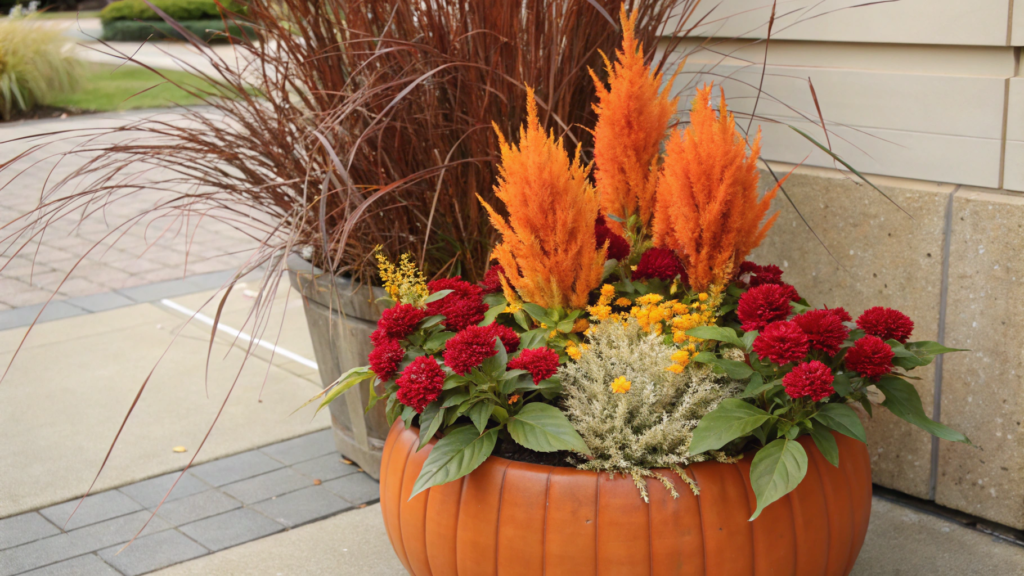
What if you try to build a fall pot not through classic leaves and shrubs, but through a color that instantly reads as autumn? For this, celosia works perfectly.
Its rich orange and red shades already create the right mood. And if you add decorative grasses, the composition gets movement and feels more alive.
Another plus — celosia handles dry weather well, as long as you don’t overwater it.
What you’ll need
- Pot 14–18 inches (35–45 cm), preferably in a warm tone
- 2–3 plants of celosia
- 1–2 decorative grasses
- Quality soil with good drainage
- Decorative pumpkins or simple decor
- Watering can
How to make it
- Prepare the pot
Fill it with soil about 2/3. If the pot is large, make sure it stands stable — tall grass adds wind resistance. The soil should be loose, without large clumps. - Plant decorative grass
Place it closer to the center or slightly shifted. This will be the vertical accent. If the roots are tangled, gently loosen the bottom part before planting. - Add celosia around
Place celosia closer to the front edge and sides. Leave 3–4 inches (7–10 cm) between plants so they don’t interfere with each other. It’s better to use 2–3 plants than one — the color spreads more evenly. - Fill gaps with soil
Add soil between the plants, spreading it carefully with your hands. Make sure roots are fully covered, but do not compact too much. - Water evenly
Water in several rounds so it absorbs gradually. Celosia does not like constant moisture, so later rely on soil condition, not a schedule. - Add decorative accents
Small pumpkins or neutral decor can be placed right on the surface. The key is not to overload. 1–2 elements are enough to enhance the theme.
Where mistakes usually happen
Common mistakes:
- too much celosia → contrast is lost
- grass is too low → no vertical effect
- too much decor → creates visual noise
It’s better to leave slightly less than overdo it.
Practical tip. Here it’s important not only to water, but also to watch the position of the pot. If it stands in an open place, wind can gradually tilt the grass to one side. Every few days, just rotate the container by 90° — this helps keep the shape.
After a couple of weeks, the decor slightly blends into the composition, and the pot starts to look unified, without the feeling that something was added separately. Everything comes together on its own if the base is set right from the start.
10. Evergreen Base Pot With Boxwood and Seasonal Blooms
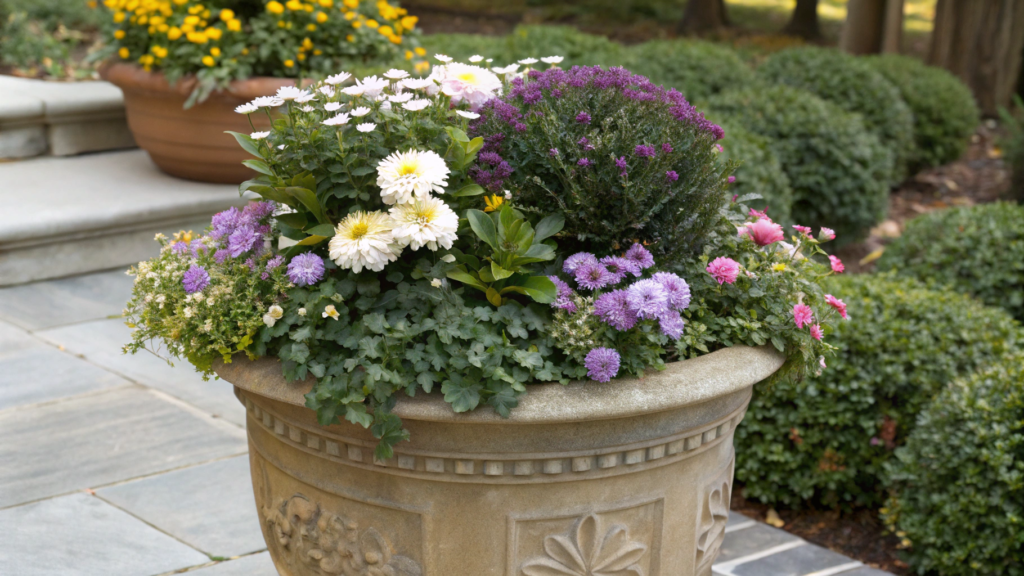
Well, agree — it’s easier to make a base that works long-term and just change accents. Boxwood as a base and any seasonal flowers on top. In fall, these can be asters, violas, or even small mums.
We also have such a pot. The boxwood stays, and the flowers change. Spring — one thing, summer — another, fall — something else. And every time it looks new, even though half of the composition is the same. This is already a long-term solution.
What you’ll need
- Pot 14–18 inches (35–45 cm)
- 1 boxwood plant
- 2–4 seasonal flowers (asters, violas, mums — depending on the season)
- Quality soil with good drainage
- Compact transplanting trowel
- Watering can
How to make it
- Prepare the pot with future updates in mind
Fill the container with soil about 2/3, but plan ahead that you will be changing flowers. Leave some free space along the edges — this will make future replacements easier. Check drainage: water should flow out quickly, especially in cool weather. - Plant boxwood as the base
Place it closer to the center or slightly shifted. This is the main element, so don’t go too small — better to take a well-shaped plant. Do not bury the crown, and slightly loosen the root ball if roots are tightly packed. - Add seasonal flowers around
Place them along the edges of the pot. Leave 3–4 inches (7–10 cm) between plants so you can easily replace them later. Do not plant too deep — this makes switching harder. - Fill gaps with soil
Add soil in small portions, carefully spreading it between plants. The soil should hold shape but stay loose. - Water and check stability
Water in several rounds so all the soil gets moist. After watering, gently shake the plants — if something feels loose, add a bit more soil. - Leave space for updates
Do not fill the pot completely tight. Small gaps along the edges are normal. They will help when you change seasonal flowers without replanting the boxwood.
Mistakes
Usually the reasons are simple:
- boxwood is too small → no sense of a base
- too many flowers → boxwood gets lost
- flowers planted too tightly → hard to replace and maintain
It’s better to keep a clear balance, where the base stays dominant and flowers only support it.
Practical tip. If you plan to change plants several times per season, do not pull them out of dry soil. First water the soil a bit — roots will come out cleaner and won’t damage the structure around the boxwood.
Every few weeks, check the shape of the boxwood. Light trimming helps it stay neat and not take all the attention.
The most convenient part here — you don’t start from scratch every time. In fall, remove some flowers, add others, and the pot already looks different. In winter, you can add evergreen branches or simple decor, in spring — something blooming. The base stays, only the mood changes, and it takes minimal effort.
Real Life Result
If you have the option, make two different pots and place them next to each other. One brighter, the other more calm in color. After a couple of days, it becomes obvious which option works better specifically in your space. Lighting, house background, even the color of the path — all this affects perception more than it seems.
Another good approach — do not change everything at once. Add one new pot, live with it, then add a second. This makes it easier to understand which combinations you actually like, not just what looks good in pictures.If you put together something from this list or make your own combination — write in the comments what you got. It’s interesting to see which options work best for you and how they behave in real conditions.