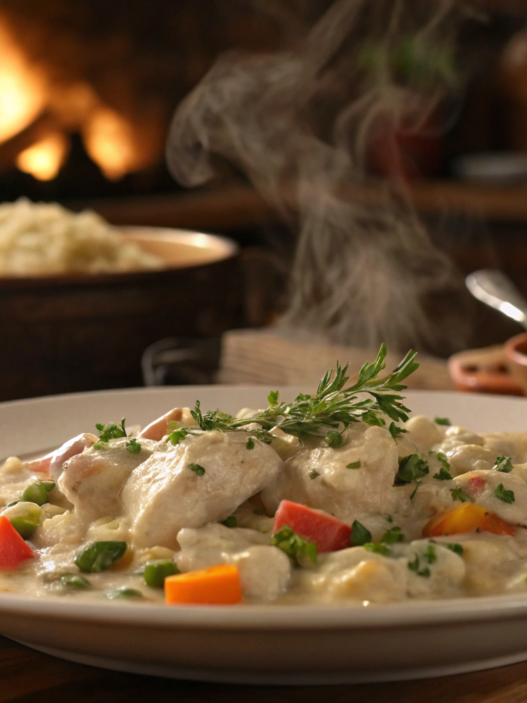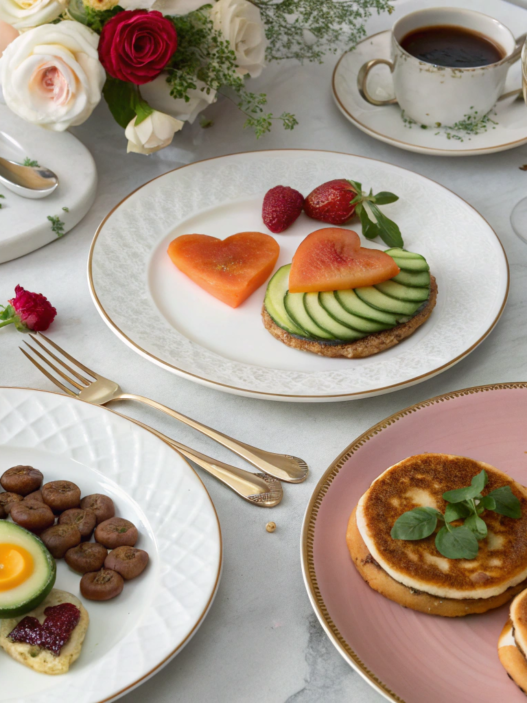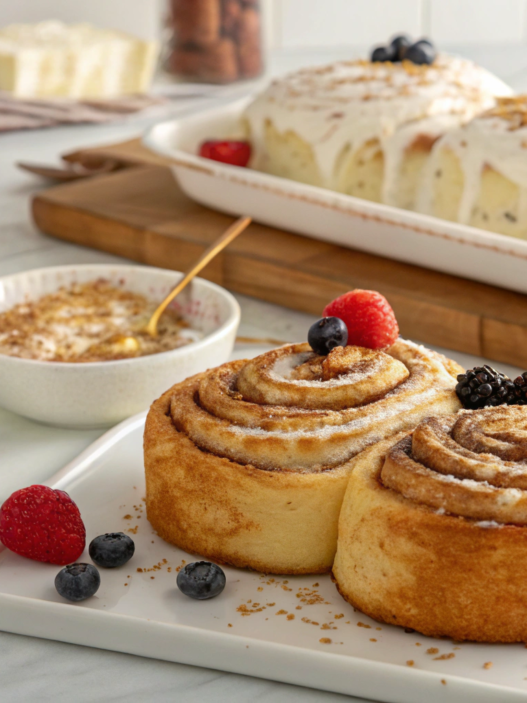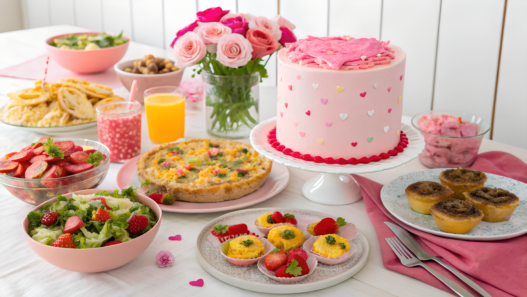
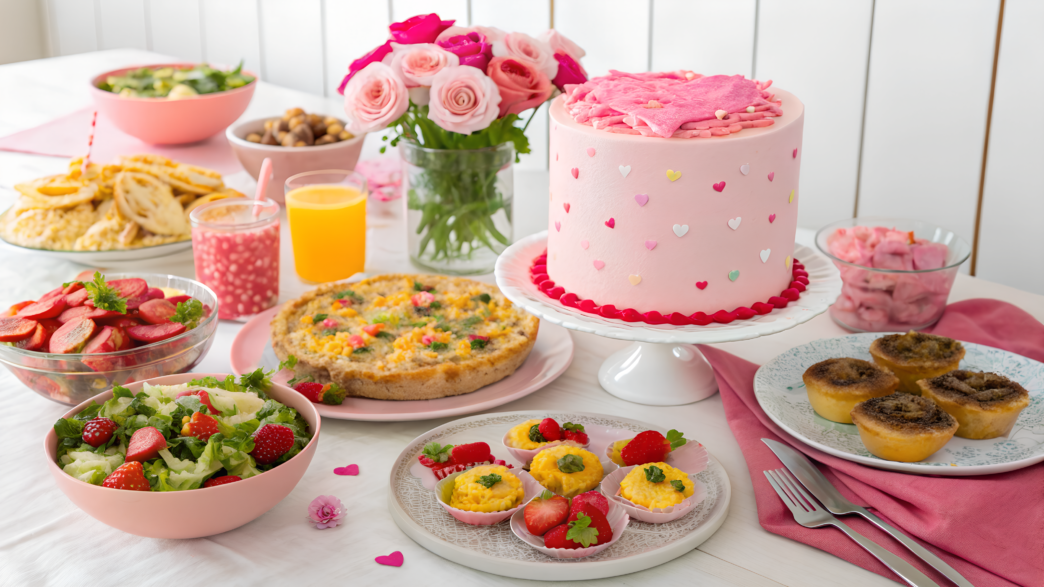
I usually host a Galentine’s brunch without a strict menu or trying to make every dish perfect. For me, it’s more of a reason to get my girlfriends around one table, make a few favorite dishes and drinks, and just spend some good time together. But since February already gives us a theme, I’m definitely keeping a little pink, some hearts, and berries.
Here are 10 Galentine’s brunch ideas for you. Some dishes can be prepped the night before, while others come together right before serving. But these definitely aren’t 10 recipes that will have you spending the whole celebration in the kitchen.
1. Mini rose-shaped cinnamon rolls with raspberry glaze
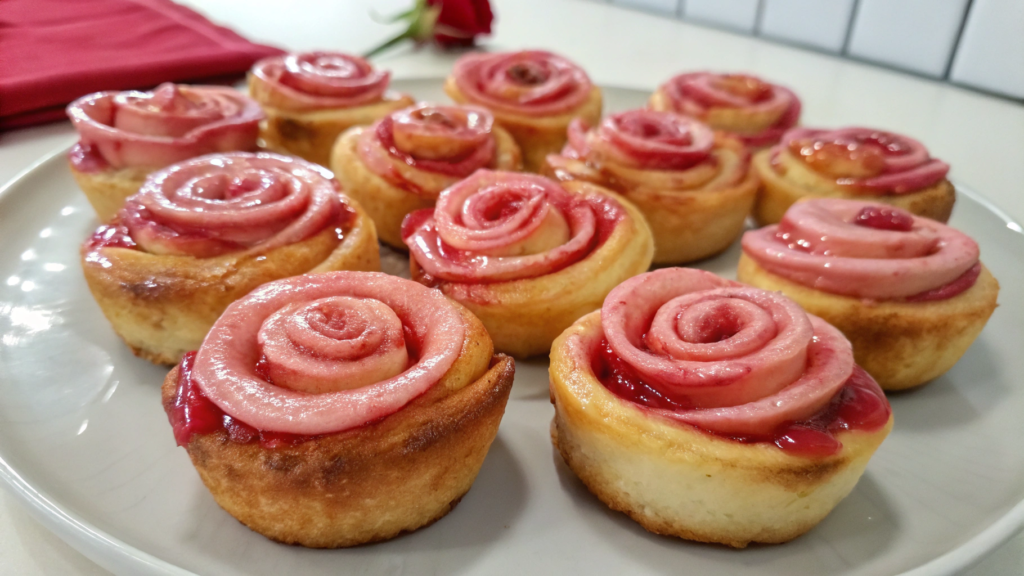
Regular cinnamon rolls can be made into little roses for this kind of brunch, and they really do look like flowers rather than just round pastries with pink glaze. Raspberries give the glaze a bright color all on their own, so there’s no need for food coloring at all.
I try to keep them small. That size works better for brunch — you can have one rose with your coffee and not spoil your appetite for the other dishes. Lindy is usually the first to grab the ones with extra raspberry glaze, so I make sure to be especially generous with a few of them.
What you’ll need
For about 10–12 small roses:
- 1 package of refrigerated cinnamon roll dough, about 12–13 ounces (340–370 g)
- ⅓ cup raspberries, fresh or frozen
- ¾ cup powdered sugar
- 1–2 tablespoons milk
- ½ teaspoon vanilla extract
- a small pinch of salt
A mini muffin pan, such as a Mini Muffin Pan, works well for these roses. The sides help the dough hold its shape while baking.
If you’re going to use store-bought dough
You can quickly make your own. Mix 2 cups flour, 2 tablespoons sugar, 2 teaspoons baking powder, and ¼ teaspoon salt. Add ¾ cup milk and ¼ cup melted butter. Knead into a soft dough and roll it into a rectangle.
Brush it with butter, sprinkle with a mixture of cinnamon and brown sugar, then cut the dough into long strips about 1–1½ inches wide (2.5–4 cm). From there, you can shape each strip into a rose the same way described below.
Homemade dough will have a slightly different texture from store-bought dough, but it holds the rose shape well.
How to make the roses
- Prepare the dough. Take the dough out of the package and separate it into individual pieces. Carefully unroll each piece into a long strip. If the dough is very cold and starts to break, leave it at room temperature for a few minutes. You can gently flatten the strip with your fingers to make it easier to shape the petals later.
- Shape the petals. Roll the strip back up, but not too tightly. As you roll, gently fold the top edge of the dough outward. You’ll get uneven layers that look like petals. And there’s absolutely no need to make all the roses identical.
- Transfer them to the pan. Place each rose in a lightly greased cup of a mini muffin pan. If you’re using a regular baking sheet, leave a little space between them.
- Bake. Place them in an oven preheated to 350°F (175°C) for about 10–14 minutes. The edges should turn lightly golden. I start checking them at around the 10-minute mark — small pastries can go from golden to too dark pretty quickly.
Raspberry glaze
While the roses are cooling, mash ⅓ cup raspberries with a fork and press them through a small sieve to remove the seeds.
Mix the raspberry purée with ¾ cup powdered sugar, 1 tablespoon milk, vanilla, and a small pinch of salt. If the glaze is too thick, add a little more milk. If it’s too thin, add a little more powdered sugar.
Lindy usually keeps an eye on the glaze and adds the milk literally one teaspoon at a time. It should be thick enough to stay on the roses instead of running straight onto the plate.
Let the roses cool for about 10 minutes and only then cover them with the glaze. If the dough is too hot, the glaze will melt quickly and most of that pretty pink color will end up underneath.
These “roses” look lovely on a big holiday table. Raspberries give the glaze a little tartness that goes well with the sweet dough and cinnamon. And if a few roses come out a little crooked, I definitely wouldn’t remake them. Together on the plate, they look really cute.
2. Sparkling strawberry mocktails with edible glitter
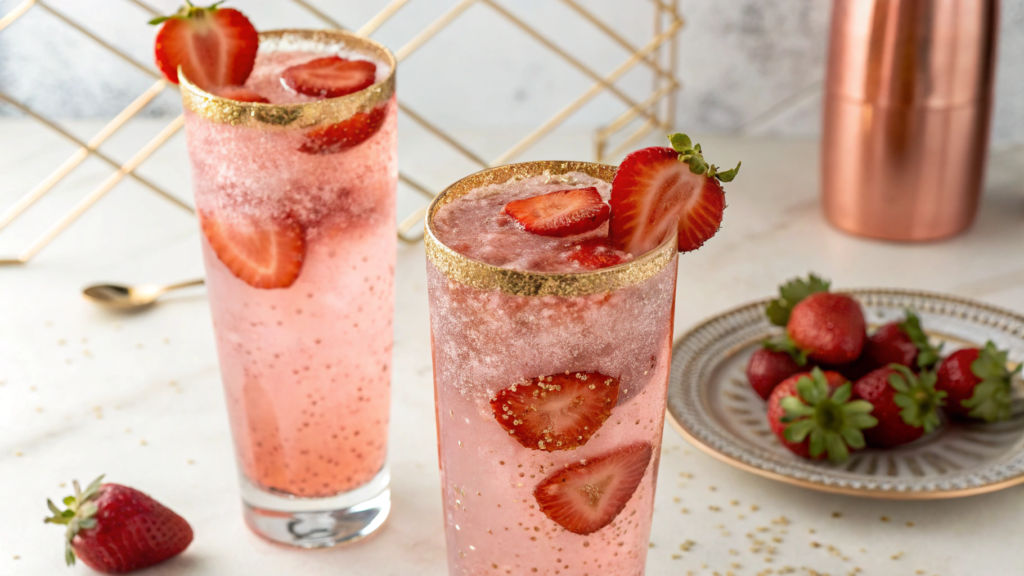
In my opinion, a strawberry mocktail for this kind of brunch shouldn’t be overly sweet. It should be fresh, well chilled, with a little tartness.
Lindy usually takes care of the drinks when we have a few people over. And she has a good rule — make the strawberry base first, taste it, and only then add sweetness. Ripe strawberries can sometimes be so sweet that you barely need any syrup.
And edible glitter gives the drink a subtle shimmer that catches the light beautifully.
What you’ll need
For about 4 glasses:
- 1½ cups fresh strawberries
- 3 tablespoons fresh lemon juice
- 1–2 tablespoons simple syrup
- 2 cups chilled sparkling water
- ½ cup crushed ice
- a small pinch of salt
- edible glitter on the tip of a spoon
- a few strawberries for serving
You can add 2–3 small basil leaves to the strawberry base. You really don’t need more than that, since basil has a pretty strong flavor and can easily overpower the strawberries.
For this drink, use edible glitter, such as Edible Glitter for Drinks. The package should clearly say that it is edible, not just “non-toxic.”
How to make strawberry mocktails
- Prepare the strawberry base. Add the strawberries to a blender with the lemon juice, 1 tablespoon of simple syrup, and a small pinch of salt. Blend until smooth. If you’re adding basil, put it in at this point too.
- Taste before adding more sweetness. Strawberries can vary a lot in sweetness. If it already tastes good, you can skip the second tablespoon of syrup completely. If the berries are tart, add a little more.
- Strain the purée if you want. Lindy prefers drinks without bits of berries, so she usually passes the strawberry mixture through a fine-mesh sieve. I leave mine as is, especially when the strawberries have blended really well. It barely changes the flavor, only the texture.
- Add the glitter. Add just a tiny bit of edible glitter to the strawberry base — about the tip of a teaspoon — and mix well. Be careful, it’s very easy to add too much. We want a soft shimmer, not a glass that looks like a jar of glitter.
- Divide the strawberry base between four glasses, add the ice, and then slowly pour in the chilled sparkling water.
- Stir before serving. One or two turns with a long spoon are enough. If you stir too much, the drink will lose its fizz quickly.
Don’t mix the whole drink ahead of time in a large pitcher if your guests aren’t arriving at the same time. You can make the strawberry base a few hours ahead and keep it in the fridge, then add the sparkling water right before serving. That way, you’ll keep a lot more of the bubbles.
I garnish the glasses with strawberry halves on the rim. You can add a thin lemon slice too, but there’s really no need to build a whole arrangement of berries, herbs, and flowers on top. The drink is already bright enough on its own.
This mocktail looks festive and comes together with just a few everyday ingredients. For a get-together with girlfriends, it’s a really fun option — it looks unusual, comes together quickly, and will almost definitely get people asking what exactly is sparkling in the glass.
3. Bacon & brie croissant bake
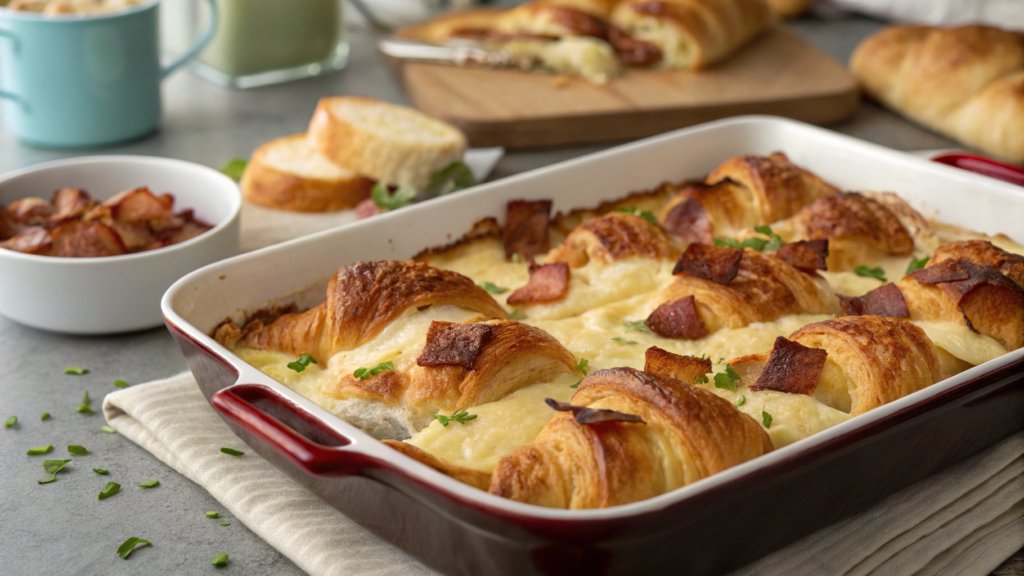
A sweet brunch spread is always better with a hot dish you can make for everyone at once. It’s really convenient — put it in the oven, then get back to everything else you’re doing in the kitchen.
Lindy usually tells me not to hold back on the cheese, but with brie, it’s better to be a little careful. If you add too much, it starts melting down to the bottom of the dish instead of staying between the croissant pieces.
What you’ll need
For about 6–8 servings:
- 5–6 large croissants
- 8 slices bacon
- 6 ounces brie cheese (about 170 g)
- 6 large eggs
- 1¼ cups milk
- 1 tablespoon Dijon mustard
- ¼ teaspoon black pepper
- 2 tablespoons chopped green onions
- a little butter for the baking dish
It’s easy to make all of this in a ceramic baking dish.
How to make it
- Prepare the bacon. Cook it until browned, transfer it to a paper towel, and let it cool slightly. Then chop or break it into small pieces.
- Cut the croissants. Cut each one into large pieces about 1½–2 inches (4–5 cm). Don’t cut them too small — smaller pieces soak up the egg mixture faster and can get too soft.
- Prepare the brie. Cut the cheese into small slices. You can leave the rind on. It’s edible and softens as it bakes.
- Assemble the dish. Butter a baking dish about 9 × 9 inches (23 × 23 cm). Add half of the croissants, then some of the bacon and brie, and repeat the layers. I try to tuck the cheese between the pieces of bread instead of leaving all of it on top.
- Make the egg mixture. Whisk the eggs, milk, Dijon mustard, and black pepper in a bowl. I usually skip the salt — the bacon and brie already add enough.
- Pour it over the croissants. Slowly pour the egg mixture evenly over the dish and gently press down the top pieces with a spoon so they soak up some of the liquid too.
- Let it sit. Leave the dish for about 15–20 minutes. If you assemble it the night before, cover it and refrigerate until morning. Before baking, let the dish sit at room temperature for about 20 minutes.
- Bake. Cook at 350°F (175°C) for about 30–35 minutes. The center should be set, and the top edges of the croissants should be lightly browned. Sprinkle with green onions during the last few minutes or add them after it comes out of the oven.
After baking, let the dish rest for 5–10 minutes. This gives the cheese a little time to set, and the croissants will be easier to divide into neat portions. Lindy usually adds a little more green onion on top right before serving — that way it stays fresh and doesn’t get lost in the other flavors.
For a Galentine’s brunch, this hot dish balances out all the pink, sweet, and berry-filled things on the table. It’s easy to make for a group, and the combination of croissants, bacon, and brie looks pretty good too — and yes, it tastes great! It definitely won’t get lost among the other dishes.
4. Heart-shaped avocado toasts with pickled onions
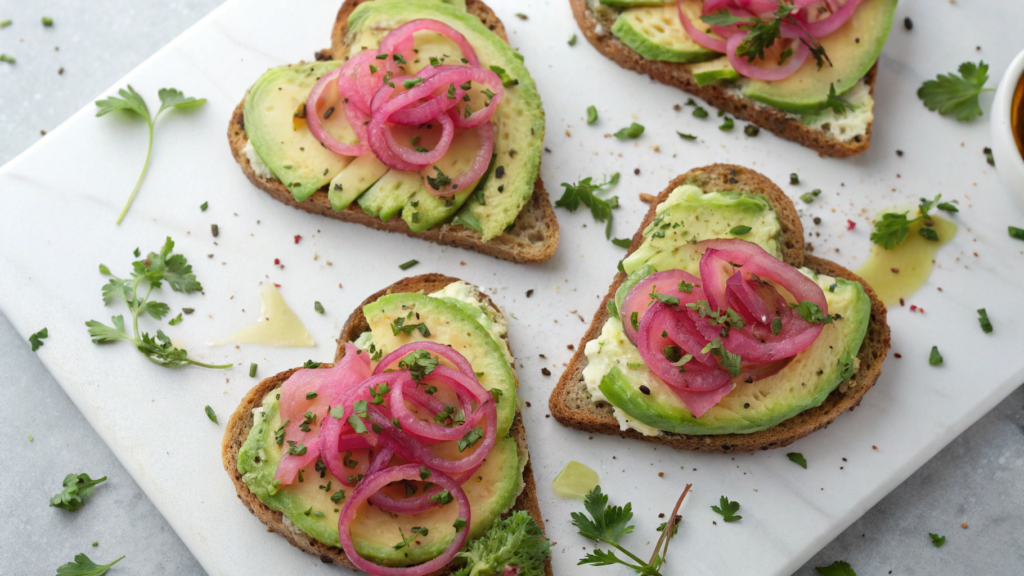
Heart-shaped toasts look festive enough without any complicated decorating. They immediately feel like part of the Galentine’s brunch theme.
Lindy preps the onions ahead of time, and while I’m working on the other dishes, they sit in the jar, pickling and mellowing out in flavor.
What you’ll need
For about 6 small toasts:
- 6 slices of toast bread or soft sourdough bread
- 2 ripe avocados
- ½ small red onion
- ¼ cup apple cider vinegar
- ¼ cup hot water
- 1 teaspoon sugar
- ½ teaspoon salt
- 1–2 teaspoons lemon juice
- black pepper to taste
- red pepper flakes, optional
To get neat, even hearts, I use heart-shaped cutters.
How to make the toasts
- Pickle the onions. Slice the red onion into very thin half-moons. Mix the hot water, apple cider vinegar, sugar, and salt, then pour the mixture over the onions. Let them sit for at least 20–30 minutes. If you have time, you can refrigerate them for a few hours.
- Cut out the hearts. Cut a heart shape from each slice of bread. It’s better to do this before toasting — soft bread cuts more evenly and crumbles less.
- Toast the bread. Arrange the hearts on a baking sheet and bake at 375°F (190°C) for about 6–8 minutes. You can also use a regular toaster if the shape fits.
- Prepare the avocado. Mash the flesh with a fork, then add a little lemon juice, salt, and black pepper. I don’t mash the avocado completely smooth — a few small chunks give it a better texture.
- Assemble the toasts. Spread the avocado over the slightly cooled bread and add a few strips of pickled onion on top. Don’t add too much, or the vinegar flavor can overpower the avocado.
- Add some heat if you want. A few red pepper flakes on top are plenty. I usually put them on the side if I’m not sure how much heat everyone likes.
These toasts are easy to make for a group, and the heart shape makes a regular avocado toast feel more fitting for a Galentine’s brunch. The pickled red onions work really well here and add plenty of color, so there’s no need for extra decoration. You end up with a simple savory option that breaks up all the pastries, berries, and sweet drinks on the table.
5. Raspberry cream waffles with lemon chantilly
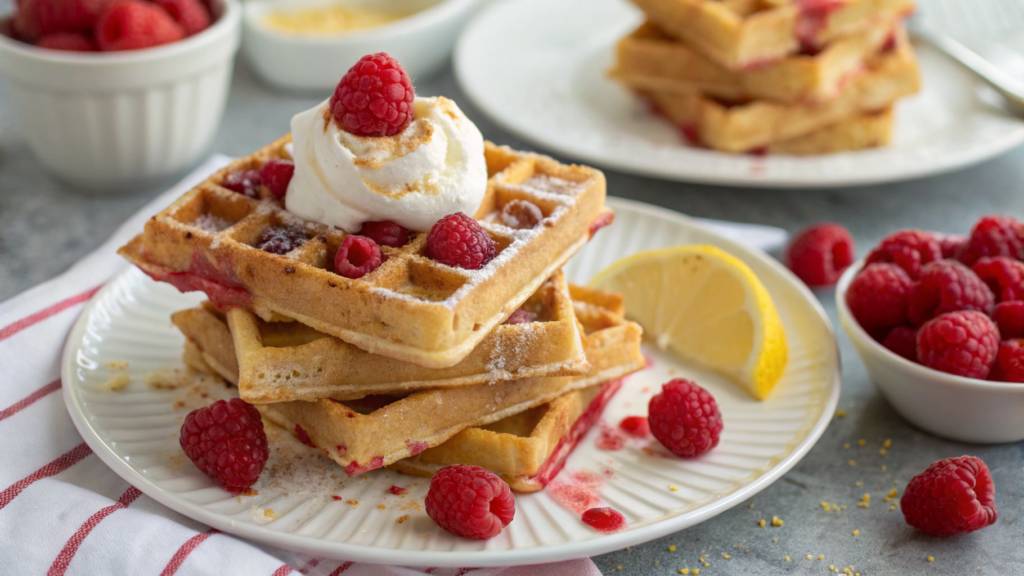
For a Galentine’s brunch, I’d rather make really good classic waffles and make the serving a little more interesting. Lindy picked raspberries right away, and I was completely on board — they add a beautiful color and work perfectly for this kind of brunch.
We assemble the waffles right before serving. If you do it too early, the cream starts softening the surface and the crisp edges disappear pretty quickly. So you can make the waffles a little ahead of time and keep the creams separate until everyone sits down at the table.
What you’ll need
6–8 waffles:
- 2 cups all-purpose flour
- 2 tablespoons sugar
- 1 tablespoon baking powder
- ½ teaspoon salt
- 2 large eggs
- 1¾ cups milk
- ½ cup melted butter
- 1 teaspoon vanilla extract
The raspberry cream:
- 1 cup raspberries
- 4 ounces cream cheese (about 115 g)
- 2 tablespoons powdered sugar
- 1–2 tablespoons heavy cream
The lemon chantilly:
- 1 cup cold heavy cream
- 2 tablespoons powdered sugar
- 1 teaspoon finely grated lemon zest
- 1 teaspoon lemon juice
How to make them
- Mix the dry ingredients. In a large bowl, combine the flour, sugar, baking powder, and salt.
- Add the wet ingredients. In another bowl, whisk the eggs with the milk, melted butter, and vanilla. Pour the wet mixture into the flour and gently stir until the batter comes together. A few small lumps are fine.
- Cook the waffles. Preheat the waffle maker and cook the waffles until golden. Don’t stack them once they’re done, or the steam will soften them pretty quickly. I lay them out in a single layer on a wire rack.
- Make the raspberry cream. Mash the raspberries and, if you want, press them through a sieve. Mix them with the cream cheese and powdered sugar. If the cream feels too thick, add a little heavy cream.
- Whip the lemon cream. Whip the cold heavy cream with the powdered sugar until soft peaks form. Add the lemon zest and juice, then mix for a few more seconds on low speed.
- Assemble right before serving. Add some raspberry cream to each waffle and a spoonful of lemon chantilly. You can finish with a few fresh berries on top.
Tip. Add the lemon to the cream little by little. I mix in the zest first, taste it, and then add the lemon juice. Sometimes one teaspoon is already enough — I want the lemon to come through without overpowering the raspberries.
I’d save these waffles for the part of brunch when everyone is already sitting at the table, talking, and in no hurry to go anywhere. That’s why I serve them a little later, with coffee or tea, instead of right at the beginning. For a Galentine’s brunch, that feels just right.
6. Smoked salmon pastry cups with dill crème
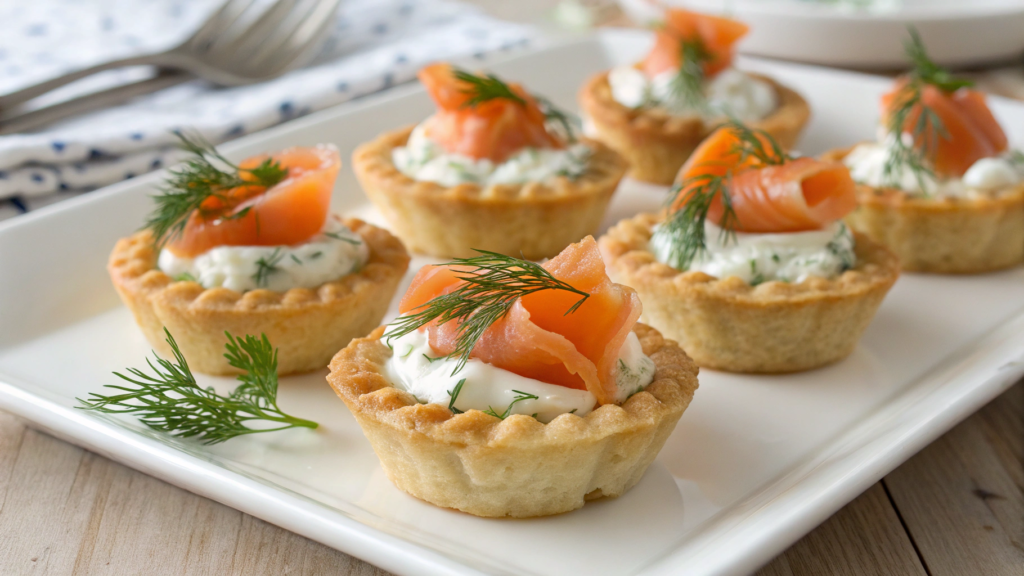
For a Galentine’s brunch, I usually make a few small savory appetizers that are easy to grab from a shared platter. These little cups are just a couple of bites each.
Lindy and I put them together quickly right before the guests arrive. I fill the cups with the cream, and she adds the salmon on top. It goes faster that way, and the puff pastry doesn’t have time to get soggy before serving.
What you’ll need
For about 12 small cups:
- 1 sheet refrigerated or thawed puff pastry
- 4 ounces smoked salmon (about 115 g)
- 4 ounces cream cheese (about 115 g)
- ¼ cup sour cream
- 1 tablespoon finely chopped fresh dill
- 1 teaspoon lemon juice
- a little freshly ground black pepper
- 1 egg for brushing the pastry
- a few small dill sprigs for serving
How to make the cups
- Prepare the pastry. Preheat the oven to 400°F (205°C). Lightly roll out the puff pastry sheet and cut it into 12 equal squares.
- Place them in the pan. Gently press each square into a cup of a mini muffin pan. You can leave the edges sticking up a little — they’ll come out uneven after baking, and that’s completely fine.
- Brush with egg. Whisk the egg with 1 teaspoon of water and lightly brush the exposed edges of the pastry.
- Bake. Put the pan in the oven for about 12–15 minutes, until the pastry has puffed up well and turned golden. If the centers rise too much, gently press them down with the back of a teaspoon while the pastry is still warm.
- Let them cool completely. This part matters. Warm pastry will soften the cream quickly, so don’t add the filling until the cups have fully cooled.
Dill crème and filling
Mix the cream cheese with the sour cream until smooth. Add the dill, lemon juice, and a little black pepper. I wouldn’t add salt right away — smoked salmon is already pretty salty.
Fill each cup with about 1 teaspoon of the cream. Cut the salmon into small strips, loosely curl them, and place them on top. Finish with a small sprig of dill if you want.
You can bake the pastry ahead of time and keep it in a closed container at room temperature, while the cream stays in the fridge. Then all that’s left is to fill the cups and add the salmon.
For a Galentine’s brunch, small appetizers like these are nice when there are lots of different dishes on the table and everyone wants to try a little of everything. They’re easy to pass around, you don’t need a knife or a separate plate, and there’s more time left for talking around the table.
7. Whipped ricotta toasts with honey & pistachios
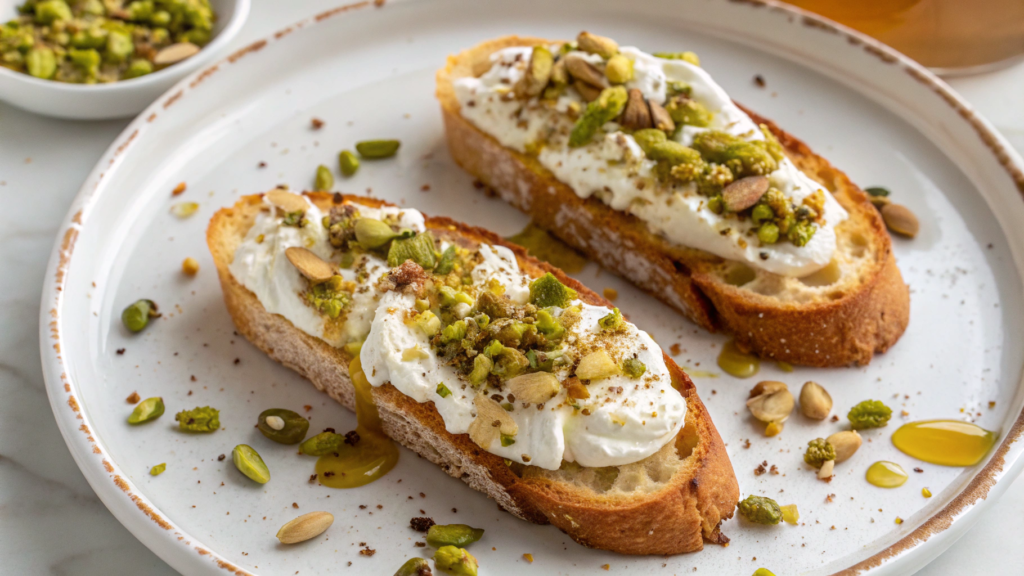
Lately, I’ve been making the toasts regular size and cutting each one in half right before serving. That works well for a Galentine’s brunch too. They’re simply easier to pick up from a shared platter that way.
What you’ll need
For about 8 small toasts:
- 8 small slices of sourdough bread
- 8 ounces ricotta (about 225 g)
- 2 tablespoons heavy cream
- 2–3 tablespoons honey
- ⅓ cup shelled unsalted pistachios
- ½ teaspoon finely grated lemon zest
- 1–2 tablespoons olive oil
- a small pinch of salt
How to make them
- Toast the bread. Lightly brush the slices with olive oil and toast them in the oven at 400°F (205°C) for about 6–8 minutes. Flip them once halfway through. The edges should get crisp, but you don’t want the bread to turn into a cracker.
- Whip the ricotta. Transfer it to a small bowl, add the cream and a pinch of salt. Beat with a hand mixer for about 1–2 minutes, until the ricotta gets lighter and smoother. If you don’t have a mixer, you can whisk it vigorously by hand — it’ll just take a little longer.
- Prepare the pistachios. Roughly chop the nuts. I prefer having pieces of different sizes rather than a fine nut crumb.
- Assemble the toasts. Spread a generous layer of whipped ricotta over the slightly cooled bread. Drizzle with a little honey and sprinkle with pistachios.
- Add the zest. Just a little lemon zest on top is enough. I don’t mix it into the ricotta ahead of time — this way it’s easier to control how much goes on each toast.
It’s better to assemble the toasts shortly before serving. You can whip the ricotta ahead of time and keep it in the fridge, and toast the bread a little earlier. If you put the cheese on the bread an hour before the guests arrive, the base won’t stay crisp.
These toasts give you a nice break between desserts and the more filling dishes. I usually arrange everything on one large platter and put it in the middle of the table — then everyone can take as much as they want.
8. Overnight brioche French toast with berries
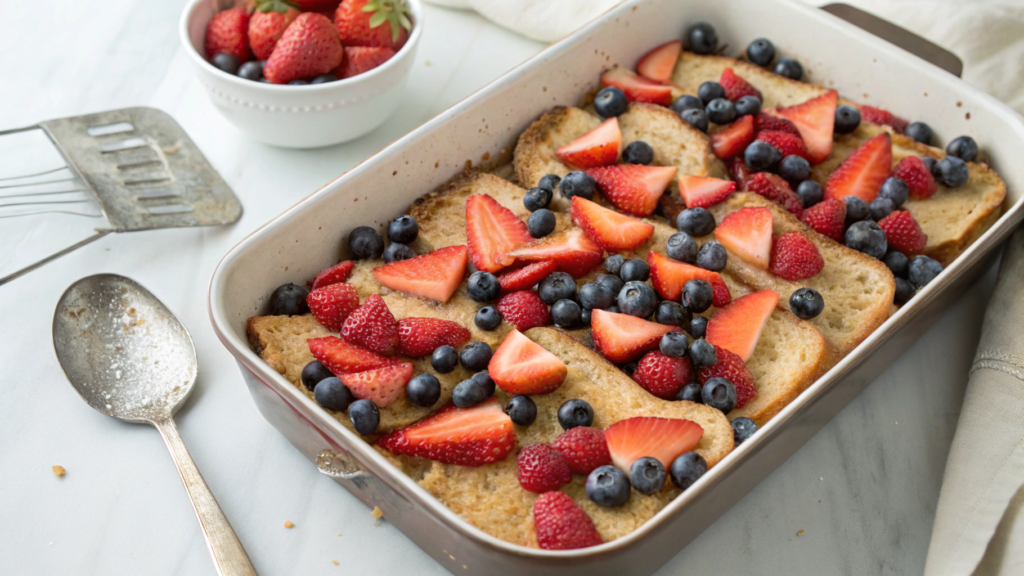
On the morning before brunch, I usually have plenty to do, so I try to prep part of the food the night before. This French toast can be fully assembled ahead of time, refrigerated, and then simply put in the oven in the morning.
For a Galentine’s brunch, it’s convenient to make it in one large baking dish and divide it into portions at the table. That’s much easier than standing at the stove and cooking French toast one piece at a time.
What you’ll need
For about 8 servings:
- 1 loaf of brioche, about 14–16 ounces (400–450 g)
- 6 large eggs
- 1½ cups milk
- ½ cup heavy cream
- ¼ cup maple syrup
- 1 teaspoon vanilla extract
- ½ teaspoon ground cinnamon
- ¼ teaspoon salt
- 1½ cups fresh berries
- 1 tablespoon butter for the baking dish
- powdered sugar for serving, optional
I usually use a mix of raspberries, blueberries, and sliced strawberries, but you can use just one kind of berry too.
How to make it
- Cut the brioche. Cut the bread into large cubes about 1½ inches (around 4 cm). If the brioche is very fresh and soft, you can leave the pieces out for an hour or two so they dry out a little.
- Prepare the baking dish. Butter a 9 × 13-inch (23 × 33 cm) baking dish and spread the brioche pieces evenly inside.
- Make the egg mixture. In a large bowl, whisk together the eggs, milk, cream, maple syrup, vanilla, cinnamon, and salt.
- Pour it over the bread. Pour the mixture evenly over the brioche and gently press the pieces down a few times with a spatula so the liquid reaches the top layer too.
- Add the berries. Distribute about 1 cup of berries between the pieces of bread. Save the rest for the morning, since fresh berries look neater on top after baking.
- Leave it overnight. Cover the dish and refrigerate for at least 6 hours, or preferably overnight. During that time, the brioche will soak up the egg mixture.
- Bake in the morning. Take the dish out of the fridge while the oven preheats to 350°F (175°C). Bake for about 40–45 minutes, until the center is set and the top turns golden.
- Add fresh berries. Let the French toast rest for about 10 minutes, then top it with the remaining berries. If you want, lightly dust it with powdered sugar.
For a softer center, I cover the dish with foil for about the first 25 minutes, then remove it and let the top brown. If you prefer a more pronounced crust, you can bake it uncovered from the beginning.
As you can see, in the morning you can work on drinks, set the table, and wait for your guests while the oven does most of the work. That makes getting ready for any celebration much easier, including a Galentine’s brunch.
9. Pink deviled eggs with beet dye
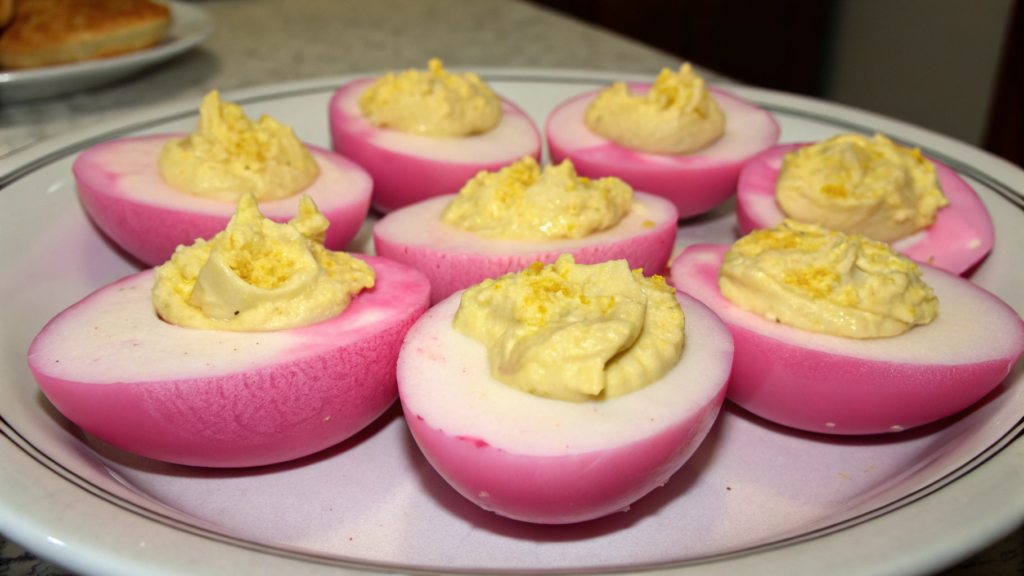
We make regular deviled eggs for all kinds of holidays. But for a Galentine’s brunch menu, I’d add pink deviled eggs dyed with beets. And there’s no need for food coloring at all.
Lindy kept worrying that the eggs would taste too much like beets. But if you don’t leave them in the marinade for too long, the flavor changes very little, while the color still comes out really noticeable.
What you’ll need
For about 12 halves:
- 6 large eggs
- 1 small boiled or roasted beet
- 1 cup water
- ½ cup apple cider vinegar
- 1 tablespoon sugar
- 1 teaspoon salt
- 3 tablespoons mayonnaise
- 1 teaspoon Dijon mustard
- ½ teaspoon lemon juice
- a little freshly ground black pepper
- fresh dill or green onions for serving, optional
How to make the pink eggs
- Boil the eggs. Place the eggs in a saucepan, cover with cold water, and bring to a boil. Once the water boils, reduce the heat and cook for 10–11 minutes. Then immediately transfer the eggs to a bowl of very cold water and let them cool.
- Peel the eggs. Once they’re completely cool, remove the shells. Try not to damage the whites — any uneven spots will be more noticeable after dyeing.
- Make the beet marinade. Cut the beet into small pieces. Mix it with the water, apple cider vinegar, sugar, and salt. Stir until the sugar and salt dissolve.
- Dye the eggs. Place the peeled eggs in the marinade so they’re fully covered, then refrigerate for about 2–4 hours. After two hours, the color will be softer; after four, it’ll be noticeably brighter.
- Cut the eggs. Remove them from the marinade, pat them dry with a paper towel, and cut them in half lengthwise. Carefully transfer the yolks to a bowl.
- Make the filling. Mash the yolks with a fork, then add the mayonnaise, Dijon mustard, lemon juice, and a little black pepper. Mix until creamy and taste before adding any salt.
- Fill the halves. Spoon the filling into the egg whites or pipe it in with a piping bag. You can add just a little dill or green onion on top.
Tip. Don’t leave the eggs in the beet marinade overnight. The longer they sit, the deeper the color moves into the egg white, but the vinegar flavor also becomes more noticeable. A few hours is plenty for a bright pink color.
Every time I make these, I’m reminded how easy it is to take a familiar appetizer and make it a brighter part of the menu. These pink eggs always look cute on a festive Galentine’s brunch table.
10. Blood orange mimosa pitcher
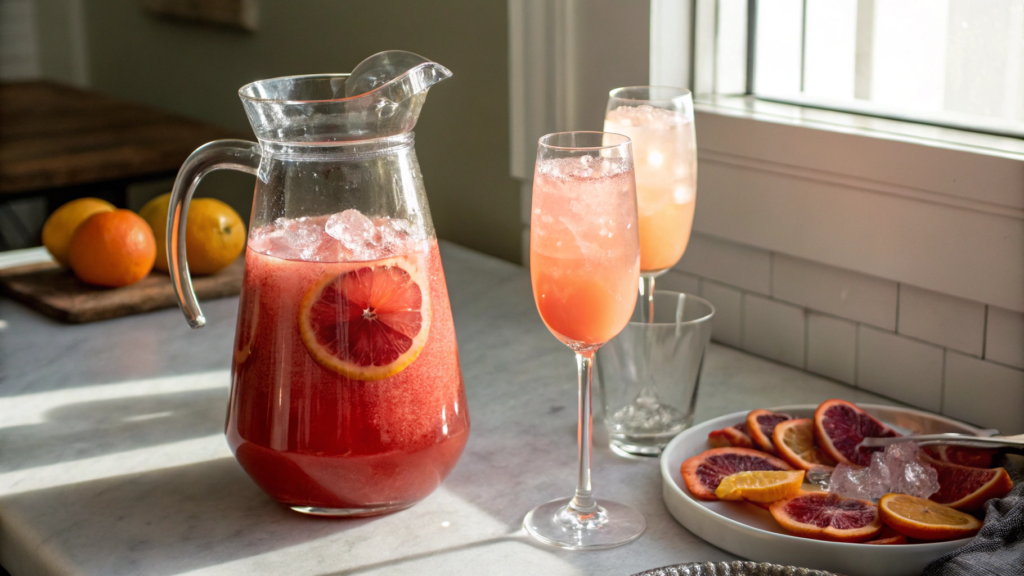
I usually make a blood orange mimosa right in a pitcher. I squeeze the juice ahead of time and chill it, then add the sparkling wine right before serving. That way, all that’s left is to pour the drinks into the glasses. Blood orange gives the drink a beautiful pink-red color that works perfectly for a Galentine’s brunch.
Lindy usually makes sure the juice and sparkling wine are already in the fridge the night before. For a mimosa, temperature really does matter — the colder the ingredients are, the less ice you’ll need and the longer the drink will stay fresh and bubbly.
What you’ll need
For about 6–8 glasses:
- 2 cups fresh blood orange juice
- 1 bottle of well chilled dry sparkling wine, 25 ounces (750 ml)
- ¼ cup orange liqueur, optional
- 1–2 blood oranges for serving
How to make it
- Squeeze the juice. You’ll need 2 cups of fresh blood orange juice. The number of oranges will depend on their size and how juicy they are. If there’s a lot of pulp or any seeds in the juice, strain it through a sieve.
- Chill the ingredients well. The juice and sparkling wine should already be cold before you mix them. I don’t add ice to the pitcher — it waters the drink down too quickly.
- Pour the juice into the pitcher. If you’re using orange liqueur, add it at this point and stir.
- Add the sparkling wine. Pour it in slowly along the side of the pitcher right before serving. After that, one gentle stir with a long spoon is enough.
- Add the oranges. Slice one blood orange into thin rounds or half-moons and add a few pieces to the pitcher. You can use the rest to garnish the glasses.
Before serving, I taste the mimosa and adjust the proportions a little if needed. Blood oranges can vary in sweetness and acidity, so sometimes I want a little more juice, and other times a little more sparkling wine.
After all the prep, it feels good to finally sit down at the table with everyone and stop going back to the kitchen every five minutes. The mimosa is ready, the glasses are filled, the conversation has started — and that’s what the whole brunch was for.
Let’s keep it simple
We’re not setting out to make all 10 dishes for a Galentine’s brunch. You can pick a few recipes you like best, add coffee, fruit, and whatever you already have at home. Nobody is handing out a prize for having the most dishes on the table.
If you’re planning your own Galentine’s brunch, tell me in the comments which dish you’d definitely make. I’m pretty sure the raspberry waffles and brie croissants are going to have some serious competition.