In winter, I cook a little differently than I do the rest of the year. I pull out my heavy pot more often, roast vegetables longer, and use more spices, butter, root vegetables…. Winter food should be hot, filling, and delicious.
I have a lot of dishes like that. And these are the 10 Cozy Winter Recipes I gathered for this article. There are some very simple options, and a few dishes that are fun to spend a little more time on when it’s cold outside and there’s nowhere you need to rush off to.
Have a good evening and enjoy your meal!
1. Smoked Potato Chowder with Roasted Garlic
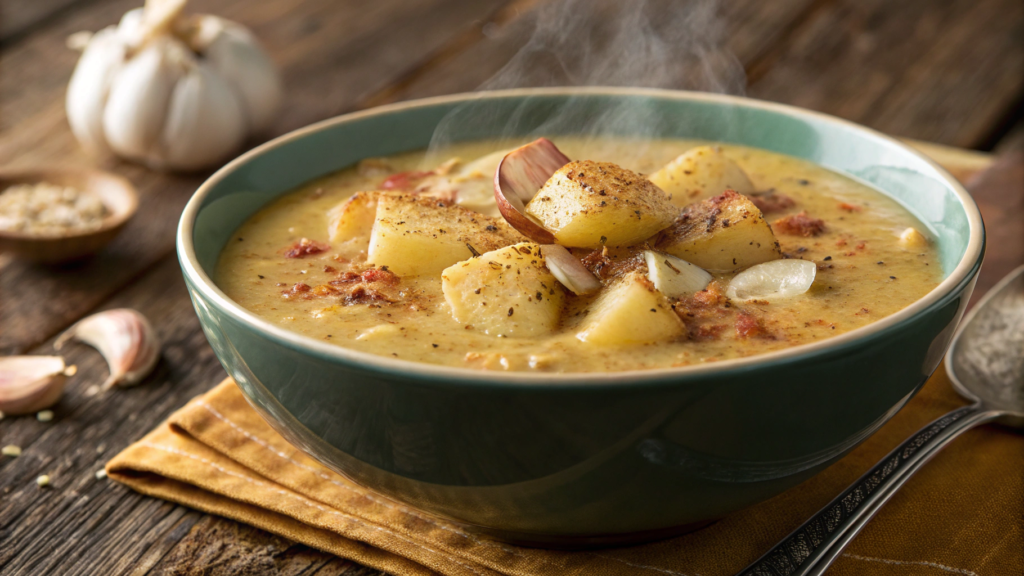
Potato soup shows up on our table pretty often in winter, but I love this version for the roasted garlic and light smoky flavor. The garlic gets soft and a little sweet in the oven, while smoked paprika makes the broth much more interesting, even though the soup itself stays very simple.
I don’t blend all the potatoes. I mash some of them right in the pot and leave the rest in pieces. That makes the chowder thick without turning it into a completely smooth puree.
What you’ll need
For about 6 servings, you’ll need:
- 2 lb potatoes (about 900 g)
- 1 large head of garlic
- 6 slices bacon
- 1 medium yellow onion
- 2 celery stalks
- 3 tbsp butter (about 45 g)
- 3 tbsp flour
- 4 cups chicken broth (about 950 ml)
- 1½ cups whole milk (about 360 ml)
- ½ cup heavy cream (about 120 ml)
- 1 tsp smoked paprika
- ½ tsp dried thyme
- salt and freshly ground black pepper
- green onions for serving
For paprika, I usually use smoked paprika, not regular sweet paprika. They taste completely different.
How to make smoked potato chowder
- First, roast the garlic. Slice the top off the head so the cloves are exposed, drizzle it lightly with oil, and wrap it in foil. Roast at 400°F (about 205°C) for 35–40 minutes. The cloves should be soft enough to squeeze easily out of their skins with a fork. Sometimes I roast two heads at once. The second one usually ends up in mashed potatoes, a sauce, or on toast. The oven is already hot, so why not.
- Cook the bacon. Cut it into small pieces and cook it in a large pot until browned. Transfer the bacon to a plate, leaving about 1–2 tablespoons of rendered fat in the pot. Add the chopped onion and celery. Cook for about 5 minutes, until the vegetables start to soften.
- Make the chowder base. Add the butter, then the flour, and stir for about a minute. Gradually pour in the broth, stirring constantly with a spoon or whisk so the flour doesn’t form lumps. Add the diced potatoes, smoked paprika, thyme, salt, and pepper. Simmer over low heat for about 15–20 minutes. The potatoes should be soft but not completely falling apart.
- Add the roasted garlic. Squeeze the cloves out of their skins and mash them with a fork. I usually mix the garlic with a couple spoonfuls of hot broth first, then add it to the pot. That helps it spread through the soup more evenly. Mash about a third of the potatoes right in the pot with a spoon or potato masher. This little step gives the chowder a thick, creamy texture without using a huge amount of cream.
- Pour in the milk and cream. Lower the heat and add them to the soup. After that, it’s better not to let the chowder boil hard — just warm it through for another 5 minutes. At the very end, return about half of the bacon to the pot. Save the rest for serving.
Ladle the chowder into bowls and add bacon and a little green onion on top. If the soup sits until the next day, it will get even thicker. I just add a splash of milk or broth when reheating it.
Lindy and I love this chowder mainly because of the roasted garlic. Without it, it would just be a good potato soup, but with it, the flavor has much more depth. So I definitely wouldn’t skip roasting the garlic, even if it means turning on the oven for almost forty minutes.
2. Hidden Parisian Onion Soup with Champagne
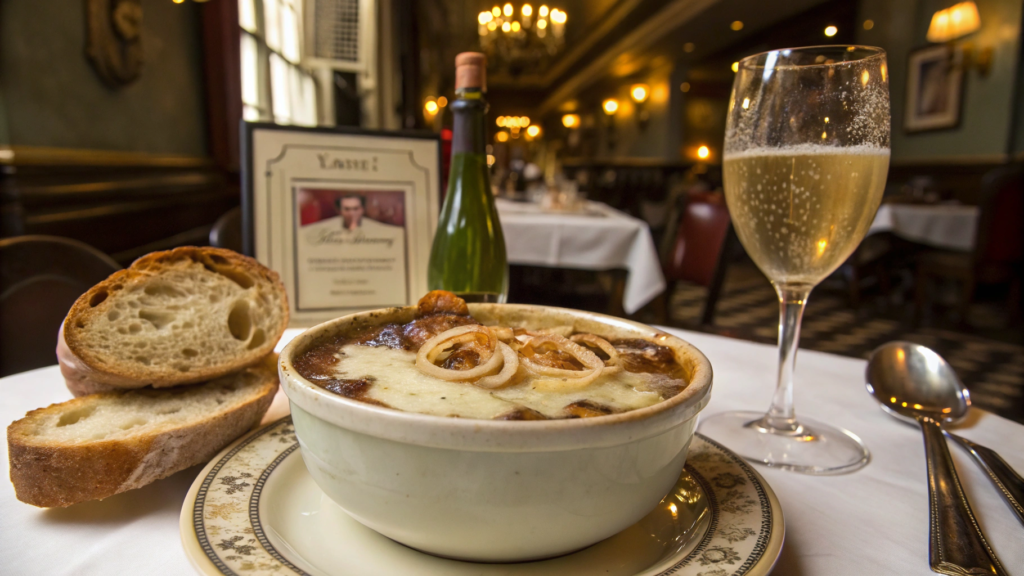
French onion soup has a very simple base — onions, broth, bread, and cheese. But the flavor is anything but simple if you give the onions enough time to caramelize and don’t rush them.
In this version of French onion soup, I add a little Champagne for a light acidity that balances the sweetness of the onions and the rich melted cheese. Lindy was a little skeptical about the idea at first, but after the first bowl, there were no more questions.
What you’ll need
For about 4–6 servings, you’ll need:
- 4 large yellow onions
- 3 tbsp butter (about 45 g)
- 1 tbsp olive oil
- 1 tsp sugar
- 2 garlic cloves
- ½ cup dry Champagne (about 120 ml)
- 6 cups beef broth (about 1.4 L)
- 1 tbsp flour
- 1 bay leaf
- ½ tsp dried thyme
- salt and tte slices
- 1½ cups shredded Gruyère cheese (about 150 g)
- 8 baguethem.
This soup is convenient to make in a heavy pot with a thick bottom, like a Dutch oven. The onions caramelize much more evenly in it, and there’s less chance of accidentally burning freshly ground black pepper
How to make Parisian onion soup with Champagne
- Slowly caramelize the onions. Slice the onions into thin half-moons. Melt the butter with the olive oil in a large pot, add the onions and a pinch of salt. Cook over medium or slightly lower heat for about 35–45 minutes, stirring from time to time. About halfway through, you can add 1 teaspoon of sugar. The onions should become deep golden and very soft, not just lightly browned.
- Add the garlic and flour. Once the onions are well caramelized, add the minced garlic and cook for about 30 seconds. Then sprinkle in the flour and stir for another minute. It will thicken the broth slightly without making the soup heavy.
- Pour in the Champagne. Add the dry Champagne and scrape the bottom of the pot well with a spoon, loosening anything that has stuck to it. Cook for 2–3 minutes so some of the liquid can evaporate. I don’t use sweet Champagne here — with this much caramelized onion, there’s definitely no need for extra sweetness.
- Cook the soup. Pour in the broth, then add the bay leaf, thyme, and black pepper. Bring it to a gentle simmer and cook uncovered for about 25 minutes. Taste it at the end and only then add salt. The broth and cheese may already be quite salty.
- Prepare the bread. Toast the baguette slices in the oven at 375°F (about 190°C) for 8–10 minutes. It’s better when the bread is already a little crisp before it goes into the soup. That way, it doesn’t get soggy right away.
- Bake it under the cheese. Ladle the hot soup into oven-safe bowls, place one or two baguette slices on top, and generously cover them with Gruyère. Put the bowls under the broiler for 2–4 minutes, until the cheese melts and browns in spots. Keep an eye on it — it doesn’t take long to go from a nice golden crust to burnt.
This soup is very filling on its own. There’s a nice combination of sweet onions, broth, and bread that has soaked up the soup underneath while still holding a layer of melted cheese on top. You barely taste the Champagne on its own, but it cuts some of the extra sweetness from the onions and adds a pleasant bit of acidity.
3. Caramelized Pear Bread Pudding with Spiced Cream
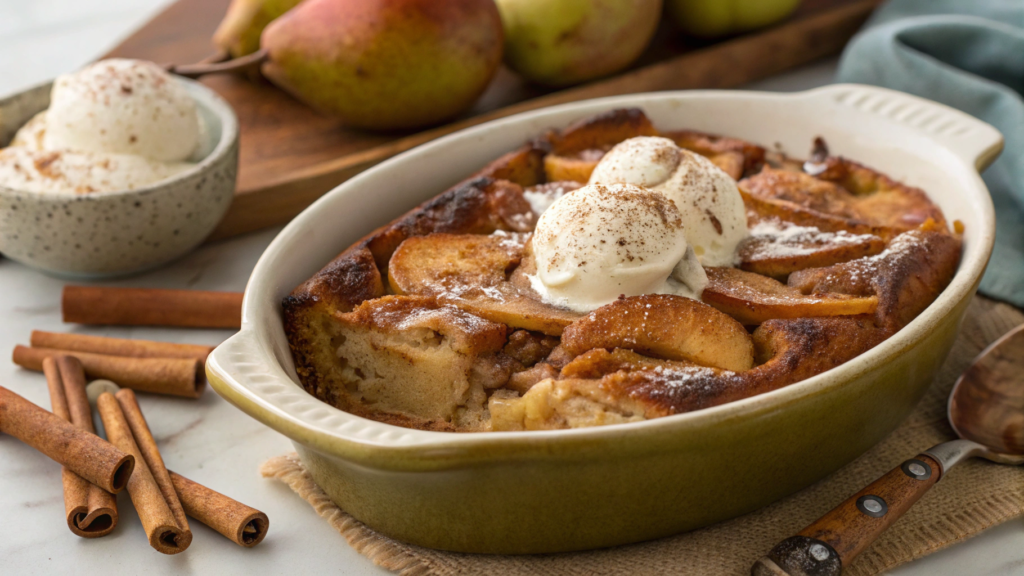
I love bread pudding because it’s easy to add whatever fruit you have on hand. In winter, for us, that’s usually pears, cinnamon, and nutmeg. If you lightly caramelize the pears first in butter and brown sugar, they soften and become noticeably sweeter. Plus, a little of that thick pear syrup from the skillet goes right into the pudding.
We use bread that isn’t completely fresh. Day-old brioche or challah works really well. It has time to soak up the creamy mixture without falling apart in the baking dish.
What you’ll need
For about 6 servings, you’ll need:
- 8 cups bread cut into cubes, preferably brioche or challah (about 400–450 g)
- 3 large pears
- 3 tbsp butter (about 45 g)
- ¼ cup brown sugar (about 50 g)
- 4 large eggs
- 2 cups whole milk (about 475 ml)
- 1 cup heavy cream (about 240 ml)
- ⅓ cup granulated sugar (about 65 g)
- 1 tsp vanilla extract
- 1 tsp ground cinnamon
- ¼ tsp nutmeg
- a pinch of salt
For the spiced cream:
- 1 cup heavy cream (about 240 ml)
- 1 tbsp powdered sugar
- ½ tsp vanilla extract
- ¼ tsp ground cinnamon
- a small pinch of nutmeg
How to make caramelized pear bread pudding
- Prepare the bread. Cut it into cubes about 1 inch (2.5 cm) in size. If the bread is very fresh, spread it out on a baking sheet and dry it at 300°F (about 150°C) for 10–15 minutes. There’s no need to brown it much.
- Caramelize the pears. Peel them if you like and cut them into small pieces. Melt the butter in a skillet, then add the pears and brown sugar. Cook for 6–8 minutes, until the fruit softens a little and the sugar turns into a thick syrup. The pears shouldn’t turn into mush.
- Mix the creamy base. In a large bowl, whisk together the eggs, milk, cream, sugar, vanilla, cinnamon, nutmeg, and salt. You don’t need to whisk for long, just until the mixture is smooth.
- Assemble the pudding. Put the bread into a greased 9 × 13-inch (23 × 33 cm) baking dish. Add the pears with the syrup and gently mix everything together. Pour the egg and cream mixture over the top. I lightly press the bread down with a spoon so the pieces on top have a chance to soak up some of the liquid too.
- Let the bread sit. Leave the baking dish for 20–30 minutes. During that time, the bread will absorb most of the liquid. If you skip this step, the middle can stay too wet while the top dries out too quickly.
- Bake. Put the dish in the oven at 350°F (about 175°C) for 40–45 minutes. The top should brown, while the center should be set but still soft.
- Make the spiced cream. Whip the cold cream with the powdered sugar, vanilla, cinnamon, and just a little nutmeg. Don’t whip it to very stiff peaks.
Tip. For this pudding, choose firm pear varieties like Bosc or Anjou, which hold their shape better after caramelizing and baking. Pears that are too soft will quickly fall apart in the skillet and almost disappear into the filling.
I serve the bread pudding warm and add the spiced cream right on the plate. Lindy and I both like the pears to stay in pieces, so I try not to leave them in the skillet too long. That way, you still get soft bites of fruit in the finished pudding instead of just bread with a creamy filling.
4. Old-Country Cabbage & Bacon Stew
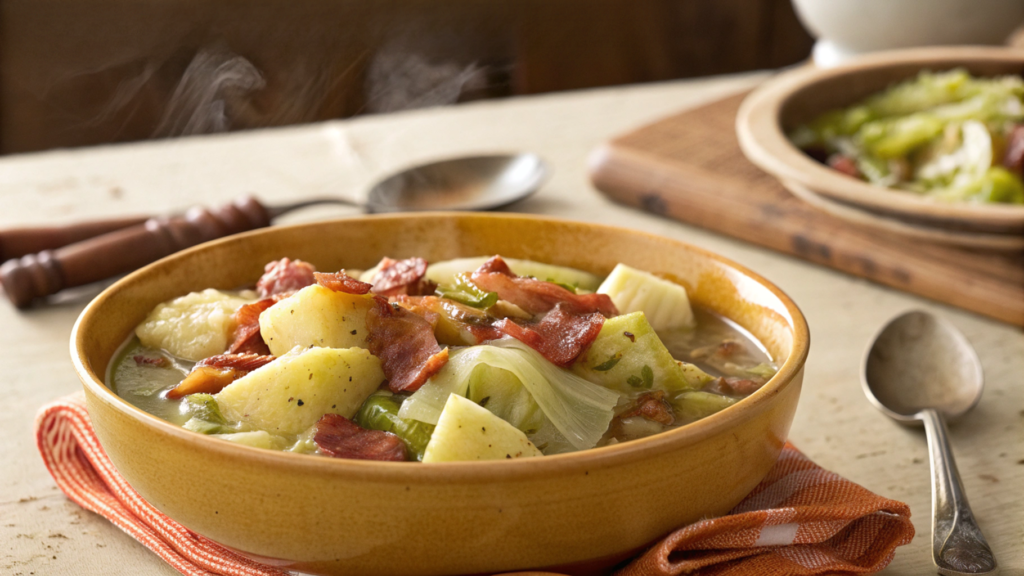
Cabbage and bacon are a very simple combination, but they’re perfect for winter. For this stew, I use regular green cabbage, potatoes, and good bacon with plenty of meat on it.
Lindy likes the cabbage to stay a little firm instead of cooking down completely. I do too, actually. So I don’t add it right at the beginning, but after the potatoes and carrots have already started cooking.
What you’ll need
For about 6 servings, you’ll need:
- 8 slices of bacon
- 1 medium yellow onion
- 2 medium carrots
- 1½ lb potatoes (about 680 g)
- ½ large head of green cabbage, about 1½ lb (about 680 g)
- 3 garlic cloves
- 5 cups chicken broth (about 1.2 L)
- 1 tsp dried thyme
- 1 bay leaf
- 1 tbsp apple cider vinegar
- ½ tsp freshly ground black pepper
- salt to taste
- 2 tbsp chopped parsley
How to make cabbage and bacon stew
- Cook the bacon. Cut it into small pieces and cook in a large pot over medium heat until browned. Transfer about half of the bacon to a plate for serving and leave the rendered fat in the pot.
- Add the vegetables. Chop the onion and carrots, add them to the bacon fat, and cook for about 5 minutes. Then add the minced garlic and stir for another 30 seconds or so.
- Add the potatoes and seasonings. Cut the potatoes into large cubes and add them to the pot with the thyme, bay leaf, and black pepper. Pour in the broth and bring it to a gentle simmer. Cook for about 10 minutes.
- Add the cabbage. Cut it into fairly large pieces and add it to the pot. At first, it may look like there’s way too much cabbage, but it will shrink quite a bit after a few minutes. Cook for another 12–15 minutes, until the potatoes are tender and the cabbage still has a little bite.
- Return some of the bacon. Add half of the reserved bacon and the apple cider vinegar to the stew. Taste the broth before adding any salt, because the bacon and prepared broth may already be salty enough.
- Let the stew sit for a bit. Take the pot off the heat and leave it for about 10 minutes. During that time, the potatoes will soak up a little of the broth and the stew will thicken slightly.
Tip. For this stew, I use a firm head of green cabbage with fresh, crisp leaves. Softer cabbage cooks down faster, especially if you plan to reheat the stew later. I also cut it into fairly large pieces so it holds its shape better.
I always save a little bacon to add when serving, along with some fresh parsley. That way, you still get a little crunch in each bite, and the cabbage doesn’t get lost among the potatoes and broth.
This stew is even better the next day. So it’s easy to make a little extra in the evening and save some for tomorrow.
5. Warm Apple Breakfast Bake with Vanilla Maple Sauce
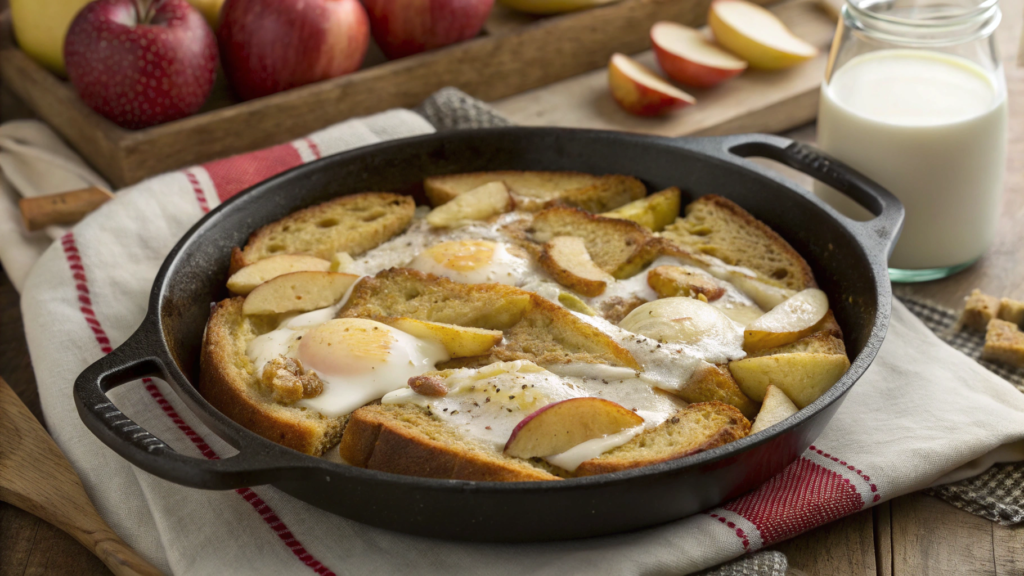
I often make this apple breakfast bake on cold weekends. It’s made with bread, eggs, milk, and apples, so the texture is a little like French toast, except everything bakes together in one dish.
Lindy takes care of the apples while I cut the bread and mix everything else. She chops them faster than I do and, I have to admit, into much more even pieces. So by the time I’m done with the base, the apples are already ready for the skillet.
What you’ll need
For about 6 servings, you’ll need:
- 8 cups bread cut into cubes, preferably brioche or challah (about 400–450 g)
- 3 medium apples
- 2 tbsp butter (about 30 g)
- 2 tbsp brown sugar
- 1 tsp ground cinnamon
- 4 large eggs
- 2 cups whole milk (about 475 ml)
- ½ cup heavy cream (about 120 ml)
- ¼ cup maple syrup (about 60 ml)
- 1 tsp vanilla extract
- ¼ tsp nutmeg
- a pinch of salt
For the vanilla maple sauce:
- ½ cup maple syrup (about 120 ml)
- ½ cup heavy cream (about 120 ml)
- 1 tbsp butter
- 1 tsp vanilla extract
- a pinch of salt
How to make the apple breakfast bake
- Prepare the apples. Cut them into small pieces. Melt the butter in a skillet, then add the apples, brown sugar, and half of the cinnamon. Cook for about 5 minutes. The apples should only soften a little.
- Mix the base. In a large bowl, combine the eggs, milk, cream, maple syrup, vanilla, remaining cinnamon, nutmeg, and salt. Whisk until smooth.
- Assemble the bake. Put the bread into a greased baking dish, spread the warm apples and their juices between the pieces, and pour the egg mixture over everything. I gently press the bread down with a spoon so the pieces on top get some of the liquid too.
- Let it sit for 20–30 minutes. The bread needs a little time to soak up the liquid. If you’re making breakfast ahead, you can cover the dish and leave it in the refrigerator overnight.
- Bake. Put the dish in the oven at 350°F (about 175°C) for 40–45 minutes. The top should be nicely browned and the center should no longer be liquid.
- Make the sauce. In a small saucepan, combine the maple syrup, cream, butter, and salt. Warm over low heat for 3–4 minutes without letting it boil hard. Take it off the heat and add the vanilla.
Tip. For this bake, it’s better to use apples that hold their shape when heated. I usually choose Granny Smith or Honeycrisp — after the skillet and the oven, they stay in pieces instead of turning into applesauce.
Lindy usually picks the pieces with more apples, while I like the edges because the bread browns more there. And we serve the sauce on the side so everyone can add as much as they want.
6. Roasted Chestnut & Truffle Pasta
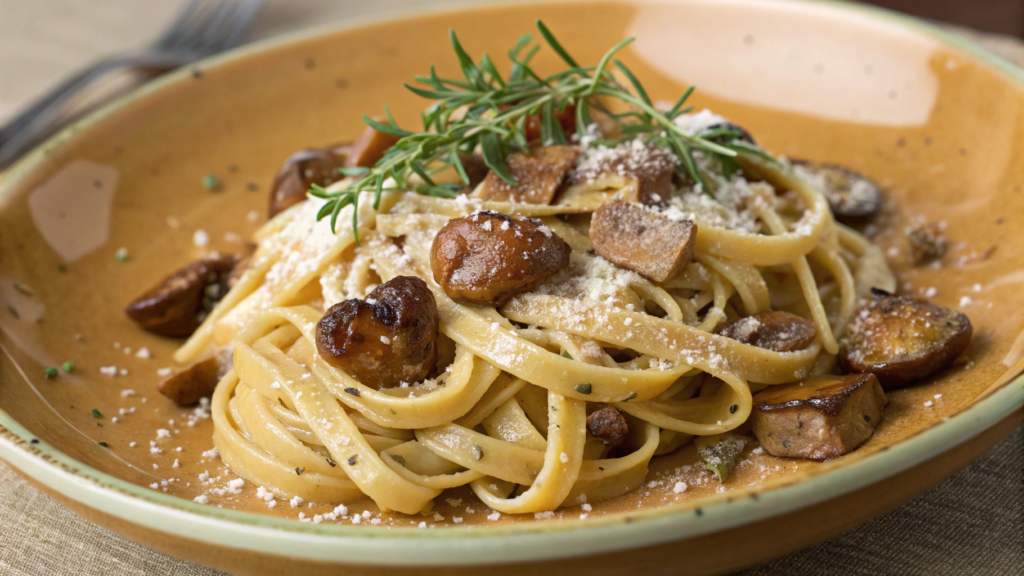
I like chestnuts in pasta most of all. After roasting, they become soft, slightly sweet, and work really well with a creamy sauce.
And you only need a little truffle oil here. A few drops at the very end are enough.
What you’ll need
For about 4 servings, you’ll need:
- 12 oz pasta (about 340 g)
- 1½ cups peeled chestnuts (about 225 g)
- 2 tbsp olive oil
- 2 tbsp butter
- 2 garlic cloves
- ¾ cup heavy cream (about 180 ml)
- ½ cup finely grated Parmesan (about 45–50 g)
- ½ cup pasta water (about 120 ml)
- ½ tsp dried thyme
- ¼ tsp freshly ground black pepper
- salt to taste
- ½–1 tsp truffle oil
- a little parsley, optional
I buy La Tourangelle White Truffle Infused Oil in a small bottle because it lasts a long time.
How to make pasta with chestnuts and truffle
- Roast the chestnuts. If you’re using ready-cooked peeled chestnuts, toss them with a spoonful of olive oil and roast at 400°F (about 205°C) for 12–15 minutes. They should brown slightly around the edges. Leave half whole or in large pieces, and lightly mash the other half with a fork.
- Cook the pasta. Boil it in well-salted water until it still has a little firmness in the center. Before draining, save about ½ cup of the cooking water. You’ll need it for the sauce.
- Make the creamy base. In a large skillet, melt the butter with the remaining olive oil. Add the minced garlic and thyme and cook for about 30 seconds. Then pour in the cream and add the mashed chestnuts. They will thicken the sauce slightly and give it a stronger nutty flavor.
- Add the pasta. Transfer it straight into the skillet, add the Parmesan, and start with a few spoonfuls of the pasta water. Mix well. If the sauce seems too thick, add a little more water. It should coat the pasta, not sit on it in a heavy layer.
- Add the remaining chestnuts. Stir in the larger pieces, add black pepper, and taste for salt. At this point, you can take the skillet off the heat.
- Add the truffle oil last. Start with just ½ tsp and mix. Taste it, then decide if you want a little more. Don’t heat it for long, because the aroma will fade.
A small tip
If you buy ready-cooked peeled chestnuts, check the ingredients. I choose ones that list only chestnuts, without sugar, syrup, or flavorings. Sweet chestnuts packed in syrup definitely won’t work for this pasta.
I love this pasta mainly because of the chestnuts. They add a little sweetness, a nutty flavor, and stay as soft pieces throughout the pasta. The truffle oil brings everything together with the Parmesan and cream. Lindy usually says that without the chestnuts, it would be a completely different pasta — and I agree with her.
7. Five-Minute Hot Buttered Rum Tea
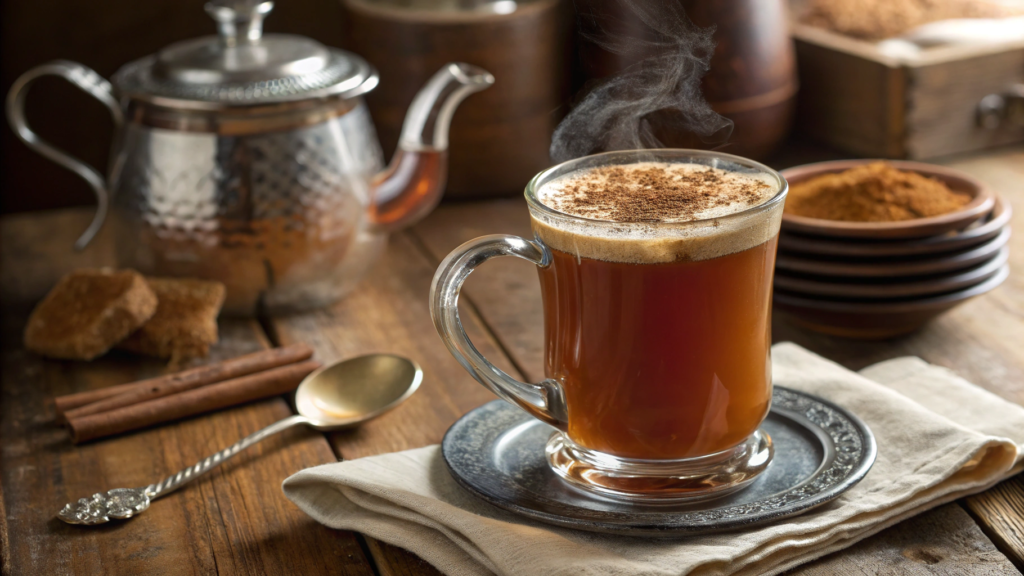
When it’s cold outside, I often make strong hot tea with rum, butter, and spices. It’s rich, a little spicy, and takes just a few minutes to make.
What you’ll need
For about 2 mugs, you’ll need:
- 2 cups hot water (about 475 ml)
- 2 bags of black tea
- 2 oz dark rum (about 60 ml)
- 1½ tbsp butter (about 20 g)
- 2 tbsp brown sugar
- ¼ tsp ground cinnamon
- a pinch of nutmeg
- a pinch of ground cloves
- ½ tsp vanilla extract
Fresh nutmeg is easier to grate right before serving, and a nutmeg grater works well for that, like the Microplane Premium Classic Zester Grater.
How to make hot buttered rum tea
- Brew strong tea. Pour boiling water over the tea bags and let them steep for about 4 minutes. Weak tea gets lost pretty quickly behind the rum and spices in this drink.
- Mix the butter and sugar. While the tea is steeping, mash the softened butter together with the brown sugar, cinnamon, nutmeg, and cloves. No need to whip it — just mix it well with a spoon.
- Divide the mixture between the mugs. Add half of the butter mixture to each mug, then pour in the hot tea and stir until the butter melts.
- Add the rum and vanilla. Pour 1 oz of rum into each mug, add the vanilla, and stir again. After that, it’s better not to heat the drink again so the rum doesn’t lose its aroma.
Tip
It’s better to use regular unsalted butter. Salted butter will work too, but together with the brown sugar, rum, and spices, the salt can become too noticeable and start overpowering the other flavors.
This drink is best without whipped cream, syrups, or extra toppings. Strong tea, a little rum, butter, and spices are plenty. By the way, our neighbor now always asks me to make one for her too when she stops by in the evening to chat.
8. Secret Farmhouse Chicken Casserole
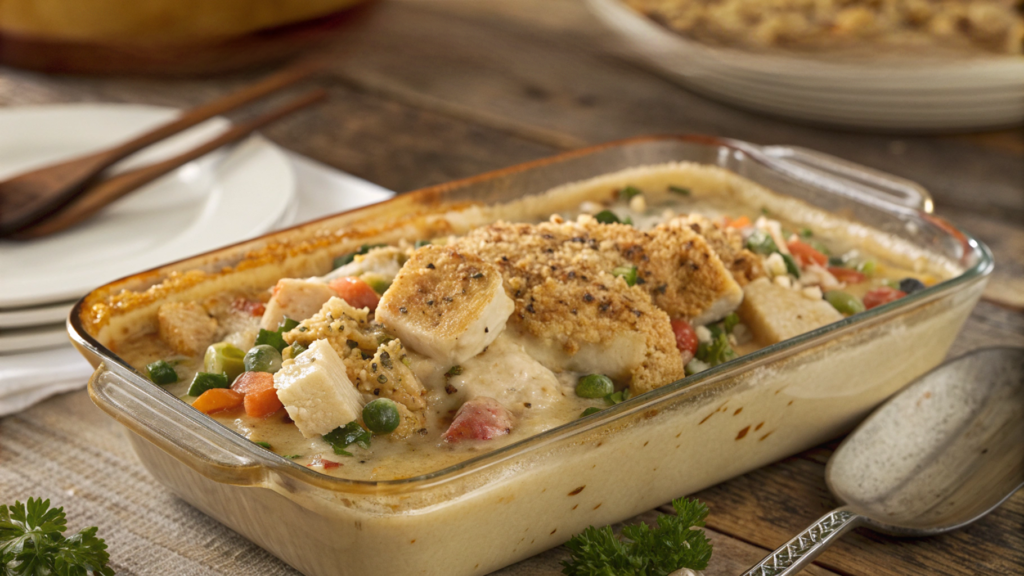
There’s nothing complicated about this chicken casserole. It’s basically a simple farmhouse dinner made with ingredients we almost always have at home anyway. The whole “secret” is the topping made with breadcrumbs, butter, Parmesan, and parsley. It browns nicely in the oven and turns crisp.
Lindy, as usual, handles the vegetables while I pull the chicken apart. If there’s roasted chicken left in the fridge from the night before, even better — then everything comes together much faster.
What you’ll need
For about 6 servings, you’ll need:
- 3 cups cooked chicken, pulled into small pieces (about 420 g)
- 1½ lb potatoes (about 680 g)
- 2 medium carrots
- 1 medium yellow onion
- 2 tbsp butter
- 2 tbsp flour
- 2 cups chicken broth (about 475 ml)
- ¾ cup heavy cream (about 180 ml)
- 1 tbsp Dijon mustard
- 1 tsp dried thyme
- ½ tsp dried sage
- salt and freshly ground black pepper
For the topping:
- 1½ cups breadcrumbs
- 2 tbsp butter
- 2 tbsp grated Parmesan
- 1 tbsp finely chopped parsley
A deep ceramic baking dish works well for this casserole.
How to make farmhouse chicken casserole
- Prepare the vegetables. Cut the potatoes into small cubes and the carrots into rounds or half-moons. Boil them in salted water for about 7–8 minutes. They shouldn’t be fully cooked because they’ll finish cooking in the oven.
- Make the sauce base. Melt the butter in a large skillet and add the finely chopped onion. Cook for about 5 minutes, then add the flour and stir well. After a minute, gradually pour in the broth, stirring constantly so there are no lumps.
- Add the cream and seasonings. Pour in the cream, then add the Dijon mustard, thyme, sage, black pepper, and a little salt. Cook over low heat for another 3–4 minutes, until the sauce thickens slightly.
- Assemble the casserole. Add the chicken, potatoes, and carrots to the baking dish. Pour the sauce over everything and gently mix so it gets between the pieces.
- Make the topping. Mix the breadcrumbs with the melted butter, Parmesan, and parsley. Scatter it evenly over the top.
- Bake. Put the dish in the oven at 375°F (about 190°C) for 25–30 minutes. The sauce should start bubbling gently around the edges, and the breadcrumbs on top should brown well.
Tip
If you’re using chicken breast, don’t cut it too small. Small pieces dry out quickly in a casserole, especially if the chicken was already cooked. I prefer pieces about 1–1½ inches (2.5–4 cm).
Almost everyone loves the crispy breadcrumb topping on this casserole. We’ve even had someone head back into the kitchen after dinner and scrape the browned bits from the edge of the baking dish with a spoon. So now I make that layer a little thicker than I used to.
9. Baked Spiced Oatmeal Cookies with Brown Butter
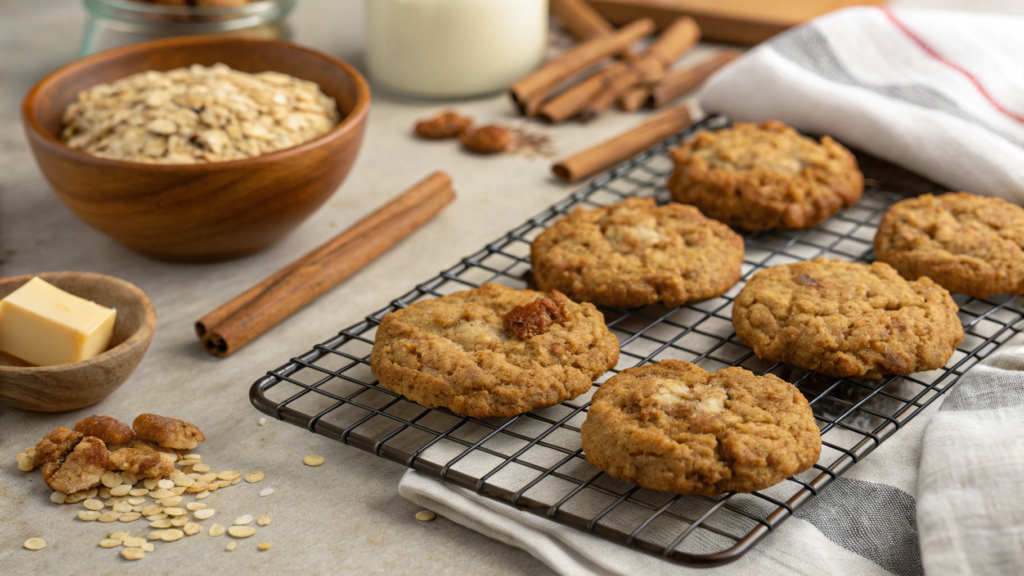
Oatmeal cookies have always felt very homemade to me. No frosting, complicated filling, or decorations — just rolled oats, butter, cinnamon, and a little sugar. But in this recipe, I brown the butter first. It gets a nutty flavor, and regular oatmeal cookies turn out a little different and, in my opinion, more interesting.
Lindy, unlike me, always notices the exact moment when the butter is ready. She can tell by the smell before I can. And there are literally only a few seconds between golden brown butter and burned butter.
What you’ll need
For about 18–20 cookies, you’ll need:
- 1 cup butter (about 225 g)
- 1 cup brown sugar (about 200 g)
- ½ cup granulated sugar (about 100 g)
- 2 large eggs
- 1 tsp vanilla extract
- 1½ cups all-purpose flour (about 190 g)
- 2½ cups rolled oats (about 225 g)
- 1 tsp baking soda
- 1½ tsp ground cinnamon
- ½ tsp ground ginger
- ¼ tsp nutmeg
- ½ tsp salt
For these cookies, it’s better to use regular old-fashioned rolled oats like Bob’s Red Mill Organic Old Fashioned Rolled Oats, not quick oats.
How to make oatmeal cookies with brown butter
- Brown the butter. Put it in a small light-colored saucepan or skillet and melt it over medium heat. First, it will foam, then brown bits will start forming on the bottom. As soon as the butter turns golden brown and develops a noticeable nutty smell, take it off the heat right away and pour it into a bowl. Let it cool for about 15 minutes.
- Mix the sugar and butter. Add both sugars to the warm brown butter and mix well. Then mix in the eggs one at a time and add the vanilla.
- Add the dry ingredients. In another bowl, mix the flour, baking soda, cinnamon, ginger, nutmeg, and salt. Add everything to the butter mixture and stir only until there’s no dry flour left.
- Add the oats. Mix the dough with a spoon or spatula. It will be fairly thick. Let it sit for 10 minutes so the oats can absorb some of the moisture and the cookies will hold their shape better.
- Shape the cookies. Scoop about 2 tbsp of dough onto a parchment-lined baking sheet, leaving about 2 inches (5 cm) between each one. There’s no need to press the dough down. It will spread a little on its own in the oven.
- Bake. Put the baking sheet in the oven at 350°F (about 175°C) for 10–12 minutes. The edges should already be browned, while the centers may still look a little soft. Leave the cookies on the baking sheet for another 5 minutes after they come out of the oven, and they’ll finish setting from the residual heat.
Tip
When making brown butter, it’s better to use a light-colored skillet or saucepan. On a dark surface, it’s much harder to see the moment when the milk solids turn brown. And be sure to pour the butter out as soon as you take it off the heat, because the hot pan will keep cooking it.
I like these cookies best completely cooled. The edges get firmer while the centers stay soft, and you can really taste the browned butter. Lindy puts the leftover cookies into a big jar in the kitchen, but trust me, they never stay there for long.
10. Heritage Cranberry Pork with Orange Glaze
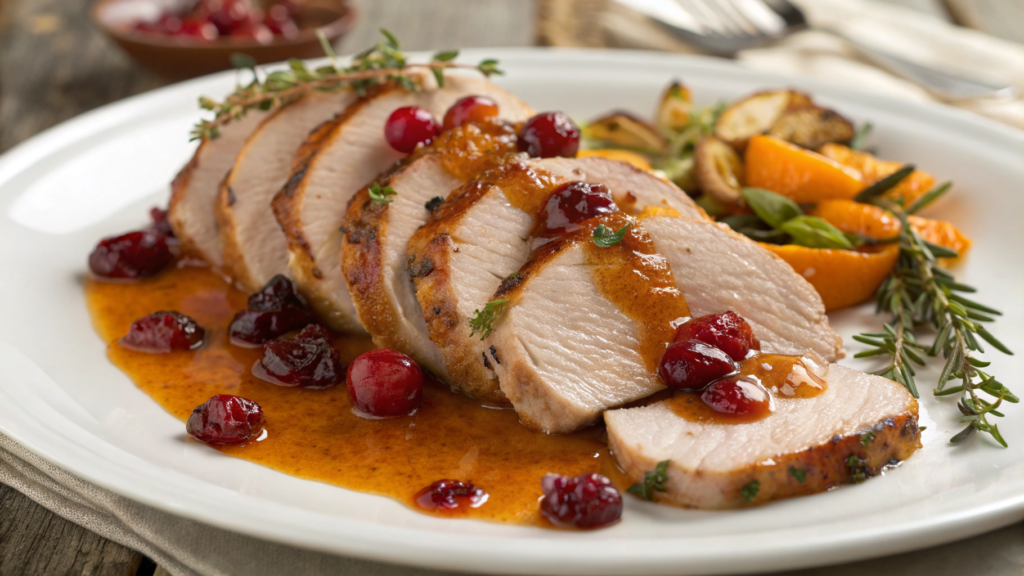
For this dish, I usually use pork tenderloin or a small pork loin roast — both are easy to roast whole and then slice before serving. Cranberries add a nice tartness, while orange brings sweetness and aroma.
We always have cranberries in the freezer. I love combinations like pork with tart berries and fruit — long before modern sauces, families cooked meat this way using what they were able to preserve after harvest. So cranberries and orange feel like a very natural pairing to me in this recipe. Lindy already knows that I’ll always save a few bags of fall cranberries specifically for winter cooking.
What you’ll need
For about 4–6 servings, you’ll need:
- 2 lb pork tenderloin or pork loin (about 900 g)
- 1½ cups fresh or frozen cranberries (about 150 g)
- ½ cup freshly squeezed orange juice (about 120 ml)
- zest of 1 orange
- ⅓ cup maple syrup (about 80 ml)
- 2 tbsp brown sugar
- 1 tbsp Dijon mustard
- 1 tbsp apple cider vinegar
- 2 tbsp olive oil
- 2 garlic cloves
- 1 tsp dried thyme
- ½ tsp salt
- ½ tsp freshly ground black pepper
I use a kitchen thermometer to check the temperature inside the meat. With pork, I stopped relying only on cooking time a long time ago.
How to make pork with cranberry and orange glaze
- Prepare the meat first. Pat the pork dry with a paper towel, rub it with olive oil, and season with salt, pepper, and thyme. Sear it in a very hot skillet for about 1–2 minutes on each side, until you get a browned crust.
- Make the cranberry base. In a small saucepan, combine the cranberries, orange juice, zest, maple syrup, brown sugar, mustard, vinegar, and minced garlic. Cook over medium heat for about 8–10 minutes. The berries will start to burst and the liquid will gradually thicken. I usually leave a few of the cranberries whole.
- Coat the pork with the glaze. Transfer the meat to a baking dish and spread about half of the cranberry mixture over the top. Leave the rest in the saucepan for now.
- Roast. Put the meat in the oven at 375°F (about 190°C). Pork tenderloin usually takes about 20–30 minutes, while a larger pork loin will need more time. It’s better to watch the internal temperature rather than the clock. The pork is ready when the temperature inside, at the thickest part of the meat, reaches 145°F (about 63°C).
- Let the meat rest. Take it out of the oven and leave it for about 10 minutes before slicing. That way, the juices stay in the meat instead of running straight out onto the cutting board.
- Bring the sauce to the right consistency. Warm the remaining cranberry mixture for another couple of minutes. If it gets too thick, add a little more orange juice. You can spoon some over the sliced pork and serve the rest on the side.
Tip
For this dish, I prefer fresh or frozen cranberries instead of ready-made cranberry sauce. The canned kind already has a lot of sugar, so together with the orange and maple syrup, the glaze can easily turn out too sweet. There’s no need to thaw frozen cranberries first.
The cranberry sauce can be made ahead, and the meat can go into the oven closer to dinner. And the bowl of extra sauce almost always ends up on the table next to the pork — someone adds one spoonful, and someone else goes for two…
Your favorite recipes
I already know I’ll come back to several recipes from this collection more than once this winter. Some are good for a regular dinner at home, while others I’d save for a weekend or an evening when friends are coming over. And we almost always have at least some of the ingredients for them in the pantry or freezer anyway.
If you make something from these ten, tell me in the comments what you chose and how it turned out. And if your family has a recipe that shows up on the table winter after winter, tell me about that too. I really enjoy reading stories like that, and maybe your recipe will end up staying with us for a long time.