In winter, a quick salad rarely feels convincing. You need a hot, filling dinner, but that doesn’t mean making it heavy with cream, lots of cheese, or a huge portion of meat.
Lindy and I don’t count every gram of protein at the table, but I’ve started paying more attention to how much of it we actually get from regular home-cooked food. So I tried to put together 10 high-protein winter dinners that still feel like normal homemade meals — hot, with a good sauce, vegetables, grains, legumes, and proper portions.
Some ingredients come from the garden and our summer preserves, some are always in the pantry, and we buy the rest as we need them. And if all of that can turn into a good dinner — great. Those are exactly the kinds of meals I collected in this article.
1. Creamy white bean & chicken skillet (no cream)
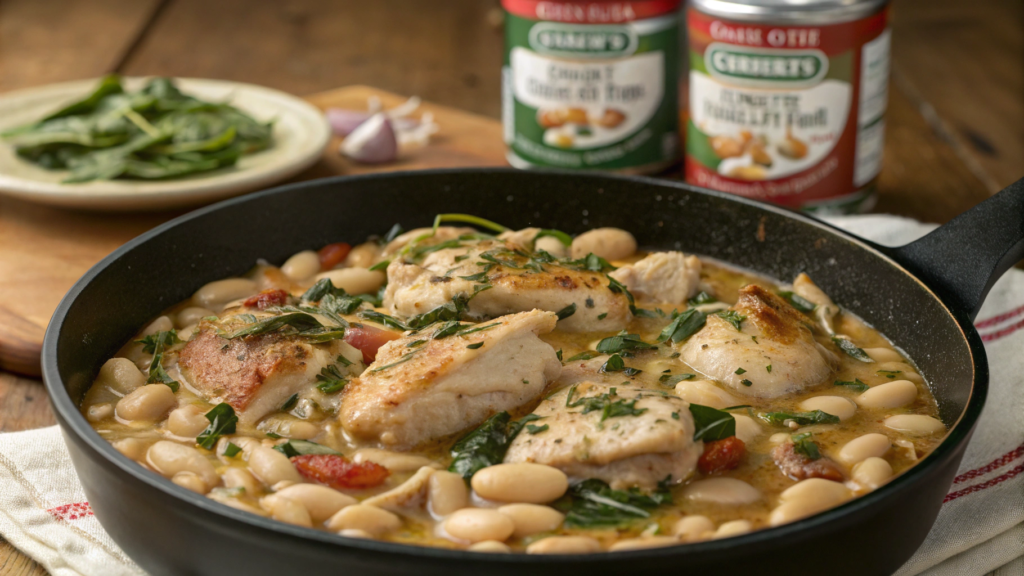
White beans are great for winter dinners. They give the dish some body, add plant-based protein, and even help thicken the sauce. So we won’t need cream at all.
In winter, Lindy and I often make meals like this with what we saved from the summer season — dried herbs, garlic, onions, and sometimes spinach from the freezer. After several years on our homestead, I’ve come to appreciate recipes where ordinary ingredients can turn into a proper, complete dinner, instead of buying ten special ingredients for one meal.
Each serving has about 35–40 grams of protein, depending on the size of the chicken pieces and how much beans you use.
What you’ll need
For 4 servings, I use:
- 1½ lb boneless, skinless chicken breast (about 680 g)
- 2 15-oz cans white beans, rinsed and drained (about 850 g including the liquid before draining)
- 1 cup chicken broth (240 ml)
- 3 large garlic cloves
- 1 small yellow onion
- 2 cups fresh spinach (about 60 g)
- 2 tbsp olive oil
- 1 tsp dried thyme
- ½ tsp dried rosemary
- ½ tsp smoked paprika
- ½ tsp salt, plus more to taste
- freshly ground black pepper
- 1 tbsp lemon juice
- ¼ cup finely grated Parmesan (about 25 g), optional
I usually use cannellini or Great Northern beans. Cannellini beans are easy to mash because they have a pretty soft, creamy center. For this dish, a large cast-iron skillet works best, such as the Lodge Cast Iron Skillet on Amazon.
How to make the creamy white bean and chicken skillet
- Cut the chicken into fairly large pieces. I make them about 1–1½ inches (2.5–4 cm). Pieces that are too small dry out quickly. Season with salt, pepper, and smoked paprika.
- Heat a large skillet well and add 1 tablespoon of oil. Arrange the chicken in a single layer. I don’t stir it for the first couple of minutes so it can develop a browned crust underneath. Cook for about 5–7 minutes, turning occasionally, then transfer it to a plate.
- Add the remaining oil to the same skillet along with the finely chopped onion. Cook for about 3 minutes. Add the garlic, thyme, and rosemary and stir for another 30 seconds or so.
- Add the beans and broth. Mash about ¾ cup of the beans directly in the skillet with a spoon or spatula. You don’t need to turn them completely into a puree. Some of the beans should stay whole.
The starch from the beans mixes with the broth, and after a few minutes you get a texture that’s very close to a creamy sauce.
- Return the chicken to the skillet along with any juices from the plate. Reduce the heat and cook for another 5–7 minutes, until the chicken is fully cooked and the sauce has thickened a little.
- At the very end, add the spinach and lemon juice. The spinach only needs a minute or two. If you’re using Parmesan, stir it in after lowering the heat.
I try not to let the sauce boil after adding the cheese, so it stays smooth instead of separating into liquid and little bits of cheese.
We often make this dish in winter, when friends stop by in the evening and we just want to spend time together without rushing anywhere. Lindy usually slices the bread, I put the skillet right on the table, and we sit there talking for a long time. Those ordinary evenings are exactly when I enjoy cooking the most.
2. Turkey & sweet potato winter bake with sage
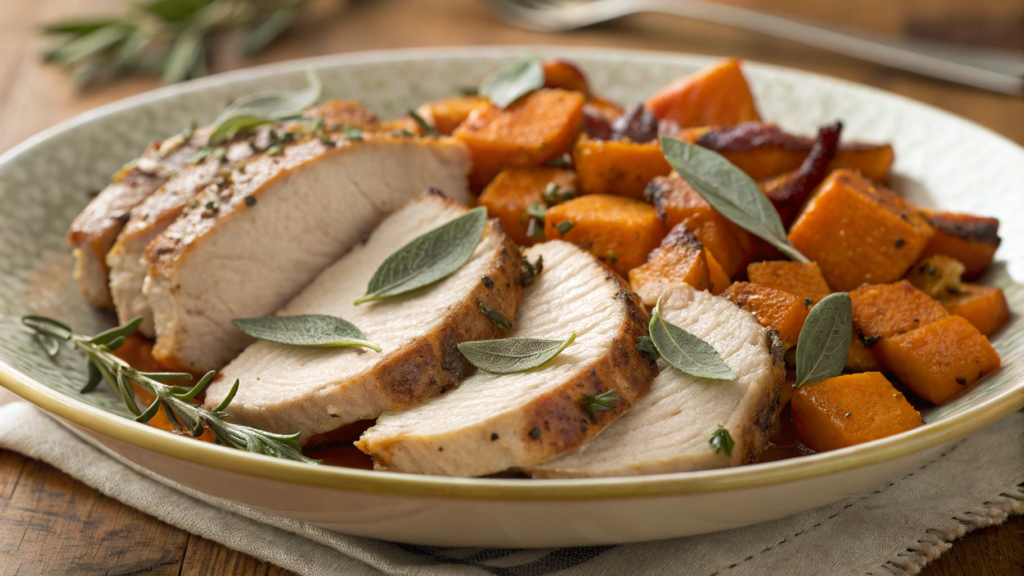
Sweet potatoes can turn just about any dinner into something truly filling. And with turkey, you also get a solid amount of protein — around 35–40 grams per serving if you divide the dish into four portions.
On our homestead, sage grows alongside our other perennial herbs… It pairs really well with turkey and sweet potatoes, so in winter I often use some of our dried stash in dishes like this.
What you’ll need
For 4 servings:
- 1¼ lb ground turkey (about 570 g)
- 2 medium sweet potatoes, about 1½ lb total (680 g)
- 1 medium yellow onion
- 2 garlic cloves
- 1 tbsp olive oil
- 1 tbsp finely chopped fresh sage or 1 tsp dried sage
- 1 tsp dried thyme
- ½ tsp smoked paprika
- ½ tsp salt
- black pepper to taste
- ½ cup chicken broth (120 ml)
- ½ cup shredded sharp cheddar (about 55 g), optional
- 2 cups fresh spinach (about 60 g)
How to make the turkey and sweet potato bake
- Preheat the oven to 400°F (205°C). Cut the sweet potatoes into cubes about ¾ inch (around 2 cm). If the pieces are much larger, the turkey may be done before the sweet potatoes are tender.
- Toss the sweet potatoes with half of the olive oil, a small pinch of salt, and black pepper. Spread them in the baking dish and put them in the oven for about 15 minutes. I give them this head start before adding the other ingredients so you don’t end up with firm pieces in the finished bake.
- While the sweet potatoes are roasting, heat the remaining oil in a large skillet. Add the chopped onion and cook for 3–4 minutes. Then add the ground turkey and break it into small pieces with a spatula.
- When the turkey is almost cooked, add the garlic, sage, thyme, and smoked paprika. Stir and cook for about another minute. Fresh sage is pretty strong, so there’s no need to add a huge handful — one tablespoon is enough for us.
- Take the baking dish out of the oven. Add the turkey, spinach, and broth and gently mix everything with the sweet potatoes. Return the dish to the oven for another 15–20 minutes. The sweet potatoes should be easy to pierce with a fork.
- If you’re adding cheddar, sprinkle it over the bake during the last 5 minutes. I use just a little rather than covering the whole top with cheese. That way you can still taste the turkey, sage, and sweet potatoes.
Tip. If you’re using dried sage, rub it between your fingers before adding it. That helps release more of its aroma, and one teaspoon will be plenty. You don’t need to do this with fresh sage.
I usually serve this bake straight from the dish, so there’s no need to come up with three more sides for it. Lindy and I normally add something simple, like a salad or some bread. And it’s actually even better the next day — the sage and sweet potato flavors have more time to come together.
3. High-protein mushroom stroganoff (no heavy cream)
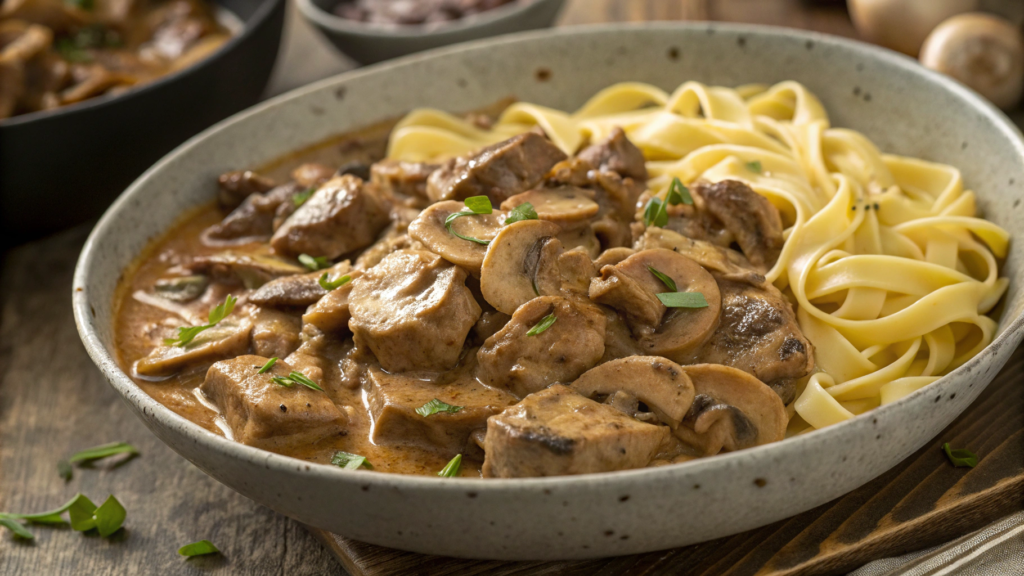
Mushroom stroganoff works really well for us in winter, but the classic version with a lot of cream can feel pretty heavy. So I make mine a little differently. Each serving has around 30–35 grams of protein, while the sauce still stays thick and rich.
Lindy and I love mushrooms and cook with them pretty often, and in this stroganoff they don’t feel like a meat substitute — they are the base of the dish. If you brown them well and don’t crowd the skillet, the mushrooms give the sauce a deep, rich flavor.
For 4 servings, you’ll need:
- 1½ lb mushrooms, preferably cremini or a mix of cremini and shiitake (about 680 g)
- 1 medium yellow onion
- 3 garlic cloves
- 1 tbsp olive oil
- 1 tbsp butter
- 1 tbsp flour
- 1½ cups vegetable broth (360 ml)
- 1 tbsp Dijon mustard
- 1 tsp smoked paprika
- ½ tsp dried thyme
- ¾ cup thick plain Greek yogurt (about 180 g)
- 1 tbsp soy sauce
- salt and black pepper to taste
- 2 tbsp chopped parsley
- 8 oz chickpea or lentil pasta (about 225 g)
For the mushrooms, I use a wide, heavy skillet. In a crowded pan, they quickly start steaming instead of browning.
If you’re using shiitake, remove the tough stems before slicing. You don’t have to throw them away — freeze them and add them to homemade vegetable broth later. Lindy is usually the first one to remind me about little things like that. Too much good food ends up in the trash just because we’re used to thinking of it as waste.
How to make mushroom stroganoff
- Slice the mushrooms fairly thick. Small pieces shrink a lot while cooking and can almost disappear into the sauce. I usually slice cremini about ¼ inch (6 mm) thick.
- Heat a large skillet well and add the olive oil. Add half of the mushrooms in a single layer and leave them alone for about 2 minutes. Then turn them and cook for a few more minutes. Transfer them to a plate and cook the second batch the same way.
Don’t add all the mushrooms at once. If the skillet is overcrowded, they release a lot of water, and instead of browned edges you end up with a soft, steamed mushroom mixture.
- Reduce the heat to medium. Add the butter and chopped onion. Cook for about 4 minutes, until the onion softens. Then add the garlic, thyme, and paprika and cook for another 30 seconds or so.
- Sprinkle the flour over the onions and stir well. Gradually pour in the broth, stirring constantly with a spatula so you don’t get any lumps.
- Add the Dijon mustard and soy sauce. Return the mushrooms to the skillet and cook for about 5 minutes, until the sauce thickens slightly.
- Remove the skillet from the heat and let the sauce sit for a minute. Then stir in the Greek yogurt. Don’t add it to a rapidly boiling sauce — high heat can make the yogurt curdle.
- While the mushrooms are cooking, boil the chickpea or lentil pasta according to the package directions. I prefer it to regular noodles because it noticeably increases the amount of protein in each serving.
Right before serving, it definitely doesn’t hurt to add parsley and a little freshly ground black pepper. If the sauce feels too thick after mixing it with the pasta, add a couple of spoonfuls of the pasta cooking water.
I think this stroganoff fits cooler weather better. In summer, I’d probably choose something fresher and quicker, but on a cold evening, a dish like this makes much more sense. And for something this hearty, it’s also a proper high-protein dinner — more than 30 grams of protein per serving without meat or heavy cream.
4. Garlic herb quinoa bowls with roasted vegetables
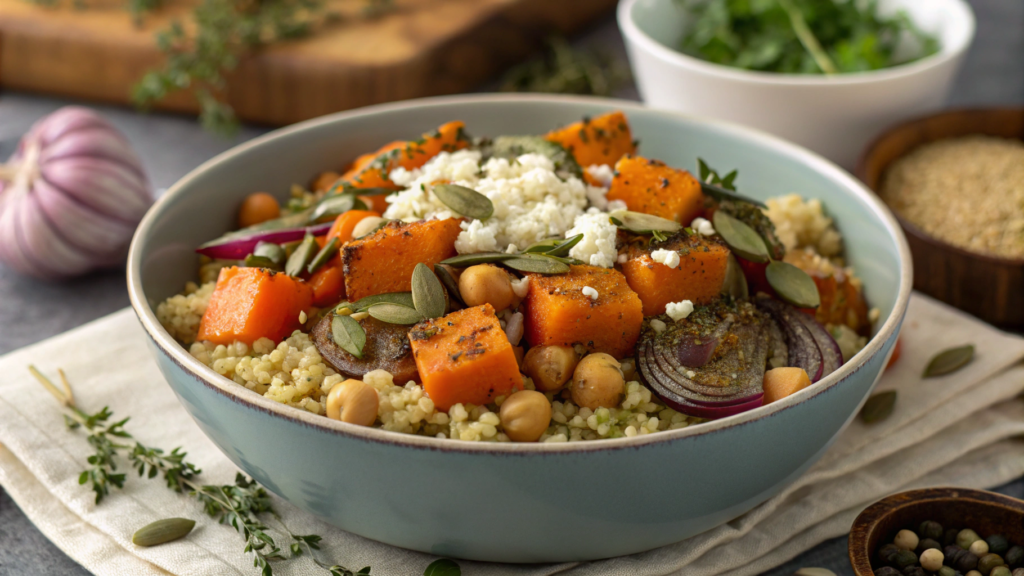
Quinoa works really well with roasted vegetables in a dish like this, soaks up the garlic dressing, and makes the meal filling instead of just a big bowl of vegetables. With chickpeas, pumpkin seeds, and feta, each serving comes out to around 25–30 grams of protein.
In winter, Lindy and I often cook with vegetables that store well after harvest. Pumpkin, carrots, onions, and garlic can keep for quite a while, and dried herbs always get used in our kitchen during the colder months. We never stick too rigidly to the recipe — we use the vegetables we have at the time and adjust the mix a little.
What you’ll need
For 4 servings:
- 1½ cups dry quinoa (about 255 g)
- 3 cups vegetable broth or water (720 ml)
- 1 15-oz can chickpeas, rinsed and drained (about 425 g before draining)
- 1 small sweet potato, about 10 oz (280 g)
- 2 medium carrots
- 2 cups broccoli florets (about 180 g)
- 1 small red onion
- 3 tbsp olive oil
- 3 garlic cloves
- 1 tsp dried thyme
- 1 tsp dried oregano
- ½ tsp smoked paprika
- ½ tsp salt
- black pepper to taste
- ¼ cup pumpkin seeds (about 30 g)
- ½ cup crumbled feta (about 75 g), optional
- 2 tbsp lemon juice
- 2 tbsp chopped parsley
By the way, you can swap the sweet potato for pumpkin, and the broccoli for Brussels sprouts or cauliflower. The main thing is to cut the vegetables into roughly the same size pieces so they cook at the same rate.
How to make quinoa with roasted vegetables
- Start by prepping the vegetables. Preheat the oven to 425°F (220°C). Cut the sweet potato into cubes about ¾ inch (2 cm), slice the carrots into fairly thick rounds, break the broccoli into small florets, and cut the onion into large wedges. Pieces of broccoli that are too small can dry out before the sweet potato softens.
- Spread the vegetables on a baking sheet. Add the chickpeas, 2 tablespoons of olive oil, thyme, oregano, smoked paprika, salt, and black pepper. Mix everything well with your hands or a large spoon, then spread it out in a single layer. If the vegetables are piled up, they’re more likely to steam than roast.
- Roast until the edges are browned. Put the baking sheet in the oven for about 25–30 minutes. After 15 minutes, I usually turn the sweet potato and carrots and give the chickpeas a quick stir. It’s better not to move the broccoli around too much — that helps the florets get those nicely browned edges.
- Cook the quinoa at the same time. Rinse it well in a fine-mesh strainer under cold water. This removes some of the natural bitterness from the surface of the grains. Transfer the quinoa to a saucepan, add the broth, bring it to a boil, then lower the heat. Cover and cook for about 15 minutes, until the liquid is absorbed.
- Let the quinoa sit for a few minutes. Once you turn off the heat, leave the lid on for another 5 minutes. Then fluff the quinoa with a fork. The texture turns out much better than if you start stirring it aggressively with a spoon right away.
- Make the garlic dressing. Mix the remaining tablespoon of olive oil with the lemon juice, finely grated garlic, and parsley. I add the garlic to the dressing instead of roasting it with the vegetables. At 425°F, small pieces of garlic can burn easily and turn bitter.
- Divide the quinoa into four portions, then add the roasted vegetables and chickpeas on top and drizzle with the garlic dressing. Sprinkle with pumpkin seeds and feta, if using. The seeds add a little more protein and fat, so the meal ends up noticeably more filling.
These bowls rarely turn out exactly the same in our house. One time it might be sweet potato and broccoli, another time pumpkin, cauliflower, or Brussels sprouts. Quinoa, chickpeas, and seeds give us the protein base, and we simply change the vegetables depending on the season and what we have stored.
5. Seared salmon with creamy spinach lentils
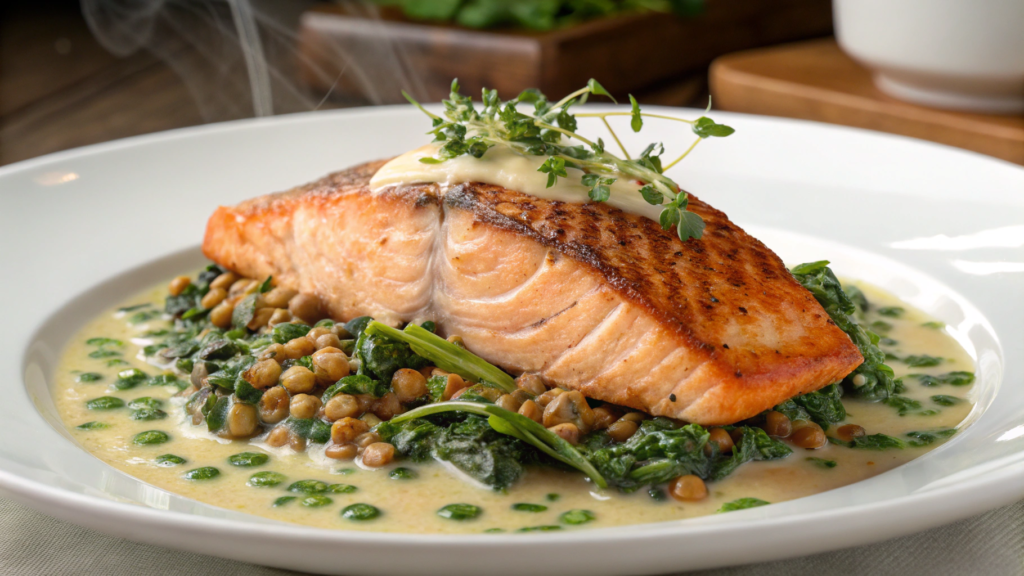
Salmon and lentils work really well together in one dinner. Both bring plenty of protein, while the creamy spinach pulls everything into one dish that doesn’t really need a separate side. The sauce stays smooth and rich without using a lot of cream.
On our current homestead, Lindy and I try to keep greens growing for as much of the year as possible. Spinach handles cooler weather well, so for us it keeps going longer than many other leafy greens in spring and fall. In winter, I’m perfectly happy using frozen spinach for dishes like this, and it works really well in a hot sauce.
What you’ll need
For 4 servings:
- 4 salmon fillets, 5–6 oz each (140–170 g)
- 1 cup dry green or brown lentils (about 190 g)
- 3 cups water or vegetable broth (720 ml)
- 5 oz fresh spinach (about 140 g)
- 1 small yellow onion
- 3 garlic cloves
- 1 tbsp olive oil
- 1 tbsp butter
- ¾ cup milk (180 ml)
- ⅓ cup finely grated Parmesan (about 35 g)
- 1 tsp Dijon mustard
- ½ tsp dried thyme
- 1 tbsp lemon juice
- ½ tsp salt, plus a little more for the fish
- black pepper to taste
For this dish, I usually use green or brown lentils instead of red. Red lentils break down quickly and turn almost into a puree. Here, we want lentils that stay whole and hold up in the sauce.
How to make salmon with lentils and spinach
- Cook the lentils first. Rinse them, transfer them to a saucepan, and cover with water or broth. Bring to a boil, then lower the heat and cook for about 20–25 minutes. Start checking a little earlier — the lentils should be tender inside but still hold their shape. If there’s a lot of liquid left, just drain it.
- Prepare the salmon for searing. Pat the fillets dry on both sides with a paper towel — wet fish will start releasing water into the skillet first. Season with salt and a little black pepper right before cooking.
- Heat the skillet well. Add the olive oil and place the salmon skin-side down, if it has skin. I don’t move the fish at all for the first 3–4 minutes. Then carefully flip it and cook for another 2–4 minutes, depending on the thickness of the fillet. Transfer the cooked salmon to a plate.
- Make the base for the sauce. Leave about a tablespoon of fat in the same skillet and add the butter. Add the finely chopped onion and cook for 3–4 minutes. Then add the garlic and thyme for another 30 seconds or so. The garlic shouldn’t have time to brown.
- Add the spinach. Add it to the skillet in small batches and stir until the leaves wilt down. If you’re using frozen spinach, thaw it first and squeeze out the excess water well. Otherwise, the sauce can turn too thin.
- Make the creamy sauce. Pour in the milk, add the mustard, and lower the heat. After a couple of minutes, stir in the Parmesan a little at a time. You don’t need a hard boil here. The cheese just needs to melt while the liquid thickens slightly.
- Combine the sauce with the lentils. Add the cooked lentils to the skillet and stir gently. If the mixture feels too thick, add 2–3 tablespoons of water or broth. Add the lemon juice at the very end and check the salt.
- Return the salmon before serving. Place the fillets on top of the lentils and warm them for just about a minute over low heat. There’s no reason to leave the fish in the sauce longer, especially if it’s already cooked through the way you want it.
Lindy and I eat lentils pretty often, but with fish they feel completely different from the way they do in soups or simple vegetable dishes. You end up with more than 40 grams of protein per serving, but dinner still doesn’t turn into one huge piece of salmon taking over the plate. To me, it’s a good example of how plant and animal protein can work really well together in the same meal.
6. Lean beef & barley stew with hidden mushrooms
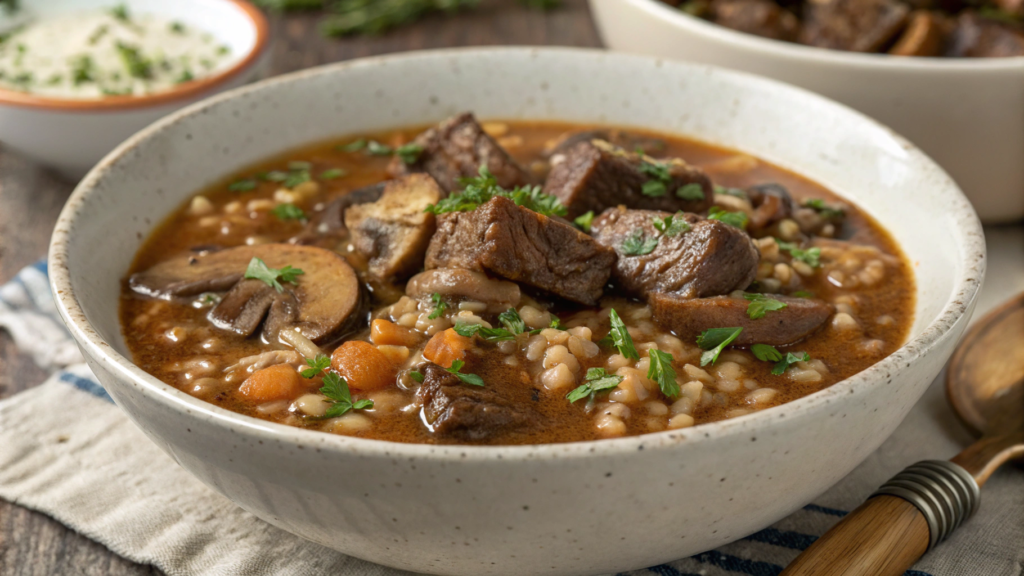
Beef and barley make a pretty hearty winter dinner, while the mushrooms add more depth and let you cut back a little on the amount of meat. I chop them very finely, so they almost melt into the base instead of turning the dish into a mushroom stew.
For a long time, barley was something we used mostly in soup. Then we started adding it more often to thick stews. It holds up really well to long, slow cooking without turning mushy.
What you’ll need
For 6 servings:
- 1½ lb lean stewing beef (about 680 g)
- 8 oz cremini mushrooms (about 225 g)
- ¾ cup dry pearl barley (about 150 g)
- 1 large yellow onion
- 2 medium carrots
- 2 celery stalks
- 3 garlic cloves
- 1 tbsp olive oil
- 1 tbsp tomato paste
- 5 cups beef broth (1.2 l)
- 1 tsp dried thyme
- 1 bay leaf
- 1 tsp Worcestershire sauce
- ½ tsp salt
- black pepper to taste
- 1 tbsp chopped parsley for serving
For a dish like this, a heavy pot with a thick bottom works really well, such as the Lodge Enameled Cast Iron Dutch Oven on Amazon. It holds steady heat well, and you can brown the meat right in the same pot.
Tip. You can soak the barley for 1–2 hours, or leave it in water overnight if you’re planning ahead. It will cook a little faster and more evenly. If you don’t have time, that’s fine too — just rinse it well and give it a little longer to cook if needed.
How to make beef and barley stew
- Dry and brown the meat well first. Cut the beef into pieces about 1–1½ inches (2.5–4 cm), pat them dry with a paper towel, and season lightly with salt. Heat the oil in a heavy pot and brown the meat in batches. Don’t crowd the bottom, or the beef will start steaming in its own juices. About 4–5 minutes per batch is usually enough.
- Prepare the vegetable base. Transfer the meat to a plate, lower the heat to medium, and add the chopped onion, carrots, and celery. Cook for about 5 minutes, stirring occasionally, until the vegetables soften a little and pick up all the browned bits from the bottom.
- Add the finely chopped mushrooms. I chop the cremini almost into crumbs with a knife or quickly pulse them in a food processor. Add them to the vegetables and cook for another 5–7 minutes. At first, the mushrooms will release quite a bit of liquid, but it will gradually cook off and the mushroom mixture will turn much darker.
- Add the garlic and tomato paste. Stir in the garlic, thyme, and tomato paste and cook for about a minute. The tomato paste should darken slightly — that gives the stew a richer flavor than adding the broth right away.
- Return the meat and add the liquid. Put the beef back into the pot along with any juices from the plate. Pour in the broth, add the bay leaf and Worcestershire sauce, and bring everything to a gentle simmer. Lower the heat, cover, and cook for about 45 minutes.
- Add the barley. Stir in the rinsed barley and mix well. Continue cooking for another 35–45 minutes at a gentle simmer. Check the bottom from time to time, because the barley gradually thickens the broth and can start sticking.
- Check the meat and thickness. The beef should pull apart easily with a fork, and the barley should be tender without falling apart. If the stew gets too thick before the meat is ready, add another ½–1 cup of hot broth or water.
- Let the stew rest for a few minutes. Remove the bay leaf, turn off the heat, and leave the pot covered for 10 minutes. The barley will absorb a little more liquid during that time, so it’s better to judge the final consistency after the rest. Then taste and add more salt or pepper only if needed.
The next day, this stew gets thicker because the barley keeps absorbing the broth. I always add a little water or broth when reheating it, then check the salt again. It turns out almost the same as the day before, just with a richer flavor.
7. Protein-packed ricotta gnocchi in tomato basil sauce
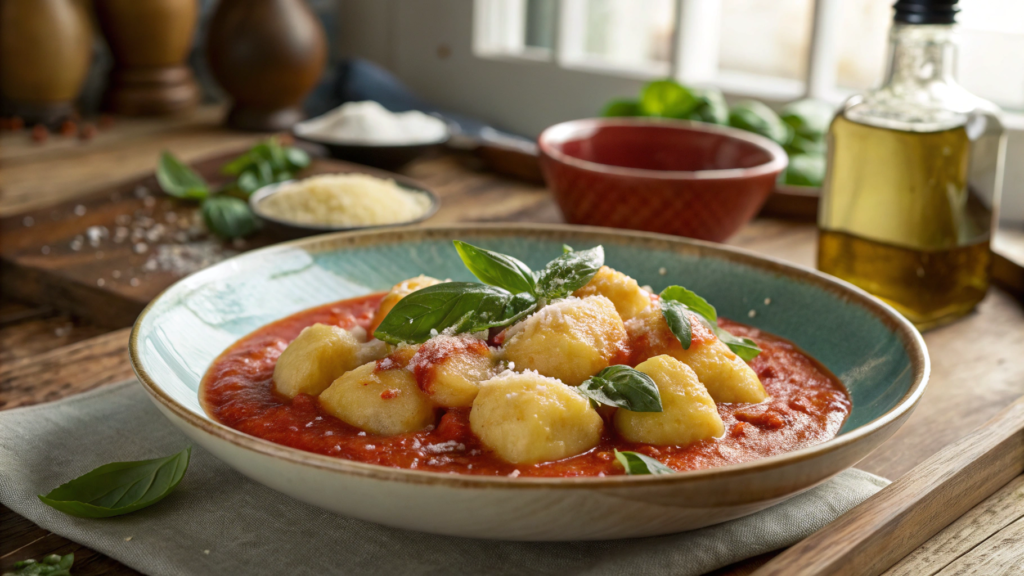
Ricotta gnocchi turn out noticeably more tender than potato gnocchi while also giving you more protein. The dough doesn’t need a lot of kneading or rolling, and the whole dinner can come together pretty quickly — especially if you already have tomato sauce on hand.
In summer, Lindy and I make a lot of tomato sauce from our own tomatoes and freeze some of it in small portions. Those little batches really come in handy in winter. I thaw one portion of sauce, add garlic and basil — fresh or frozen — and the base for dinner is already done. To me, that’s just normal home cooking — we do a little extra work in summer and use it in winter.
What you’ll need
For 4 servings:
- 15 oz whole milk ricotta (about 425 g)
- 1 large egg
- ¾ cup finely grated Parmesan (about 75 g)
- ¾–1 cup all-purpose flour (90–120 g), plus a little more for the work surface
- ½ tsp salt
- black pepper to taste
- 2 cups thick tomato sauce (about 480 ml)
- 2 garlic cloves
- 1 tbsp olive oil
- ¼ tsp red pepper flakes, optional
- ½ cup fresh basil
- a little more Parmesan for serving
Tip. Always check how wet the ricotta is. If there’s a lot of liquid in the container, transfer the cheese to a fine-mesh strainer for 15–20 minutes. The drier the ricotta, the less flour you’ll need, and the gnocchi will stay soft.
How to make ricotta gnocchi
- Start by mixing the base of the dough. Put the ricotta in a large bowl, add the egg, Parmesan, salt, and a little black pepper. Mix with a regular fork or spatula until combined.
- Gradually add the flour. Start with about ¾ cup and mix gently. The dough should stay soft and a little sticky but still hold its shape. If it’s spreading all over the bowl, add flour 1 tablespoon at a time. The more flour you add, the denser the finished gnocchi will be.
- Shape the dough into small ropes. Lightly flour your work surface and divide the dough into 3–4 pieces. Gently roll each piece with your hands into a rope about ¾ inch (2 cm) thick. There’s no need to press hard — the dough is very soft.
- Cut the gnocchi. Slice each rope into pieces about 1 inch (2.5 cm) long. You can leave them as they are or lightly roll them over the tines of a fork. I usually don’t spend time on that — the sauce sticks to them just fine without the ridges.
- Prepare the tomato sauce. While the water is coming to a boil, heat the olive oil in a large skillet. Add the finely chopped garlic and, if using, the red pepper flakes. After 20–30 seconds, pour in the tomato sauce and let it warm gently.
- Cook the gnocchi in small batches. Drop them into a wide pot of salted water without filling the pot all at once. At first, the gnocchi will sink to the bottom, then after about 2–3 minutes they’ll start floating. Once they rise, give them another 30 seconds or so and lift them out with a slotted spoon.
- Transfer the gnocchi straight into the sauce. That way, a little cooking water stays on them and helps the tomato sauce coat the surface. Gently toss the skillet instead of pressing the gnocchi with a spatula — they’re pretty delicate.
- Add the basil at the very end. Take the skillet off the heat, tear the leaves by hand, and stir them into the sauce. If you add the basil earlier and let it boil for too long, most of its fresh aroma disappears.
When Lindy and I make gnocchi together, we usually don’t even need to discuss who does what. I cut the dough, she watches the pot, and then we might switch. A few minutes later, the whole work surface is covered in flour, the gnocchi are waiting their turn by the stove, and we’re talking about whatever comes to mind.
Things like this really are more enjoyable to make together.
Each serving has about 30 grams of protein from the ricotta, egg, and a good amount of Parmesan. For a meatless dinner, that’s pretty substantial. But it still tastes like soft homemade gnocchi in tomato sauce, not some special “protein” meal.
8. Cozy chicken & chickpea curry (no dairy needed)
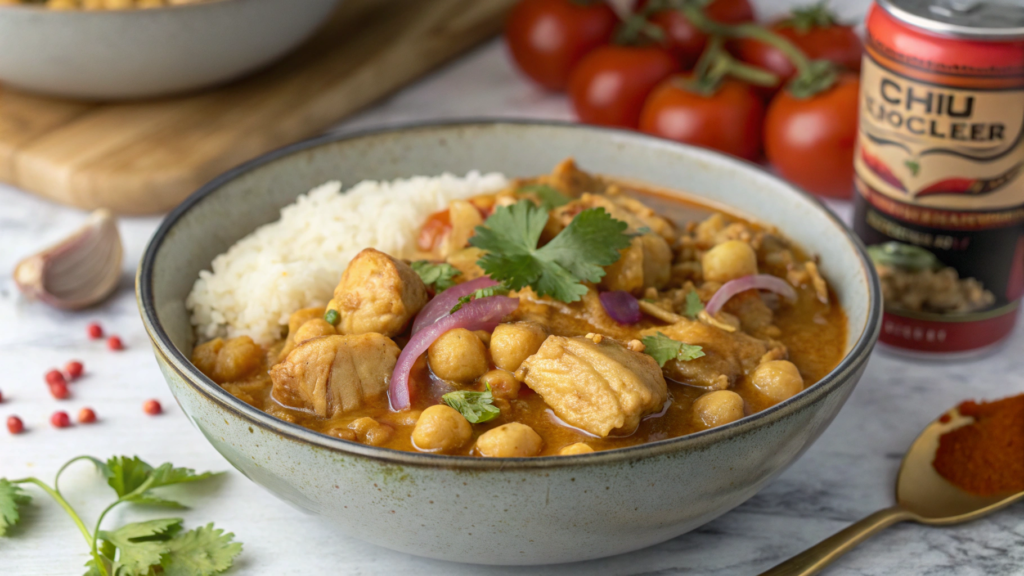
Toward the end of the week, Lindy and I often cook this way — we look at what’s left at home and make dinner from that. Chickpeas, onions, garlic, spices, and a can of tomatoes are usually already in the kitchen, so there’s no need for another trip to the store.
What you’ll need
For 4 servings:
- 1½ lb boneless, skinless chicken breast (about 680 g)
- 1 15-oz can chickpeas, rinsed and drained (about 425 g before draining)
- 1 medium yellow onion
- 3 garlic cloves
- 1 tbsp freshly grated ginger
- 1 tbsp olive oil
- 1 tbsp curry powder
- 1 tsp ground cumin
- ½ tsp ground turmeric
- ½ tsp smoked paprika
- 1 14–15 oz can crushed tomatoes (about 400 g)
- 1 cup unsweetened coconut milk (240 ml)
- ½ cup chicken broth (120 ml)
- 3 cups fresh spinach (about 90 g)
- 1 tbsp lemon juice
- ½ tsp salt
- black pepper to taste
- fresh cilantro for serving, optional
How to make chicken and chickpea curry
- Cut and season the chicken. Cut the chicken into pieces about 1–1½ inches (2.5–4 cm). Add a little salt and black pepper. Try to keep the pieces roughly the same size so they cook evenly.
- Brown the chicken in batches. Heat the oil in a deep skillet over medium heat. Add the chicken in a single layer and cook for about 5–6 minutes, turning it until it gets some color on the outside. It doesn’t need to be fully cooked at this point. Transfer it to a plate.
- Prepare the base of the sauce. Add the finely chopped onion to the same skillet and cook for about 4 minutes. Then add the garlic and ginger and stir for another 30–40 seconds. That’s enough — garlic burns quickly and can turn bitter.
- Warm the spices. Add the curry powder, cumin, turmeric, and paprika. Stir for about 30 seconds. The spices should warm up in the oil without burning. If the skillet looks too dry, add a tablespoon of broth.
- Add the tomatoes, chickpeas, and liquid. Pour in the crushed tomatoes, coconut milk, and broth. Add the chickpeas and stir well, scraping up all the browned bits from the bottom. Bring the sauce to a gentle simmer.
- Return the chicken to the skillet. Lower the heat and cook at a gentle simmer for another 8–10 minutes. The chicken will finish cooking and the sauce will thicken. If the liquid is reducing too quickly, cover the skillet halfway with a lid.
- Add the spinach at the very end. Stir it into the hot sauce and leave it for 1–2 minutes, until the leaves wilt down. Then add the lemon juice and check the salt again.
We always keep a few cans of chickpeas on hand for dinners like this. There’s nothing to prep the night before, and chickpeas hold up well when they simmer in sauce. You can mash some of the chickpeas right into the sauce to make it thicker without flour or starch.
Each serving has around 40 grams of protein, depending on the amount of chicken and chickpeas. And as you can see, the high protein here doesn’t come from a huge portion of meat, but from combining several ingredients in the same dish.
9. High-protein broccoli cheddar casserole (lightened up)
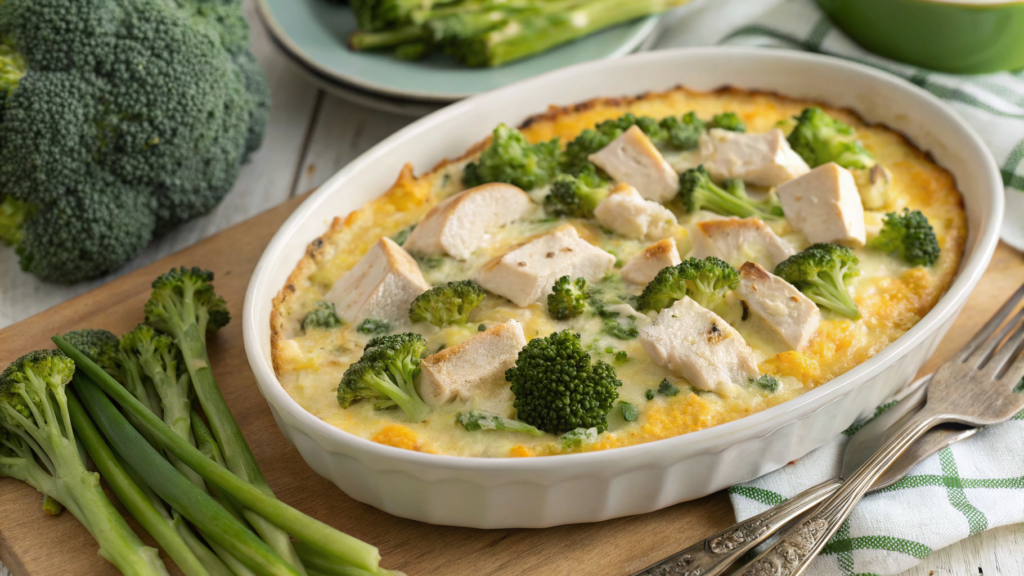
Broccoli and cheddar are a pretty classic combination, but for this version I change up the creamy base a little. Instead of using a lot of cream and cheese, I go with cottage cheese and Greek yogurt, and use less cheddar than in a classic casserole. The chicken adds extra protein too, so the dish ends up lighter while still being filling.
Lindy and I really love broccoli. We eat some of the harvest fresh and freeze some in smaller portions, which comes in really handy for casseroles. In winter, there’s no need to go out and buy fresh broccoli if we still have some of our own in the freezer.
What you’ll need
For 4–5 servings:
- 1 lb cooked chicken breast, cut into small pieces (about 450 g)
- 5 cups broccoli florets (about 450 g)
- 1 cup 2–4% cottage cheese (about 225 g)
- 1 cup shredded sharp cheddar (about 110 g)
- ½ cup plain Greek yogurt (about 120 g)
- 2 large eggs
- ½ cup milk (120 ml)
- 2 garlic cloves
- 1 tsp Dijon mustard
- ½ tsp smoked paprika
- ½ tsp dried thyme
- ½ tsp salt
- black pepper to taste
- ¼ cup whole wheat breadcrumbs (about 25 g), optional
- 1 tsp olive oil
Tip. If you’re using frozen broccoli, thaw it completely and squeeze out the excess water well. Otherwise, that extra moisture will end up in the sauce and make the casserole too watery.
How to make broccoli cheddar casserole
- Prepare the broccoli. Preheat the oven to 375°F (190°C). Cut the fresh broccoli into small florets and blanch them in boiling water for 2–3 minutes. They should soften a little but still stay firm. Drain right away and let them drain well.
- Make the high-protein sauce base. Add the cottage cheese, Greek yogurt, eggs, milk, garlic, mustard, paprika, thyme, salt, and pepper to a blender. Blend for about 20–30 seconds, until the mixture is almost smooth. A little texture is fine — it mostly disappears after baking.
- Mix the filling. In a large bowl, combine the broccoli and cooked chicken. Add about ¾ cup of the shredded cheddar and mix. Then pour in the cheese mixture and gently work it through the pieces of broccoli.
- Transfer everything to the baking dish. Lightly grease the dish with oil and spread the mixture evenly. Don’t pack it down too firmly — the sauce needs room to settle between the broccoli and chicken.
- Add the top layer. Sprinkle the remaining cheddar over the top. If you want a little crunch, mix the breadcrumbs with a teaspoon of olive oil and spread them in a thin layer over the casserole. You don’t need much, or the breadcrumbs can start taking over the flavor.
- Bake until done. Put the dish in the oven for about 25–30 minutes. The edges should be gently bubbling, and the cheese on top should be melted and lightly browned. If the center still looks too wet, give it another 5 minutes.
- Let it sit for a few minutes before cutting. Wait 8–10 minutes after taking it out of the oven. The sauce will thicken a little, and the casserole will be easier to portion without leaving a puddle of liquid at the bottom of the dish.
When Lindy and I make casseroles like this together, she’s usually the one grating the cheese. And she almost always goes a little more generous than I ask. There usually ends up being more on top than I planned, but I stopped arguing with Lindy about cheddar a long time ago.
There are around 35–40 grams of protein per serving, but you really don’t think about that at the table. It’s just a good hot casserole with broccoli, chicken, and melted cheddar. The sauce is lighter than in the classic version, while the whole thing still feels like a proper homemade dinner.
10. Spicy black bean & turkey chili for cold nights
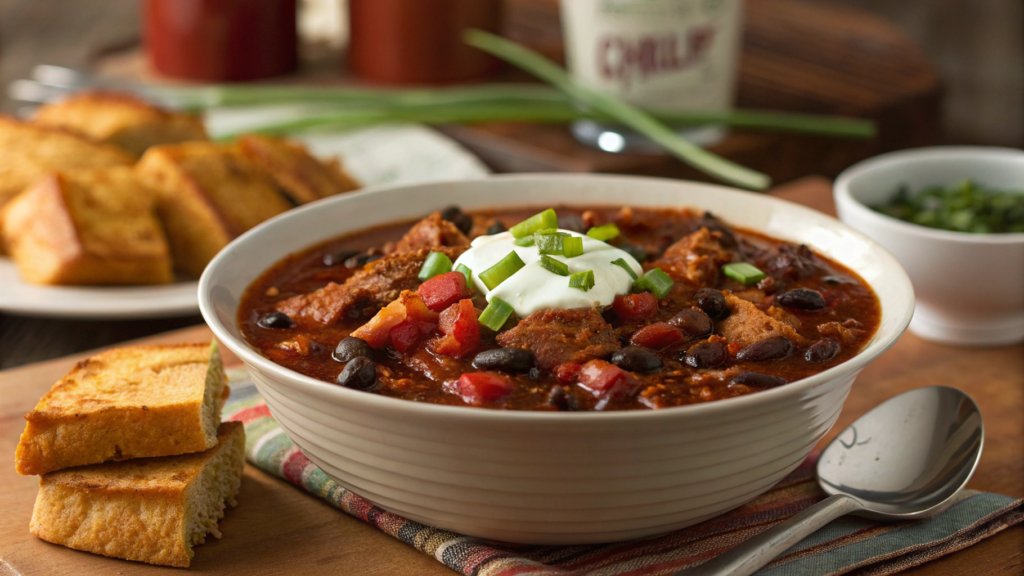
Lindy and I usually don’t make chili too fiery. I like some heat, but I still want to taste the tomatoes, beans, and spices, not just the pepper. So it’s easier to add extra hot sauce or fresh jalapeño to your own bowl to taste.
What you’ll need
For 6 servings:
- 1½ lb ground turkey (about 680 g)
- 2 15-oz cans black beans, rinsed and drained (about 850 g before draining)
- 1 28-oz can crushed tomatoes (about 800 g)
- 1 medium yellow onion
- 1 red bell pepper
- 3 garlic cloves
- 1 tbsp olive oil
- 2 tbsp tomato paste
- 1½ tbsp chili powder
- 2 tsp ground cumin
- 1 tsp smoked paprika
- ½ tsp dried oregano
- ¼–½ tsp cayenne pepper, to taste
- 1 cup chicken broth (240 ml)
- ½ tsp salt
- black pepper to taste
- 1 tbsp lime juice
- fresh cilantro for serving, optional
If the chili turns out too spicy, don’t try to fix it by adding water. Add a little more tomatoes or beans instead. That will soften the heat without watering down the flavor.
How to make turkey and black bean chili
- Brown the turkey first. Heat the oil in a large pot over medium heat. Add the ground turkey and break it into small pieces with a spatula. Cook for about 6–7 minutes, until most of the liquid has evaporated and the meat starts browning in a few spots. If the turkey still looks very wet, give it another couple of minutes uncovered.
- Add the onion and bell pepper. Cut them into small cubes and add them to the turkey. Cook for another 5 minutes, stirring occasionally. The onion should soften and the pepper should cook down a little, but it doesn’t need to fall apart.
- Add the garlic and spices. Add the chili powder, cumin, paprika, oregano, and cayenne pepper. Add the finely chopped garlic and stir for about 30 seconds. That gives the spices enough time to warm up in the oil and become more fragrant without burning.
- Cook the tomato paste. Add it straight to the pot and cook for about a minute, stirring constantly. The paste will darken slightly and lose that raw tomato smell. This gives the base a much richer flavor.
- Add the tomatoes, beans, and broth. Pour in the crushed tomatoes and broth, then add the black beans. Stir well, scraping the bottom of the pot with your spatula. Bring everything to a gentle simmer.
- Let the chili simmer. Lower the heat and cook uncovered for about 25–30 minutes. Stir every few minutes, especially toward the end as the sauce starts to thicken. If you want a thicker texture, mash a small amount of the beans against the side of the pot with a spoon.
- Check the heat closer to the end. The spices get stronger as the chili cooks, so don’t add the full amount of cayenne right away. Taste it after about 20 minutes and only then decide if it needs more.
- Add the lime after turning off the heat. One tablespoon is usually enough. Then check the salt and black pepper again and let the chili sit covered for 5–10 minutes.
Lindy, for example, might add a spoonful of yogurt to hers, I’ll add more jalapeño, and someone else might go for cheese or avocado. So I keep the chili itself moderately spicy, and everyone can add whatever they like from there.
This dish has around 35–40 grams of protein per serving from the turkey and black beans. But what matters most to me is that one bowl actually fills you up, and half an hour later you’re not wandering around the fridge looking for something else.
A good winter dinner
High-protein food definitely doesn’t have to look like chicken breast with a bland side dish on schedule. You can get plenty of protein from several ingredients in one meal, while still making something you want to eat simply because it tastes good.
Over dinner, you can talk about work, plans for the homestead, laugh about something completely ridiculous, or just sit quietly and eat for a while. And to me, that’s a pretty good test for home-cooked food. If you still want to sit at the table a little longer after dinner, then everything turned out just right.
I hope one of these recipes becomes a regular winter dinner in your home. Tell me in the comments which one. I always love hearing which recipes end up sticking around for the long haul.