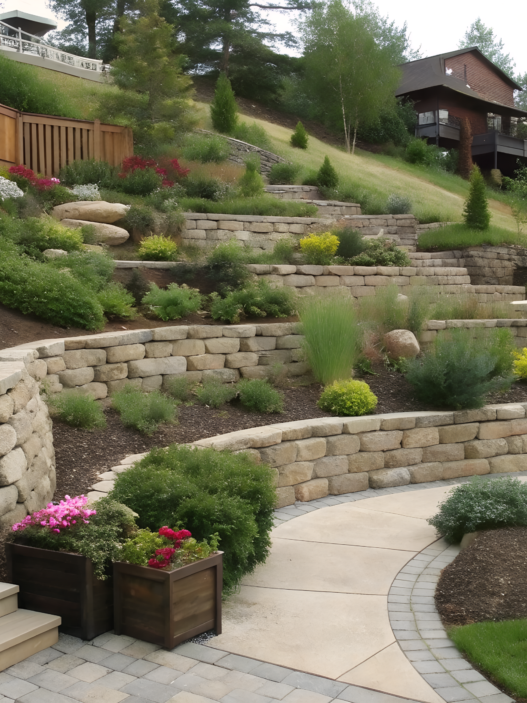
I think you probably dislike it just as much as I do when mosquitoes start circling around the yard on summer evenings. Especially after watering near the garden beds. You step outside for literally five minutes and come back with bitten legs already.
We tried so many different things in the fight against mosquitoes. Candles, traps, sprays, portable fans. A lot of it simply didn’t work well enough. But at the same time, I noticed that some fragrant plants and the right setup around seating areas can make the yard much more comfortable in summer.
These are aromatic herbs along walkways, flowering bed edges, gravel corners with lavender and thyme. At the same time, the space becomes more pleasant for people and less comfortable for mosquitoes.
Here I have a few options for you that worked well for us during the hottest months. Most of these ideas are easy to put together even over a weekend without seriously reworking the yard.
1. Citronella Grass Border Planting For A High Scent Perimeter
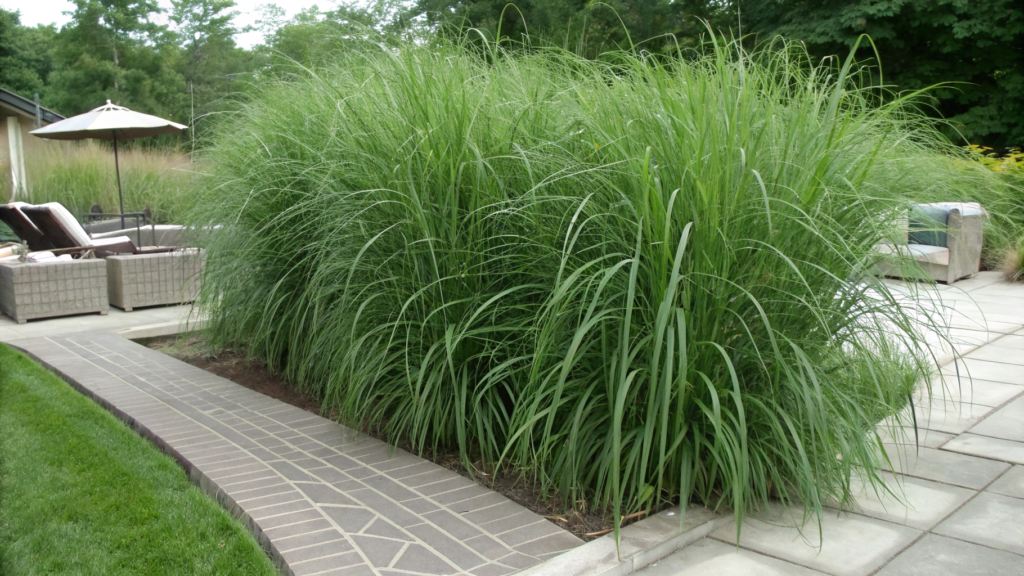
Citronella grass does not destroy mosquitoes and does not replace other ways of protecting the yard. And that’s important to remember. Citronella oil has been used in mosquito repellents and garden candles for many years, which is why this plant is often planted near seating areas.
For this type of citronella border, I recommend doing a dense planting instead of adding one or two bushes “just for looks.” Once the plants grow at least 3–4 ft (90–120 cm) tall, you get a real fragrant green barrier.
What You’ll Need
- Citronella plants or seeds. If you want fast results in one season, ready plants are more convenient
- Compost
- Mulch
- A shovel
- A garden hose or drip irrigation
- Gloves
- A sunny spot with at least 6–8 hours of light per day
How To Make a Citronella Border
- Find the most problematic areas of the yard
Mosquitoes are usually worse near damp areas: close to irrigation, water barrels, dense plantings, or shady corners of the yard. For us, the area with the most insects was always the path near the vegetable garden. You don’t need to plant the entire yard. Sometimes it’s enough to frame only one side of a seating area or walkway. - Prepare the planting strip
For a proper border, it’s better to leave a strip around 2 ft (60 cm) wide. Citronella spreads quickly and looks much more impressive when the plants are not crowded. It’s a good idea to add compost to the soil. In loose soil, the bushes grow more actively and become fuller. - Space the plants properly
It’s convenient to leave around 24–30 inches (60–75 cm) between bushes. At first the planting may look a little empty, but by mid-season the plants start filling in. Planting too tightly is not a good idea. Moisture begins to stay trapped inside the bushes and air circulation becomes worse. - Add mulch
A mulch layer around 2–3 inches (5–7 cm) helps the soil stay moist longer and reduces weeds. Plus, the planting line itself starts looking much neater. I like using dark wood mulch. Against that background, the tall green grass looks especially striking. - Water deeply, especially after planting
During the first few weeks after planting, citronella needs deep watering while the plants establish roots. Later, the bushes become much more heat tolerant. At the same time, constant wetness around the roots is unnecessary. Rare but deep watering works much better.
What Else Is Important To Keep In Mind
Citronella loves warmth and sun. In cooler regions, it is sometimes grown as an annual or containers are brought indoors for winter. The scent becomes stronger when the leaves are brushed by hands or clothing. Because of that, these plantings are especially useful:
- along walkways
- near seating areas
- beside backyard entrances
- around patios
- near garden beds and garden paths
A citronella border really can make evenings in the yard feel more comfortable. Especially when combined with good air circulation, no standing water, and dense planting around seating areas.
2. Lemongrass Pots Near Doors For A Fast Backyard Upgrade
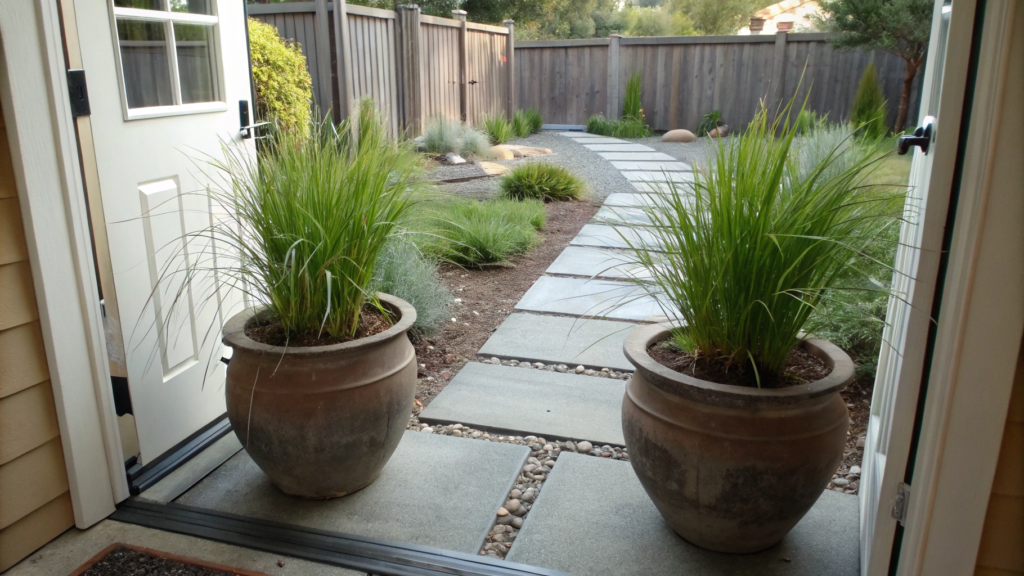
What I like about this lemongrass setup is that you don’t need to rebuild the entire yard, dig long garden beds, or make new flower borders. A couple of large containers, and suddenly everything around them starts looking completely different.
Lemongrass contains natural compounds that are used in some insect repellent products. That’s exactly why people often plant it near seating areas and walkways. Of course, one pot will not completely solve the mosquito problem, but near doors and small patio areas the difference really can be noticeable. Especially if you place two large matching containers on both sides of an entrance.
What You’ll Need
- Large outdoor pots at least 16–20 inches (40–50 cm) wide
- Lemongrass plants
- Potting soil for containers
- Compost
- Mulch or decorative gravel
- A watering can or garden hose
- Pruning shears
- Fertilizer for herbs if needed
- Tall containers with good drainage holes, like Kante Tall Planter Set on Amazon
How To Make Lemongrass Containers Near Doors
- Choose a sunny spot near the entrance
Lemongrass loves heat and sun. It grows best in places that get at least 6 hours of direct sunlight per day. Near a north-facing wall, the bushes usually stretch less and look thinner. - Pick containers that are large enough
This is one of the most important parts. Small containers do not work well for lemongrass. The plant develops a large root system very quickly and starts feeling cramped. I especially like heavy tall planters that don’t tip over in the wind, especially once the plants grow taller than 3 ft (90 cm). - Make the soil loose and breathable
I usually mix regular potting soil with compost. The soil should hold moisture without staying constantly wet. You can also add a little gravel or coarse bark at the bottom of the container for drainage. - Plant closer to the center of the pot
Lemongrass gradually becomes very large and full. Because of that, it’s better to leave some free space around the edges of the container from the beginning. At first the plant may look small, but during peak summer the leaves begin spreading out aggressively. - Water regularly during hot weather
Containers dry out much faster in summer than regular garden beds. Especially near concrete patios and wooden decks where heat reflects from the surface. If the leaf edges start looking dry, that’s usually the first sign the plant needs more water.
Where These Containers Make the Most Sense
It’s best to place lemongrass containers in areas where people walk every day. That way the plants become not only part of the yard design, but also a practical addition near active spaces. Plus, in high-traffic areas the leaves constantly get brushed by hands or clothing, and the scent becomes much stronger.
The best spots for these containers are usually:
- near backyard doors
- beside patios
- around outdoor kitchens
- near barbecue areas
- along paths between the house and the garden
- near places where people sit in the evenings
I prefer not to place containers too far away from seating areas. If the pots are sitting somewhere near a distant fence, the scent is barely noticeable where people actually spend the evening. But near an entrance, table, or garden path, the smell of lemongrass becomes much stronger — especially on warm evenings when mosquitoes become more active.
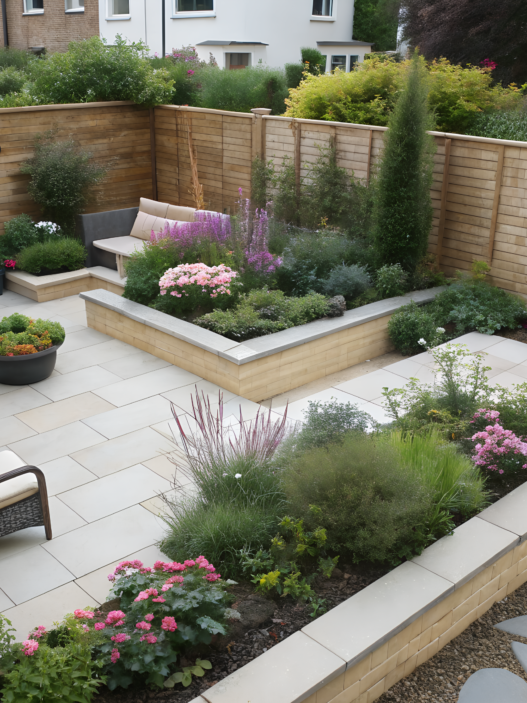
3. Lavender Hedge Line For Patio Seating Zones

When we planted lavender along the area with wooden chairs near the garden, the whole place immediately started feeling like a separate seating zone. On top of that, its strong scent can make the space less attractive to some insects. That’s exactly why lavender is so often used near patios, walkways, and places where people spend time outside in the evenings.
I like that a lavender hedge line does not require complicated maintenance once the plants are established. Especially in dry sunny yards where many other plants start struggling from heat very quickly.
What You’ll Need
- Compact lavender varieties for borders
- Compost
- Well-draining soil or sand for heavy ground
- Gravel or small stone mulch
- Pruning shears
- A shovel
- A garden hose
- A sunny location
How To Make a Lavender Hedge Line Near a Patio
- Choose the sunniest spot possible
Lavender does poorly in constant moisture and shade. The more sun the planting gets, the denser and more fragrant the bushes become. These hedge lines work best along open spaces where air circulates normally. - Prepare well-draining soil
This is one of the most important parts. Lavender does not like heavy wet soil. If the ground is dense, I usually add sand or fine gravel together with compost. After that, the roots develop much more reliably. - Plant the bushes at equal spacing
For a clean-looking hedge line, plants are usually spaced around 18–24 inches (45–60 cm) apart. Planting too tightly may look nice during the first season, but later the bushes start competing with each other, get worse airflow, and age faster inside. - Use stone mulch instead of wood mulch
I personally like fine gravel or crushed stone around lavender much more. Stone holds less extra moisture around the base of the plants and visually works very well with the silvery foliage. Plus, after rain the planting looks cleaner and neater. - Trim the bushes after flowering
Without pruning, lavender gradually becomes loose and starts falling apart to the sides. I usually trim the bushes slightly after the main flowering period to keep the hedge line dense and compact.
Where This Type of Planting Looks Especially Good
Lavender borders are perfect in places where you want to separate a seating area from the rest of the yard without using heavy fences or tall shrubs. The space still feels open, but at the same time there’s a clear sense of structure and boundaries.
Most often, these plantings are used:
- along patios
- near outdoor seating areas
- beside walkways
- around gravel seating zones
- near outdoor kitchens
- around small fire pit areas
You probably know that lavender keeps looking good for most of the season. Even after flowering, the bushes hold their shape instead of turning into empty patchy spots like some perennials do.
If you want to make a patio feel more comfortable in summer without complicated maintenance or overcrowded plantings, a lavender hedge line works really well for that. It adds fragrance, gives the seating area a more finished look, and helps create a place where mosquitoes feel less annoying in the evenings.
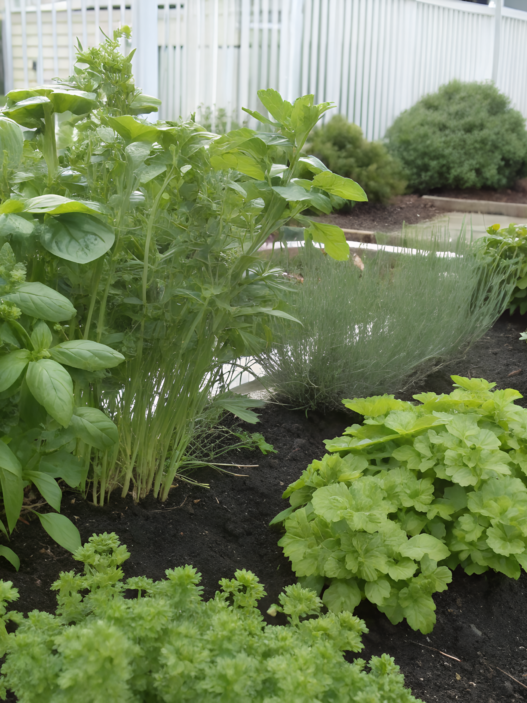
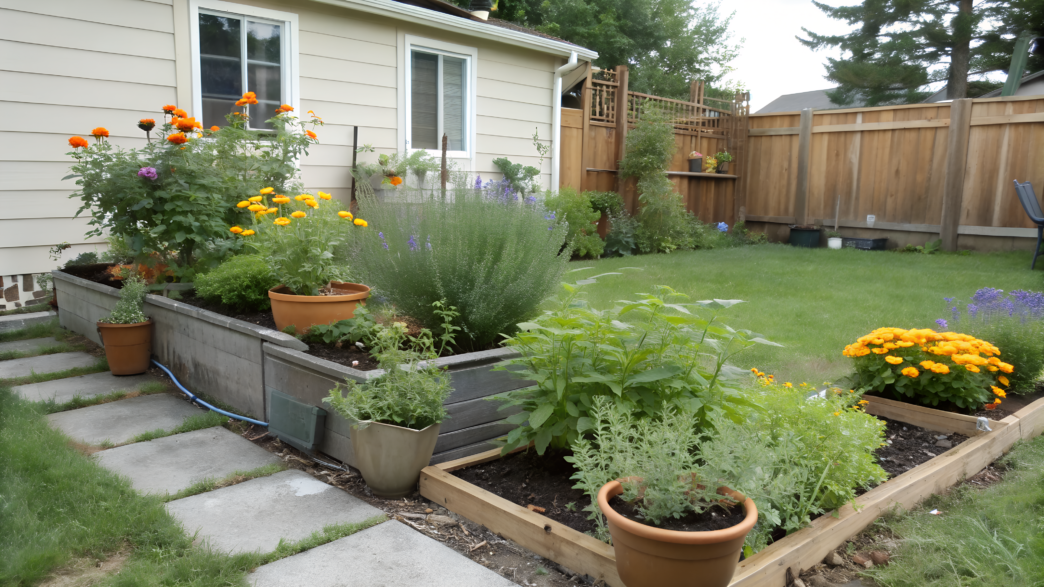
4. Basil and Mint Container Pairing For Tabletop Protection
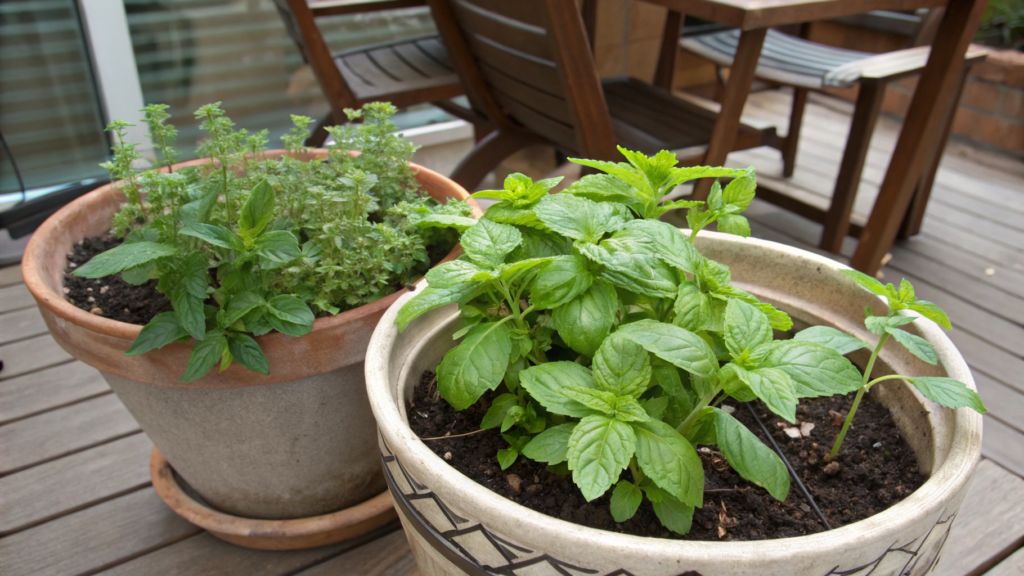
We added these containers after one especially difficult summer when it was impossible to sit near the table peacefully after watering the garden. Mosquitoes started circling around within just a few minutes. And surprisingly, containers with basil and mint near the seating area created a really noticeable difference. Especially in a small backyard where the plants sit very close to the table and chairs.
This is probably one of my favorite “quick” ways to make a seating area more comfortable during mosquito season. There’s no need to rebuild anything. You just place a few containers with basil and mint beside the table, and evenings near the patio already feel much better.
The leaves constantly get brushed by hands, the scent becomes stronger, and the whole patio area starts feeling fresher.
What You’ll Need
- Convenient containers for mixed plantings
- Basil plants
- Mint plants
- Nutrient-rich potting soil
- Compost
- A watering can or garden hose
- Scissors or pruning shears for regular trimming
- A sunny location
How To Make a Basil and Mint Container Arrangement Near a Table
- Choose containers that are large enough
For one pair of plants, it’s better to use containers at least 14–18 inches wide (35–45 cm). In smaller pots, the soil dries out too quickly, especially during summer near a heated patio. If you’re using a long planter box, it’s better to keep basil and mint slightly separated because mint becomes very aggressive over time. - Use loose nutrient-rich soil
Both plants like fertile soil with good moisture retention. I usually add a little compost to the container so the herbs stay juicy and actively growing longer. The bottom of the container absolutely needs drainage holes. Constantly wet soil affects basil especially badly. - Place the containers as close to the seating area as possible
This is one of those situations where placement really matters. These containers work especially well near outdoor dining tables, beside patio chairs, around outdoor kitchens, and near evening seating areas. If the pots are sitting somewhere “just for decoration,” the scent becomes much weaker. - Trim the leaves regularly
The more often you harvest the herbs, the fuller the plants become. I try not to let basil flower too quickly. That way the bushes stay dense and produce many more fresh leaves. Mint behaves similarly — regular trimming helps keep the container neat, otherwise after a couple of months it literally starts spilling out of the pot. - Watch the watering during hot weeks
Containers near tables and patios heat up extremely fast in summer. Especially if there’s concrete, tile, or wooden decking nearby. If mint leaves start becoming soft by midday, the problem is usually dry soil. Basil also reacts quickly to lack of moisture and can lose firmness within just a few hot hours.
Why This Combination Is So Convenient
This setup doesn’t look like some kind of “special mosquito protection.” From the outside, it simply looks like beautiful containers with greenery near a seating area. And that’s exactly why they fit naturally into almost any backyard.
On top of that, the containers are easy to move around. If the seating area changes during summer, the pots can quickly be moved closer to the table or chairs without replanting anything.
For small backyards and summer patios, a combination of basil and mint in containers is one of the easiest ways to add fragrance, fresh herbs within reach, and a little more comfort during evening time outside.
5. Rosemary Walkway Planting That Releases Scent When Brushed

The strong scent of rosemary is often mentioned among plants that help make a space less attractive to certain insects. That’s exactly why rosemary is so often planted near patios and seating areas.
Rosemary does especially well in places where people regularly brush against the plants with their hands or clothing. That way, the scent gets released almost every single time someone walks by.
Rosemary itself also gives the yard a more natural look, especially near stone, gravel, wooden walkways, or terracotta planters.
What You’ll Need
- Compact rosemary varieties for walkways, like Tuscan Blue Rosemary Plants on Amazon
- Compost
- Sand or fine gravel for drainage
- Gravel or stone mulch
- A shovel
- Pruning shears
- A garden hose
- A sunny location
How To Make a Rosemary Planting Along a Walkway
- Choose a well-lit walkway
Rosemary loves sun and dry air. The more light the plant receives, the denser the bush becomes and the stronger the scent of the leaves feels. These plantings work especially well along garden paths, walkways to the vegetable garden, trails near patios, paths leading to barbecue areas, and backyard entrances. In deep shade, the bushes often become loose and hold their shape poorly. - Prepare well-draining soil
This is very important for rosemary. In heavy wet soil, the roots begin suffering quickly, especially after rain. If the ground is dense, I usually add sand, fine gravel, or small stones together with compost. After that, water stops sitting around the base of the plants. - Leave room for the plants to spread
It’s convenient to leave around 24–36 inches (60–90 cm) between plants depending on the variety. At first the walkway may look too empty, but after one season the bushes become much fuller, especially in hot climates.
I like when the branches slightly reach toward the edge of the path without blocking the walkway completely. That way the leaves naturally get brushed while walking by and the scent releases on its own. - Use stone mulch
Rosemary feels much better next to gravel or small stones than beside damp wood mulch because stone holds less moisture, helps keep warmth around the roots, makes the planting look cleaner, and works beautifully with silvery-green foliage.
Rosemary looks especially beautiful beside light gravel or natural stone. - Trim the bushes several times during the season
Without light pruning, rosemary gradually becomes too wide and starts falling onto the walkway. I usually trim the bushes slightly after active growth and occasionally cut sprigs for the kitchen. After that, the plants become even fuller.
Why Rosemary Works So Well Along Walkways
I like that rosemary keeps its shape for almost the entire season and doesn’t look messy even during hot weather. That’s important near walkways because plants that become too soft or oversized quickly start getting in the way.
Plus, rosemary handles heat from stone, tile, and gravel extremely well. Many plants near these kinds of paths begin drying out or losing their appearance during summer, while rosemary usually stays perfectly fine in those conditions.
The scent releases naturally without any special effort. You simply brush against the branches with your hand or walk beside a narrow path, especially during warm evenings after a hot day. That’s exactly why these plantings are so often placed near seating areas and walkways people use every day.
If the goal is to make garden paths feel more pleasant during summer, rosemary with its strong fresh scent works especially well for that. Fragrant rosemary bushes near walkways can help keep mosquitoes away, especially during warm evenings.
6. Marigold Bed Edges To Redirect Pests From The Garden
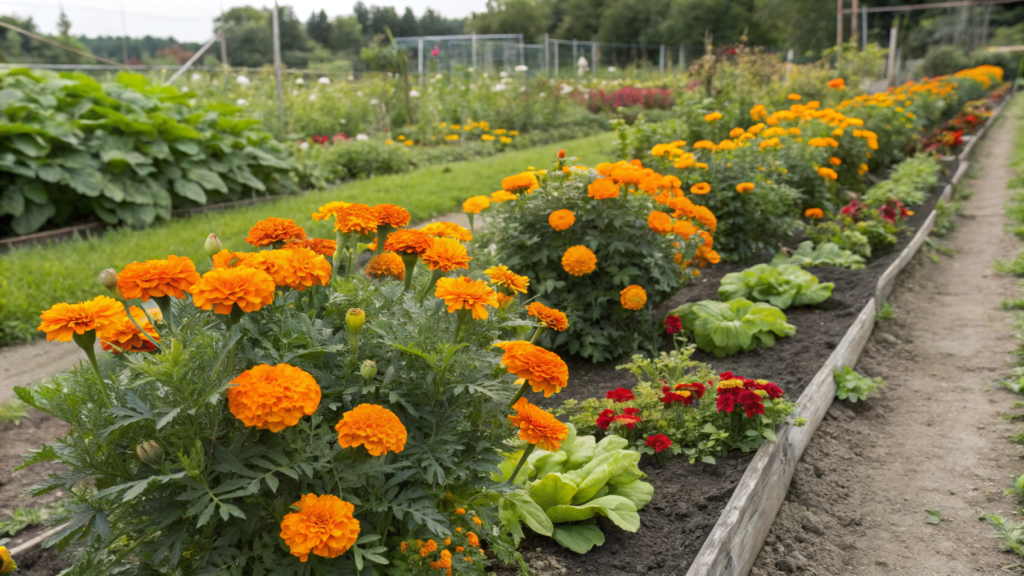
I noticed that marigolds along the edges of garden beds make everything look much more alive in summer, especially near vegetables. And there also seem to be fewer insects constantly hovering around tomatoes and lettuce.
Marigolds have a fairly strong and distinctive smell, which is why they’ve been used in plantings near vegetable beds and seating areas for many years. Of course, they do not protect against every insect 100%, but together with other fragrant plants the difference really can be noticeable.
What You’ll Need
- Compact marigold varieties for borders
- Compost
- A shovel or hand trowel
- Mulch
- A garden hose
- A sunny location
How To Edge Garden Beds With Marigolds
- Identify the beds that suffer most from insects
I usually start with vegetables that always seem to attract more pests: tomatoes, peppers, cabbage, lettuce, and cucumbers. You do not need to plant marigolds around the entire garden right away. Sometimes a few of the most problematic areas are enough. - Create a narrow planting strip along the edge
For this kind of border, a strip around 8–12 inches wide (20–30 cm) is usually enough. I like planting marigolds along the outer edge of the bed so the flowers do not interfere with the main crops while still staying highly visible. - Leave space between the plants
It’s convenient to leave around 8–10 inches (20–25 cm) between the bushes. That way the border looks full without becoming overcrowded. If the plants are too tight together, moisture starts getting trapped inside the planting after rain. - Water moderately after planting
During the first few weeks, marigolds need regular watering while the roots establish. Later, the plants become fairly heat tolerant. Ours handle summer weeks surprisingly well even beside hot walkways and raised beds. - Remove old flowers regularly
This really affects how the planting looks. If you remove dried blooms from time to time, the bushes continue producing fresh flowers and the border stays bright almost until fall.
Where This Type of Planting Is Especially Useful
I like that marigolds can be used for much more than just vegetable gardens. They work well in almost any sunny planting where a low colorful border is needed.
Most often they are planted:
- along vegetable beds
- near greenhouses
- around raised beds
- beside tomatoes
- near garden walkways
- around container plantings
Marigolds also give quick results. Just a few weeks after planting, the garden beds already start looking much brighter and more finished.
7. Catnip Patch Placement Away From Entryways To Avoid Strays

Catnip can help repel some insects, which is exactly why people often add it to “mosquito-repellent” plantings. But at the same time, catnip starts attracting cats from all over the neighborhood. In our case, regular visits from neighbor cats started after we planted one bush right near the back door. After that, the catnip moved to a far corner of the garden pretty quickly.
If you place a catnip patch farther away from entrances, seating areas, and walkways, the plant behaves much better in the yard. It stays decorative, attracts pollinators, gives off a strong herbal scent during summer, and does not turn the space near the house into a “cat club.”
What You’ll Need
- Seeds for larger fragrant plantings, like Catnip Seeds Heirloom Variety on Amazon
- Compost
- A shovel
- Mulch
- A garden hose
- Gloves
- A sunny or lightly shaded location
- Plant barriers if needed
How To Place Catnip Properly in the Yard
- Choose a location away from entrances right away
This is the most important part of the entire planting. It’s better not to plant catnip near doors, patios, children’s areas, outdoor furniture, parking spots, or walkways leading to the house.
At first it feels like “nothing bad will happen,” but once several neighborhood cats begin regularly visiting the yard, opinions usually change very quickly.
It’s much better to immediately give the plant its own separate garden area or a far edge of the vegetable garden. - Leave enough room around the plant
Catnip becomes very full and wide, especially during the second half of summer. For one bush, I usually leave at least 18–24 inches (45–60 cm) of open space on all sides. That helps the plant keep a rounded shape and stay properly ventilated. If planted too tightly, the center of the bush gradually starts thinning out. - Prepare loose soil
Catnip does not like heavy wet ground. In overly damp soil, the bushes become less dense and hold their shape poorly. I usually add some compost and, if needed, sand when the soil feels too compact. After that, the plant grows much more actively. - Avoid overwatering
This is one of the most common mistakes. Once established, catnip handles dry weather much better than constant moisture around the roots. Ours easily survive hot summer weeks even beside gravel walkways. It’s especially important to water carefully around mulch and dense plantings where the soil dries more slowly. - Trim the bushes after flowering
Without pruning, catnip gradually becomes loose and starts falling apart to the sides. I usually trim the bushes lightly after the first flowering wave. After that, the plant becomes denser and often produces a fresh wave of greenery closer to the end of the season.
Why Catnip Works Well in Natural-Style Plantings
I like that catnip looks good even in more natural plantings where the plants slightly spill outside the flower bed and create a softer shape.
These bushes look especially good near:
- gravel
- wooden borders
- natural stone
- lavender and sage
- pollinator flower beds
Over time, the bushes become quite full and start filling the surrounding area with soft gray-green foliage. Plus, during hot weather the scent of the leaves becomes much stronger, especially after rain or evening watering.
With catnip, the most important thing is choosing the right location from the beginning so you don’t end up replanting half the flower bed together with unexpected furry “guests.”
8. Sage and Thyme Dry Zone Planting For Full Sun Yards
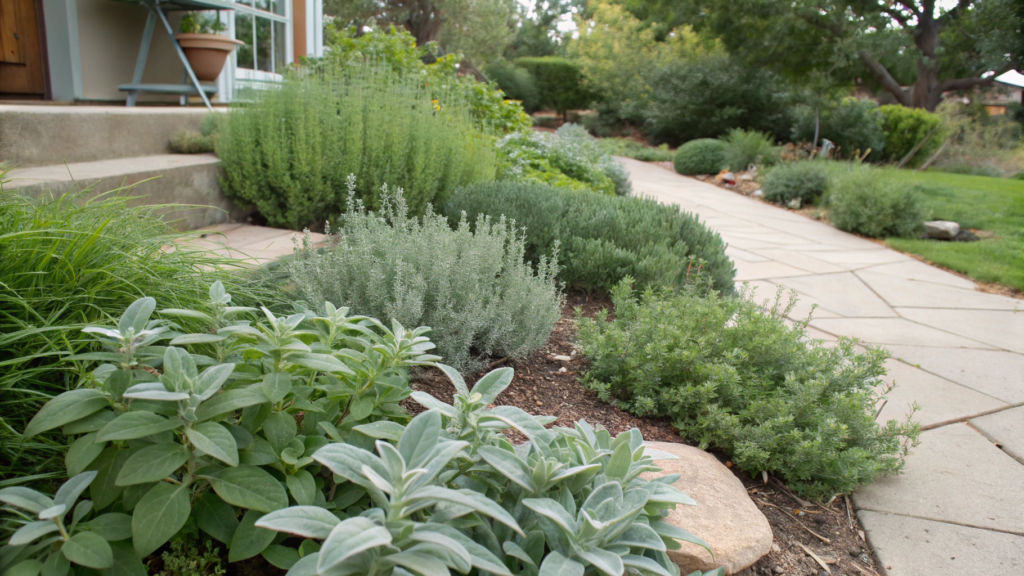
A combination of sage and thyme is a great solution for open sunny yards where you do not want to constantly run around with a hose trying to save plantings from heat.
The planting looks natural and calm, nothing overly bright. The silvery-green leaves of sage, dense thyme cushions, and the smell of herbs after heat or rain all work together really well.
Both plants are also considered fragrant herbs that are often used near seating areas and walkways. Especially in dry yards where people want greenery without constant watering.
What You’ll Need
- Sage plants
- Thyme plants
- Compost
- Sand, fine gravel, or crushed stone for drainage improvement
- A shovel
- Stone mulch
- Pruning shears
- A garden hose
- A sunny location
How To Make a Dry Fragrant Planting With Sage and Thyme
- Find the sunniest area of the yard
These plants love heat and large amounts of sunlight. The drier and warmer the location is, the better they usually look. These plantings work especially well near south-facing walls, beside gravel areas, along stone walkways, around steps, near open patios, and close to retaining walls. In shade, sage often becomes loose while thyme starts spreading less actively. - Prepare well-draining soil
This is the foundation of the entire planting. If the soil is heavy and holds moisture too long, the roots may begin rotting, especially during winter or after long rainy periods.
I usually dig the area around 10–12 inches deep (25–30 cm), add compost, mix the soil with sand or fine gravel, and remove spots where water tends to collect. After this kind of preparation, the plants handle hot summers much more easily. - Arrange sage and thyme in layers
I like using sage as the taller background layer while thyme creates a lower spreading edge in front.
Sage can be planted closer to a wall or the back of the bed, while thyme works well along the walkway or planting edge. That way the planting looks fuller and more structured even without using many plants. - Use stone mulch
For dry plantings like this, stone works much better than wood mulch. I usually choose fine gravel, crushed stone, light-colored gravel, or river pebbles. Stone helps the soil dry faster on top and visually works very well with the gray-green foliage of sage. Plus, after rain the area looks much cleaner. - Avoid overwatering the plants
The plants need moisture during the first few weeks while establishing roots. But after that, sage and thyme feel much better in slightly dry soil than in constantly wet ground.
It’s especially important to be careful with plantings located near automatic lawn irrigation systems because extra moisture appears there very quickly. - Trim the plants several times during the season
Without light trimming, thyme gradually loses its dense shape. Sage can also become too wide and messy over time. I usually lightly trim thyme after active growth, remove old flower stalks from sage, and occasionally cut fresh sprigs for cooking. After that, the planting immediately looks much neater.
Why Sage and Thyme Work So Well in Hot Yards
I noticed that this type of planting stays neat even during the driest part of summer. While many plants start looking tired from heat, sage and thyme usually continue holding their shape and keeping rich foliage color.
Sage has larger silvery leaves while thyme creates a dense low layer near the ground. Because of this texture contrast, even a small planting immediately looks more dimensional.
The scent also becomes stronger during hot weather. Especially in the evening, when heated stone or gravel continues holding warmth for hours. That’s exactly why these plantings work so well in open sunny yards where nobody wants high-maintenance landscaping.
9. Mosquito Repellent Garden Corner With Layered Herbs and Gravel

If you have a corner in the yard where the air feels heavier, moisture lingers longer in the evenings, and mosquitoes somehow always seem worse than everywhere else, that’s usually the perfect place for a fragrant herb corner with gravel.
And this does not look like some kind of “mosquito control zone.” It simply becomes a neat layered planting with stone, herbs, and different plant textures. But thanks to fragrant plants, drier ground surfaces, and better air circulation, the area really does start feeling more comfortable.
Here the plants are arranged in layers: taller herbs in the back, medium-sized bushes in the center, and lower fragrant plants closer to the edges. That way even a small corner starts looking much fuller and more dimensional.
What You’ll Need
- Lemongrass, lavender, thyme, rosemary, and sage
- Compost
- Sand or fine gravel for drainage
- Decorative gravel or crushed stone
- A shovel
- Pruning shears
- A garden hose
- Landscape fabric if needed
How To Make a Layered Fragrant Herb Corner
- Choose the most problematic corner of the yard
This type of setup works best in places where humid air lingers during summer, irrigation or water sources are nearby, airflow feels limited, more insects gather in the evenings, or there’s simply an empty awkward corner of the yard.
At the same time, the area should still receive plenty of sunlight because most fragrant herbs do poorly in constant dampness and deep shade. - Plan the plant heights carefully
This changes the entire look of the planting. I usually place the tallest plants in the back, medium bushes in the center, and lower herbs closer to the edges and walkways. For example, lemongrass or tall sage work well as a background layer, lavender fits nicely in the middle, and thyme softens the lower edge near the gravel.
That way the corner looks natural instead of chaotic. - Prepare a dry well-draining base
This is one of the key parts of the entire planting. I usually remove the top layer of dense soil, add sand or fine gravel, mix compost into the ground, and check whether water stays trapped after watering.
If the area remains wet for several days after rain, many fragrant herbs quickly begin losing their shape. - Add gravel between the plants
Gravel is not only decorative here. It helps reduce mud after rain, dries the soil surface faster, visually ties the planting together, reduces weeds, and makes the corner feel brighter and cleaner.
I especially like the combination of silvery sage and lavender foliage with light-colored stone. - Leave enough space between bushes
When the plants are still small, there’s always a temptation to plant everything tightly together. But after one season, fragrant herbs begin spreading aggressively. I usually leave around 18–24 inches (45–60 cm) between medium bushes and up to 36 inches (90 cm) for larger plants like lemongrass.
That way air moves properly through the planting and the plants suffer less from trapped moisture. - Add a few larger stones or planters
This step is optional, but it really helps visually pull the entire composition together. Terracotta pots, large stones, wooden elements, low garden lights, and nearby gravel paths all work especially well.
After that, the corner no longer looks like a random planting beside a fence.
Why These Fragrant Corners Feel So Natural in a Yard
I think these plantings look more relaxed and natural than traditional flower beds with strict borders because of the mixture of herbs, gravel, and stone.
The contrast of textures works especially well here: dense thyme near the ground, taller sage, thin lemongrass leaves, and silvery lavender beside the stone. The entire area immediately starts feeling more layered and dimensional.
Another important thing is that once established, most of these plants handle hot summers very easily and do not need constant watering. That makes this kind of planting especially useful for sunny yards where people want less maintenance in the middle of the season.
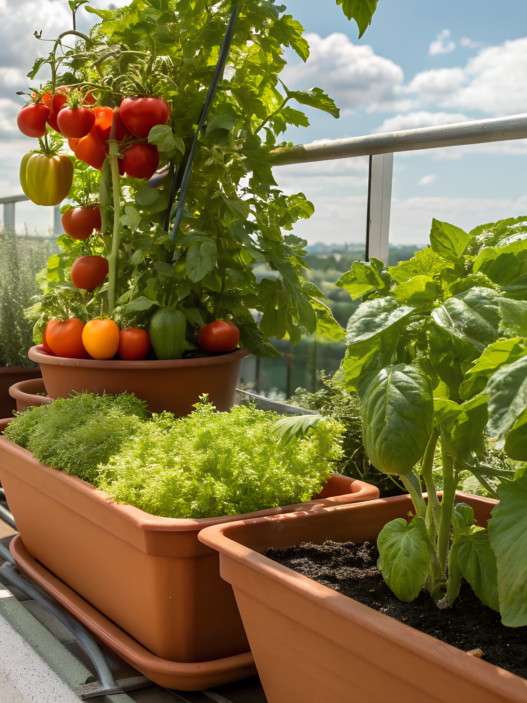
10. Patio Planter Recipe Using Four Repellent Plants Together
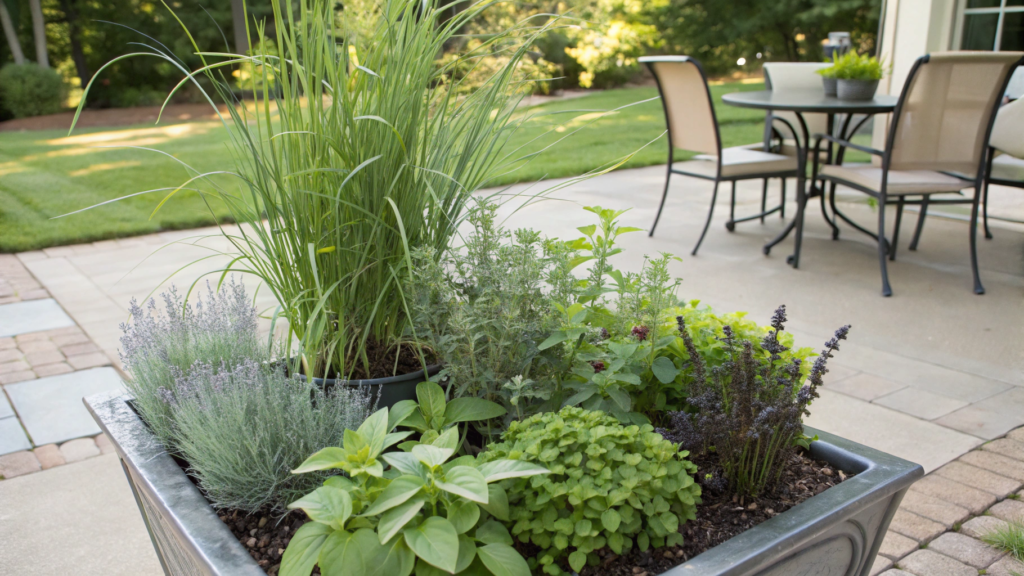
For a small seating area, it makes a lot of sense to use one large container with several fragrant plants together.
For this kind of planting, I especially like combining:
- lemongrass
- lavender
- thyme
- basil
The plants all differ in height, leaf shape, and scent, which makes the arrangement feel full and layered even inside a single container.
What You’ll Need
- A large outdoor planter at least 20–24 inches wide (50–60 cm)
- A lemongrass plant
- A lavender plant
- A thyme plant
- A basil plant
- Nutrient-rich potting soil
- Compost
- Sand or perlite for drainage
- Fine decorative gravel
- A watering can
- Pruning shears
How To Make a Container With Four Fragrant Plants
- Choose a container that is deep enough
This is very important for mixed plantings. In a small pot, the plants quickly begin competing for water and space, especially lemongrass, which develops roots very aggressively during summer.
I usually use large heavy planters that do not overheat too quickly, stay stable in the wind, hold moisture slightly longer, and give the plants enough room. If the container is too light, tall lemongrass can eventually make the entire arrangement unstable. - Make a well-draining soil mix
This type of planting needs soil that holds moisture without staying constantly wet. I usually mix potting soil with compost, add a little sand or perlite, and check the drainage holes before planting.
A little crushed stone can also be added at the bottom, especially if the planter is very deep. - Arrange the plants by height
This helps the arrangement look neat from the very beginning. I usually place lemongrass closer to the back of the container as the tallest element, lavender slightly to one side, basil closer to the center, and thyme near the edges so it can spill slightly outward.
That way the planting looks fuller and more natural while the plants do not completely block one another. - Do not plant everything too tightly
When the container is first planted, it always feels like there is too much empty space inside. But within a few weeks, the greenery begins expanding actively. Basil fills out quickly during hot weather, thyme spreads after rooting, and lemongrass becomes much larger by mid-summer.
If everything is planted too closely together, airflow becomes worse and the plants start competing for moisture. - Add a layer of decorative gravel on top
A layer of light decorative gravel on top of the soil helps the container look cleaner, slows down surface drying, reduces muddy splashes after watering, and visually works very well with fragrant herbs.
The whole planter immediately starts looking more finished and structured. - Place the planter as close to the seating area as possible
These types of arrangements work best near chairs, outdoor dining tables, patio entrances, grills, outdoor kitchens, or terrace seating areas. If the container sits too far away from people, much of the effect disappears.
Why These Arrangements Work So Well on Patios
One large container with several fragrant plants usually looks much more balanced and neat than many small pots scattered around. This is especially noticeable on small patios or compact terraces.
All the plants in one arrangement visually complement each other. Tall lemongrass adds height, lavender softens the shape, thyme covers the lower edge of the container, and basil creates dense greenery in the center.
That’s exactly why these planters are so often placed directly on patios near seating areas where people want fewer mosquitoes and more comfort during summer evenings.
Useful Plants
Of course, it’s probably impossible to get rid of mosquitoes completely using only plants. But the right plantings, fragrant herbs, dry gravel areas, and smart container placement really can change how a yard feels during summer and make it much more comfortable to spend time outside.
Especially when everything is planned to work together.How do you deal with mosquitoes in your yard? Maybe some other fragrant herbs work especially well for you, or maybe you have your own favorite combinations for patios and seating areas. Share them in the comments — I always enjoy reading ideas like that.