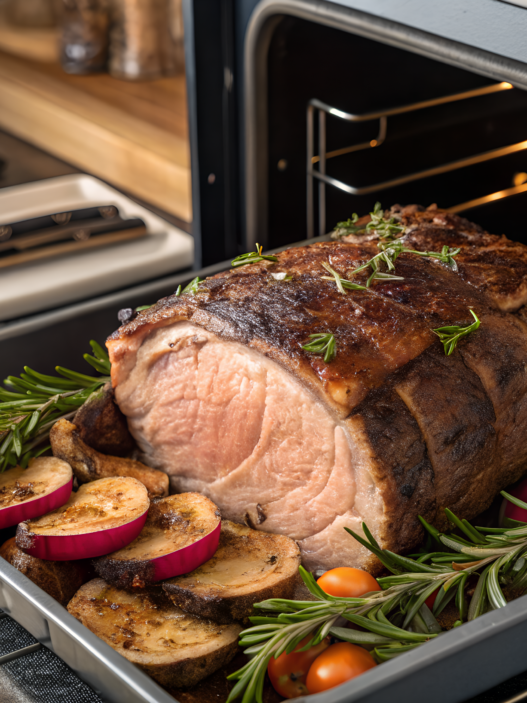

It feels like there’s nothing that special you can make with chicken. Especially on weekdays when time is short and there’s absolutely no desire to cook anything complicated. So over time we ended up collecting a few recipes that are actually quick to make, don’t require any unusual ingredients, and still taste really good.
I’ve always liked recipes where you don’t need to go through ten separate steps for one plate of food, but the chicken still turns out juicy, the sauces aren’t watery, and the dish reheats perfectly the next day without losing flavor.
Here are 10 simple chicken recipes that fit into real everyday life without spending the entire evening standing by the stove.
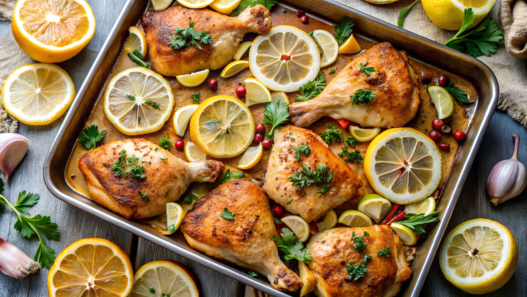
1. Sheet Pan Lemon Garlic Chicken with Hidden Spice Twist
I absolutely love meals like this — one sheet pan, normal ingredients from the fridge, 25–30 minutes in the oven, and dinner is already on the table.
The main secret here is smoked paprika and a tiny pinch of cinnamon. The chicken doesn’t become sweet at all, but it gets a warmer background flavor that goes really well with lemon and garlic. And don’t forget the high temperature — that’s what helps the chicken brown quickly on the outside while staying juicy inside.
Ingredients
- 4 boneless skinless chicken thighs or 2 large chicken breasts
- 1 lb baby potatoes (450 g)
- 1 zucchini
- 1 red onion
- 4 cloves garlic, minced
- 1 lemon
- 3 tbsp olive oil (45 ml olive oil)
- 1 tsp smoked paprika
- 1/4 tsp cinnamon
- 1 tsp dried oregano
- salt and black pepper
- fresh parsley
- large sheet pan — Nordic Ware Naturals Baker’s Half Sheet on Amazon
How to Make Lemon Garlic Sheet Pan Chicken
- Preheat the oven
Preheat the oven to 425°F (220°C). The high temperature gives the chicken a beautiful crust and helps the vegetables roast properly instead of turning soft and watery. It’s better to line the sheet pan with parchment paper right away — cleanup goes much faster later. - Prepare the vegetables
Cut the potatoes in half. Slice the zucchini into large chunks. Cut the onion into thick wedges. There’s no need to cut everything too small here. By the time the chicken is done cooking, tiny vegetable pieces will already start drying out around the edges. - Mix the marinade
In a large bowl combine olive oil, garlic, smoked paprika, oregano, cinnamon, salt, and black pepper. Add a little lemon zest and the juice of half a lemon.
The smell of garlic and paprika starts coming through immediately. The cinnamon is very subtle, but it completely changes the background flavor. - Mix the chicken and vegetables
Add the chicken and vegetables into the bowl with the marinade. Mix everything well with your hands so the spices and oil coat everything evenly. Using a spoon usually doesn’t give the same result, especially with potatoes. - Spread everything on the sheet pan
Arrange everything in a single layer. Don’t pile it all together.
If the ingredients sit too close to each other, the vegetables start releasing moisture and the roasting turns into something closer to steaming. Leave a little space between the pieces.
You can place a few thin lemon slices on top. - Roast until golden
Place the sheet pan into the oven for about 22–28 minutes. Chicken breast cooks a little faster. Thighs handle the oven really well and stay juicy longer inside.
During the last 2–3 minutes you can turn on the top heat so the potatoes get darker around the edges.
Serving
Right after the oven, I sprinkle the chicken with fresh parsley and squeeze a little lemon juice over the top. The aroma becomes noticeably brighter on the hot pan.
This dish is really convenient to serve right on a large tray or wooden board. A simple Greek yogurt sauce with garlic and black pepper goes really well next to it. Warm rice, bulgur, or flatbreads are also perfect here for soaking up the juices from the pan.
And the leftovers the next day easily turn into filling for wraps, salads, or quick sandwiches. For me, this is one of the most practical weekday dinner options — minimal dishes, accessible ingredients, and proper hot food without spending forever in the kitchen.
2. 5-Ingredient Creamy Tuscan Chicken for Busy Nights

Creamy chicken with sun-dried tomatoes is Lindy’s favorite meal. There are only 5 main ingredients here, but the flavor turns out really rich. It’s the sun-dried tomatoes, unlike regular ones, that bring all the depth. The creamy sauce thickens in just a few minutes, and the chicken stays tender without long cooking.
Ingredients
- 2 large chicken breasts
- 1 cup heavy cream (240 ml)
- 1/2 cup sun-dried tomatoes (80–100 g)
- 2 cups fresh spinach (about 60 g)
- 1/2 cup grated parmesan (45–50 g)
- 2 tbsp olive oil (30 ml)
- salt and black pepper
- 1 tsp garlic powder
- large deep skillet
How to Make Creamy Chicken with Sun-Dried Tomatoes
- Prepare the chicken
Slice the chicken breasts lengthwise into thinner pieces. This helps them cook faster and stay juicier inside. Season both sides with salt, black pepper, and garlic powder.
If the chicken breast is too thick, the outside may brown before the inside fully cooks. It’s especially noticeable over higher heat. - Cook the chicken
Heat the olive oil in a large skillet over medium heat. Add the chicken and cook for about 4–5 minutes per side until golden. Don’t keep moving the meat around constantly. When the chicken stays still for a few minutes, the surface browns properly and the flavor becomes much richer.
Transfer the cooked chicken to a plate. - Make the creamy sauce
In the same skillet add the cream, parmesan, and chopped sun-dried tomatoes. Stir and cook for a few minutes until the sauce thickens.
The sun-dried tomatoes are very important here. They add a slight tang and a much more concentrated flavor than regular tomatoes. Especially if you use tomatoes packed in oil. - Add the spinach
Add the spinach directly into the hot sauce. At first it will look like too much, but within a minute the leaves shrink down quickly. At this point the sauce becomes more flavorful and no longer tastes just creamy. - Return the chicken to the skillet
Place the chicken back into the sauce and cook for another 2–3 minutes so everything heats through together.
If the sauce becomes too thick, add a couple spoonfuls of water or chicken broth. For a thicker texture, simply keep the skillet on the heat a little longer.
Serving
This chicken is perfect served right in the skillet, especially with a large piece of warm bread. The sauce turns thick and rich, and people usually end up scooping it up with everything — bread, potatoes, even pasta.
The chicken also goes really well with rice or soft mashed potatoes. And on top you can add a little extra parmesan and freshly ground black pepper.
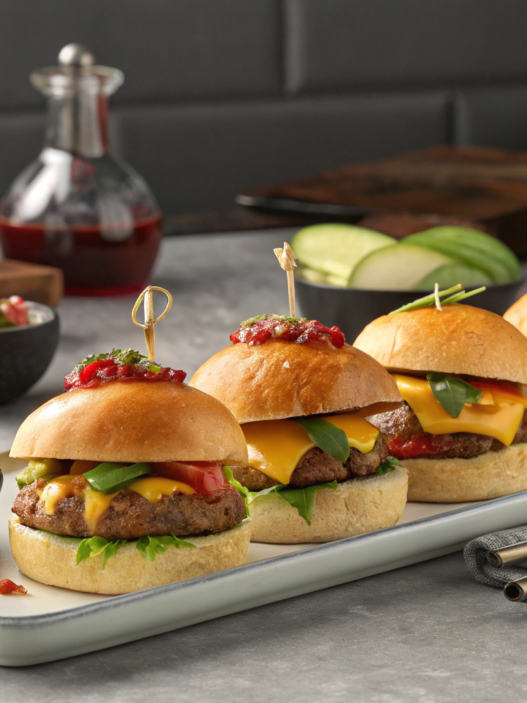
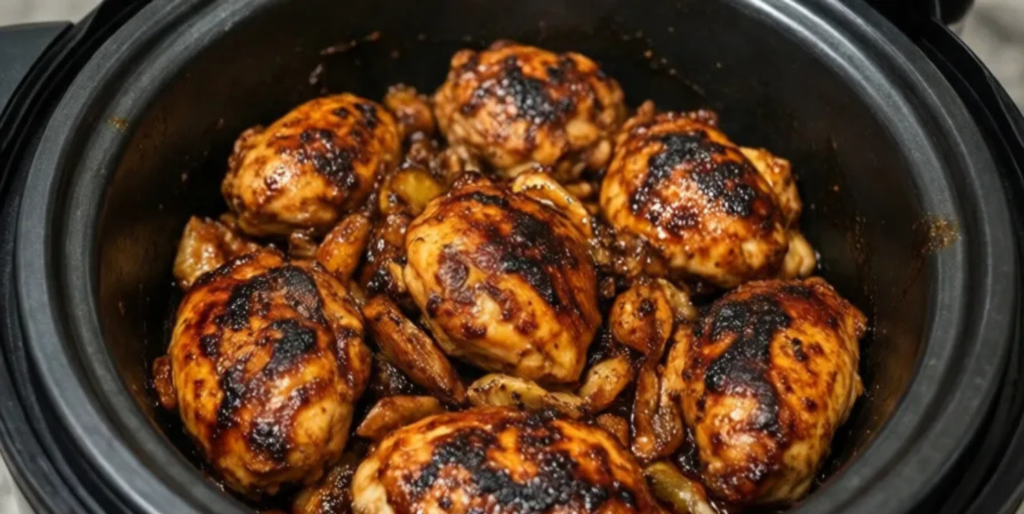
3. Instant Pot BBQ Chicken That Tastes Like It’s Smoked
The pressure cooker always saves me when I want a proper meal but barely have any time left and I’m already tired of sandwiches. In this dish the chicken turns out tender, juicy, easy to pull apart into strands, and somehow tastes like the meat spent hours in a smoker. And all of that comes from smoked paprika, dark barbecue sauce, and a quick caramelization in the oven after cooking.
This recipe is especially convenient to make in a large batch. The chicken then goes into burgers, rice bowls, tacos, or hot sandwiches for the next couple of days.
Ingredients
- 2 lb boneless chicken thighs (900 g)
- 1 cup barbecue sauce (240 ml)
- 1/2 cup chicken broth (120 ml)
- 1 tbsp tomato paste
- 1 tbsp apple cider vinegar
- 1 tsp smoked paprika
- 1/2 tsp garlic powder
- 1/2 tsp onion powder
- 1 tsp Worcestershire sauce
- salt and black pepper
- pressure cooker — Instant Pot Duo on Amazon
How to Make BBQ Chicken in a Pressure Cooker
- Prepare the chicken
Pat the chicken thighs dry with paper towels and lightly season them with salt. If the pieces are too large, you can cut them in half. Chicken thighs work better than breasts for this recipe. After pressure cooking they stay tender and easily pull apart into juicy strands. - Mix the sauce
In a separate bowl combine the barbecue sauce, chicken broth, tomato paste, apple cider vinegar, smoked paprika, garlic powder, onion powder, and Worcestershire sauce.
The smoked paprika and Worcestershire sauce are exactly what create that deeper “grilled” flavor without any extra ingredients. - Transfer everything into the pressure cooker
Place the chicken into the pressure cooker bowl and pour the prepared sauce over the top.
Mix everything so the sauce gets between all the pieces of meat. There should always be enough liquid at the bottom for pressure cooking. - Cook under pressure
Close the lid and cook on high pressure for about 12 minutes. After cooking, don’t open the valve immediately. Let the pressure release naturally for at least 5–7 minutes. This helps the meat stay softer and hold the juices inside. - Shred the chicken
Transfer the cooked chicken into a large bowl and shred it with two forks. The meat should fall apart with almost no effort. For an even juicier texture, add a few spoonfuls of the hot sauce back into the chicken after shredding. - Broil for deeper flavor
Don’t skip this part. Spread the cooked chicken in a thin layer on a sheet pan and place it under the oven broiler for 3–5 minutes.
The edges will start darkening and caramelizing, and the flavor becomes much closer to real grilled meat.
Serving
This chicken is great served inside soft buns with coleslaw and pickled onions. It also works perfectly for tacos, potatoes, rice, or homemade flatbreads.
On top you can add a little more barbecue sauce, fresh cilantro, or thin slices of pickles, which help lighten the thick sweet-smoky sauce.
And the leftovers the next day turn into a really convenient quick lunch. That’s exactly why recipes like this usually stay in rotation at home for a long time — minimal effort, lots of ready-to-use meat, and great flavor even after reheating.
4. Air Fryer Honey Mustard Chicken in 20 Minutes Flat
The air fryer, which honestly spends more time sitting in the cabinet unused, turned out to be incredibly convenient specifically for chicken. Especially on nights when there’s no desire to preheat the entire oven just for a couple pieces of meat.
The key thing here is making the honey mustard glaze with the right balance of honey and mustard. The honey creates light caramelization, Dijon mustard adds depth, and a small amount of paprika helps pull the whole flavor combination together.
Ingredients
- 1.5 lb boneless chicken thighs (700 g)
- 2 tbsp Dijon mustard
- 1 tbsp honey
- 1 tbsp olive oil
- 1 tsp smoked paprika
- 1/2 tsp garlic powder
- salt and black pepper
- a little fresh parsley
- air fryer
How to Make Honey Mustard Chicken in the Air Fryer
- Prepare the chicken
Pat the chicken thighs dry with paper towels. This helps the surface brown faster during cooking.
If there are large pieces of fat on the chicken, it’s better to trim them off right away. The glaze spreads more evenly that way and nothing starts burning too early. - Make the sauce
In a bowl combine Dijon mustard, honey, olive oil, smoked paprika, garlic powder, salt, and black pepper. The sauce turns out thick and very aromatic. The honey is not here for sweetness alone. It helps the surface of the chicken caramelize beautifully while cooking. - Coat the chicken with the marinade
Add the chicken into the bowl and mix everything well with your hands so the sauce coats every piece.
If you have extra time, you can leave the meat for 10–15 minutes. But even without long marinating, the flavor still turns out rich enough. - Preheat the air fryer
Preheat the air fryer to 390°F (200°C) for about 2–3 minutes. That short preheating step helps create a more golden surface right from the start of cooking. - Cook the chicken
Arrange the chicken pieces in the basket in a single layer. Leave a little space between them so hot air can circulate properly. Cook for about 9–10 minutes, then flip the chicken and cook another 7–8 minutes until golden.
If the pieces sit too tightly together, the surface starts steaming more than browning. - Let the chicken rest
After cooking, transfer the chicken to a plate and let it rest for 2–3 minutes. During that time the juices distribute more evenly inside the meat, which helps the chicken stay juicier after slicing.
Serving
Sprinkle the chicken with fresh parsley and add a little black pepper before serving. Cabbage salad, cucumbers, or a light yogurt sauce work especially well next to it.
This chicken is also great for wraps, burgers, or simply served over rice. And if you slice the leftovers into thin pieces, they make a really good quick lunch the next day.
For a busy weekday evening, this is one of the most convenient recipes: minimal prep, barely any dirty dishes, and proper hot food in less than half an hour.
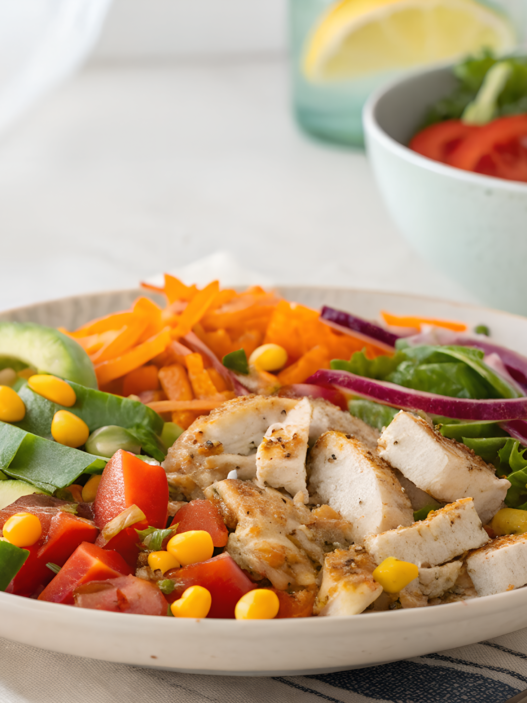
5. Healthy Chicken Stir-Fry Inspired by Tokyo Street Flavor
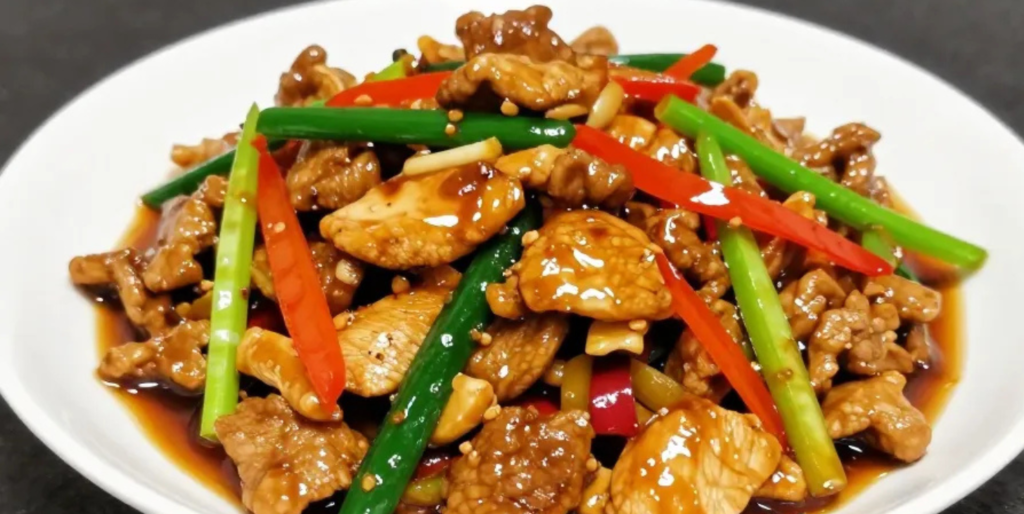
After a trip to Tokyo, Lindy pointed out something I hadn’t really noticed before — local street food is usually made with very simple ingredients, but the flavor still feels incredibly bright. Especially in dishes where meat is quickly cooked over high heat together with vegetables and sauce.
This version has a very similar feel: fast cooking, lots of texture, a little sweetness, a salty sauce, and a very hot pan.
Ingredients
- 1 lb chicken breast (450 g)
- 1 red bell pepper
- 1 cup broccoli (about 100 g)
- 1 carrot
- 3 green onions
- 2 cloves garlic
- 1 tsp freshly grated ginger
- 2 tbsp soy sauce
- 1 tbsp honey
- 1 tbsp rice vinegar
- 1 tsp sesame oil
- 1 tbsp olive oil
- 1 tsp sesame seeds
- salt and black pepper
- large wok pan
How to Make a Quick Chicken Stir-Fry
- Prepare all the ingredients ahead of time
This is very important for a good stir-fry. Slice the chicken into thin strips, separate the broccoli into small florets, cut the carrot into thin slices, and slice the bell pepper into long strips.
Everything cooks very quickly after that, so there won’t be time left for extra chopping. - Mix the sauce
In a small bowl combine soy sauce, honey, rice vinegar, and sesame oil.
The sauce turns out salty, slightly sweet, and very aromatic at the same time. The honey doesn’t make the dish sweet — it helps the sauce coat the meat and vegetables better. - Heat the pan
Place the pan over high heat and let it heat up properly. Only after that add the olive oil. High heat is extremely important for a dish like this. The vegetables should cook quickly instead of slowly steaming in their own juices. - Cook the chicken
Spread the chicken in a single layer and cook for about 4–5 minutes, stirring occasionally.
It’s better not to overcrowd the pan all at once. If there’s too much chicken, it starts releasing moisture and you lose that proper seared texture. Once the edges become golden, transfer the chicken to a plate temporarily. - Cook the vegetables
Add the broccoli, carrot, and bell pepper into the same pan. Cook over high heat for about 4 minutes.
The vegetables should stay slightly crisp inside. That texture is exactly what makes a good stir-fry much more interesting.
At the end add the garlic, ginger, and green onion. They only need about 30–40 seconds in the pan. - Bring everything together
Return the chicken back into the pan and pour in the sauce. Stir quickly so the hot sauce coats all the ingredients. After a couple of minutes the sauce becomes slightly thicker and starts shining over the meat and vegetables.
Serving
This stir-fry goes especially well with hot rice or rice noodles. Before serving, sprinkle the dish with sesame seeds and extra green onion. You can also serve this chicken with thinly sliced cucumbers mixed with rice vinegar. They make the dish feel fresher and lighter.
As you can see, everything in this recipe cooks quickly, the vegetables don’t turn into a soft mess, and the leftovers work perfectly for lunch the next day.
6. Crockpot Ranch Chicken That Melts in Your Mouth
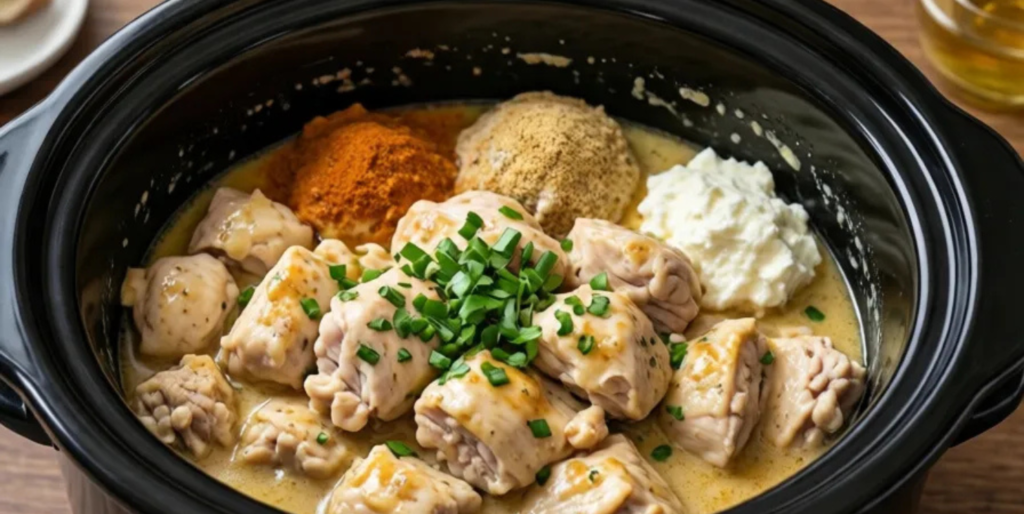
In the morning you throw all the ingredients into the slow cooker, close the lid, go do your own things, and by dinner the meat is already soft, creamy, and easy to pull apart into strands. Sounds tempting, right?
The main ingredients here are chicken, cream cheese, and ranch seasoning. The result is a creamy sauce that coats the meat without turning the dish into something overly heavy. And when you add a little broth and garlic, the flavor becomes seriously hard to resist.
Ingredients
- 2 lb boneless chicken breasts or thighs (900 g)
- 8 oz cream cheese (225 g)
- 1/2 cup chicken broth (120 ml)
- 2 tbsp dry ranch seasoning
- 1 tsp garlic powder
- 1/2 tsp onion powder
- 1/2 tsp black pepper
- 1 tbsp butter
- 1/2 cup shredded cheddar cheese (50 g), optional
- 2 tbsp chopped green onion for serving
- slow cooker — Crock-Pot 7 Quart Oval Manual Slow Cooker on Amazon
How to Make Tender Ranch Chicken in a Slow Cooker
- Prepare the chicken
Pat the chicken dry with paper towels and place it in a single layer on the bottom of the slow cooker. If you’re using chicken breast, it’s better to use pieces that aren’t too thick. That way the meat cooks more evenly and doesn’t stay dense in the center.
Chicken thighs give a juicier result here, but breasts work too. The important thing is not to overcook them, especially if your slow cooker runs hot even on the low setting. - Add the seasoning and broth
Sprinkle the chicken with ranch seasoning, garlic powder, onion powder, and black pepper. Then pour the chicken broth along the edge of the cooker instead of directly over the spices so they don’t wash down to the bottom immediately.
You only need a little broth. It helps the chicken cook gently and creates the base for the sauce, but the dish shouldn’t be swimming in liquid. The meat will release its own juices while cooking, and that’s enough for a tender texture. - Add the cream cheese and butter
Cut the cream cheese into large chunks and place them over the chicken. Add the butter on top.
There’s no need to mix everything right away. The cheese slowly softens and later combines with the chicken juices and broth. If you stir everything in the beginning, the sauce can settle too heavily at the bottom. - Cook on low heat
Close the lid and cook on low for 4–5 hours. If you need it faster, you can cook on high for 2–3 hours, but the meat usually turns out more tender on low.
After about 3.5–4 hours, check the chicken with a fork. If it pulls apart easily, it’s ready for the next step. If the meat still feels firm, give it a little more time. The main thing is not to open the lid every 20 minutes because the slow cooker loses heat and the cooking time stretches out. - Shred the chicken
Remove the chicken or shred it directly inside the slow cooker using two forks. The meat should easily fall apart into soft pieces. After that, mix everything well with the sauce so the cream cheese fully melts into it.
If the sauce feels too thick, add 2–3 spoonfuls of hot broth. If it feels too thin, leave the cooker uncovered on warm mode for about 10–15 minutes so some extra moisture evaporates. - Add the cheese at the end
If you want a richer version, add the shredded cheddar only after the chicken has been shredded. Stir everything together and leave it under the lid for 5 minutes so the cheese melts.
It’s better not to add cheddar at the beginning. After long heating it can become grainy. At the end it melts more smoothly and makes the sauce thicker.
Serving
This chicken is especially good served in soft buns, tortillas, over rice, or together with baked potatoes. For a lighter version, you can place it over salad greens and add cucumbers, tomatoes, and a little green onion.
Before serving, it helps to add something fresh: green onion, parsley, pickled red onion, or a couple drops of lemon juice. That helps balance the creamy sauce and makes the flavor feel lighter.
The leftovers can be stored in the fridge for 3–4 days. The next day this chicken works perfectly in quesadillas, sandwiches, quick bowls, or as filling for baked potatoes. A very practical recipe for days when dinner needs to be filling, soft, and require almost no effort at the stove.
7. Classic Southern Fried Chicken with a Greek Yogurt Upgrade

Have you ever tried making fried chicken with Greek yogurt? Classic buttermilk is obviously good, but Greek yogurt makes both the coating and the meat even more interesting. The acidity helps the chicken become more tender, while the crust turns out more textured and sticks better to the surface. Especially on thighs and drumsticks.
Oh, and one more thing I almost forgot — yogurt stays on the chicken much better. The spices spread more evenly, and the flour coating doesn’t slide off in chunks during frying.
Ingredients
- 2 lb chicken drumsticks and thighs (900 g)
- 1 cup Greek yogurt (240 ml)
- 2 tbsp hot sauce, optional
- 1 1/2 cups flour (180 g)
- 1/2 cup cornstarch (60 g)
- 1 tsp smoked paprika
- 1 tsp garlic powder
- 1 tsp onion powder
- 1/2 tsp dried thyme
- 1/2 tsp black pepper
- 1 1/2 tsp salt
- oil for frying
- heavy cast iron skillet
How to Make Fried Chicken with Greek Yogurt
- Prepare the chicken
Pat the chicken dry with paper towels. If there’s extra moisture on the pieces, the coating won’t stick as well and may start peeling off during frying. Drumsticks and thighs work best for this recipe. They stay juicy inside even over high heat, while the crust has enough time to brown properly. - Make the marinade
In a large bowl combine the Greek yogurt, hot sauce, and half of the salt. Add the chicken and mix everything well with your hands so the marinade completely coats the meat.
The yogurt is not just here “for tenderness.” Its acidity helps soften the meat fibers, and later the chicken surface holds onto the flour and spices much better.
If you have extra time, leave the chicken in the fridge for at least 1 hour. But even 20–30 minutes already changes the texture noticeably. - Prepare the coating
In a separate deep bowl combine the flour, cornstarch, smoked paprika, garlic powder, onion powder, thyme, black pepper, and the remaining salt.
The cornstarch helps create a crispier, rougher crust with those little crunchy pockets that later turn beautifully golden in the oil. - Coat the chicken
Remove the chicken pieces from the marinade and coat them one by one in the flour mixture.
Press the coating onto the chicken well with your hands, especially around folds and edges. The more texture you create on the surface, the more interesting the crust will look later.
After coating, let the chicken rest for about 10 minutes on a rack or plate. During that time the flour slightly hydrates and starts sticking better. - Heat the oil
Pour oil into a heavy skillet in a layer about 1–1.5 inches deep (3–4 cm). Heat it to 350°F (175°C). If the oil isn’t hot enough, the coating starts absorbing fat and becomes heavy. But if the oil is too hot, the crust darkens before the meat inside finishes cooking.
You can check the temperature with a wooden stick — active little bubbles should appear around it. - Fry the chicken in batches
Carefully place a few chicken pieces into the oil. Don’t overcrowd the skillet. There should be space between the pieces, otherwise the oil temperature drops too quickly.
Cook for about 6–8 minutes per side. The crust should become deeply golden and noticeably crispy.
There’s no need to keep turning the chicken every 30 seconds. When a piece sits still in the oil, the coating sets better and turns out more even. - Let the chicken rest
Transfer the cooked chicken onto a rack or paper towels and leave it for 5–7 minutes. Right after frying the crust is still extremely hot and slightly softer than it will be a few minutes later. As the extra steam escapes, the surface becomes crispier.
Serving
Lindy loves this chicken with coleslaw, pickles, or a light yogurt herb sauce. Mashed potatoes, corn, or warm soft buns also work really well here. For a more “street food” style serving, you can make large sandwiches with spicy pickles and lettuce leaves.
And as always, the leftovers never go to waste. Cold fried chicken the next day honestly feels like a completely separate dish and works perfectly for lunch boxes, picnics, or quick homemade sandwiches.
8. Easy Indian Butter Chicken with Coconut Cream Shortcut
With coconut cream, the sauce becomes more silky, richer, and slightly deeper in flavor. At the same time, the coconut itself is barely noticeable on its own. It simply softens the tomatoes and spices, while the chicken stays very tender even without long marinating.
Of course, this is not an authentic Indian butter chicken. It’s simply a homemade version of a really good dish for a regular evening at home.
Ingredients
- 1.5 lb chicken breast or boneless thighs (700 g)
- 1 tbsp butter
- 1 small onion
- 3 cloves garlic
- 1 tsp freshly grated ginger
- 1 cup tomato sauce (240 ml)
- 3/4 cup coconut cream (180 ml)
- 1 tbsp tomato paste
- 1 tsp garam masala
- 1 tsp ground paprika
- 1/2 tsp turmeric
- 1/2 tsp ground cumin
- 1/4 tsp ground chili, optional
- salt and black pepper
- a little fresh cilantro
- deep skillet or sauté pan
How to Make Quick Butter Chicken with Coconut Cream
- Prepare the chicken
Cut the chicken into large pieces of roughly equal size. It’s better not to make the pieces too small because they lose juiciness faster during cooking.
Chicken thighs give a softer result here, but chicken breast works too. The main thing is not to overcook it in the sauce for too long. - Cook the onion and spices
Melt the butter in a deep skillet over medium heat. Add the finely chopped onion and cook for about 4–5 minutes until it softens and becomes lightly golden around the edges. Then add the garlic, ginger, garam masala, paprika, turmeric, cumin, and ground chili.
It’s very important to let the spices warm in the butter for at least 30–40 seconds. That’s when the aroma becomes much brighter and the flavor later turns more balanced. - Add the tomatoes
Pour in the tomato sauce and add the tomato paste. Stir well and cook for a few minutes until the sauce becomes slightly thicker. If you taste the sauce at this stage, it may feel a little sharp. But later the coconut cream smooths everything out. - Cook the chicken in the sauce
Add the chicken pieces directly into the hot sauce and stir so the meat becomes fully coated with the spices. Cook for about 8–10 minutes, stirring occasionally. The chicken should cook through completely but still stay tender.
If the sauce starts thickening too quickly, you can add a few spoonfuls of water. - Add the coconut cream
Pour in the coconut cream and lower the heat. After that the sauce becomes noticeably softer, thicker, and more silky. This is exactly where that classic butter chicken effect appears, when the sauce literally coats the rice.
There’s no need to boil it for long after adding the cream. About 3–4 minutes over low heat is enough. - Taste and adjust the flavor
Before serving, taste the sauce. Sometimes tomatoes are more acidic, and in that case a tiny pinch of sugar or a little more coconut cream helps.
For a brighter spice flavor, you can add a little more garam masala right at the end of cooking.
Serving
This chicken is best served with hot basmati rice or warm flatbreads. The recipe makes quite a lot of sauce, and people usually end up scooping up every last spoonful.
Add a little fresh cilantro and a couple drops of lemon juice on top. They make the flavor fresher and lightly complement the creamy texture of the sauce. A simple cucumber yogurt salad or pickled red onions also work really well next to it.
This dish cooks much faster than classic butter chicken, doesn’t require long marinating, and still gives that feeling of proper homemade food instead of a “quick compromise dinner.”
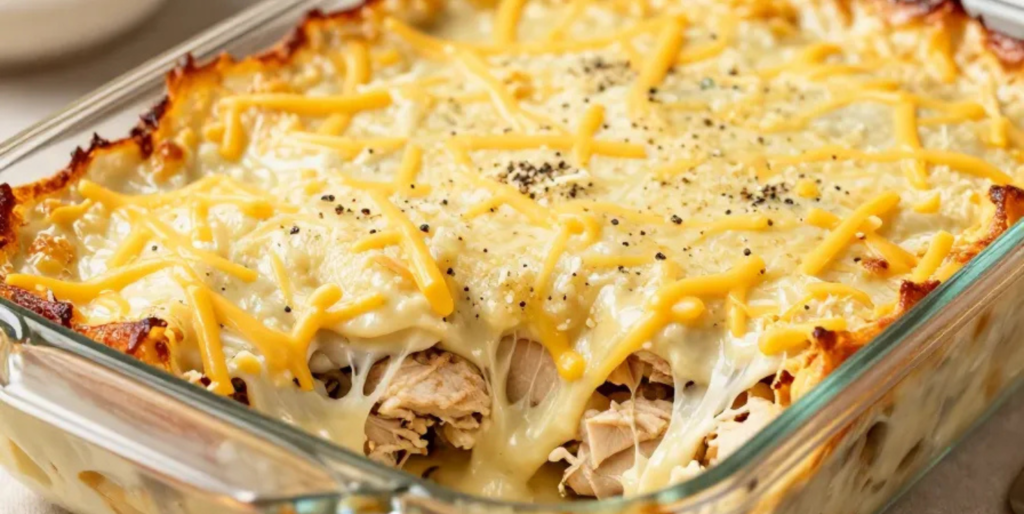
9. Parmesan Garlic Chicken Casserole That Reheats Perfectly
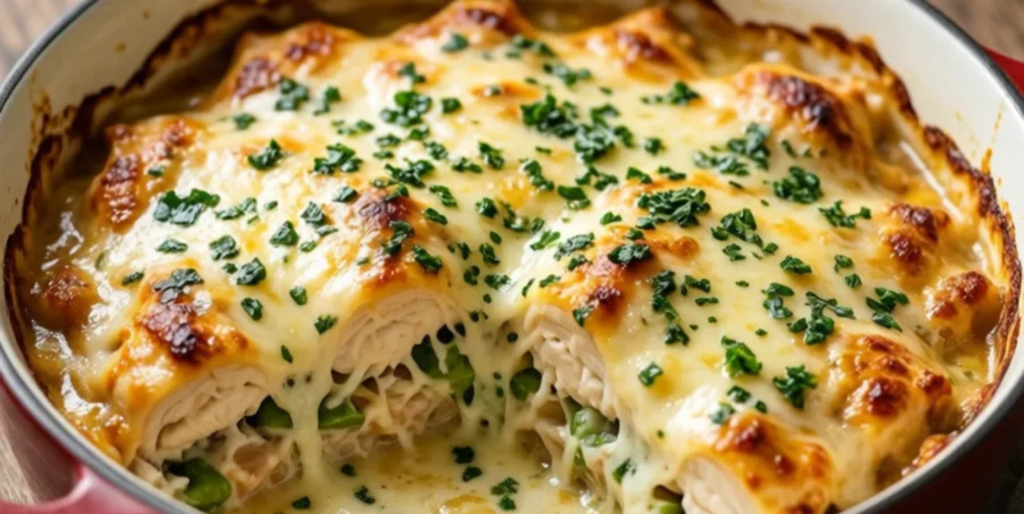
Even the next day, this chicken casserole stays soft, the sauce doesn’t separate, and the top still has that nice cheesy stretch thanks to the melted cheese.
The most important part here is the combination of parmesan, garlic, and creamy sauce. Parmesan gives the dish a deeper flavor without needing a huge list of ingredients, while baking brings everything together into one rich and filling meal.
Ingredients
- 2 cups cooked chicken, chopped into pieces (about 300–350 g)
- 8 oz short pasta (225 g)
- 2 tbsp butter
- 4 cloves garlic
- 1 cup heavy cream (240 ml)
- 1 cup grated parmesan (90–100 g)
- 1 cup shredded mozzarella (100 g)
- 1/2 tsp garlic powder
- 1/2 tsp Italian herbs
- salt and black pepper
- a little fresh parsley
- baking dish
How to Make Creamy Parmesan Chicken Casserole
- Prepare the pasta
Cook the pasta in salted water until slightly firmer than usual. It will continue cooking in the oven later, so it’s better not to overcook it.
After cooking, drain the pasta but save a couple spoonfuls of the pasta water. Sometimes it helps adjust the sauce texture at the end. - Make the garlic sauce
Melt the butter in a large skillet and add the finely chopped garlic. Cook for only about 30–40 seconds over medium heat. The garlic should become fragrant but not dark. If it cooks too long, the sauce later gets a slightly bitter flavor.
Then pour in the cream and add garlic powder, Italian herbs, salt, and black pepper. - Add the cheese
Gradually add the parmesan and half of the mozzarella into the hot sauce. Stir constantly so the cheese melts evenly. The sauce should become smooth and thick. If it looks too dense, add a little pasta water.
Parmesan is especially important here. It gives the sauce a deeper flavor and makes it thicker than a regular cream sauce. - Combine the pasta and chicken
Add the cooked chicken and pasta into the sauce. Mix everything well so the sauce coats everything evenly.
It’s better to use chicken cut into smaller pieces rather than very large chunks. That way the casserole becomes easier to serve and keeps its texture better after reheating. - Transfer into the baking dish
Lightly grease the baking dish with oil and transfer the whole mixture into it. Spread the remaining mozzarella and a little extra parmesan on top. That top layer is exactly what creates the golden cheesy crust later. - Bake until golden on top
Bake at 400°F (200°C) for about 15–20 minutes. The top should become golden, and the sauce around the edges should start bubbling slightly. For a darker crust, you can turn on the broiler for another 1–2 minutes at the end. - Let the casserole rest
After removing it from the oven, leave the casserole for 5–10 minutes. Right after baking the sauce is still very hot and loose. Once the temperature drops slightly, the texture becomes firmer and easier to serve.
Serving
I love serving this casserole with a simple green salad or roasted vegetables. You can sprinkle a little fresh parsley and black pepper on top before serving. Something fresh and slightly acidic also works really well here — for example a salad with lemon dressing or pickled vegetables. They make the creamy cheese sauce feel lighter.
The casserole reheats really well the next day and still tastes great. Convenient, right? You cook once — and several proper hot dinners are already ready to go.
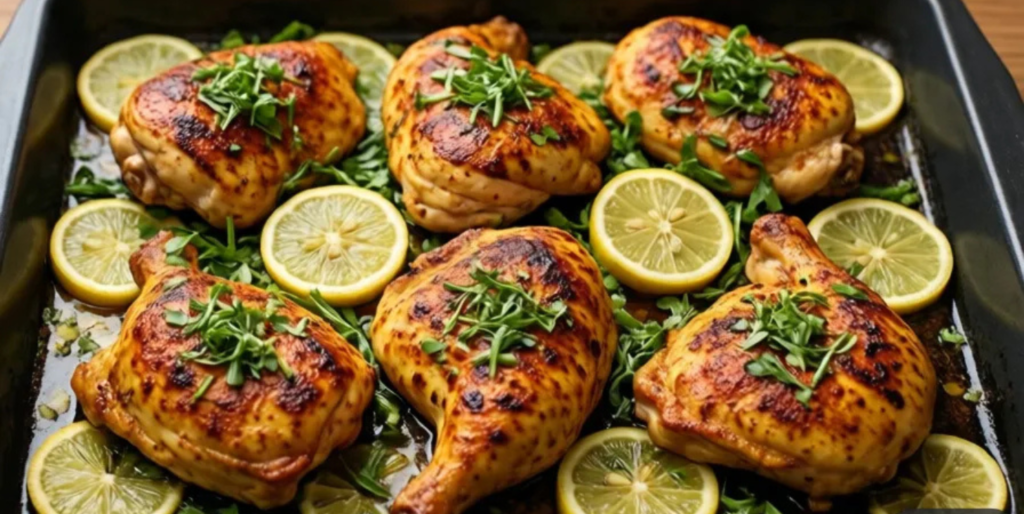
10. Zesty Lime and Cilantro Chicken Tacos the Whole Family Craves
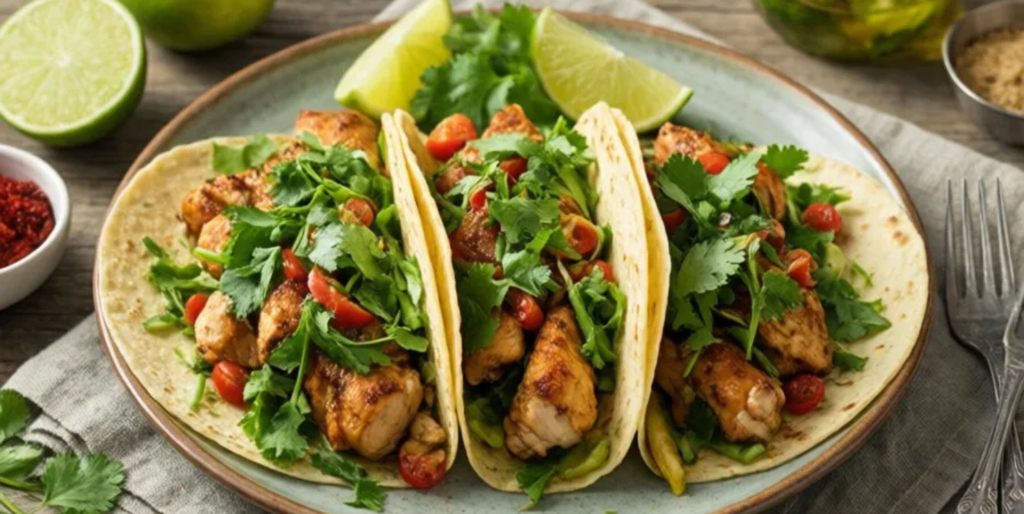
I really love tacos because everyone can build them exactly the way they like. The main secret here is the marinade with lime, garlic, and cilantro. It makes the chicken taste fresher without complicated spices or a huge ingredient list. And this kind of chicken cooks quickly without needing long marinating.
Ingredients
- 1.5 lb boneless chicken thighs (700 g)
- 2 tbsp olive oil
- juice of 2 limes
- 3 cloves garlic
- 1 tsp ground cumin
- 1 tsp smoked paprika
- 1/2 tsp ground coriander
- salt and black pepper
- 1/2 cup fresh cilantro
- small tortillas
- 1 avocado
- 1 cup thinly shredded cabbage
- 1/2 cup sour cream or thick yogurt
- a little pickled red onion
- large grill pan
How to Make Lime and Cilantro Chicken Tacos
- Prepare the marinade
In a large bowl combine olive oil, lime juice, finely chopped garlic, cumin, smoked paprika, coriander, salt, and black pepper.
The marinade smells incredibly fresh right away. Lime doesn’t just add acidity here. It brightens the flavor and helps the chicken absorb the spices faster. - Marinate the chicken
Add the chicken into the marinade and mix everything well with your hands. Chicken thighs work best for this recipe. They stay tender even over high heat and later slice perfectly for tacos.
If you have extra time, leave the chicken for at least 20–30 minutes. But even a short marinating time already gives great flavor. - Prepare the toppings
While the chicken marinates, thinly shred the cabbage, slice the avocado, and prepare the cilantro.
It’s very convenient to place everything into small bowls ahead of time. Then assembling the tacos later goes quickly and nobody has to stand around waiting near the hot pan. - Cook the chicken
Heat the pan over medium or slightly higher heat. Add the chicken and cook for about 5–6 minutes per side until nicely browned. Don’t flip the meat too often. When the chicken stays still on the hot surface, the seared flavor becomes much deeper.
After cooking, let the meat rest for a couple of minutes before slicing. - Slice the chicken
Cut the chicken into thin strips or small pieces. If there’s too much juice inside, you can return the meat to the pan for about 1 minute so the surface becomes slightly more browned again. - Warm the tortillas
Tortillas are much better lightly warmed on a dry skillet or directly over the flame for a few seconds.
After warming they become softer, more flexible, and don’t tear while assembling the tacos.
Serving
These tacos are best assembled right before eating. Start with a warm tortilla, then add chicken, a little cabbage, avocado, cilantro, and a spoonful of sour cream or thick yogurt on top. Pickled red onions work especially well here. They add acidity and make the flavor brighter. You can also squeeze a little extra lime juice on top and add a few drops of hot sauce.
For a larger group, it’s very convenient to place all the toppings in the center of the table and let everyone build their own version. And the leftover chicken works perfectly in salads or quick wraps the next day. Nobody will even think it’s leftovers from yesterday’s dinner.
What’s for Dinner?
The most useful recipes are the ones that cook quickly, don’t take much time, use simple ingredients, and somehow you start making them more and more often because they actually fit into everyday life.
I’m always curious which meals become people’s regular go-to dishes for busy days. Especially if you have your own little trick that makes chicken taste better, juicier, or simply easier to cook.
So tell me in the comments — which recipe from this list would you make first? Maybe you already came up with your own version and tested it yourself?
Good luck and enjoy your meal!