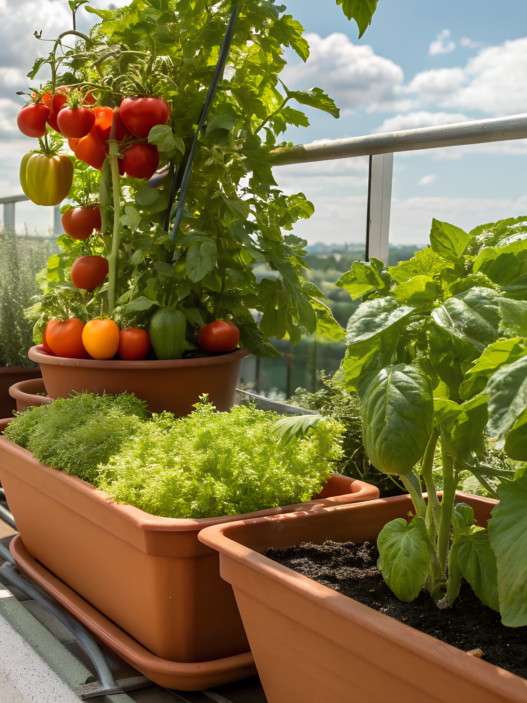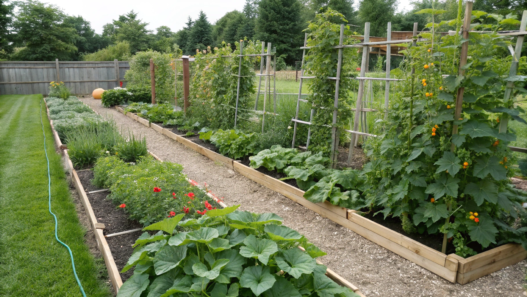
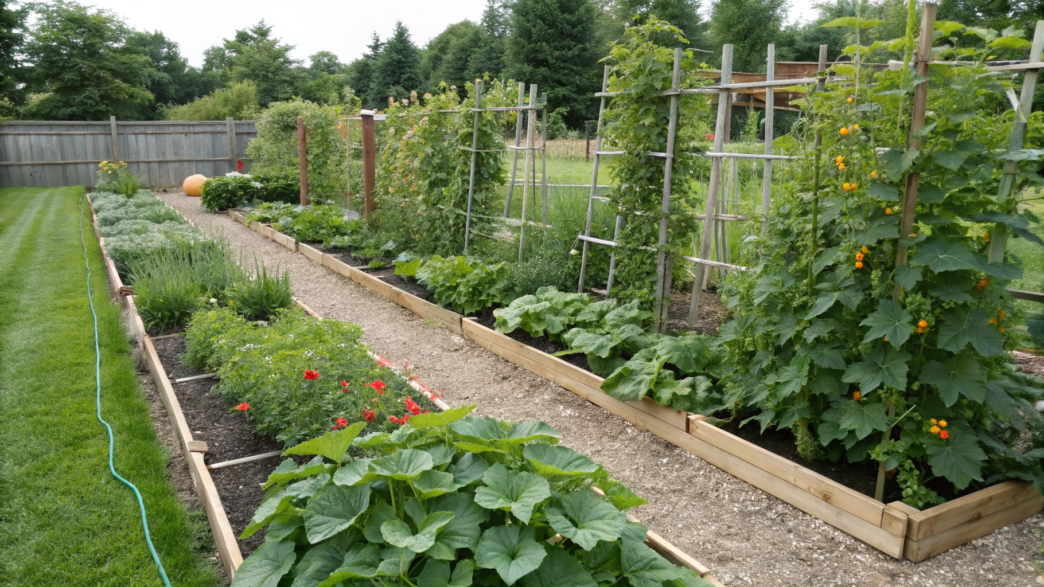
On my property, I experimented a lot with companion planting and came to the conclusion that not only the combination of crops matters, but also how exactly they are arranged. Sometimes an extra 12 inches (30 cm) between plants gives more benefit than one more additional bush.
Over time, you start noticing how some plants help each other — even with simple shade, leaf placement, or the way they use garden bed space.
Here you’ll find simple layouts for cucumbers, peppers, corn, squash, garlic, carrots, lettuce, and onions that help use space more wisely, reduce crowding, and make summer garden beds much easier to manage.
1. Cucumber and Corn Trellis Hack With a Clear Airflow Gap
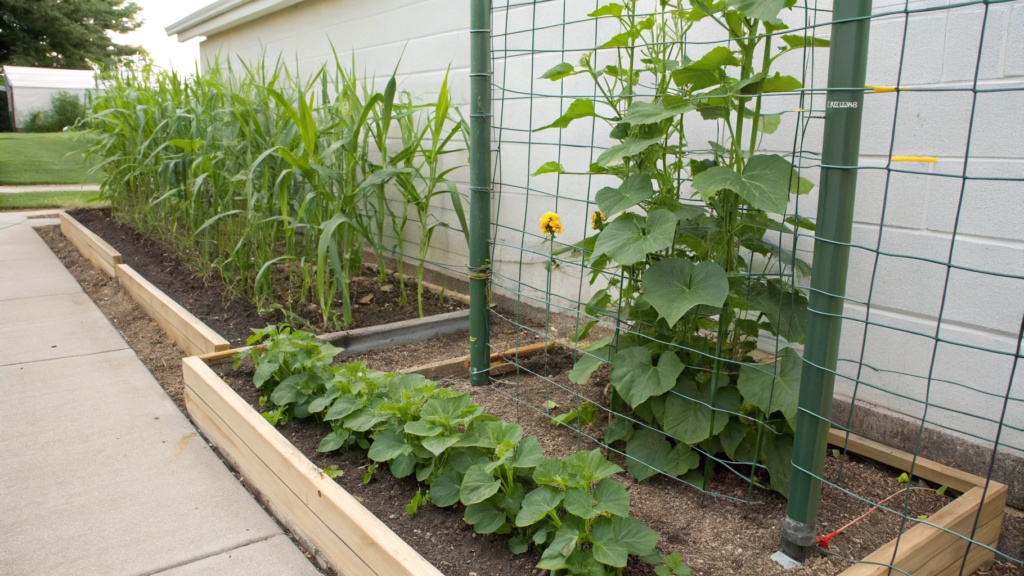
After many experiments, I now use a simple layout where corn grows in a separate block, and next to it there’s a row of cucumbers on a vertical trellis. A free airflow gap stays between them, and that space keeps the planting from turning into dense wet overgrowth by the middle of summer.
Corn and cucumbers use space differently. Corn grows upward, while cucumbers grow vertically on the trellis. In small gardens, this helps get more harvest from one bed.
Free space between plantings is very important because poor air circulation around cucumbers increases the risk of fungal diseases, including powdery mildew and downy mildew.
What You’ll Need
- Cucumber seeds or seedlings
- Sweet corn
- A trellis 6–7 ft (1.8–2.1 m) tall
- Garden ties VELCRO Brand Garden Ties on Amazon
- Trellis netting
- Compost
- Mulch
- Drip irrigation or a long hose
How to Make This Layout
- Plant corn in a separate block instead of one long strip. Corn is wind-pollinated, so compact planting helps produce fuller ears. I usually make a block about 4 ft (1.2 m) wide and leave about 12 inches (30 cm) between rows.
- Place a vertical cucumber trellis next to the corn. It’s better to install it before the vines start actively growing so you don’t damage roots later or struggle to squeeze between plants. Guide cucumbers only onto the trellis, not onto the corn.
- Leave at least 18 inches (45 cm) of open space between the corn and the trellis. If your summer is humid, around 24 inches (60 cm) is even better. This gap helps air move through the planting, and leaves dry much faster after rain or watering.
- Plant cucumber bushes about 12 inches (30 cm) apart. If the planting gets too dense, the vines quickly tangle together and moisture starts building up inside again.
- Position the trellis so the corn doesn’t block sunlight from the cucumbers for most of the day. I try to place it on the north side. That way the light moves across the plants more evenly.
- Mulch the free space between the crops. Straw, wood mulch, or a thin layer of dried grass help hold moisture and reduce the amount of dirt that splashes onto leaves after rain.
Quick Spacing Cheat Sheet
| Crop Area | Spacing |
| Between corn and trellis | 18–24 inches (45–60 cm) |
| Between cucumber plants | 12 inches (30 cm) |
| Between corn rows | 12 inches (30 cm) |
| Trellis height | 6–7 ft (1.8–2.1 m) |
Small Tip
If your summers are humid and stuffy, try mulching the entire free gap between the corn and cucumbers instead of only around the plant bases. This helps the soil dry out more slowly and reduces the amount of dirt that splashes onto the leaves after rain. We usually use straw or a thin layer of dried grass and avoid laying mulch in a thick wet layer.
With cucumbers and corn, those extra 18–24 inches (45–60 cm) between plantings later pay off with healthier leaves, easier harvesting, and noticeably fewer problems in the middle of summer.
2. Pepper and Onion Edge Planting for Fewer Leaf Pests
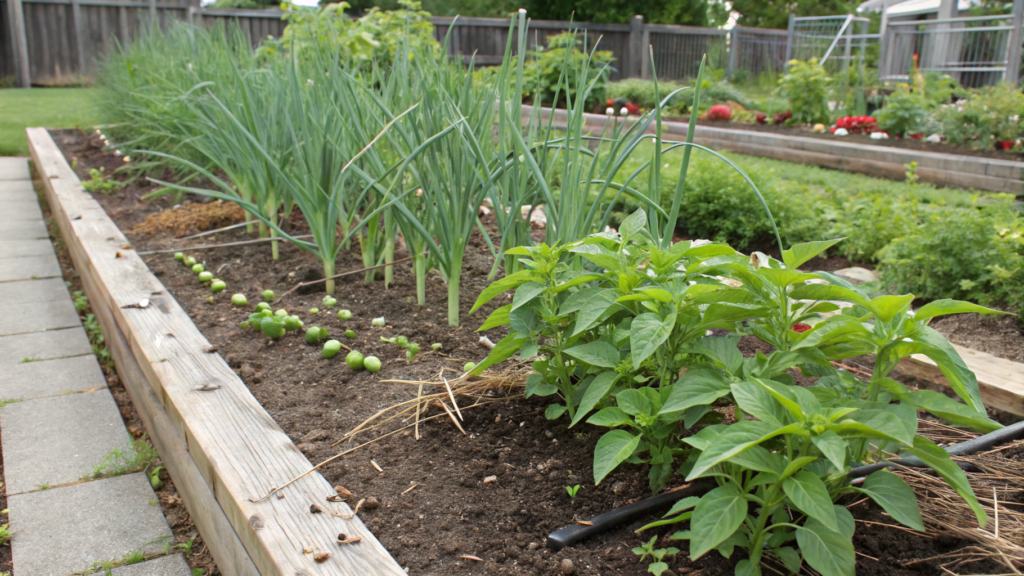
I really love growing peppers, but for some reason they’re always the first plants in our garden to attract every tiny leaf pest each season. Aphids, little jumping bugs, ants… That’s why I now almost always use onion border planting around peppers. Of course, pests don’t disappear forever, but the difference is honestly noticeable.
It creates a kind of living border around the bed. Onions don’t take up much space, and the whole garden bed looks neater and becomes easier to manage.
What You’ll Need
- Sweet pepper seedlings
- Onion sets or green onion seedlings
- Compost
- Mulch
- Drip irrigation or a hose
- Garden snips
- Low hoops or supports for windy weather
How to Make This Layout
- Prepare a garden bed about 3–4 ft (90–120 cm) wide. It’s better not to plant peppers too densely. When the bushes start spreading in July, they need proper air circulation.
- Plant the peppers in the center of the bed. I usually leave about 16–18 inches (40–45 cm) between bushes. That gives enough room for healthy growth and easier harvesting later.
- Plant onions along the edges of the bed. I most often use regular bulb onions or green onions for fresh tops. I leave around 4–6 inches (10–15 cm) between bulbs.
- Don’t place onions too close to the pepper stems. It’s better to leave at least 8–10 inches (20–25 cm) between the onion border and the pepper bushes so air can move freely through the planting.
- Mulch the soil well after planting. Peppers especially dislike sudden soil drying, and mulch helps keep moisture levels more stable during hot weeks.
- Regularly check the underside of the leaves. Even with companion planting, pests can still appear. But usually there are fewer of them, and outbreaks spread more slowly.
A Small Tip From Personal Experience
If the peppers start getting too crowded, don’t be afraid to remove a few lower leaves closer to the soil. This improves air movement inside the plant and reduces dampness after watering. Especially after stuffy July weeks when leaves barely dry overnight.
I can honestly say this layout works for me not only because of fewer leaf pests. With this setup, the pepper bed becomes easier to care for, looks tidier, and turns into a tangled overgrown mess much more slowly by the middle of the season.
3. Zucchini and Garlic Placement to Reduce Powdery Mildew Pressure
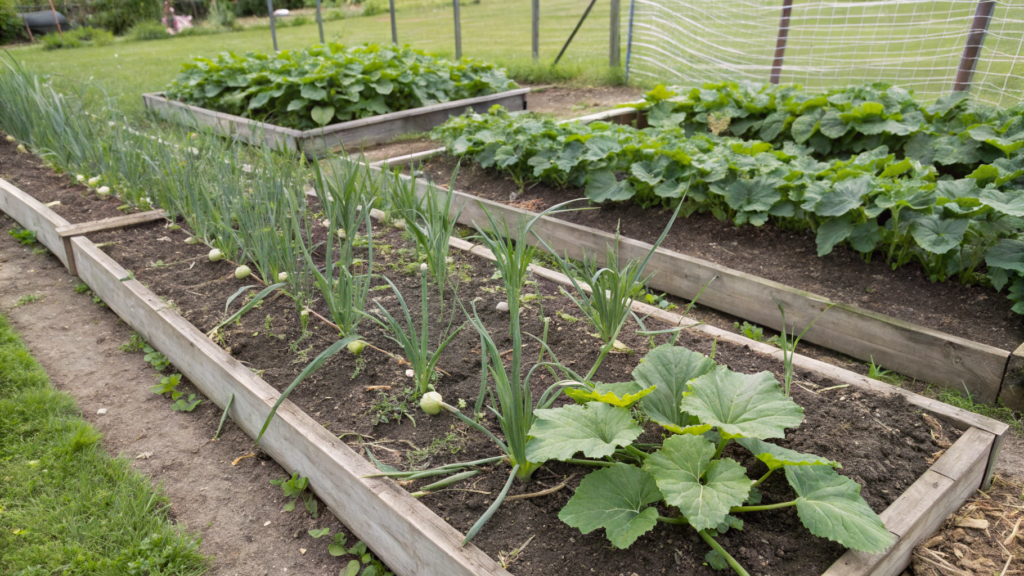
I think you already know what powdery mildew is. Because of it, I stopped planting zucchini in one solid wall. Now I almost always grow garlic next to zucchini, with proper spacing for airflow.
The right garden layout helps reduce dampness around the plants and keeps the bed from becoming too dense. And for zucchini, that already makes a huge difference.
Poor air circulation and long-lasting moisture on leaves significantly increase the risk of powdery mildew on cucurbit crops. That’s why spacing between plants plays a big role here.
What You’ll Need
- Zucchini seeds or seedlings
- Hardneck or softneck garlic
- Compost
- Mulch
- Drip irrigation or a hose
- Garden pruners
- Gardening gloves
How to Make This Layout
- Prepare a wide garden bed with good airflow. Zucchini spreads much more aggressively than it seems at the beginning of the season. It’s better to give the bed at least 4–5 ft (1.2–1.5 m) of width right away so the leaves don’t later pile on top of each other in one wet layer.
- Plant zucchini with large gaps between bushes. Leave around 3–4 ft (90–120 cm) between plants. Yes, at first the bed may look a little empty. But within a month, most of that free space will disappear.
- Plant garlic along the outer edge of the bed or between bushes with a large offset. It’s better to leave at least 12 inches (30 cm) between the garlic and the base of the zucchini plant. This helps keep air moving around the leaves and prevents extra crowding.
- Avoid watering leaves from above in the evening. Zucchini leaves hold moisture very quickly, especially during cool nights. It’s better to use drip irrigation or water only at the base of the plant in the morning.
- Remove old lower leaves as the bush grows. Especially leaves touching the soil or looking too dense inside the plant. After this kind of pruning, the bush dries much faster after rain.
- Mulch the soil around the plants. Straw or wood mulch helps reduce the amount of dirt that splashes onto leaves after watering. It also helps the soil stay moist longer during hot weather.
Earlier, I made the mistake of overcrowding zucchini plants and placing bushes much closer together. By August, the leaves inside barely dried out, and powdery mildew spread through the plants almost like a wave. After that, I stopped trying to save space between zucchini bushes.
A Small Tip for Wet Summers
If your summer is rainy, try lifting the large zucchini leaves once a week and checking the center of the bush. That’s usually where the first damp spots appear and fungal problems begin developing. The earlier you notice it, the easier it is to keep the leaves healthy until the end of the season.
As you can see, zucchini often doesn’t really need another fertilizer or another spray treatment. What it usually needs more is free space between the leaves. Especially in the middle of summer, when the bushes almost double in size within just a few days.
4. Squash and Lettuce Shade Strategy for Hot Weeks
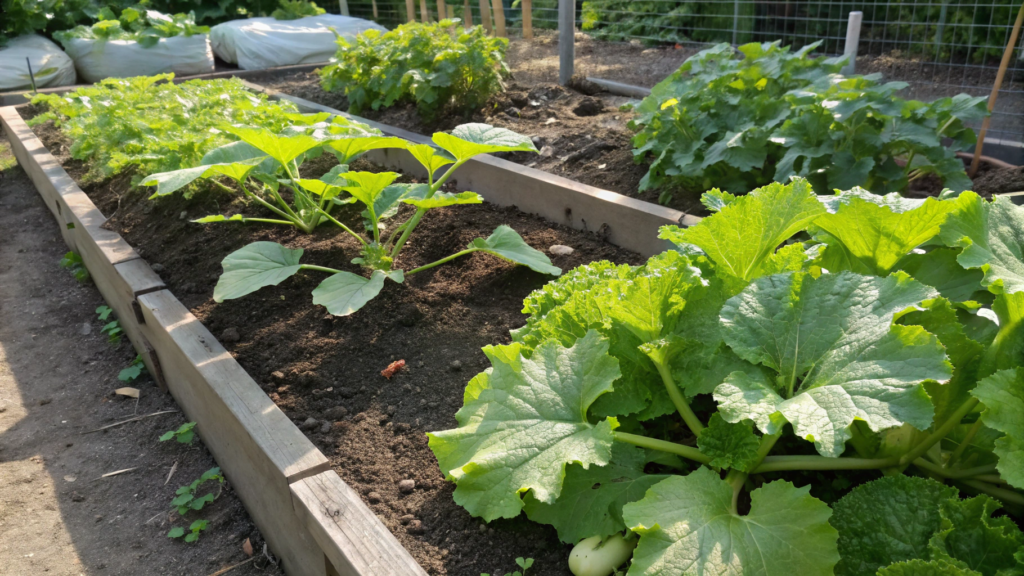
Lettuce leaves are usually the first to suffer from heat. That’s why I really like a garden layout where squash or pattypan squash creates light partial shade for lettuce. While the squash is still small, the lettuce gets enough sunlight. Later, the squash leaves become larger and start partially shading the soil and nearby plants from overheating.
What You’ll Need
- Squash, pattypan squash, or summer squash seeds or seedlings
- Lettuce seeds
- Compost
- Mulch
- Drip irrigation or a watering can with gentle flow
- Garden snips
- Soil thermometer Vee Gee Scientific Soil Thermometer on Amazon
How to Make This Layout
- Prepare a wide garden bed with enough room for large leaves. Squash and pattypan squash spread very quickly, so it’s better to dedicate a bed around 4–5 ft (1.2–1.5 m) wide from the beginning. Otherwise, by mid-summer the plants will completely block the pathways.
- Plant squash on the north or west side of the bed. This way the large leaves will partially shade the lettuce during the hottest hours of the day instead of blocking sunlight from morning to evening.
- Plant lettuce at a distance from the base of large squash bushes. I usually leave around 18–24 inches (45–60 cm) between the lettuce and the center of the squash plant. That gives enough light and proper air circulation.
- Use cut-and-come-again lettuce varieties. Leaf mixes and softer varieties like romaine or oak leaf work especially well in this setup because you can harvest them gradually over several weeks.
- Mulch the soil around the lettuce. Under large squash leaves, moisture stays longer, and mulch helps keep the soil cooler during hot weather.
- Make sure squash leaves don’t completely cover the lettuce. Light partial shade helps, but dense shade makes the leaves weak and stretched. Sometimes I simply remove 1–2 overly large leaves if the squash starts fully covering the bed.
A Tip From Our Experience
If the heat lasts for several days in a row, try watering lettuce early in the morning while the soil is still cool. Evening watering during humid weather can sometimes create too much moisture around the leaves, especially in dense plantings.
And I want to remind you once again that light shade works better than full cover. When lettuce still gets at least a few hours of soft morning sun, the leaves stay firmer and taste better, and the plants themselves don’t end up looking stretched and weak by the middle of the season.
5. Carrot and Pepper Underplanting That Uses Empty Soil Space
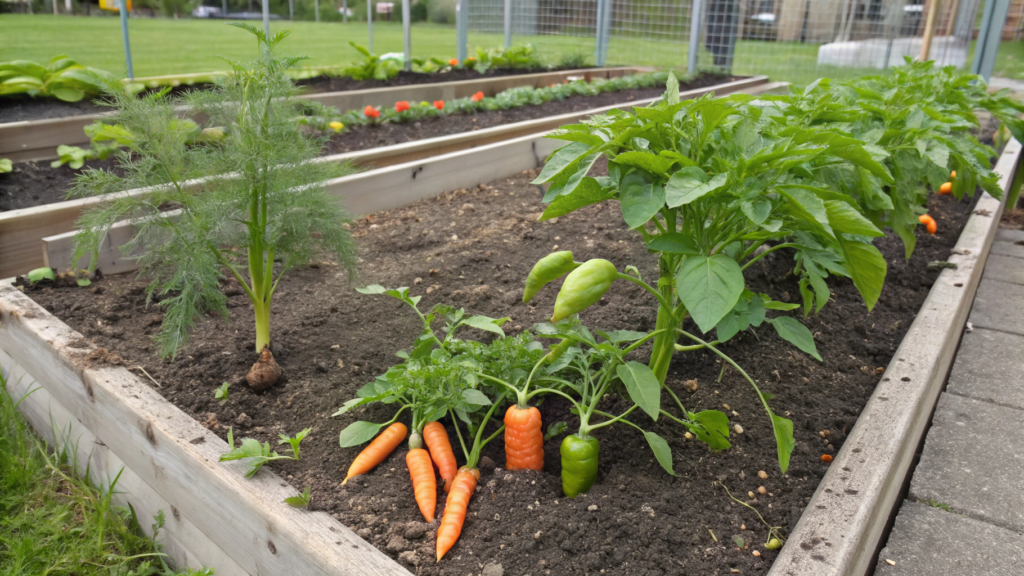
In small gardens, you always want to get the most harvest possible from one bed. That’s why sowing carrots between peppers works so well. While the peppers are still gaining size and stretching their leaves upward, the carrots quietly develop underneath and use the free space that would otherwise simply dry out under the sun.
Research from Texas A&M AgriLife Extension and University of California Agriculture and Natural Resources shows that crops with different root depths can use water and garden bed space more efficiently.
What You’ll Need
- Sweet pepper seedlings
- Carrot seeds
- Compost
- Fine mulch
- A hose with gentle watering or drip tape
- Row markers
- Hand cultivator
How to Make This Layout
- Prepare loose soil without large clumps. This is especially important for carrots. If the soil is heavy and compacted, the roots start twisting and branching instead of growing straight.
- Plant peppers with proper spacing. It’s better to leave around 16–18 inches (40–45 cm) between bushes. At the beginning of the season, this may look like too much space, but by July the plants become much wider.
- Sow carrots between the pepper rows. I usually leave a narrow strip roughly in the middle between bushes. That gives the carrots enough room to grow properly before the peppers start creating dense shade.
- Don’t plant the seeds too deeply. Carrots prefer shallow sowing. Usually about ¼ inch (6 mm) of soil on top is enough. After sowing, it’s better to gently press the soil down with your palm instead of compacting it too hard.
- Watch moisture levels during the first weeks. Carrots germinate slowly and don’t like the top layer of soil drying out. During hot weather, I sometimes lightly water the bed even twice a day.
- Add a thin layer of fine mulch after seedlings appear. This helps the soil dry out more slowly and reduces overheating between the pepper bushes.
- Don’t wait too long to harvest young carrots. While the peppers still haven’t fully closed together, the carrots receive more sunlight and grow faster. By mid-summer, it’s usually better to gradually remove the roots.
At the beginning of the season, beds like this look almost empty, but within a few weeks it becomes obvious how quickly the space between the peppers fills with leaves and greenery.
How to Keep Moisture Between Peppers
If the top layer of soil starts drying out too quickly, try watering not the entire bed at once, but specifically the carrot strips between the peppers. Under the pepper leaves, moisture later stays much longer, and the soil itself doesn’t turn into a dry crust by the middle of the day.
The difference becomes especially noticeable in July, when the sun starts literally “baking” open areas of soil.
6. Cucumber and Tomato Separation Rule That Prevents Crowding
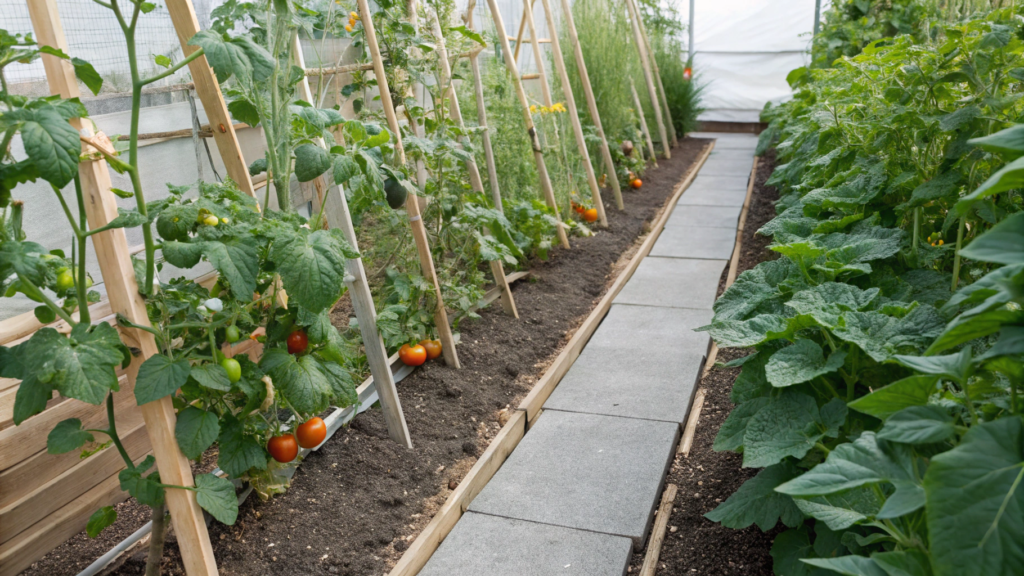
To keep the bed from turning into a dense green wall where leaves rub against each other and air barely moves, I try to follow one simple rule: cucumbers grow on their own trellis, tomatoes stay on their own supports, and a proper walkway remains between them where you can water, tie plants up, remove old leaves, and comfortably harvest.
If you plant them too close together, the inside of the bed quickly becomes damp, and wherever leaves stay wet for too long, fungal problems appear much faster.
What You’ll Need
- Tomato seedlings
- Cucumber seeds or seedlings
- A separate cucumber trellis 6–7 ft (1.8–2.1 m) tall
- Tomato cages, stakes, or vertical supports
- Garden ties
- Cucumber trellis netting
- Compost
- Mulch
- Drip irrigation or a hose
How to Plant This Layout
- Separate cucumbers and tomatoes with a walkway. It’s better to leave at least 24–30 inches (60–75 cm) between the cucumber trellis and the tomato row. This is not wasted space — it’s a working zone. You’ll use it to reach the plants, tie vines, remove lower leaves, and harvest without constantly brushing against the bushes.
- Place cucumbers on a separate trellis. Don’t let cucumber vines climb onto tomato cages or stakes. At first it may seem convenient, but later cucumbers start grabbing onto everything, blocking the walkway and making tomato care much harder. A separate trellis keeps cucumbers vertical and helps the leaves dry faster after rain.
- Support tomatoes separately and above the lower leaves. Tomatoes are best trained right away on stakes, twine, or sturdy cages. Once the plants get heavy, they quickly start leaning toward the cucumbers. I try to tie not only the main stem, but also large side branches with fruit so they don’t collapse into the walkway.
- Don’t plant cucumbers directly at the base of tomatoes. It’s better to leave at least 24 inches (60 cm) between the tomato base and the nearest cucumber plant. Cucumbers build leaf mass very quickly, and if planted too close, they start covering the lower part of the tomatoes. And tomato lower leaves already struggle enough with moisture and soil splash.
- Remove lower tomato leaves once the bushes become established. When the plants are actively growing, you can gradually remove leaves touching the soil or blocking airflow. Don’t strip the plant all at once. It’s better to do it little by little so the plant doesn’t experience extra stress.
- Water at the base instead of over the leaves. For this pairing, it’s especially important. Cucumbers like steady moisture, tomatoes also dislike sharp moisture swings, but wet leaves definitely don’t help either crop. Drip irrigation works best here because the water goes exactly where it’s needed while the foliage stays dry.
- Check the layout again a month after planting. On planting day, everything looks spacious. Four weeks later, it’s a different picture. If cucumber vines start hanging beyond the trellis, guide them back. If tomatoes begin falling into the walkway, tie them higher. It’s much easier to fix the layout early in the season than fight through wet overgrowth in August.
A Typical Mistake
The most common mistake is planting cucumbers and tomatoes in one tight line because the seedlings are still small and it feels like there’s enough room. In May, it looks neat. By July, not anymore.
With cucumbers and tomatoes, it’s better to think not about the size of the seedlings, but about the size of the mature plants.
With this planting method, cucumbers calmly grow upward on their own trellis, tomatoes stay on their own supports, and enough room remains for airflow, your hands, and a harvest basket.
7. Corn and Squash Layout That Still Lets You Water Easily
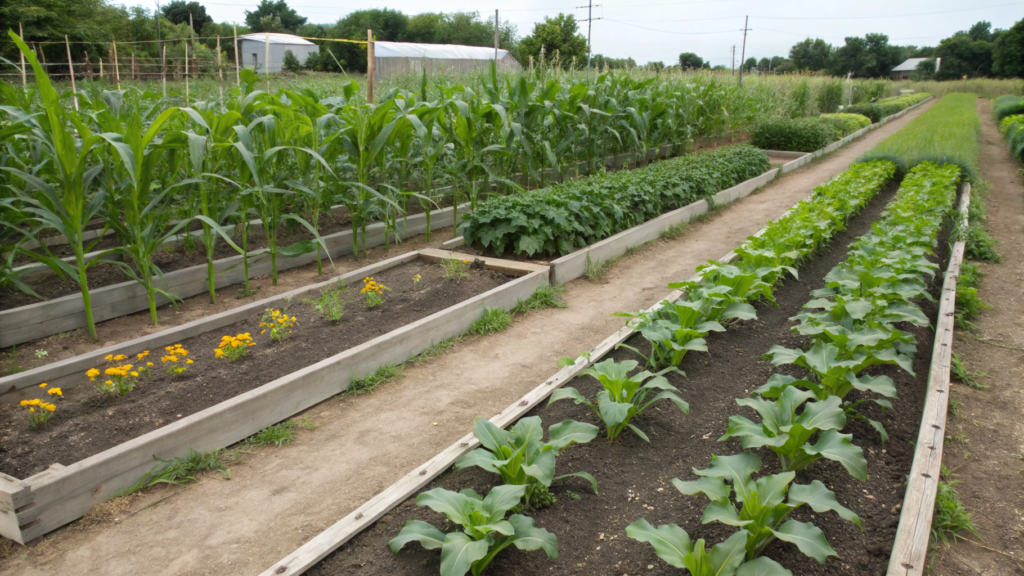
I came to the conclusion a long time ago that it’s better not to create overly dense companion planting layouts where by the middle of summer you can no longer tell where the pathway ends and the garden bed begins. When it comes to corn and squash planting, my corn grows in separate wide rows, while squash stays closer to the edges so access for watering remains easy even during peak season.
This becomes especially important in hot regions where corn and squash may require a lot of moisture for several weeks in a row.
What You’ll Need
- Sweet corn seeds
- Squash seeds or seedlings
- Compost
- Mulch
- Drip tape or a long hose
- Garden stakes
- Watering wand
How to Make This Layout
- Divide the bed into wide sections instead of one dense solid mass. Corn pollinates better in groups, so I usually make a block around 4–5 ft (1.2–1.5 m) wide. But I always leave pathways or open zones between the blocks for easier access to water.
- Plant corn compactly, but not too tightly. I usually leave around 12 inches (30 cm) between rows and about 10–12 inches (25–30 cm) between plants. When corn grows too densely, reaching the center of the planting with a hose becomes difficult by mid-summer.
- Place squash along the edges of the bed instead of inside the corn block. This is one of the most important parts of the layout. If squash grows directly between corn stalks, the huge leaves quickly block access to the soil. Watering later becomes almost blind work.
- Leave at least one proper walkway for a hose or watering can. A minimum of 24 inches (60 cm) works well, and even more is better if the bed is long. At the beginning of the season, this path may look too wide. By August, it suddenly feels like a very smart decision.
- Think about your watering system before the hottest weeks arrive. If you use drip tape, place it before the squash spreads out. Once the large leaves cover the bed, adjusting irrigation becomes much more inconvenient.
- Guide squash vines in one direction. Once the plant starts spreading aggressively, I regularly move the vines by hand so they don’t block pathways or crawl underneath the corn.
- Mulch the soil after it warms up properly. Under large squash leaves, moisture stays longer, and mulch gives extra protection against overheating and soil drying.
A Smarter Approach
At first, a wide walkway may feel like wasted space. But by the middle of the season, that same walkway starts saving a huge amount of time and frustration. If I can’t comfortably walk along the bed with a bucket or hose without hitting leaves and vines, then the planting is already too crowded.
Corn and squash naturally create the feeling of a full, lush garden without needing to be planted tightly against each other.
8. Onion and Carrot Alternating Rows for Cleaner Roots
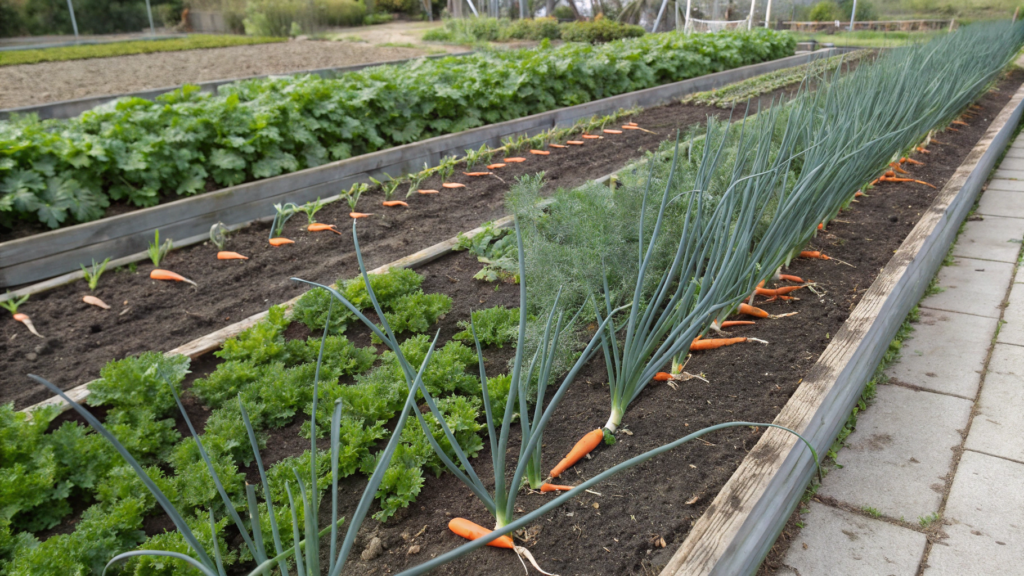
Carrots and onions work together very naturally because of the way they grow. Carrots go deeper into the soil, while onions stay more compact above ground. This makes the garden bed layout much more efficient.
A bed with alternating onion and carrot rows is easier to maintain, easier to loosen, and water spreads more evenly during irrigation. Carrots have delicate feathery tops, while onions grow narrow upright leaves. They don’t create heavy dense shade for each other, so the bed stays well ventilated even in the middle of summer.
Mixed planting with onions and carrots may also help reduce some pest activity because of the smell of the leaves and the difference between the crops growing in the same area.
What You’ll Need
- Carrot seeds
- Onion sets or young onions
- Compost
- Fine mulch
- A hose with gentle watering
- Row markers
- Hand cultivator
How to Make This Layout
- Prepare loose and deep soil. Carrots react especially badly to heavy soil with large clumps. If the ground is compacted, the roots start twisting and branching instead of growing straight.
- Create separate straight rows instead of chaotic mixed planting. I usually alternate them like this: one carrot row, one onion row, then another carrot row. This layout helps maintain airflow and makes the bed much easier to care for.
- Leave around 10–12 inches (25–30 cm) between rows. This gives enough room for watering, loosening the soil, and normal leaf growth without the bed feeling overcrowded by mid-season.
- Don’t overseed carrots. It’s very tempting to sprinkle seeds “just in case,” but later that turns into endless thinning. It’s better to sow more carefully from the beginning and leave about 2–3 inches (5–7 cm) between roots after germination.
- Plant onions a little more loosely than feels necessary in spring. Around 4–6 inches (10–15 cm) between bulbs is usually enough. By the middle of the season, the green tops become much larger than they looked during planting.
- Water the bed evenly without extreme drying. Carrots especially dislike situations where the soil dries out completely and then suddenly gets soaked with too much water at once. That can cause the roots to crack.
- Keep the top layer of soil loose. After heavy rain or watering, the soil sometimes forms a dense crust. I try to gently loosen between the rows with a hand cultivator while the plants are still small.
The most common mistake is making the spacing between rows too narrow. In spring, everything looks neat and compact. But later the carrot tops begin falling onto the onions, leaves tangle together, and water stops moving properly through the bed during irrigation. The roots also tend to come out dirtier because heavy damp soil stays trapped inside the crowded bed longer.
Tip
About a week before harvest, I usually reduce watering slightly if the weather isn’t too hot. The soil becomes a little drier and looser, and the carrots later come out of the ground much cleaner. This becomes especially noticeable after rainy periods, when heavy wet soil literally sticks to the roots in thick layers.
9. Garlic and Lettuce Bed Design for Fast Harvest Cycles
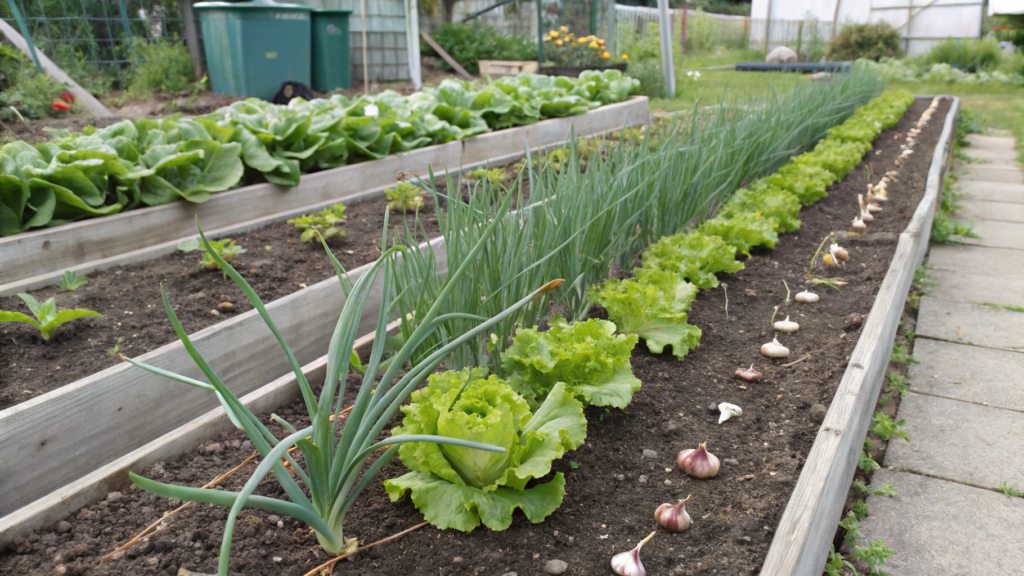
In this layout, lettuce grows quickly, while garlic develops more slowly and keeps occupying the space longer. While the garlic is still gaining strength, the lettuce already has time to grow, gets heavily used in the kitchen, and then quietly frees up space afterward.
One crop leaves, while the other keeps growing. This is especially convenient in small garden spaces where you don’t want half the bed sitting empty for a single crop.
What You’ll Need
- Hardneck or softneck garlic
- Lettuce seeds or seedlings
- Compost
- Fine mulch
- A hose with gentle watering
- Garden harvest basket
- Plant markers Garden Row Plant Labels on Amazon
How to Make This Layout
- Prepare a bed with loose and light soil. Both garlic and lettuce prefer soil that holds moisture well without turning into a heavy dense mass after watering.
- Plant garlic in rows with proper spacing. I usually leave around 5–6 inches (12–15 cm) between cloves and about 10–12 inches (25–30 cm) between rows. It’s better not to overcrowd garlic. By mid-season, the greens become much fuller than they seem during planting.
- Sow lettuce between the garlic rows. While the garlic still hasn’t filled all the space with leaves, the lettuce has enough time to grow calmly and produce a full harvest. Leaf mixes and cut-and-come-again lettuce varieties work especially well here.
- Don’t let the lettuce fall into deep shade too early. If the garlic starts spreading aggressively and fully covers the young leaves, it’s better to harvest part of the lettuce earlier while it still stays tender and crisp.
- Water the bed evenly without extreme drying. Lettuce reacts quickly to lack of moisture with bitterness and limp leaves, while garlic can form weaker bulbs during sharp moisture swings.
- Use mulch in a thin layer. This helps especially in June when the soil starts heating up quickly. Under mulch, lettuce stays fresh longer, and the top layer of soil doesn’t dry out within just a few hours of sun.
- Harvest lettuce gradually instead of all at once. While one part of the bed starts opening up after lettuce harvest, the garlic receives more airflow and more space for continued growth.
What Often Goes Wrong
During hot weeks, lettuce leaves quickly become tougher and start bolting. And if lettuce stays between the garlic for too long, the planting becomes tighter inside and airflow gets worse.
That’s why it’s better not to delay lettuce harvest too much. In this setup, lettuce works better as a fast first-wave crop rather than something meant to stay there all summer.
What Helps Speed Up Harvests
I try sowing lettuce in small sections about 1–2 weeks apart. That way the bed doesn’t produce the entire harvest at once, and the greens can be picked gradually without rushing.
This planting style creates a feeling of constant movement in the garden. While the garlic calmly keeps growing, the lettuce already manages to complete almost its entire cycle and free up space.
10. Pepper and Cucumber Support Setup Using One Trellis Line
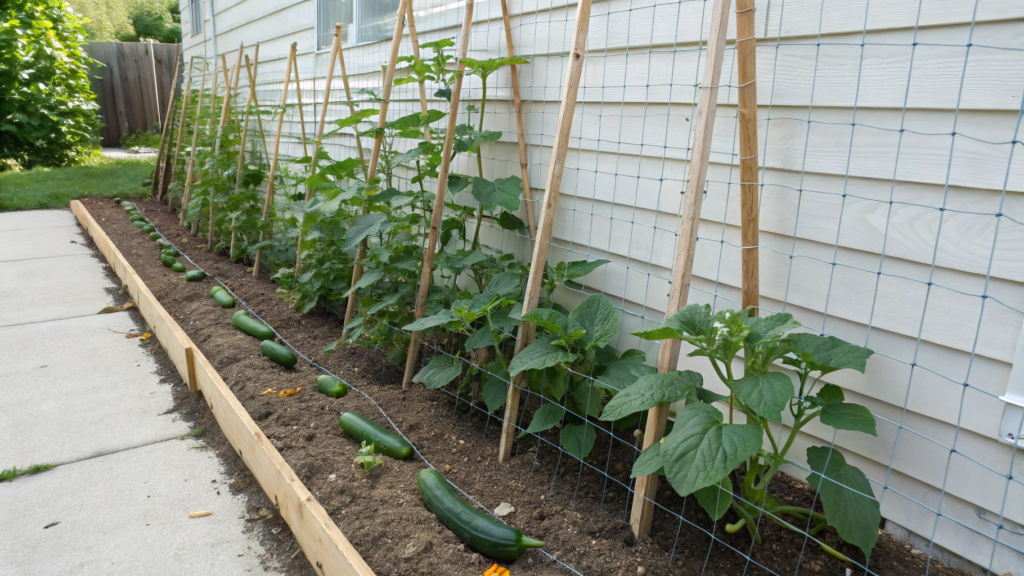
I tested a setup with one shared trellis line where cucumbers climb upward on the netting while peppers stay along the lower part of the structure and receive support as they grow. And it turned out that this kind of garden bed not only saves space, but also looks much cleaner by the middle of summer when the plants start actively spreading.
Cucumbers take the vertical space. Peppers stay lower and wider. The trellis becomes more of a support and organization line for the peppers rather than a full climbing wall.
This works especially well in long narrow garden beds where you don’t want to install separate structures for every crop.
What You’ll Need
- Sweet pepper seedlings
- Cucumber seeds or seedlings
- A sturdy trellis 6–7 ft (1.8–2.1 m) tall
- Trellis netting
- Garden ties
- Compost
- Mulch
- Drip tape or a hose
- Strong metal posts or stakes
How to Make This Layout
- Install one long trellis along the entire bed. It’s better to make it sturdy from the beginning. Once cucumbers gain weight after rain, the load becomes much heavier than it seems early in the season.
- Plant cucumbers on one side of the trellis. Around 12 inches (30 cm) between plants usually works well. Cucumbers quickly start grabbing onto the netting and filling the vertical space.
- Plant peppers along the same line, but on the opposite side of the trellis. It’s better to leave around 16–18 inches (40–45 cm) between pepper bushes so the leaves don’t turn into one dense wall by mid-summer.
- Don’t press peppers directly against the netting. Leave at least 8–10 inches (20–25 cm) between the base of the pepper plant and the trellis. This helps air move properly between the leaves and makes harvesting much easier.
- Tie up heavy pepper branches as the plants grow. Many varieties initially look sturdy, but once large fruits appear, the branches start leaning outward. I usually secure the heaviest shoots directly to the trellis line using soft garden ties.
- Regularly guide cucumber vines upward. If left uncontrolled even for a couple of weeks, the vines quickly start wrapping around the pepper bushes and blocking pathways.
- Watch the lower part of the bed during mid-season. When cucumbers become very dense, moisture can build up inside the planting. Sometimes removing a few old lower leaves is enough to restore proper airflow through the bed.
A Common Mistake
A very common mistake is trying to plant both crops too close to the same trellis line. In spring, it looks compact and convenient. But by July, cucumbers start spreading upward and sideways while peppers build mass underneath.
Eventually the leaves tangle together, fruits hide deep inside the greenery, and the trellis turns into a dense “living wall” where it becomes difficult even to fit your hand through.
How to Avoid the Problem
If you can’t comfortably slide your hand between the cucumber and pepper leaves without touching wet greenery, the planting is already becoming too dense. Sometimes removing a couple of extra cucumber vines or tying pepper branches slightly higher is enough to improve airflow again.
The Benefit of Companion Planting
I always find it interesting to see which companion planting layouts actually work well in other people’s gardens and which ones only look pretty during the first couple of weeks after planting. Because in reality, everything becomes obvious closer to the middle of summer — when the heat arrives, humidity builds up, squash leaves become enormous, cucumber vines start tangling everywhere, and suddenly you’re just trying to somehow reach the hose between the plants.
Almost every time, the real problem wasn’t the crops themselves, but the spacing between them and the way the bed was organized.So definitely share in the comments which mixed planting combinations work best for you. Are there crops that unexpectedly grow great together in your garden? Or combinations that seemed like a perfect idea in spring… but turned into complete chaos by August?