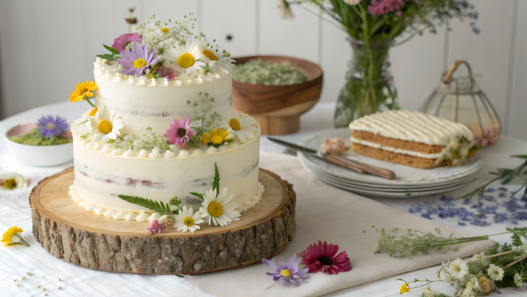
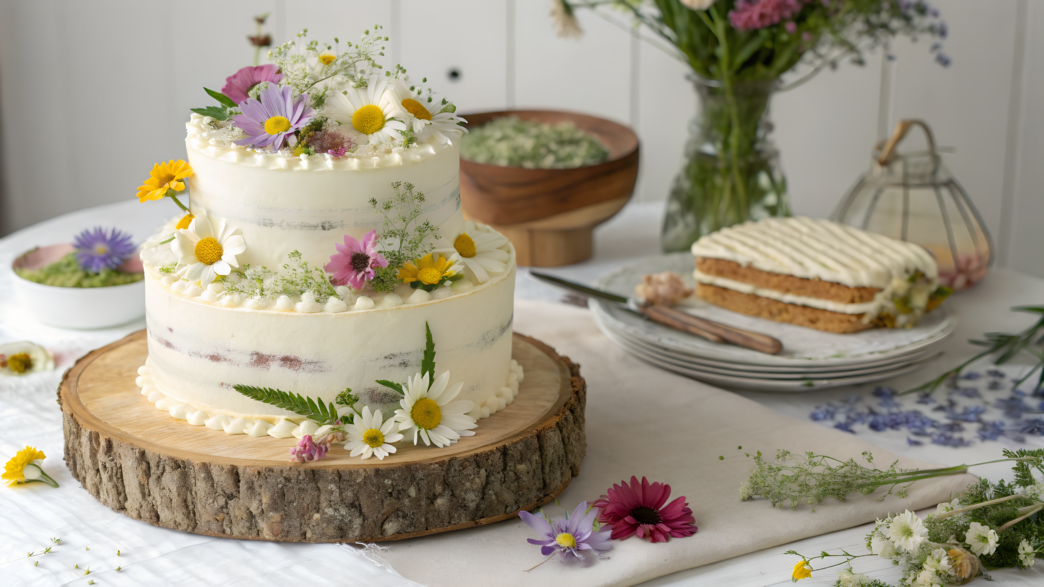
Decorating a cake with wildflowers is surprisingly easy to overdo. Add too many, and the cake starts looking more like a fairground postcard than a dessert. Add too few, and the idea feels unfinished. That’s why what really matters here isn’t a collection of expensive decorations, but a sense of balance.
A cake like this doesn’t have to be perfect. The flowers can all look a little different, the frosting doesn’t have to go on perfectly smooth, and a wildflower cake will still feel alive because it has space, color, and flavor that doesn’t get lost behind the decorations.
All 10 of these ideas can be made at home without professional baking skills. Lindy and I have tried baking a lot of them, and the results were never exactly the same. Even so, we always finished every last crumb because the cake was made with our own hands.
1. Easy Wildflower Buttercream Meadow Cake
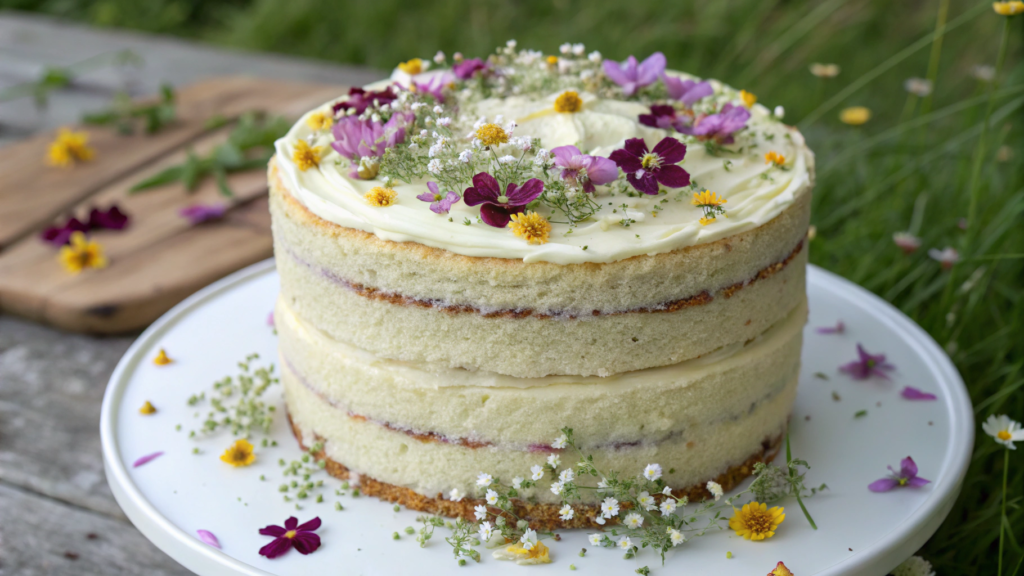
Easy Wildflower Buttercream Meadow Cake looks beautiful with buttercream frosting, little buttercream flowers, and edible petals, and you can easily make it at home.
Bake soft vanilla cake layers, cover them with light-colored frosting, and finish the top with a little flower meadow.
Ingredients
Cake Layers
- 2 ½ cups all-purpose flour (310 g);
- 2 ½ tsp baking powder;
- ½ tsp salt;
- 1 cup unsalted butter, softened (225 g);
- 1 ¾ cups sugar (about 350 g);
- 4 large eggs;
- 1 cup milk (240 ml);
- 2 tsp vanilla extract.
For the Frosting
- 1 ½ cups unsalted butter, softened (about 340 g);
- 5–6 cups powdered sugar (about 600–720 g);
- 2–4 tbsp heavy cream or milk;
- 2 tsp vanilla extract;
- ¼ tsp salt;
- food coloring: green, yellow, pink, and purple.
The Decoration
- 2–3 tbsp edible dried petals;
- a few fresh edible flowers that are safe to eat;
- a little green frosting for the leaves and grass.
For the buttercream flowers, use the Wilton Icing Open Star Tip #1M. It makes it easy to pipe rosettes and small flowers, even if you don’t have much experience.
For the finishing touch, use only edible dried petals, not decorative ones.
How to Make the Cake
- Bake the cake layers. Preheat the oven to 350°F (175°C). Grease two 8-inch cake pans and line the bottoms with parchment paper. In one bowl, mix the flour, baking powder, and salt. In another bowl, beat the butter and sugar for 3–4 minutes, then add the eggs one at a time, followed by the vanilla. Add the dry ingredients, alternating with the milk. Divide the batter between the pans and bake for 25–30 minutes.
- Let the cake layers cool completely. If they’re still warm, the frosting will start melting and the decoration will slide around. Once the layers are cool, trim off the domed tops if needed. They don’t have to be perfectly flat—just even enough.
- Make the frosting. Beat the softened butter for 3–5 minutes until it becomes lighter in color. Add the powdered sugar a little at a time, then mix in the vanilla, salt, and 2 tablespoons of cream. If the frosting is too thick, add a little more cream. If it’s too soft, add more powdered sugar.
- Prepare the frosting for decorating. Transfer about ¾ of the frosting into a separate bowl for covering the cake. Divide the remaining frosting between four small bowls: add green coloring to one for the leaves, and pink, yellow, and purple to the others for the flowers. Keep the colors soft, not too bright.
- Assemble the cake. Place the first cake layer on a plate or cake stand. Spread about ½ inch (1.2 cm) of white frosting on top. Place the second layer over it. Cover the cake with a thin layer of frosting to seal in the crumbs, then chill it in the refrigerator for 20–30 minutes.
- Apply the final layer of frosting. Cover the cake with a second layer of white frosting. Don’t smooth it until it’s perfectly even. A little texture from the offset spatula looks nice here because you’ll be adding the floral decoration on top.
If you don’t have time to make the batter from scratch, use a ready-made vanilla cake mix instead. Bake the cake layers according to the package directions, let them cool completely, then move on to the frosting and decoration. For this cake, vanilla cake mix or white cake mix works best.
Don’t worry—the result will still turn out great.
How to Make the “Meadow”
- Mark the direction. Choose a diagonal line, for example from the bottom left corner to the top right. The decoration will look more natural than flowers placed evenly in a circle.
- Pipe the large flowers. Fill a piping bag with pink or yellow frosting. Using the 1M piping tip, pipe small rosettes by holding the bag straight up, making a short spiral, and releasing the pressure. Make 5–7 large flowers.
- Add the small flowers. Pipe a few smaller flowers in a different color between the larger rosettes. Don’t cover the entire cake. The white background should still be visible.
- Pipe the leaves. Use the green frosting to add short leaves around the flowers. There’s no need to pipe every blade of grass. Just a few quick strokes are enough to make the decoration look like a little meadow.
- Sprinkle on the petals. Finish by adding a few edible petals along the flower diagonal. Use only a small pinch so the petals don’t cover the buttercream flowers.
Keep the finished cake in the refrigerator. Take it out 30–45 minutes before serving so the frosting has time to soften.
Tip. Use only edible flowers that were grown without chemical treatments. Calendula, nasturtiums, violets, pansies, rose petals, bachelor’s buttons, and basil flowers all work well.
If this is your first time making this kind of decoration, practice on a cupcake or a piece of parchment paper first. After piping a few rosettes, your hand will naturally get the movement, and making this cake will become much easier.
2. Real Flower Pressed Petal Sheet Cake
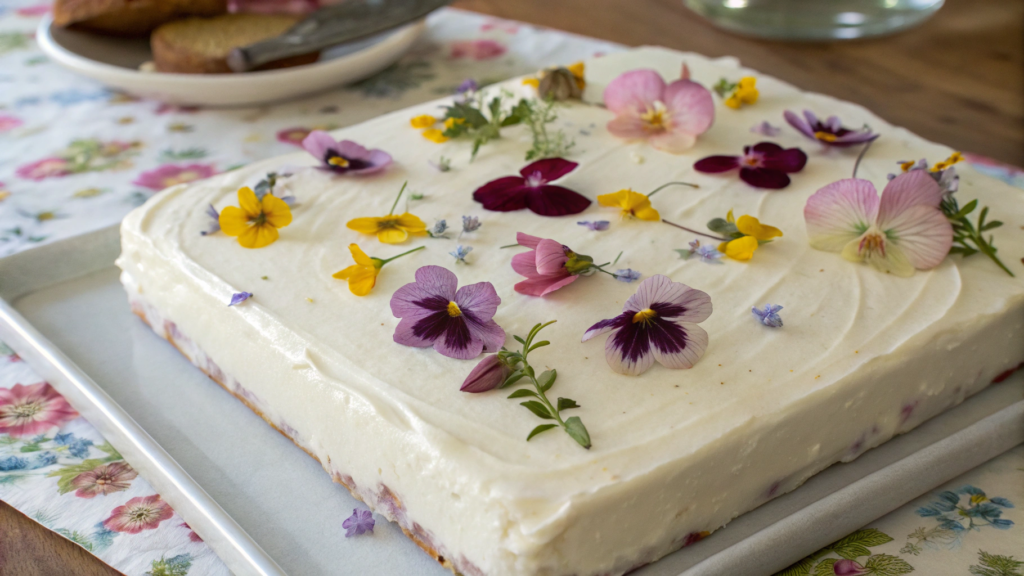
Real Flower Pressed Petal Sheet Cake is easy to bake, easy to slice, and you don’t have to stack it into several tiers. Here, you need a smooth frosting surface and thin flowers on top. You can make this cake for a spring birthday, tea party, Easter, or a small family celebration.
Ingredients
Cake
- 2 ½ cups all-purpose flour (310 g);
- 2 tsp baking powder;
- ½ tsp baking soda;
- ½ tsp salt;
- 1 cup unsalted butter, softened (225 g);
- 1 ¾ cups sugar (350 g);
- 4 large eggs;
- 1 cup buttermilk or regular milk with 1 tbsp lemon juice (240 ml);
- 2 tsp vanilla extract;
- 1 tbsp lemon zest.
Frosting
- 1 cup unsalted butter, softened (225 g);
- 4–5 cups powdered sugar (480–600 g);
- 2–3 tbsp heavy cream or milk;
- 1 ½ tsp vanilla extract;
- ¼ tsp salt.
Decoration
- ½ cup edible petals or small edible flowers;
- 1–2 tbsp fine sugar;
- a few small mint or basil leaves.
Fresh flowers can also be used, but only if they were grown specifically for food: for example, from your own garden without chemical treatment or from a seller of edible flowers.
How to Make the Cake
- Prepare the pan. Preheat the oven to 350°F (175°C). Take a 9×13-inch pan (23×33 cm), grease it with butter, and line the bottom with parchment paper. The parchment makes it easier to remove the cake from the pan, especially around the corners.
- Mix the dry ingredients. In a bowl, combine the flour, baking powder, baking soda, and salt. Whisk them together so the baking powder and salt are evenly mixed into the flour.
- Beat the butter and sugar. In another bowl, beat the butter and sugar for 3–4 minutes, until the mixture becomes lighter. Add the eggs one at a time. Then add the vanilla and lemon zest.
- Make the batter. Add the dry mixture in parts, alternating with the buttermilk or milk. Mix only until smooth. After adding flour, don’t beat the batter for too long, or the cake may turn out denser.
- Bake the cake. Pour the batter into the pan, smooth the top, and bake for 28–35 minutes. Check it with a toothpick: it should come out dry or with a few moist crumbs.
- Cool the cake. The cake needs to cool completely before frosting. On a warm cake, the frosting will soften quickly, and the petals will start sinking into the surface.
- Make the frosting. Beat the butter for 3–4 minutes. Add the powdered sugar in parts, then add the vanilla, salt, and 2 tablespoons of cream. The frosting should spread easily over the cake, but it should not be runny.
- Spread the frosting over the cake. Add the frosting to the fully cooled cake and smooth it with a spatula. The layer can be around ¼–½ inch (0.6–1.2 cm) thick.
- Smooth the surface. For a pressed petal cake, the frosting should be smoother than it would be for a cake with buttercream flowers. Petals look prettier on an even, light background.
If you’re short on time, take a vanilla or white cake mix and bake the cake according to the package directions. A chocolate base is not the best choice for this idea because flowers and petals look much more expressive on a light cake.
How to Make the Decoration
- Prepare the petals. Lay the flowers and petals on a paper towel. They should be dry. Water will leave spots on the frosting.
- Start with the larger flowers. First, place the pansies, violets, or large rose petals. Arrange them on the surface, and only then gently press them into the frosting.
- Add smaller petals. Add calendula, bachelor’s buttons, or small rose petals between the larger flowers. Don’t cover the whole surface. The light frosting should still show between the flowers.
- Gently press the decoration. Use a clean finger or a small dry brush to press the petals into the frosting. Don’t push them in too deeply. They should stay on top, not sink into the frosting.
- Add a little sugar. Sprinkle the cake with a small pinch of fine sugar. It will add a light shine and help the petals look cleaner.
- Chill the cake. Put the cake in the refrigerator for 20–30 minutes so the frosting can set.
If the cake needs to look nice for serving, wipe the knife after every few cuts. The slices will look cleaner, and the frosting won’t drag the petals along with it.
This cake looks good on a simple plate or board. You can set berries, tea, or lemonade next to it. It doesn’t need much else: the flowers on top already give it enough decoration.
Good to Know
Don’t place flowers on frosting that is too soft. If the frosting is warm or runny, the petals will sink quickly.
Don’t rinse the flowers right before decorating. If they need to be rinsed, do it ahead of time and let them dry completely.
Don’t mix too many colors. Three or four colors usually look better than ten. That way, the cake stays light and doesn’t start looking like a floral napkin.
I would make this cake on the day of serving or the night before. The cake can be baked ahead of time, and the frosting can also be made earlier, but the petals are better added closer to serving.
3. Pink Wildflower Ombre Birthday Cake
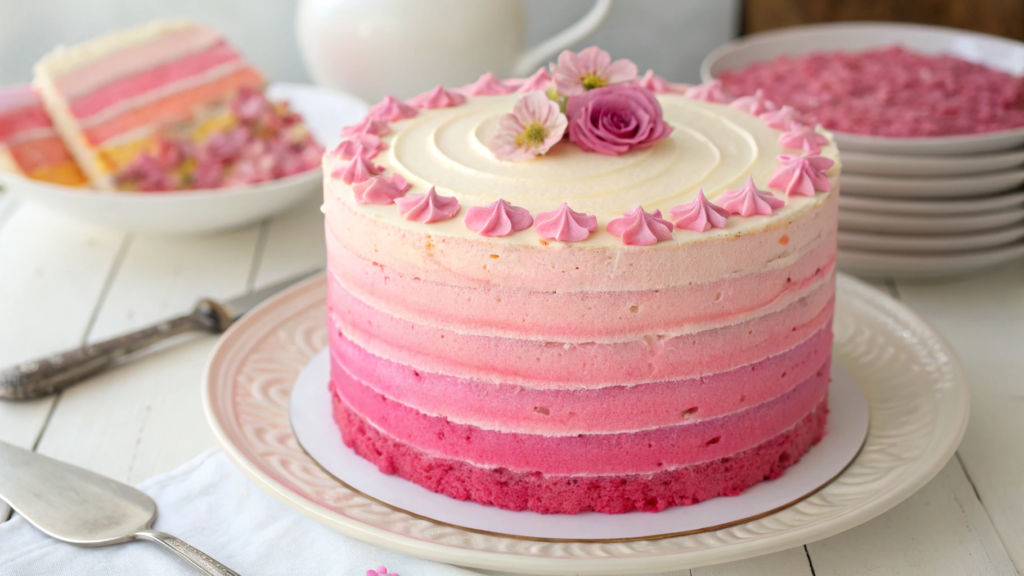
In Pink Wildflower Ombre Birthday Cake, the whole effect comes from the color. Make three shades of pink, apply them in layers, smooth them a little with a spatula, and you can already see that the cake is not quite ordinary and looks festive.
Ingredients
Cake Layers
- 2 ½ cups all-purpose flour (310 g);
- 2 ½ tsp baking powder;
- ½ tsp salt;
- 1 cup unsalted butter, softened (225 g);
- 1 ¾ cups sugar (350 g);
- 4 large eggs;
- 1 cup milk (240 ml);
- 2 tsp vanilla extract;
- ½ cup strawberry jam for the filling.
Frosting
- 1 ½ cups unsalted butter, softened (340 g);
- 5–6 cups powdered sugar (600–720 g);
- 2–4 tbsp heavy cream or milk;
- 2 tsp vanilla extract;
- ¼ tsp salt;
- pink food coloring.
Decoration
- ¼–½ cup food-grade pressed flowers or edible petals;
- a few birthday candles.
How to Make the Cake
- Bake the cake layers. Preheat the oven to 350°F (175°C). Grease two 8-inch cake pans and line the bottoms with parchment paper. In a bowl, mix the flour, baking powder, and salt. Separately, beat the butter and sugar for 3–4 minutes, add the eggs one at a time, then add the vanilla. Add the dry mixture in parts, alternating with the milk. Divide the batter between the pans and bake for 25–30 minutes.
- Cool and level the cake layers. Let the cake layers cool completely. If the tops are domed, trim them with a long knife. For an ombre cake, this is especially helpful: the more even the base is, the easier it is to smooth the frosting around the sides.
- Make the frosting. Beat the butter until it becomes lighter. Add the powdered sugar in parts, then add the vanilla, salt, and a little cream. The frosting should spread easily but still hold its shape on the spatula.
- Divide the frosting into shades. Leave one part almost white. Add a drop of pink food coloring to the second part. Add a little more to the third. Make the fourth the deepest pink. Don’t make the color too bright right away. It is better to add one more drop than try to bring back a softer shade later.
- Assemble the cake. Place the first cake layer on a stand. Add a layer of frosting, then a thin layer of strawberry jam. Don’t add too much jam, or it will push out through the sides. Cover with the second cake layer.
- Make the thin first frosting layer. Cover the cake with a thin layer of white or very light pink frosting to seal in the crumbs. Place it in the refrigerator for 20–30 minutes.
If you are short on time, bake the cake layers from a vanilla cake mix, for example, Betty Crocker Super Moist Vanilla Cake Mix.
You can use only two frosting shades: light pink on top and a deeper pink at the bottom. It is faster, and the effect will still be easy to see.
How to Make the Pink Ombre
Make the ombre after the thin first frosting layer has chilled. Start with the dark pink frosting at the base of the cake. Add the medium shade above it, and cover the upper sides with the lightest shade. The top can stay light, or you can gently stretch the same color transition onto it for a softer look.
The borders don’t have to be perfect. Take a spatula or scraper, hold it vertically, and move it around the side of the cake. The frosting will blend a little where the shades meet, and you will get a soft transition.
If you can see cake somewhere, add the right shade of frosting and lightly smooth it again. Don’t smooth for too long, or all the shades will turn into one pink color.
How to Decorate the Top
- Leave the center for candles. Place the candles first, or at least mentally leave room for them, so you don’t have to move them later.
- Add flowers along the edge. Arrange the food-grade pressed flowers closer to one edge or in a half circle. Don’t cover the whole top with them. This cake already has color because of the ombre.
- Press the decoration into the frosting. Gently press the flowers with a dry finger or a small brush. If the frosting has chilled too much, let the cake sit for 5–10 minutes so the surface softens.
- Chill before serving. Put the cake in the refrigerator for at least 20 minutes. Before serving, take it out 30–40 minutes ahead of time so the frosting can soften.
Tips
Don’t add too much jam between the cake layers. A thin layer is enough. If the filling pushes out, the side of the cake will be harder to smooth.
Don’t make the frosting runny. For ombre, it needs to stay on the sides of the cake, or the colors will start sliding and blending more than they should.
Don’t place too many flowers on top. For a birthday cake, it is better to leave room for candles, writing, or berries.
The cake will hold up fine overnight in the refrigerator, but it is better to decorate it with flowers and candles right before the party. That way, the top stays fresh, and you won’t have to fix anything at the last minute.
4. Rectangle Wildflower Garden Party Cake
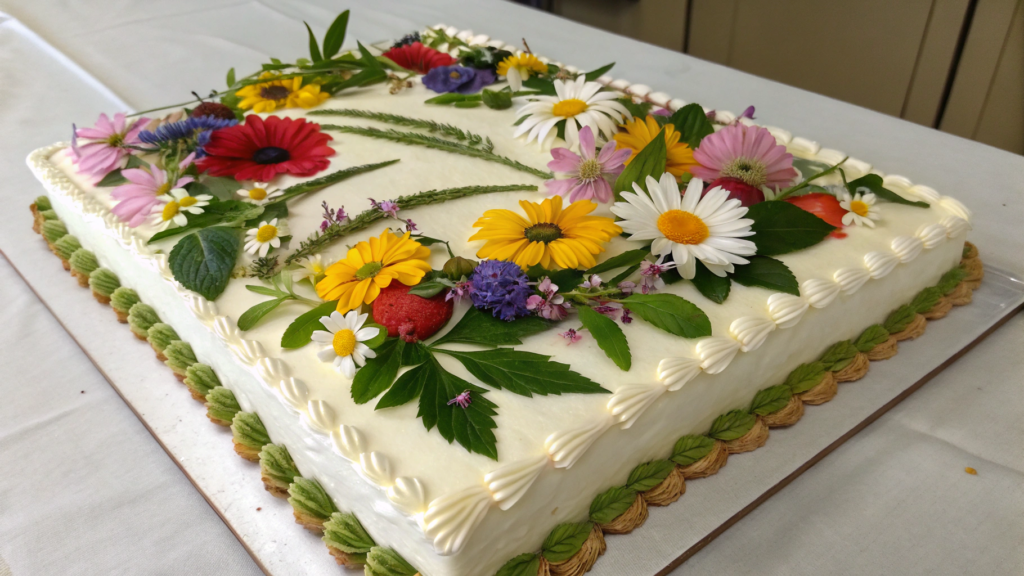
Rectangle Wildflower Garden Party Cake is a handy format for big tables. It works well for a garden party because it is easy to cut into many pieces, and the decoration can be arranged right on the surface.
Ingredients
Cake
- 2 ½ cups all-purpose flour (310 g);
- 2 tsp baking powder;
- ½ tsp baking soda;
- ½ tsp salt;
- 1 cup unsalted butter, softened (225 g);
- 1 ¾ cups sugar (350 g);
- 4 large eggs;
- 1 cup buttermilk or milk (240 ml);
- 2 tsp vanilla extract.
Frosting
- 1 cup unsalted butter, softened (225 g);
- 4–5 cups powdered sugar (480–600 g);
- 2–3 tbsp heavy cream or milk;
- 1 ½ tsp vanilla extract;
- ¼ tsp salt.
Decoration
- ½ cup fresh berries;
- ¼ cup food-grade petals or pressed flowers;
- a few small mint leaves;
- 1–2 tbsp fine sugar.
For the floral decoration, use only food-grade pressed flowers. Do not use bouquets from a flower shop under any circumstances.
How to Make the Cake
- Prepare the pan. Preheat the oven to 350°F (175°C). Take a 9×13-inch pan (23×33 cm), grease it with butter, and line the bottom with parchment paper.
- Mix the dry ingredients. In a bowl, combine the flour, baking powder, baking soda, and salt.
- Beat the base. In another bowl, beat the butter and sugar for 3–4 minutes. Add the eggs one at a time, then add the vanilla.
- Make the batter. Add the dry mixture in parts, alternating with the buttermilk or milk. Mix only until smooth.
- Bake the cake. Pour the batter into the pan, smooth the top, and bake for 28–35 minutes. Let it cool completely before adding frosting.
- Make the frosting. Beat the soft butter for 3–4 minutes, until it becomes lighter. Add the powdered sugar in parts, on low speed, so it doesn’t fly all over the kitchen. Then add the vanilla, salt, and 2 tbsp cream. Beat for one more minute. If the frosting is too thick, add 1 more tbsp cream. If it gets too soft, add a little powdered sugar.
- Cover the cake. Spread the frosting over the cooled cake in a layer around ¼–½ inch (0.6–1.2 cm) thick. You don’t need to smooth it too much, but the surface should be even enough for the decoration.
If you are short on time, take a vanilla cake mix and bake it in a 9×13-inch pan according to the package directions.
How to Make the Garden Party Decoration
Imagine the top of the cake as a little garden bed, just without strict rows. First, arrange the berries: a few strawberries, raspberries, or blueberries, without covering the whole surface. Then add the edible flowers and petals between the berries, closer to the corners and edges. That way, the cake will look more airy.
It is better to add the mint at the very end. A few small leaves are enough, or it will quickly take all the attention. A pinch of fine sugar on top will add a little more shine.
Tip.The berries should be dry. If you washed them ahead of time, lay them on a towel and let them dry. Wet berries quickly leave marks on the frosting.
The cake and frosting can be made the day before, and the top can be decorated on the day of the party. That way, the cake will look fresh, and you will have less rushing around before the guests arrive. Cut it into squares or rectangles. To keep the pieces neat, wipe the knife after every few cuts.
5. Wildflower Cupcake Bouquet Pull Apart Cake
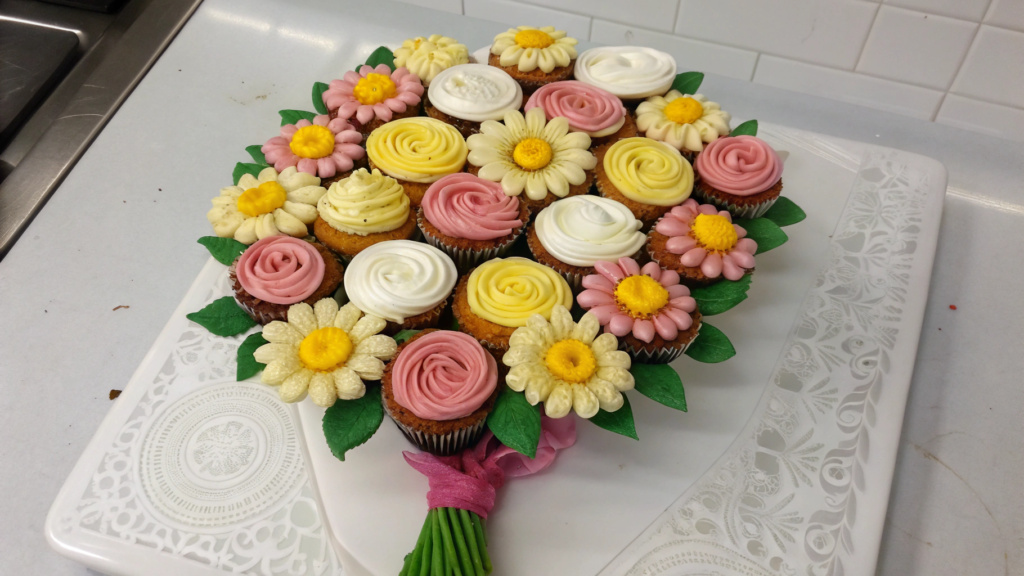
This cake is made from small cupcakes arranged together in the shape of a bouquet and decorated with buttercream flowers. You don’t need to cut it with a knife — guests simply take one cupcake each. It’s a convenient option for any event.
Even if one flower doesn’t turn out very pretty, there will be others next to it, and no one will look at it under a magnifying glass.
Ingredients
Cupcakes
- 2 cups all-purpose flour (250 g);
- 2 tsp baking powder;
- ½ tsp salt;
- ¾ cup unsalted butter, softened (170 g);
- 1 ½ cups sugar (300 g);
- 3 large eggs;
- ¾ cup milk (180 ml);
- 2 tsp vanilla extract.
Frosting
- 1 ½ cups unsalted butter, softened (340 g);
- 5 cups powdered sugar (600 g);
- 2–4 tbsp heavy cream or milk;
- 2 tsp vanilla extract;
- ¼ tsp salt;
- food coloring: pink, yellow, purple, and green.
Decoration
- paper cupcake liners;
- ¼ cup edible flower petals;
- a few small mint leaves;
- ribbon or wrapping paper for serving.
How to Make the Cupcakes and Frosting
- Prepare the pan. Preheat the oven to 350°F (about 175°C). Place paper liners into a cupcake pan.
- Mix the dry ingredients. In a bowl, combine the flour, baking powder, and salt.
- Beat the butter and sugar. In another bowl, beat the butter and sugar for 3–4 minutes. Add the eggs one at a time, then the vanilla.
- Make the batter. Add the dry mixture in batches, alternating with the milk. Mix only until everything is combined.
- Bake the cupcakes. Fill the liners about ⅔ full. Bake for 18–22 minutes. Let them cool completely before adding the frosting. On warm cupcakes, the frosting will become soft very quickly.
- Make the frosting. Beat the softened butter for 3–4 minutes until it becomes lighter in color. Add the powdered sugar in batches, then add the vanilla, salt, and 2 tbsp of cream. If the frosting is too thick, add a little more cream. If it becomes too soft, add more powdered sugar.
- Divide the frosting by color. Color most of it pink, yellow, and purple for the flowers. Leave a small amount green for the leaves. It’s better to keep the colors soft, not too bright.
If you’re short on time, use a vanilla cupcake mix. For this idea, it’s more important to bake the cupcakes evenly and decorate them nicely with frosting than to make the batter from scratch.
How to Assemble the Bouquet
Arrange the cupcakes closely together on a large board or tray. You can make a round bouquet, an oval, or a heart shape. Place the cupcakes close to each other so they look like one complete bouquet from the top.
Pipe a buttercream flower on each cupcake. Make a rosette on some, a simple star on others, and a small swirl on the rest. The flowers don’t need to be identical. A bouquet actually looks better when they’re a little different.
Use the green frosting to add small leaves between the flowers. If there are any empty spaces left, you can fill them with mint leaves or a few edible flower petals. Just don’t use too many, because the buttercream flowers should be the main focus.
Wrap the bottom of the tray with paper or add a ribbon on the side so the whole arrangement looks like a bouquet. You don’t have to do this, but it looks cute for a birthday and doesn’t require much extra work.
A Small Tip. Don’t glue the cupcakes together with frosting. They should stand close together but come apart easily. That way, guests can take one cupcake without a knife and without the whole arrangement falling apart.
It’s better to make the frosting a little thicker than you would for a regular cake. The flowers should hold their shape, especially if the cake sits on the table for a while. Before serving, you can chill the bouquet for 20–30 minutes.
This cake looks great in the center of the table. People quickly understand that they can simply take one flower cupcake. Beautiful, delicious, and convenient.
6. 1st Birthday Wildflower Smash Cake With Mini Florals
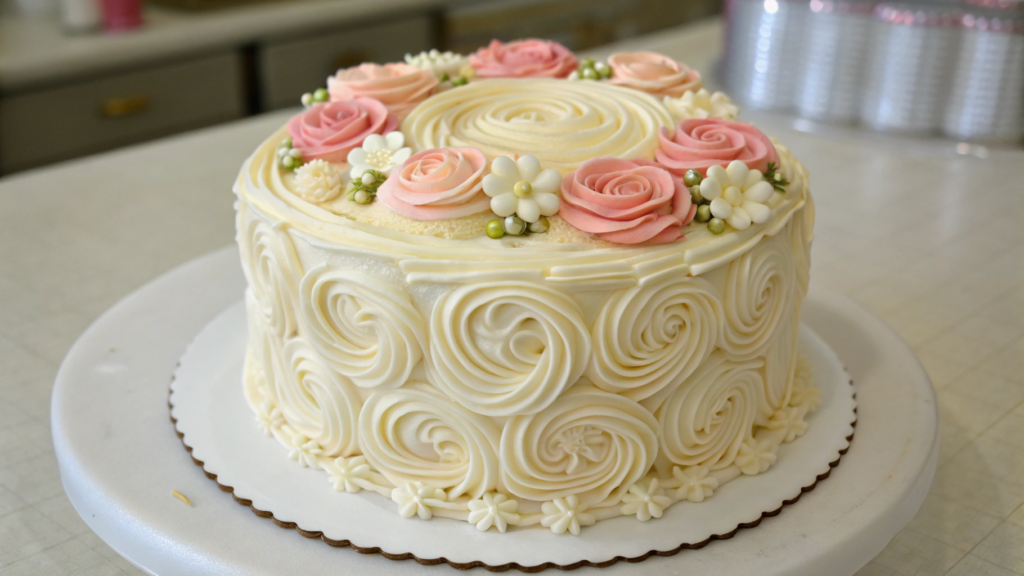
This is a small cake for a first birthday, usually placed in front of the baby for photos and that funny moment with frosting on their fingers. The main cake for guests can be kept separate, and this one can be made small and neat, about 6 inches. Cover it with soft light frosting and add mini frosting flowers.
Real flowers, beads, hard decorations, and small ornaments are not needed here. The cake should be beautiful for the photo, but simple and safe to serve.
Ingredients
Cake Layers
- 1 ½ cups flour (190 g);
- 1 ½ tsp baking powder;
- ¼ tsp salt;
- ½ cup unsalted butter, softened (115 g);
- ¾ cup sugar (150 g);
- 2 large eggs;
- ½ cup milk (120 ml);
- 1 tsp vanilla extract.
Frosting
- 1 cup unsalted butter, softened (225 g);
- 3–4 cups powdered sugar (360–480 g);
- 2–3 tbsp cream or milk;
- 1 tsp vanilla extract;
- a pinch of salt;
- a little pink, yellow, and green food coloring.
Decoration
- small candles;
- a few frosting flowers;
- a cake board or plate with a rim.
How to Make the Cake Layers and Frosting
- Prepare the pans. Preheat the oven to 350°F (about 175°C). Take two 6-inch pans, grease them with butter, and line the bottoms with parchment paper.
- Mix the dry ingredients. In a bowl, combine the flour, baking powder, and salt.
- Beat the butter and sugar. In another bowl, beat the butter and sugar for 2–3 minutes. Add the eggs one at a time, then the vanilla.
- Make the batter. Add the dry mixture in batches, alternating with the milk. Mix only until smooth.
- Bake the cake layers. Divide the batter between the pans and bake for 20–25 minutes. Let them cool completely before adding the frosting. Small cake layers cool faster, but still don’t rush.
- Make the frosting. Beat the softened butter until light in color. Add the powdered sugar in batches, then the vanilla, salt, and 2 tbsp cream. The frosting should be soft so the baby can touch it easily, but not runny.
- Prepare the frosting for decoration. Leave most of the frosting white for covering the cake. Set aside about 2 tbsp of frosting into each of three small bowls: color one portion pink, the second yellow, and the third green for the leaves.
If you’re short on time, you can bake the cake layers from a vanilla cake mix. Just use small pans and watch the time, because 6-inch cake layers often bake faster than a large cake.
How to Assemble the Small Cake
- Place the first cake layer on a plate or cake board. Add a layer of white frosting, cover with the second cake layer, and press lightly. Then cover the cake with a thin layer of frosting to seal in the crumbs.
- After that, apply a second layer of frosting. Don’t smooth it too strictly: this cake is usually filmed close-up and not for long, and then it becomes part of a real family moment. It’s enough for the sides to look neat in photos.
- If the cake seems too tall, you can cut off part of the cake layers or make it one layer. For a first birthday, a small cake looks better because it’s easier to place in front of the baby, easier to control, and easier to clean up after the photoshoot.
How to Decorate
Make a few small frosting flowers on top and a little on the side. Don’t cover the whole cake with them. Leave room for the candle and for the clean light frosting — this makes the cake look better in photos.
Pipe small dots, stars, or short swirls with the pink or yellow frosting. Add 3–5 leaves next to them with the green frosting. Mini decor works better here than large decor because the cake itself is small.
If one flower turns out crooked, add a small leaf or a dot of frosting next to it. Usually, that’s enough to make the decor look fine.
Serving Tip. Place the cake on a stable tray or a small table for photos. It’s better to put paper, a napkin, or a washable mat underneath. The frosting will almost definitely end up not only on the cake.
Put the candle on for the photo, then remove it. Do the same with any decor that could get in the baby’s way: no hard beads, dry stems, large flowers, or small details. Soft frosting, a small cake, and minimal decorations are enough for this idea.
This cake can be served to the baby only under adult supervision and more as a symbolic tasting than as a full dessert. The main cake for guests is better kept separate.
7. Wildflower Wedding Cake With Simple Piped Stems
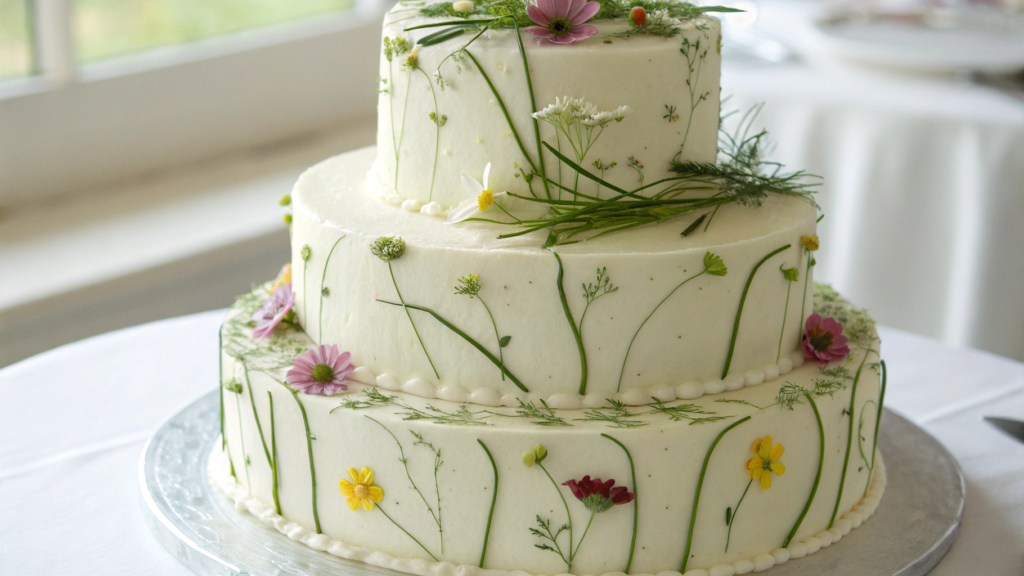
This Wildflower Wedding Cake With Simple Piped Stems is a wedding cake with simple frosting stems and small flowers on top.
Here, all the beauty is in the thin green lines. First, we make a light cake, then add simple frosting stems, and then small flowers or edible petals on them. This version works well for a small wedding, a garden dinner, or a home celebration.
Ingredients
Cake Layers
- 2 ½ cups flour (310 g);
- 2 ½ tsp baking powder;
- ½ tsp salt;
- 1 cup unsalted butter, softened (225 g);
- 1 ¾ cups sugar (350 g);
- 4 large eggs;
- 1 cup milk (240 ml);
- 2 tsp vanilla extract;
- 1 tsp lemon zest.
Frosting
- 1 ½ cups unsalted butter, softened (340 g);
- 5–6 cups powdered sugar (600–720 g);
- 2–4 tbsp cream or milk;
- 2 tsp vanilla extract;
- ¼ tsp salt;
- a little green, pink, and yellow food coloring.
Decoration
- ¼ cup edible petals or small pressed flowers;
- a little white frosting for the background;
- green frosting for the stems;
- a small round piping tip.
How to Make the Cake Layers and Frosting
- Prepare the pans. Preheat the oven to 350°F (about 175°C). Grease two 8-inch pans with butter and line the bottoms with parchment paper.
- Mix the dry ingredients. In a bowl, combine the flour, baking powder, and salt.
- Beat the butter and sugar. In another bowl, beat the butter and sugar for 3–4 minutes. Add the eggs one at a time, then the vanilla and lemon zest.
- Make the batter. Add the dry mixture in batches, alternating with the milk. Mix only until smooth.
- Bake the cake layers. Divide the batter between the pans and bake for 25–30 minutes. Let them cool completely before adding the frosting.
- Make the frosting. Beat the softened butter until light in color. Add the powdered sugar in batches, then the vanilla, salt, and 2 tbsp cream. If the frosting is thick, add a little more cream. If it is soft, add a little powdered sugar.
- Prepare the frosting for decoration. Transfer most of the white frosting to a separate bowl — this will be used to cover the cake. Set aside 3–4 tbsp frosting in a small bowl and color it green for the stems. Transfer another 2 tbsp of frosting into each of two small bowls and color them pink and yellow for the flowers.
If you don’t want to bake the cake layers from scratch, use a vanilla cake mix. For this idea, a neat light background and thin stems are more important than a complicated sponge cake.
Assembling the Cake
Place the first cake layer on a stand. Add a layer of white frosting, cover with the second cake layer, and press lightly. Cover the cake with a thin layer of frosting to seal in the crumbs, then refrigerate for 20–30 minutes.
After chilling, apply the second layer of frosting. For this cake, it is better to make the background fairly smooth, because the stems will be thin and any large uneven spots will start to interfere with the design. But you don’t need to fight for a perfect surface. A smooth light layer is already enough.
How to Decorate With Frosting
- Transfer the green frosting to a piping bag with a small round tip. Start on the side of the cake: pipe thin lines from the bottom upward, making them slightly different lengths. Don’t make them strictly parallel, because in nature, stems don’t stand in a straight line.
- Some of the stems can go onto the top of the cake. Make a few lines taller and a few shorter. The main thing is not to fill the whole cake. Let the light background remain between the stems, so the decor looks lighter.
- If your hand shakes, add a small leaf or flower next to it. Thin lines can be imperfect.
- At the ends of the stems, add small frosting dots, stars, or edible petals. It is better to choose 2–3 shades. For a wedding cake, soft pink, cream, and light yellow look good.
- The flowers don’t have to be placed on every stem. A few empty stems create a sense of lightness, especially if the cake stands next to fresh flowers on the table.
- On the top edge, you can place a couple of edible pressed flowers.
If the cake needs to be transported, this stem design is more convenient than a tall floral top. Nothing sticks out too much, and the cake is easier to cover with a box. It works well for a small wedding where everything is set on a long table: a simple tablecloth, plates, garden flowers in vases, and this cake without too much ceremony, beautiful and delicate.
8. Lemon Thyme Wildflower Cake With Herbal Syrup
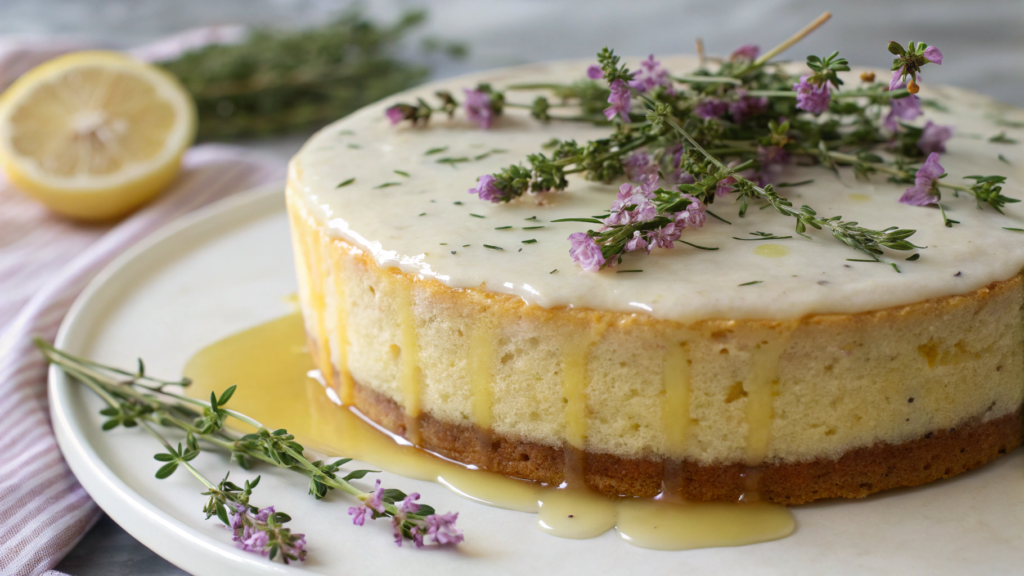
Lemon Thyme Wildflower Cake With Herbal Syrup is not as sweet as a regular celebration cake because lemon and thyme add a fresh aroma.
Here, the main focus is the lemon thyme syrup, and the flowers are only needed for a pretty top.
Ingredients
Cake Layers
- 2 ½ cups flour (310 g);
- 2 ½ tsp baking powder;
- ½ tsp salt;
- 1 cup unsalted butter, softened (225 g);
- 1 ¾ cups sugar (350 g);
- 4 large eggs;
- ¾ cup milk (180 ml);
- ¼ cup lemon juice (60 ml);
- 2 tbsp lemon zest;
- 1 tsp vanilla extract.
Syrup
- ½ cup water (120 ml);
- ½ cup sugar (100 g);
- 2 tbsp lemon juice;
- 3–4 sprigs fresh thyme.
Frosting
- 1 ½ cups unsalted butter, softened (340 g);
- 5 cups powdered sugar (600 g);
- 2–3 tbsp cream or milk;
- 1 tsp vanilla extract;
- 1 tsp lemon zest;
- ¼ tsp salt.
Decoration
- ¼ cup edible petals or small edible flowers;
- a few thin sprigs of thyme;
- a little lemon zest.
For the syrup, it is convenient to use fresh thyme, and for small decor, you can use only edible pressed flowers. We do not use bouquets from a flower shop.
How to Make the Cake Layers and Frosting
- Prepare the pans. Preheat the oven to 350°F (175°C). Grease two 8-inch pans with butter and line the bottoms with parchment paper.
- Mix the dry ingredients. In a bowl, combine the flour, baking powder, and salt.
- Beat the butter and sugar. In another bowl, beat the butter and sugar for 3–4 minutes. Add the eggs one at a time, then the vanilla, lemon juice, and zest.
- Make the batter. Add the dry mixture in batches, alternating with the milk. Mix only until smooth.
- Bake the cake layers. Divide the batter between the pans and bake for 25–30 minutes. Let them cool completely before soaking.
- Make the frosting. Beat the softened butter until light in color. Add the powdered sugar in batches, then the vanilla, lemon zest, salt, and 2 tbsp cream. The frosting should spread easily but hold its shape.
If you don’t want to bake the cake layers from scratch, use a vanilla cake mix. You can add lemon zest to the batter and make the flavor more interesting with the syrup.
Herbal Syrup
In a small saucepan, mix the water, sugar, and lemon juice. Warm over medium heat until the sugar dissolves. Add the thyme sprigs, turn off the heat, and let the syrup steep for 10–15 minutes.
Then remove the thyme. The syrup should smell like lemon and herbs, but not taste sharp. Don’t leave the thyme in for too long, or the flavor may become rougher.
How to Assemble the Cake
- Place the first cake layer on a stand. Use a brush or spoon to add a little syrup to the surface. Don’t pour it over the cake layer. We need a light soak, not a wet cake.
- Add a layer of frosting, cover with the second cake layer, and lightly soak the top again. Cover the cake with a thin layer of frosting, refrigerate for 20–30 minutes, then apply the main layer. For this cake, I would keep the covering light and simple, without bright colors on the sides.
Decor
Add a few small edible flowers, thin thyme sprigs, and a little lemon zest on top. Don’t cover the whole surface. Loose decor looks beautiful here: flowers closer to one edge, a couple of sprigs nearby, and a little zest for color.
If you use thyme, place only thin soft sprigs. It is better not to add thick stems because they get in the way when slicing.
Keep the finished cake in the refrigerator, but take it out 30–40 minutes before serving. This way, the frosting will become softer, and the lemon aroma will be more noticeable.
9. Rustic Wildflower Naked Cake With Honey Buttercream
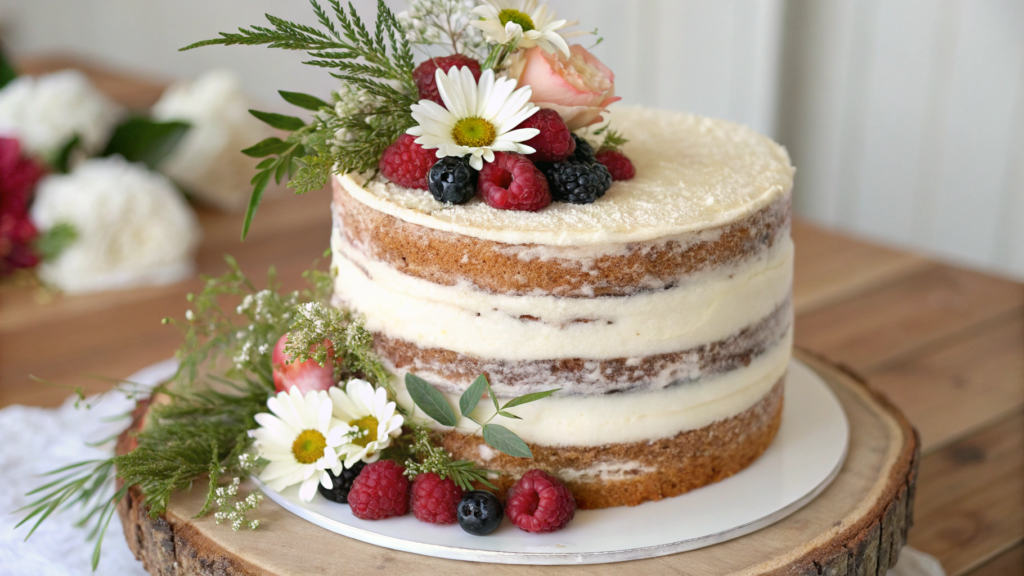
In this cake, you don’t need to hide the cake layers under a thick layer of frosting. On the contrary, the visible layers are part of the beauty. The main thing is to assemble the cake neatly, not overdo the frosting, and add a few flowers, berries, or greens on top.
Ingredients
Cake Layers
- 2 ½ cups flour (310 g);
- 2 ½ tsp baking powder;
- ½ tsp salt;
- 1 cup unsalted butter, softened (225 g);
- 1 ½ cups sugar (300 g);
- ¼ cup honey (85 g);
- 4 large eggs;
- 1 cup milk (240 ml);
- 2 tsp vanilla extract.
Honey Buttercream
- 1 ½ cups unsalted butter, softened (340 g);
- 4 ½–5 cups powdered sugar (540–600 g);
- ¼ cup honey (85 g);
- 2–3 tbsp cream or milk;
- 1 tsp vanilla extract;
- ¼ tsp salt.
Decoration
- ¼ cup edible petals or small edible flowers;
- ½ cup fresh berries;
- a few mint or thyme leaves.
For this kind of cake, natural honey works well, and for the top decor, you can use edible pressed flowers. We do not use bouquets from a flower shop.
How to Make the Cake Layers and Frosting
- Prepare the pans. Preheat the oven to 350°F (175°C). Grease two 8-inch pans with butter and line the bottoms with parchment paper.
- Mix the dry ingredients. In a bowl, combine the flour, baking powder, and salt.
- Beat the butter, sugar, and honey. In another bowl, beat the butter and sugar for 3–4 minutes. Add the honey and mix. Then add the eggs one at a time and pour in the vanilla.
- Make the batter. Add the dry mixture in batches, alternating with the milk. Mix only until smooth.
- Bake the cake layers. Divide the batter between the pans and bake for 25–30 minutes. Let them cool completely before assembling.
- Make the frosting. Beat the softened butter until light in color. Add the powdered sugar in batches, then the honey, vanilla, salt, and 2 tbsp cream. The frosting should be soft but not runny. If it does not hold well on the spatula, add a little more powdered sugar.
If you don’t want to bake the cake layers from scratch, you can use a vanilla cake mix. In that case, it is better to add the honey to the frosting, not to the ready mix.
How to Assemble the Cake
- Place the first cake layer on a stand. Add a layer of honey buttercream about ½ inch (1.2 cm). Cover with the second cake layer and press lightly.
- Now add a little frosting on top and around the sides. Use a scraper or spatula to remove the extra frosting from the sides so the cake layers stay visible. Don’t cover the cake completely. That is the whole point of a naked cake.
If the cake layer shows through more in some places, that’s normal. This kind of cake should not look like a perfectly smooth wedding tier. It is closer to a home table, a wooden board, and a plate of berries next to it.
Decorating the Top
Arrange berries, small edible flowers, and a few mint or thyme leaves on top. Don’t make a tall flower mound. For this kind of cake, low, loose decor looks better — a few berries along the edge, a few flowers closer to the center, and a couple of green leaves for freshness.
Tip. If you use honey with a strong flavor, don’t add too many aromatic herbs. Thyme is good only in a small amount.
You can bake the cake layers ahead of time, and leave the frosting and decor for the day of the celebration. This cake looks beautiful on a wooden board, with a bowl of berries and hot tea. Honey, soft frosting, visible layers, and a few flowers on top already create the right mood.
10. Chocolate Wildflower Cake With Salted Olive Oil Frosting
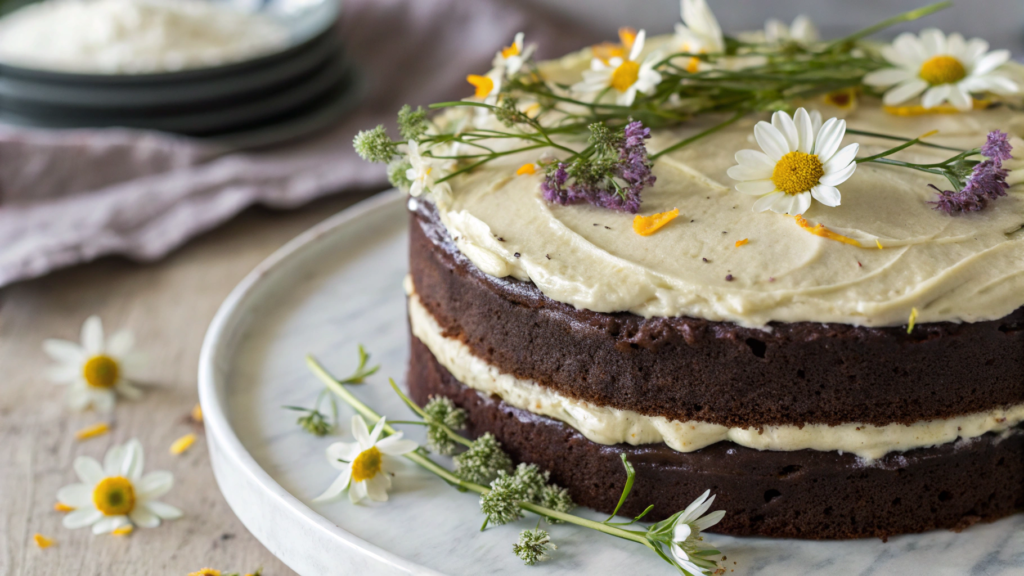
Lindy really loves this chocolate cake with olive oil frosting and a pinch of salt. It is not as overly sweet as a regular chocolate cake with heavy frosting. A pinch of salt makes the chocolate flavor brighter, and olive oil gives the frosting softness and a light fruity note.
Ingredients
Cake Layers
- 2 cups flour (250 g);
- ¾ cup unsweetened cocoa powder (75 g);
- 2 tsp baking powder;
- ½ tsp baking soda;
- ½ tsp salt;
- 1 cup sugar (200 g);
- ½ cup brown sugar (100 g);
- 3 large eggs;
- ¾ cup olive oil (180 ml);
- 1 cup buttermilk or milk (240 ml);
- 2 tsp vanilla extract;
- ½ cup hot coffee or hot water (120 ml).
Frosting
- 1 cup unsalted butter, softened (225 g);
- 4–5 cups powdered sugar (480–600 g);
- 3 tbsp olive oil;
- 2–3 tbsp cream or milk;
- 1 tsp vanilla extract;
- ½ tsp fine salt.
Decoration
- ¼ cup edible petals or pressed flowers;
- a little grated chocolate;
- a pinch of fine salt for the top.
For the frosting, it is better to use mild olive oil. A very strong aroma is not needed here — chocolate should stay the main flavor. Edible pressed flowers work well for the floral top. We do not use bouquets from a flower shop.
How to Make the Cake Layers and Frosting
- Prepare the pans. Preheat the oven to 350°F (175°C). Grease two 8-inch pans with butter and line the bottoms with parchment paper.
- Mix the dry ingredients. In a bowl, combine the flour, cocoa, baking powder, baking soda, and salt.
- Make the liquid base. In another bowl, beat the eggs, sugar, brown sugar, olive oil, milk, and vanilla.
- Make the batter. Add the dry mixture to the liquid mixture and mix until smooth. Pour in the hot coffee or water and mix again. The batter will be fairly thin — that is how it should be.
- Bake the cake layers. Divide the batter between the pans and bake for 25–30 minutes. Let them cool completely before assembling.
- Make the frosting. Beat the softened butter for 3–4 minutes. Add the powdered sugar in batches, then pour in the olive oil, vanilla, salt, and 2 tbsp cream. The frosting should be smooth and easy to spread. If it is thick, add a little more cream.
- Assemble the cake. Place the first cake layer on a stand. Add a layer of frosting, cover with the second cake layer, and press lightly. Cover the cake with a thin layer of frosting to seal in the crumbs, then refrigerate for 20–30 minutes.
- After chilling, apply the main layer of frosting. For this cake, the frosting can stay a little textured. On the chocolate cake layer, it looks good: there is no need to smooth every line perfectly.
If you don’t have time or don’t want to bake the cake layers from scratch, you can use a chocolate cake mix. The flavor of the frosting will still make the cake more interesting, especially because of the olive oil and salt.
Decorating the Cake
Add a few edible petals, grated chocolate, and a very small pinch of salt on top. Don’t cover the whole top with flowers. On dark chocolate, separate light spots look better than a dense floral layer.
Try placing the petals closer to one edge. This makes the decor look more expressive than an even sprinkle over the whole surface.
This dessert is not overly sweet. Chocolate, salt, and olive oil give it a deeper flavor, and the flowers on top make it beautiful and original. Dark cake layers, light frosting, a few petals — and that is enough. And with strong tea or black coffee — mmm, delicious!
Wildflower Cake
If this is your first time making a cake with wildflowers, don’t start with the most complicated one. There is less risk, less assembly, and a better chance that you will finish in a good mood instead of wanting to throw the spatula out the window.
Sometimes, a few petals, a couple of berries, thin frosting stems, or a small floral edge on top are enough. Let the cake look alive and real, even if it is not perfect. Put it on the table and look at it from a distance. I assure you, it usually looks much better than it seemed during the process.
Tell me in the comments how everything turned out for you. Share your secrets!