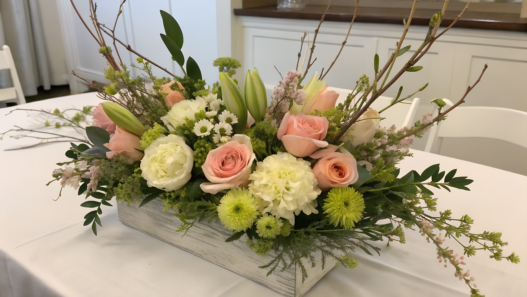
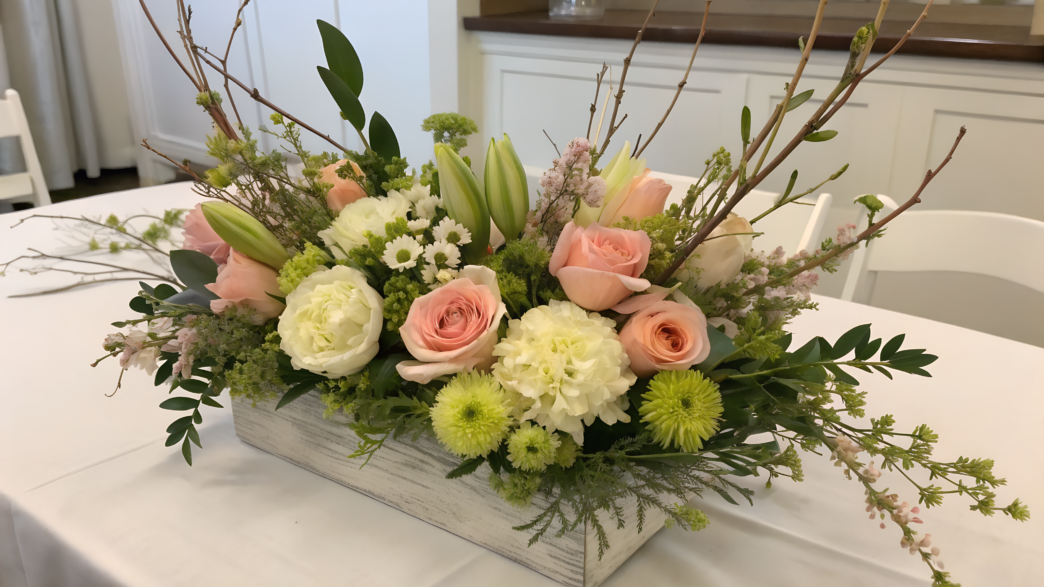
Spring is the best time to add some fresh flowers to your home. And you definitely don’t have to buy expensive bouquets or hire a florist for that. I truly believe you can make a beautiful arrangement yourself if you know a few simple tricks that help flowers look neat, full, and natural.
Our yard has always been full of flowers, and Lindy and I have tried all kinds of arrangements. Sometimes things didn’t go as planned, and we had to learn from our own mistakes. Other ideas worked so well that now we use them every spring. In this article, I’ve put together 10 spring floral arrangements. They’re all simple, easy to follow, and perfect for a regular home. The best part is that many of them don’t require expensive materials, and some can give you a beautiful result with just one bouquet.
1. Ottolenghi-inspired herb and bloom centerpiece
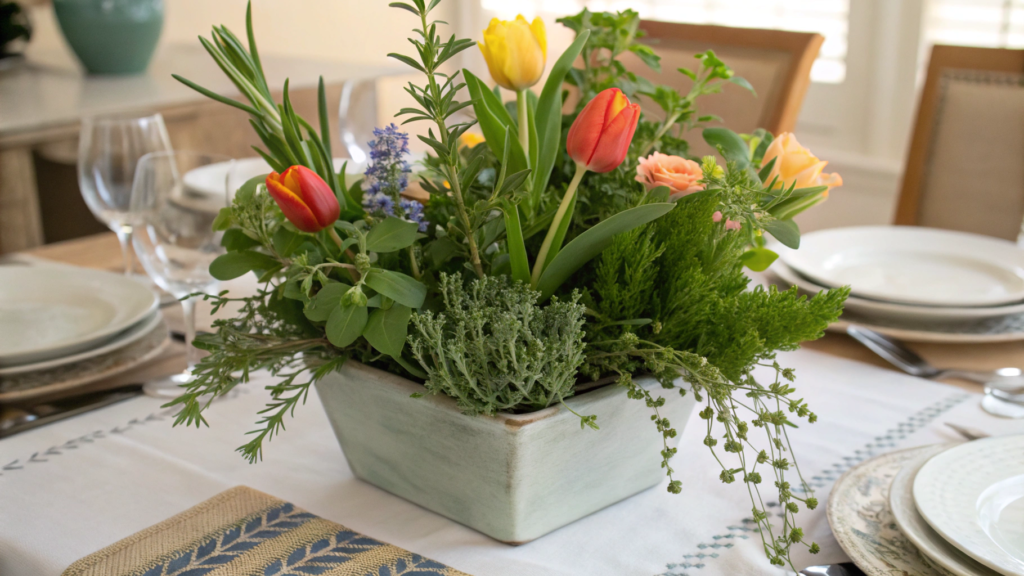
Have you ever thought that a table centerpiece could be not only beautiful but also useful? That’s when I stopped buying only decorative flowers and started adding fresh herbs. Lindy looked surprised at first: “Are you seriously going to put rosemary in a vase with tulips?”
I love the way dishes are presented in the work of Yotam Ottolenghi, where there’s plenty of natural, effortless charm and the feeling that everything was just picked from the garden. His flowers and greenery usually look like one unified arrangement.
What you’ll need
- 8–10 tulips
- 4–6 stems of flowering greenery
- 5–7 sprigs of rosemary
- a few stems of mint
- a few stems of thyme
- 2–3 sprigs of sage
- a wide ceramic or glass vase about 6–8 in (15–20 cm) in diameter
- sharp pruning shears or floral scissors, for example, Fiskars 6″ Pruning Scissors for Flowers, Buds, Weeds and Small Plants
It often happens that you don’t have one type of greenery, but that’s completely fine. You don’t need a perfect selection of plants. A few sprigs from your own garden look wonderful in spring arrangements.
How to make it
- Fill the vase with cool water to about two-thirds full. Before you do that, remove any leaves that would end up below the water line. They’ll quickly start to rot, and the water will become cloudy. If the herb stems have already started to wilt a little, let them sit in water for 15–20 minutes separately before putting the arrangement together.
- Place the strongest and tallest rosemary sprigs first. They’ll create the foundation of the arrangement and help support the softer stems. I usually keep some sprigs almost upright and angle a few slightly toward the edge of the vase. That gives the bouquet its shape without making it look too perfect.
- Add the sage and thyme in small groups, instead of one stem at a time. That way, the greenery won’t disappear among the flowers. I like placing 2–3 stems together so the bouquet has little fragrant sections. Turn the vase as you work so the arrangement looks good from every side, not just the front.
- Trim the tulip stems at an angle and place them among the herbs. Put some flowers a little deeper and some a little higher. The different heights make the bouquet look fuller. Turn a few blooms outward so the arrangement feels more natural, as if the flowers found their own place.
- At the very end, add the mint closer to the edges of the vase. Its leaves can extend a little beyond the overall shape of the bouquet. Every time you walk past the table, you’ll notice a light, fresh scent, especially in spring when the kitchen already smells like herbs, lemon, and something warm coming out of the oven.
I used to spread the herbs evenly throughout the bouquet, but I didn’t really like the result because it looked too neat. Now I make one side of the vase fuller with greenery and leave the other side lighter and more open.
Tip
If the arrangement will sit on your dining table, don’t make it too tall. About 12–14 in (30–35 cm) is usually enough. People should be able to see each other through the flowers instead of peeking over them.
Before placing the rosemary and sage in water, gently rub a few leaves between your fingers. The fragrance of the herbs will become much stronger, especially during the first few hours after setting the table.
This arrangement changes almost every day. Today the tulips are just starting to open, tomorrow the mint becomes fuller, and a few days later you can already cut the rosemary for roasted potatoes. In the end, it’s not just a table decoration, but a little piece of the kitchen and the garden at the same time. I love that!
2. Paris bistro basket arrangement with tulips and dill
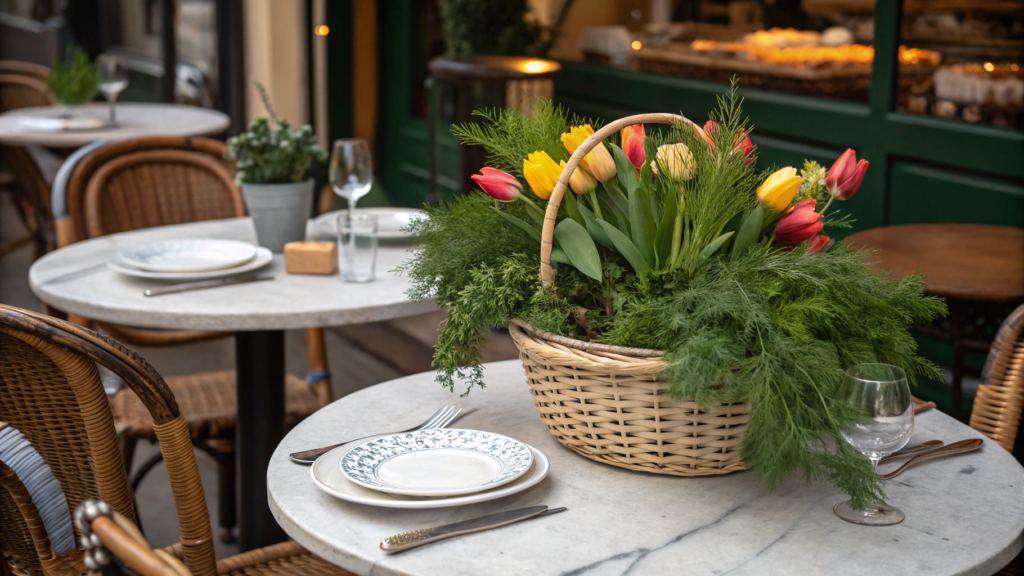
The mood of a little Paris bistro comes from tulips on the table, greenery next to the plates, and a bit of thoughtful messiness…
Once, Lindy and I made a similar arrangement for lunch on our porch. Store-bought tulips, dill from the garden, and an old woven basket were all we needed.
What you’ll need
- 10–12 tulips
- 6–8 stems of fresh dill
- 3–5 thin sprigs of greenery or small spring flowers
- a low woven basket about 10–12 in (25–30 cm) wide
- a low jar, glass, or plastic container that fits inside the basket
- a piece of parchment, a linen napkin, or a thin kitchen towel
- sharp floral scissors
If your basket doesn’t hold its shape or has gaps inside, first place a waterproof container in it. The flowers shouldn’t stand directly in the basket. Wicker quickly absorbs moisture, and then it can darken or start to smell damp. We ruined a small basket like that once. It was annoying.
How to make it
- Place a low jar or container with water inside the basket. It should sit at least 1–2 in (2.5–5 cm) below the edge of the basket so it isn’t visible. If the container wobbles, tuck a folded napkin or a piece of parchment along the side.
- Line the inner edges of the basket with a linen napkin or parchment. You don’t need to make perfectly even folds. Let the fabric peek out a little around the edges, as if the arrangement was quickly put together before breakfast.
- Trim the tulips at an angle and remove the lower leaves. The leaves shouldn’t end up in the water. For a basket, it’s better to leave the stems at different lengths: some around 9–10 in (23–25 cm), and some a little shorter. That way, the flowers will look more natural.
- Place the first tulips around the edges of the container. Angle them slightly outward so they follow the shape of the basket. Then add a few flowers closer to the center. Don’t try to build a perfect circle. A Paris basket should look loose, but not messy.
- Add the dill between the tulips in small bunches. Don’t place one thin stem here and there — it will just disappear. It’s better to gather 2–3 dill stems together and place them so the airy greenery peeks out above the flowers. Dill adds lightness, and the tulips instantly stop looking too formal.
- Fill the empty spots with thin sprigs of greenery. If the container is visible somewhere, cover it with a tulip leaf, a napkin, or a short sprig. I often use tulip leaves for this: they’re wide, flexible, and already right there.
I rarely leave the basket handle completely empty. If I have a long dill stem or a thin tulip leaf left, I gently drape it over the handle, just a little carelessly. I think these are the kinds of details that make the arrangement feel handmade, not store-bought.
Tip
For this arrangement, it’s better to choose tulips with still-closed or half-open buds. They’ll continue opening in the basket, and by the second day the arrangement will look fuller. If the tulips are already fully open, the basket will still be beautiful, but the shape may start to fall apart faster.
If the basket is on the dining table, its height should be about 10–13 in (25–33 cm). For a buffet table, you can raise the tulips higher, but for dinner, it’s better to keep the arrangement below the face level of a seated person. We want to talk at the table, not peek at each other through dill.
I like that the tulips bring color, the dill adds airiness, and the basket makes the whole arrangement feel more homey. And if a couple of fresh dill sprigs are left after lunch, I’ll happily send them into a potato salad. Not only pretty, but practical too!
3. Hydrangea cloud centerpiece using tape grid method
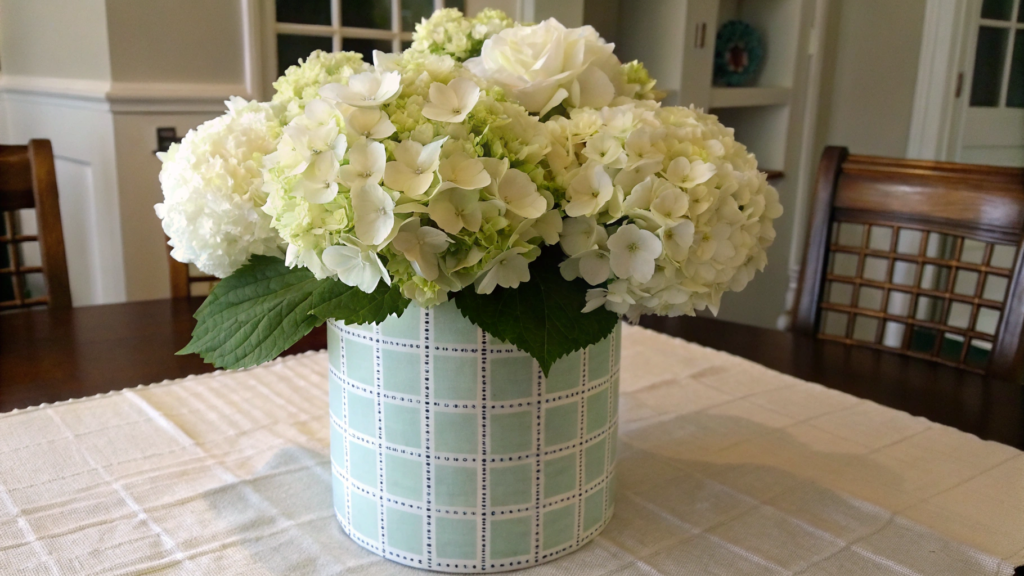
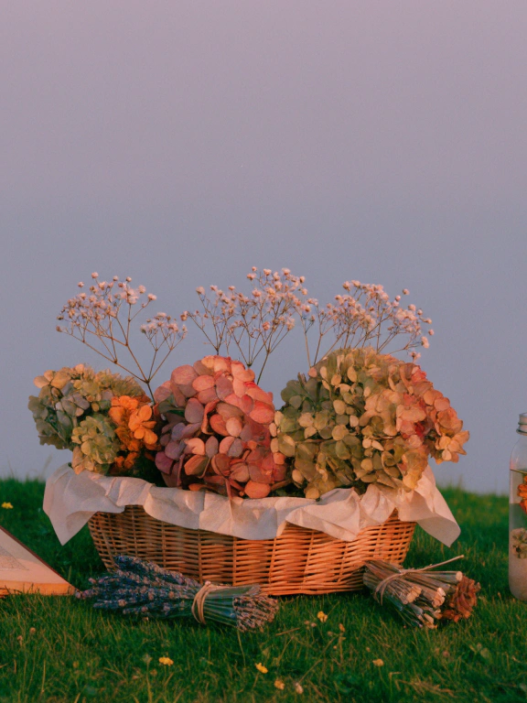
A hydrangea arrangement using the tape grid method is one of those cases where a few large flowers can look like a florist spent a whole hour working on the table. In reality, though, the main secret is not expensive flowers, but a simple structure on top of the vase. A floral tape grid holds the heavy hydrangea heads in place, helps spread them out evenly, and keeps the stems from sliding to one side.
I love hydrangeas, but I also trust them only a little. Are they beautiful? Very. But if they don’t get enough water or sit crookedly in the vase, then in just a couple of hours they already look like they’re offended by the whole house. We’ve had that happen. Lindy puts dinner on the table, I turn toward the vase, and one hydrangea has dramatically dropped its head. Not exactly the mood you want next to the plates.
That’s why, for a low centerpiece, I almost always choose the tape grid method. It works especially well for a round vase or wide bowl when you want to get a full cloud shape, but without floral foam.
What you’ll need
- 5–7 large hydrangeas
- a wide low vase or bowl about 8–10 in (20–25 cm) in diameter
- clear floral tape
- sharp floral scissors
- clean cool water
- 2–3 short sprigs of greenery, if you want to cover the edge of the vase
For this arrangement, it’s better to choose hydrangeas with dense, fresh flower heads. If the petals are already a little dry around the edges, they can quickly lose their look. I usually gently touch the flower with my fingers: a good hydrangea shouldn’t feel like paper.
How to make it
- Fill the vase with cool water to about two-thirds full. Hydrangeas drink a lot, so don’t keep the water level too low. If the vase is wide, the water should reach at least the lower part of all the stems after trimming.
- Apply strips of clear floral tape across the top of the vase. First make 3–4 strips in one direction, then another 3–4 strips across them. You’ll get a simple grid with squares about 1–1.5 in (2.5–4 cm) wide. Don’t leave the tape too loose, or it will sag under the weight of the flowers.
- Secure the tape edges on the outside of the vase. I usually run my finger along every edge so the tape sticks well to the glass or ceramic. If the surface is wet, the tape won’t hold as well, so wipe the edge of the vase dry first.
- Trim the hydrangea stems at an angle. For a low arrangement, leave about 6–8 in (15–20 cm) of stem. If a flower needs to sit closer to the edge, make it a little shorter. For the center, you can leave the stem 1–2 in longer.
- Place the first hydrangea in the center of the grid. It will set the height for the whole arrangement. Then place the flowers around the edges, inserting each stem into a separate opening in the grid. This way, the hydrangea heads won’t collapse onto each other.
- Turn a few flower heads at different angles. They don’t all need to face straight up. One hydrangea can lean slightly toward the edge, and another can sit a little higher. Different heights make the arrangement more interesting.
- Cover any visible parts of the tape with greenery or lower hydrangea leaves. If the tape shows somewhere, hide it with a short sprig or gently turn a flower head to cover it.
For hydrangeas, the grid is almost necessary because they have heavy flower heads and fairly soft stems. Without support, the flowers often slide toward the edge of the vase or lie on top of each other. The grid helps each hydrangea stay in its own place and creates that same full cloud shape without floral foam.
In this case, you can skip floral foam. For a home arrangement, a tape grid is usually enough. Foam is convenient, and I understand why people use it, but for simple spring table styling, I like working with a vase, water, and proper stem support much more.
Tip
If the arrangement will sit on the dining table, its height should be about 10–12 in (25–30 cm). Hydrangeas are large, and even a low arrangement can quickly take up a lot of visual space. For a long table, it’s better to make two small bowls than one huge one.
Care
Don’t forget to refresh the cuts if you notice the hydrangeas starting to wilt a little. Add cool water and let the flowers stand in a deep container for 30–60 minutes. Sometimes they bounce back so strongly, as if nothing happened. That’s just how hydrangeas are.
When finished, this arrangement looks like a soft floral cloud, but as you can see, it comes together without complicated florist techniques. The grid holds the shape, the low vase doesn’t get in the way of conversation at the table, and the hydrangeas themselves give the right amount of volume almost without extra flowers. This is exactly what you need for a small party or a festive breakfast.
4. Tall vase arrangement with branches and floating blooms
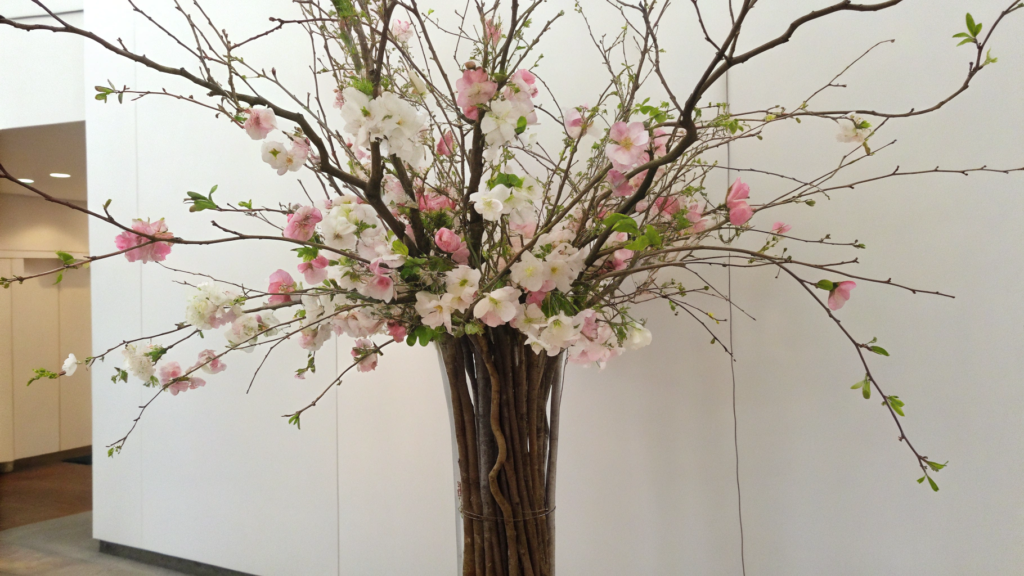
A tall arrangement with branches and “floating” blooms instantly adds height without looking heavy. The branches create the shape, and the flowers appear between them not as a bouquet, but as separate soft spots.
We can always cut a few thin branches from our yard. Lindy and I usually walk around the garden, and ten minutes later there’s already a small pile of branches on the kitchen table.
What you’ll need
- 3–5 thin branches about 24–36 in (60–90 cm) long
- 5–7 large spring flowers: tulips, ranunculus, daffodils, or anemones
- a tall vase about 12–16 in (30–40 cm) high
- a few short stems of greenery
- clean cool water
- sharp floral scissors
For the branches, it’s better to choose ones that are not too thick, but flexible and expressive in shape. A beautiful curve matters more here than fullness. If the branch has little buds or its first leaves, that’s even better.
How to make it
- Fill the tall vase with cool water about halfway. Branches don’t need a huge amount of water, but the lower ends should stand firmly in it. If the vase is clear, remove the leaves from the lower part of the stems right away so everything inside looks clean.
- Place the tallest branch first. It will set the overall height of the arrangement. I usually don’t place it right in the center, but slightly to one side. That instantly makes the vase feel more alive, as if the branches naturally grew in that direction.
- Add the remaining branches at different angles. One can reach higher, another can move to the side, and a third can softly cross the center. Don’t turn them into a fan. It’s better to leave air between the branches so the flowers later look light, not squeezed in.
- Trim the flowers at an angle and place them below the branch tips. The main mistake is raising the flowers to the same height as the branches. Then the arrangement starts looking like a tall bouquet. Here, it’s better for the flowers to sit at about ⅓–½ of the branch height.
- Place the flowers in small groups, not evenly around the circle. Put 2–3 flowers closer together on one side, then another 1–2 lower on the other side. This creates the feeling that the blooms are floating between the branches instead of just sticking out of the vase opening.
- Add short greenery at the base. It will cover the neck of the vase and connect the branches with the flowers. Just don’t pack the bottom too tightly. If the base becomes heavy, the top will lose its lightness.
- Turn the vase and check the silhouette. Look not at each flower separately, but at the overall line. If one side feels too empty, add a thin branch. If it feels too dense, remove one stem.
The floating look doesn’t come from complicated floral materials, but from the space between the elements. Branches add height and lines, while the flowers sit lower, with open space left between them, and the eye completes the shape on its own.
You don’t need many flowers, or the arrangement will lose its lightness. It’s better to add a few statement blooms than to fill the vase completely. Tulips with curved stems or ranunculus that open slowly look especially beautiful here.
If the branches start leaning to one side and the vase feels unstable, place a few clean decorative stones or glass marbles at the bottom. Weight at the bottom helps the vase stay steady, especially when the branches are long.
Tip
For a dining table, this arrangement only works if it stands off to the side or at the end of the table. In the center, it will get in the way. But on a buffet, console, or small table by the window, a height of 24–36 in (60–90 cm) looks very beautiful.
A tall vase makes the arrangement noticeable even in a large room. And a small spring branch from the garden with flowers brings a breath of spring into the house.
5. Wedding table bud vase formula for mixed stem types
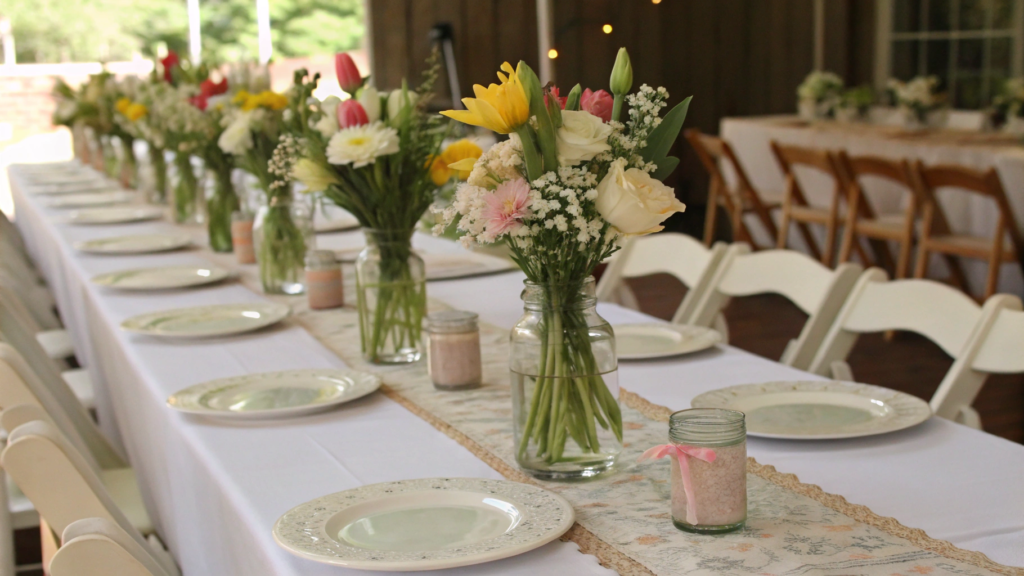
This option lets you make the table beautiful without huge arrangements in the middle. Small vases don’t block guests’ faces, don’t get in the way of plates and glasses, and also let you use different types of flowers, which is great for a spring wedding, backyard dinner, or small family celebration.
What you’ll need
- 5–9 small vases in different heights
- 3–5 large accent flowers: tulips, ranunculus, garden roses, or peonies
- 6–10 medium stems: daffodils, anemones, spray roses, lisianthus
- 8–12 thin stems: sweet peas, daisies, small wildflowers, or greenery
- clean cool water
- sharp floral scissors
- a set of small glass vases, for example, Bud Vases Set
For a wedding table, I wouldn’t choose all the same vases. It’s better to mix low, medium, and slightly taller vases. Then the table feels more alive, but still neat.
How to make it
- Arrange the empty vases on the table before you start adding flowers. Leave about 8–12 in (20–30 cm) between them. This way, the arrangements won’t get in the way of plates, candles, and glasses. On a long table, don’t place the vases in a straight line. It’s better to shift them slightly: one closer to the center, another a little to the side, so the table feels more alive.
- Divide the flowers into three groups. The first group is large accent flowers. The second is medium stems that add volume. The third is thin flowers and greenery that add movement.
- Place no more than 1–3 stems in each vase. A small vase quickly starts to look overloaded. In one, you can place one tulip and a sprig of greenery; in another, two thin stems and one small flower. Don’t try to repeat the same mini bouquet ten times.
- Alternate the flower heights. In one vase, let the main flower be about 8–10 in (20–25 cm) tall; in another, keep it lower, around 5–7 in (13–18 cm). The eye moves across the arrangement instead of stopping at identical points.
- Mix stem types, but not all at once. If one vase already has a large flower, add something thin to it. If the vase is narrow and tall, place one expressive stem inside. If the vase is low, you can add a small bunch of 2–3 delicate flowers.
- Check the table from the level of a seated person. This is more important than looking from above. Sit on a chair and check if the flowers block the face of the person across from you. For a wedding dinner, the height of most vases should usually stay around 6–10 in (15–25 cm).
- Remove anything extra at the end. If one vase looks too full, pull out one stem. Small arrangements often become prettier when they have a little air.
I like grouping these little vases into small sets. For example: one tall, two medium, and one low. The tall one can hold one tulip or ranunculus, the medium ones can each have 1–2 smaller stems, and the low one can hold short greenery or a tiny flower. Then you can repeat a similar group farther down the table, but slightly change the spacing, flower heights, or stems themselves. That way, the table looks neat, but not too strict.
Tip
If the budget is limited, buy fewer large flowers and more thin stems. One beautiful ranunculus or tulip in a small vase can look more expensive than a random bouquet of mixed flowers. Especially if there is greenery or a light thin stem next to it.
Right before serving, top up the water in all the vases. Small containers lose water quickly, especially if the room is warm or the table is near a window.
In this setup, the small vases add color, height, and movement, but still leave enough space for plates, glasses, and food. And I like that after the celebration, they’re easy to take apart: some flowers can go by the sink, some on the bedside table, and one small stem can stay where the first cup of coffee will be in the morning.
6. Simple tulip wrap trick for a fuller look
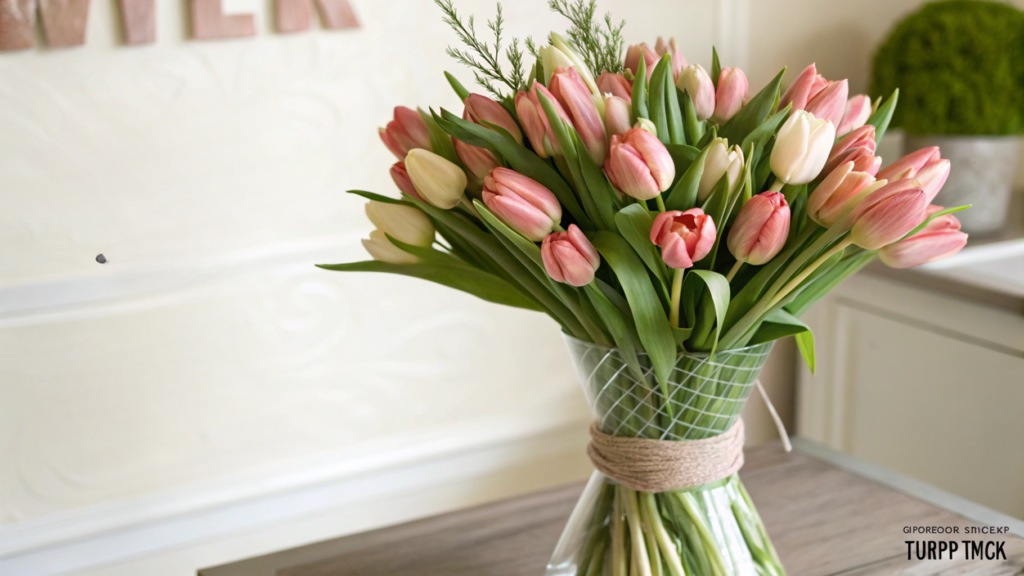
You look at a bouquet of tulips in the store, and it’s beautiful. Then you bring it home, put it in a vase… and it doesn’t look nearly as full. The flowers seem to spread out in different directions, big gaps appear between them, and the bouquet itself becomes much narrower.
This trick helps make the bouquet look visually fuller in just a few minutes. You won’t need to buy any extra flowers. All you need is to gather the tulips correctly before placing them in the vase.
What you’ll need
- 10–15 tulips
- a wide vase about 5–7 in (13–18 cm) in diameter
- a sheet of kraft paper or thin wrapping paper
- twine or thin ribbon
- sharp floral scissors
If you just brought the tulips home, don’t rush to put them in the vase right away. After the trip, it’s helpful to let them rest on the table for a little while as you prepare everything else.
How to make it
- Remove the store packaging and carefully inspect the bouquet. Take off any damaged leaves and stems if there are any. It’s better to leave the rest of the leaves because they also add volume.
- Gather all the tulips into a tight bunch. The buds should sit at about the same level, and the stems should fit closely together. Don’t worry if the bouquet feels too tight at first.
- Wrap the lower part of the bouquet with kraft paper. The paper should cover about half of the stems. Secure it with twine or ribbon so the flowers can’t spread apart.
- Leave the bouquet like this for 1–2 hours in cool water. During this time, the stems will drink and remember their new position. This is the most important step, so it’s better not to skip it.
- Remove the paper and refresh the cuts. Trim each stem by about ½–1 in (1–2.5 cm) at a slight angle. After that, place the tulips straight into the prepared vase.
- Gently turn a few flowers in different directions. You don’t need to arrange each one separately. It’s enough to change the direction of just a few buds so the bouquet looks natural and full.
This method doesn’t change the natural shape of tulips. After a few days, they will still start to bend softly, reach toward the light, and shift direction a little. That’s one of the special things about these flowers, and exactly why so many people love them.
Tip
If the vase is wide, don’t place the bouquet exactly in the center. Shift it just a couple of centimeters to one side. That instantly makes the arrangement feel more alive and less “perfect.”
You have to admit, it’s much nicer when one good bouquet, after a simple bit of prep, looks like it suddenly has noticeably more flowers. Sometimes a few minutes really are enough to get a completely different result.
7. Silk spring arrangement for heat and sunlit rooms
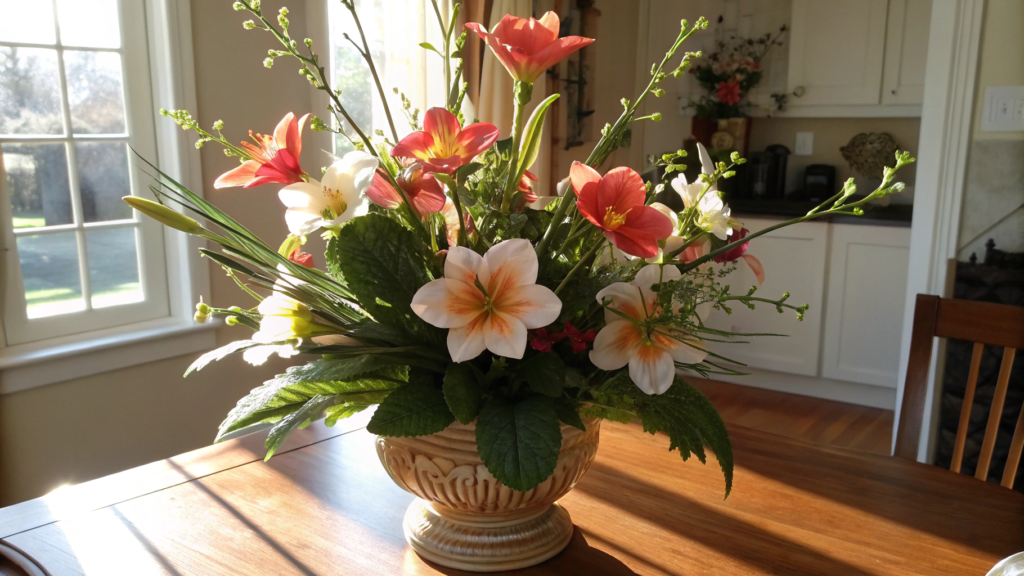
I used to be pretty skeptical about artificial flowers. But modern options look very natural. Especially if you place them somewhere fresh flowers would only last a few days anyway. After all, not every spot in the house is right for fresh spring flowers.
What you’ll need
- 6–8 artificial spring flowers: tulips, ranunculus, anemones, or daffodils
- 2–4 artificial greenery branches
- a glass or ceramic vase about 8–12 in (20–30 cm) tall
- wire cutters for artificial stems
- decorative glass stones or clear marbles, optional
When buying artificial flowers, I almost never choose a ready-made bouquet. It’s much better to pick several different types separately. That way, the arrangement looks more natural, instead of looking like it was just pulled out of a box.
How to make it
- Prepare all the stems before arranging. Take the flowers out of the packaging and smooth the leaves with your hands. After shipping, they’re almost always a little crushed. Five minutes of this prep changes the look of the whole arrangement.
- Match the stem height to the vase. If they’re too long, trim them with wire cutters. For most home vases, it’s enough to leave the flowers about 12–16 in (30–40 cm) tall from the base. Don’t make all the stems the same. Let the difference be at least 1–3 in (2.5–7.5 cm).
- Start with the greenery. Place the tallest branches first so they set the shape of the arrangement. One can lean slightly to the right, another to the left. Space for the flowers will appear between them right away.
- Add the large flowers in small groups. I usually place two tulips together, then leave a small gap and add one ranunculus. If you alternate every single flower one by one, the arrangement starts to look too perfect.
- Turn the buds in different directions. One flower can face slightly toward the window, another toward the edge of the vase, and a third a little downward. These tiny details are exactly what make an artificial arrangement look more like a living bouquet.
- Fill the remaining gaps with greenery. Don’t try to cover every empty space completely. Small openings make the arrangement feel lighter.
- If the vase is clear, style the lower part. You can add a little water and place clear glass stones inside.
I like using these bouquets exactly in places where I used to keep moving live plants from one spot to another. Now one arrangement can last for several months, and I spend my time in the garden instead of replacing flowers in the house again and again.
Tip
To make the arrangement look better and more natural, gently bend a few stems with your hands. Most good-quality artificial flowers have a thin wire inside. Thanks to that, you can change the direction of each flower. If all the stems stay perfectly straight, the bouquet instantly looks less natural.
Another thing that’s easy to forget is dust. Once every two or three weeks, I go over the flowers with a soft brush or cool air from a hair dryer. It takes literally a couple of minutes, but the petals look fresh again. This is especially noticeable on light tulips and white daffodils.
There are rooms where sunlight hits the same surface almost all day. Fresh flowers lose moisture quickly in those conditions, especially if heating or air conditioning is running nearby. An artificial arrangement handles bright sun and warm air just fine, so you don’t have to replace it every week.
8. Church altar arrangement with foam-free mechanics
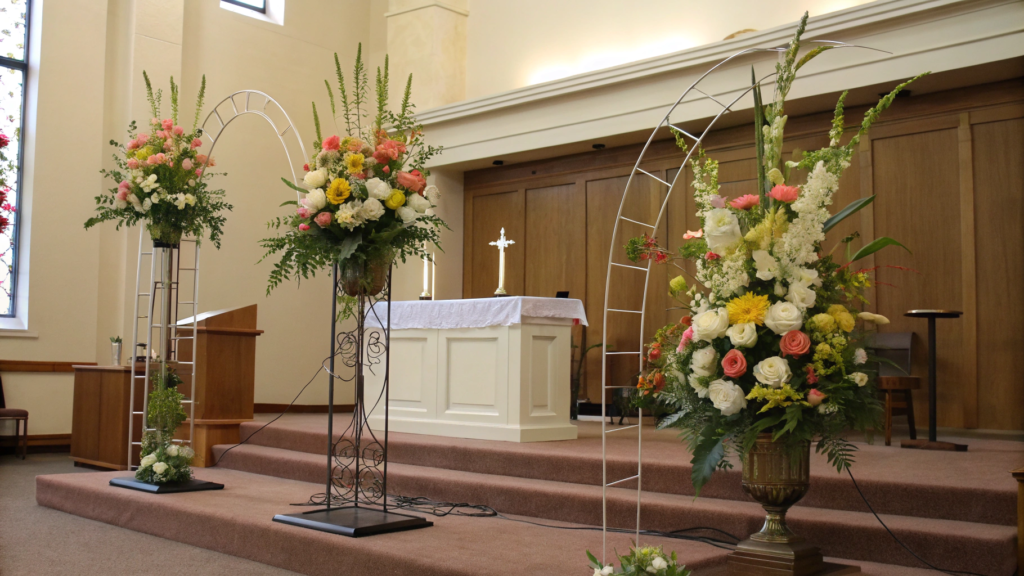
A floral arrangement for a church altar is usually made ahead of time and needs to last for several hours, or even a full day, while still looking natural and beautiful.
I like mechanical support methods without floral foam, even though many florists use foam. There’s less waste afterward, and the flowers are easier to move or replace if one stem accidentally breaks. The whole arrangement also looks lighter.
What you’ll need
- 15–25 large flowers: hydrangeas, garden roses, lilies, peonies, or delphiniums
- 10–20 stems of greenery
- a few long branches for height
- a large sturdy vase or decorative bowl
- a metal flower holder, for example, Flower Frog
- floral mesh
- waterproof floral tape
- sharp floral scissors
You don’t have to use all the elements at once. Sometimes metal mesh is enough, and sometimes a flower holder works better. It all depends on the shape of the vase and the size of the arrangement.
How to make it
- Fill the vase about halfway with water. If the arrangement will be tall, don’t fill the water all the way to the edge. This makes it easier to work without spilling it with every movement.
- Set up the support for holding the stems. If you’re using metal mesh, gently crumple it into a loose ball and place it inside the vase. It should press firmly against the sides. If you choose a metal holder, secure it at the bottom and make sure it doesn’t move.
- Start with the tallest branches. They define the overall shape of the arrangement. Don’t place them perfectly vertical. Slight angles make the silhouette softer and help avoid the feeling that you’re looking at just a tall bouquet.
- Add the large flowers. Place them in the center first, then gradually move toward the sides. Leave space between the blooms. In a large arrangement, air matters just as much as the flowers.
- Fill the gaps with greenery. It will connect all the elements and help hide the mesh or holder inside the vase. If one area feels too dense, it’s better to remove one branch than add three more.
- Step back a few steps. Look at the whole arrangement. Sometimes turning one flower or slightly changing the direction of a branch is enough to make the entire composition look much better.
- Check the stability of each large stem. Gently touch the flowers with your hand. If one noticeably wobbles, place it deeper into the mesh or find another support point for it.
In this kind of arrangement, the flowers keep their natural angle, the branches move more freely, and the whole piece feels more like living plants gathered together than a perfectly built decoration.
Tip
If the arrangement will stand on a platform or altar, look at it from below, not from above. That’s the angle most people will see. Sometimes a flower that looks perfectly placed from above is completely hidden behind nearby stems from below.
Before the final placement, gently shake the vase and make sure nothing shifts. It’s better to spend one minute checking this than to fix the flowers during the event.
In large arrangements like this, the eye usually catches the overall silhouette first and only then starts noticing the small details. Tall branches set the direction, large flowers create volume, and greenery ties everything together. All the attention stays on the flowers, not on how they’re secured. That’s probably exactly what makes a good base for any large spring arrangement.
9. Home decor coffee table trio using one bouquet
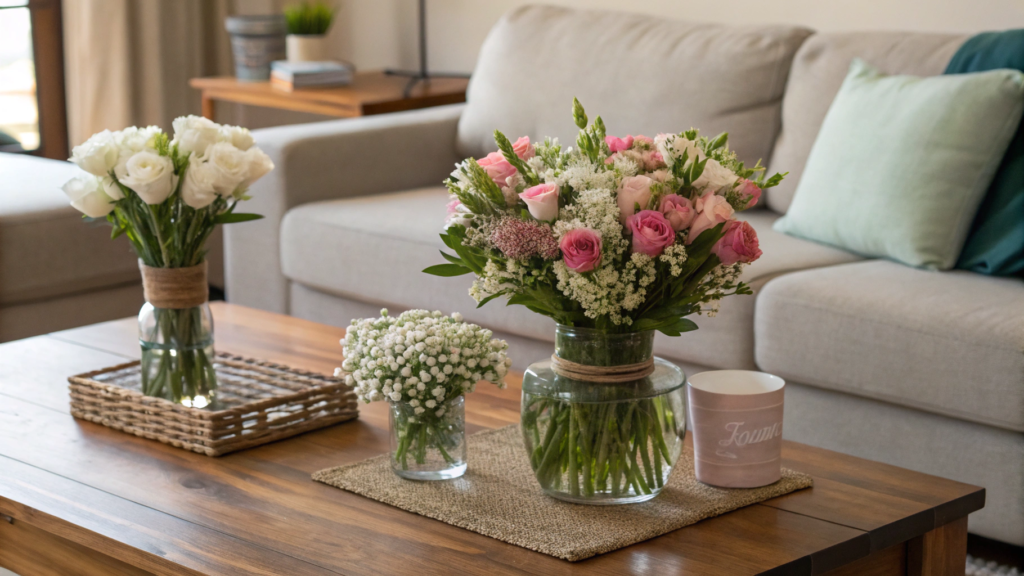
I like the idea of splitting one bouquet into three small arrangements instead of placing it in one large vase.
Lindy and I often do this when we buy a bouquet at the farmers market. At first, it feels like there aren’t that many flowers. But there are usually enough to divide them into three small groups.
What you’ll need
- 1 spring bouquet with 10–15 stems
- 3 small vases in different shapes or heights
- a few sprigs of greenery, if they’re included in the bouquet
- clean cool water
- sharp floral scissors
- a set of small glass vases
Vases in different heights but in the same style look best. For example, all clear glass or all ceramic. That way, the arrangements look connected to each other, even though each one stays separate.
How to make it
- Take the bouquet apart into individual stems. Don’t try to keep the store-bought shape. This is when you can see which flowers look better together and which ones can become a beautiful standalone accent.
- Choose the main bouquet. Place the largest vase in the center of the coffee table. It usually gets about half of all the flowers. This will be the arrangement that catches the eye first.
- Make two smaller arrangements. Use the remaining flowers and greenery. Don’t try to make them identical. Let one be a little taller and the other more compact. That difference looks natural.
- Change the stem heights. Before placing the flowers in water, trim some stems shorter than the others. This gives each arrangement its own silhouette, instead of making it look like a smaller copy of the one next to it.
- Add greenery to each vase. Even if you only have a few sprigs, divide them between all three arrangements. A small amount of greenery connects the arrangements better than matching flowers do.
- Arrange the vases in a triangle on the table. Leave about 6–10 in (15–25 cm) between them. Don’t place them in one straight line. This makes the setup look fuller, while the table still stays practical for books, a cup of coffee, or a small candle.
- Look at the table from the sofa. This is the spot where you’ll see the arrangement most often. If one vase completely blocks another, just adjust the distance between them a little.
I like that each little vase can play its own role. The largest one becomes the main accent, the medium one supports the whole setup, and the smallest one adds the feeling that the flowers are slowly “spreading” through the room. It feels light and doesn’t look like the decor is trying too hard to get attention.
Tip
Don’t place all three vases too close to each other. There should be a little open space between them. That space is what helps you see the arrangements as one setup, not as one large bouquet that was accidentally split into parts.
You don’t have to use this trio only on a coffee table. Three small vases can sit on a dresser, kitchen island, wide windowsill, or entryway shelf. The main thing is to keep them close enough so they read as one group, not as three random little vases forgotten in different places.
10. Hydrangea and tulip mix that stays upright without foam
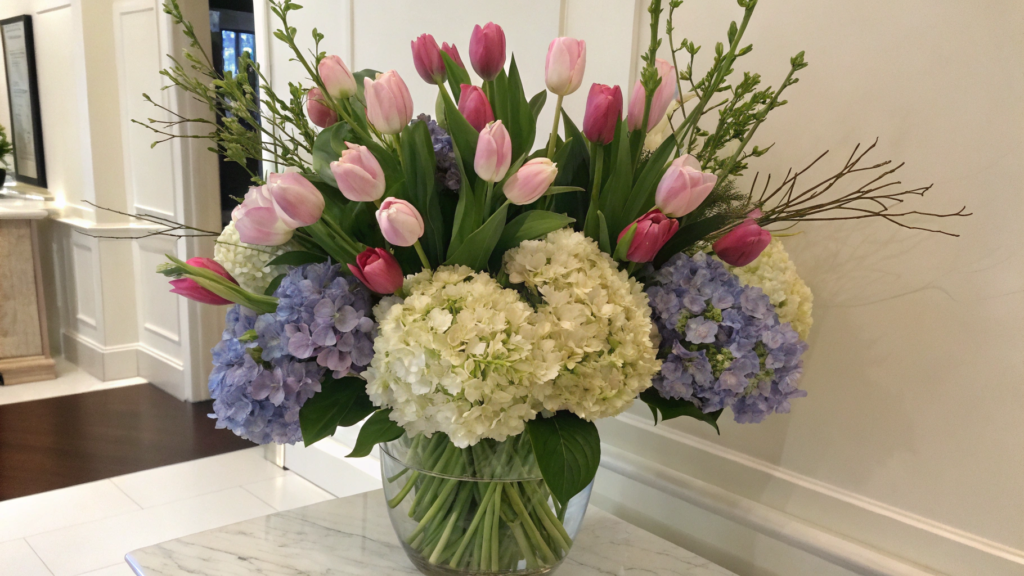
Hydrangeas and tulips look beautiful in one arrangement. But hydrangeas are heavy, and tulips start to bend and reach toward the light over time. If you just place them in a wide vase, the arrangement can lose its shape after a few hours.
We found a method that helps keep the flowers in shape without floral foam. Now we use it almost every time.
What you’ll need
- 3–5 large hydrangeas
- 8–12 tulips
- a few sprigs of eucalyptus, sage, or other greenery
- a wide vase about 7–9 in (18–23 cm) in diameter
- clear floral tape, for example, Clear Floral Tape
- sharp floral scissors
It’s better to choose tulips that are not fully open. They’ll gradually open in the vase and keep a beautiful shape longer.
How to make it
- Fill the vase with cool water to about two-thirds full. Make sure to remove any leaves that will end up under water. This helps the water stay clean longer.
- Make a grid on top with clear floral tape. Apply several strips in one direction first, then across them. You’ll get small openings that will hold the stems in place.
- Place the hydrangeas first. They create the base of the arrangement. Place one closer to the center and the rest slightly to the sides. Don’t press the flowers too tightly together. There should be a little open space between the large flower heads.
- Add the tulips between the hydrangeas. Insert each stem into a separate opening in the grid. Let some flowers sit a little higher and some a little lower. This makes the arrangement look fuller and more natural.
- Fill the empty spaces with greenery. It will soften the transition between the large flower heads and the long tulip stems. A few small sprigs are usually enough.
- Turn the vase and look at the arrangement from all sides. If one area feels too dense, move one flower. That’s enough to make the whole arrangement look airier.
- Leave the bouquet in a cool place for one hour. During this time, the flowers will settle into place, and the tulips will get used to the new shape a little. After that, you can move the arrangement to its permanent spot.
At first glance, it may seem like these flowers are too different. But that contrast is exactly what makes the arrangement interesting. Plus, hydrangeas and tulips bloom around the same time. You don’t have to look for exotic plants to make a beautiful spring bouquet. Just stop by a flower shop or local market.
Tip
If the next day the tulips start leaning too much, don’t take the whole arrangement apart. Just remove the stems that have shifted more than the others, refresh the cuts a little, and place them back into nearby grid openings. It usually takes just a couple of minutes, and the bouquet gets its neat shape back again.
With this method, the grid holds each stem separately, so the arrangement keeps its shape much longer. Without the grid, hydrangeas slowly start pressing on the tulips, and the tulips spread out to the sides. In the end, you get an arrangement that looks festive, but is still made from easy-to-find spring flowers.
Bouquet fantasies
I’ve noticed that people interpret the same idea in their own way. Sometimes all it takes is replacing one flower or choosing a different vase, and the arrangement starts to look completely different.
If you try any of these options or have your own favorite way to arrange spring bouquets, please share it in the comments. Tell me which flowers you like combining, which tricks really work in your home, and of course, show your photos. I’d love to see what you made.