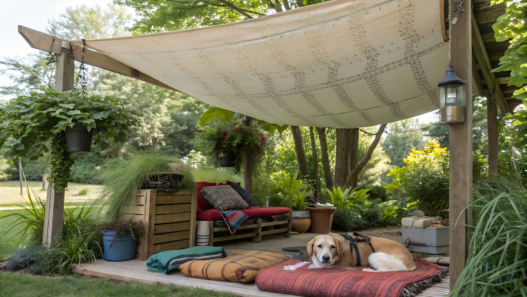
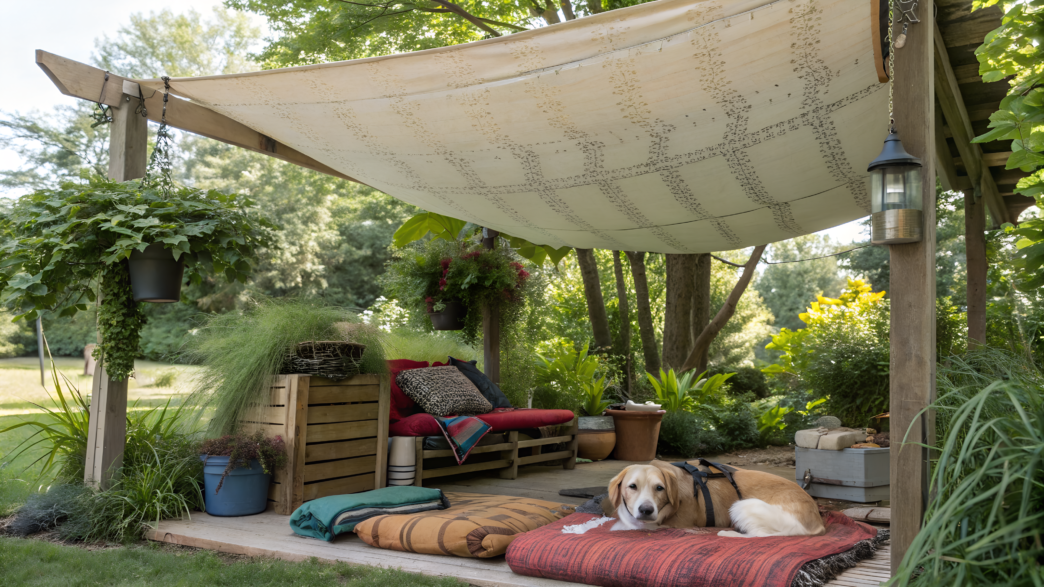
DIY shade outdoor cheap ideas — this is something you remember the moment the sun starts to really hit. Plants react first, a bit later everything else follows — the dog can’t find a normal place, and it becomes hard for you to stay outside already by the middle of the day.
We first tried to compensate with watering, moving things around, doing some small actions… and then we just realized that fighting the sun is useless and something has to be done about overheating. Not to block everything completely, but to soften the solar load where it becomes critical.
And you see that even a small amount of shade at the right time changes the behavior of plants and animals much more than it seems at first.
1. Tomato Cage Shade Dome With Shade Cloth Wrap
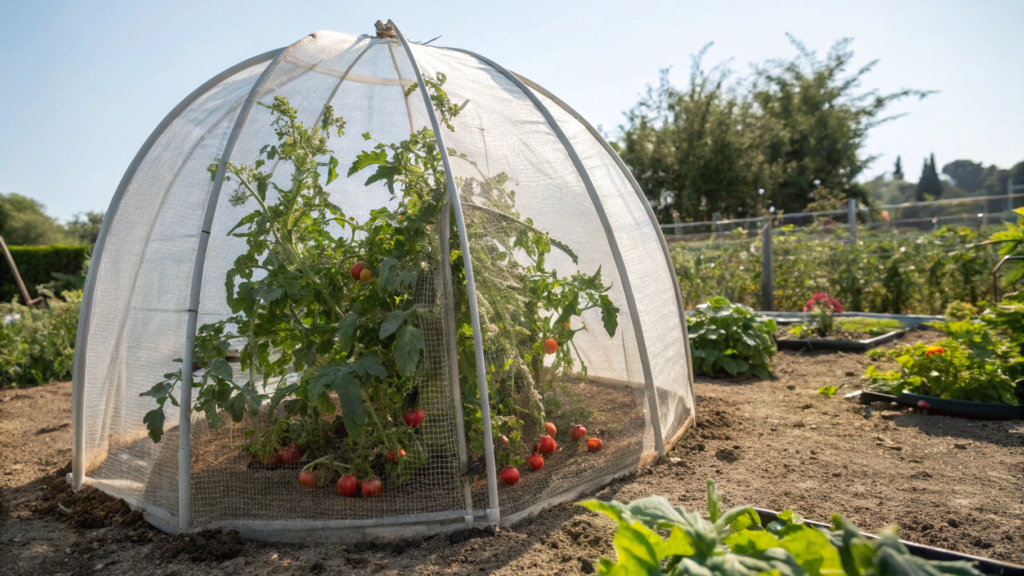
In the heat, leaves curl, tops droop, and blossoms start dropping. We already knew you can’t fix this with water, because the soil has moisture — but the plant still suffers. So the cause is above — overheating from direct sun.
A simple dome made from a tomato cage and shade cloth helps. Try it and see what happens.
What You Need
- Metal tomato cage
- Shade cloth (30–50%), like Coolaroo Shade Fabric. It doesn’t overheat the air inside and holds shape even in wind.
- Zip ties or garden clips
- Scissors
How to Make It
- Install the cage right after planting. At this point the root system is still compact, and you can easily push supports into the soil without touching the roots. If you do it later, when the plant is already growing, something almost always gets damaged and the plant “pauses” for a few days.
- Wrap the cage with shade cloth all around. No need to measure perfectly — just take a piece slightly wider than the circle and wrap it with a small overlap. The main thing is not to pull it too tight so it doesn’t press on the leaves.
- Secure the cloth with zip ties in several spots. Fix it not only at the bottom but along the full height — this way the structure keeps its shape and doesn’t move. The top part should be tighter, because wind hits there most often and starts to break the structure.
- Leave the top partially open. A fully closed dome traps hot air and the effect can turn opposite. When the top is open, heat goes up and the inside stays more balanced.
- As the plant grows, loosen or lift the cloth. When the plant stretches, leaves may start touching the fabric. At that point just loosen the ties a bit or raise the cloth to give space. Usually checking once every 1–2 weeks is enough.
After installation you’ll quickly notice that leaves stop curling, the plant holds its shape even at midday, and flowers don’t drop as much. Materials from University of Florida IFAS Extension note that partial shading helps reduce heat stress in plants.
For Which Plants This Is Especially Useful
This type of cover works best when plants are actively growing or flowering and are especially sensitive to overheating.
- Tomatoes — during flowering and fruit formation
- Peppers — quickly react to heat by dropping flowers
- Eggplants — sensitive to overheating of soil and leaves
- Young transplants — not yet adapted to open sun
How to Choose Shade Density
The density defines how much you reduce the impact of sunlight. It’s better to understand the difference instead of guessing.
- 30% — light diffusion, good for moderate heat
- 50% — noticeable protection at midday
- above 50% — only for very harsh sun
Too much shade can slow down development, especially if there isn’t enough morning and evening light.
In practice, we saw that plants under the domes held fruit longer and looked more stable during the whole heat wave. Without cover, plants got “tired” faster and lost momentum.
This kind of dome noticeably reduces the load on the plant during the hardest hours of the day, and that is already enough to keep normal growth and yield.
2. Pop Up Plant Shade Using Laundry Drying Rack
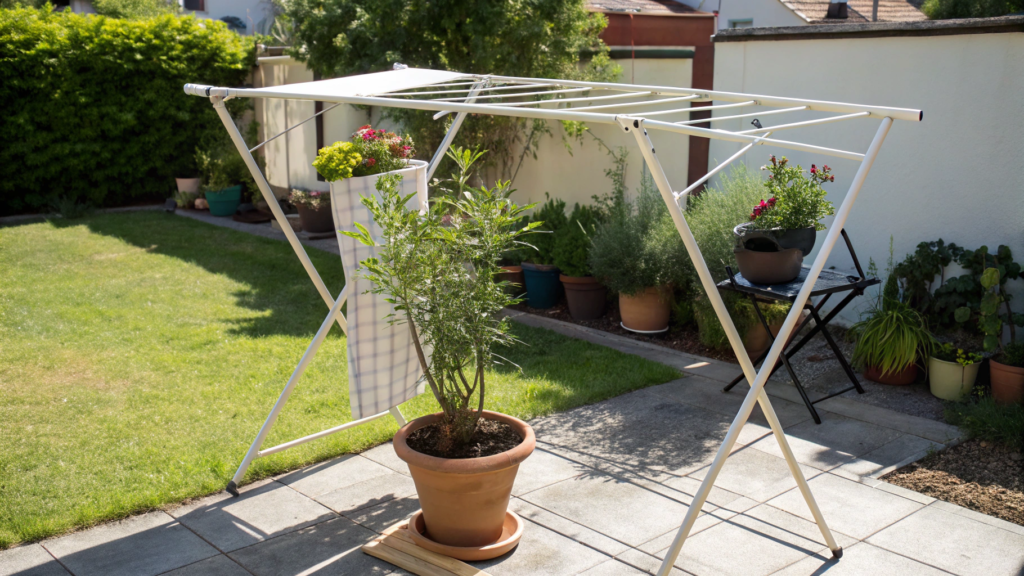
I think everyone had moments when shade is needed right now, especially in spring, when it still feels cool… and then one sunny day hits — and that’s it, leaves are already drooping.
Funny, but what helps is an unexpected thing — a laundry drying rack. It’s one of the fastest ways to give plants a break from sudden heat.
What You Need
- Foldable laundry drying rack (better metal, stable)
- Light fabric or shade cloth
- Clothespins or clips
How to Make It
- Set up the drying rack right over the plants. It’s important to place it so it doesn’t touch the leaves, but leaves a small gap above. Usually the height is enough to cover even grown plants.
- Throw a light fabric or mesh on top. It can be an old sheet, curtain, or a piece of shade cloth. The main thing is that the material lets air through and doesn’t create a “oven” effect inside.
- Secure the fabric with clothespins along the edges. Fixing it in a few spots is enough so wind doesn’t move it. If the day is calm, you can even leave it slightly loose — that helps air circulate better.
- Leave the sides partially open. Full closure is not needed — the goal is not to hide the plant, but to soften direct sunlight exposure.
- If needed, easily move the structure. This is one of the main advantages — you can just pick it up and place it where shade is needed at the moment.
When This Helps the Most
This setup is not for permanent use, but rather a quick solution during peak heat moments. It works especially well when plants are still weak or have just been transplanted.
- Seedlings and young plants that are not adapted yet
- Container plants that heat up faster than garden beds
- Fresh transplants going through stress
- Small areas where shade is needed in a specific spot
What to Pay Attention To
As they say, details matter:
- Light fabric is better than dense — it doesn’t trap extra heat
- A metal rack is more stable than plastic, especially in wind
- It’s important to make sure the fabric doesn’t rest on the leaves
- In strong wind, it’s better to secure the structure more
This method is the most convenient when you need to react quickly to weather conditions. You just take what you already have on hand and create soft shade exactly where it’s needed right now.
3. Dog Run Shade From a Tarp and Fence Clips
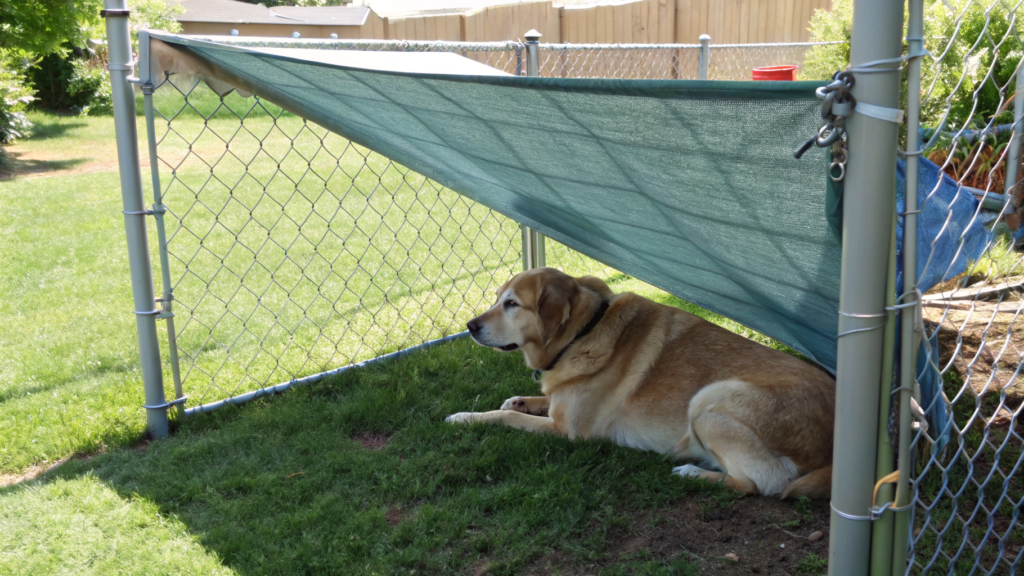
A dog doesn’t handle heat well, especially if there’s no way to hide in the shade. So this is something you need to take care of. This option with a tarp and clips is not a permanent solution, but a way to quickly create proper shade where there is none at all.
What You Need
- A heavy-duty tarp with grommets — Xpose Safety Heavy Duty Tarp, I like this option because it doesn’t tear in the wind and keeps its shape even after several seasons
- Fence clips or tarp clips
- Rope or ties (if you need to reinforce the setup)
How to Make It
- Define the area where shade is needed first. You don’t have to cover the entire run — most of the time it’s enough to create one spot where the dog can move during peak heat. Pay attention to how the sun moves during the day — this helps you understand where shade will last longer.
- Secure one side of the tarp to the top of the fence. Use grommets and clips to spread the load across the whole length. If you only fix it in two spots, the fabric will start to sag and wear out quickly.
- Create a sloped structure, not a flat “roof.” You can do this by fixing the opposite side a bit lower or pulling it down with rope. This angle allows air to move and prevents hot air from building up underneath.
- Leave space for air circulation. Don’t close everything tightly — the goal is to reduce direct sun, not to turn the run into a closed tent. Side gaps work better than full isolation.
- Check the stability of the structure. Pull on the edges and see how it behaves in wind. If there is movement, add more attachment points or reinforce it with rope. The tarp should stay in place without constant shifting.
When shade appears, the dog moves less in search of a cooler spot, and breathing becomes more even. This is normal, because reducing direct sun exposure lowers the risk of overheating. This is also supported by recommendations from the American Kennel Club, which highlight the importance of постоянного доступа к тени для собак в жаркую погоду.
Where This Option Is Really Needed
This type of cover fits situations where the dog has no natural shade.
- Open dog runs and enclosures
- Areas with wire fencing and no roof
- Yards where trees are still small and don’t provide shade
- Temporary holding areas, for example during repairs or moving
What to Pay Attention To During Setup
Before installing, it’s important to consider details that affect safety and durability. A sloped angle works better than a flat surface, because water and wind don’t get stuck.
The tarp should not hang too low — sometimes the dog can catch it. Attachments should be spread evenly, not concentrated in a few points. And in strong wind, it’s worth checking the setup from time to time to make sure everything stays secure.
This kind of shade helps a lot during the day. There’s no need to look for shade around the perimeter or lie down wherever it’s just a bit cooler. In hot periods, it significantly reduces the load on the body and makes the dog’s behavior calmer.
4. Cooling Shade Spot Using Reflective Emergency Blanket
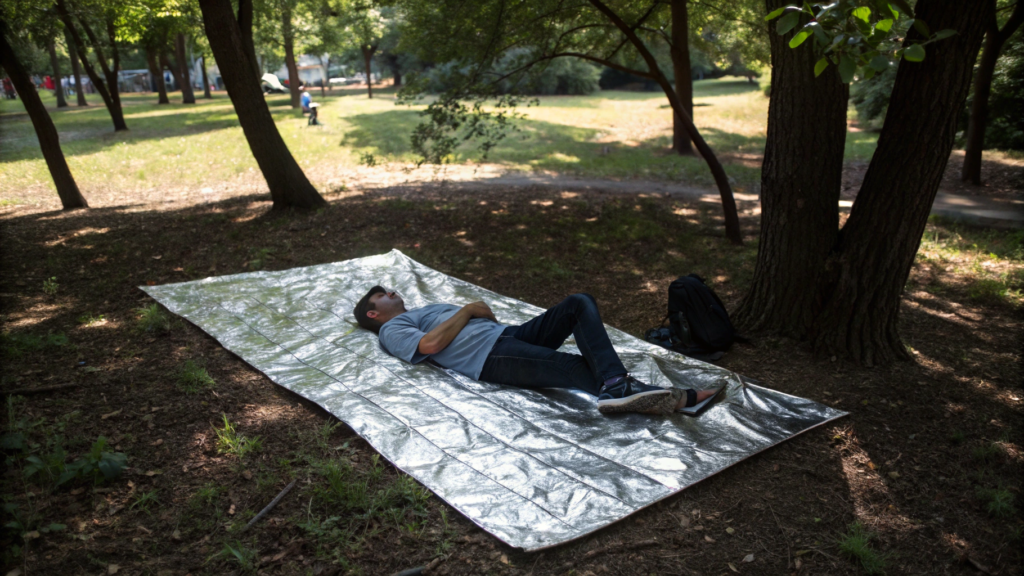
The emergency blanket sat in storage for a long time. Until we tried using it not for its original purpose. It turned out that under this kind of cover it actually feels cooler.
What You Need
- A reflective emergency blanket (the thin, silver one) — Swiss Safe Emergency Mylar Thermal Blanket, I like it because it’s lightweight, folds into a pocket, and reflects sunlight well
- Any support: hoops, sticks, a rack, even branches
- Clothespins, clips, or rope
How to Make It
- Find the spot where the sun hits the hardest. It’s not always the center of the area — sometimes it’s a side where the sun comes in during the second half of the day. That’s where the effect will be most noticeable.
- Secure the blanket above plants or a resting area, not directly on them. There should be a gap between the surface and the cover — at least 30–50 cm so air can move.
- Spread it with the reflective side facing up. This is important, because the goal is to bounce sunlight back, not absorb it. If you flip it, the effect will be weaker.
- Don’t stretch it too tight. Let it have a slight sag — this way it tears less and handles wind better. But it shouldn’t flap too much either, so fix it in several points.
- Leave the sides open. A fully closed space heats up quickly, and here we need the effect of reflecting and diffusing heat.
Reflective surfaces send most of the solar radiation back, preventing the space underneath from heating up. Similar materials are even used in agriculture.
Where This Is Especially Useful
This option works as quick help during the hottest hours.
- Small garden beds that overheat during the day
- Container plants in full sun
- A spot where the dog lies and can’t find a cool place
- Temporary rest areas in the yard or outdoors
Sometimes covering even a small area is enough to reduce overheating.
What to Pay Attention To
Only after using it you start noticing some things. The material is very light, so wind can easily carry it away, which means the setup has to be secured well. It can also create strong glare, especially when the sun is low. It’s better not to place it directly on plants — contact points can overheat. Over time, small tears may appear, but usually it lasts for a season.
Using this kind of improvised cover, at the hottest moment you can create a small island of coolness exactly where it’s really needed.
5. Camping Shade Lean-To With Trekking Poles and Guy Lines
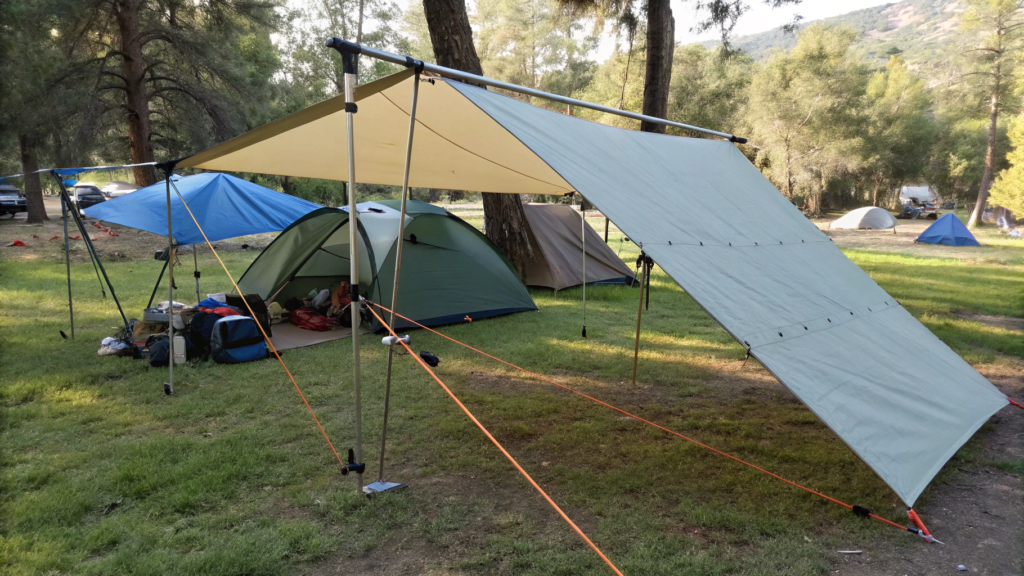
During the day, a campsite often turns into a heated open space with no cover. In moments like this, a lean-to made from trekking poles and guy lines comes in handy. It can be set up in a few minutes and gives you a normal place where you can wait out the heat.
What You Need
- Trekking poles
- A light tarp or piece of fabric
- Guy lines (rope)
- Stakes or any ground anchors
How to Make It
- Find the direction of the sun and decide which side needs protection. Usually, it’s the side where the sun hits in the second half of the day — that’s where the lean-to gives the strongest effect.
- Set up the trekking poles as front supports. Adjust them to the needed height — the higher they are, the more air flows through, but the lighter the shade becomes. It’s important to find the right balance for your situation.
- Attach the top edge of the tarp to the poles. You can just throw it over and fix it with rope or clips so it doesn’t slide.
- Pull the back side of the tarp down and secure it to the ground with stakes. The result should be a sloped surface — not a flat roof, but a proper angle that reflects sunlight and allows airflow.
- Tighten the guy lines for stability. Don’t over-tighten — the fabric should be firm, but not stretched like a string, otherwise wind will put more stress on it.
Under this kind of setup, it becomes comfortable to sit, cook, or just rest. This type of shelter is used even in field conditions — sloped structures reflect sunlight better and don’t trap hot air.
When This Option Really Saves You
There are situations where, without this kind of cover, отдых quickly turns into dealing with the sun. And that’s exactly where a lean-to works best.
- Open campsites with no trees
- Beaches or mountain areas with minimal shade
- Day stops during hikes
- Places where you need to create shelter quickly without building anything
Setup Details That Matter
Here it’s not just the structure itself, but how you set it up. The angle of the slope affects how much sun is reflected and how much gets inside.
The tension of the fabric also matters — if it sags too much, the shade becomes uneven and less effective. And one more thing is wind. Even light gusts can move the setup, so it’s better to check how it behaves and add another anchor point if needed.
6. Bucket Base Umbrella Substitute With PVC and Concrete
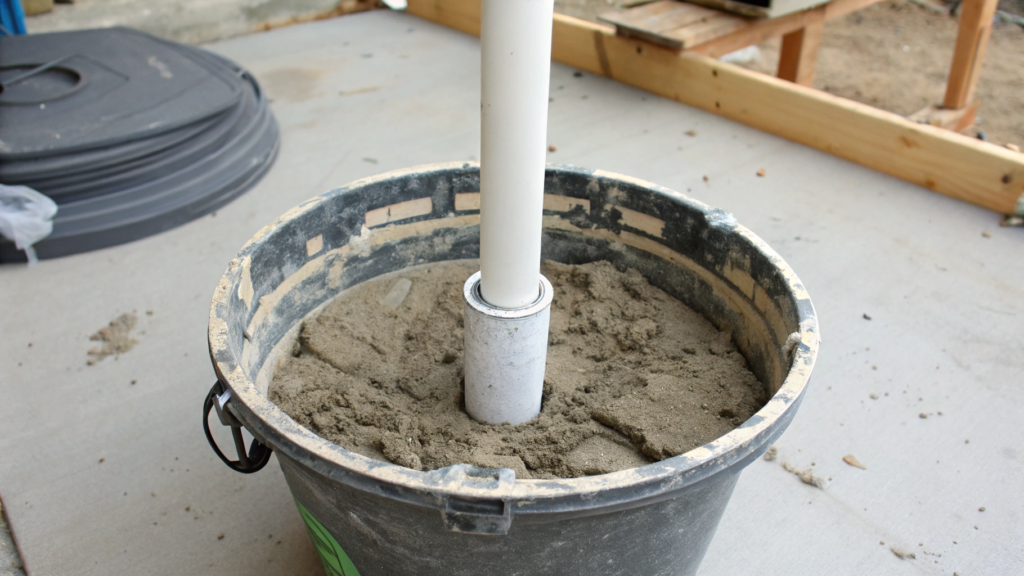
With umbrellas, as we learned from experience, you need a stable base, not something random. For example, a bucket filled with concrete and a PVC pipe, where you can insert an umbrella or any light shade structure. It looks simple, but works reliably.
What You Need
- Plastic bucket (10–20 L)
- PVC pipe of the right diameter
- Dry concrete mix that sets quickly and doesn’t require complicated prep
- Water
- A stick or level for alignment
How to Make It
- Choose the bucket and pipe size carefully. The pipe should be slightly wider or exactly match the diameter of the umbrella pole so it fits tightly but without force. Too much space will cause wobbling later.
- Place the PVC pipe exactly in the center of the bucket. This is important for stability. You can temporarily fix it with stones or support it from the outside so it doesn’t move while pouring the mix.
- Pour the dry concrete mix around the pipe. Do it gradually so the pipe doesn’t shift. Then add water according to instructions — the mix should become thick, not watery.
- Check the vertical position of the pipe. Don’t rush this step — if it tilts, it won’t be fixable later. You can use a level or just step back and look from the side.
- Leave the structure until it fully sets. This usually takes from a few hours to a full day, depending on the mix and weather. Don’t touch it or insert the umbrella before that.
- After it sets, insert the umbrella or shade pole into the pipe. If everything is done right, it will stand straight and won’t wobble even in wind.
Now the umbrella doesn’t move around, doesn’t tilt, and doesn’t need constant adjustment. This is especially important if shade is needed in one place for a long time — for example, over a sitting area or near where the dog lies.
Where This Is Convenient to Use
This option works well in places where you need stable shade in one spot.
- A sitting area in the yard or on a terrace
- A spot where the dog rests during the day
- Near garden beds or containers
- Temporary “fixed” points around the yard
What to Consider When Using It
You need to take into account the weight of the structure. A bucket filled with concrete becomes heavy, which is good for stability but makes it hard to move. So it’s better to decide in advance where it will stand.
The pipe diameter also matters — if it’s wrong, the umbrella either won’t fit or will be unstable. And finally, consider water and drainage: if the bucket stays in the rain, water can collect on top, so sometimes it makes sense to create a slight tilt or a drainage hole.
This option is reliable, and in hot weather it gives stable shade that helps throughout the entire sunny day.
7. Portable Plant Cart Shade With Curtain Sheers
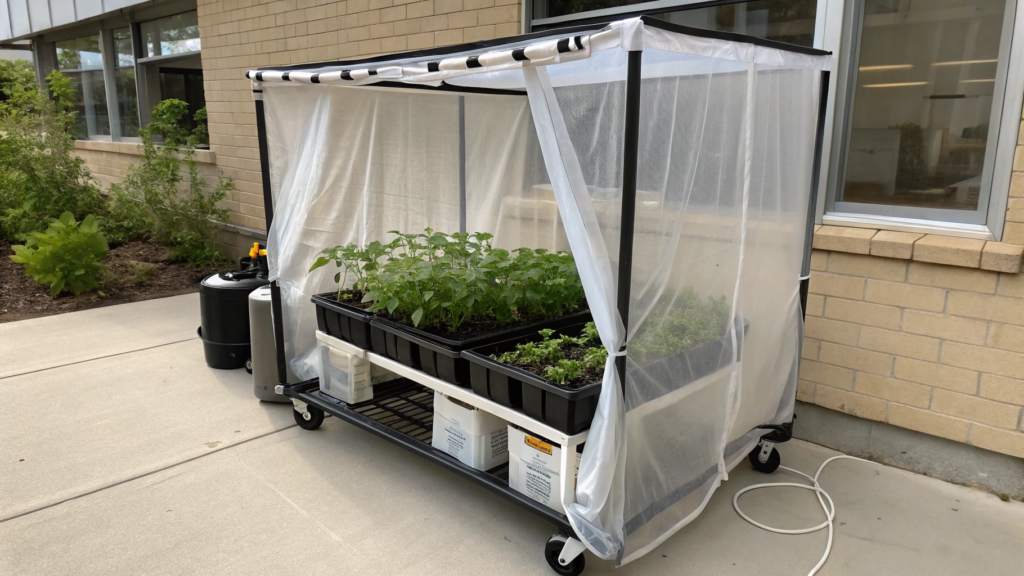
Container plants in heat overheat faster than garden beds. And if direct sun hits them, the plant really starts experiencing stress from overheating.
This is where a setup with a mobile cart and light curtains works well.
What You Need
- A portable garden cart or wheeled stand
- Light curtains or sheers that diffuse light well and don’t overload the structure
- Clips, clothespins, or fasteners
- (optional) a light frame or hoops for support
How to Make It
- Place the plants on a cart or wheeled platform. It’s important that the structure can handle the weight of the pots and moves smoothly without tilting. It’s better to check how it behaves under full load right away.
- Attach a light frame or supports along the edges. This can be hoops, sticks, or even parts of the cart itself. The goal is to create a base where the fabric can hang.
- Hang the light curtains on the sides. Don’t pull them tight — let them hang freely and softly diffuse the light. This “airiness” is what creates a more comfortable microclimate.
- Leave the top partially open or lightly covered. If you close it completely, heat can build up inside. It’s better to let light pass from above and soften it from the sides.
- Move the cart depending on the sun. In the morning you can leave more light, and during the day move it to a more protected spot. That’s the main advantage — you control the conditions throughout the day.
You’ll quickly notice that leaves don’t overheat, the soil stays moist longer, and there’s no feeling that everything is “burning” by midday. Light fabrics diffuse the light without fully blocking it — a similar approach is used in greenhouses to reduce stress from direct sun.
When This Option Is Useful
This solution doesn’t replace fixed shade, but gives flexibility that is often missing on a site.
- Container plants on open terraces
- Young plants in pots
- Areas where the sun moves actively during the day
- Situations where you want to adjust conditions based on the weather
Here a lot depends on the balance between light and protection. Too dense fabric can shade plants more than needed and slow growth. Too loose fastening will make the curtains start to move around in the wind.
Also pay attention to the movement of the structure — if the cart stands unevenly or the wheels are weak, plants may shift and lose stability when moving.
8. Shade Tunnel Row Cover Using PVC Hoops
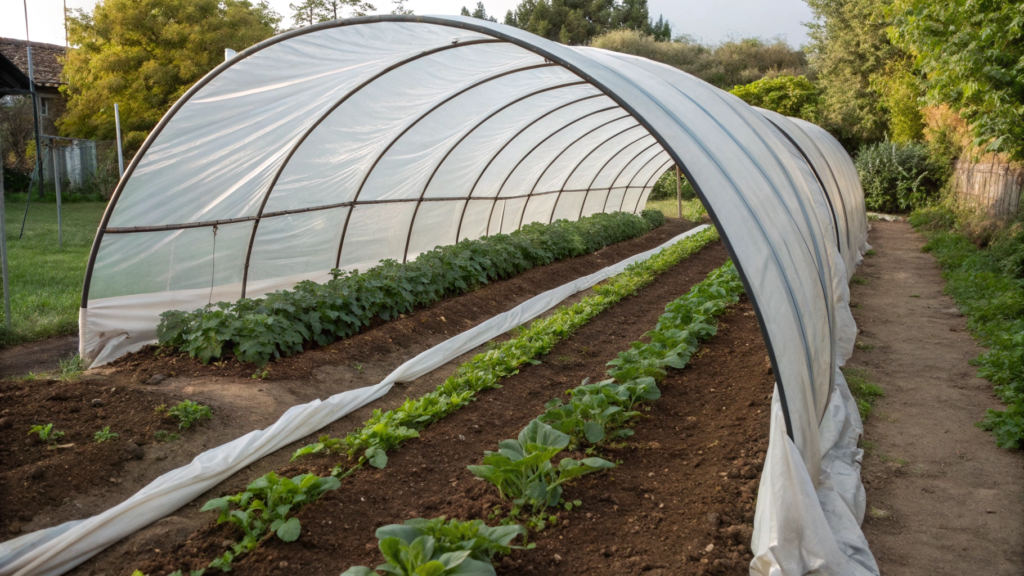
A shade tunnel on PVC hoops is not just point protection, but a full cover for the entire planting row.
What You Need
- Flexible PVC pipes (about 16–20 mm diameter) that bend easily and hold their shape
- Shade cloth (30–50%)
- Metal or plastic stakes/rods for fixing
- Zip ties, clips, or fasteners
How to Make It
- Mark the bed and install support stakes on both sides. The spacing between hoops is best kept around 60–100 cm — if wider, the structure may sag, if closer, it’s just extra work without much difference.
- Place the PVC pipes onto the stakes, forming arches. The pipes bend easily, creating a clean “tunnel.” It’s important that all hoops are roughly the same height — this way the cloth lays evenly without dips.
- Stretch the shade cloth over the top. Spread it gradually to avoid misalignment. It’s better to leave a small length margin than to try to pull it tight later.
- Attach the cloth to each hoop with clips or ties. This keeps it from shifting or moving in the wind. Pay extra attention to the edges — that’s where movement usually starts.
- Secure the bottom edge of the cloth. You can weigh it down with boards, bricks, or cover it with soil. This helps keep the shape and gives extra protection from side sun.
- If needed, leave one side partially open. This makes it easier to access plants and improves airflow, especially on hot days.
After setting up the tunnel, the temperature inside feels softer, the soil doesn’t dry out as quickly, and leaves look alive instead of “tired.” This happens because the cloth reduces the intensity of solar radiation and spreads light more evenly.
When This Tunnel Is Really Needed
This option is useful when heat becomes constant, not just occasional.
- Long garden beds with vegetables that suffer from overheating
- Dense plantings where it’s hard to cover each plant individually
- Periods of steady heat in the middle of the season
- Areas with no natural shade
Important Details During Setup
The evenness of the hoops affects how the cloth sits — if there are uneven parts, “pockets” can form where heat builds up. The tension of the cloth also matters: if it’s too loose, it starts to sag; if too tight, it wears out and tears faster. It’s also worth thinking about access to the plants in advance — how you will water, harvest, and check their condition.
9. Dog Porch Shade Using Bamboo Mat and Zip Ties
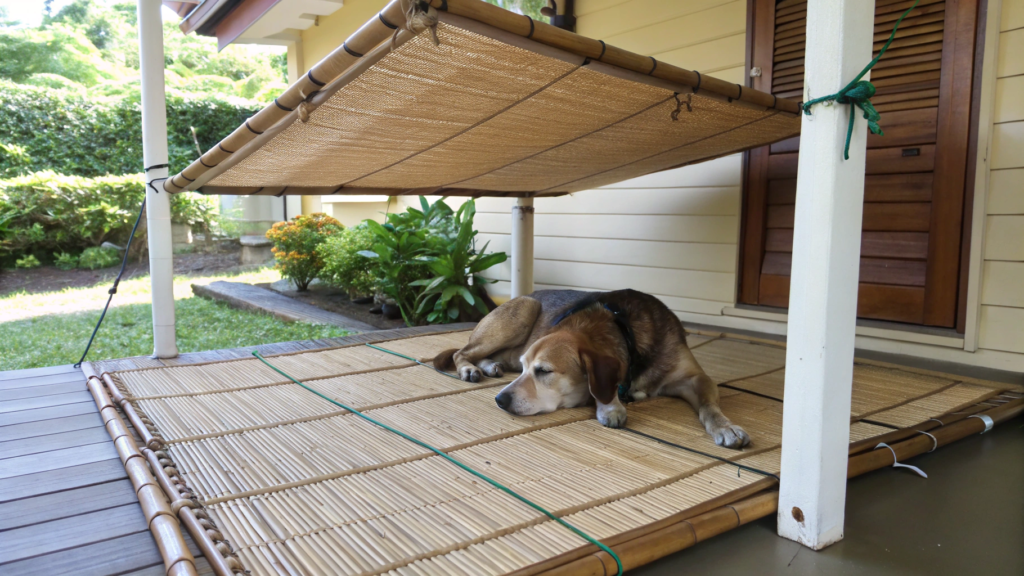
A bamboo mat + zip ties helped solve the problem. You just add a layer that cuts direct light, and the space changes right away.
What You Need
- A bamboo mat or roll-up shade — Bamboo Privacy Screen Roll, I like it because it gives shade but doesn’t turn the space into a closed box
- Plastic zip ties, they fix quickly and hold shape
- Scissors
How to Make It
- Identify the side where the most aggressive sun comes from. Usually it’s one specific line, not the whole porch. There’s no need to cover everything — it’s enough to block that one angle.
- Unroll the bamboo mat along the open side. It should cover the area where the dog lies most often, not just hang “for looks.” It’s better to hold it in place first and see where the light line проходит in the middle of the day.
- Attach the mat to railings or supports using zip ties. Fix it not only at the top but also along the sides so it stays close to the structure. Bamboo is light, but in wind it starts to move if not secured well.
- Leave small gaps at the edges or bottom. This is important for airflow — a fully closed surface will trap heat, while here the goal is to reduce buildup.
- Check how the shade falls during the day. Sometimes it’s enough to slightly shift the mat or lower it to block the sun at the exact needed moment.
Bamboo diffuses light and partially blocks direct rays, while air still moves freely. This principle is used in traditional buildings in hot regions, where natural materials reduce overheating without fully blocking light.
Where This Works Well
This option fits places where there is some shade, but not enough during certain hours.
- Porches and verandas with an open side
- Spots where the dog rests during the day
- Areas where the sun comes in at an angle
- Spaces near the house without trees
Important Setup Details
The tightness of the fit affects whether the shade will be even or if light gaps appear. The installation height also matters — if the mat is too high, sunlight will still come through from below. And without solid fixation, the structure starts to move in the wind, and the shade becomes unstable.
A clear spot appears where the dog can lie during the day without moving every ten minutes in search of shade. And you can see it right away in the dog’s behavior — it stays calm and feels comfortable.
10. Car Awning Shade Using a Shower Curtain Liner
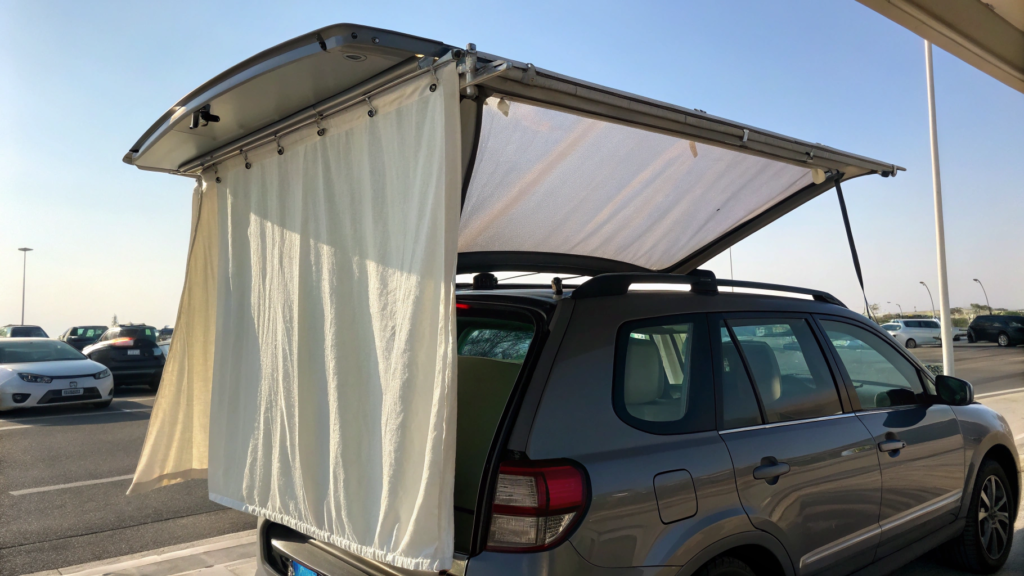
A good idea is to use the car itself as a base for shade with a regular shower curtain liner. It’s lightweight, doesn’t mind moisture, attaches quickly, and creates a soft, diffused shade where you can спокойно wait out the daytime heat.
What You Need
- A shower curtain liner (preferably thicker or slightly matte)
- Rope or guy lines
- Clothespins, clips, or carabiners
- Any supports: sticks, trekking poles, or even branches
How to Make It
- Open a door, the trunk, or choose a point on the roof where it’s convenient to attach the fabric. The car works as the main support, so it’s important to figure out where to fix the top edge so it doesn’t slip and doesn’t get in the way.
- Secure the top part of the curtain. Many models already have holes for rings — you can run rope through them or just clip them on. You can attach it to the trunk, roof rails, or even gently trap it in the door.
- Stretch the curtain away from the car, forming a sloped awning. Don’t make it horizontal — a slight angle gives better shade and lets air move freely.
- Secure the opposite edge to supports or stakes. If you don’t have special poles, anything available works — the main thing is that the fabric holds shape and doesn’t sag too much.
- Adjust the tension and height. If you pull it too tight, the curtain starts acting like a sail in the wind. If it’s too loose, the shade becomes uneven and doesn’t give the right effect. It’s better to adjust it a couple of times and see how the light falls.
Once everything is set, the light becomes softer, there’s no feeling of being “hit” from above, and even the air under the awning feels lighter. This happens because semi-transparent materials diffuse sunlight and reduce surface heating. Similar approaches are used in outdoor shelters and temporary shade setups.
When This Option Is Really Needed
Without this kind of shade, staying outside often turns into a short stop.
- Picnics and roadside stops with no trees
- Camping in open areas
- Beaches and steppe-like landscapes
- Any place where the car is the only “structure” around
This kind of awning can be set up right on the spot, and next to the car you get a full shaded area where you can spend time comfortably. This is especially valuable in the middle of the day, when the sun is at its strongest and staying outside without cover becomes uncomfortable.
Comfort of Your Space
Of course, you don’t get a perfect yard or a perfect campsite. But you do get a few spots where it simply feels normal to be. Plants don’t fade by midday, the dog stays in one place instead of searching for shade, and you don’t need to run back inside after half an hour outside.
Over time, this turns into a habit of noticing where and when the sun becomes a problem, and reacting to it quickly with a clear result you can see the same day.If you have your own ideas, especially the kind you “put together from what you had,” write in the comments. These kinds of solutions usually come from real experience — and they end up being the most useful.