I always thought that neat gardens look so beautiful because a lot of money was put into them and a ton of complex work was done. But in practice, many things are put together from the simplest materials — if you understand how to use them. Here we will try to break down 10 garden DIY ideas that look thoughtful and expensive, but are made without extra costs and without complex tools.
Each idea — is not just “make it and forget it”, but something that is really used every day and makes garden care easier. Simple, without extra details — only what actually works.
I think you will like these solutions for different tasks.
1. Cinder Block Herb Wall With Hidden Drip Line
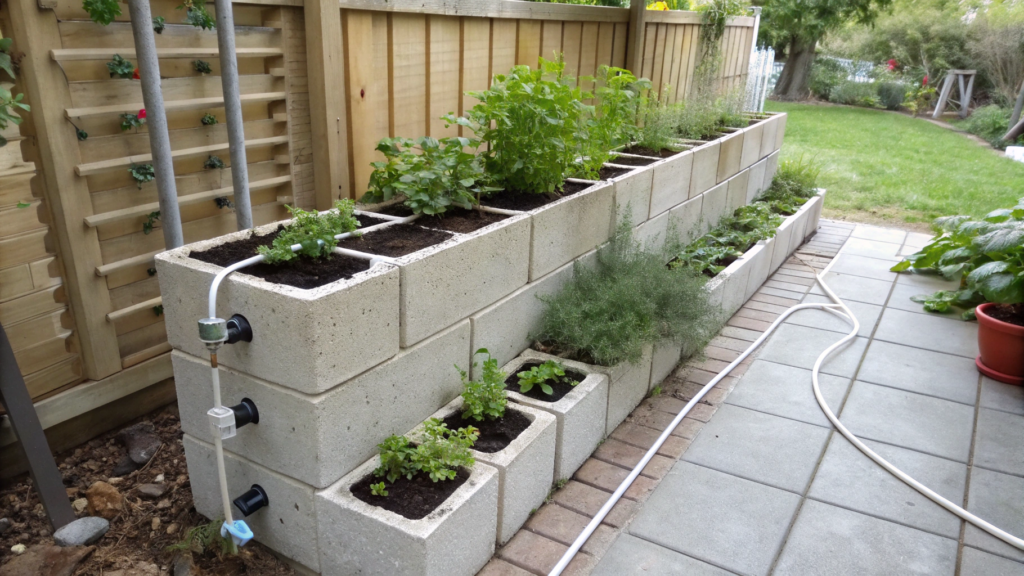
Cinder block herb wall — are assembled over a weekend and do not require anything complicated.
Personally, we just didn’t have enough space. And instead of expanding, we started “going up” vertically. Blocks, soil, all that… But after a couple of weeks, when basil and thyme started growing, it became one of the most convenient solutions on the site.
By the way, vertical structures give plants more light and air, and this reduces the risk of fungal diseases — this is noted, for example, in gardening recommendations from USDA Extension.
Why this is convenient
- Saves space — ideal for small plots or a container garden
- Makes care easier — less bending, everything is at hand level
- Looks neat — especially if you hide the watering
When the drip line is hidden, it immediately changes the feeling of the project. No visible hoses, no chaos — just clean geometry and greenery.
What you’ll need
- Cinder blocks, standard 16 x 8 x 8 inches (40 x 20 x 20 cm)
- Geotextile or landscape fabric
- Soil for containers (better light, with good drainage)
- Herbs: basil, thyme, oregano, mint (but mint — carefully, better separately)
- Drip irrigation system (thin tubes + drippers)
- Water source or adapter to a tap
- Decorative mulch (optional)
For convenience, you can take a ready-made drip irrigation kit — it already has everything basic, no need to assemble in parts.
How to make it
- Choose a place
Best — a sunny side, at least 6–8 hours of direct sunlight per day. The wall can stand near a fence or just as a separate element. It is important that the surface is level. - Assemble the base from blocks
Lay the blocks in a staggered pattern. This gives stability and makes the structure visually more interesting. Usually 3–4 levels in height are enough so as not to overload the structure. - Prepare planting pockets
Line the inner holes of the blocks with geotextile. This will hold the soil, but allow water to pass through. - Lay the hidden drip line
Run a thin tube along the back of the blocks and bring drippers into each “pocket”. Try to hide the line between the blocks — so that it is not visible from the front at all. - Fill with soil and plant herbs
Use a light substrate. Do not fill to the very edge — leave about 1 inch (2–3 cm) so water does not overflow. Plant herbs by principle: more moisture-loving plants — lower, more drought-resistant — higher. - Connect water and check the system
Turn on the water supply and see how moisture is distributed. It is better to adjust the pressure right away so there is no overflow. - Add final touches
A little mulch on top — and everything starts to look much neater. This is where that designer look appears.
Small notes
Pay attention to details, namely:
- If the soil is too dense — water will stagnate
- If you don’t hide the hose — all the aesthetics break
- If you plant mint with others — it will quickly take over the space
Do not overload the wall with different plants. Better 3–4 types, but growing well. Then the composition looks cohesive and clean, not like a random set.
Such a wall really works and becomes part of your day. Because it is not just a project, but a thing you use every day without thinking.
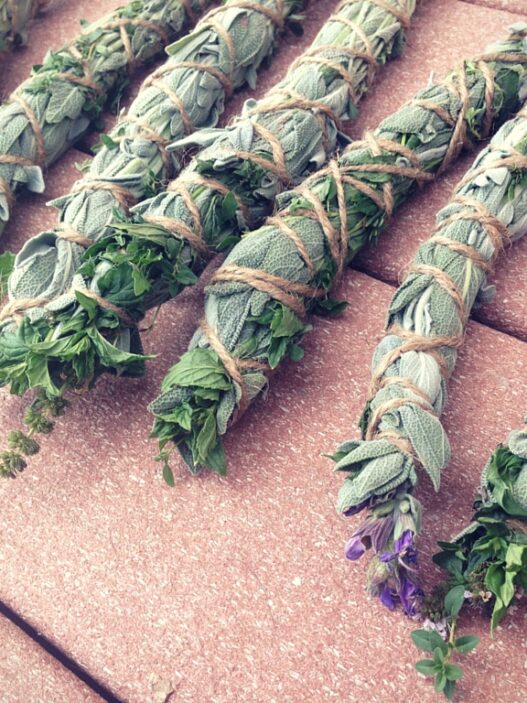
2. Vintage Spoon Plant Markers With Stamped Labels
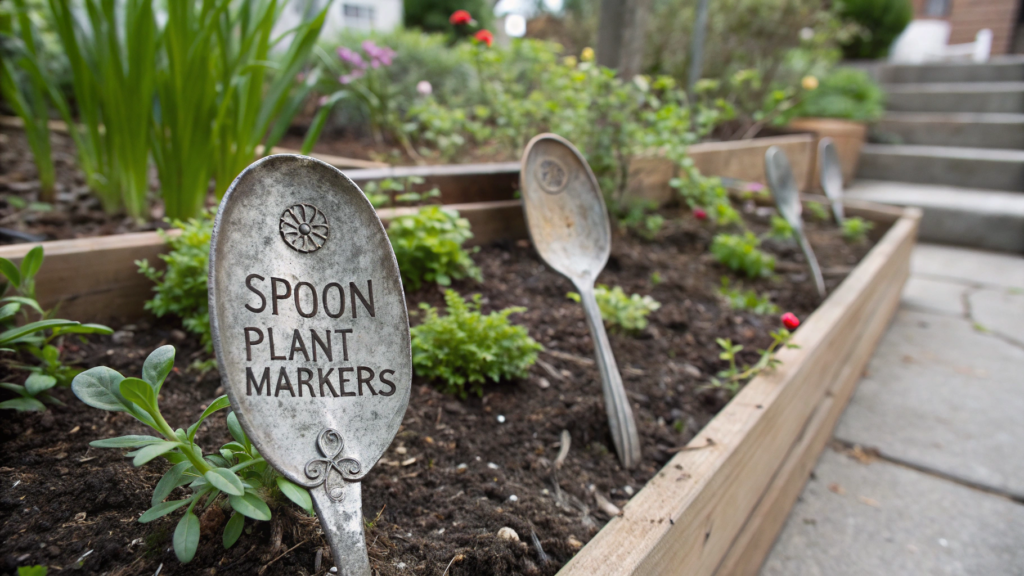
Vintage spoon plant markers — old spoons, a bit of time — and you already have not just a garden bed, but a neatly labeled system where everything is clear at a glance.
Metal markers last longer — unlike wooden ones, which start to rot over a season, especially in moist soil conditions.
This is convenient, because they:
- Do not fade in the sunlight
- Are not afraid of water and temperature changes
- Are easy to read even after a season
- Look neat and do not stand out from the overall look
When all plants are labeled, care becomes easier. You don’t need to remember where what is planted, especially if you are experimenting with new crops.
What you’ll need
- Old metal spoons (better stainless steel or nickel silver)
- Metal stamping set
- Hammer
- Hard surface (for example, a piece of steel or an anvil)
- Marker or pencil for layout marking
- Gloves
How to make it
- Prepare the spoons
Wash and degrease the surface. If there are strong scratches or buildup — you can lightly go over it with sandpaper. Not to perfection, just so the engraving sits evenly. - Mark the text
With light strokes, mark where the text will be. This saves a lot of time — otherwise letters easily drift to the side. - Stamp the text
Place the spoon on a hard surface. Set the stamp and carefully hit with a hammer. Not too hard, but confidently. Better one precise hit than several weak ones. - Check readability
If you want to increase contrast — you can lightly go over the letters with dark paint and immediately wipe off the excess. The paint will stay in the engraved grooves. - Shape the handle
The spoon handle can be slightly bent if you need to change the angle. Or leave it as is — it already goes well into the garden soil. - Place into the ground
Insert the marker near the plant, but not too close to the stem. Leave some space so it does not interfere with plant growth.
Tip
If you want the markers to look neat all season, do not push the spoon deep into dense soil — over time it may tilt. It is better to first slightly loosen the spot by hand or with a small scoop, insert the marker and only then firm the soil around. Then it will stand straight and will not “move” after watering or rain.
From our experience
It is better to use short names (Basil, Thyme, Mint), and also make a consistent labeling style — this brings the composition together. And it is better not to overload the text — the marker should be quick to read.
3. Pallet Privacy Screen With Built In Planter Ledge
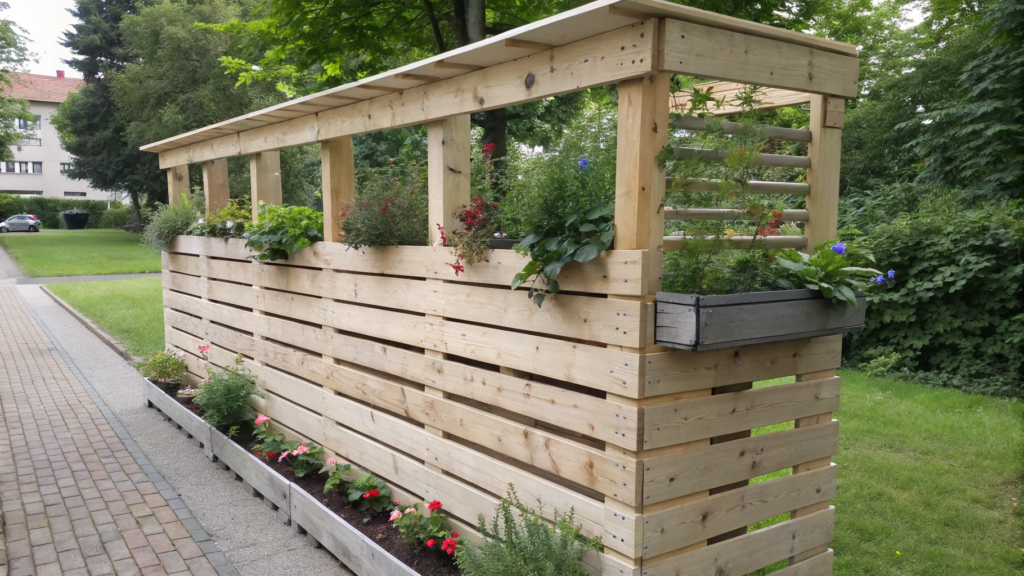
Pallet privacy screen with built in planter ledge — this solution helps you get privacy, zone the space and at the same time add a place for plants. And all this — from regular pallets, which can often be found almost for free.
Vertical elements in the garden help reduce visual noise and create a feeling of seclusion — this is noted in studies on landscape design and environmental psychology.
Why this works
- Blocks unwanted views without the feeling of a solid fence
- Adds verticality — the garden starts to look more structured
- Gives extra space for plants
- Can be adapted to any size
What you’ll need
- Wooden pallets (usually 40 x 48 inches / ~100 x 120 cm)
- Wood screws
- Drill
- Lumber for reinforcement (2×4 inches / ~5 x 10 cm)
- Board or plywood for the shelf (about 8–10 inches / 20–25 cm deep)
- Sandpaper or a sander
- Protective finish (oil or stain)
- Level
A basic kit like a BLACK+DECKER Cordless Drill Set makes assembly much easier.
Pay attention to markings. Options marked HT (heat-treated, no chemicals) are suitable.
Pallets marked MB are better to avoid — they go through chemical treatment.
How to make it
- Prepare the pallets
Inspect them. Remove protruding nails, sand the areas where hands or plants will be. No need to make it perfect — just remove rough splinters and uneven spots. - Define the height and width of the screen
You can use one pallet vertically or connect two side by side. If you go higher than 5–6 feet (150–180 cm), it is better to plan ground or wall fixing in advance. - Reinforce the structure
Add lumber on the back along the edges and in the center. This makes the screen rigid and removes movement in the wind. Just attach the lumber with wood screws to the pallet. - Make the planter ledge
Attach a board or plywood piece to the horizontal slats of the pallet. Depth of 8–10 inches (20–25 cm) is enough for most pots. Check with a level so the shelf is not tilted. - Treat the wood
Cover the surface with oil or stain. This protects from moisture and makes the look more cohesive. The wood immediately starts to look more finished and expensive. - Install the screen
Place the structure on a level surface. If there is wind risk — fix it to the ground or wall. Even simple metal brackets already give good stability. - Arrange the plants
This is where everything comes alive. Place pots with herbs, flowers or even strawberries. Better not to overload — a few plants look cleaner and calmer than a dense row.
Tip
If you plan to place heavy pots, reinforce the shelf with extra lumber from below right away. This takes a couple of minutes during assembly, but later saves you from sagging and warping when plants gain weight after watering.
What to pay attention to
Sometimes the screen seems assembled correctly… but looks like just a pallet against a wall.
- If you leave the wood untreated — it quickly loses its look and turns gray
- If you place pots in one row randomly — the sense of composition disappears
- If you ignore the background — the screen can blend in and not give the effect
And the opposite — when you slightly play with plant heights, leave some visual breathing space between them and choose a calm tone for the wood, the whole structure starts to look like a thought-out part of the garden, not a temporary solution.
4. Concrete Leaf Stepping Stones With Crisp Veins
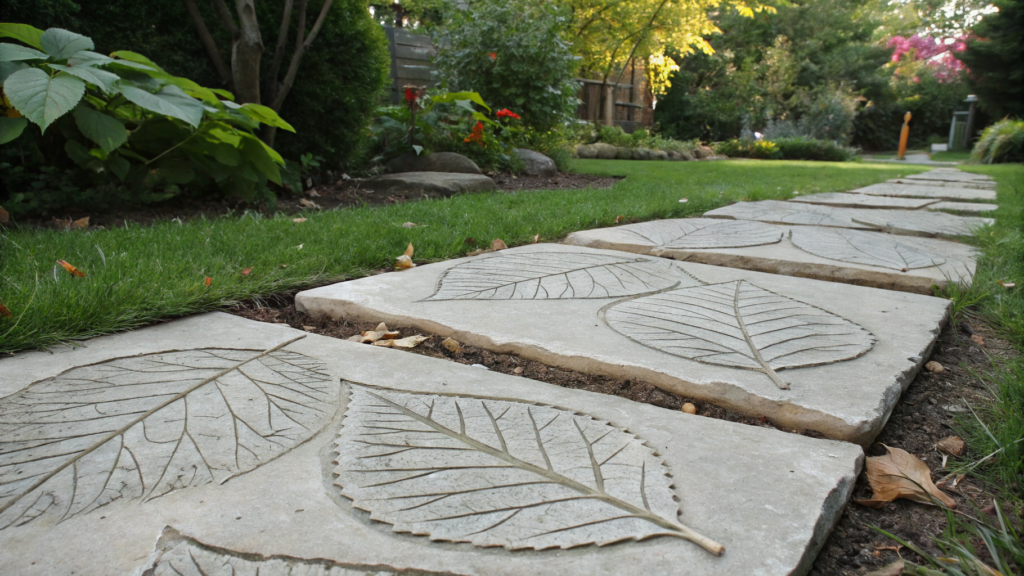
Concrete leaf stepping stones add structure to the garden and at the same time do not look like something made “in a rush”. The imprint of a real leaf gives the needed detail — veins, edges, texture — which is hard to recreate manually.
We also tried leaves — first one, then more… and in the end it turned into a path that looks very clean and intentional.
Why this works
- The path does not look heavy or artificial
- Each element is unique — no feeling of repetition
- Simple technique without complex molds
- Fits well into any style
What you’ll need
- Leaves with pronounced veins (burdock, rhubarb, hosta)
- Concrete mix
- Water
- Mixing container
- Gloves
- Plastic sheet or bags for the base
- Spatula or trowel
You can use a ready mix like Quikrete Concrete Mix — it is already balanced and gives a predictable result.
How to make it
- Choose suitable leaves
The leaf should be large, with clear veins. The more textured the surface, the more expressive the imprint will be. It is better to use fresh leaves — they hold shape and do not tear easily. - Prepare the base
Lay plastic or a dense bag on a flat surface. You can make a small “mound” of sand under the plastic — then the stone will be slightly curved, not completely flat, which looks more natural. - Place the leaf
Put the leaf face down (back side up) — this is where the veins are more pronounced. Carefully smooth it out so there are no folds or creases. - Mix the concrete
Mix the dry mix with water to a thick sour cream consistency. Do not make it too liquid — otherwise the concrete will spread and lose its shape. - Apply concrete on the leaf
Lay a layer about 1–1.5 inches (2.5–4 cm). Start from the center and move to the edges. Do not press too hard — it is important to keep the leaf texture. - Shape the edges
Carefully adjust the edges with gloved hands or a trowel. You can leave them uneven — it looks more organic. - Let it cure
Leave for 24–48 hours. It is better to cover with plastic so the concrete does not dry too quickly — this reduces the risk of cracks forming. - Remove the leaf
After full drying, flip the stone and carefully remove the leaf esidue. Sometimes it comes off whole, sometimes — in parts, leaving a clear vein pattern.
Tip
If you want a more defined pattern, lightly press the concrete into the veins with gloved hands in the first minutes after applying. Do not push hard, just help the mix settle into the natural relief — this makes the lines much more visible after drying.
Sometimes the difference between “just stones” and a clean path is in how they are placed.
- If you place them too evenly — it starts to feel too artificial
- If you leave slight offsets — the path looks more alive
- If you add gravel or grass between them — everything feels like a unified space
This is how your path gradually becomes part of the garden.
5. Terracotta Pot Fountain Using a Solar Pump
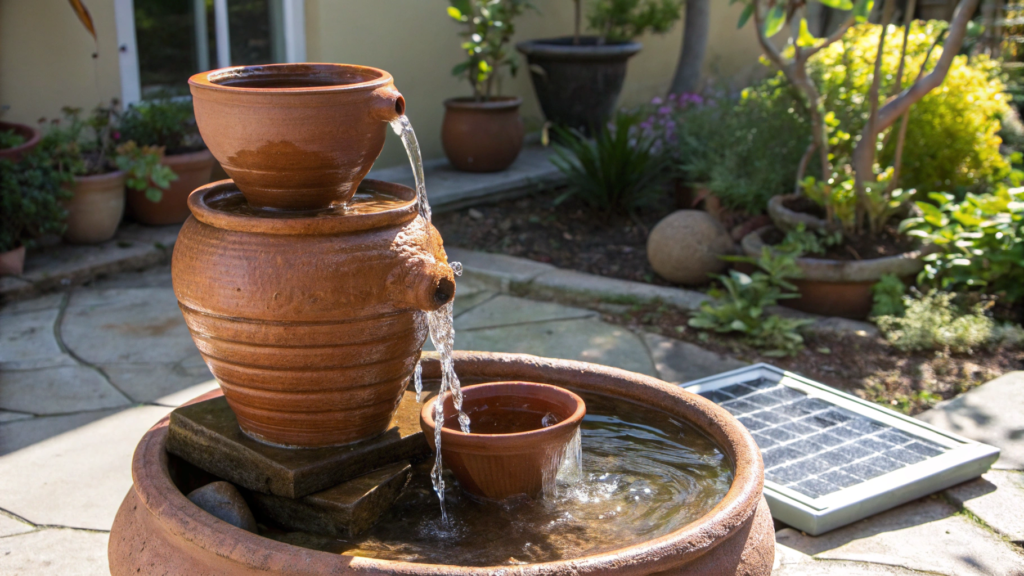
Terracotta pot fountain using a solar pump — this is just sunlight and a couple of pots. The water starts to make sound, a light sense of movement appears… and all this without wires, without connection to the grid. And by the way, small water elements really affect the microclimate around — they slightly cool the air and increase humidity. Not dramatically, but you can feel it, especially on hot days.
Why this works
- Adds the sound of water without complex installation
- Does not require electricity
- Easy to assemble and disassemble if needed
- Works as an accent without overloading the space
What you’ll need
- 2–3 terracotta pots (different sizes, for example 12, 10 and 8 inches / 30, 25 and 20 cm)
- Tray or large bowl for water
- Solar pump
- Hose (usually included with the pump)
- Stones or pebbles
- Silicone sealant
How to make it
- Prepare the base
Choose a stable bowl or tray that will hold water. Depth at least 3–4 inches (7–10 cm) so the pump is fully submerged in water. - Seal the drainage holes
Terracotta pots have holes at the bottom. They need to be sealed with silicone, otherwise water will leak out. Let the sealant dry (usually 12–24 hours) for a watertight seal. - Place the pump
Put the pump in the center of the tray. Make sure it sits level and will not tip over, keeping the water flow stable. - Assemble the pot structure
Place the pots upside down, one on top of another, starting with the largest. Run the hose through the center or along the side — the main thing is that it comes out at the top for a clean water outlet. - Set up the water flow
Connect the hose to the pump and bring it to the top pot. You can use a nozzle for a softer stream or leave it open for a simple water stream. - Add stones and decor
Fill the space around the pump area with pebbles. This hides the technical parts and makes the look more neat and cohesive. - Add water and test
Fill the tray with water and turn on the pump. It is important that the water level always covers the pump — otherwise it will quickly burn out.
Tip
If the water flow seems too weak, check the position of the solar panel — even a small turn toward the sun can noticeably increase the pump power. With these pumps, it is felt immediately.
What makes the fountain feel thought-out
As always, it is all about the details:
- If the hose is visible — the neat look disappears
- If the pots are uneven — everything feels unstable
- If the area around is empty — the fountain gets lost
And the opposite — when everything is assembled tightly, without extra elements, it starts to look like a natural part of the space, not an add-on.
At first it is just the sound of water in the background. And then you start noticing it in pauses — in the morning, in the evening, when everything is quiet. And it feels calming.
6. Raised Bed Corner Bench From One Sheet of Plywood
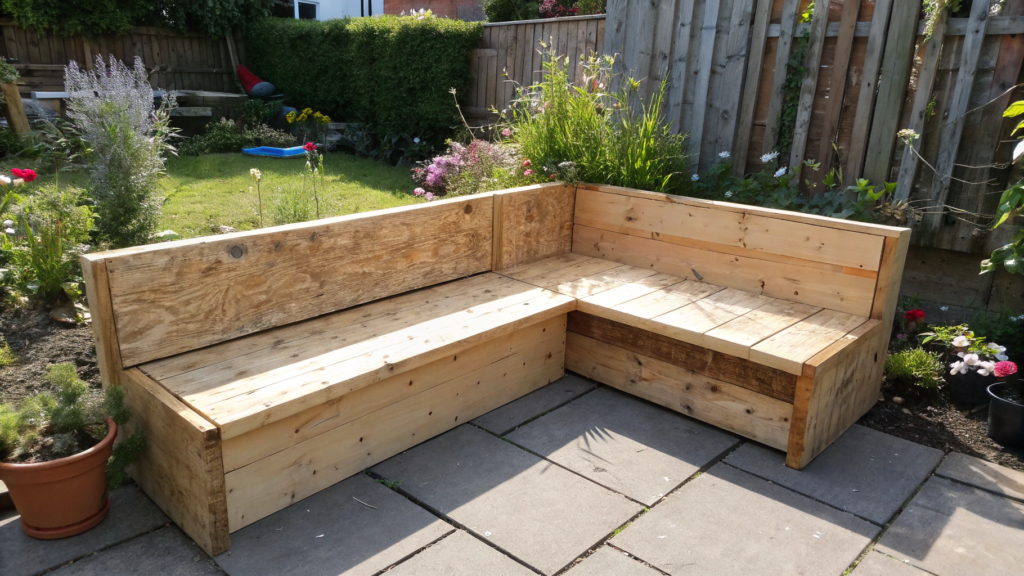
Raised bed corner bench from one sheet of plywood — this is a proper spot next to the bed where you can work, place tools or just rest for a couple of minutes.
Themselves reduce strain on the back — this is noted in garden ergonomics recommendations. And when there is a fixed place to sit nearby, working becomes noticeably easier.
Why this works
- Gives support next to the bed — no need to look for where to sit
- Uses a corner that usually stays empty
- Lets you store small items right under the seat area
- Looks like part of the structure, not separate furniture
What you’ll need
- Sheet of plywood 4 x 8 feet (122 x 244 cm), thickness 3/4 inch (18–20 mm)
- Lumber 2×4 inches (5 x 10 cm) for the frame
- Wood screws
- Drill
- Saw (hand saw or circular)
- Sandpaper
- Level
- Protective finish (oil or sealant)
How to make it
- Measure the corner of the bed
Measure the inner corner where the bench will go. Usually it is 90°, but better to check. Define the side lengths — most often 18–24 inches (45–60 cm) is enough for comfortable seating. - Mark and cut the plywood
From one sheet you can cut the seat and side panels. Mark an L-shape or two rectangles that will connect later. Mark carefully — this affects how well everything fits together. - Build the frame
Make a base from lumber under the seat. This is a simple frame matching the bench shape. Add cross supports — they hold the load and prevent the plywood from bending over time. - Attach the seat
Screw the cut plywood to the frame. Screw spacing about 6–8 inches (15–20 cm) so the surface does not flex or move. - Smooth the edges
Sand all corners and edges. It is quick, but removes the feeling of a rough build and makes the bench safe to use. - Check level and install
Place the bench into the corner of the bed and check with a level. If there are differences — use small wedges or adjust the base for a stable position. - Apply protection
Apply oil or sealant. This protects the plywood from moisture and extends its life, especially if the bench stays outdoors in changing weather conditions.
Tip
If you want the bench not to move over time, fix it to the bed walls through the side panels. A couple of screws — and the structure becomes solid and stable.
Often the bench just doesn’t get used. Usually the reason is simple:
- If it is too high or too low — it is uncomfortable to sit
- If there is no rigidity — it feels temporary
- If access to the bed is not considered — it gets in the way instead of helping
When everything is done right, you get a corner where you can sit, put down pruners, lay out seeds… and continue working without extra effort.
7. Dollar Store Trellis Wall With Zip Tie Weaving
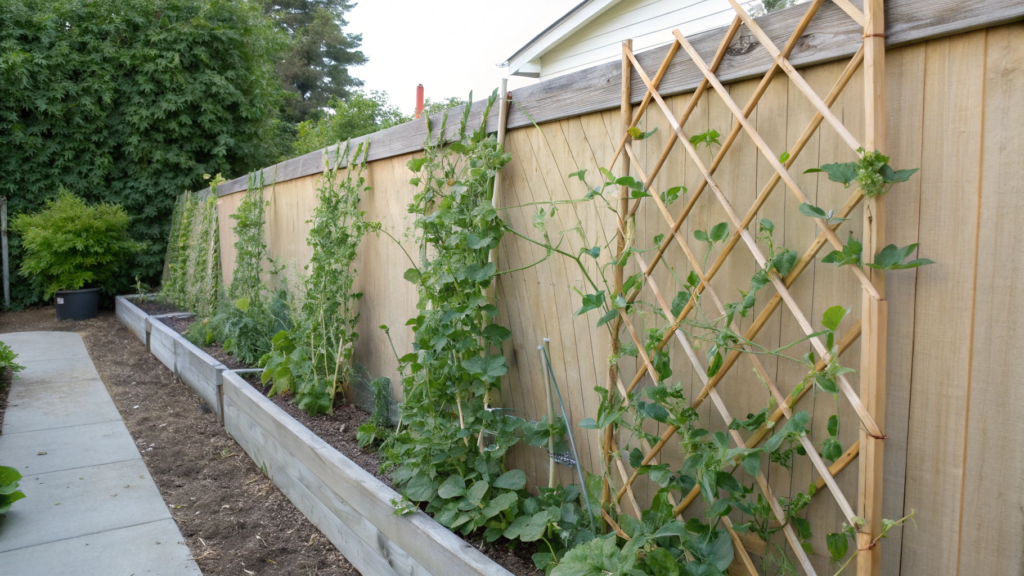
We had climbing plants. Peas and beans just had nowhere to go. There was not enough support, and we didn’t want to install anything heavy. We tried putting together a light trellis wall — at first as something temporary… but it stayed for the whole season.
Vertical growing improves access to light and air for plants, and this directly affects their development and reduces the risk of plant diseases.
Why this works
- Very lightweight structure — does not overload the space
- Quick to assemble and disassemble
- Works well for temporary or seasonal setups
- You can change the shape and size for your specific needs
What you’ll need
- Plastic grids, mesh or panels from a dollar store
- Cable ties (zip ties)
- Scissors or cutters
- Support (fence, posts or a simple frame)
- Optional — hooks or mounting hardware
How to make it
- Choose the installation spot
Look where the sun falls and how the plant will grow. For beans or cucumbers — at least 6 hours of direct sunlight. If it is a fence, make sure it is solid and does not move. If it is a standalone structure — think in advance how you will secure it in the ground. - Lay out the elements on the ground
Place panels or mesh on a flat surface and “assemble” the future wall without fixing it yet. Adjust sizes, remove excess, see where the joints will be. Better to spend 5 minutes here than redo it later while holding everything in place. - Connect panels with zip ties
Start with corners and key points, then add connections in the center. Distance between ties — about 4–6 inches (10–15 cm) so the structure does not move. Do not tighten fully at first — leave a bit of slack to adjust alignment. - Attach to the support
Lift the structure and fix it to the fence or posts. Add attachments at the top, sides and bottom — this distributes the load evenly. If using posts, you can fix them into the ground at a depth of 8–12 inches (20–30 cm) for extra stability. - Tighten all connections
Once the structure is in place, go through all zip ties and tighten them fully. Make sure the mesh is stretched, but not deformed. Trim excess ends neatly so nothing sticks out. - Guide the plants
In the first weeks, gently guide the plants — wrap the shoots around the mesh or lightly tie them with soft ties. After that, they will start to attach and fill the surface on their own through natural growth patterns.
Tip
If the structure is tall, leave a small gap between the mesh and the wall (1–2 inches / 2–5 cm). This improves air circulation, and plants feel noticeably better.
What ruins the look
Sometimes these structures look too “temporary”.
- If zip ties stick out in different directions — it creates a feeling of visual chaos
- If the mesh sags — the shape is lost
- If there are no clear lines — everything looks random
When everything is tightened, lines are clean, and plants start filling the space — the structure stops being noticeable, and all attention goes to the plants themselves.
8. Wine Bottle Garden Border With Sand Set Base
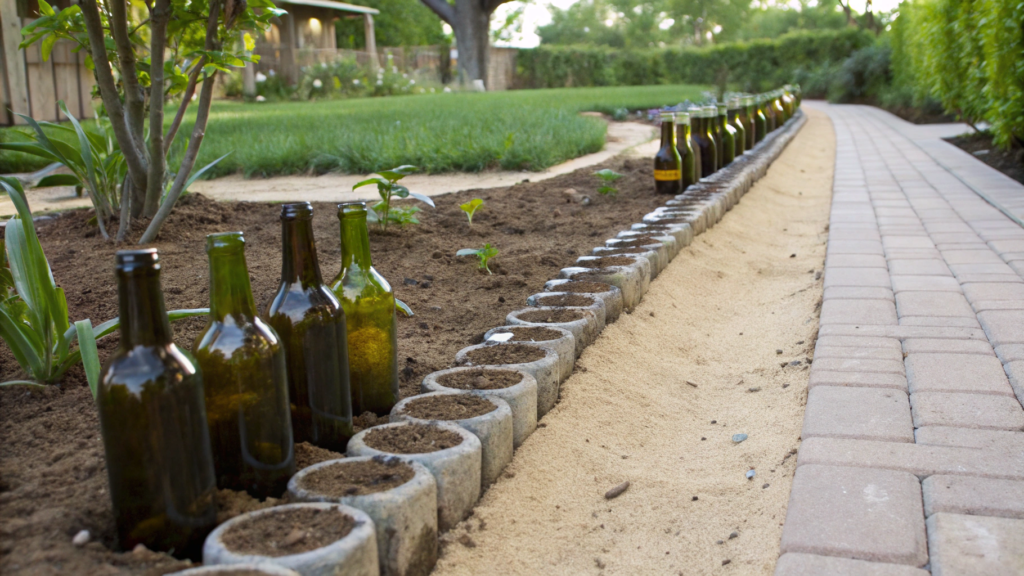
In this method, glass bottles create a clean, defined line, and the sand base keeps everything in place while staying flexible — if something needs adjusting, it can be done in a couple of minutes.
Sand distributes load well and provides drainage, so water does not stagnate around the glass. This is a basic principle of paving that is also used in paths.
Such a border:
- Gives a smooth, clean edge without concrete
- Is easy to adjust when needed
- Holds its shape well after rain
- Uses accessible materials
What you’ll need
- Glass bottles (preferably the same height)
- Sand (construction or coarse)
- Shovel
- Level or just a straight board
- Water for compaction
If you don’t want to collect bottles for long, you can use a set like FastRack Wine Bottles Clear Glass 750ml — the uniform shape makes installation much easier.
How to make it
- Mark the border line
Define where the boundary will go. You can mark it with a string or just run a shovel along the line. This helps keep a straight layout. - Dig a shallow trench
Depth about 6–8 inches (15–20 cm), width slightly larger than the bottle diameter. Try to make the bottom as even as possible — this affects how the bottles will sit in place. - Add a sand layer
Pour 2–3 inches (5–7 cm) of sand at the bottom. Level it and lightly compact. You can add some water — it helps the sand settle faster. - Place the bottles
Insert bottles neck-down, slightly pressing them into the sand. Keep the same height — a straight board or visual alignment helps maintain a consistent line. - Level everything
Go along the entire line and adjust the bottles. Lift some slightly, push others deeper. This is the most visible stage — it defines the overall neatness. - Fill gaps with sand
Pour sand between the bottles and along the sides. It fixes them and prevents movement, creating a stable structure. - Compact the base
Add water and lightly compact. After this, the structure becomes stable and does not move or shift over time.
Tip
If the soil is soft or often overwatered, make the sand layer a bit thicker (up to 4 inches / ~10 cm) — this adds stability and prevents bottles from sinking deeper over time.
If the bottle height “jumps”, the line immediately breaks. And if there are large gaps between them — the sense of cohesion is lost. When the line is even, spacing is consistent, and the glass is clean — everything starts to look like a thought-out part of the garden.
9. Hanging Gutter Strawberry Planter With End Caps

Hanging gutter strawberry planter with end caps — a way where a regular gutter turns into a long container, and the end caps keep moisture inside so plants do not dry out too quickly.
Why this works
- Berries do not touch the ground — less rot and damage
- Easy to harvest — everything is at hand level
- Saves space
- Makes watering easier to control and manage
What you’ll need
- Plastic gutter, length 6–10 feet (180–300 cm)
- End caps for the edges
- Mounts or chains for hanging
- Drill
- Drill bit for drainage holes
- Container soil
- Strawberry seedlings
How to make it
- Prepare the gutter
Measure the needed length and cut carefully, without chips. It is optimal to stay within 6–8 feet (180–240 cm) — longer starts to noticeably sag under the weight of wet soil. After cutting, go over the edges with sandpaper or a knife to remove sharp edges. - Make drainage holes
Turn the gutter upside down and mark the points for holes. Spacing about 6–8 inches (15–20 cm) along the length. Drill carefully, do not press — plastic can crack. It is important that holes are at the bottom, not on the sides — this ensures even water drainage. - Install end caps
Put end caps on both sides. Check that they fit tightly and do not move. If there is even slight play, apply a thin layer of silicone inside — this prevents water leaks and adds rigidity. - Plan the hanging setup
Mark mounting points before filling with soil. For 6 feet (180 cm) — at least two points, but better three: edges and center. If using chains, fix them so the gutter hangs perfectly horizontal — even a small tilt will cause water to flow to one side. - Fill with soil
Add substrate gradually, without pressing it too much. You can lightly shake the gutter so the soil settles naturally. Leave about 1 inch (2–3 cm) from the edge — this prevents water overflow during watering. - Plant strawberries
Make small holes by hand or with a scoop. Spacing between plants — 8–10 inches (20–25 cm). After planting, lightly press the soil around the roots to remove air pockets. - Water and check balance
Water carefully and observe how water drains. It should flow through holes along the entire length, not collect in one spot. If you see imbalance — adjust the height of the hanging right away, before the structure becomes fully loaded.
Tip
If the gutter dries out quickly in the sun, add a bit of vermiculite or coconut substrate into the soil — they retain moisture and reduce the need for frequent watering.
Possible mistakes
- If there is not enough drainage — roots start to suffer
- If the gutter is too long — it begins to sag
- If plants are too close — the yield drops
When everything is balanced, the structure works almost by itself. Watering, growth, harvesting — everything feels simple and natural.
10. Fire Pit Gravel Pad With Brick Ring Layout
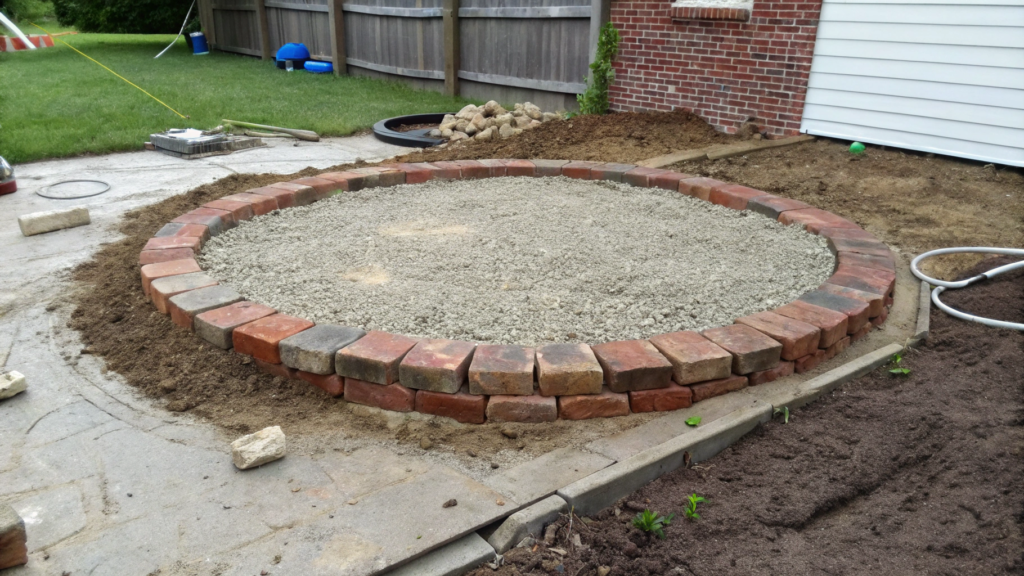
Fire pit gravel pad with brick ring layout — gravel handles drainage and leveling, while brick forms a clean ring that holds shape and defines the boundary.
Before, our fire pit area looked like this — a bit of trampled ground, a couple of stones… and every time after rain it turned into a mess. When we made a proper base with gravel, everything changed in one evening — it became clean, dry and defined.
Why this works
- No mud forms after rain
- Clear boundary for the fire pit zone
- Good drainage — water does not stay
- Simple setup without complex materials
What you’ll need
- Gravel (size 3/4 inch / ~20 mm — optimal for stability)
- Bricks or blocks for the ring
- Shovel
- Geotextile (optional)
- Level or long straight board
- Rubber mallet
How to make it
- Define the diameter
Usually it is comfortable to make a circle about 3–4 feet (90–120 cm) in diameter for the fire itself and leave another 1–2 feet (30–60 cm) around for gravel. Mark the circle with a string or a stick for a clear layout. - Remove the top layer of soil
Remove about 3–4 inches (7–10 cm) of soil across the whole area. Try to keep the depth even — this makes leveling much easier and gives a stable base. - Lay geotextile
This is optional, but helps a lot. It prevents weeds from growing through and keeps gravel in place. Lay the fabric with a small overlap around the edges for long-term stability. - Add gravel
Pour a layer about 3 inches (7–8 cm). Level it with a rake or board. You can lightly water and compact it — this makes it more dense and firm. - Build the brick ring
Lay bricks in a circle in the center. Keep spacing even and fit them tightly. If the surface is uneven — tap bricks with a rubber mallet to get a smooth circle shape. - Check level and shape
Go around the circle and check for uneven spots. Even small misalignment is noticeable when there is fire inside, so aim for a balanced structure. - Final fill
Add some gravel around the bricks to fix them in place and remove gaps. This locks the ring and creates a clean transition.
Tip
If you plan to use the fire pit often, make the inner diameter at least 30 inches (75 cm) — this is safer and more convenient for a proper fire size.
Avoid mistakes
- If the gravel layer is too thin — mud appears
- If the ring is uneven — the whole structure feels temporary
- If boundaries are unclear — the zone does not read as a separate area
When the base is firm, the circle line is clean, and there is enough space around — everything starts to work as its own zone, not just a place with fire. And you start forming a habit of gathering right here. At some point you stop thinking why — it just becomes that spot.
Choosing the right idea
Each of these ideas solves a specific problem. Somewhere to bring order, somewhere to add comfort, somewhere just to stop stepping into mud after rain.
Just start — and over time you will notice that the garden stops being a set of separate solutions. It starts to look like one connected space, where everything is thought through. Maybe not perfect, but enough to feel comfortable every day.
Write in the comments if you have already tried something similar or have your own experience. Let’s see and discuss which ideas people use most and what they adapt for themselves.