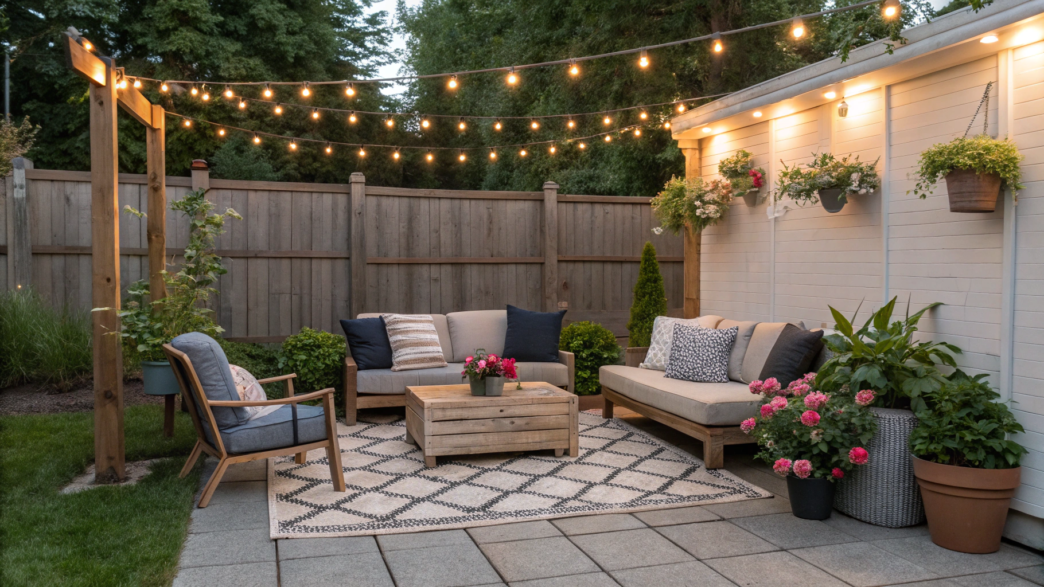
We always have plenty of things to spend money on. Especially when we’re working on the house, the garden, and a dozen other projects at the same time. So before buying something new, I usually look at what we can fix up ourselves, find secondhand, or make with materials we already have.
I’ve put together 10 budget-friendly back patio ideas that will help you refresh old flooring, find affordable furniture, add shade, lighting, and plants. You can do many of these projects yourself, even without much renovation experience. I hope you’ll appreciate that!
There are different ideas in this collection, and I’m sure you’ll find something for your own backyard.
1. DIY concrete patio resurfacing for a fresh new look
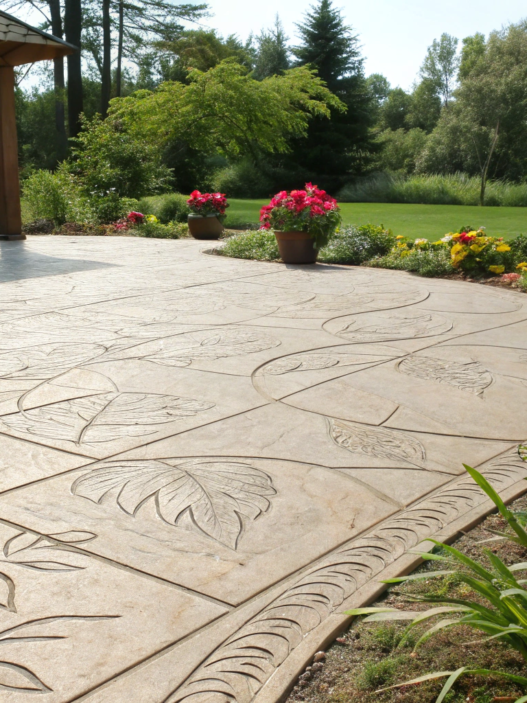
An old concrete patio with stains, small cracks, and worn spots often doesn’t need to be poured all over again. You can simply resurface the top layer of concrete, and the patio will look almost brand new. And it’ll cost a lot less than replacing the entire surface.
How to resurface your concrete patio
For this project, you’ll need a cement-based concrete resurfacing mix that you apply in a thin layer over the old concrete. But first, take a good look at the patio. If the slab has sunk, developed deep cracks, or started falling apart, a new surface layer won’t fix the problem.
If the concrete is still solid and just doesn’t look very good anymore, you can get started.
- Clean the concrete. Move all the furniture, plant pots, and anything else out of the way. Give the patio a good sweep, then scrub it with water and a stiff brush. Some resurfacing mixes require a pressure washer, so check the instructions beforehand. You’ll also need to remove peeling paint and any remaining old coating. Grease stains might take a little extra work too, or the new mix may not bond properly.
- Repair any damage. Fill small holes and cracks with a suitable concrete repair compound. A narrow putty knife makes it easier to work the compound into all the gaps. If there are lots of cracks, figure out what’s causing them first. After all, it would be frustrating to spend your weekend fixing the patio only to see the same damage again a couple of months later.
- Prepare the mix. A QUIKRETE concrete resurfacing mix is a good option for this project. Add water according to the instructions, not by guessing. Some mixes start setting pretty quickly, and spreading the mixture over concrete for the first time can take longer than you expect. It’s better not to mix too much at once.
- Apply the new layer. First, dampen the old concrete and remove any puddles. Then pour out a small amount of the mix and spread it with a rubber squeegee. For a thin coating, about ⅛ inch (3 mm) is usually enough, but check the package for the exact thickness. Work from the far end of the patio toward the exit. And be sure to check the weather forecast. Working under the blazing sun or right before rain is definitely not a good idea.
- Add a little texture. While the coating is still wet, run a stiff broom across it in one direction. This creates small grooves that make the surface less slippery after rain. Don’t press too hard. You want faint lines, not deep broom marks.
According to the QUIKRETE manufacturer’s recommendations the prepared mix stays workable for about 20 minutes at 73°F (23°C). So don’t mix a whole bucket right away if you’ve never worked with this material before. Also, remember to preserve the existing concrete joints and follow the recommended curing time for the new coating.
How to decorate your resurfaced patio
The simplest option is to leave the concrete light gray. A wooden table, a couple of outdoor chairs, and large pots with greenery will look great against it. Even old furniture will look different on a clean, even surface.
You can also try a sand or light beige color if you find a pigment that’s compatible with your resurfacing mix. Just test the color on a small area first and let it dry completely.
In general, a concrete patio doesn’t require much maintenance. You can move furniture around, repot flowers, and have outdoor dinners without much fuss. And if you ever want to change the look, you can simply rearrange the chairs or add a few plants. You won’t have to redo the patio itself.
I think there’s something really nice about stepping outside in the evening, putting some homemade food on the table, inviting friends over, and spending a few hours in the fresh air. And a resurfaced concrete patio will give you a solid foundation for that kind of outdoor space for years to come.
2. Creative covering options that add shade and charm
In summer, an open patio can get so hot that it’s almost impossible to spend time out there during the day. Especially if it’s on the south or west side of the house. The table and chairs are already there, the flowers are growing, but you can’t really sit outside until later in the evening.
A good patio shade cover can solve this problem, and you won’t need to build a full roof. There are several affordable options you can install yourself.
What to use instead of an expensive patio cover
- Shade sail. One of the most affordable options for an open patio. It’s a sturdy triangular or rectangular piece of fabric stretched between secure supports. For example, a Shade Sail Canopy for your patio. For a small area, you could choose a 10 × 12 ft (3 × 3.7 m) size. These shades come in different colors. I personally like light beige. It doesn’t make the space too dark and goes well with outdoor furniture.
- Fabric panels over a pergola. If you already have a wooden pergola on your patio, you can stretch strips of outdoor fabric between the beams. This will create partial shade, with gaps between the panels to let some sunlight through. Outdoor shade fabric works well for this. Choose a material designed to handle sun and rain, and attach it in a way that makes it easy to remove for washing or winter storage.
- Retractable awning. A more convenient option, although it’s also more expensive. You can extend it during the hottest hours and retract it when you want more sunshine. A retractable awning can be a good choice for a small patio next to the house. Just make sure the wall is suitable for mounting it and that the structure can handle wind loads.
What to keep in mind
- Before choosing a patio cover, spend some time watching how the sun moves throughout the day. For example, if the sun shines directly from the side in the afternoon, an overhead cover might not help much. You may also need a side curtain or a trellis with climbing plants.
- Also, pay attention to the plants on your patio. They might need protection from the summer heat too. Gardening experts recommend using shade cloth that blocks about 30–40% of sunlight. This amount of shade can help plants get through especially hot days without cutting off too much light. Of course, it depends on what kinds of plants you’re growing.
- And don’t forget about the wind. You can’t just tie a shade sail to the nearest tree or a thin fence post. It needs strong supports designed to handle the tension of the fabric. Before strong winds, removable shade covers should be taken down if the manufacturer’s instructions call for it.
I prefer covers that still let plenty of daylight through. With this kind of patio, you can repot seedlings at the table, have lunch outside, or just sit with a book. Plus, a lightweight fabric cover doesn’t require major construction in the backyard, and you can replace it after a few seasons if you want to. I think it’s a really practical option.
3. Paver pattern layouts that look premium but cost less
Recently, I was looking at photos of backyard patios and noticed once again how much the way pavers are laid can change the look of a patio. In one photo, ordinary rectangular pavers looked pretty basic, while in another, the exact same pavers were arranged in a beautiful geometric pattern.
And you don’t need expensive decorative pavers for this. Just choose an interesting pattern, add a border around the edges, and spend a little more time laying the pavers.
Three paver laying patterns
For a budget-friendly patio, I think regular concrete pavers or clay brick pavers would be a good choice. You can find them at most home improvement stores, and some patterns can be laid with very little complicated cutting.
- Running bond pattern. The easiest option for a DIY project. Each new row is offset by half the length of a paver, just like bricks in a wall. Rectangular pavers measuring 4 × 8 inches (10 × 20 cm) work well for this pattern. They look really nice in gray, sand, or terracotta colors.
- Basket weave pattern. Here, you lay two pavers horizontally, then the next two vertically, and repeat the pattern across the entire patio. The result looks like a woven basket. I’m sure Lindy would appreciate this pattern near a garden area with flowers and greenery. Just make sure the pavers have the right proportions so that each pair forms an even square.
- Herringbone pattern. Rectangular pavers are placed at right angles to each other, creating a zigzag pattern. I think this pattern looks best with a narrow border of darker pavers. However, you’ll need to cut more pavers along the edges, so for a first DIY project, I’d choose a 90-degree herringbone pattern rather than a 45-degree one.
How to save money on paver installation
Regular rectangular pavers are often cheaper than decorative ones, and you can create several beautiful patterns with them. So there’s no need to buy pavers in different shapes and sizes. It’s better to choose one affordable type and make the design more interesting through the laying pattern.
There are a few other useful things to keep in mind.
- Draw a layout on paper first. Measure your patio and try arranging the pavers so you end up with as few narrow cuts along the edges as possible. This will also help you calculate how much material you need.
- Look for discounted leftover pavers. Home improvement stores sometimes sell leftover stock from discontinued collections at lower prices. For a small patio, there might be enough to cover the whole area. Just make sure all the pavers are the same thickness and suitable for outdoor paving.
- Buy a little extra material. For a simple straight layout, it’s common to allow about 5–10% extra pavers, while a diagonal herringbone pattern may require up to 15%. The more cutting you need to do, the more offcuts you’ll have.
If you’re laying the pavers yourself, a rubber mallet and a long spirit level will come in handy. And don’t forget about preparing the base. Pavers need to be laid on a properly prepared and compacted base with a slight slope to direct water away from the house. Otherwise, even the prettiest pattern can become uneven over time.
By the way, if you’re working with a small budget, it’s better not to pave the entire backyard at once. You can start with a 10 × 10 ft (3 × 3 m) patio that has enough room for a small table and a few chairs. And leave some space nearby for flower beds or low-growing shrubs.
I actually think small patios are often more practical than huge paved areas. You’re sitting at the table, flowers are growing nearby, and the garden starts just a little farther away. Lindy always manages to find room for a few more pots, even when we’ve already agreed not to add anything else.
4. Upcycled furniture projects for outdoor lounging
An old wooden bench, worn-out chairs, or a small table can easily get a second life on your patio. Upcycling old furniture costs much less than buying a new set, especially if you already have some of the materials at home.
I actually love browsing thrift stores and checking out what people are selling at garage sales. Sometimes, among things that seem completely useless at first glance, you can find sturdy wooden furniture. It just needs a little attention. Although Lindy sometimes has to remind me that we’re pretty much out of space for another project.
What furniture can you upcycle for your patio?
First, I’d recommend choosing one piece of furniture that you’ll actually use on your patio. Here are a few ideas you can tackle yourself.
- Old wooden bench. If the frame is sturdy, you just need to clean the wood, smooth out any rough spots with sandpaper, and apply a protective finish designed for outdoor use. You can keep the natural wood color or paint the bench dark green, white, or gray. And a couple of outdoor cushions will make it more comfortable to sit on.
- Wooden crates instead of a coffee table. Take two identical sturdy wooden crates, place them side by side, and securely fasten them together. You can attach a tabletop made from wooden boards on top. For a small patio, a table measuring about 24 × 36 inches (61 × 91 cm) should be enough. The space inside the crates is handy for storing gardening supplies or small items that can handle a little moisture.
- Refinished metal chairs. If the paint on your old outdoor chairs is peeling or they’ve started to rust, you don’t have to throw them away. Check the joints, remove surface rust, apply a suitable metal primer, and then paint the chairs with outdoor paint. And to make the metal chairs more comfortable, add soft outdoor chair cushions to the seats.
A few tips before you get started
Before starting any furniture upcycling project, I’d definitely check how sturdy the furniture is. Wobbly legs, rotting wood, or badly rusted joints can cause plenty of trouble. A fresh coat of paint won’t fix those problems.
Scratches, darkened wood, and worn finishes, on the other hand, usually aren’t such a big deal. If the surface is safe to work on, you can sand it with 120-grit sandpaper, remove the dust, and apply a suitable outdoor paint or protective wood oil. With outdoor furniture, it’s important to treat not just the top surfaces but also the ends of the legs, where wood can absorb moisture particularly easily.
Estimate the costs before buying materials. How much paint will you need? Do you have to replace any hardware or buy new boards? Sometimes, fixing up old furniture costs almost as much as buying something new. So it’s worth checking what you already have at home first. You might find that you don’t need to buy half the supplies after all.
Over time, this kind of furniture will still pick up scratches and marks from flower pots. That’s just part of keeping furniture outdoors. But at least you won’t have to worry about every little stain when friends come over for dinner or someone decides to work on seedlings right at the table. You can always give an old bench another coat of paint, and spend the money you saved on plants for the garden.
5. Small patio with foldaway dining setup
It can be tricky to fit even a regular dining table on a small patio. Put one in the middle, add a couple of chairs, and there’s hardly any space left. But you still want room for some flowers, a clear path to the garden, and maybe even a spot to stretch your legs in a chair.
For patios like this, folding outdoor dining furniture is probably the best option. You can quickly put it away after breakfast or dinner. It takes up very little space when folded, making the patio much more practical to use.
What furniture to choose for a small patio
There are several types of folding furniture, and not all of them are equally convenient. A lot depends on the shape of your patio and how many people usually sit around the table.
- Round folding table with two chairs. For breakfast for two, a table about 24–28 inches (61–71 cm) in diameter is enough. There’s room for two plates, cups, and a small serving dish. You can look for a three-piece folding outdoor dining set. These sets come in metal and wood. I’d definitely choose one where both the table and chairs fold up.
- Wall-mounted folding table. For a really narrow patio, you can attach a folding tabletop to the side of the house. Raise it when it’s time to eat, then fold it down afterward. For two people, a tabletop about 30 inches (76 cm) wide and 18–20 inches (46–51 cm) deep should work. Just make sure you use sturdy folding brackets and that the wall is suitable for mounting them.
- Folding table with four chairs. If you often have guests over, you can choose a rectangular table about 48 inches (122 cm) long. Keep it folded on regular days, then set it up with extra chairs for family dinners. Just check beforehand that there’s enough room around it for everyone to sit down and get up comfortably.
How to position the table without blocking the space
Let’s try a little experiment. Grab a few boxes or anything else that’s roughly the right size and use them to mark out where the table and chairs would go. Try walking to the door, heading out into the garden, and imagining how much space you’ll need to pull out a chair.
Ideally, leave a walkway about 30–36 inches (76–91 cm) wide, plus some extra room behind the chairs so you can pull them out. If you only unfold the table for occasional dinners, it’s perfectly fine to use up some of that open space temporarily. The important thing is to keep a safe, clear path to the exit.
By the way, you don’t have to carry folding chairs back to the shed every single time. You can keep them against a wall under a cover or find a narrow spot for them near the door. Just don’t leave wooden furniture out in the rain for long periods. Even wood designed for outdoor use can deteriorate with constant moisture exposure.
Plants on a small patio
When space is limited, it’s better to make use of vertical space. For example, you could place a narrow plant shelf along the wall or hang a few planters. Just make sure the plants don’t block the walkway.
I remember how often Lindy has to clear my gardening supplies off the table before lunch. Folding furniture makes you a little more disciplined in that sense. Finish repotting the plants, put the tools away, wipe down the table, and it’s time to sit down for lunch.
For a small patio, I think that’s more than enough. A couple of chairs, a table for homemade breakfasts, and a few plants nearby. And when you no longer need the table, just fold it away and free up the space for something else. Don’t you agree?
6. Apartment-friendly patio styling under $100
When you live in a rental apartment, you can’t always change the patio the way you’d like. Your landlord might not allow you to drill into walls, replace the flooring, or install permanent structures. But you don’t want to keep looking at an empty concrete patio either, especially when you could be having breakfast or spending summer evenings out there.
Even $100 can make a big difference to a small patio if you choose a few affordable things that you can easily take with you when you move.
As always, start by checking what you already have at home. Maybe you’ll find a suitable chair, a small table, or a few plant pots. You might not need to buy everything new after all.
What to buy for $100
Let’s imagine we have a small patio measuring 6 × 8 ft (1.8 × 2.4 m) and one outdoor chair. Let’s see how we can decorate it without going over budget.
- Outdoor rug — around $20. A 3 × 5 ft (91 × 152 cm) rug would work well for a patio this size. Choose a polypropylene rug designed for outdoor use. You can wash it with water and simply roll it up once it’s dry.
- Two cushions — around $20. One for the seat and another for your back. You can choose matching cushions or pair a solid-colored one with a striped one. Just make sure the cushions have covers designed for outdoor use, otherwise they might develop stains after a few rainy days.
- Two plant pots — around $20. One larger and one smaller. I’d plant rosemary and thyme in them if the patio gets enough sunshine. They look lovely, and you can always snip some fresh herbs straight from the plants for cooking. If you already have the plants at home, you’ll only need to spend money on pots, or you might not need to buy anything at all.
- Small side table — around $25. You don’t need a full dining table here. A lightweight metal table about 14–18 inches (36–46 cm) in diameter is enough for a cup, a book, or a breakfast plate. Just make sure it’s sturdy.
- Solar-powered light — around $15. One portable lantern with warm lighting should be enough for a small patio. You can put it on the table or next to your plant pots. Just remember that the solar panel needs several hours of good sunlight to charge.
That brings us to around $100 in total. Of course, this is an estimated budget, not a set of fixed prices. If you shop during sales or use things you already have at home, you could spend even less.
How to arrange everything on a small patio
I don’t like filling every empty corner with stuff. You can place the rug near the chair, put the side table next to it, and group the plant pots along the wall. That way, they won’t get in the way when you’re walking through or watering the plants.
For rental properties, items that don’t need to be attached to walls or floors are the most convenient. And before buying anything, it’s worth checking your building’s rules. For example, some apartments don’t allow flower boxes to be attached to the outside of balcony railings.
Don’t forget about the plants either. Soil in small pots dries out quickly during summer, so you’ll need to check the moisture regularly for your rosemary and thyme. And if your patio stays in the shade all day, it’s better to choose plants that don’t need much direct sunlight.
The best part about decorating this way is that you won’t have to leave anything behind when you move. Everything comes with you! Roll up the rug, bring the table inside, and take your plant pots to your new place. And who knows, maybe your next home will even have a whole garden for them.
7. Accent lighting techniques for cozy evenings
When we’re having dinner on the patio, we don’t really need bright lighting. Just enough light over the table, a little illumination for the plants, and some soft light near the chairs. But one powerful light overhead can ruin the whole atmosphere, especially if it’s shining right into your eyes.
For a patio, it’s better to use several small light sources at different heights. And you don’t have to spend a lot of money on them. There are plenty of affordable outdoor lights you can install yourself.
How to light up your patio
I’ve put together a few options you can use separately or combine.
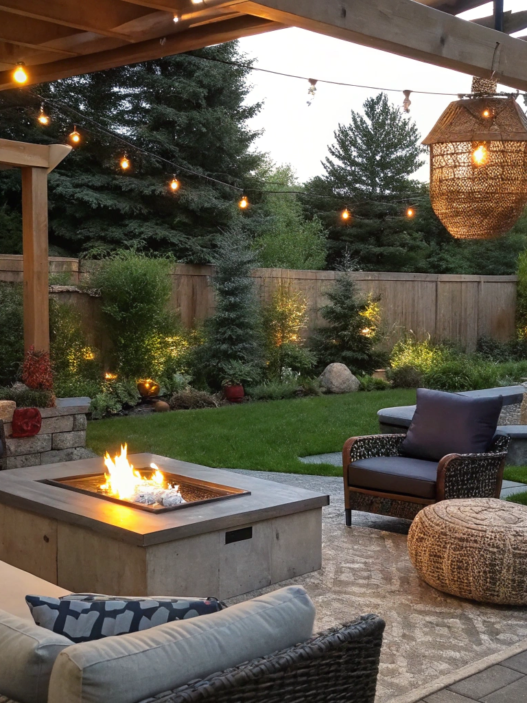
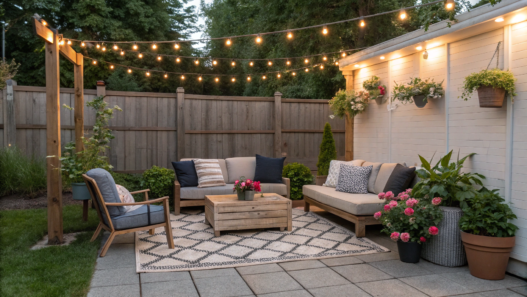
- String lights over the dining area. One of my favorite options for summer evenings. You can hang string lights between the posts of a pergola or along the wall of your house. For a patio measuring 10 × 12 ft (3 × 3.7 m), a string of lights about 24–48 ft (7–15 m) long is often enough, depending on how you hang it. I especially like outdoor string lights with warm white bulbs. And definitely choose shatterproof bulbs, because you never know what might happen outside.
- Small lanterns on the table. Instead of regular candles, you can place two or three lanterns with battery-operated LED candles on the table. They won’t blow out in the wind, and you can safely place napkins or wooden dishes nearby. That’s a big plus for me because I often bring homemade baked goods outside and cover the table with a fabric tablecloth. With real candles, I’d have to keep a closer eye on everything.
- Plant accent lighting. Place one or two small lights at the base of a large plant or near a raised flower bed. Point the light upward so you can see the leaves and branches in the evening. Plants with large leaves look especially nice with this kind of lighting. Just make sure the lights aren’t shining too brightly into your neighbors’ windows.
- Pathway lights. If there’s a garden path leading to your patio, you can install a few small solar-powered lights along it. Place them near turns and steps, where you really need to see where you’re walking. Solar-powered garden pathway lights are a good option here.
What kind of lighting to choose
When buying bulbs, pay attention to their color temperature. For relaxing outdoors in the evening, bulbs with warm light around 2200–2700 K are usually a good choice. They give off a soft, yellowish glow, similar to traditional incandescent bulbs.
There are a few other practical things to keep in mind.
- Choose lights designed for outdoor use. For an open patio, look for models with suitable moisture protection, such as an IP44 rating or higher in areas exposed to splashes. More exposed locations may require better protection.
- Don’t install too many lights. Start by hanging string lights above the table and placing a small lantern near the chairs. Turn them on in the evening and see if there’s enough light for dinner and relaxing. If one area is still too dark, add another light there. This way, you’ll know how many lights your patio actually needs and won’t spend money on extras.
- Make sure the lights are easy to turn off. String lights with a timer or remote control let you switch everything off without walking around the entire backyard before bed.
It’s better to turn off garden lighting at night. Excess light can disturb insects and other nocturnal wildlife. Even for pathways, you can choose motion-sensor lights that only turn on when someone walks by.
Lindy is the one who makes sure we don’t forget to turn off the outdoor lights. And sometimes I get so caught up in conversations over dinner that I completely lose track of time. Especially in summer, when it finally cools down after a hot day and nobody’s in a hurry to leave. I think evenings like these are worth spending a little time setting up the patio lighting for.
8. Mixing textures with rugs, plants, and stone
When I look at photos of backyard patios, I often come across interesting combinations of different materials. For example, stone pavers, wooden chairs, a woven rug, and large pots filled with green plants. You can recreate a similar look in your own backyard, and mixing different materials and textures can make even a plain concrete patio look much more attractive.
What materials can you combine?
There are three main materials — textiles, plants, and stone — and you can use each of them in different ways.
- Outdoor rug. For a patio with a concrete floor, a woven polypropylene rug is a good choice. For a small seating area, you could choose a 5 × 7 ft (1.5 × 2.1 m) rug. Rugs with simple stripes or geometric patterns look nice. Just make sure the rug is suitable for outdoor use and can dry properly after rain.
- Plants in different-sized pots. Try placing two or three planters together, for example, 12, 18, and 24 inches (30, 46, and 61 cm) tall. You could plant ornamental grass in the largest pot and thyme or other low-growing plants in the smaller ones. The pots don’t have to match. Terracotta, ceramic, and simple concrete planters can look great together.
- Wooden furniture. Wood goes well with both stone pavers and woven rugs. For example, you could place two teak or acacia chairs with cushions made from durable outdoor fabric and a small wooden table between them. The furniture doesn’t have to come from the same collection. Just try to keep the wood tones fairly similar. And if you already have old wooden chairs, you can sand them down and refinish them with a protective outdoor coating.
- Natural stone and pebbles. Along the edge of your patio, you can create a decorative strip using river pebbles or flat natural stones, such as flagstone. It will separate the concrete patio from the lawn or flower bed. A strip about 8–12 inches (20–30 cm) wide is enough. If you’re using pebbles, spread them in a layer about 2 inches (5 cm) deep and install edging to keep them from scattering onto the patio. Flagstones can be laid on a prepared base with small gaps between the stones.
How to bring everything together on one patio
It’s best to stick to two or three main colors so the rug, planters, and furniture go well together. For example, you could pair a light-colored rug with beige cushions and terracotta pots. The wood and natural stone will add their own earthy tones to the mix.
It’s better to arrange plants in groups of two or three pots rather than placing them one by one all around the patio. And try to combine taller and shorter plants so they don’t block each other. Make sure there’s enough room around the chairs and table, too.
By the way, we sometimes disagree about this. I can always find room for a few more pots, while Lindy rightly reminds me that we still need to be able to walk around the patio. Especially when you’re carrying something in from the garden and really don’t want to weave your way between plants.
Choose plants based on how much sunlight your patio gets. Lavender and rosemary love the sun, while some ferns prefer partial shade. So before arranging your pots around the patio, check how many hours of sunlight each area gets during the day. That way, your plants will be happier, and you won’t have to keep moving them from one spot to another.
A woven outdoor rug, natural stone, and green plants look great together on the same patio. These three elements have different textures, while wooden furniture adds its warm tones. And you can create a beautiful combination even on a small budget, using things you already have at home or in the garden.
9. Backyard patio near a pool with natural accents
I’ve always liked the combination of light-colored natural stone, wooden lounge chairs, and plants in large pots when decorating a patio near a pool. It works well for an outdoor area where you can sunbathe, relax after swimming, and spend time with family.
I always pay attention to how the space around the pool is designed. I like patios where lounge chairs sit in the shade of a patio umbrella, with ornamental grasses and shrubs growing nearby. Especially when you can see the greenery right from the pool.
How to set up a seating area near the pool
It’s important to plan where the lounge chairs, plants, and walkways will go. There should be enough space around the pool to walk comfortably and get in and out of the water.
Here are some materials you can use.
- Light-colored pavers or natural stone. For the area around the pool, you can choose light-colored travertine or special outdoor pavers with a slip-resistant surface. I prefer sandy and light beige shades. They go well with wooden furniture and greenery. Plus, light-colored surfaces tend to get less hot in the sun than dark ones, although a lot depends on the material itself. The important thing is to choose pavers specifically designed for pool areas, with good traction even when wet.
- Wooden lounge chairs. For a small seating area, two lounge chairs with adjustable backrests should be enough. You can choose teak or acacia models designed for outdoor use. It’s also nice to have cushions with removable covers, which make lying down and reading after a swim more comfortable. And you can place a small side table between the loungers for drinks and towels.
- Large potted plants. Ornamental grasses, low-growing evergreen shrubs, and plants with large leaves look nice around the pool. I’d place two or three large planters near the lounge chairs and plant the rest along the edge of the patio. It’s important to consider your climate and avoid placing pots where they’re constantly splashed with pool water.
- Patio umbrella. For two lounge chairs, you can choose an umbrella about 9 feet (2.7 m) in diameter. A model with an offset pole is a better option, so the pole won’t be right between the loungers. Be sure to check the requirements for the base and stability. Near a pool, the umbrella needs to be securely anchored, and you should close it in strong winds.
What to consider when setting up the area
The ground around a pool often gets wet, so regular smooth pavers aren’t a good choice here. Before buying, check whether the surface is designed for pool areas and how slip-resistant it is. This is especially important if children will be walking around the patio.
You also need to plan for drainage. The patio should have a slight slope toward the designated drains or away from the pool, according to the design. We definitely don’t need puddles around the lounge chairs or on the walkways.
And don’t place furniture or large plant pots near the pool safety fence. Children could use them to climb over it. The pool itself should be protected by a safety fence with a secure gate that meets local requirements, and young children should never be left unattended near the water.
What plants to grow near a pool
It’s a good idea to place a few large terracotta pots with ornamental grasses and low-growing evergreen shrubs near the pool. They go well with light-colored stone and wooden lounge chairs. For a sunny area, you could choose compact varieties of blue fescue, for example. Choose the other plants based on your climate and how much sunlight your garden gets.
Just keep in mind that some trees and shrubs constantly drop leaves, flowers, and seeds. If they grow too close to the pool, all of that will end up in the water. So it’s better to choose plants that don’t drop too much plant debris. After all, who wants to clean the pool every single day?
For planting, use sturdy pots with drainage holes and wide bases so the wind won’t knock them over. Place them a little away from the pool’s edge, leaving enough room to walk around comfortably.
After a few hours of working in the garden, it’s so nice to take a dip in the cool water, then stretch out on a wooden lounge chair in the shade with a cold drink. Light-colored natural stone under your feet, greenery and ornamental grasses nearby… Wood, stone, and plants complement each other, and the patio becomes a comfortable spot to relax by the pool and enjoy warm days.
10. Minimalist patio decor with a big impact
Minimalist patio decor means having less furniture, fewer decorations, and fewer unnecessary details that create visual clutter. Instead of dozens of flower pots, lots of cushions, and decorative figurines, you can keep two comfortable chairs, a small table, and one large plant. This way, even a small patio will look more spacious.
Lindy is usually much quicker than I am at deciding what to keep and what to remove. I can spend ages moving flower pots around, trying to find the right spot for each one. But more often than not, I just need to remove half of them and keep only the plants that look good next to the furniture.
What to choose for a minimalist patio
Think about how you usually spend your time outside. If you enjoy sitting with a book or having your morning coffee, a couple of comfortable chairs will be enough. For family dinners, you’ll need a larger table.
Here’s what you can use to decorate your patio.
- Simple furniture. Two wooden chairs with straight backs and a small table are perfectly fine for a small patio. For an open patio, choose furniture made from materials designed for outdoor use. If you already have chairs, you can simply replace the old cushions or refinish the wood. It’s better to stick to neutral colors, such as beige, gray, or natural wood tones.
- One large potted plant. Instead of lots of small planters, you can use one large pot about 18–24 inches (46–61 cm) in diameter. For a sunny patio, a compact ornamental shrub or tall ornamental grass would be a good choice. If the patio gets partial shade, choose a plant that suits those conditions. I like simple terracotta or concrete pots without patterns, where all the attention stays on the plant itself.
- Small outdoor rug. If your patio has concrete or tiled flooring, a rug can help define the seating area. For two chairs, you could choose a 4 × 6 ft (1.2 × 1.8 m) rug. Solid-colored or with a small geometric pattern. An outdoor rug would work well here. But if you already have beautiful stone pavers, you can easily skip the rug.
- Woven basket for blankets. Place one large basket made from synthetic rattan or another outdoor-friendly material next to the chairs. You can keep a couple of blankets for chilly evenings and some small cushions inside. For example, a basket about 18–20 inches (46–51 cm) tall would work well. For an uncovered patio, it’s better to choose a model with a lid and moisture protection. Even with a basket like this, you shouldn’t leave textiles outside in the rain.
- One simple light. Instead of several strings of lights and decorative lanterns, place a portable light with a warm glow near the chairs. It’ll be enough for relaxing in the evening, and during the day, it won’t draw too much attention.
On a minimalist patio, everything should have its place. When the furniture, plants, and decorations don’t get in each other’s way, your eyes aren’t distracted by dozens of little details. It’s also easier to keep things tidy, and you have more open space to relax. And the nice thing is, you won’t need to buy a lot of new stuff to decorate it this way.
Your refreshed patio
Some people lay pavers themselves, others give old furniture a new life, and for some, a few plants and a string of lights are enough to make them spend more evenings outside.
Tell me in the comments which of these 10 ideas you liked the most. And if you’ve already updated your patio on a small budget, share your experience. What did you manage to do yourself, where did you save money, and what would you do differently now?
I’d love to read your stories and tips. Maybe your experience will help someone finally get started on those backyard changes they’ve been planning for ages.