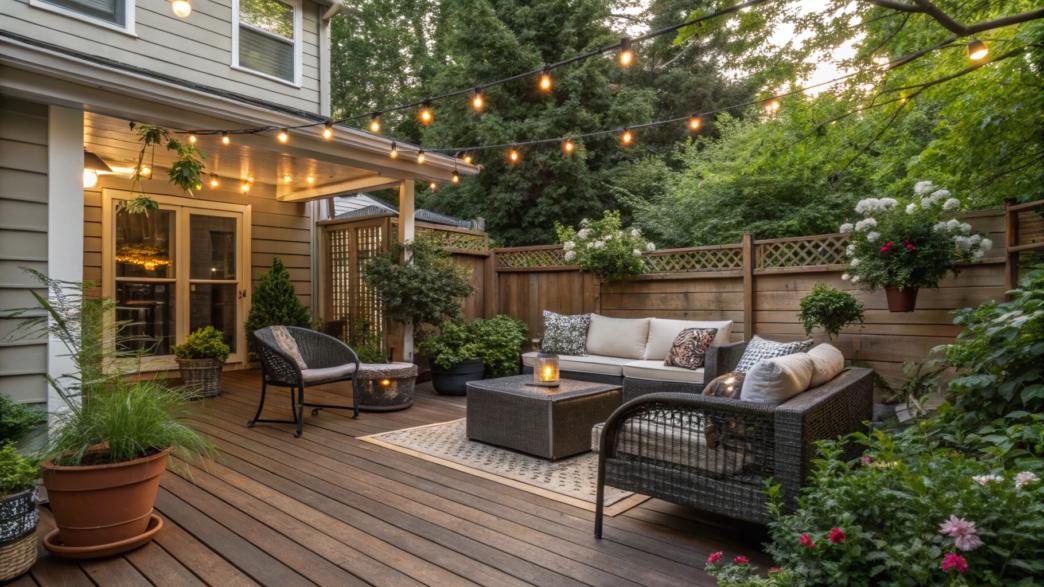
You can update your backyard patio without spending a fortune or doing any major construction work. Even an old concrete patio can be cleaned up, furnished with comfortable furniture, decorated with plants, and turned into a great place to relax.
Lindy and I have spent quite a bit of time working on the space around our home. And I know very well how one little project can sometimes lead to another! But you definitely don’t have to change everything at once.
Here are 10 back patio ideas, some of which you can bring to life over a weekend, while others will take a little more preparation. So choose what works for your backyard and your budget.
1. Cozy concrete patio makeover with budget-friendly decor
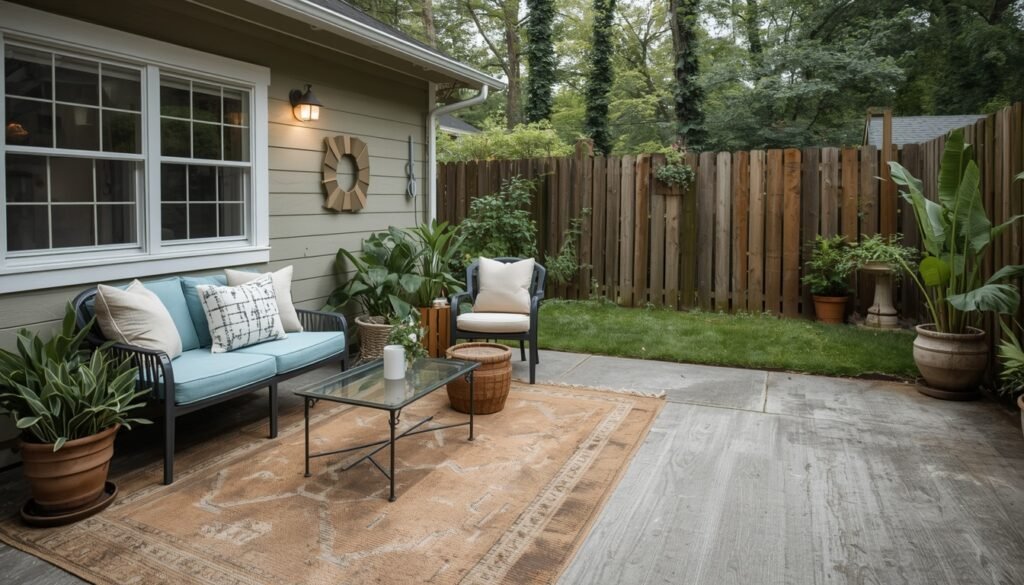
A concrete patio can lose its appeal over time. Dirt and stains appear on the surface, and an old table with a couple of plastic chairs only make it more obvious that the area hasn’t had much attention in a while. But there’s no need to replace the concrete itself. Just give it a good cleaning, lay down a rug, arrange a few comfortable cushions and potted plants, and plan some suitable lighting.
You can make most of these changes over a weekend. And if you already have furniture, the costs will be pretty low. Start with cleaning and whatever stands out the most, then gradually work on the rest.
What you’ll need
- A stiff brush, bucket, and mild detergent for cleaning the concrete.
- An outdoor rug suitable for open patios.
- Outdoor paint and a protective wood finish if your furniture needs refreshing.
- Outdoor furniture cushions or new covers made from water-resistant fabric.
- Several plant pots of different heights.
- Solar-powered outdoor lanterns or LED candles.
How to transform a concrete patio
- Give the concrete surface a thorough cleaning.
First, remove leaves and debris, then wet the concrete with water. Mix a little mild detergent in a bucket and scrub the surface with a stiff brush, paying special attention to stains and darkened areas. After that, rinse away the dirt with clean water and let the concrete dry completely before laying down the rug and arranging the furniture. - Lay a rug in the seating area.
It will cover part of the gray concrete and visually define the space for chairs or a small sofa. Choose the rug size based on your patio’s dimensions and furniture arrangement. Ideally, at least the front legs of the chairs or sofa should sit on the rug. Choose an outdoor rug that’s easy to wash and dry. - Freshen up your outdoor furniture.
If your table and chairs are still sturdy, there’s no need to buy new ones. Plastic furniture can be thoroughly washed, wooden furniture can be sanded and given a fresh protective finish, and metal furniture can be cleaned of rust and painted with outdoor paint if needed. - Arrange cushions on the sofa and chairs.
You don’t have to buy new outdoor furniture. If your sofa and chairs are still in good condition, simply replace the old cushions or covers. Choose two or three matching colors, such as beige, olive green, and terracotta. Buy water-resistant outdoor cushions, but it’s better to bring them inside during long periods of rain. - Arrange plants around the edges of the patio.
Place one large pot near the sofa and a couple of smaller ones beside it. Ornamental grasses, rosemary, or lavender look great if the spot gets plenty of sun and the growing conditions suit the plants. Just make sure the pots don’t block the walkway. - Plan your evening lighting.
A couple of outdoor lanterns near the chairs or LED candles on the table create a really cozy atmosphere on the patio in the evenings. For example, you can use solar-powered outdoor lanterns, which don’t need a nearby electrical outlet.
When Lindy and I were setting up our concrete patio, the first thing we did was give the surface a really good cleaning. Then we moved the furniture and plant pots around several times until we found a comfortable arrangement.
We wanted to leave plenty of open space while creating a little spot where we could sit after working in the garden. In the end, the patio became one of our favorite places to relax.
2. Small space patio with vertical garden walls
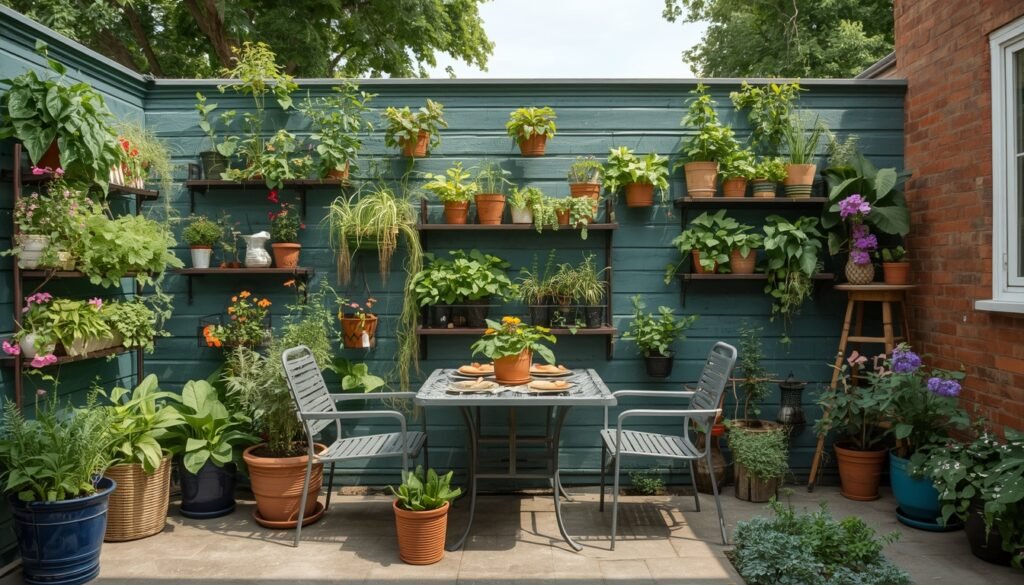
On a small patio, every square foot counts. If you place several large pots on the ground, you might barely have any room left for furniture or a clear walkway. A vertical garden lets you grow plants on a wall or fence without taking up much of the patio space.
You can grow leafy greens, herbs, flowers, and some compact vegetables in this kind of garden. You can even grow strawberries! The main thing is to choose plants based on the amount of sunlight they get and avoid overloading the wall with heavy containers.
What you’ll need
- A wall trellis or sturdy support for the vertical garden.
- Hanging planters with drainage holes.
- Brackets and mounting hardware suitable for your wall or fence.
- All-purpose potting mix for container plants.
- Herb, flower, or compact vegetable seedlings.
- A watering can with a narrow spout for easy watering.
How to set up a vertical garden
- Choose a suitable wall.
Check how many hours of sunlight it gets throughout the day. Basil, thyme, and strawberries do better in a spot with plenty of sunlight, while some varieties of mint and parsley can grow in partial shade. Don’t forget that the plants will need regular watering. - Install supports for the planters.
If your patio is next to the house, you can attach a metal trellis to a suitable wall. If the patio has a sturdy wooden fence, use special pot holders. For a completely open patio, a freestanding vertical plant stand is a good option. In any case, make sure the support is stable and can handle the weight of the planters filled with wet soil. - Arrange the pots at different heights.
It’s better to place larger, heavier containers at the bottom and smaller herb planters higher up. Leave enough space between the pots for the plants to grow, and make sure you can easily reach every container when watering. - Plant your seedlings.
Fill the planters with potting mix, plant the seedlings, and water them well. Thyme, oregano, and basil are good choices for a sunny spot. Parsley, mint, and some leafy greens can go where the sun only shines for part of the day. It’s better to grow mint separately because it spreads quickly. - Set up a comfortable seating area.
Place a small table and a couple of folding chairs across from the green wall. That way, the plants will remain the main decoration of the patio, and the furniture won’t take up the entire space. For a really narrow patio, a table that attaches to the railing can be a good option, as long as the railing is designed to support that kind of weight.
Lindy and I have always looked for ways to fit more greenery into limited spaces, and vertical gardening helps us use every available corner to grow plants. Our own experience keeps showing us that even a small wall of herbs near the seating area can be a useful part of the garden. And you won’t have to head to the store for fresh thyme or parsley!
3. Covered patio lounge with string lights
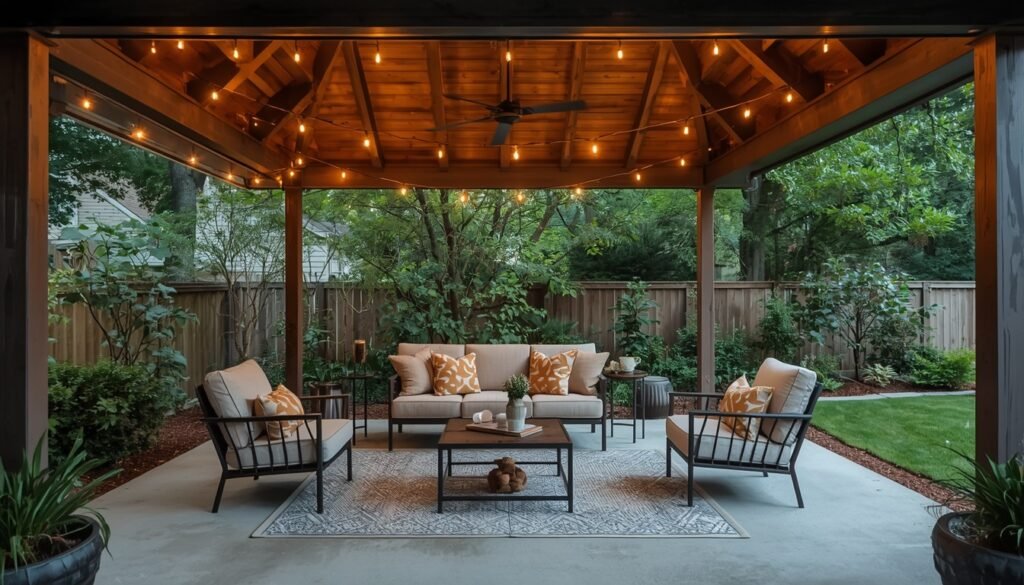
A covered patio has one big advantage — the furniture and seating area are protected from direct sunlight and light rain. And if you hang warm string lights under the roof, you won’t need bright overhead lighting in the evening.
For this kind of space, a small sofa, a couple of armchairs, and a coffee table are more than enough. The main thing is to leave a clear walkway and arrange everything so it’s comfortable to chat, read, or just relax after working in the garden.
What you’ll need
- Outdoor LED string lights with warm lighting, such as Outdoor Warm White LED String Lights.
- Hooks or special mounting clips for the string lights.
- An outdoor sofa or a few armchairs.
- A small coffee table.
- Cushions and a throw blanket for cooler evenings.
- An outdoor rug in a suitable size.
How to set up a covered patio lounge
- Decide where to place the furniture.
I think the sofa should go along one of the walls or railings, with the armchairs placed across from it or to the side. Leave room for a small table between the seats. Make sure the furniture doesn’t block the doors or get in the way of walking through the patio. - Hang string lights under the roof.
First, you definitely need to measure the space and decide where the wires will run. String lights can be hung along the beams or arranged in several parallel lines across the ceiling.
Use warm white outdoor string lights designed for outdoor use. Secure them with suitable hooks without pulling the wire too tight. Heavy string lights with large bulbs are better hung on a separate support cable. - Lay a rug near the sofa.
It will define the seating area and make the floor more comfortable for bare feet. Choose a size that allows the front legs of the sofa and armchairs to sit on the rug. Even for a covered patio, it’s better to choose outdoor rugs that won’t get damaged by occasional moisture. - Choose cushions and blankets for the furniture.
Use firm, fairly thick cushions for the seats and softer ones for the backs. You can also put a couple of decorative cushions on the sofa. And choose removable covers made from water-resistant, fade-resistant fabric. You can prepare a few throw blankets too and keep them in a basket near the sofa. During rainy weather, it’s better to store the textiles somewhere dry. - Check the lighting in the evening.
Lindy turns on the string lights after sunset and checks whether there’s enough light near the sofa and coffee table. You might need a separate outdoor lamp for reading. Extension cords and connections must be rated for outdoor use and protected from water.
I think nobody would argue that it’s nice to have a place near the house where you can sit outside in the evening, even when the weather isn’t great. After a whole day working in the garden, it’s lovely to settle down under the roof with a cup of tea. And string lights let you spend time on the patio after sunset without turning on bright overhead lights.
4. DIY paver patio upgrade for under $200
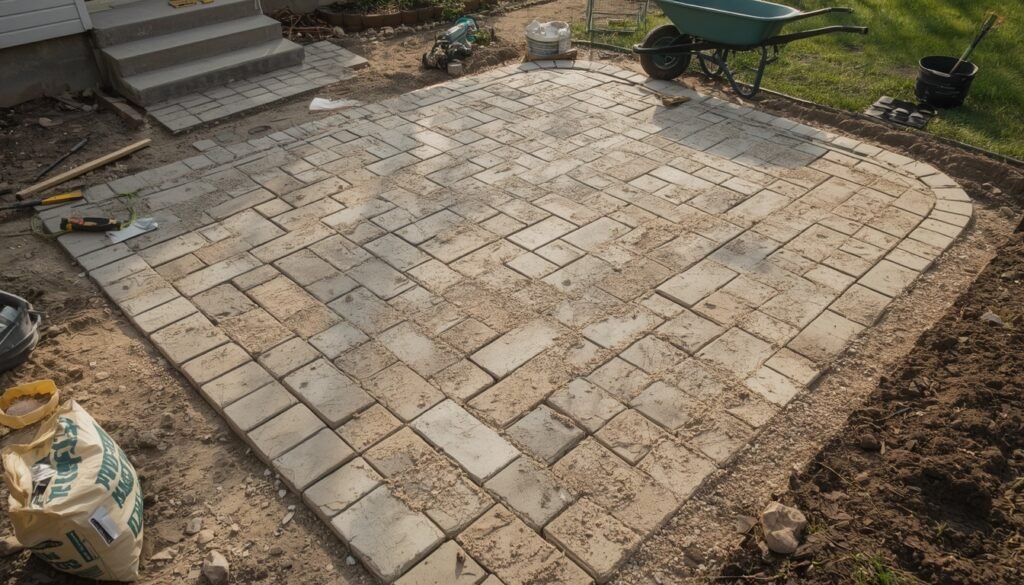
Over time, even a good paver patio starts to lose its original appearance. Stains and cracks appear on the pavers, some areas start to sink, and the sand between the joints gradually washes away. But that’s no reason to replace the entire surface.
If the base is still in good condition, you can replace damaged pavers, level uneven areas, and refill the joints yourself. This kind of update won’t require major repairs, and the materials can easily fit within a $200 budget.
What you’ll need
- New pavers to replace damaged ones, matching the existing surface in material, size, and thickness.
- Leveling sand to restore the base beneath individual pavers.
- Polymeric sand for filling joints
- A stiff brush, bucket, and mild detergent.
- A narrow putty knife for removing old sand.
- A rubber mallet and a level.
- A hand tamper for compacting the base.
How to upgrade a paver patio
- Clean the surface thoroughly.
First, remove leaves and debris, then wet the pavers with water and mild detergent and scrub them with a stiff brush. Pay special attention to stains, darkened areas, and joints. Rinse away the dirt with clean water. Once everything dries, it’ll be much easier to tell which pavers actually need replacing. - Replace cracked and damaged pavers.
Remove the sand from the joints around a damaged paver and carefully lift it out. Inspect the base, clear away any debris, and adjust the leveling layer if needed. The new paver should match the old one in size and thickness. Set it in place and check with a level to make sure it doesn’t stick up above the surrounding pavers. - Level any sunken areas.
If some pavers have sunk below the others, carefully remove them. Check the base and compact it if it’s still structurally sound. Then restore the leveling sand layer and put the pavers back in place. If needed, gently tap them with a rubber mallet. But if the sinking is caused by a damaged or washed-out base, more extensive repairs will be necessary. - Refresh the sand between the pavers.
Remove the old, loose material from the joints to the required depth. Wait until the pavers and the spaces between them are completely dry. Then spread polymeric sand with a brush, filling the joints.
Carefully remove any leftover sand from the surface to prevent stains after wetting. Follow the manufacturer’s instructions for the amount of water and drying time, since different products have different requirements. - Check the patio edges.
Inspect the pavers around the perimeter. If they’ve started shifting, check the condition of the edge restraints. Damaged pieces need to be replaced, and loose ones should be securely fastened. Finally, make sure the surface is even and there are no raised edges left.
Staying under $200 is definitely possible if you’re updating only the damaged areas and pavers that need replacing, rather than the entire patio surface.
Of course, material costs depend on your region, the type of pavers, and the amount of work involved. So before buying anything, check prices at local home improvement stores and calculate how much material you’ll need.
On our property, we’ve gotten used to paying close attention to the condition of paths and paved areas around the house. Especially after winter, when uneven spots become more noticeable. I think it makes sense to first figure out which areas actually need repairs and which ones just need a really good cleaning.
After all, spending a weekend on a small repair is much nicer than taking on a complete patio makeover.
5. Apartment balcony turned mini oasis
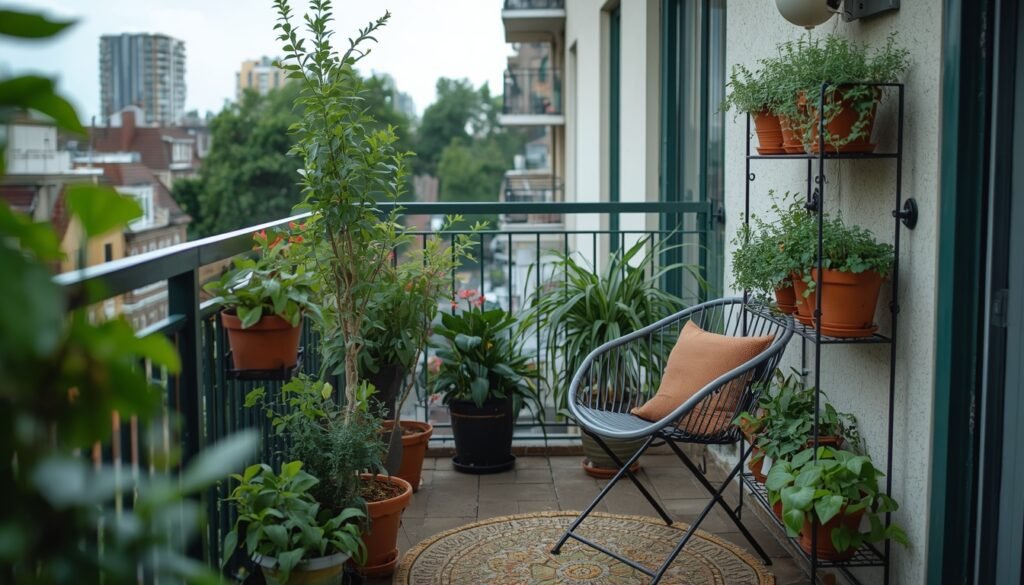
Even if you have a small apartment balcony, I’m sure you can turn it into a place where you can enjoy your morning coffee, read a book, or sit outside in the evening surrounded by the lovely scent of plants. You don’t need much for that. Just think about where to place a chair, some plants, and a small table.
Greenery on a balcony doesn’t just decorate the space. It can also be useful in the kitchen. You can easily grow herbs, leafy lettuce, and some flowers in pots. And if you’re really short on space, you can place some of the plants on a vertical stand.
What you’ll need
- A compact folding table and one or two outdoor chairs.
- Pots or planters with drainage holes.
- Potting mix for container plants.
- Herb and flower seedlings suited to your balcony conditions.
- A small outdoor rug.
- Cushions with removable water-resistant covers.
- Battery-operated outdoor lanterns for evening lighting.
How to set up a small balcony
- Clear the space and measure your balcony.
Remove things you haven’t used in a long time, and wash the floor and railings. Measure the available space so you can choose furniture that fits. Make sure to leave a clear path to the door and don’t block any drains. - Choose compact furniture.
A folding table and a couple of chairs are good options for a narrow balcony. If there’s only enough room for one chair, place a small side table next to it. Folding furniture is easy to put away when you need more open space. Look for pieces made from metal with a protective coating or other outdoor-friendly materials. - Arrange plants along the wall.
Place a few pots on a narrow, sturdy plant stand or use a vertical rack. On a sunny balcony, you can grow basil, thyme, rosemary, and petunias. Parsley, mint, and some varieties of begonias are good choices for partially shaded spots. Choose plants based on how much sunlight the balcony gets, and make sure to use saucers to catch excess water. - Lay down a rug and prepare the seating area.
A small outdoor rug will cover the cold tiles and make the floor more comfortable for bare feet. Put cushions with washable, removable covers on the chairs. It’s better to choose a rug that dries quickly, and make sure water doesn’t collect underneath it. - Plan your evening lighting.
You can place a small LED lantern on the table and hang battery-powered string lights along the wall. Battery-operated outdoor lanterns are another good option. They don’t need an electrical outlet, but before buying, check that the model is designed for outdoor use. - Check that all fixtures are secure. Don’t place heavy pots on the railings, and don’t hang planters on the outside of the balcony without permission and secure mounting. Keep the balcony’s weight limit in mind, especially if you’re using large containers filled with wet soil. In a rented apartment, it’s better to choose freestanding plant stands so you don’t have to drill into the walls.
When Lindy and I first started gardening, we had very little experience but a huge desire to grow our own vegetables, greens, and fruit. And I still believe that you don’t need a big piece of land to start experimenting with plants. Even a few pots of greens on a balcony can give you your first homegrown harvest. And how nice is it to pick fresh basil right before dinner!
6. Backyard fire pit zone on a concrete base
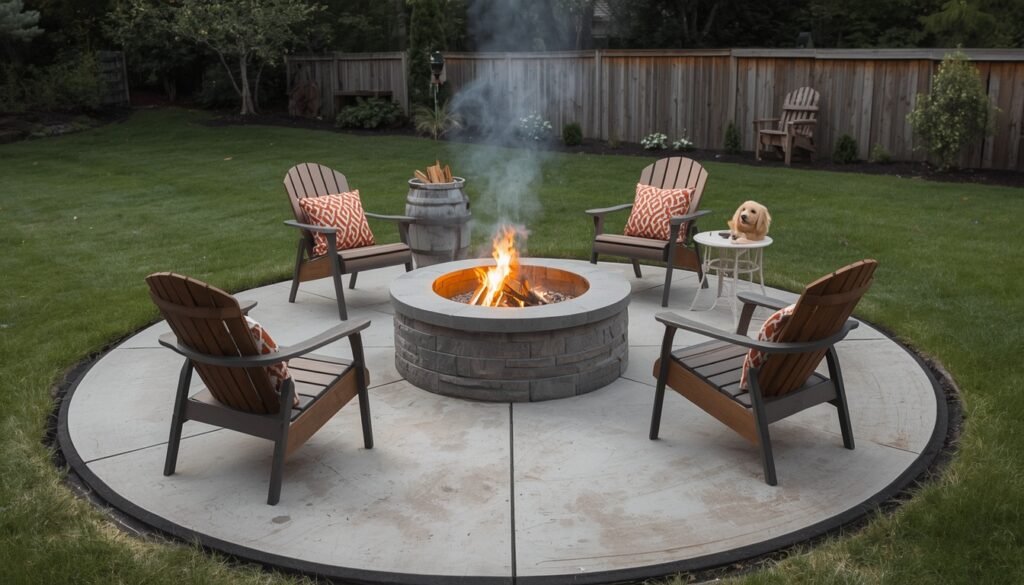
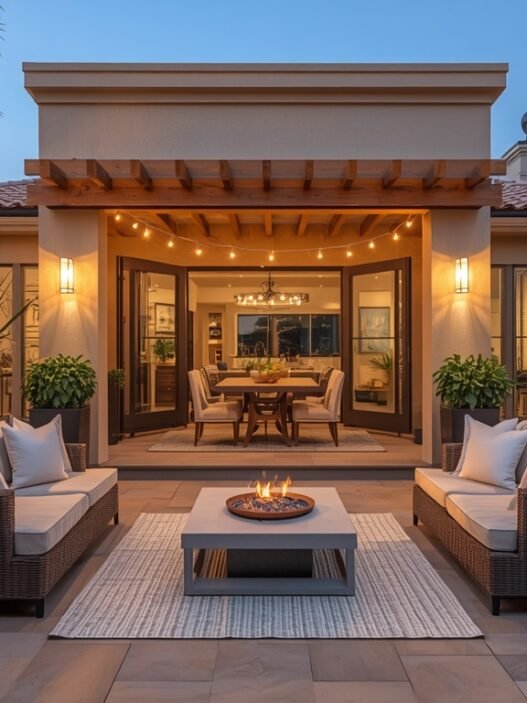
You can turn a concrete patio into a place to gather around the fire in the evenings without rebuilding the patio or pouring a new foundation. All you need is a portable outdoor fire pit, some comfortable chairs around it, and a spot to store firewood.
Personally, I’d vote for a round metal fire pit bowl. You can place it in the center of the seating area and arrange a few chairs around it. It’ll be a great place to spend an evening with family, chat with friends, or just warm up by the fire after working in the garden.
But don’t forget one important thing! Concrete doesn’t burn, but it can crack from intense heat. So you shouldn’t place a fire pit directly on concrete without following the manufacturer’s requirements for protecting the surface.
What you’ll need
- A portable metal fire pit with legs, designed for outdoor use.
- A heat-resistant protective mat or base that’s compatible with the fire pit and suitable for concrete.
- Three or four outdoor chairs made from materials suitable for outdoor use.
- A small side table for drinks.
- A metal ash container with a tight-fitting lid.
- A spark screen, if one isn’t included with the fire pit.
- A fire poker and suitable fire-extinguishing equipment.
How to set up a fire pit seating area
- Choose a safe spot.
The fire pit should stand on a level concrete surface, away from the house, wooden fences, trees, and awnings. For wood-burning fire pits, aim for a distance of at least 10 feet (3 m) from combustible materials, and follow local regulations and the manufacturer’s instructions. There shouldn’t be a roof, branches, or other structures above an open fire. - Prepare the concrete base. Clear the area of leaves, dirt, and dry grass. Inspect the concrete, especially if it already has cracks. Place special heat-resistant protection under the fire pit, rated for the temperature and design of your chosen model. An ordinary decorative rug won’t work for this.
- Set up the portable fire pit.
A metal fire pit bowl with sturdy legs is a convenient choice for a small seating area. Make sure it sits level and doesn’t wobble. If you’re planning to burn wood, choose a model with a spark screen. Don’t use homemade stands or place extra materials underneath the bowl unless the manufacturer allows it. - Arrange chairs around the fire.
You can place them in a semicircle, leaving enough space for a safe walkway. Don’t move the furniture too close to the fire pit — the minimum distance depends on its size and heat output. Place a small table near the chairs for cups and plates. Keep cushions and blankets away from the open flames. - Get everything ready for safe use.
Store firewood away from the fire pit, and keep a separate metal container with a lid for ashes. Never leave the fire unattended, and always put it out completely after use. Before lighting your first fire, also check local restrictions on outdoor fires, especially during dry and windy weather.
When Lindy and I moved to our property in the Pacific Northwest, we wanted to spend as much time outdoors as possible. And the evenings there can get pretty chilly! Sitting by the fire after a long day in the garden has always been one of my favorite parts of country living. The main thing is to think about safety ahead of time, so you can relax later without unnecessary hassle or stress.
7. Neutral palette patio with earthy textures
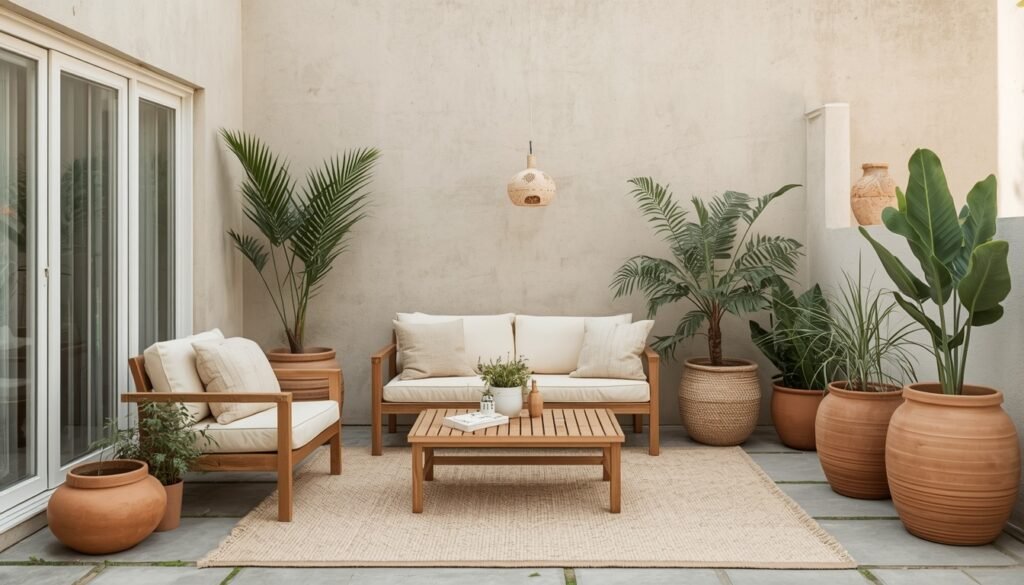
Beige, sand, cream, and light brown — these neutral colors are great for decorating a patio, especially when there’s lots of greenery around. They go well with wooden furniture, clay pots, and stone paving. And you don’t have to buy everything new.
I like the combination of light-colored textiles, wood, and terracotta. For example, you can put beige cushions on simple wooden chairs, lay a woven outdoor rug on the floor, and place a few large pots with plants nearby.
It’s a good idea to use materials with different textures. Even if everything is in similar shades, mixing different textures will make your patio look more stylish and thoughtfully designed.
What you’ll need
- Wooden or wicker outdoor furniture suitable for outdoor use.
- Cushions with removable covers in beige, cream, or brown.
- An outdoor rug with a woven texture.
- Terracotta or ceramic pots for plants.
- A wooden tray or small table.
- Plants with decorative green foliage.
- An outdoor throw blanket for cooler evenings.
How to decorate a patio in neutral colors
- Choose your main colors.
Pick two or three shades that you’ll repeat in the furniture and decor. For example, cream for the cushions, sand for the rug, and terracotta for the pots. If you already have wooden furniture or stone paving on your patio, use their colors as a starting point. That way, you won’t have to replace things that are still perfectly good. - Freshen up the furniture.
You can clean wooden chairs and tables, lightly sand them if needed, and apply a fresh protective finish for outdoor use. If your furniture is metal, leave it as it is or repaint it in a suitable shade. Light brown, charcoal gray, and dark beige go well with natural materials. - Choose a rug with a noticeable woven texture.
A jute-look outdoor rug is a great choice for a patio. Unlike real jute, synthetic outdoor rugs handle moisture better. Place the rug in front of the sofa or under the coffee table. It’ll define the seating area and complement the patio’s natural color palette. - Arrange cushions with different textures.
Put firm seat cushions on the chairs and a few decorative cushions with removable covers on the sofa. You can mix smooth fabric with a noticeable weave or a textured pattern. Just make sure all the covers are suitable for outdoor use and won’t fade in the sun. - Arrange ceramic pots with plants.
Try combining matte beige planters with classic terracotta pots. For a sunny patio, lavender, rosemary, and ornamental grasses are good choices, while hostas or ferns can grow in partial shade if your local climate suits them. Place large pots near the furniture and smaller ones on a sturdy plant stand or beside them. - Decorate the table with simple items.
This part is completely up to your taste! A wooden tray, a small ceramic pot with herbs, and a lantern with an LED candle will do just fine. But don’t cover the entire tabletop with decorations — leave enough room for cups, plates, and other things you’ll actually use.
I’ve always loved natural materials, especially terracotta pots. They look beautiful with green plants, and I think they only get more attractive over time. Whitish water marks and small soil stains may appear on the surface, and the clay itself gradually changes color. That doesn’t bother me one bit! These pots keep decorating our garden and patio for years.
8. Budget-friendly outdoor dining area setup
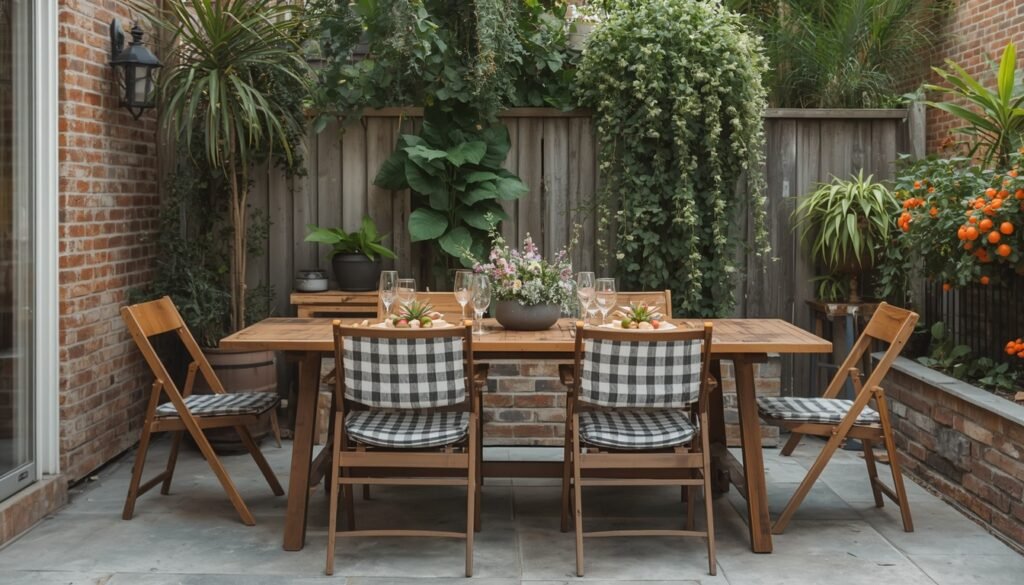
Dining outdoors is much nicer when you have a proper place for it, like a dining area on your patio. You can use furniture you already have or find an inexpensive table and chairs.
I prefer wooden tables with simple folding chairs. This kind of furniture is easy to move around, and when guests come over, you can quickly make more room or bring extra chairs from inside. The main thing is to have a table that’s big enough for plates and serving dishes, and chairs that are actually comfortable. After all, you can spend hours enjoying a summer dinner!
What you’ll need
- An outdoor dining table or an old table suitable for outdoor use.
- Four chairs, preferably folding ones if space is limited.
- An outdoor tablecloth or washable placemats.
- Seat cushions with removable covers.
- A large patio umbrella for sun protection if your patio is uncovered.
- Small pots of herbs to decorate the table.
- An LED outdoor lantern for evening dinners.
How to set up an outdoor dining area on a budget
- Choose a spot for the table.
Pick a level area on your patio, preferably close to the kitchen door so it’s easy to bring food outside and clear the dishes afterward. Measure the available space, including room for chairs when they’re pulled out. Ideally, leave about 3 feet (90 cm) behind them for a comfortable walkway. - Use furniture you already have.
You can clean an old wooden table, sand it if needed, and refresh its protective outdoor finish. For metal chairs, simply wash them, remove any rust, and touch up damaged areas with paint. If you don’t have furniture yet, check out local secondhand stores. Sometimes you can find a perfectly decent set for very little money. - Get the table ready for outdoor meals.
Lay down a water-resistant tablecloth or use placemats that are easy to wash after eating. For example, woven placemats made from synthetic materials are a good choice for a wooden table, while silicone or plastic ones work for a metal table. Pick two or three matching shades based on the furniture colors and your patio decor. - Make sure you have some shade.
If the sun shines on your patio for most of the day, set up a patio umbrella with a sturdy base. A model that you can tilt as the sun moves is the most convenient. Always keep the wind in mind and close the umbrella when you’re not using it. If your patio is covered, you might not need any extra sun protection at all. - Put soft cushions on the chairs.
For hard seats, use cushions designed for outdoor furniture. It’s better to choose removable covers made from water-resistant, fade-resistant fabric. You can secure the cushions with ties so they don’t slide off the chairs. Bring them somewhere dry when it rains. - Decorate the table with plants and set up lighting.
Place small pots of thyme, basil, or rosemary in the center. They won’t block the view of anyone sitting across from you, and you can use the fresh herbs right when you’re preparing food. For evening dinners, one LED lantern or a few small battery-powered lights will do.
With a dining area like this, we get to eat outside more often. Especially in summer, when the kitchen gets hot and you really don’t want to stay indoors. After working in the garden, Lindy and I often spend time at the table, talking about what else needs to be done in the garden.
And when dinner includes our own homegrown vegetables and herbs, that’s a pleasure of its own!
9. Compact patio poolside seating layout
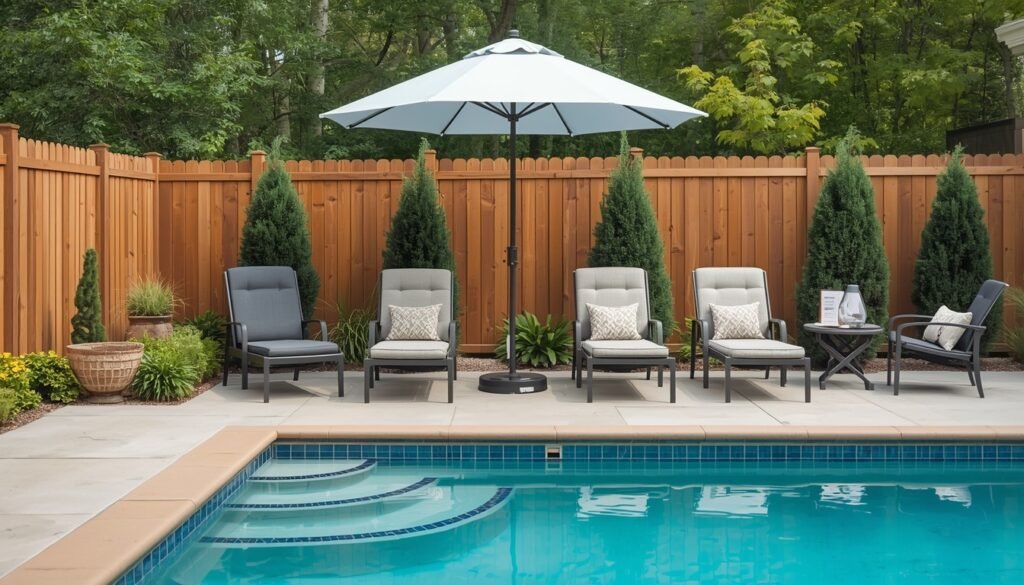
Near a pool, you’ll usually find lounge chairs, a small table, a patio umbrella, and sometimes a few extra chairs for guests. But if your patio is small, all that furniture can take up way too much space. So it’s worth deciding first where you’ll relax after swimming and where you need to keep a clear walkway.
I think two compact lounge chairs with a small table between them would be a good choice. That’s plenty for a space with limited room. And if you use folding furniture, you can put it away once pool season is over.
What you’ll need
- Two compact or folding outdoor lounge chairs.
- A small side table made from water-resistant material.
- A patio umbrella with a sturdy base, if there’s no shade near the pool.
- Lounge chair cushions made from quick-drying materials.
- A small basket for towels.
- Potted plants to decorate the seating area.
How to set up a poolside seating area
- Plan your furniture layout.
First, measure the available space next to the pool. Figure out where people will get in and out of the water and where the walkways are. Keep access to the pool clear and don’t block the paths with furniture or plant pots. - Place two lounge chairs side by side.
Arrange them parallel to each other, preferably in a spot where you can relax in the sun or light shade. For a small patio, choose models with adjustable backrests. If the lounge chairs are foldable, they’ll be easier to store during winter. Be sure to check their dimensions when fully unfolded before buying. - Place a table between the lounge chairs.
You can put drinks, a book, or sunscreen on it. It’s better to choose a small table made from plastic, aluminum, or another water-resistant material. Glassware isn’t a good idea near the pool — broken glass can be hard to spot on a wet surface, and someone could get hurt. - Set up a patio umbrella.
If your patio is completely open, place the umbrella beside the lounge chairs so its base doesn’t block the walkway. A compact model with an adjustable tilt is a good option for a small area. The base should match the umbrella’s size and the manufacturer’s requirements. Always close the umbrella when it’s windy. - Prepare cushions and a place for towels.
For lounge chairs, it’s best to use cushions with quick-drying filling and outdoor covers. You can place a plastic or woven basket nearby for clean towels. Wet towels should be hung up to dry right after swimming instead of being left in the basket. - Arrange plants behind the seating area.
You can place a few pots with ornamental grasses or flowers along a wall or fence. Try to choose plants that don’t drop too many leaves or petals into the water. Large pots should stand securely and not get in the way of walking around the pool.
Pay special attention to the surface near the water. It should be slip-resistant, level, and free from damaged areas. It’s better not to use regular rugs near the pool. They get wet, take a long time to dry, and can slide on wet surfaces, increasing the risk of falling.
I actually think it’s better to leave plenty of open space around a pool. Two comfortable lounge chairs, a small table for drinks, and a little greenery are more than enough for relaxing after a swim. And being able to walk around the pool comfortably is much more important than having an extra chair that hardly anyone uses.
10. Seasonal patio decor swaps for year-round style
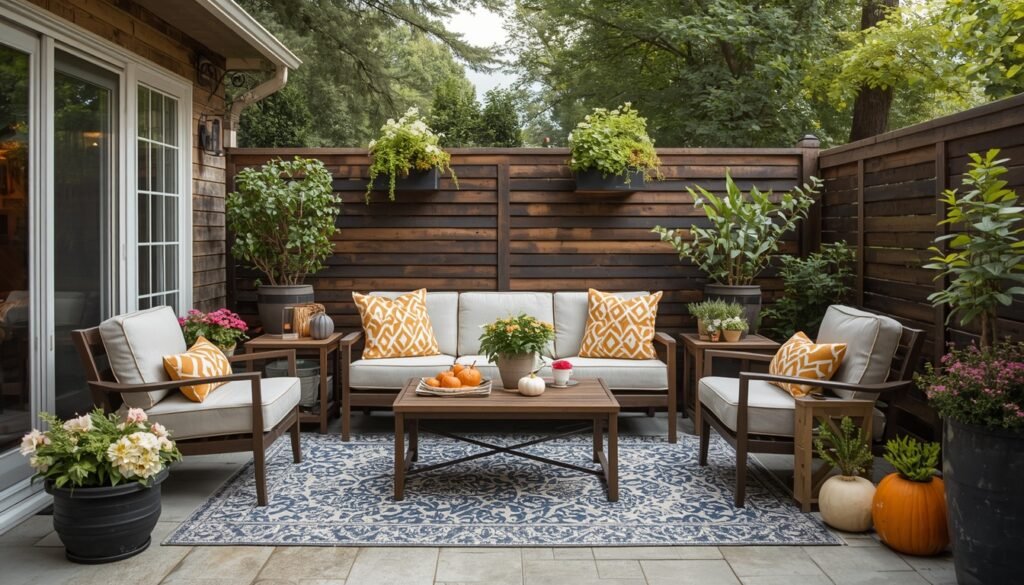
You don’t have to completely change your patio decor every season. Outdoor furniture, tables, and large plant pots can stay in place all year round. But cushions, flowers, tablecloths, and small decorations are easy to switch out depending on the season.
This approach to decorating a patio helps save money, and I like that. For example, in spring, you can decorate the patio with flowering plants, in summer, use colorful textiles, and in fall, arrange pumpkins and lanterns. And you won’t need to buy a new furniture set for any of it!
What you’ll need
- Cushions with interchangeable covers in different colors.
- Throw blankets for cooler evenings.
- Flower pots and planters that can be reused.
- Seasonal plants and flowers.
- Decorative lanterns with LED candles.
- Small seasonal decorations — pumpkins, wreaths, and evergreen branches.
- Storage containers for decorations when they’re not in use.
How to change your patio decor with the seasons
- Arrange flowering plants in spring.
After winter, clean the furniture and patio surface, check the condition of your pots, and get them ready for new plants. Pansies, primroses, daffodils, and tulips are good choices for spring decorating. Pansies handle cool spring weather well and bloom for a long time when conditions are right. Put cushions with light green, cream, or pale yellow covers on the chairs. - Use bright colors and lightweight fabrics in summer.
Replace spring flowers with petunias, geraniums, or other plants suited to the summer heat in your area. For cushions, you can choose terracotta, blue, or yellow.
Put a light-colored tablecloth on the table and place a basket with lightweight blankets near the chairs in case the evening gets chilly. Don’t forget to water your container plants regularly — the soil in pots dries out especially quickly in summer. - Decorate your patio with pumpkins and seasonal flowers in fall.
I absolutely love the combination of chrysanthemums, small pumpkins, and dried ornamental grasses. Place a few pumpkins near the entrance or next to large plant pots, and swap the summer cushion covers for burgundy, mustard, or brown ones. Lanterns with LED candles are a great choice for evening lighting. Just don’t place decorations where they’ll block the walkway. - Use cold-resistant decorations in winter.
If your climate allows you to use the patio during winter, decorate it with evergreen branches, a wreath, and outdoor string lights with a warm glow. You can leave dwarf conifers, cold-hardy shrubs, or ornamental grasses in pots, as long as they’re suited to your region.
For outdoor winter use, it’s better to choose containers made from frost-resistant plastic or fiberglass. Regular terracotta and ceramic pots should be emptied of soil and stored somewhere dry. Keep cushions and blankets indoors, bringing them out only when you’re relaxing outside. - Organize storage for seasonal decorations. Set aside a few plastic storage bins with lids and label them by season. Before storing decorations, clean them and make sure they’re completely dry. Wash removable cushion covers according to their care instructions and store them separately. That way, when the next season comes around, you won’t have to search for decorations all over again or buy things you already own.
I prefer refreshing our patio with seasonal plants and decorations, using the pots and decor we already have. I especially love decorating the patio in fall with chrysanthemums, pumpkins, and lanterns with warm lighting. And when the season ends, we simply put the decorations away in storage. That way, the patio changes with the seasons, and most of our things last for years.
What does your patio look like?
I’m always curious to see how other people set up the space around their homes. Especially when old furniture gets a new purpose, and an ordinary patio gradually becomes a favorite spot for family evenings.
Tell me in the comments what your patio looks like right now and what you’d like to change about it. Maybe you’ve been planning to set up a fire pit, start a small garden in pots, or simply refresh the old paving?
And if you’ve already given your patio a makeover without major renovations, be sure to share your experience. I’d love to know whether you were happy with the results.