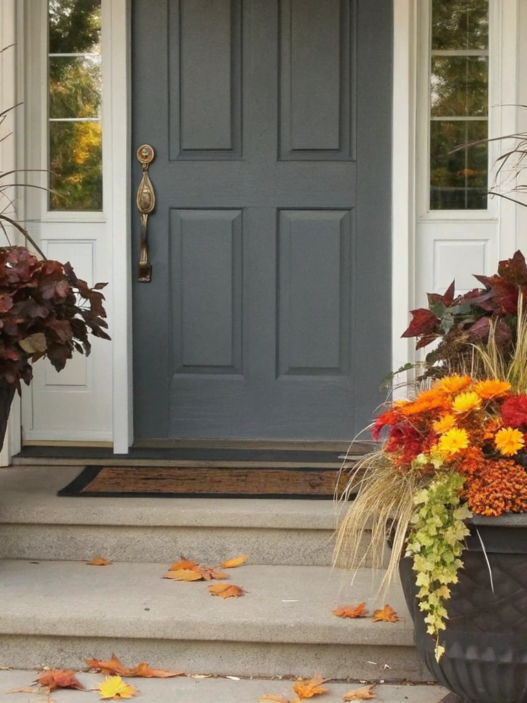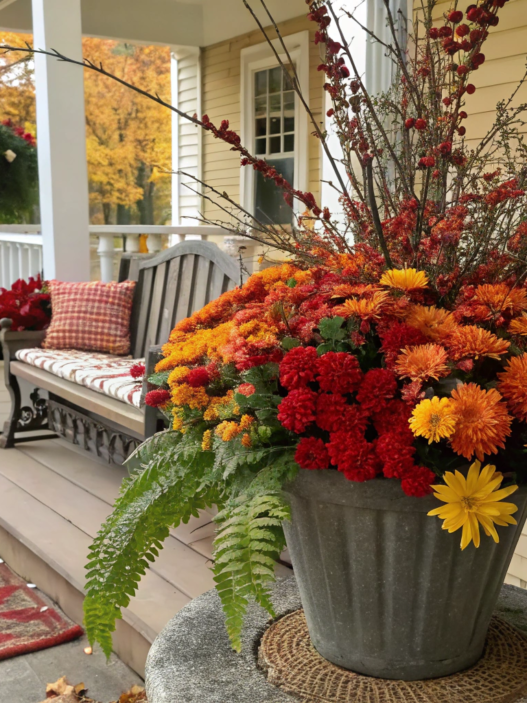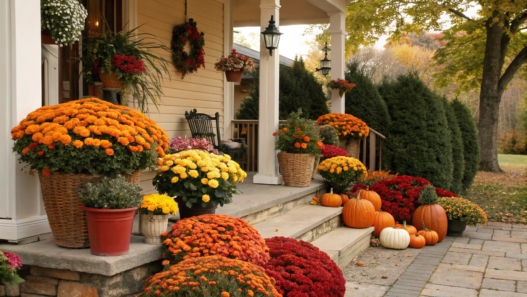
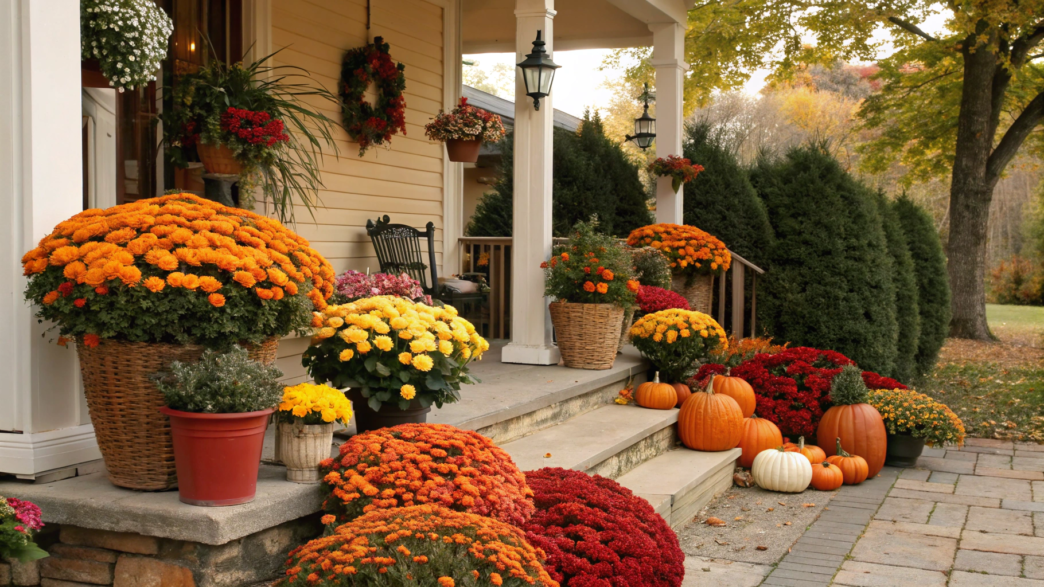
In fall, mums on the front porch are almost always among the first plants I want to bring closer to the entrance. They stay in bloom for a long time and handle cooler weather well.
I usually think not only about the color of the mums themselves, but also about what to put them in, what height to place them at, and what to pair them with.
To make the porch look attractive, a couple of well-placed plants or one large arrangement with them is enough.
In this article, we’ll go through 10 mums flowers front porch ideas that make fall look expensive and learn how to use mums near the entrance so everything looks thought-out but not overloaded.
1. Layered mum planters with pumpkins
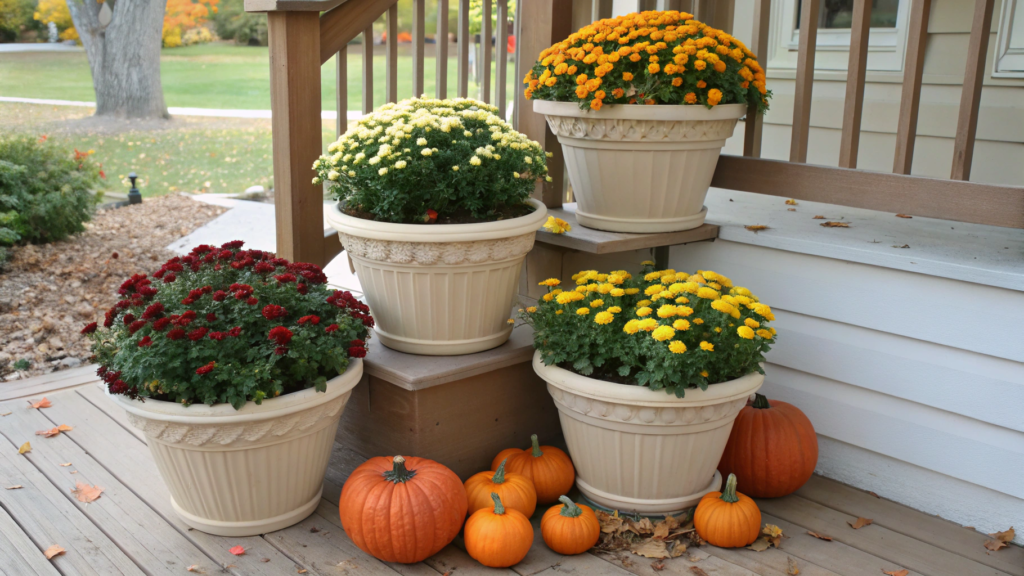
One of the easiest ways to decorate the porch for fall is to arrange mums at different heights and fill the spaces between the pots with pumpkins. This kind of arrangement looks more natural than several identical plants lined up in a row and doesn’t require a complicated setup or a lot of decor.
What you’ll need for the arrangement
- 2–3 large mums in pots about 12–14 inches (30–36 cm) in diameter;
- planters with drainage holes — simple, matte ones without bright patterns work best, for example, Classic Home and Garden Honeysuckle Resin Flower Pot Planter;
- ready-made potting mix for container flowers — loose enough so water doesn’t sit around the roots after watering;
- a wooden crate, low stand, or upside-down planter for the second level;
- 4–6 pumpkins in different sizes and shapes;
- a small watering can or a hose with a gentle spray for watering.
If the mums stay in their nursery pots and you simply place them inside decorative planters, you won’t need any extra soil at all. If you do decide to repot them, don’t use heavy garden soil from your yard — it compacts easily in containers and drains water less effectively.
Start with two or three large mums
For the lower level, pots about 12–14 inches (30–36 cm) in diameter work well.
You can place one directly on the porch floor or a step and raise the second one on a wooden crate, low stand, or upside-down pot. If the porch is spacious enough, add a third level about 6–10 inches (15–25 cm) higher than the first.
There’s no need to line everything up perfectly. A small difference in height looks more natural, and the flowers don’t block one another.
Place pumpkins between the pots
I don’t think there’s any need to buy five completely identical orange pumpkins. It’s much more interesting to mix different sizes and shapes.
You can use:
- one large classic pumpkin;
- two or three smaller ones;
- one white or cream pumpkin;
- one gray-green pumpkin, if you can find one.
Some of the pumpkins can be tucked slightly under the mum foliage. This fills the empty spaces between the planters and makes the plants and pumpkins feel like one arrangement.
Choose two main colors
In fall, garden centers are full of rows of yellow, red, white, orange, and burgundy mums. But for the porch, I would stick to one or two shades.
For example, you can combine burgundy and cream mums or orange and dark red ones. Larger blocks of color are easier to see from the walkway and pair well with pumpkins.
Lindy usually keeps an eye on our fall arrangements so they change from time to time. Sometimes one pumpkin from our garden turns out crooked, another is too small, and a third looks nothing like what was shown on the seed packet. Those are exactly the pumpkins I use most often in the arrangement. They’re perfect for filling the spaces between the pots, and there’s absolutely no need to buy decorative pumpkins just for the perfect shape.
2. Symmetrical porch step mum display
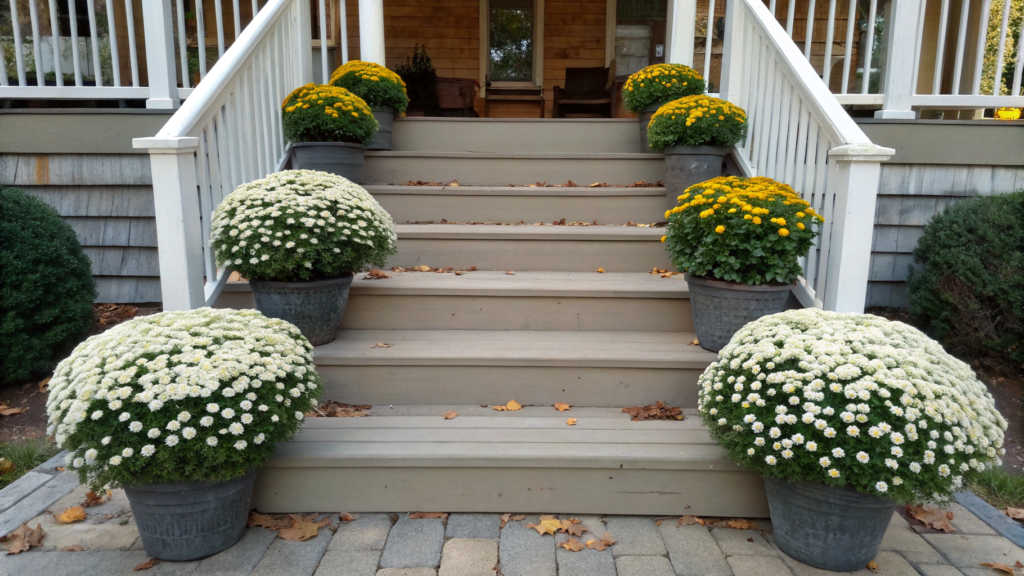
If your porch has several steps, you can use them to place mums in pairs on both sides, repeating the same arrangement on each level. There’s no need to come up with anything complicated — just choose plants that are roughly the same size and leave enough space in the center so it’s easy to walk up and down the stairs.
What you’ll need for the arrangement
- 4–6 mums that are roughly the same size;
- matching or very similar planters about 10–12 inches (25–30 cm) in diameter;
- ready-made potting mix for container flowers, if you plan to repot the plants;
- 2–4 small pumpkins, if you want to add some fall decor between the planters;
- if needed, protective saucers or stands under the pots so water doesn’t sit on wooden steps after watering.
If the mums already come in neat nursery containers, there’s no need to repot them just for this arrangement. Sometimes it’s enough to place the plastic pot inside a nicer planter.
Start with the top step
Place one mum on each side of the top step. Then repeat the same pair farther down — it doesn’t have to be on the very next step. If the staircase is long, you can skip one step and place the next pair lower down.
This way, the plants will be evenly distributed along the staircase, with enough open space between them. On a staircase with 5–6 steps, three pairs of mums are usually enough — one near the top, one around the middle, and one closer to the bottom.
If the staircase is wide, you can shift each lower pair slightly outward by 2–4 inches (5–10 cm). This makes the lower part of the staircase look wider and keeps the plants from sitting too close together.
Choose plants of a similar size
For this idea, that really matters. One huge mum on the left and a small one on the right will immediately throw off the whole arrangement.
But there’s no need to find two completely identical plants either. It’s enough if the bushes are roughly the same height and width. A difference of a few inches is usually barely noticeable, especially once the flowers are fully open.
It’s also best to choose one mum color for all the steps. For example, deep burgundy, cream, or rich yellow. Here, repeating the same shade actually works in our favor.
Leave enough room to walk through
When you start arranging the pots, it’s easy to forget that there still needs to be a comfortable walkway between the two sides of the staircase.
I try to leave at least 30–36 inches (76–91 cm) of open space in the center. I also don’t place the planters too close to the very edge of the step, especially if the pot is tall or the porch is exposed to strong wind.
You can place a few small pumpkins near the lower planters, but it’s better not to overdo it. The symmetry already gives the arrangement enough detail.
When we first started arranging mums on the steps, I kept adjusting the pots, trying to make the spacing the same on both sides of the staircase. Lindy couldn’t understand why I kept moving the same pot by a couple of inches.
But if you step back and look at the whole porch, the difference in spacing between the pots is really noticeable. Now I first arrange all the pots on one side and then simply repeat the same placement on the other. That makes it much easier to keep the symmetry.
3. Rustic crate mum arrangement
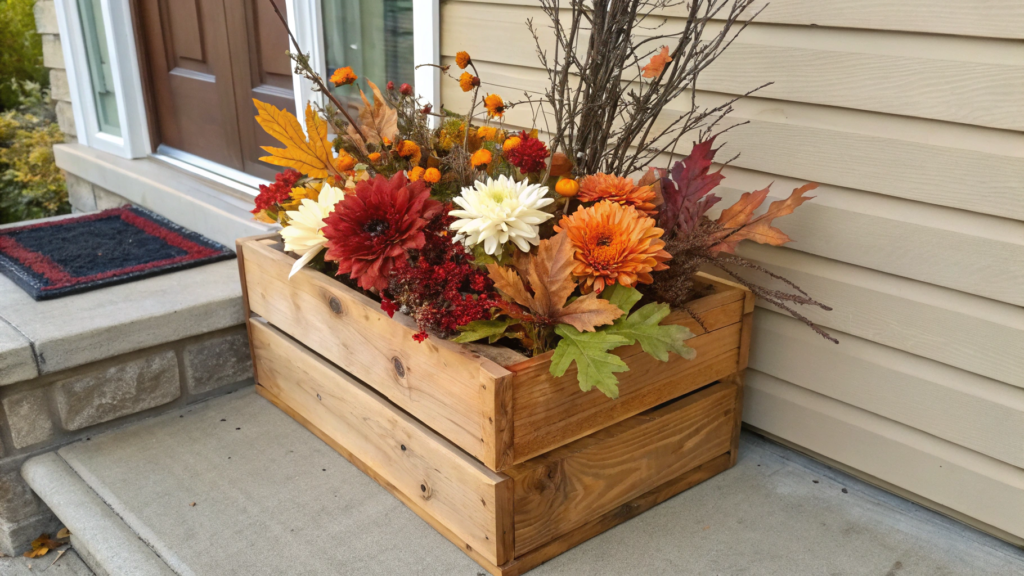
For this idea, you’ll need a wide wooden crate that can hold the whole fall arrangement in one place. It works well near the front door, against the wall of the house, or in a porch corner. Unlike several separate pots, this setup immediately looks like one finished decorative element.
What you’ll need for the arrangement
- a wooden crate about 24–30 inches (61–76 cm) wide;
- 2–3 small mums in pots about 6–8 inches (15–20 cm) in diameter;
- 2–3 small pumpkins in different shapes;
- pot stands or saucers if needed, so water doesn’t collect inside the crate after watering.
It’s better to choose a crate made from light or slightly stained wood. If you already have an old utility crate, you can use that too, but first clean the wood well, remove any splinters, sand it, and refresh the finish if needed. It should still look neat enough to sit on the porch.
Arrange the mums
I don’t think there’s any need to repot the plants. It’s easier to leave them in their nursery pots and place them inside the crate.
Start by placing the largest mum slightly closer to the back, then put one or two smaller ones toward the front and a little off to the sides. There’s no need to line the plants up in a straight row. A slight offset helps each one stay visible.
The mums also shouldn’t be packed too tightly together. Leave a little space between the pots so the foliage doesn’t get crushed and the plants are easy to water.
Place the pumpkins
Once the flowers are in place, you’ll be able to see where there are empty spaces. That’s where you can add two or three small pumpkins.
Place one closer to the front edge of the crate, another between the pots, and the third can simply sit next to the crate on the porch floor. There’s no need to fit everything inside.
A mix of classic orange pumpkins with one cream or light green pumpkin works well.
Don’t cover the wood completely
In this arrangement, the crate itself matters just as much as the flowers. So it’s better to leave part of the front and side panels visible instead of covering them completely with foliage and pumpkins.
It looks much better when you can see the wood, the plants, and the pumpkins separately, while they still read as one arrangement. That way, the crate becomes part of the decor instead of just a container you’re trying to hide.
We use similar wooden crates around the homestead quite often, but for the porch I only choose the ones that can be cleaned up properly. A good cleaning and light sanding are usually enough, and sometimes I also refresh the finish. A neat crate like that works perfectly as part of the arrangement.
4. White mum and lantern entryway
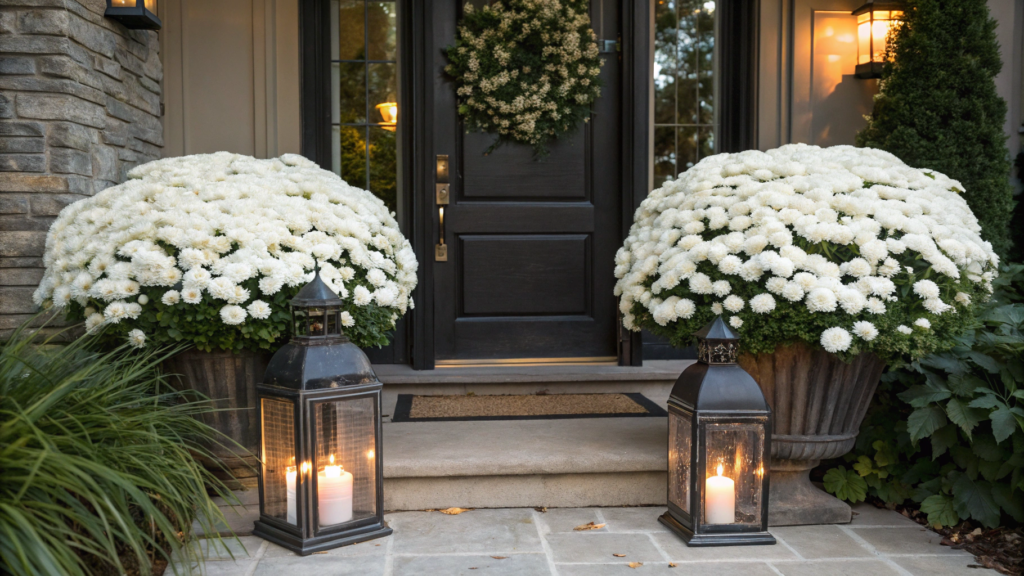
White mums work really well for decorating the area around the front door. They don’t need much extra decor — a few large plants and a pair of lanterns are enough to frame the entrance and make it stand out in the evening.
This combination looks best next to a dark door or wooden exterior. The white flowers stand out clearly against that kind of background, while the lanterns softly light them from below.
What you’ll need for the arrangement
- 3 white mums in pots about 10–14 inches (25–36 cm) in diameter;
- simple neutral-colored planters, if you want to hide the nursery pots;
- 2 outdoor lanterns in different heights — one about 20–24 inches (51–61 cm), the other around 12–16 inches (30–41 cm);
- LED candles for the lanterns, preferably with a timer, such as Homemory Outdoor Waterproof Flameless Candles.
I always use LED candles for this. There will be plants, dry leaves, and possibly wooden surfaces nearby, so there’s really no need for an open flame near the entrance.
Place the mums by the door
Place one large white mum on one side of the entrance and two slightly smaller ones on the other. You can space them out a little so the foliage and flowers don’t blend into one large mass.
There’s no strict mirrored layout here. Both sides of the door are still decorated, but the arrangement doesn’t look like it was measured with a ruler.
If the entrance is narrow, you can keep it to two large mums — one on each side.
Place the lanterns
Place the lanterns lower than the mums, closer to the base of the arrangement. The taller lantern can go next to the single mum, while the shorter one can sit near the group of two plants.
This way, the lanterns visually connect both sides of the entrance.
Keep white as the main color
White mums create large light areas around the door, while the lanterns add darker vertical shapes. So I don’t think any additional colors are really needed here.
Black, dark gray, or metallic lanterns work well with white mums. If the door is very dark, you can choose lanterns made from light wood so they don’t disappear into the background.
Don’t place the lanterns directly under the foliage. Leave a little space between them and the pots so it’s easy to water the plants and change the batteries in the candles.
This arrangement looks best in the evening. White mums are still easy to see at dusk, while the lanterns softly light the lower part of the arrangement around the pots.
I usually use candles with a timer and set them to turn on around dusk. Then the lanterns light up on their own in the evening, and I don’t have to remind Lindy about it every time.
5. Cascading Mum Porch Corner
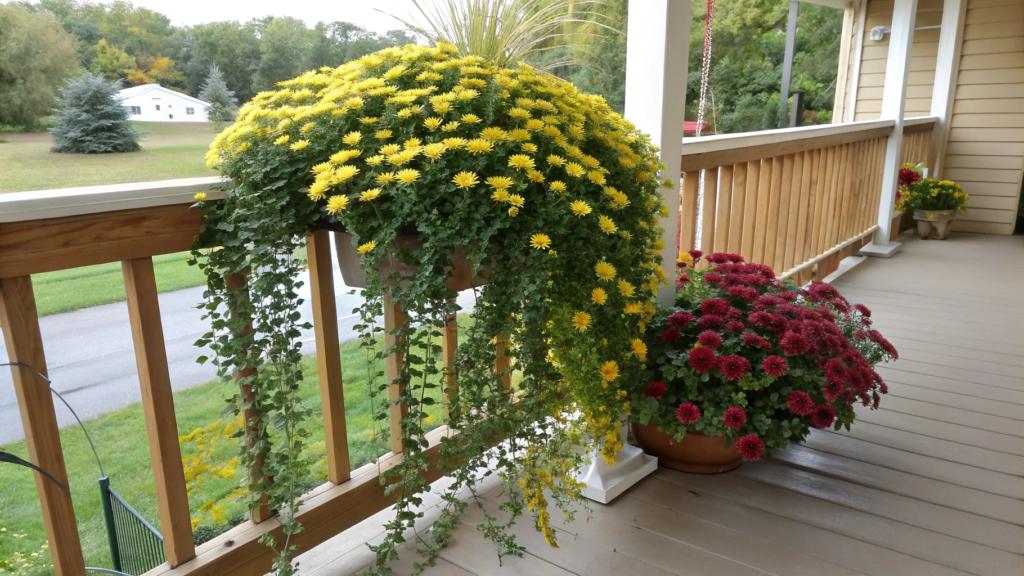
The main plant in this arrangement is a cascading mum — it spreads outward and partly trails over the edge of the planter. A plant like this fills an empty porch corner really well and takes up space very differently from a typical rounded mum.
One good option is the Skyfall series. These mums grow to about 8–14 inches (20–36 cm) tall, but they can spread to 20–30 inches (51–76 cm) wide. They have flexible stems and a spreading shape, which is why they are also grown in hanging baskets.
What you’ll need for the arrangement
- 1 large cascading mum, for example from the Skyfall series;
- a planter about 10–12 inches (25–30 cm) in diameter with good drainage holes;
- a light potting mix for containers that lets excess water drain out quickly;
- a sturdy tall plant stand or a planter on legs to lift the plant off the floor;
- if needed, a plant stand.
There’s no need to look for a regular mum with especially long stems. For this arrangement, it’s better to choose a spreading variety with a trailing growth habit right away, like Skyfall. Its shape is much wider than it is tall, so the stems naturally spread outward and partly hang over the edge of the planter.
Classic cascading mums look similar, but they are usually trained over the course of the season by gradually directing the long stems downward. For porch decorating, it’s much easier to use an already grown plant with the right shape.
Raise the plant off the floor
Place the planter on a sturdy stand or use a tall planter, so the trailing stems can fall freely downward and outward.
It’s better to leave a little open space around the plant in the porch corner. A cascading mum quickly takes up a lot of width, and if you place several other large pots next to it, its shape will simply get lost.
Light
This is always worth keeping in mind. Even if the porch corner looks perfect size-wise, first check how much sun it gets. Mums need good light, and a cascading shape doesn’t change the plant’s basic needs.
Drainage matters too. Water shouldn’t sit in the planter after watering — this is especially important for mums in containers. For the Skyfall series, the grower also notes full sun placement and a moderate water need.
As you can see, it’s convenient that you don’t need to build a whole arrangement from five separate pots to fill one corner. If the mum has grown well, its stems will naturally cover part of the planter and spread to the sides. You just need to leave enough space around it and not try to fill every open spot with extra decor.
6. Vintage basket mum display
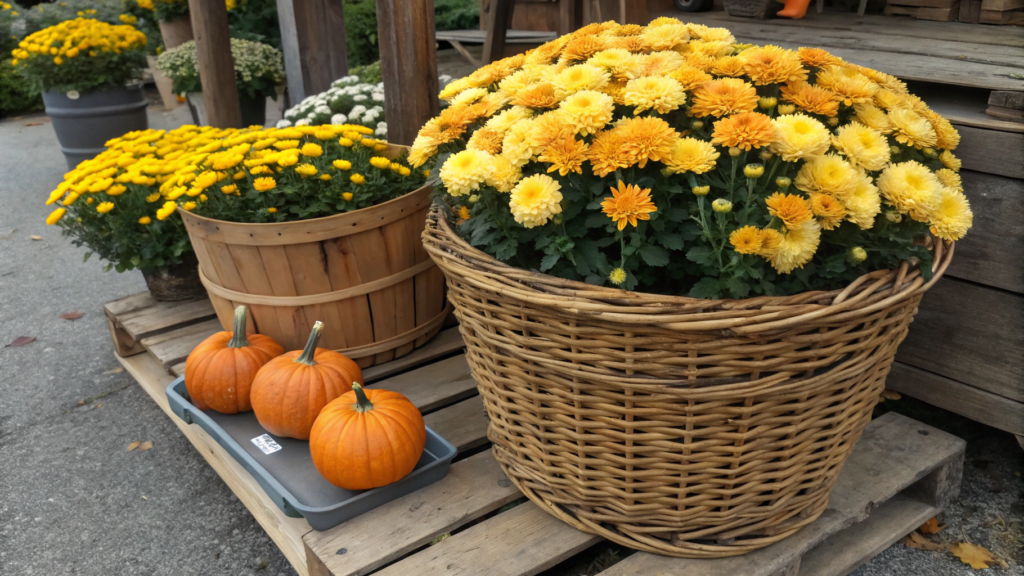
For this arrangement, use a large woven basket instead of a regular planter. An old basket for picnics, harvest, or shopping works well — the main thing is that it should be deep enough for the plastic pots, but not so deep that it hides the mums themselves.
You can leave the flowers in their nursery pots and simply place them inside. If there’s space left between them, add a few small pumpkins. It’s better to place a tray or some other water protection on the bottom so the weaving doesn’t get damp after watering.
What you’ll need for the arrangement
- one large woven basket about 20–28 inches (51–71 cm) wide
- 1 large or 2–3 small mums in plastic pots;
- a wide tray for the pots or a dense waterproof liner;
- 2–3 small pumpkins, if there is free space left in the basket;
It’s best to find a basket with tight weaving and sturdy handles. A real old basket can work perfectly well, but first it’s worth checking the bottom and edges. If the wicker is already breaking from light pressure, it’s better to leave it for dry decor.
Don’t plant the mums directly in the basket
It’s easier to leave the plants in their nursery pots. Place a wide tray on the bottom of the basket, and then set the mums on top of it. That way, water won’t keep getting onto the weaving after watering, and the plants will be easy to remove at the end of the season.
The basket itself stays as a decorative outer layer, while the plant keeps growing in its regular container.
If the basket is wide, you can place two or three small mums side by side inside it. In a compact basket, it’s better to keep one large mum — the flower mound should be noticeably wider than the top edge of the basket.
Leave part of the weaving visible
There’s no need to cover the basket with flowers all the way down. The top of the mums can be very full, but at least a few inches of the weaving should stay visible.
If there is free space left between the pots inside the basket, place one or two small pumpkins there. You can put one more next to the basket.
Match the flowers to the tone of the basket
Older wicker usually has a warm honey or brown tone. Burgundy, cream, yellow, and muted orange mums look especially good next to it.
There’s no need to mix four different colors in one basket. If you’re using several plants, stick to one shade or two close ones. That way, both the flowers and the woven texture stay visible — which is the whole reason we used a basket instead of a regular pot.
I always clean the basket well first and check the bottom. If it has a few scuffs and some darkened weaving, I leave them alone. Those little signs of age are exactly what give it that vintage look, so I wouldn’t fully repaint or refinish a basket that is still sturdy and neat.
7. Mum and ornamental kale planters
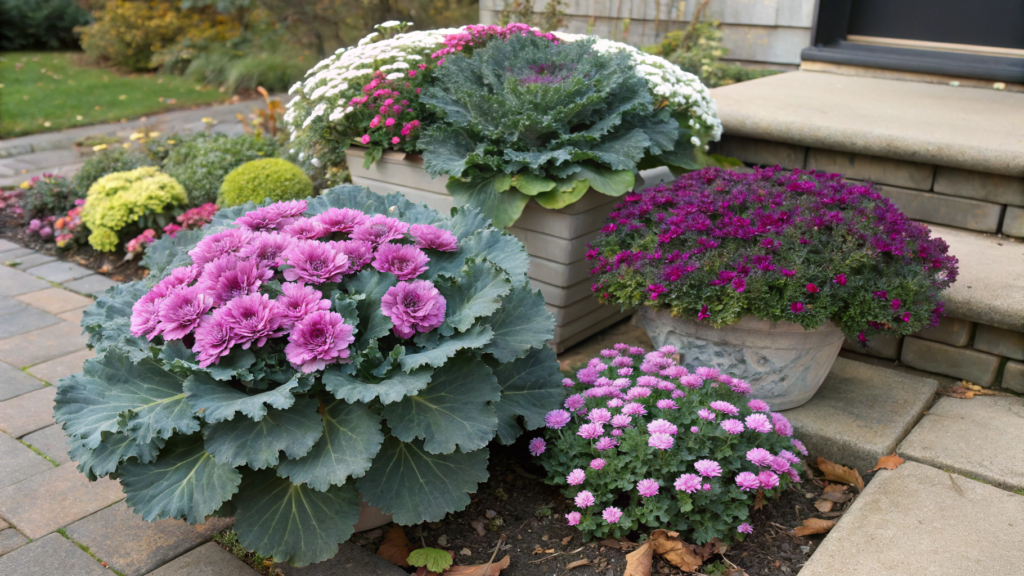
In one planter, you can combine a mum and ornamental kale. The mum forms a dense, rounded mound of small flowers, while the ornamental kale grows into a large rosette of wavy leaves. That contrast helps the plants complement each other.
This combination is also practical in fall — ornamental kale is a cool-season plant and keeps looking good when summer flowers are already fading.
What you’ll need for the arrangement
- 1 medium mum in a pot about 8–10 inches (20–25 cm) in diameter;
- 2 small ornamental cabbages or kale plants;
- a wide planter about 18–22 inches (46–56 cm) in diameter with drainage holes;
- ready-made potting mix for container flowers, loose and well-draining;
Don’t plant the ornamental kale too close to the mum. Over time, its rosette can spread to about 1 foot (30 cm) wide, so it’s better to leave some space between the plants from the start.
Plant placement
The mum will be the tallest and fullest plant, so it’s easier to place it near the center or slightly toward the back of the planter.
Plant the ornamental kale toward the front and sides. It’s better to use two plants instead of surrounding the mum with a full ring — mature rosettes can get quite large.
Before planting, it helps to place all the plants in their pots inside the empty planter first and look at the arrangement from a few steps away. If the kale disappears completely behind the mum, move it closer to the edge.
Choosing colors
The center of an ornamental kale rosette can be white, pink, purple, or greenish, so it’s easy to match it with the color of the mums. For example, burgundy mums pair well with kale that has a pink or purple center, while white and cream mums work well with lighter, green-and-white varieties.
It’s better to stick to two main shades in one planter. If you mix yellow mums, purple kale, pink rosettes, and several other colors at the same time, the plants start competing with one another visually.
Watering and drainage
Both mums and ornamental kale need good drainage. The planter should have holes in the bottom, and it’s better not to fill it with heavy garden soil from the yard. For mums in containers, loose soil and watering after the top layer of soil begins to dry are recommended, while ornamental kale also prefers well-drained soil and regular watering.
Lindy and I usually keep these planters by the porch as long as the mums are still holding their color and the ornamental kale keeps its dense rosettes. In the end, we get fall plantings on our porch that don’t need to be replaced after just a couple of weeks.
8. Front door mum color blocking
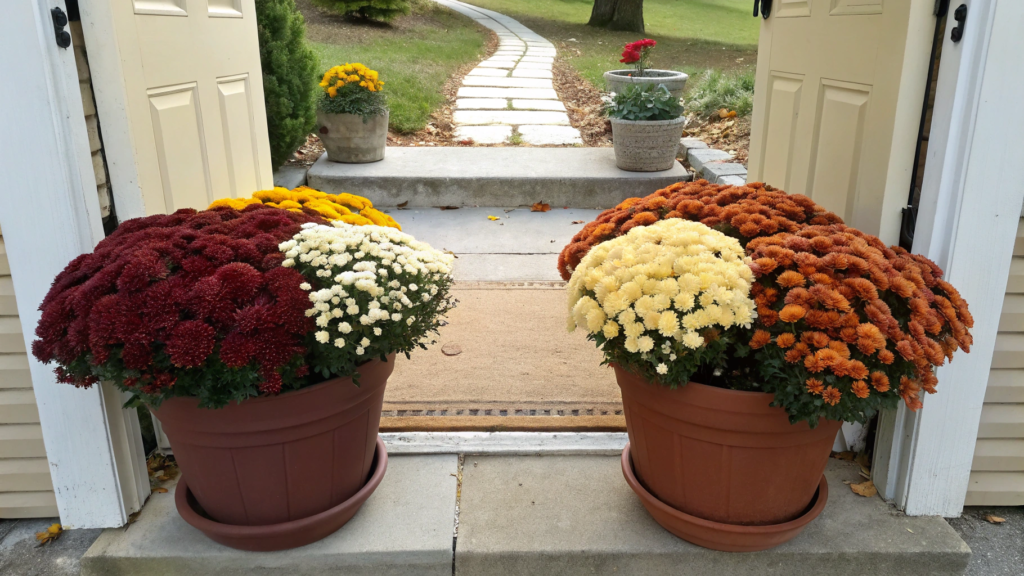
Pots with mums are grouped here by color, without mixing different shades together. For example, you can place several burgundy mums on one side of the door and cream or orange ones on the other.
It’s better to stick to two, or at most three colors. Once you add more shades, the color-blocking effect starts to disappear and the whole arrangement looks too busy.
What you’ll need for the arrangement
- 4–6 pots of mums in two different colors — 2–3 pots of each shade, preferably roughly the same size, about 10–14 inches (25–36 cm) in diameter;
- ready-made potting mix for container plants, if you plan to repot the mums.
Group the plants by color
On the left side of the door, you can place three pots of burgundy mums, and on the right, two or three cream ones. When one color is kept together in a separate group, it looks much more noticeable than when the shades alternate from pot to pot.
Within each group, the pots can be shifted slightly: place one closer to the door, another a little farther forward, and the third slightly to the side. This keeps the arrangement from looking lined up with a ruler, while each color still reads as its own separate group.
If you want to add a third shade, it’s better to give it its own spot, for example closer to the steps. That way, the area around the door doesn’t turn into a mix of too many colors.
Door color
For us, the door is always the starting point, because no one is going to change it to match new mums, of course. Against a dark green or black door, cream, white, and orange flowers stand out well. Against a light exterior, you can choose richer burgundy, red, or bronze shades.
If the door itself is bright, two mum colors are usually enough. Otherwise, the door, the flowers, and the rest of the decor all start competing for attention near the entrance.
Group the color blocks
It’s better to group the mums closer to the entrance instead of spreading the pots along the entire porch. A few dense groups look more expressive than several pots placed evenly from one end of the porch to the other. This kind of grouping keeps one clear focal point in the arrangement.
When Lindy and I decorate the porch with mums, we first place plants of one color together and keep the other color separate. That makes it much easier to see if there’s too much of one shade and how evenly the color groups are distributed. Sometimes all it takes is removing one pot or shifting it slightly, and the whole arrangement looks better.
9. Tiered mum stand arrangement
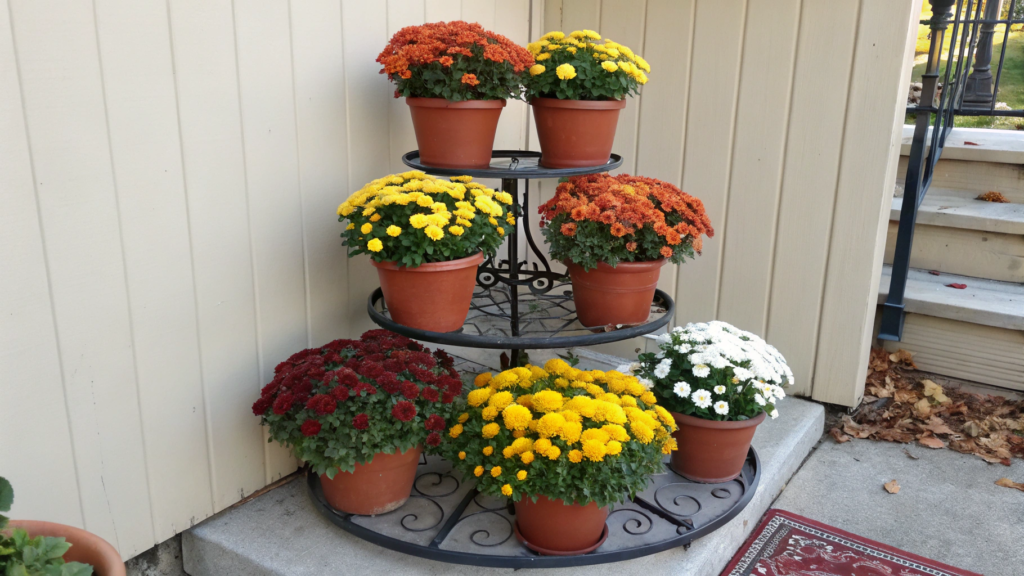
If your porch doesn’t have much free space, several pots of mums can be placed on a tiered plant stand. Instead of spreading them across the floor, we raise the plants to different heights and keep the whole arrangement in one place.
A tiered plant stand works well against a wall or to the side of the door — anywhere several separate pots would take up too much space.
What you’ll need for the arrangement
- a tiered plant stand about 30–40 inches (76–102 cm) tall, for example, Bamworld Plant Stand;
- 4–5 pots of mums;
- 1–2 larger mums in pots about 10–12 inches (25–30 cm) in diameter;
- 2–3 smaller mums in pots about 6–8 inches (15–20 cm) in diameter;
- saucers under the pots so water doesn’t drip onto the lower plants or the porch floor after watering.
Before buying the stand, be sure to check its maximum weight capacity and shelf dimensions. A pot filled with wet soil is much heavier than an empty planter, so a thin decorative stand won’t work well here.
Arrange the pots
The heaviest and largest mums are better placed on the lower levels. Smaller pots can go higher up.
This is safer and also looks more balanced — the larger plants form the base of the arrangement, while the smaller ones stay clearly visible above them.
Don’t place the pots too close together. Leave a little space between the mums so the plants don’t block one another and are easy to reach when watering.
Once everything is in place, step back a few feet and look at the whole stand. If a lower plant is blocking part of a mum above it, shift it to the side or move it to another level.
After watering, check the stability of the stand again. Wet soil becomes heavier, so it’s important that the whole structure stays level and nothing becomes too heavy on one side.
Colors at different levels
For a stand like this, two mum colors are enough. For example, burgundy and cream. Don’t place all the burgundy pots on one shelf and all the cream ones on another. It’s better to alternate them at different heights so the color is spread throughout the whole arrangement.
There’s no need for extra decor here. The pots are already arranged on several levels, so pumpkins, signs, and other small details can quickly make the stand look overcrowded.
10. Copper pot mum entryway display
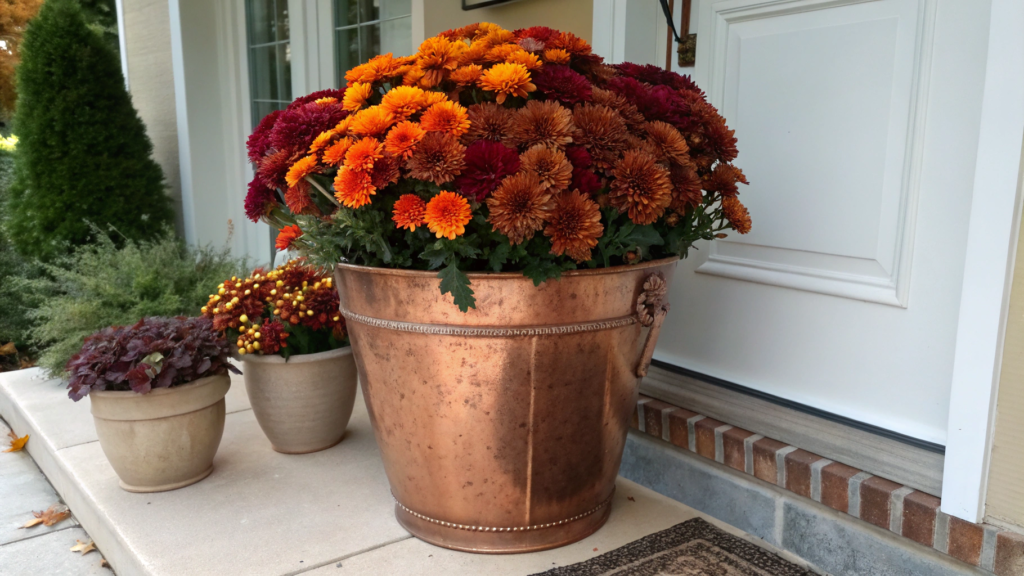
One large mum in a copper planter can replace a whole group of smaller pots by the door. Copper pairs beautifully with deep fall flower colors — burgundy, dark red, bronze, or rich orange.
Lindy and I usually start by looking at how many details are already around the entrance. If there are already lights, a wreath, or other decorative elements by the door, one large copper planter with a mum is usually enough. Adding a second one next to it can make the whole setup feel too busy.
What you’ll need for the arrangement
- 1 large mum in a pot about 12–14 inches (30–36 cm) in diameter;
- 1 copper or copper-finished planter slightly wider than the nursery pot;
- a saucer or small protective stand under the planter.
If the planter is made from real copper, place a saucer or protective stand underneath it. After rain or watering, water can run down the metal and leave marks on stone or other porous surfaces.
Keep the mum in its original pot
There’s no need to repot the plant directly into the decorative planter. It’s easier to place the nursery pot inside the copper planter, especially if the mum is already in full bloom.
Just make sure water doesn’t sit inside the outer planter after watering. Mums need moist soil, but the roots shouldn’t constantly sit in water. If there’s no drainage hole, you can carefully drill one in the bottom of the planter with a metal drill bit. After that, lightly smooth the edges so there are no sharp burrs left.
Place the planter by the entrance
It’s better to place the copper planter on one side of the front door, where it can be clearly seen from the walkway. Don’t push it right up against the wall or door frame — leave a little room so it’s easy to water the mum and turn it if needed.
Also look at the planter from the direction people usually approach the house. Sometimes moving it just a few inches to the side is enough to make both the mum and the copper surface fully visible.
Mum color
Burgundy and dark red mums pair especially well with copper. Together, they create a deep fall palette without needing several extra colors. For a lighter option, choose a cream or white mum, especially next to a dark door.
There’s really no need to mix several different shades in one large planter here. The copper planter already draws attention, so it’s better to use one large mum instead of several smaller plants.
The copper surface will gradually darken over time, with some areas staying shinier than others. There’s no need to keep trying to make the planter look brand new — copper that has changed slightly with age pairs beautifully with fall mums.
Fall arrangements
On our porch, Lindy and I usually start with mums, then bring in pumpkins and pull out old baskets or crates that suddenly become useful again. Everything comes together gradually, without trying to decorate the whole porch in one go.
If the mums are healthy, the pots are placed comfortably, and there’s enough space around them, the arrangement will already look good. Everything else can be adjusted little by little, and only when something really feels missing.
How do you decorate your porch with mums in fall? Tell me in the comments — I’m always curious to see new ideas from people who also spend every fall moving around pots, pumpkins, and seasonal plants.