A pergola is more than just a sunshade. It’s a space where you brew your morning coffee, hide away with a book on a hot day, throw cozy evening get-togethers, or even host a storybook wedding.
In 2025, it’s no longer just a garden structure — it’s a vibe, a statement, and a chance to express who you are.
We’ve gathered 20 truly unique, bold, and practical pergola ideas that work for everything — from tiny patios and rooftop setups to full-on outdoor wedding ceremonies. Each one is designed to inspire you to create not just a structure — but a place you want to spend more time in.
1. Building a DIY pergola frame with no power tools

Building a DIY pergola frame with no power tools isn’t just for people who avoid drills. It’s a legit way to build a good-looking, sturdy, clean-lined pergola — without noise, dust, or expensive gear.
If you want a chill shaded spot to relax but don’t want to mess with tools, this is one of the easiest setups. You can actually put it together by hand, using pre-cut boards and simple hardware.
What you’ll need:
- 4 posts, 4×4 and 8 feet long (2.4 m) — about 25 lbs each (11 kg), easy for one person to carry
- 4 beams, 2×6 and 8 feet long (2.4 m) — cedar or pressure-treated pine works great
- Metal L-brackets
- Bolts, washers, and nuts (3–4″ long), around 16–20 total
- Wrench or adjustable spanner (basic one is fine)
- Post bases like the Simpson Strong-Tie ZMAX
- Wood waterproofer
How to do it:
- Mark the layout and install the anchors. If you’re building on concrete or decking — screw in the anchors. If it’s going on bare soil — we’ll cover that in another section.
- Set the 4×4 vertical posts into the anchors. Use a level to keep them upright and temporarily support them with stakes or rope if needed.
- Attach the side beams (2×6). Secure the horizontal beams to both sides using L-brackets and bolts.
Slip the bolt into the bracket hole and tighten it by hand using the washer and nut. - Add the top cross beams. Lay the remaining beams across the top — either parallel or crisscrossed, however you like. Secure them with the same brackets and bolts.
- Seal the wood with waterproofer. Focus on the ends and all connection points. Two coats is best. Use a soft brush or roller — it’s a quick job.
If you’re after shade — hold off on building a full roof. Sometimes a simple stretch of UV-resistant fabric is all you need. You can choose the color and size you like. It’s super easy to install: just use rope, clips, or carabiners, stretch it between the beams — and that’s it.
It looks great, filters the sun just right, and most importantly — you don’t need a single power tool to make it happen.
2. Using budget lights to style a pergola

A pergola without lighting is like a pie without a crust. Tasty, sure — but something’s missing.
Using budget lights to style a pergola is one of the easiest and fastest upgrades you can make. And no — it’s not just “adding bulbs.” It’s about finishing the space, giving yourself an excuse to hang out on the patio just to admire the setup you built yourself.
And yes — you can make it look good, sturdy, and long-lasting without dropping money on luxury string lights.
What you’ll need:
- Outdoor solar string lights, ideally with durable insulation
Example: Brightown 48FT Outdoor Solar String Lights — waterproof, warm glow, holds charge for 6–8 hours - Metal hooks or cable clips (if you don’t want to drill)
- Zip ties — to attach the lights to the beams
- Light specs: 48 ft (14.6 m) in length, weighs about 2 lbs (900 g) — which means it’s safe even for lightweight setups
How to do it:
- Choose the layout — zigzag, arches, or straight lines. It helps to map out where the wire will run, especially if there’s a solar panel involved.
- Attach hooks or clips along the beams. If you don’t want to drill — use removable clips. They hold well as long as the surface is clean and dry.
- Hang the lights with a bit of slack. Don’t pull them tight like a guitar string — some slack prevents sagging over time and puts less stress on the beams.
- Secure each section with zip ties. This keeps the lights from swinging in the wind or hitting the wood.
- Place the solar panel where it gets at least 6 hours of sun daily. You can even extend it further from the pergola if needed.
Style tips:
- Warm white (2700K) gives off a cozy glow — not like a Christmas fair
- Black wire blends in beautifully with wood
- Want a designer vibe? Hang a couple of bulbs lower on individual cords — it looks intentional, not like a $20 Amazon setup.
A quick word on safety:
- Always use outdoor-rated string lights — look for waterproof (IP65 or IP67) on the label
- No indoor “holiday” lights — they can’t handle moisture and may short out
- Never wrap cords in fabric, plants, or insulation — even LED bulbs generate some heat, especially in summer
- Solar-powered lights are the safest bet, especially if you don’t want to run extension cords across the yard
- If you do use plug-in lights — only connect them through outdoor weatherproof outlets with covers
A hanging light setup weighing under 3 lbs is totally safe for any standard pergola. Just don’t hang the entire string from a single hook — spread out the load evenly
3. Attaching a fold-out bar shelf to a pergola

Attaching a fold-out bar shelf to a pergola is one of those little things that ends up changing everything. Picture this: you walk out with an iced tea or a glass of wine, flip down a compact shelf — and boom, it’s an instant mini bar. Cute, handy, and honestly, you can build the whole thing in just a few hours.
Yeah, we once spotted one of these on a couple’s backyard in Utah. At first, it looked purely decorative — until they started placing glasses, a vase of flowers, a bowl of guac… Safe to say, it’s been down ever since.
What you’ll need:
- Folding shelf brackets, ideally with locking arms
Example: Domisl 12-Inch Heavy Duty Folding Brackets — supports up to 160 lbs (72 kg) per pair - A wooden board for the shelf — roughly 30–36 inches long (75–90 cm) and 10–12 inches deep (25–30 cm)
Best to go with a 1″ (2.5 cm) thick board — strong and looks solid - Bolts, washers, and nuts — for mounting the brackets to the pergola beam
- Wrench or socket driver — no power tools needed again
How to do it:
- Pick the pergola side that’s easy to access or walk up to. A side beam works best so the shelf doesn’t block walkways.
- Measure the height — usually 36–38 inches (91–96 cm) off the ground, like a standard bar top.
- Mount the folding brackets to the inside of the beam, spaced 20–24 inches (50–60 cm) apart.
Use bolts through the wood, with washers for stability. - Place the shelf board on top, align it, and screw or bolt it in place — depending on the bracket’s holes.
- Test the lock and level. The shelf should fold up and down smoothly, with no wobble.
Build notes:
This kind of shelf doesn’t add dangerous weight to your pergola — as long as the beam is 2×6 or thicker and well anchored.
Snacks, glasses, and a pitcher of lemonade? That’s 20–30 lbs at most — totally fine.
Just don’t hang heavy planters or dishware on it — that’s a whole different conversation.
Style tips:
- Paint the shelf a contrasting color or finish it with oil to make it a standout detail
- Instead of a basic board, use a reclaimed stair tread or a live-edge slab — for a rustic vintage look
- Worried about glass rings? Toss a narrow table runner across the top
4. Creating a living roof with climbing plants

Creating a living roof with climbing plants is more than just a design choice — it’s a functional upgrade. This kind of “green roof” provides shade, keeps things cooler, adds humidity, and gives your pergola that lush, garden feel. It’s stunning when vines start to hang down softly and light filters through the leaves.
We once saw a setup like this at a guy’s place in Arizona — his pergola stood next to a brick wall, and the grapevines covered the top so densely, it created a full roof. Not a single piece of fabric involved.
What you’ll need:
- Natural or metal trellis lines (wire, rope, or cable)
- A set of hooks or brackets to hold those lines in place
- Wire cutters or snips — to trim the cable or rope
- Compost or fertilizer — if planting right next to the base
- Climbing plants (see list below)
- A watering can. Some patience. Maybe a cup of tea.
Good climbing plants (for the U.S.):
- Grapevine (Vitis spp.) — fast grower, thick shade, edible
- Wisteria — gorgeous but heavy (only for strong pergolas)
- Honeysuckle (Lonicera) — quick grower, smells amazing
- Clematis — delicate, needs guidance, but the blooms are worth it
- Trumpet vine (Campsis radicans) — covers well, but aggressive — needs pruning
How to do it:
- Run trellis lines between the top beams — 2–3 parallel cables or ropes every 12–16 inches (30–40 cm).
This gives the plants something to grab onto as they climb up and spread into a living roof.
Without these guides, the vines will just dangle or grow sideways — you won’t get even coverage. - Prep the soil at the base of each pergola post. Dig a small hole and mix in compost and organic matter.
- Plant the climbers right next to the posts. Make sure they’ll get at least 6 hours of sun a day — otherwise your green roof will be patchy.
- Start training the growth — gently guide the vines toward the beams, and tie them loosely with soft twine.
In 3–4 weeks, they’ll start climbing on their own. - Trim the side shoots regularly, so the plant grows upward instead of sprawling out.
The first two months matter the most — after that, it kind of builds itself.
Construction notes:
The weight of the plants can be significant — especially after rain. If you’re planting grapevines or trumpet vine, your pergola should be built with at least 2×6 beams and have solid joints.
Avoid using a green roof on temporary or lightweight pergolas. Also, don’t combine a fabric roof with vines — the plants will tear the fabric, especially in strong winds.
Care tips:
- Feed the plants every 3–4 weeks during the first season to help them fill in fast
- Prune in the fall — otherwise you’ll have a tangle of dead vines the next year
- Keep the vines on the outside of the structure — don’t let them grow inside, or you won’t be able to reach the fasteners later
5. Installing a pergola over gravel without cement

Installing a pergola over gravel without cement might sound like a quick fix — but with the right anchors and a well-packed base, it can actually be a solid, lasting setup. This method is great for lightweight pergolas: no swings, no roof panels, no heavy gear. Just a cozy shade zone with lights and fabric.
What you’ll need:
- 4×4 posts (8 ft / 2.4 m long)
- Metal anchors with ground spikes — for example: Titan Post Anchor Ground Spike 24″
- Compacted gravel (fine or medium grade)
- Sledgehammer or heavy mallet (to drive the anchors)
- Level
- Bolts or screws to attach posts to anchors
- Gloves, tape measure, string for marking out your layout
How to do it:
- Mark out the space. Use string and a tape measure to map out the rectangle for your pergola. Check the diagonals to make sure it’s square.
- Prepare the base. At each post location, remove the topsoil and dig down about 4–6 inches (10–15 cm).
Fill with fine gravel (up to 1/4″) and compact it well — this creates a stable, draining base. - Install the anchor. Drive the anchor straight through the gravel into the dense soil below. Use a sledgehammer or mallet.
Gravel doesn’t hold the anchor by itself, but it creates resistance and stability around it.
Once it’s in, add more gravel around the sides and compact again. - Check for level. Use a builder’s level — each anchor needs to be perfectly vertical, or your pergola will end up crooked.
- Install the 4×4 posts. Drop the posts into the anchors and secure them with bolts — preferably two bolts per side, in a crisscross pattern for better rigidity.
If there’s a gap, shim with a thin washer or spacer.
What can this setup handle?
A pergola with string lights, fabric, or climbing plants — no problem
Handles wind up to 25–30 mph (40–50 km/h) — if the anchors are deep enough and gravel is well packed
Not suitable for swings, hammocks, polycarbonate roofs, or heavy fixtures
Tips:
- If the soil is soft, add 2–3 extra bags of gravel around the anchor after it’s driven in — this boosts stability
- Want to move the pergola next season? This method is way easier than concrete — just pull out the anchors and reassemble
- Before winter, check for looseness — if anything wiggles, just tamp the gravel down again
6. Decorating a pergola using only Dollar Tree items

Decorating a pergola using only Dollar Tree items isn’t a joke or a last-resort hack. It’s a real way to create something charming for barely any money.
Sure, those $1.25 string lights won’t last ten years, and faux flowers won’t smell like jasmine.
But if you want to quickly decorate a space for a party, a photo zone, or just add some soul without overspending — this totally works.
What can you find at Dollar Tree and use on your pergola?
- Solar garden lights — lightweight, on stakes, and give off a soft glow
- Plastic garlands with leaves, grapes, or flowers
- Fabric pennants and ribbons (especially in summer or for holidays)
- Mesh and decorative polyester curtains
- Containers and hanging planters
- Plastic hooks, tape, zip ties
- LED candles and mini battery lanterns
How to do it:
- Pick a theme or vibe. Do you want “Mediterranean café” or “backyard BBQ hangout”? That decision helps guide your color and decor choices.
- Hang garlands and greenery. Leaf garlands can run along the beams or perimeter, or hang like green curtains.
Attach them with zip ties or soft wire — no drilling needed. - Add fabric accents. A light curtain or mesh from Dollar Tree can be tacked to one side and instantly gives a feeling of a defined “zone.”
Works great with just 1–2 panels — more than that can feel heavy. - Light up key spots. Stick those mini solar lights in the ground at the corners, and hang small lanterns from the top.
They weigh nothing, so they’re safe even for light pergolas. - Create hanging planters. Combine plastic planters and faux greenery to make hanging arrangements that are featherlight but surprisingly cute.
Things to know:
Everything from Dollar Tree is great for seasonal or temporary decor only
These items won’t handle snow, wind, or long rain — after a few weeks, most will fade or lose shape
But for 1–2 months, it’s perfect — parties, birthdays, summer setups, photo shoots
Tips:
- Mix it up: greenery + fabric + one strong accent (like a lantern or centerpiece)
- Don’t go overboard — 2–3 decorated areas (like the entrance, one corner, and the main beam) work better than wrapping everything
- Stick to neutral or natural tones — white, green, beige look much more upscale than neon colors
7. Painting a pergola to look like aged wood

Painting a pergola to look like aged wood isn’t about faking vintage — it’s about giving your structure that timeless, “been-here-for-years” charm that blends with your garden.
You don’t need to be an artist or buy fancy brushes. It’s all about layering textures, playing with contrast, and using stain or paint in two passes.
We saw a pergola like this in a rustic backyard — and the wood looked nothing like new lumber. It looked like an old farmhouse beam. Beautiful — and easy to pull off.
What you’ll need:
- Base stain or paint in a light tone (gray, “natural oak,” “driftwood”)
- Medium bristle brush + a dry rag
- Darker stain or paint (like “walnut” or “espresso”)
- Wire brush or rough sponge (even sandpaper works)
- Clear finish oil or sealer (optional)
How to do it:
- Prep the surface. If the wood’s already treated, lightly sand it to remove any gloss.
For new boards, just make sure they’re dry — no need for primer. - Apply a light base coat. Use a wide brush and go with the grain. Don’t aim for solid coverage — let some bare spots show through. That’s what creates the worn look.
- Wait 1–2 hours until dry.
- Go over the most visible areas with a wire brush or rough sponge.
This adds little scratches that mimic sun-faded or weathered wood. - Dab on dark stain in select areas. Use a dry brush or rag to touch up knots, cracks, and edges.
Then blend it in, and you’ll get that natural aged depth like an old timber beam. - Add a finish (optional) — if your pergola gets rained on. Water-based oil is best: no gloss, but great protection.
This method is perfect for cedar, pine, or fir — especially wood with a strong grain.
Smooth wood (like engineered lumber) needs more effort, and the aging effect might not be as striking.
Avoid glossy paints — they ruin the depth and age effect.
Tips:
- For a “European-style” finish, go with gray-brown tones instead of red-browns
- Instead of a wire brush, you can use a dry brush with a little leftover black paint to add depth in cracks
- Don’t want to paint the whole thing? Just focus on the top beams and corners — that’s often enough.
8. Building a Privacy Wall for a Patio Pergola

This kind of wall isn’t just for “hiding from the neighbors.”
It’s about creating a space where you can sip your coffee in pajamas and not feel awkward.
It’s cozy here, with a breeze that doesn’t blow napkins off the table.
The wall can be semi-transparent, fabric-based, wooden, vertical or corner-style — and all of these options can be DIY.
The key is knowing what you want: full coverage, light filtering, or just a design accent.
What Can You Use?
- Wooden slats (1×2 or 1×3)
- Ready-made trellis panels (wood or plastic)
- Tension fabric (canvas, tarp, or heavy curtains)
- Metal hardware: brackets, anchors, corner plates
- Bolts or screws + a drill (yes, you’ll probably need it here)
- Cable or rod — if you want a “curtain-style” wall
- Wood stain or sealant to protect against moisture
How to Build It
- Pick the side that needs coverage. It can be one side of the pergola or a corner, if you want to “visually block off the space.”
- Choose the style: rigid or soft.
Rigid — wood or trellis
Soft — fabric on rings, hooks, or cable - If you’re building a wooden screen:
- Measure the height (usually 6 feet / 1.8 meters)
- Screw in vertical posts (use 2×2 or 2×4) to the existing pergola beams
- Nail the slats horizontally or at an angle
- Leave 1–2 inches of space between slats so it’s not a solid wall
- Coat everything with stain or sealant
- Measure the height (usually 6 feet / 1.8 meters)
- If you’re building a fabric screen:
- Stretch a cable or curtain rod between beams
- Hang the fabric using grommets, rings, or just tie the corners
- Use dense outdoor canvas — it holds its shape and doesn’t soak through
- Stretch a cable or curtain rod between beams
A wooden wall creates wind load, especially if it is solid or almost solid. To keep everything in place:
- the posts must be secured with at least two bolts to the beam
- it is advisable to reinforce the lower fastening to the base or anchors
Fabric is a safer option, does not require rigid fastening, but it can flap in the wind.
Tips
- Want it to look nice? Use slats with different spacing (like 2-1-2 inches) to create a rhythm.
- You can replace the fabric with a bamboo roll-up screen — it’s lightweight, semi-transparent, and looks natural.
- If you want to zone off the pergola, set up two walls at a 90° angle and add a low planter at the base.
9. Making a Retractable Fabric Cover for a Pergola

This is one of the most practical upgrades you can do.
You get shade, light rain protection, and that cozy “roof” feeling — which you can open or close whenever you want.
You can build it yourself without any fancy mechanisms. And if the fabric fades or tears, it’s easy to replace.
What You’ll Need
- Outdoor fabric — preferably dense with UV protection
- Stainless steel cable or a strong, non-stretch rope
- Curtain clips with rings
- Hooks, screw anchors, carabiners or tension blocks
- Sewing machine (optional) or pre-hemmed fabric
How to Build It
- Run two parallel cables along the long sides of the pergola — from beam to beam.
One cable goes near one edge, the second one near the opposite side. The space between them should match the width of the fabric. - Secure the cables tightly using screw anchors or strong hooks.
Use a carabiner with tension or a block system to avoid sagging. - Prep your fabric. You can use a panel that’s about 4–6 feet wide (1.2–1.8 m) and 1.5 times longer than the pergola.
- Create loops at the edges or use clip-on curtain rings to attach the fabric to the cables.
- Slide the rings onto the cables to get a curtain-like effect. The rings will slide back and forth, letting you open or close the fabric like an accordion.
You literally pull the edge — and the roof opens or shuts. - Add stoppers so the fabric doesn’t move around in the wind — simple side hooks will do the trick.
A canopy like this works best if your pergola is solidly built, with beams at least 2×6 and a sturdy perimeter.
The fabric’s weight (even when wet) gets evenly distributed across the cables, so it doesn’t stress the structure.
In strong winds, the fabric can act like a sail — it’s best to take it down in storms or winter. Takes 2 minutes.
Tips
- Want it super easy? Use pre-made fabric with grommets, like tent covers.
- Space the rings every 12 inches to keep the folds tight and avoid sagging.
- For a softer look, pick semi-transparent fabric — it won’t block all the sun but gives a nice visual effect.
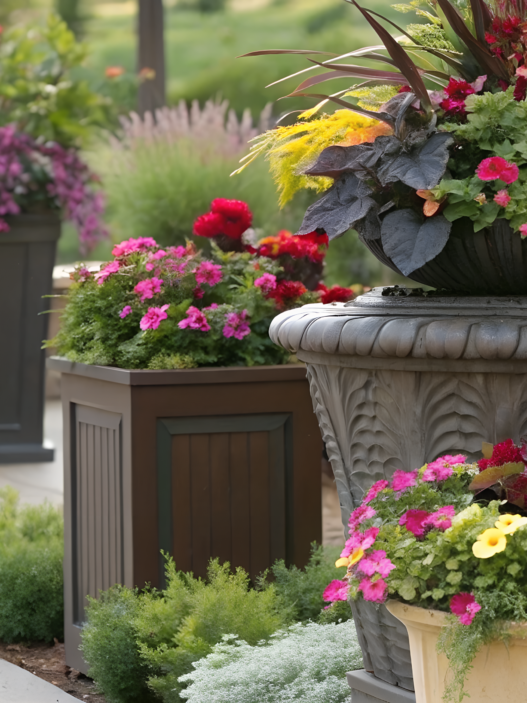
10. Hanging Planters from a Small Garden Pergola

Hanging planters from a small garden pergola sounds cute…
Until you hang five pots full of wet soil and, well… you know.
That’s why the approach is simple: weigh it out, hang it right, know your structure — and you’re good to go.
What You’ll Need
- Hooks with self-tapping threads or bolt-style rings
- Chains or ropes for hanging (adjustable length is ideal)
- Plastic planters with coco liners or self-watering systems — they’re lighter
- Lightweight soil mixes (like coco coir or vermiculite-based blends)
- Reliable plant varieties — see list below
How to Build It
- Choose a beam that can handle weight. The safest option is a central cross beam that’s 2×6 or thicker, especially if it’s supported on both ends.
Don’t hang anything from the edge of the pergola or decorative trim. - Think about load. A single 10” hanging planter with soil and water weighs around 8–12 lbs (3.5–5.5 kg).
It’s safe to hang no more than 2–3 pots per 8-foot beam, with at least 2 feet of space between them. - Screw in the hooks by hand or with a wrench. Do this right into the center of the beam to avoid splitting the wood.
If needed, pre-drill a small pilot hole first. - Hang your planters using chains or strong rope. Ideal height? Around eye level or slightly below, so you can water and remove them easily.
- Use a backup safety line. If your planter is hanging above a seating area or table, run a thin safety cable alongside the chain to catch the pot if it falls.
Best Plants for Hanging Baskets
- Petunias — colorful, low-maintenance, beautiful trailing
- Silver Dichondra — creates a leafy waterfall effect
- Verbena, Bacopa, Alyssum — sun-loving and light
- Strawberries — pretty and tasty
- Succulents in hanging baskets — perfect if you forget to water often
A small pergola (like 4 posts with 2×6 beams) can handle 30–40 lbs (13–18 kg) of hanging weight if everything is installed properly and evenly.
Don’t overload a single point. Spread hooks across different beams.
Remember the wet weight — soil gets 1.5 to 2 times heavier after watering.
Tips
- Hang your planters asymmetrically, so the arrangement doesn’t look “too perfect.”
- Nervous about the weight? Hang pots in the corners, where the beams intersect — those are the strongest spots.
- For metal pergolas, use magnetic hangers if you like to rearrange your setup often.
11. Attaching a pergola roof without damaging the house

Pergolas attached to a home can look like they’ve always been there. But no one really wants to drill into the siding of their freshly painted house just to mount a few beams.
Especially when we’re talking about stucco, vinyl siding, or a modern façade — not to mention that any hole you make is a potential leak.
Thankfully, there are ways to build a covered pergola roof without drilling into your house wall. We’ve done it ourselves on an old farmhouse where every hole in the wall was basically a water invitation. So here’s what worked best:
So how do you avoid drilling into your wall?
- Use a post right up next to the wall. Instead of anchoring the pergola directly into your house, you place an extra vertical post just a few inches away from the wall.
The upper beam looks like it’s attached, but it’s actually supported by posts. This method is especially smart if you don’t want to risk your wall’s waterproofing. - Leave a small gap + build a floating roof. If you want your pergola roof to “hover” close to the house but not touch it — leave a 1–2 inch gap.
That’s what we did on our summer kitchen. The roof snuggled up close, but didn’t actually touch the wall. No rain comes in, but the wall stays safe and sound. - Use an aluminum mounting profile. This is super handy if you’re using polycarbonate or metal panels.
You can install a special mounting profile on a wooden beam instead of drilling the wall — then slide the roof panels into it. The Suntuf Polycarbonate Side Ridge is a great option for sloped pergolas. It gives a watertight connection without ever touching the house.
Why is it better not to drill into the wall (if you can help it)?
- Every single hole is a leak risk. Even with sealant.
- You might void your siding or exterior finish warranty — especially in new builds.
- And if your home has modern lines or beautiful natural wood siding… well, let’s not mess with the aesthetics.
Some lessons we learned the hard way:
- If you do end up attaching to the wall, use proper anchor bolts with gaskets — not just screws. They create a waterproof seal between your beam and the wall.
- Don’t skimp on caulk! We use Gorilla Waterproof Caulk & Seal (10 oz / 295 ml).
- Always slope the roof away from the house, so water flows off, not onto the wall.
In the end, you get a pergola that looks like part of the house, but doesn’t cause leaks, siding issues, or warranty problems. Which means you can enjoy your coffee under the cover without worrying about surprise repairs down the line.
12. How to Turn a Covered Pergola into an Open-Air Dining Room

Sometimes all it takes is a roof overhead for a whole new room to appear in your backyard or on your terrace. Not just a shady spot — but a full-on summer dining room, where you can eat, work, host guests, or light some candles for a dinner under the stars.
And a covered pergola is the perfect way to create that space. You just need to style it right.
What do you need to create that “outdoor living room” feel?
1. A large, sturdy dining table.
Nope, plastic won’t cut it. And even a fold-out table is just a temporary fix.
You want a heavy, beautiful table — something made of wood or metal that can anchor the whole space.
We love this Acacia wood dining table for its durability and rich look. It can easily handle rain, sun, and even sudden temperature drops.
2. Hanging lights — but skip the chandelier.
Too much brightness can kill the vibe. Instead, hang low pendant lanterns on a cord or string up some warm LED fairy lights. They’re cozy, atmospheric, and energy efficient. Bonus points if they’re on a timer.
3. Chairs you actually want to sit in.
A lot of outdoor chairs are… punishment. Hard, slippery, and stiff.Instead, go for wicker chairs with cushions or outdoor armchairs with soft padding. You can always swap out the cushions, but comfort is what makes a dining room truly a dining room.
4. Textiles and small details.
A linen tablecloth. A throw draped over a chair. A jar of wildflowers or a few candles.These aren’t must-haves, but they bring your space to life. If you’re worried about rain, use outdoor polyester fabric — it looks great and doesn’t mind getting wet.
A few extra touches that take your pergola dining room to the next level
- Add a big planter with herbs nearby — basil, mint, rosemary. It’s not just pretty, it smells amazing while you eat.
- Install a side curtain panel on one side — it blocks sun and gives the table a sense of intimacy.
- Put a low shelf or rolling cart next to the table — perfect for drinks, plates, or lanterns. It makes hosting way easier.
A covered pergola plus a solid table is all it really takes to create an open-air dining room you’ll want to live in.
And trust me — a simple garden veggie pasta tastes way more magical when you eat it outside, under a warm summer sky.
13. Choosing a Transparent Polycarbonate Roof for Brightness

A transparent polycarbonate roof keeps you dry without blocking out the sunshine. It’s perfect for pergolas that face north or sit under trees — when every bit of sunlight counts.
We first noticed this option when we were searching for something lighter than a solid roof. We didn’t want to turn the yard into a dark storage shed — we wanted something that felt open and airy.
What does polycarbonate give you?
- Lets in up to 90% of sunlight (depending on thickness and finish)
- Blocks UV rays, especially when you choose panels with a protective coating
- Lightweight, so your pergola structure doesn’t need to be extra reinforced
- Resists hail, rain, rot, and time — no need for complicated upkeep
Which type of material should you choose?
- Solid polycarbonate — it looks like glass but is way lighter and stronger
- Twinwall polycarbonate — more affordable, holds heat better, but gives a slightly hazy look
What to pay attention to during installation:
- Install panels with a slope, so rainwater can drain easily
- Use rubber gaskets and washers to keep moisture from sneaking in
- Seal the joint between the pergola roof and the house wall with something like waterproof caulk to protect the siding
If you’re looking for something reliable and easy to use, check out Suntuf Polycarbonate Panels, 6mm, UV Protected, Clear. These are lightweight, UV-protected, and easy to install on sloped or flat structures.
Tip. If you want less heat at noon, go for tinted panels. They don’t block too much light, but they do create a nice soft shade.
A roof like this is a dream setup for an outdoor kitchen, morning coffee zone, or even a little greenhouse with a chill-out space underneath. It’s bright, dry, pretty — and you won’t even need lights on gloomy days.
14. Decorating a Wedding Pergola Using Florals and Fabric

A covered pergola can easily become your perfect wedding arch — even if you’re hosting the event right in your backyard. It already has the shape, the structure — all it needs is a little mood. Want a classic pastel-toned ceremony? Or a boho-chic look with dried flowers and linen? Totally doable.
Just remember: the decor should match the surroundings. If there’s a rose bed nearby, don’t go wild with tropical orchids. Let the decor echo what’s already there.
What can you use?
- Fabric — ideally light and flowy: voile, muslin, organza
- Fresh flowers — roses, hydrangeas, eucalyptus, lavender
- Artificial garlands — for more durability and peace of mind
- Ribbons, tassels, linen — perfect for boho or rustic themes
- Hooks, clips, cords — to keep everything in place
- Floral wire and tape — to secure bouquets and live arrangements
- LED string lights — for that evening magic
How to do it
1. Prep the structure. Make sure the pergola is clean, dry, and stable. If the pergola roof is already installed, you can attach the fabric underneath it — this adds depth and shadows to the whole look.
2. Attach the fabric. Wrap the posts or beams, create soft drapes, or hang curtains. It’s key to secure the fabric in several places — especially if there’s a breeze. Use metal clamps that hold well without tearing the material.
3. Add floral accents. Start with key “anchor” bouquets — on the corners or at the top. If you’re using fresh flowers, keep them in wet floral foam or tubes. You can layer garlands or wreaths on top of the fabric.
4. Blend styles. Don’t be afraid to mix fresh and faux florals, add greenery, dried stems, or even a few sprigs of rosemary — it smells amazing and looks beautiful.
5. Photo check. Before the ceremony, take a few test photos of the pergola. Make sure the whole setup looks dimensional, balanced, and doesn’t disappear into the background.
What not to forget
- Always keep an extra roll of floral wire, clips, and tape with you — better safe than scrambling last minute
- If the fabric is too long, don’t cut it right away. Fold or tie it off — you might want to keep it as a keepsake
- Avoid decor that crumbles or falls apart easily in the wind (like loose petals with no structure)
- Ask a guest or bridesmaid to keep an eye on the setup before the ceremony starts
We decorated our friend’s pergola for her backyard wedding once. It was July, blazing hot, and the fabric felt like it was melting in our hands. But when we finished — that simple wood frame turned into a glowing altar. We added sprigs of lavender and soft fairy lights, and it felt truly magical.
And you know what? The budget was tiny — but the result was stunning.
15. Installing LED Lighting into a Pergola Roof

As the sun sets, it’s the lighting that turns your covered pergola into a truly inviting space. A well-lit pergola roof means you can read at the table, enjoy dinner with friends, or just soak in the evening air — without reaching for your phone flashlight.
And in this game, LEDs win every time.
Why go with LED?
- They’re energy-efficient. Even if you leave them on all night, your electricity bill won’t go crazy.
- They barely get warm. That’s key when dealing with wood and fabric structures.
- They’re super versatile. From tiny spotlights to flexible strip lights you can hide inside beams.
What do you need?
- Waterproof LED strip (look for an IP65 rating or higher)
- Outdoor-rated power supply
- Mounting gear: plastic clips, silicone holders, or self-adhesive backing
- Dimmer or controller, if you want to adjust brightness
How to do it
1. Decide where you need light. Over the dining table, around the edge of the pergola roof, or maybe a “starry night” ceiling with spotlights? It all depends on how you plan to use the space.
2. Run the cable cleanly. Try to follow the beams, tucking wires inside or under slats. No messy dangling cords.
3. Protect the connections. Use sealed connectors, or wrap joints with electrical tape and slide on a silicone sleeve for extra waterproofing.
4. Add a dimmer. You’ll love being able to switch from bright dinner lighting to cozy evening glow.
Safety tips for LED installation
Working with electricity — even outdoors — means staying smart. Especially when your setup includes wooden beams, fabric canopies, and unpredictable weather.
Here’s what matters most:
- Only use waterproof strips and fixtures, rated IP65 or higher. That means they can handle both rain and dust.
- Power should come from a weather-protected outlet with a covered box. No outdoor plug? Call an electrician — don’t DIY this part.
- Wire joins and controllers should be inside sealed outdoor boxes — you can find these at any hardware store.
- Secure all cables properly, so they don’t sag or end up within reach of kids or pets.
- If you’re using multiple LED strips, don’t plug them all into one socket — it could overheat the power supply.
LEDs are a fantastic choice, but even the safest lights need smart setup. Do it right once — and then just hit the switch and enjoy the glow.
16. Building a Covered Pergola on a Rooftop Terrace

A covered pergola on a rooftop isn’t just a hangout spot — it’s a full-on outdoor room under the sky. But from a technical point of view, it’s not the easiest DIY. Especially if you want to avoid damaging the roof’s waterproofing or adding too much weight.
What to check before you start
Before you drill a single screw, check the weight limits of your rooftop. Different buildings and surfaces have very different tolerances. It’s best to play it safe and ask an engineer — or dig into your building’s documentation.
And yep — never drill directly into the membrane! Even one wrong screw can turn your terrace into a ceiling leak nightmare.
What materials work best
- Lightweight aluminum or pressure-treated 2x4s
Weight is the enemy here. Instead of heavy timber, choose dry wood or metal framing. - Ballast-mounted framing (no drilling!)
Use concrete blocks or large planters to hold the structure down. This avoids puncturing the roof and saves you from red tape with your HOA or building management. - Waterproof padding
If you have to rest anything directly on the surface, use thick rubber pads or EPDM sheets to protect the membrane. - Modular or removable roof panels
Polycarbonate, fabric, or even slatted wood — go for something light and easy to remove if a storm hits.
How to build it
- Build the frame off-roof. Make sure every post is standing perfectly straight and the weight is evenly distributed. A flat or gently sloped roof design is ideal — less stress on the surface.
- Use ballast weights at the base. Concrete pavers, weighted planters, or special ballast mounts all work to keep it grounded.
- Add braces or guy wires for wind. Wind is way stronger on rooftops. Your pergola needs to feel anchored and solid — especially if it has a roof.
- Install a lightweight roof. Think polycarbonate sheets, grommeted canvas, or treated slats — anything that won’t become a giant sail in a gust.
Smart rooftop tips
- Fabric canopies work great on tensioned cables — they block sun but reduce stress on the frame.
- Keep it simple — less weight, less risk.
- Think about drainage — even a tiny roof needs a water exit plan.
What about rain?
A pergola roof gives you cover — but also responsibility. Rain shouldn’t pool up or spill down right onto your table.
- Add a slope. Doesn’t matter if it’s fabric or plastic — even a 5–10° pitch helps water move in the right direction.
- Plan drainage. Let runoff flow to the far edge of the terrace, ideally into a drainage zone like a scupper, drain trough, or pipe leading to the edge of the roof.
- Add a rain barrel or container. Want to collect water? Easy — just capture the flow at the edge.
- Fabric needs a slope too. Flat cloth will sag and flood. Always tension it or angle it slightly.
You don’t have to pick just one of these — you can mix and match solutions. The goal: let water out, keep yourself dry.
We used to have nothing but blazing sun and bare tile on our rooftop. Just a sad umbrella that flew away with the first breeze.
Then we added a small pergola with a transparent roof, hung a few curtains, set up a bench — and suddenly it was a room.
Now it’s our favorite place for morning coffee and quiet evenings. Just a simple structure, but it changed everything.
17. Creating a Sloped Pergola Roof to Drain Rainwater

The slope of your covered pergola roof might seem like a “minor” detail — until it rains. Then it suddenly decides whether you stay dry… or end up dealing with water pooling, mold, and rotting wood.
Why a roof slope matters
Because rain needs somewhere to go. Even if you’re using waterproof fabric or clear polycarbonate, water will collect without a proper slope — and that leads to:
- sagging roof panels
- dirty stains and moss buildup
- wood decay or structural damage
What’s the ideal roof slope?
Minimum: 1 inch per foot of roof length (about an 8.3% incline).
So for a 10-foot-long pergola, you need at least a 10-inch height difference between the rear and front beams (about 25 cm).
If you live in a rainy area, go even steeper. Bigger pergola is more slope.
How to build the slope
- Use uneven post heights
For example: rear posts = 8 ft, front posts = 7 ft — simple and effective. - Adjust existing flat roofs
If your pergola is already built, you can add slope using angled rafters or shims under the roof mounts. - Angle the panels themselves
With polycarbonate sheets, it’s common to tilt them directly during installation — so water flows to the back or sides.
Where does the water go?
A sloped pergola roof is only half the job — you also need to plan for drainage, especially on a deck or rooftop.
Here are 3 simple DIY-friendly drainage options:
- Let it run to the far edge. Direct the slope toward a clear corner of your terrace or yard, away from furniture and garden beds.
You can place a decorative rain barrel or stone trough to prevent splashing or tile damage. - Build a gravel strip or drainage trench. On rooftops or paved patios, dig a narrow trench near the roof’s edge, filled with gravel. Water quietly disappears without flooding the surface.
You can even connect it to your home’s rainwater system via a scupper, flexible pipe, or gutter. - Install a mini gutter system. If you already have downspouts nearby, install a gutter under the roofline, just like a porch. Then run a pipe downward — neat and clean.
Tip. Don’t let fabric roofs sag! If your pergola uses fabric covers, watch out for “puddling pockets.” Take them down during winter or rainy seasons — even a small sag can become a soggy disaster.
We once visited a rooftop café during a city tour. The pergola looked basic — just a sloped polycarbonate cover — but in one corner sat a large clay bowl.
Turns out, the café owner used it as a “stylish rain catcher”. Water trickled down one corner, landing in the bowl — no splashes, no mess, no leaks.
And it worked like a charm.
18. Using Curtain Panels in a Covered Pergola for Privacy
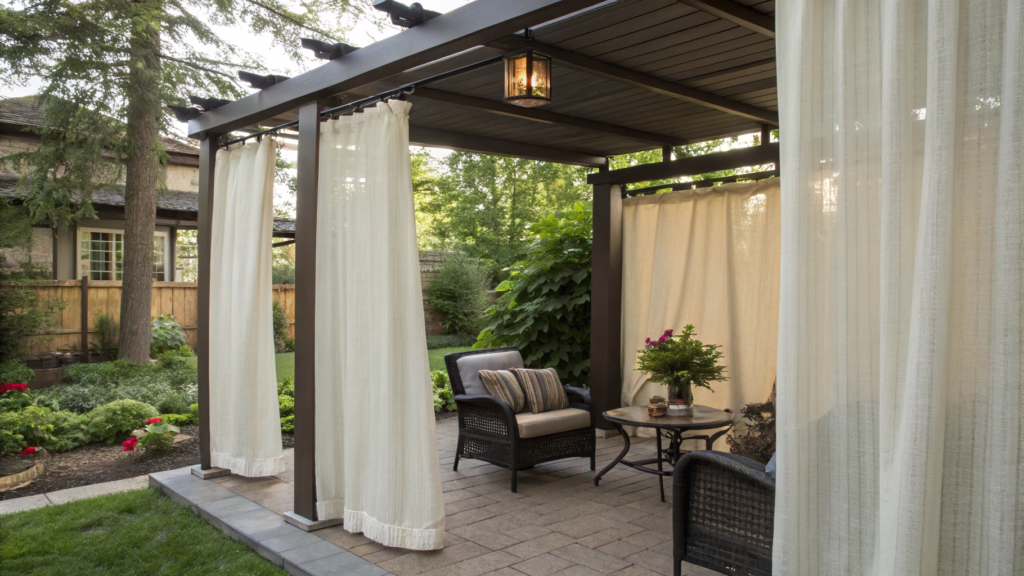
The easiest way to add privacy and atmosphere to your covered pergola? Hang fabric curtains.
You don’t need much — just a couple of panels on one side can completely change the mood.
Suddenly, it’s not a “grill corner” anymore — it’s an outdoor living room where you can read, nap, or sip tea in your bathrobe.
What to Use
- Outdoor curtain panels — look for water-repellent and UV-resistant options
- Curtain rods or stainless-steel cables — stretch them between pergola beams
- Clip rings or grommets — for easy hanging and smooth sliding
- Magnets or bottom clips — to keep curtains from flapping in the wind
How to Do It
- Choose your privacy zones. Usually, that’s one or two sides — the ones facing neighbors or getting strong wind.
- Stretch a rod or cable between beams. A stainless steel cable is best — it holds tension and won’t sag over time.
- Hang your curtain panels. You can use grommet-style panels or hang with clip rings.
Make sure they slide easily — so you can open them in the day, then close them for privacy or shade. - Add magnets at the bottom. Especially helpful if your pergola is open-sided — this keeps the fabric from blowing around or slapping in the wind.
Extra Tips
- Use double panels on corners — they create a curtain-like vibe even when left partially open
- If you’re worried about fading, go with neutral shades like light gray, cream, or dusty green
- For added privacy and texture, hang a woven bamboo screen behind the curtains
Curtains can completely shift the vibe of your pergola — no drilling, no rebuilding.
One day it’s light and breezy, the next it’s cozy and shaded — and it only takes 30 minutes and a few clips.
19. Mounting a Ceiling Fan Inside a Covered Pergola

A ceiling fan in a covered pergola isn’t a luxury — it’s comfort, style, and real functionality.
What You’ll Need
- Outdoor-rated ceiling fan — only these are safe for outdoor use
- Power supply — run from your house or through an outdoor-rated conduit
- Mounting bracket — usually included, but make sure it fits your beam
- Weatherproof box and sealed wire connectors — for safe outdoor wiring
- A licensed electrician (sometimes) — if you don’t plan to run the wiring yourself
How to Install It
- Choose the right fan model. Look for a fan marked “Damp Rated” or “Wet Rated” — only these are built for outdoor use.
- Attach the mounting bracket to a ceiling beam. If your pergola roof is wood-paneled, just locate a structural beam and install it there.
Make sure the beam can support the weight — usually between 12–20 lbs (5–9 kg). - Connect the power. If you’re doing it yourself, use a weatherproof cable and run it through an exterior conduit.
All connections should go inside a sealed junction box to keep moisture out. - Hang the fan and check its balance. It should hang straight and level. Once it’s on, there should be no wobble or vibration.
- Decide how you’ll turn it on. Some fans use remote controls, others have pull cords, like old-school lamps.
A remote is definitely more convenient — especially when you’re mid-burger flip.
Safety Notes
Outdoors means exposure — to moisture, heat, dust, and wind. So:
- Never install indoor fans outside — they’ll break down fast and could be dangerous
- Seal all electrical connections to keep water out
- Ask an electrician if you’re unsure — sometimes one visit saves a lot of stress later
20. Blending a Pergola into a House Façade Using Siding Trim
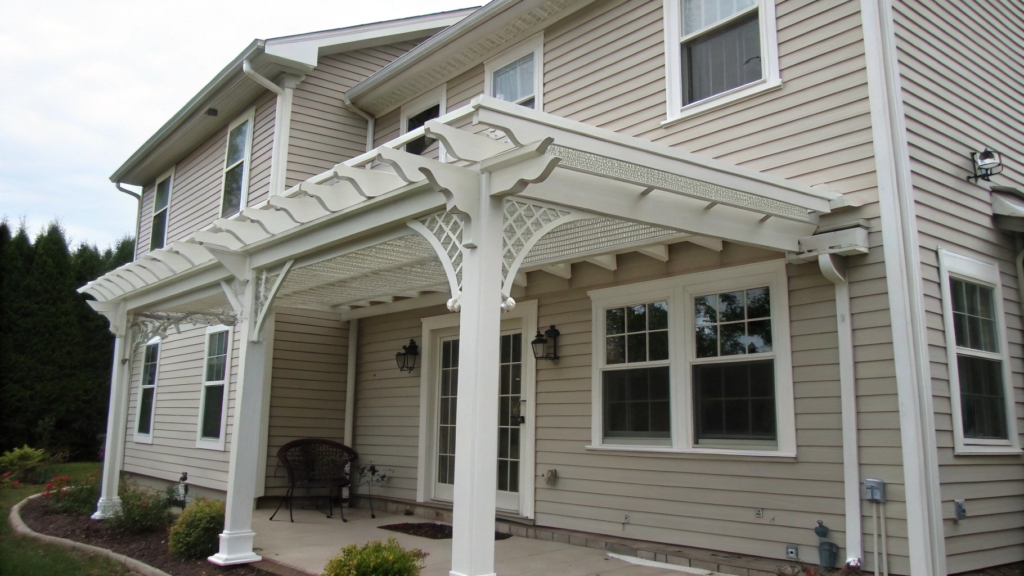
A pergola can look like an afterthought — or like it’s always been there. The difference is in the transition between the pergola and your house, especially if you want it to feel built-in, not just tacked on.
Why This Detail Matters
When your covered pergola is attached directly to the house, the joint line becomes the most visible spot. And if it looks sloppy — it ruins the whole vibe, no matter how pretty your table or flowy curtains are.
But framing that connection with siding trim or decorative molding makes magic happen: it visually merges the structure with the house itself.
How to Do It Right
- Match your house siding. If you have vinyl siding, use matching finishing pieces (like J-trim or end caps).
If it’s wood, build the transition with the same boards — or use painted fascia to mimic the look.
Important. Your trim color should either match exactly or contrast intentionally. Anything in between just looks off. - Cover the beam-to-wall seam. That’s the main eyesore. Whether your pergola beam cuts into the siding or just meets it — always run a trim board along the top edge to hide gaps and give it a clean, finished look.
- Use corner pieces, drip edges, and molding. If there are awkward joins or uneven cuts, use corner profiles to smooth it out.
And if rainwater runs off here, consider a small drip cap to channel it away from the wall. - Paint it all one color — or use contrast for effect. Sometimes a coat of paint is enough.
Other times, contrast works better — like dark pergola trim on a white wall. Classic and sharp.
Pro Tip. Still not sure how to blend the pergola in? Look at your windows and doors.
What kind of trim do they have? How are they framed?
Copy those lines, and your pergola will feel like a natural part of the architecture — not an add-on.
A friend of ours built a pergola right outside his back wall — nothing fancy, just covering an old concrete path.
At first… it looked like something from a hardware store demo. Just a pergola leaned up against the house, visually disconnected.
But the moment he added a white PVC trim where the beam met the wall — it transformed.
Suddenly it looked like it belonged there all along.
So… what’s your pergola like?
Let each of these ideas be a reason to make your little outdoor spot even cozier and more beautiful.
Because a pergola isn’t just an architectural feature. It’s a space that reflects your style, your habits, your dreams. Each of these 20 ideas is an invitation to bring your space to life.
If even one of them spoke to you — tell us. And if you’ve already built something, made a change, or found a clever solution — share it in the comments.
Your story might just be what sparks someone else’s very first pergola. We’re here, we’re listening — and we’d love to connect.