Every yard is different. Some have a weird triangle near the porch, others have an endlessly long fence, and some just don’t get any shade at all. And when you look at it all, it feels like “normal” flower beds just won’t fit here. But these uneven spots and awkward edges? That’s exactly where the most expressive garden corners are born. We’ve put together 15 flower bed ideas that fit into tricky spaces, don’t need a fortune to create, won’t burn out in a week, and won’t turn into limp greenery by August.
Some of them you can build in a weekend. Others you’ll craft and refine over the years, like a personal piece of land art.
Whatever you choose — do it your way. For your zone, your aesthetic, your rhythm of care.
1. Curved Corner Flower Bed for Awkward Lawn Edges
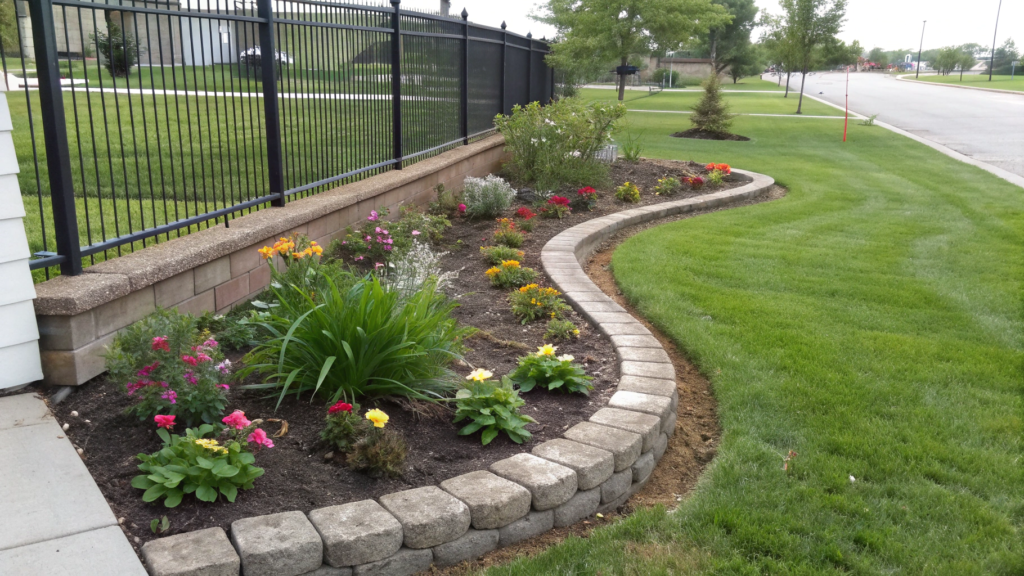
“Awkward corner”—yep, we all know what that means. That weird patch by the fence where the grass won’t grow, where mowing’s a pain, and where you keep promising to plant something. And your eye just keeps catching on it.
A curved flower bed is one of the simplest and most effective ways to turn that forgotten corner into a true feature of the yard.
Straight angles often make a space feel rigid, especially if the fence, walkway, or house already have sharp lines. A curved shape softens the visual and adds flow, making transitions between areas more natural—especially in permaculture gardens where we aim for organic lines.
How to create a curved flower bed:
1. Outline the shape of the flower bed.
Use a garden hose or rope to “draw” the curve right on the ground. A half-moon or soft arc that opens toward the yard works best.
Typical dimensions are 8–10 feet (2.5–3 m) long and 3 to 5 feet (0.9–1.5 m) wide, depending on your space.
Use garden landscape stakes and twine to lock in the curve.
2. Prep the soil.
Remove any turf. A garden spade with a curved blade works best—it follows the curve more easily.
Add organic matter: compost (2–3 inches), a bit of bone meal, and some sand or perlite if the soil is heavy.
Mix the top layer down to a depth of 6–8 inches (15–20 cm).
3. Define the edge.
To keep the bed from “spilling out,” go with one of these:
- Plastic edging (for minimalists)
- Stone or brick (for a rustic look)
- Woven edging (for that English garden feel)
On our first property, I used flat stones that weighed up to 20 pounds (9 kg)—quite the workout! But five years later, they still look like we just laid them yesterday.
4. Choose plants in layers.
The main rule: layer the plants from tallest in the back to ground covers at the edge.
Sample layout for a sunny corner:
- Back layer (3–5 ft tall): clary sage (Salvia sclarea), lanceleaf coreopsis, longleaf speedwell
- Middle layer (1.5–3 ft): purple coneflower, catmint (Nepeta), goldenrod
- Edge (up to 1.5 ft): sweet alyssum, sedum, violas
For partial shade, swap the sage for astilbe and the coneflower for heuchera.
Pick varieties that match your region—consider your frost dates, summer heat, and overall growing season.
5. Add an accent!
Even a small garden statue, ceramic pot, or trellis can create a visual focal point.
We, for example, placed an old vintage wagon wheel (found at a yard sale)—and that’s what everyone compliments, not the flowers!
Want to keep it easy? Add a drip irrigation system with a battery timer. It turns on automatically, so your plants stay hydrated even when you’re out of town.
A few final tips:
- Don’t be afraid to test your layout in pots before planting in the ground. That way, you can see how things look together.
- At the end of the season, mulch with 2 inches (5 cm) of straw or wood chips to protect the soil and retain moisture.
- If your flower bed borders the lawn, plan for mowing—leave a 6-inch (15 cm) plant-free strip to easily run the mower edge.
If you’ve got a spot like this in your yard—don’t ignore it. It might just be the start of a whole new garden story.
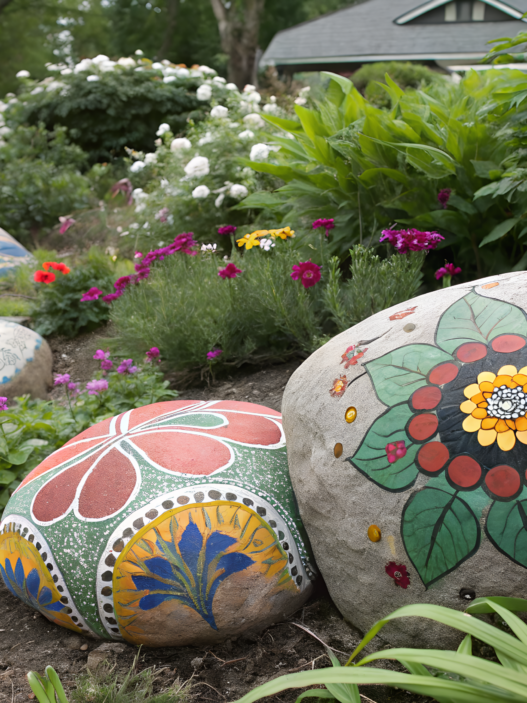
2. Rock-Framed Full Sun Flower Bed with Layered Heights
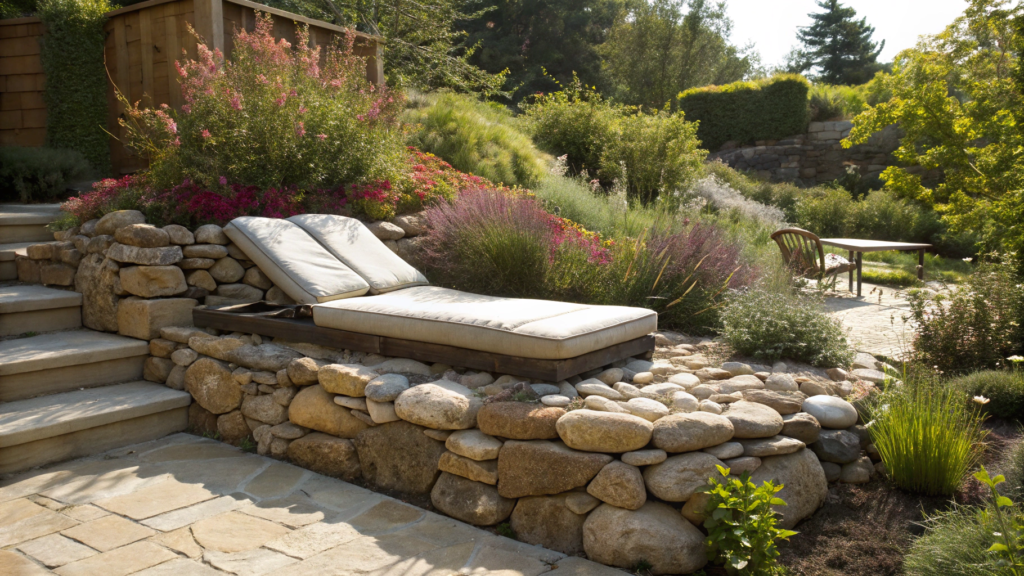
Some spots feel like you’ve moved your garden to Texas — the sun just blazes all day, testing your plants like it’s a survival contest. But that’s not a problem — it’s an opportunity! A sunny flower bed can become a rich, layered display, framed with stone and blooming like a mini backyard resort.
Why add a stone edge?
- First, the aesthetic. Stone adds visual weight and a sense of structure, creating a clear edge between the bed and your lawn or walkway.
- Second, functionality. It stores heat and slowly releases it in the evening — perfect for heat-loving flowers.
How to build this kind of Flower bed:
1. Shape the bed.
These beds usually have an oval, teardrop, or curved shape, around 6 to 10 feet long (1.8–3 m), depending on your space. It’s best when it’s visible from all sides.
2. Choose your stone border.
Great options include:
- Sandstone
- Granite boulders
- River rock (6–10 inches or 15–25 cm in diameter)
Want to save money? Check Craigslist or ask local contractors — you’d be surprised how often they give away leftover stone.
3. Prep the soil and build height
- Remove sod and loosen the soil 8–10 inches deep (20–25 cm).
- Pile extra compost in the center to create a gentle mound — this gives the height layers their shape.
- Add mulch and your chosen stones to define the bed’s natural outline.
4. Plant in layers: from tall to low groundcovers.
Mentally divide the bed into three zones: center (tall), middle (mid-height), and edge (low cover).
- Center — 3–5 feet tall plants
Lavender ‘Hidcote’, Echinacea purpurea, Rudbeckia ‘Goldsturm’ - Middle — 1.5–3 feet
Salvia ‘May Night’, Coreopsis ‘Zagreb’, Culinary sage - Edge — up to 1.5 feet (45 cm)
Creeping thyme, Sweet alyssum, Sedum ‘Autumn Joy’
Pro tip. Always check if your plants are USDA zone appropriate. These plants thrive in climates with four distinct seasons, especially where spring is short and summer hits hard.
5. Stone and mulch.
Add fine gravel or crushed rock between plants. It cuts down evaporation and adds a tidy finish. I use small stone mulch — it doesn’t wash away in the rain and always looks sharp.
6. Irrigation matters.
You’d be shocked how fast water disappears from a sunny flower bed. A drip system with a timer will save you time and plants. We use the Raindrip R675CT Analog 3-Dial Water Timer — it’s been running 3 years on the same batteries.
Lavender, sage, and echinacea attract bees and butterflies like magnets. And if you throw in some butterfly weed (Asclepias tuberosa), you’ll be helping the monarchs too! In summer, our garden turns into a flying festival.
A full-sun flower bed framed in stone isn’t just pretty — it’s a strong, low-maintenance system that holds up for years, even if you’re not out there digging every weekend.
3. Symmetrical Entryway Flower Bed with Evergreens and Blooms
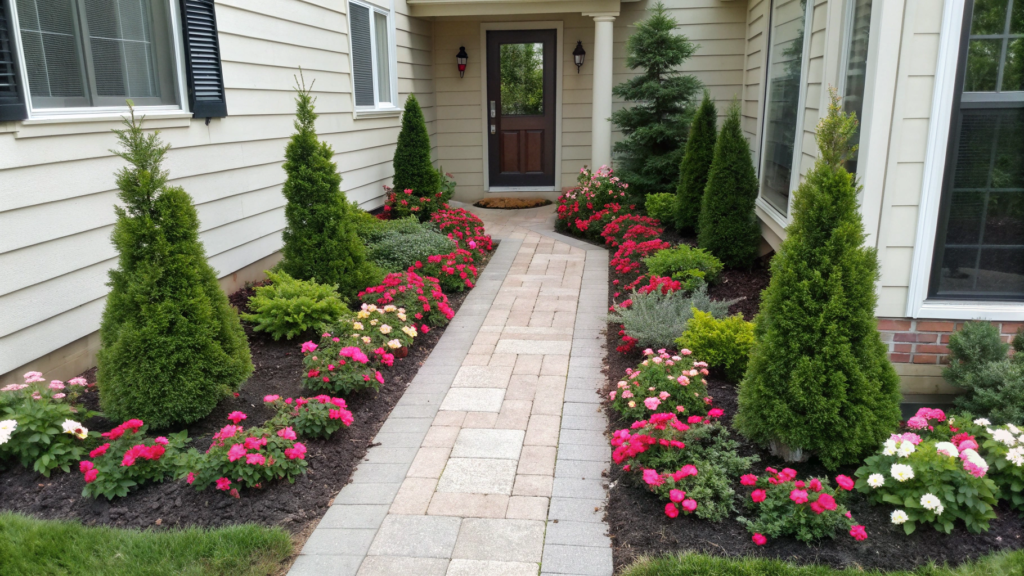
An entryway bed is like your home’s business card. At first glance, it says: “Everything here is intentional. We care about the details.”
A neat, symmetrical flower bed gives a sense of order. It frames the space visually, especially in front areas where the eye looks for balance.
And yes — even if your porch is a little wonky (ours was!), symmetrical planting balances it visually. It really works.
Where this kind of Flower bed works best:
- On both sides of the walkway
- Flanking stairs or your front porch
- Along the front of the house, especially if your facade is symmetrical
Ideal width. 3 to 5 feet (90–150 cm). It should feel like part of the overall entry design — not something randomly stuck on. The key is to highlight the architecture, not fight it.
How to build it:
1. Start with evergreens as the base.
They give you year-round structure. Place them at the edges or the back of the bed if it runs along the facade.
Symmetry is everything here — so plant in pairs.
Good options:
- Buxus sempervirens (boxwood) — easy to shape, a timeless look
- Thuja occidentalis ‘Smaragd’ — narrow and space-saving
- Ilex crenata — great boxwood alternative for warm, humid zones
Example: National Plant Network – Live Boxwood Shrub, 2 Gallon Pot (available on Amazon)
2. Add flowering perennials.
Flowers add the seasonal accent. Choose ones that bloom in sequence across the growing season. Again — plant them in mirrored pairs with even spacing.
Recommended varieties:
- Echinacea purpurea ‘White Swan’ — pure white and tough
- Salvia nemorosa ‘Caradonna’ — deep purple blooms into fall
- Coreopsis ‘Zagreb’ — bright yellow, fine dense foliage
3. Fill in the edge with low-growing plants.
Front-of-bed plants help define the shape, hold mulch in place, and give a clean, finished look.
Reliable favorites:
- Nepeta faassenii ‘Walker’s Low’ — full of blooms, bees love it
- Heuchera ‘Lime Rickey’ or ‘Palace Purple’ — bold foliage all season
- Ajuga reptans ‘Burgundy Glow’ — spreads fast, smothers weeds
4. Add matching planters for seasonal swaps.
A pair of matching planters at your entry finishes the whole design. You can refresh the look every 2–3 months, based on mood or season.
Seasonal examples:
- Spring: violas, forget-me-nots
- Summer: petunias, calibrachoa
- Fall: mums, ornamental cabbage
5. Mind the details
- Leave a clean edge — about 6–8 inches (15–20 cm) along the walkway
- Use bark or wood chip mulch to boost that tidy look
- Don’t overcomplicate it — less really is more. Fewer varieties, well-placed, look more curated.
Always check whether the plants you choose will work for your region. What thrives for us here in North Idaho — with snowy winters and sudden heat in summer — might behave very differently where you live.
Keep in mind:
- Your lowest winter temperatures
- Total rainfall
- Whether your entry is in sun or shade
- Your growing season length
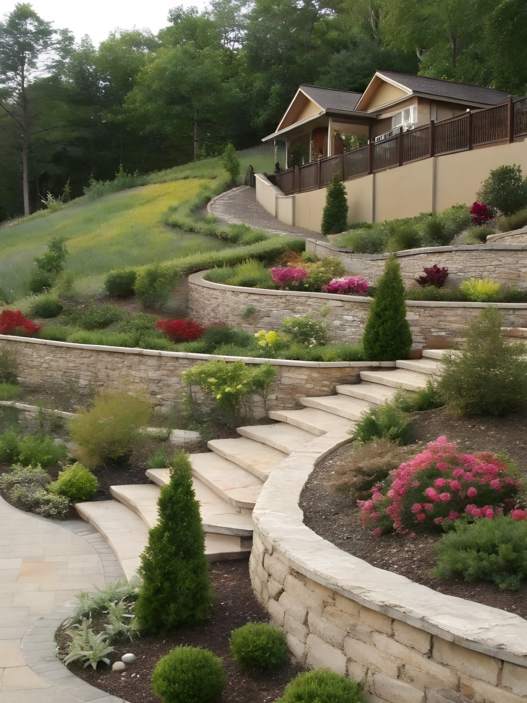
4. Tiered Flower Bed Against Backyard Fencing
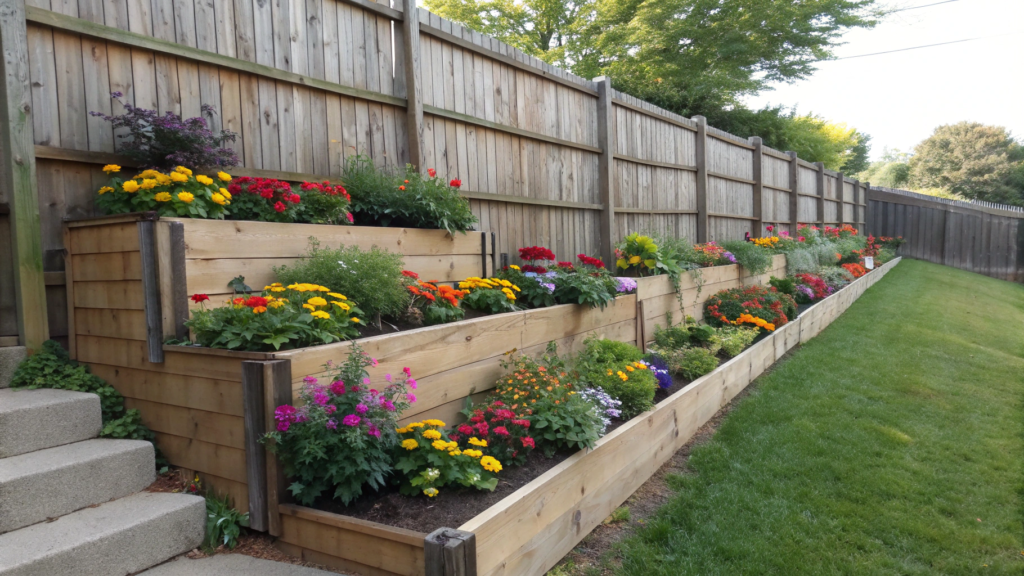
Do you have a beautiful fence? Yeah, we definitely don’t. Especially in the backyard, where the old boards lean and look completely lifeless.
That’s why a tiered flower bed along the fence is a game-changer. It turns that dull flat wall into a vertical stage, breaking up the monotony and adding real depth to your space.
A fence is already a built-in backdrop. It offers wind protection, reflects warmth from the sun, and gives you a clear visual line — perfect for building layers along.
How to build a tiered bed along a fence:
1. Mark out the shape and depth.
Your flower bed should be 2.5 to 4.5 feet deep (75–140 cm). Any less and it’ll look too flat; any more and it’ll eat up your whole yard.
Stick to a long straight shape, or soften the ends for a more “gardeny” feel.
2. Improve the soil.
The soil by fences is usually… dust and clay. So:
- Remove weeds and the top 6–8 inches (15–20 cm) of junk soil
- Mix in compost, aged manure, or store-bought garden soil (50/50 with the native soil)
- Add sand or vermiculite if it’s super heavy clay
If the soil is hopeless or the area is new, just build a raised bed. We used 8-inch (20 cm) boards and got a perfect tiering base.
3. Plant in layers — tall to short.
Classic backyard fence bed structure:
Back row (3–5 ft / 90–150 cm):
- Helenium autumnale ‘Moerheim Beauty’ — warm red, blooms in August
- Delphinium ‘Black Knight’ — vertical spikes, deep purple
- Echinacea purpurea ‘Magnus’ — a time-tested favorite
Middle row (1.5–3 ft / 45–90 cm):
- Rudbeckia fulgida ‘Goldsturm’ — bright yellow, low maintenance
- Phlox paniculata ‘David’ — white, fragrant, long-lasting
- Monarda didyma ‘Jacob Cline’ — bold color, attracts bees and hummingbirds
Front edge (up to 1 ft / 30 cm):
- Nepeta ‘Walker’s Low’ — like a soft blue cushion
- Heuchera ‘Caramel’ or ‘Obsidian’ — vibrant foliage through frost
- Sedum ‘Dragon’s Blood’ — low-growing, ruby-pink blooms
Tips. Don’t plant in a straight line — stagger your depth to create a wave effect.
Add annuals between the perennials in year one to fill empty spots.
Use wood or rocks to create mini terraces if the ground is sloped.
4. Plan for maintenance
- Watering. Fence lines are often dry. Use drip tape with a timer
- Mulch. 2 inches (5 cm) of bark or decorative gravel
- Support. Stake tall plants like delphinium, monarda, or echinacea — do it early, not when it’s too late
Make sure to choose plants adapted to your region and conditions.
If your fence faces south, it’ll be blazing hot. In partial shade, pick more shade-tolerant types.
Consider:
- How hot and windy this corner gets
- Whether water tends to pool there after rain
- How quickly the soil warms up in spring
5. Front Porch Wrap-Around Flower Bed with Seasonal Color Swaps
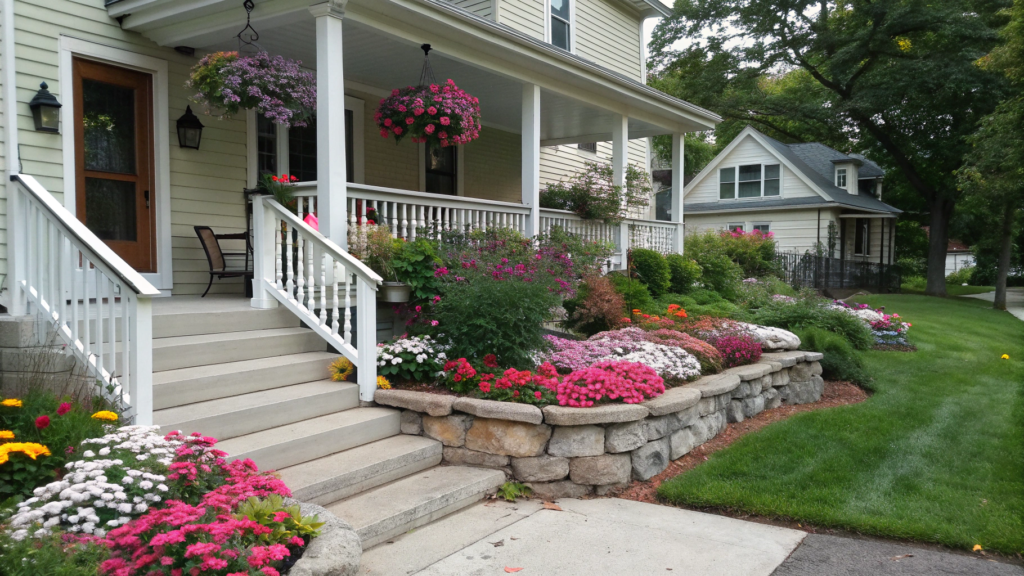
A wrap-around flower bed doesn’t just “decorate” your home’s front — it hugs it. And if you plan it right, it can evolve with the seasons and bring joy from April to November. We know — it works like a charm on our own porch. It’s not just pretty — it brings life to the space, even during the dullest shoulder seasons.
This type of bed adds softness and volume at the entrance, blending steps, railings, and paths into one connected picture.
It works for traditional porches with railings and modern slab-style entries that need a bit of charm.
Plus — it’s the first thing guests see and the last thing you notice walking out the door.
Personally, I like being greeted by a few blooming echinaceas and geraniums on the way to the chicken coop.
How to create a wrap-around flower bed with seasonal color swaps:
1. Check the size and sun exposure around your porch.
Make sure there’s space on both sides and a bit along the front — at least 18–24 inches (45–60 cm) deep.
Notice which side gets more sun? Where does the wind blow in from? That’ll guide your plant selection.
2. Start with evergreen anchors.
Without these, your bed will look like a bald stripe all winter. You want structure and greenery year-round:
- Buxus ‘Green Velvet’ — a compact boxwood
- Ilex glabra ‘Compacta’ — a dense evergreen holly
- Juniperus horizontalis ‘Blue Chip’ — a ground-hugging blue juniper
Plant them evenly along the bed — these are your “anchors” around which everything else shifts through the year.
3. Add perennials that bloom at different times.
This gives the illusion of constant color without frequent swaps.
- Spring: Brunnera macrophylla, Tulipa ‘Queen of Night’
- Summer: Echinacea ‘Cheyenne Spirit’, Salvia nemorosa ‘Rose Marvel’
- Fall: Aster ‘October Skies’, Sedum ‘Autumn Joy’
Scatter them like waves: blooms peeking here and there, not lined up like soldiers.
4. Bring in swap-friendly accents in pots or borders.
This is the fun part — annuals that you can rotate each season. We like to mix edible varieties with ornamentals — it’s both practical and beautiful.
- Spring: violas, alyssum, potted mint
- Summer: calibrachoa, mini tomatoes, nasturtium
- Fall: mums, ornamental kale, sage
Recommended Classic Home and Garden Honeysuckle Planter, 13” — works with both rustic and modern porch styles.
5. Don’t skip mulch and edging.
A crisp edge is like eyeliner for your bed — it frames everything. Use dark bark mulch for contrast or gravel for a minimalist feel. Line it with plastic edging or bricks to keep it neat.
Right now, our bed has Nepeta ‘Walker’s Low’ and Sedum ‘Angelina’ on the edge, Echinacea ‘Green Twister’ and sage in the middle, and a topiary boxwood as the anchor. In pots near the railing — calibrachoa and lavender.
It only takes up 20 inches (50 cm) of width from the porch, but visually stretches all the way to the fence.
As always: pick what works for your zone, soil, and light. Here in Northern Idaho, we’ve got wet springs, dry hot summers, and long falls. So we:
- Plant spring bulbs under mulch in fall
- Mulch twice during summer — early and mid-season
- Cut back only the annuals in fall and leave echinaceas standing — they’re beautiful even dry
6. Shaded Retreat Flower Bed Under a Tree Canopy
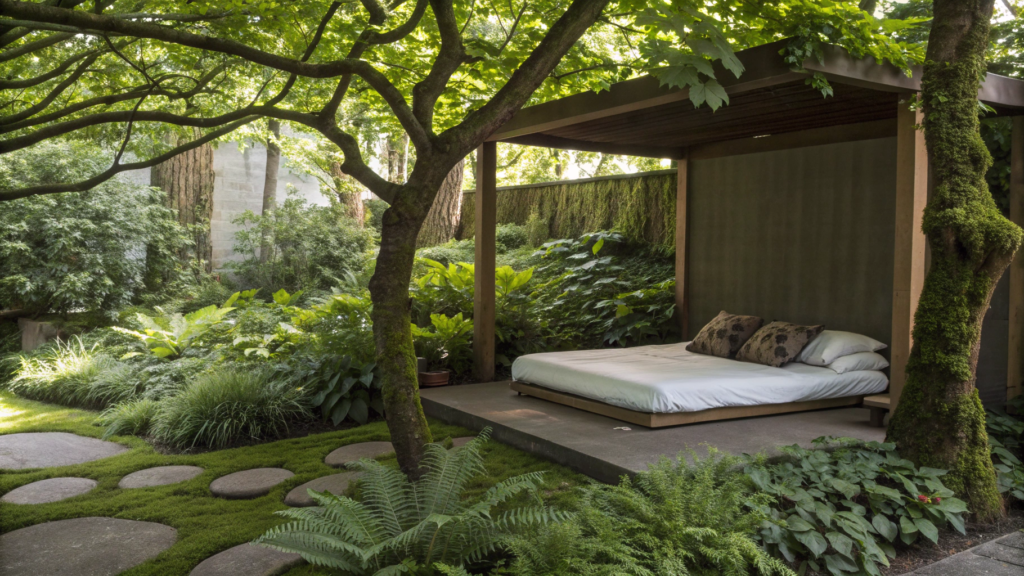
Shade can be intimidating — especially for new gardeners.
When nothing seems to grow under a tree, the soil is tough, and the area stays dry and gloomy all summer — it’s tempting to give up. We used to call these spots “dead zones,” too.
But later I realized: shade isn’t a sentence — it’s a chance to create a quiet green retreat.
One that soothes with texture, foliage, and calm, not flashy blooms.
Why shade isn’t a dead end
Under tree canopies:
- it’s cooler in summer (especially helpful on the south side),
- moisture evaporates more slowly,
- weeds aren’t as aggressive,
- and most importantly — you can create a woodland garden vibe right in your yard.
We built one like that under our old apple tree — where nothing but moss and three dandelions used to grow. Now it’s one of our favorite places to unwind.
How to turn a shady corner into a leafy retreat:
1. Clear and enrich the soil.
Soil under trees is often depleted, root-filled, and compacted. Gently remove debris and weeds, then layer on 2–3 inches (5–7 cm) of compost mixed with garden soil.
Don’t dig deep — you don’t want to damage tree roots. Just work the top layer. If the soil is dry and tight, add leaf mold or coconut coir to loosen it up.
2. Focus on foliage over flowers.
You won’t get wild color in the shade. And that’s the beauty of it.
Foliage becomes your main tool — for shape, texture, and contrast.
Our go-to shade plants:
- Hosta ‘Francee’ or ‘Sum and Substance’ — wide leaves, big impact
- Heuchera ‘Caramel’ and ‘Plum Pudding’ — striking color contrast
- Ferns like Athyrium ‘Ghost’ or Dryopteris erythrosora — soft and lacy
- Tiarella cordifolia — fluffy foliage with spring blooms
- Brunnera ‘Jack Frost’ — silvery leaves, forget-me-not-like flowers
3. Add vertical structure.
Shade can feel sunken or flat — you want to guide the eye upward. Try:
- Hydrangea arborescens ‘Annabelle’ — thrives in shade and blooms big
- Astilboides tabularis — a dramatic giant if you’ve got moisture
- Rodgersia pinnata — like a tropical rhubarb for shady spots
4. Soften the front edge.
To avoid a harsh cutoff at the walkway, tuck in some border-friendly plants:
- Pulmonaria ‘Trevi Fountain’ — silvery leaves + spring flowers
- Ajuga ‘Black Scallop’ — deep bronze tones and ground cover
- Vinca minor — crawling and spring-flowering
5. Create atmosphere with simple touches.
Even a stump or a flat rock can become a presence.
We placed an old wood bench and a couple smooth river boulders under the tree — they’re perfect for setting down a mug or a book.
A small solar string light adds quiet glow in the evening — it changes everything.
Shady flower bed maintenance tips:
- Watering. Infrequent but deep — once every 7–10 days is enough if mulched.
- Mulch. Use wood chips or decayed leaves, 2 inches (5 cm) thick.
- Compost refresh. Once a year, in early spring before new growth appears.
Know your type of shade
There are several kinds:
- Full shade (north side, dense canopy)
- Dappled shade (filtered through branches)
- Dry shade (under spruce or maple)
- Moist shade (low spots, north-facing slopes)
Know what you’re working with and tweak your plant list accordingly.
Our apple tree spot gets dappled shade with moderate moisture, so most woodland-style plants took well.
Our experience
I honestly once considered dumping bark over this spot and sticking in a pot of geraniums.
But we started slow — planted a couple hostas, then added heuchera and a few shade-tolerant phlox.
Two seasons later, the bed started glowing — not in color, but in calm and texture.
Now we place a lounge chair there in summer — it’s the best spot when it’s hot.
And in fall? It’s just peaceful. And sometimes, that’s more than enough.
7. Monochrome Color Block Bed for Modern Homes
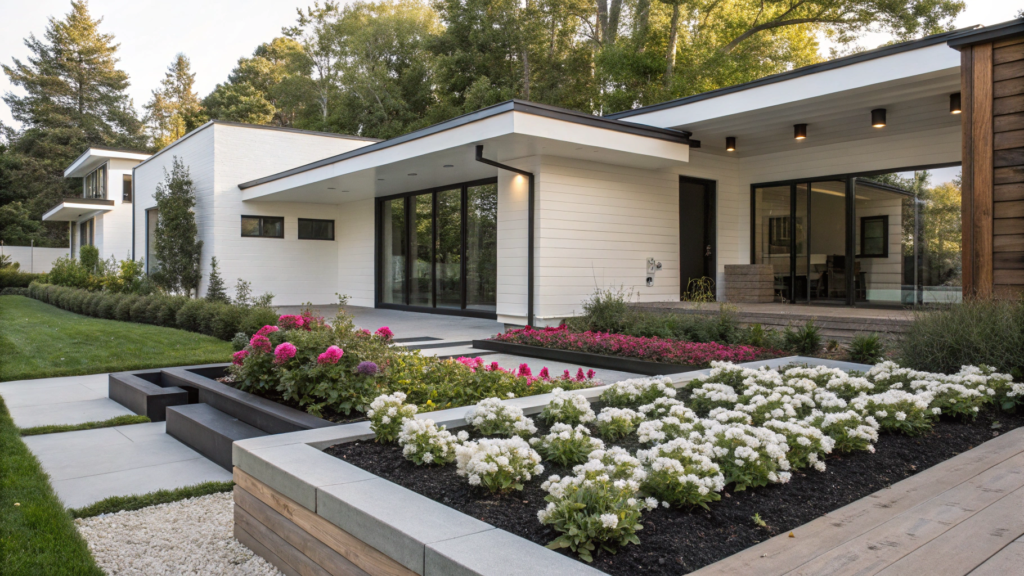
You see a sleek modern home with straight lines, minimalist architecture… and next to it — a cottage-style flower bed, exploding in fluffy textures and every color imaginable.
Contrast? Sure. But not the good kind.
Modern houses need a different kind of flower bed — one that’s structured, simple, and deliberate.
That’s why a monochrome bed, built around a single color with tone variations, works best.
Why monochrome works so well
- It doesn’t distract from the architecture — it enhances it.
- It looks expensive — even if the plants came from a $2 local nursery sale.
- It gives a sense of unity and intention.
We created one like that along the concrete path to Lindy’s studio. The house is all white walls, graphite roof, glass accents. The flower bed? All purples and blues, from salvia to delphiniums.
Every time I walk there to grab a thistle or a book, it feels like we invested ten times more in the landscaping than we actually did.
How to build a monochrome bed for a modern home
1. Pick one color. Just one. It could be:
- White — clean, perfect against a dark exterior
- Purple — for depth and focus
- Yellow — to brighten up a gray house
- Dark green + silver — for a near-monochrome with texture
Don’t mix “red” and “blue.” Skip pastels and neons in the same bed. One color = endless variations.
2. Define the bed’s shape. Modern style = sharp geometry. Think rectangles, straight strips along a path, or a U-shape along a wall. No soft curves, no rock gardens, no “naturalistic” edges.
3. Build layers by height. That structure makes the bed feel like part of the architecture.
Back layer — tall verticals. Middle — dense, rounded forms. Front — carpet-style ground cover.
Example for a purple monochrome:
- Back (3–5 ft / 90–150 cm): Delphinium ‘Black Knight’, Salvia ‘Indigo Spires’
- Middle (1.5–3 ft / 45–90 cm): Echinacea ‘Magnus’, Nepeta ‘Walker’s Low’
- Front (up to 1 ft / 30 cm): Ajuga ‘Black Scallop’, Heuchera ‘Obsidian’
4. Repeat your structure. Modern design thrives on repetition. Plant the same species in equal spacing — 3 to 4 times in a row. That alone creates rhythm and visual clarity.
We used just five salvia plants, spaced evenly — and the whole bed instantly looked intentional.
5. Use texture, not extra color. In modern design, leaves do the talking:
- Silvery or sage-green: Stachys byzantina, Artemisia
- Glossy dark leaves: Heuchera, Carex
- Narrow verticals: Iris sibirica, Festuca glauca
They add personality without adding “noise.”
6. Give the edge a sharp finish. The border is half the style. Use a clean edge: concrete, metal strip, or hidden black plastic edging that holds shape.
Mulch? One tone only. Either dark brown or gravel. No “multi-shade wood chips.”
Maintenance
- Watering. Drip system with auto-timer (like Raindrip R675CT)
- Mulch. 2 inches (5 cm), one consistent color
- Pruning. Seasonal — keep shapes symmetrical
- Deadheading. Crucial for keeping the bed clean
As always — choose plants that thrive in your region and fit the light conditions.Ours do well in full sun, with moderate watering and thick mulch.
In damper or shadier spots, you might swap salvia for astilbe, and echinacea for geranium.
8. Butterfly-Friendly Flower Bed for Full-Sun Front Lawns
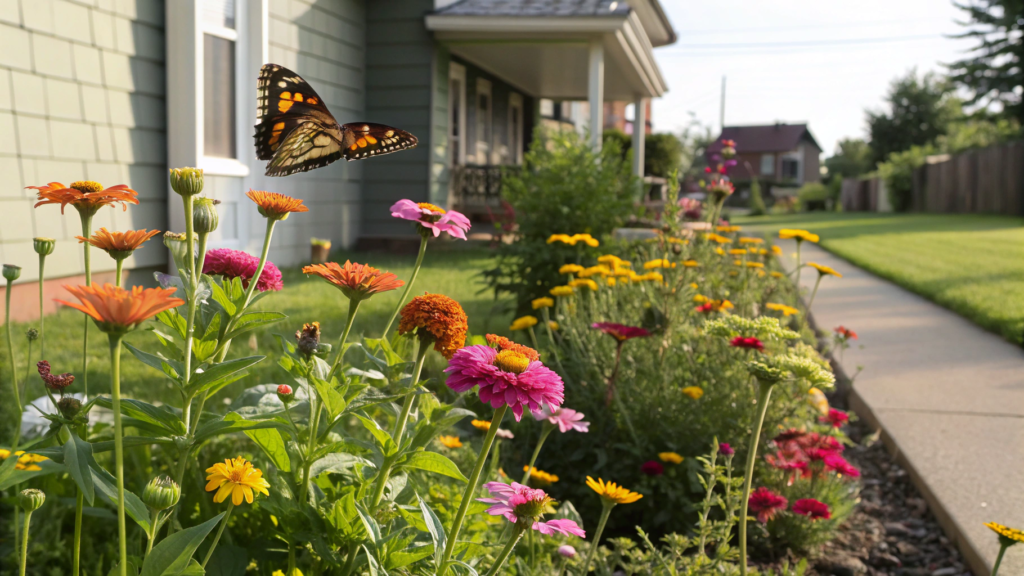
You walk out the door — and you’re not just seeing flowers, you’re noticing life buzzing all around them. Butterflies, bees, bumblebees — they’re not just pretty guests. They’re a sign of a healthy yard.
And trust me, a flower bed that attracts butterflies doesn’t need to be exotic. Just the right plants, a sunny spot, and a bit of patience.
Why it’s worth giving butterflies a spot in your yard
- You’re helping support local ecosystems and pollinator populations.
- You get nonstop blooming from spring to fall — butterflies don’t hang around empty spaces.
- It becomes a living element of your landscape — something that makes your front lawn truly yours.
How to create a butterfly magnet flower bed:
1. Pick the sunniest spot in your yard.
Butterflies need warmth. They’re active when the sun is out.
Ideally, choose a spot that gets at least 6–8 hours of direct sun a day.
Even better if it’s sheltered from strong wind — like in front of a south- or east-facing wall.
2. Remove the lawn and prep the soil.
Cut the turf about 1–2 inches deep (2.5–5 cm) and fill the area with a mix of compost and garden soil.
Add organic matter and loosen the soil a bit. Mulch comes later.
3. Plant nectar flowers for adult butterflies.
Butterflies feed on nectar — so they need flowers with “easy landings” and pollen access.
Stick to native plants when you can — they’re hardier and more beneficial.
Nectar-rich plants (1.5–4 feet / 45–120 cm):
- Echinacea purpurea ‘Magnus’ — a magnet for monarchs
- Liatris spicata — tall spikes butterflies love
- Asclepias tuberosa (butterfly weed) — main food source for monarch caterpillars
- Coreopsis verticillata ‘Moonbeam’ — long-lasting, lush blooms
- Monarda didyma ‘Jacob Cline’ — hummingbirds will show up, too
- Verbena bonariensis — airy, but tall and structured
4. Mix up bloom times and plant heights.
Butterflies come through the whole season, so the bed should offer something every month:
Spring. Iberis, Lupinus
Summer. everything listed above
Fall. Aster novi-belgii, Sedum ‘Autumn Joy’
5. Add a “landing pad” and water source.
Butterflies love warming up on stones. Place a couple flat rocks in the bed for basking.
Also add a shallow saucer filled with water and pebbles — they’ll sip while perched.
6. Mulch and don’t rush cleanup.
A 2-inch (5 cm) layer of bark or straw mulch helps keep moisture in.
Don’t cut back stems in fall — many butterflies overwinter in dried stalks. Just trim them in spring.
Want to prevent water loss? Add a soaker hose — like the Melnor Flat Soaker Hose — for gentle watering that won’t scare pollinators.
Check what kinds of butterflies and milkweeds are native to your region. Monarchs, for example, prefer Asclepias tuberosa or A. incarnata, while others love phlox and asters.
In dry climates, look for thick-leafed, deep-rooted plants.
Here in North Idaho, liatris, echinacea, verbena, and coreopsis thrive — even with minimal watering.
Our Experience
The first butterflies showed up just a week after planting. At first, I thought it was a coincidence. Then the swallowtails came. Then the monarchs.
Now, this spot isn’t just pretty. It’s alive. And every spring, we add a couple more nectar buddies — because we want the movement to keep going.
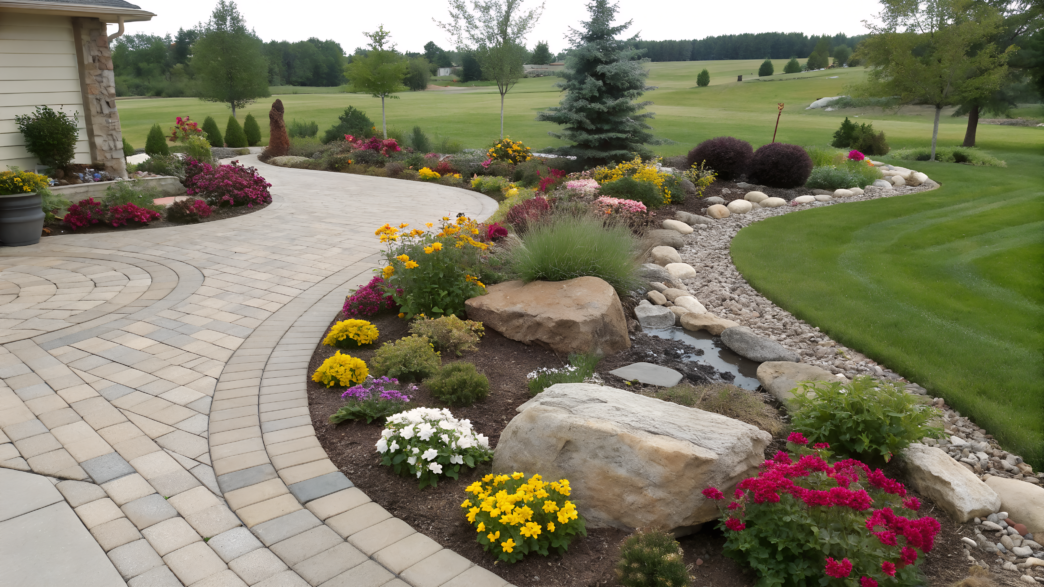
9. Cottage-Style Border Flower Bed Along Pathways
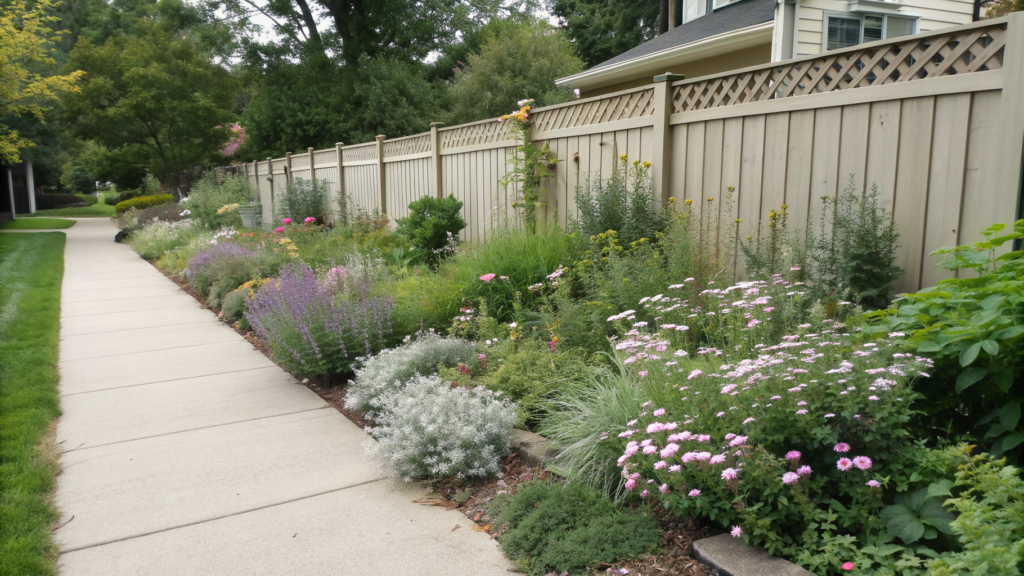
A cottage-style border bed isn’t about neat symmetry — it’s about natural abundance, texture, and flow, all still built on solid design rules. A paradox? Not really. Just good design.
What makes a cottage-style border bed different
- It runs along a path, fence, or house wall — like a ribbon.
- It always has several layers: from low groundcovers to lush shrubs.
- Flowers and plants blend and overlap, but they never block the way.
- This isn’t a 90s-style mixborder. It’s a controlled wildness that you want to walk past slowly and soak in.
How to build this kind of border along a path:
1. Define the length and width of the strip.
The bed should be at least 2 feet wide (60 cm) — ideally 3–4 feet (90–120 cm) if space allows.
It can run along one or both sides of the path. Just don’t block the walkway, especially if it’s narrow.
2. Create a soft edge.
Cottage style isn’t about being rigid. Skip the plastic edging. Better options:
- low woven border
- two rows of brick
- simply a clean cut of the turf
From our own experience: we used granite cobblestones for the edge — they’re almost buried in the ground but hold the bed’s shape beautifully.
3. Prepare the soil.
Cottage-style doesn’t tolerate poor, compacted dirt. Remove the top layer about 6–8 inches deep (15–20 cm), and mix in a ton of organic matter — compost, leaf mold, aged manure.
Add perlite or sand if your soil is heavy.
4. Plant in layers — without rigid blocks.
The idea is to create a wavy, living edge, where plants blend into one another naturally.
Back layer (up to 3.5–4 feet / 100–120 cm):
- Achillea millefolium ‘Paprika’ — feathery leaves, strawberry ice cream color
- Delphinium ‘Guardian Blue’ — upright spikes
- Rudbeckia ‘Goldsturm’ — like little drops of sun
Middle layer (1.5–3 feet / 45–90 cm):
- Echinacea ‘Cheyenne Spirit’ — tons of blooms that last till fall
- Salvia ‘Caradonna’ — vertical purple accent
- Phlox paniculata ‘David’ — crisp white contrast
Front edge (up to 1 foot / 30 cm):
- Geranium ‘Rozanne’ — blooms nonstop
- Alchemilla mollis — spills out beautifully
- Nepeta ‘Walker’s Low’ — soft blue carpet
5. Repeat colors and shapes with rhythm.
Cottage isn’t chaos. Pick 2–3 main colors (like lavender, white, and yellow) and repeat them along the bed.
You can swap out the plants, but keep consistent tones and shapes. That creates the look of “organized wildness.”
6. Leave space for self-seeding and annuals.
That’s what gives the garden that “growing-on-its-own” vibe. Every year we let cosmos, nigella, and calendula pop up where they want — and then decide who stays.
7. Use informal, light mulch.
Best choices are shredded leaves, hay, or compost — things that feel part of the scene.
Skip gravel or dark bark — they’re too formal for cottage style.
Care
- Watering: moderate but regular
- Deadheading: remove faded flowers to keep things blooming
- Dividing: every 2–3 years, split perennials to keep the bed full of life
- In spring: just top off old mulch with compost — it’ll all wake up on its own
Climate and Light
Cottage-style beds thrive in full sun or partial shade, depending on the plant mix.
In hot, dry areas, go for tougher plants: yarrow, salvia, geranium. In cooler spots, you can add phlox, asters, aquilegia.
As always — adjust for your zone and microclimate.
10. Island Flower Bed with 360° View in the Center of Lawn

When you look at a flat, green lawn — sure, it’s neat and tidy… but something’s missing.
You crave a focal point. Something that catches the eye and gives the whole yard some rhythm.
That’s exactly what a 360° island flower bed does — it turns your lawn from an empty space into a stage.
Why an island bed is simple but striking
- It doesn’t need a backdrop — you can place it anywhere, even in the middle of a field.
- It works as a central design feature, especially against an open lawn.
- It lets you play with shape, texture, and height since every side is visible.
- And best of all — it’s beginner-friendly: no need to think about walls or facades. Just the bed — and air around it.
How to build an island flower bed: step-by-step
1. Pick the spot and shape. Oval, round, or teardrop-shaped beds work best in open areas.
Great placement ideas:
- in the center of the lawn
- in the middle of a seating area
- at a path intersection
Size: minimum 5×5 feet (1.5×1.5 m)
2. Prep the soil.
- Remove the grass or weeds
- Add 2–3 inches (5–7 cm) of compost and garden soil
- Mix the top layer down 6–8 inches (15–20 cm)
- Form a soft mound in the middle — that gives the bed a nice, lifted look
3. Plan tiers: center to edge. The eye is drawn to the center, so put tall accents there, tapering out toward the edge.
Think wave, not tower.
- Tall center (3.5–5 feet / 100–150 cm):
Delphinium ‘King Arthur’, Verbena bonariensis, Liatris spicata - Middle ring (1.5–3 feet / 45–90 cm):
Echinacea ‘Cheyenne Spirit’, Phlox paniculata ‘David’, Coreopsis ‘Zagreb’ - Low edge (up to 1 foot / 30 cm):
Sedum ‘Dragon’s Blood’, Nepeta ‘Walker’s Low’, Geranium ‘Rozanne’
Pro tip. Repeat the same plants at intervals around the circle to keep a visual rhythm — super important with 360° views.
4. Add decorative accents. Could be a garden sculpture in the center — a jug, spire, lantern, flat stone, or even a cluster of ornamental cabbage or sage in season.
Anything that creates a top-down focal point.
5. Mulch and edge it. Add a 2-inch (5 cm) layer of bark or gravel mulch.
For the edge, you can:
- leave a shallow turf cut (if trimming with a string trimmer)
- line it with brick
- or install a metal edging strip like Dimex EasyFlex No-Dig Edging (Amazon)
Care and Watering
- Watering drip tape with a timer works great for round beds
- Mulch refresh once a year
- Spring apply compost and trim back perennials
- Fall leave dried echinacea and verbena stems — they’re beautiful and feed the birds
Light and Climate Tips
A bed in full sun means long bloom seasons and lush growth. If your spot is part-shaded, swap the verticals for astilbe, and use geranium or hosta instead of echinacea.
What matters most: choose tough, long-blooming varieties, since this bed is always in the spotlight.
11. Minimalist Gravel + Flower Combo Bed for Low Maintenance
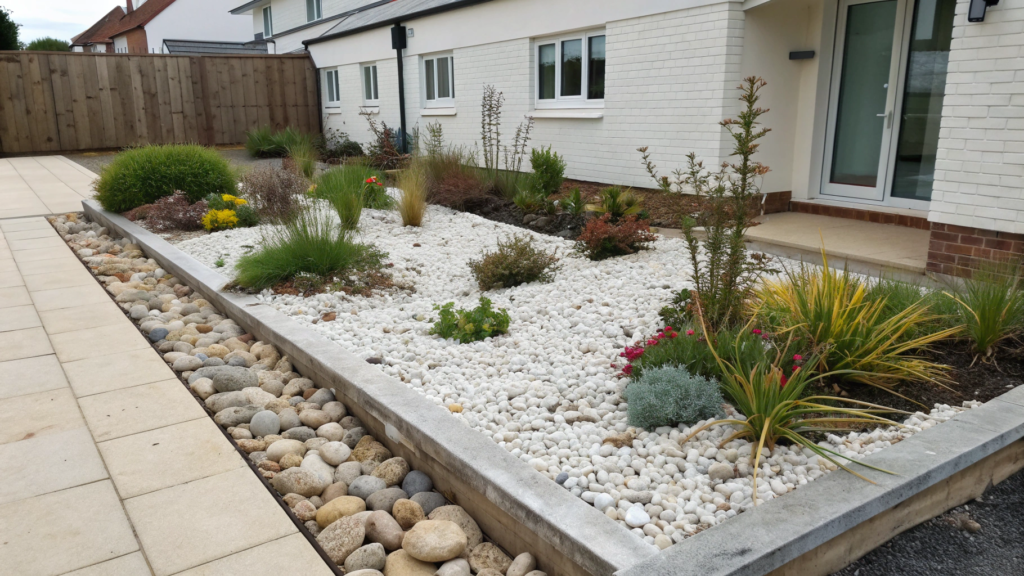
If you dream of having a flower bed but don’t want to deal with constant watering, weeding, and replanting every few months — this one’s for you.
A minimalist gravel bed with tough plants is that sweet spot between style, resilience, and low upkeep. It looks great next to modern homes, patios, walkways, and even between pavers.
Why go for a gravel bed
- It doesn’t need much maintenance — fewer weeds, less water evaporation.
- It’s perfect for dry climates and full-sun spots.
- Great for people who love clean lines and calm color palettes.
- And honestly — gravel crunches beautifully underfoot, and flowers pop like sculptures against it.
How to build a gravel + resilient flower bed: step-by-step
1. Choose the location and shape. Works best alongside walkways, house fronts, between concrete slabs, or on sunny, dry slopes.
Ideal depth: 2.5 to 4 feet (75–120 cm)
Length: any, as long as it sticks to strong geometry — rectangles, squares, lines.
2. Prep the foundation. This is the key to low maintenance:
- Remove all turf and weeds
- Lay down landscape fabric (like Ecogardener Premium Weed Barrier, Amazon)
- Add a drainage layer — small gravel or sand (1–2 inches / 2.5–5 cm)
- Then add a gravel layer: 2 to 3 inches (5–7 cm)
3. Pick resilient, sculptural plants. You want plants that can take sun, don’t need constant watering, hold their shape year-round — and of course, look striking against gravel.
Recommended perennials and grasses:
- Lavandula ‘Hidcote’ — silver foliage, purple blooms
- Salvia nemorosa ‘Caradonna’ — tall purple spikes
- Sedum ‘Autumn Joy’ — fleshy leaves, fall flowers
- Echinacea ‘White Swan’ or ‘Green Twister’ — bold contrast with stone
- Festuca glauca ‘Elijah Blue’ — cool blue grass
- Pennisetum alopecuroides ‘Hameln’ — soft ornamental grass
Repeat plants at even intervals to create rhythm and calm in the layout.
4. Plant through the gravel, not before it
- Push gravel aside, cut through the fabric, dig a hole.
- After planting, move the gravel back.
- This way, roots are in the soil — and stems look like they’re on a podium.
5. Add accents. You can drop in a stone sculpture, garden lantern, metal trellis, or just a flat boulder — anything to break up the surface and draw attention.
Maintenance is minimal — but consistent
- Watering. Оnly in the first week after planting. Then, as needed.
- Weeds. Rare but if they pop up — pull them right away
- Gravel mulch. Doesn’t need yearly topping
- Pruning. Once per season, after flowering
- Spring. Top off gravel if it’s shifted or thinned
Flat soaker hoses work well — just tuck one under the gravel, nearly invisible.
What to consider by climate
- In hot regions, lavender, salvia, and sedum thrive
- In cooler or wetter climates, use chunkier gravel (better drainage) and include grasses and echinacea
- If your soil is heavy clay — drainage and a sand layer are essential under the gravel
12. U-Shaped Bed Around a Seating Area in the Backyard
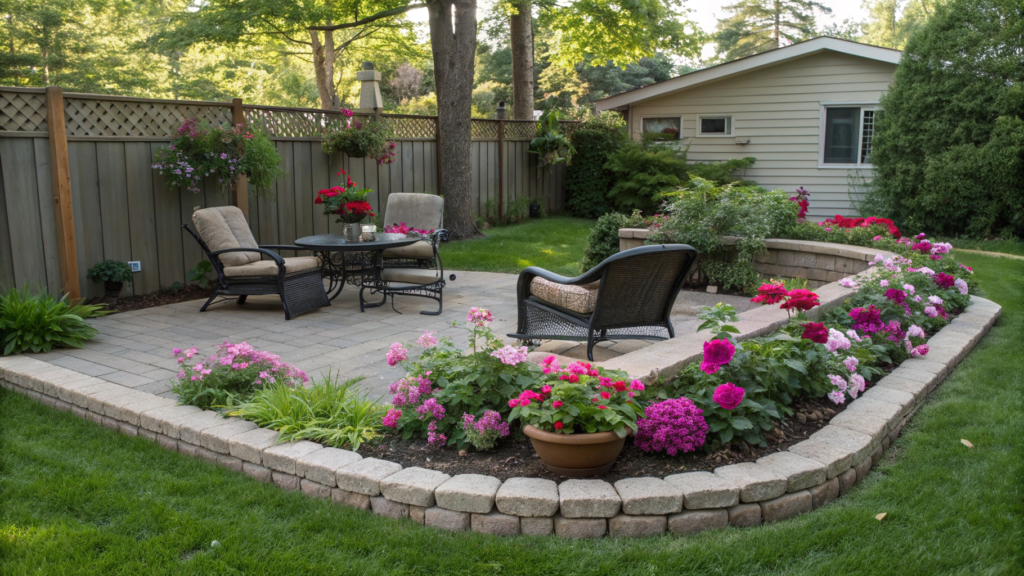
A U-shaped flower bed that wraps around a seating area isn’t just a way to plant flowers.
It’s a way to create a room without walls — full of shade, fragrance, and soft edges — where you’ll actually want to spend time.
What a U-shaped garden bed adds to your yard
- Cozy vibes without fences — plants form natural visual walls
- Smart focus — highlights the seating zone as the heart of the space
- Natural acoustics — grasses and flowers help buffer outside noise
- Microclimate — greenery adds shade, coolness, and wind protection
How to create a U-shaped bed around your seating zone:
1. Define the shape and size. The base is your seating area — a platform, patio, firepit, or just a bench on the lawn.
Around it, build a three-sided bed in a “U” shape.
The ideal distance from the edge of the seating area to the plantings: 2.5 to 4 feet (75–120 cm) — close enough to feel immersive, but not cramped.
2. Create “green walls” with tall plants. The core effect comes from plants 3–5 feet tall (90–150 cm). Try:
- Miscanthus sinensis ‘Morning Light’ — rustling ornamental grass
- Hydrangea paniculata ‘Limelight’ — soft green cloud of blooms
- Salix integra ‘Hakuro Nishiki’ — lollipop willow adds a gentle touch
Plant these on the sides and back of the U — they form your soft backdrop.
3. Add a blooming middle layer. To avoid the look of an empty base, add mid-height plants (1.5–3 feet / 45–90 cm):
- Echinacea purpurea ‘Green Twister’
- Phlox paniculata ‘Laura’
- Monarda ‘Jacob Cline’
- Salvia ‘Caradonna’
Distribute them along the “legs” of the U, alternating by color and shape.
4. Frame the front edge with low growers. So the bed doesn’t feel like it suddenly ends, plant along the edge:
- Heuchera ‘Lime Marmalade’
- Nepeta ‘Walker’s Low’
- Sedum ‘Blue Spruce’
- Alchemilla mollis
Leave a 2-foot (60 cm) opening on one side so you can easily step into the seating area.
5. Add structure and rhythm. Repeat the same plants in multiple spots. For example:
salvia, echinacea, salvia, echinacea.
This gives the whole bed visual calm — especially important if it’s a larger one.
Mulch and Irrigation
- Mulch: organic (bark, wood chips), 2 inches (5 cm) deep
- Watering: a drip system with a timer is perfect — especially if you’re sitting there and don’t want to hear a loud hose
Light and Climate Tips
If the spot gets sun — perfect. All the plants above thrive in full sun. If it’s part shade, swap echinacea for geranium, phlox for astilbe, miscanthus for hosta or fern.
Go for low-maintenance plants that won’t need daily attention — this is a place to relax, not fight off powdery mildew.
13. Small Entryway Bed with Statement Planters
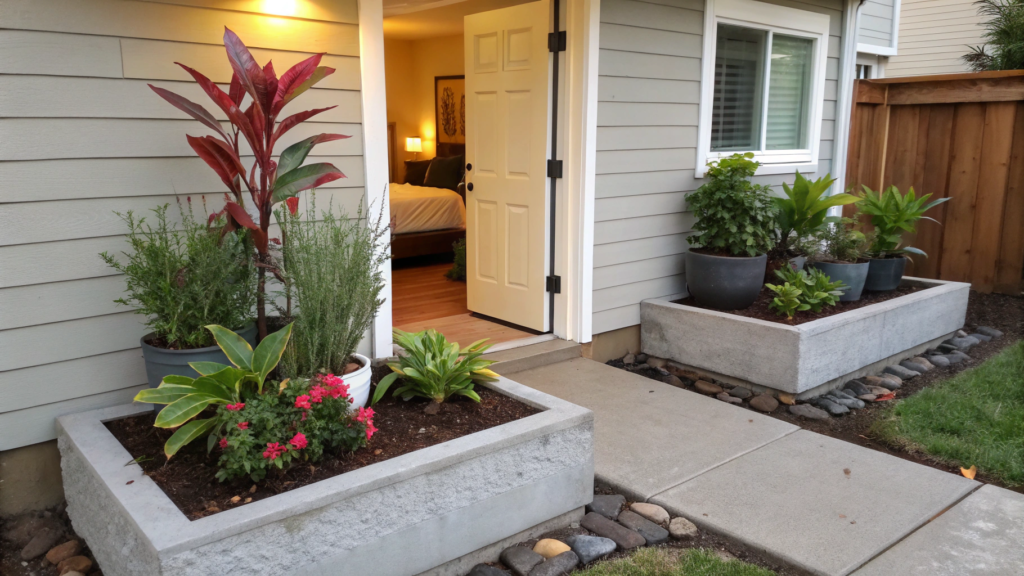
Not everyone has space for big porch flower beds.
But all you really need is a simple garden strip and a couple of planters that take the spotlight.
Why it’s worth adding a focal point at your entry
- It’s the first impression — let it feel alive, not just “concrete and steps”
- Statement planters let you change the season fast without replanting everything
- Even the tiniest bed gives a sense of care and completion
- And in narrow spaces, whatever’s there has more visual power — so even a few plants can deliver serious wow
How to build a small entryway bed: step-by-step
1. Define the spot for your bed. Most common locations:
- along the steps (one side)
- next to a railing or wall
- beside the door
Size: even 18×36 inches (45×90 cm) is enough — just don’t block the walkway.
2. Choose planters that set the tone. These will be your year-round anchors.
Best choice: two matching planters that are weather-resistant (freeze and sun-proof).
Go for a neutral color — graphite, dark terracotta, or white concrete.
3. Fill the bed with tough, striking plants. The key is: just a few, but with character.
Think: the bed for texture and structure, the planters for seasonal swaps.
In the bed (low perennials, up to 1.5 feet / 45 cm):
- Heuchera ‘Palace Purple’ — bold burgundy accent
- Carex oshimensis ‘Evergold’ — graceful arching grass
- Ajuga reptans ‘Black Scallop’ — spring flowers + groundcover
- Salvia ‘May Night’ — compact, bold color
In the planters (swap seasonally):
- Spring: tulips + ivy
- Summer: petunias + basil (smells great, tastes great)
- Fall: mums + ornamental cabbage
- Winter: evergreen clippings, pinecones, little lanterns
4. Add mulch and/or stone. Mulch makes it look tidy, even when plants are still small.
Use bark for a rustic vibe, or gravel/river rock for a modern look.
Layer: 1.5–2 inches (4–5 cm)
5. Lighting — a finishing touch. If possible, hang a small solar string light or add a garden lantern.
Your entry will feel welcoming even after dark.
Maintenance
- Watering deep but infrequent — don’t forget the planters in summer heat
- Trimming as needed. For heuchera and ajuga, just clear out dry leaves
- Planters refresh plantings once per season
- Fall top off the mulch
If your entry faces north or is in part shade, go with hostas, heuchera, ajuga, brunnera.
If it faces south, you can use salvia, lavender, echinacea, sedum.
In any case — base your picks on the actual microclimate: how hot it gets, how often it rains, how much space there is.
14. L-Shaped Bed to Soften Sharp Patio Corners
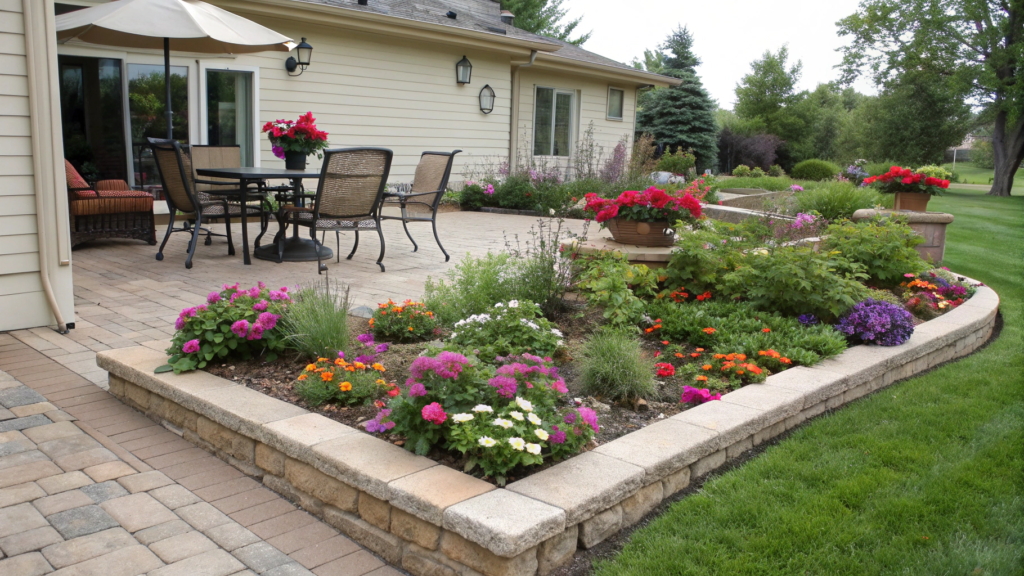
Every patio has that one corner.
You don’t quite know what to put there — too tight for furniture, too dry for grass, and honestly, you just don’t want to look at it.
That’s exactly where an L-shaped flower bed comes in.
Why the L-shape works so well
- Covers two “blank” directions at once — side and back
- Adds visual depth without crowding the space
- Softens the hard lines of concrete or deck corners
- Works great as a backdrop for chairs or a mini seating nook
How to build an L-shaped patio bed: step-by-step
1. Define the area and depth. Even a 3×3 ft (90×90 cm) corner can be transformed.
Ideal bed depth: 2 to 3 feet (60–90 cm)
Key thing: don’t block any walkways — especially near high-traffic spots.
2. Add height and structure along the back edge. At the “spine” of the L (against the wall or fence), plant something vertical to anchor the eye:
- Hydrangea paniculata ‘Bobo’ — compact hydrangea, up to 3 feet
- Salvia ‘Caradonna’ — slim purple spikes
- Calamagrostis ‘Karl Foerster’ — tall ornamental grass
3. Mid-layer: flowers and foliage for body. These go near the “knee” of the L:
- Echinacea ‘Magnus’ or ‘Green Twister’
- Coreopsis verticillata ‘Zagreb’
- Heuchera ‘Plum Pudding’ — color comes from the foliage, not blooms
Want a seasonal pop? Leave space in the corner for a single pot with annuals.
4. Front edge: low textures that spill onto the patio. To give a finished, natural feel, add:
- Nepeta ‘Walker’s Low’
- Thymus pseudolanuginosus (woolly thyme)
- Sedum ‘Blue Spruce’
These plants gently creep over the patio edge, giving the bed that relaxed “nature’s spilling out” look.
Mulch and Edging
- Mulch with bark or gravel, 2 inches (5 cm) deep — match your style
- Edge with: metal strip (EasyFlex No-Dig Edging, Amazon), stone, or just a crisp patio border
Watering and Maintenance
- Water: deep, infrequent. A drip line with a timer is ideal
- Spring: add compost, trim back perennials
- Summer: top off mulch if it’s settled
- Fall: leave the structure — echinacea and salvia look great even dried
Light and Microclimate Tips
If the corner gets full sun — perfect. All the plants above will love it. If it’s part shade or on the north side:
- Swap hydrangea for Hydrangea arborescens ‘Annabelle’
- Swap salvia for astilbe
- Swap echinacea for geranium or hosta
Always choose based on your real microclimate — how hot it gets, how fast the spot warms up, whether wind hits it, or water collects there.
15. Dry Creek Bed Design with Drought-Tolerant Flowers
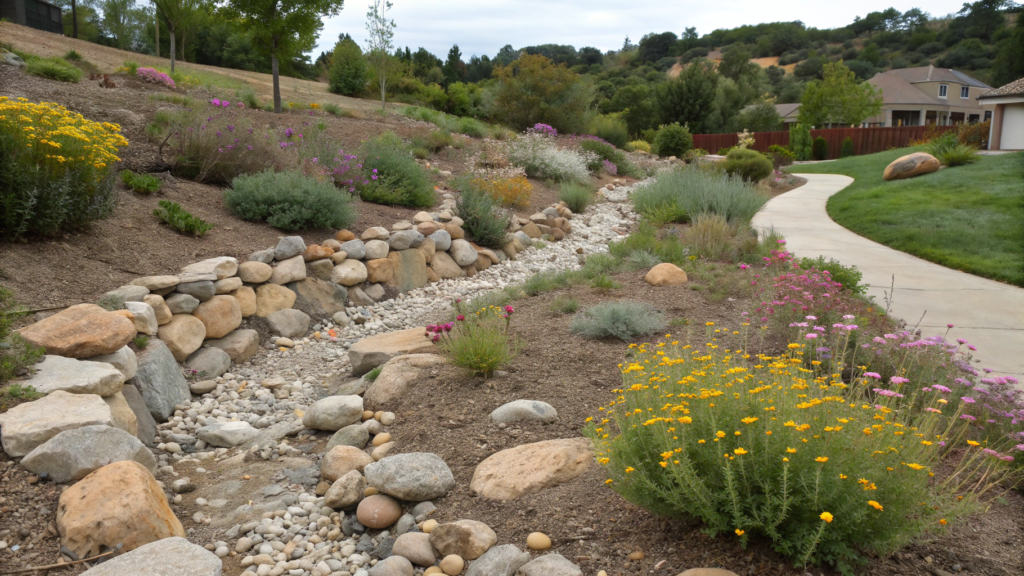
If you’ve got a spot in the garden where grass won’t grow and flowers keep dying — try a dry creek bed.
It’s not just a flower bed — it’s a real landscape feature, where a curving rocky “stream” takes the place of water, and flowers couldn’t care less when it last rained.
Where this kind of bed works well
- At the base of a slope, where water tends to collect
- In the driest corner of your yard, where moisture evaporates fast
- Along pathways, as a zoning element
- Next to gravel driveways or utility sheds
Visually, this “creek bed” adds depth and flow to the space. Best of all — it’s easy to set up and almost never needs watering.
How to build a dry creek bed with flowers:
1. Mark out a curvy “stream” line. Keep it wavy, not straight, and vary the width between 1.5 to 3 feet (45–90 cm).
Use a garden hose or rope to sketch the shape first.
2. Dig out the center and prep the base. Remove turf to a depth of 4–6 inches (10–15 cm). Lay down landscape fabric. Add a mix of gravel in different sizes:
- Larger gravel along the edges
- Finer gravel in the center
- Add a few flat stones (like slate) to mimic water-worn islands
3. Plant flowers along the edges and in clusters. Don’t line them up — plant in small natural-looking groups to keep the layout organic.
Drought-tolerant groundcovers (front layer):
- Sedum spurium ‘Dragon’s Blood’
- Thymus serpyllum
- Eriogonum umbellatum (sulphur buckwheat)
Mid-height options (for groups near the center):
- Echinacea purpurea
- Gaillardia ‘Arizona Sun’
- Lavandula angustifolia
Structural accents:
- Festuca glauca ‘Elijah Blue’
- Pennisetum alopecuroides ‘Hameln’
- Yucca filamentosa
4. Mulch and define the edge. The combo of rocks and mulch looks great and holds moisture. Use:
- Small gravel
- Bark mulch (only near plants, along the sides)
- Edging stones to complete the look
How to maintain this bed
- Watering: for the first 2 weeks, water as needed. After that — barely any
- Weeding minimal, especially with stone mulch
- Shape touch-ups in spring, you can “reshuffle” the stones to refresh the layout
- Plant additions each year, add new flower clusters to grow the look naturally
What would you do?
We’ve shared our 15 ideas — now we’re curious: what would you add to the list?
Maybe you’ve figured out a clever way to tame that awkward corner by your porch?
Or found the perfect flower combo under your apple tree — where “by-the-book” choices never worked but yours did?If even one of these beds clicked in your head — don’t keep it to yourself.
Write us. Show us. Disagree with us. Lindy and I are always up for a good garden chat.