
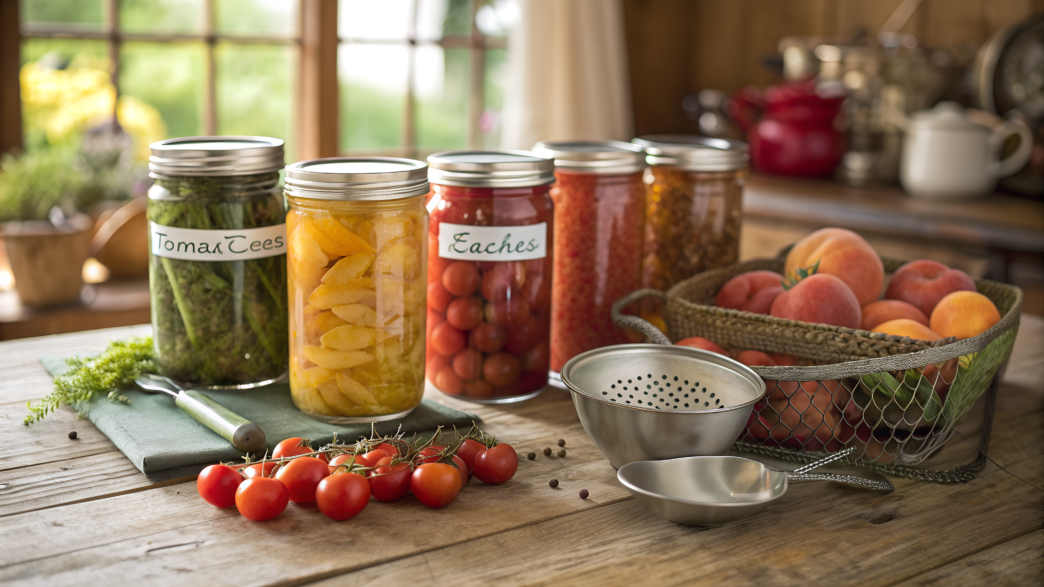
To be honest, when we first started canning, I thought it was some kind of “science for the chosen ones.” So many jars, lids, boiling baths… and the constant fear of messing it up. But step by step, I realized: canning recipes isn’t scary — it’s actually a joyful process.
In this roundup, I’ve gathered our favorite canning recipes — from classic tomato sauce to spiced peach butter. We’ve made each of them many times, tested them, and eaten them down to the last spoonful. They’re all perfect even for beginners: the ingredients are simple, the steps are clear, and the results are always satisfying.
Ready? Let’s go through all 10 canning recipes — and find the one you’ll start your first experiments with.
1. Classic Water Bath Tomato Sauce
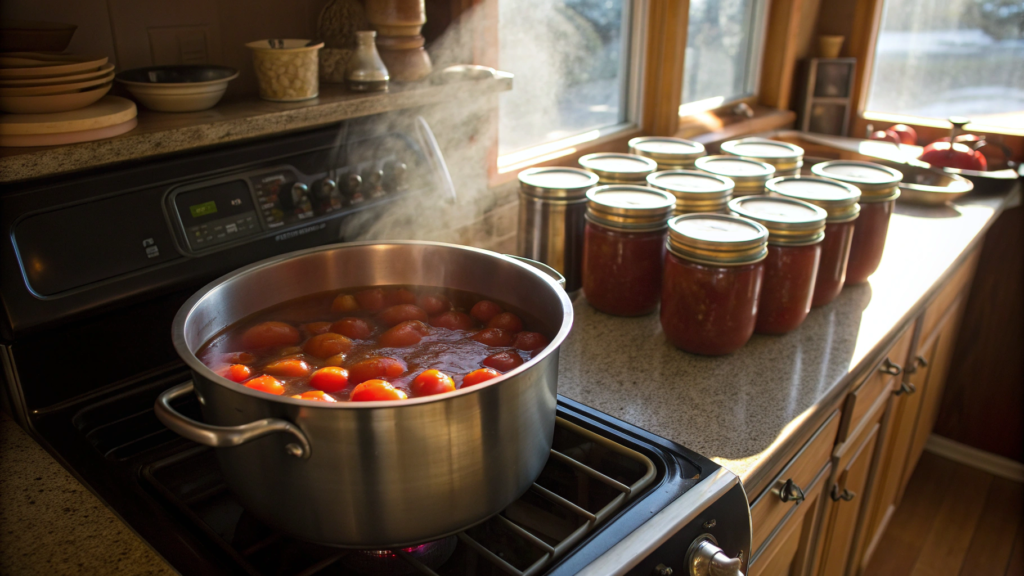
If you’re going to start your canning recipes journey, it should be with tomato sauce. I still remember our first try — we were so nervous! It felt like the water in the pot would never boil and the lids were about to pop off any second. But everything turned out perfectly, and since then tomato sauce has become our signature in winter storage.
Why start with sauce
- Tomatoes are always plentiful in season — and they just beg to be canned!
- The sauce is super versatile: you can use it for pasta, pizza, lasagna, even soup.
- The recipe is simple, and the water bath method is great practice for beginners.
Tip. You’ll need a large water bath canner for this. The Ball Fresh Preserving Water Bath Canner is spacious and comes with a rack so the jars stay stable.
Ingredients (for 6 pint jars / about 3 liters):
- 15 lbs ripe tomatoes (about 7 kg)
- 2 large onions, finely chopped
- 6 garlic cloves, minced
- 1/4 cup olive oil (60 ml)
- 2 tbsp salt (to taste)
- 2 tsp sugar (optional)
- 1 tsp dried oregano
- 1 tsp dried basil
- 1/2 cup lemon juice (120 ml) — a must for proper acidity!
How to make it canning recipes
- Prepare the tomatoes. Blanch them in boiling water, peel off the skins. Yes, it takes a little effort, but the sauce turns out silky without tomato skins. Chop them coarsely.
- Sauté the base. In a large pot, heat the oil, sauté the onion until translucent, then add garlic — let it release its flavor but don’t burn it.
- Cook the sauce. Add tomatoes, salt, sugar, and herbs. Bring to a boil, then lower the heat and simmer 45–60 minutes. The sauce should thicken slightly. Sometimes I blend half of it — the texture comes out “like in Italy.”
- Prepare jars. Sterilize jars in boiling water or in the oven at 225°F (110°C) for 10 minutes. Boil the lids separately.
- Fill and process. Add 1 tbsp lemon juice to each pint jar, then ladle in the hot sauce. Leave 1/2 inch (1.2 cm) of headspace. Place lids on top and screw on the bands finger-tight — snug, but not too tight. Process the jars in a boiling water bath for 35 minutes.
As the jars cool, you’ll start hearing light “pops.” That’s the lids getting pulled down by the vacuum. Each sound means the jar sealed properly.
Once cooled, check: press the center of the lid with your finger. It should be concave and not move up and down. If it’s firm and still, the jar is sealed.
Common beginner mistakes
When we made tomato sauce for the first time, I thought, “What could possibly go wrong?” And then one jar cracked right in the pot — that’s when I realized mistakes happen to everyone.
Here are a few things to remember:
- Temperature shock. Cold jar + boiling sauce = cracked glass. Always keep jars hot before filling.
- Wrong headspace. If you fill too high, the sauce will spill out during boiling and the lid won’t seal. Too much air inside — and condensation forms, the food spoils.
- Low acidity. Tomatoes vary in acidity. That’s why lemon juice or vinegar isn’t optional — it’s a safety step.
- Lids. Too tight — air can’t escape. Too loose — no vacuum seal. Aim for finger-tight.
These little things feel scary only at first. Once you’ve canned your first batch, confidence comes quickly. And that “pop” of the lid becomes the most satisfying sound.
We usually use this sauce as a pasta base — just warm it with garlic and olive oil. It’s also a lifesaver when dinner needs to come together fast: one spoon in soup makes it rich, or spread on bread with cheese — instant snack. And when I don’t feel like cooking in the evening, I just open a jar, add a bit of fresh basil, and it feels like sitting in a tiny trattoria somewhere in Italy.
2. Sweet Pickled Cucumbers
We’ve always been “classic” pickle lovers — dill, garlic, pepper… But one day at a small country fair, I tried a thin slice of a sweet pickle. From that moment, I knew: our pantry needed a couple of shelves filled with these jars!
These cucumbers come out with a pleasant sweetness and are perfect for sandwiches, burgers, or even just for snacking when the mood strikes.
Ingredients (for 7 pint jars / about 3.5 L):
- 4 lbs fresh cucumbers (about 1.8 kg) — choose small and firm ones
- 2 large onions, sliced into half-moons
- 1/3 cup salt (90 g)
- 3 cups apple cider vinegar (720 ml)
- 2 1/2 cups sugar (500 g)
- 1 tbsp mustard seeds
- 1 tbsp celery seeds
- 1 tsp turmeric (for that nice golden color)
For even thin slices, I use the OXO Good Grips Mandoline Slicer — a must-have when you need to slice a whole batch of cucumbers fast.
How to make it canning recipes
- Prepare the cucumbers. Slice the cucumbers into thin rounds (about 1/4 inch / 0.5 cm) and place them in a large bowl. Add the onion, sprinkle with salt, and cover with cold water. Let sit for 2 hours — this removes extra bitterness and keeps the cucumbers crisp.
- Make the brine. In a large pot, combine vinegar, sugar, and spices. Bring to a boil, stirring until the sugar dissolves completely. The brine should be clear and fragrant.
- Drain the cucumbers. Drain the salted water and rinse the cucumbers and onions under running water to remove excess salt.
- Prepare jars and lids. Wash jars thoroughly with hot soapy water, rinse, and keep them hot (in a pot of water or in the oven at 225°F / 110°C).
Wash the lids and keep them in hot water (not boiling!) — that’s what manufacturers recommend to keep the sealing ring flexible. - Fill and process. Pack the cucumbers and onions into the jars, pour the hot brine over them, and leave 1/2 inch (1.2 cm) of headspace — otherwise the jar may bulge during heating.
Place the lid disc on top, screw on the metal band to finger-tight (snug by hand, without force). Process the jars in a boiling water bath for 10 minutes.
As the jars cool, you’ll hear gentle “pops” from the lids — that means a vacuum seal has formed. Test by pressing the lid: it should be concave and not move up and down. That’s when you know they’re ready for storage.
A small warning. If you slice the cucumbers too thick, they can turn out soft instead of crisp. And don’t cut short the soaking time in salted water — without it, they’ll lose their texture.
These sweet pickles fit perfectly on sandwiches with ham and cheese, add crunch and sweetness to any burger, and sometimes I just grab a fork and eat them straight from the jar. In the evening, when I don’t feel like heavy snacks, these pickles pair perfectly with a cold beer or a cheese board.
3. Peach Preserves with a Citrus Twist
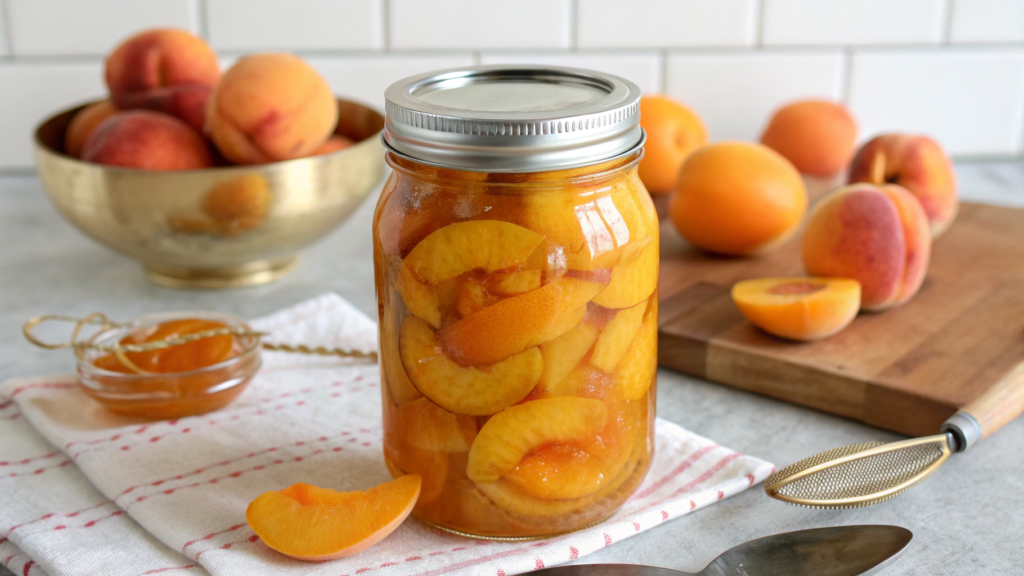
Peaches are probably the most delicious fruit you can ever preserve in a jar. And if you add a little citrus note, the result is an amazingly bright and fresh flavor. One time I accidentally added too much orange zest — and it turned out that this “mistake” made the preserve our family’s favorite.
Ingredients (for 6 pint jars / about 3 L):
- 4 lbs ripe peaches (about 1.8 kg)
- 1 lemon — juice and zest
- 1 orange — juice and zest
- 6 cups sugar (about 1.2 kg)
- 1/2 cup water (120 ml)
How to make it canning recipes
- Prepare the peaches. Blanch peaches in boiling water for 30 seconds, then transfer to cold water — the skins will peel right off. Slice them into wedges or cubes.
- Combine ingredients. Place the peaches in a large pot, add water, sugar, lemon juice and zest, and orange juice and zest. Stir and let sit for 10–15 minutes so the fruit releases its juice.
- Cook the preserve. Set the pot over medium heat. Cook, stirring, until the mixture comes to a boil. Then reduce the heat and simmer another 20–25 minutes until it thickens slightly. Skim off any foam.
- Prepare jars and lids. Wash jars thoroughly with hot soapy water, rinse, and keep them hot (in a pot of water or in the oven at 225°F / 110°C).
Wash lids as well and keep them in hot water (not boiling!) so the sealing ring stays flexible and fits tightly. - Fill and process. Ladle the hot preserve into jars, leaving 1/2 inch (1.2 cm) of headspace — otherwise the jar may bulge during heating.
Place the lid disc on top, screw on the metal band to finger-tight (snug by hand, not too tight). Process the jars in a boiling water bath for 10 minutes.
When the jars have cooled, check by pressing the lid: it should be concave and not move. If so, the jar is ready for storage.
Common mistake. Forgetting to skim the foam. If you don’t remove it, the finished preserve may ferment or darken on top.
Of course, a morning toast with a thick layer of butter and a spoon of sunny peach preserves is a classic. But try adding a couple of spoonfuls to warm oatmeal or yogurt — and suddenly it feels like breakfast at a small café by the sea.
And this preserve pairs beautifully with cheese. Put a wedge of soft Brie or Camembert on a plate, add a spoonful of peach preserve on top — and you’ve got an appetizer that looks festive and impressive.
4. Tomato Salsa with Jalapeños
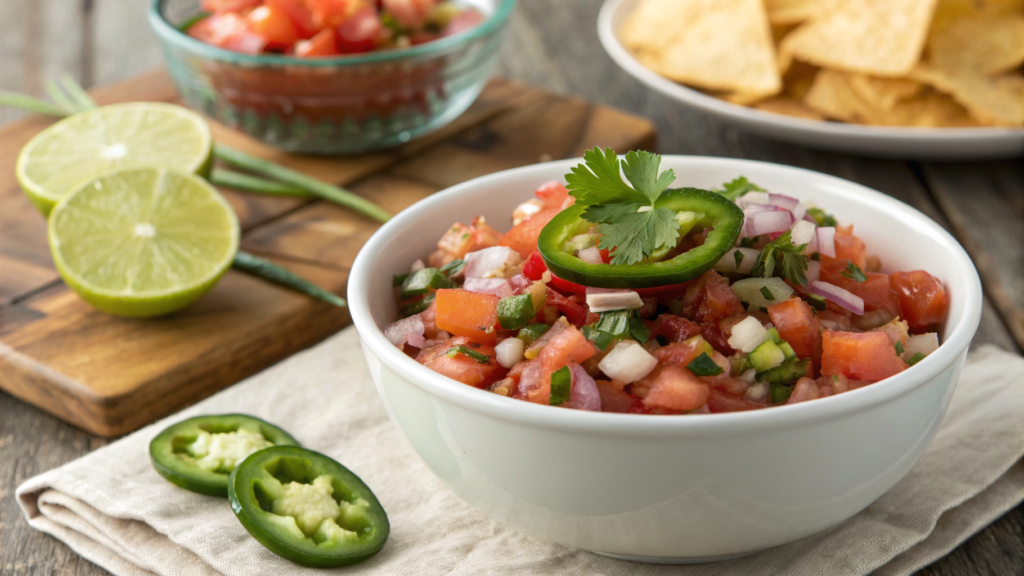
Let’s be honest — can store-bought salsa really compare to homemade? You taste the difference from the very first spoonful. Fresh tomato flavor, the kick of jalapeños, and just a hint of tang — one jar disappears in a single evening, especially if there’s a bowl of tortilla chips nearby.
Ingredients (for 6 pint jars / about 3 L):
- 10 cups peeled and finely chopped tomatoes (about 4 kg)
- 2 cups chopped onion (about 500 g)
- 1 ½ cups chopped green peppers (about 375 g)
- 1 cup chopped fresh jalapeños (about 250 g, use less for a milder version)
- 1 cup apple cider vinegar (240 ml)
- 3 tsp salt
- 2 tbsp minced garlic
- 1 tbsp sugar
- 2 tsp dried oregano
- 1 tsp cumin seeds (optional)
Tip: For chopping peppers and onions into even cubes, I always use the Fullstar Vegetable Chopper — it saves so much time, especially when working with big batches.
How to make it canning recipes
- Prepare the vegetables. Blanch tomatoes in boiling water, peel, and chop finely. Dice the onion, peppers, and jalapeños.
- Cook the salsa. In a large pot, combine all the vegetables, vinegar, salt, sugar, and spices. Bring to a boil, then simmer for 10 minutes over medium heat, stirring. The salsa should thicken slightly but keep its fresh flavor.
- Prepare jars and lids. Wash jars thoroughly with hot soapy water, rinse, and keep them hot (in a pot of water or in the oven at 225°F / 110°C).
Wash lids and keep them in hot water (not boiling!) — manufacturers recommend this so the sealing ring stays flexible. - Fill and process. Ladle the hot salsa into jars, leaving 1/2 inch (1.2 cm) of headspace — otherwise the jar may bulge during heating.
Place the lid disc on top, screw on the metal band to finger-tight (snug by hand, without force). Process the jars in a boiling water bath for 15 minutes.
When the jars cool, check by pressing the lid: it should be concave and not move. That means the seal is correct.
Be careful. Don’t reduce the amount of vinegar. It’s not just for flavor — it’s critical for safe storage.
This homemade salsa almost always disappears with chips: open a jar, grab a bowl — and movie night is on. But I love other uses too: a spoonful in a morning omelet makes it a real Mexican breakfast. On baked chicken, salsa works as a ready-to-go sauce. And sometimes I just stir a couple of spoonfuls into soup or braised veggies — the flavor instantly deepens.
5. Cucumber Relish Spread
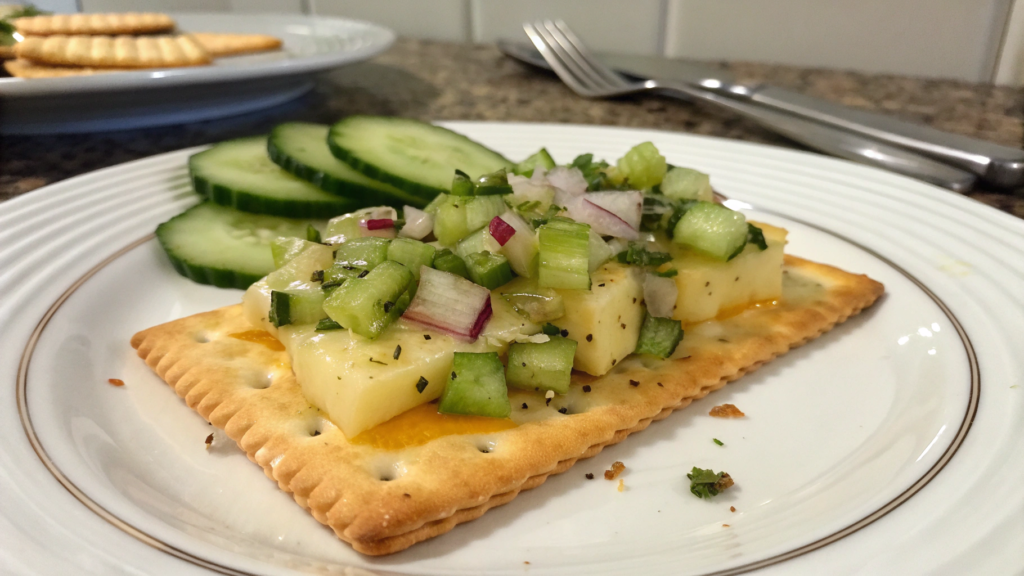
When I first tried it, I thought it was just another version of pickled cucumbers. But once I spread it on a cracker with a piece of cheese — it was insanely good!
Ingredients (for 6 pint jars / about 3 L):
- 8 cups finely chopped cucumbers (about 2.5 kg)
- 2 cups finely chopped onion (about 500 g)
- 1 green bell pepper, finely chopped
- 1 red bell pepper, finely chopped
- 1/4 cup salt (60 g)
- 3 1/2 cups sugar (700 g)
- 2 cups apple cider vinegar (480 ml)
- 1 tbsp mustard seeds
- 1 tbsp celery seeds
- 1 tsp turmeric
How to make it canning recipes
- Prepare the vegetables.Finely chop cucumbers, onion, and peppers (Cuisinart Mini-Prep Plus Food Processor). Place them in a large bowl, sprinkle with salt, and cover with cold water. Let sit for 2 hours, then drain and rinse the vegetables.
- Make the brine.In a large pot, combine vinegar, sugar, and spices. Bring to a boil, stirring until the sugar is completely dissolved.
- Combine with vegetables. Add the cucumbers, onion, and peppers to the brine. Simmer for 10 minutes over medium heat until the vegetables are soft and fragrant.
- Prepare jars and lids. Wash jars thoroughly with hot soapy water, rinse, and keep them hot (in a pot of water or in the oven at 225°F / 110°C).
Wash lids and keep them in hot water (not boiling!) so the sealing ring stays soft and fits securely. - Fill and process. Ladle the hot relish into jars, leaving 1/2 inch (1.2 cm) of headspace so the contents can expand safely during heating.
Place the lid with the sealing ring on top and screw the band on until just snug — tight enough to close, but not overly forced. Process the jars in a boiling water bath for 10 minutes.
As the jars cool, listen for the light “pops” — this means the lids have sealed. The next day, press the lid gently with your finger: it should be concave and firm.
Beginner mistake. Rushing the process. If you don’t let the cucumbers sit in salt water for the full two hours, they can turn watery and flavorless.
When friends come over, I just grab a jar, some crackers, and cheese — and the appetizer is ready. On sandwiches, this cucumber relish works as well as any sauce: it adds crunch, sweetness, and a touch of spice. Sometimes I even stir a spoonful into potato salad or pasta — and the flavor instantly shifts from simple to restaurant-level.
6. Homestyle Peach Pie Filling
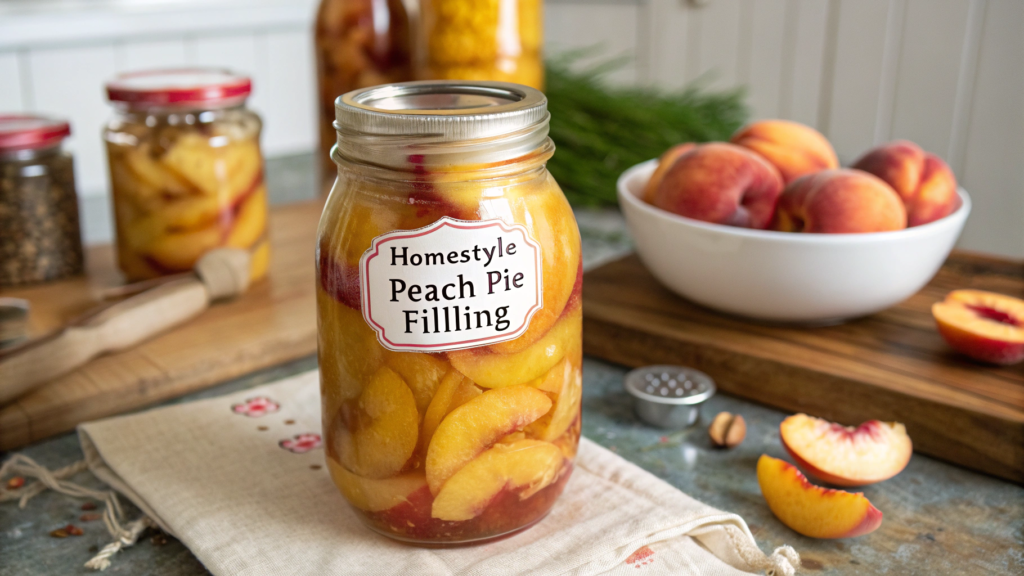
In September, when peaches come in by the crate, we make dozens of jars at once — and then in winter, when the craving for pie hits, all I have to do is grab one, roll out the dough, and that’s it. Even guests think I’ve spent the whole day baking, when in reality it only takes 20 minutes.
Ingredients (for 7 quart jars / about 7 L):
- 6 kg peeled and sliced peaches (about 24 cups)
- 7 cups sugar (about 1.4 kg)
- 2 cups cold water (480 ml)
- 1 cup lemon juice (240 ml)
- 1 cup cornstarch (120 g)
- 1 tbsp cinnamon
- 1/2 tsp ground cloves (optional)
How to make it canning recipes
- Prepare the peaches. Blanch in boiling water for 30 seconds, peel, and slice. Sprinkle with lemon juice right away to prevent browning.
- Cook the base. In a large pot, combine sugar, cornstarch, water, and the remaining lemon juice. Cook, stirring constantly, until the mixture turns clear and slightly thick. Add the spices.
- Combine with fruit. Gently stir the peaches into the hot base. Let them warm on low heat for another 5–7 minutes so everything heats evenly.
- Prepare jars and lids. Wash jars thoroughly with hot soapy water, rinse, and keep them hot (in a pot of water or in the oven at 225°F / 110°C).
Wash lids and keep them in hot water (not boiling) so the sealing ring stays soft and fits the glass snugly. - Fill and seal. Here’s the little secret: peach filling is thick, so it’s important to ladle it into jars right away while it’s still hot and pourable. Leave about 3/4 inch (2 cm) of headspace, otherwise the filling may bubble out during processing.
Place the lids on, tighten the bands until just snug (not too tight), and process in a boiling water bath for 30 minutes.
As the jars cool, they behave differently: some “pop” within 5 minutes, others after an hour. We sometimes sit in the kitchen guessing which one will go next. The main thing is to check later with your hand: the lid should be pulled inward and stay firm.
Important to remember: the filling is thick, and if you don’t leave enough headspace, it will spill out during boiling.
In winter, this is a true lifesaver. Roll out dough, pour in the jar’s contents, cover with another layer — and the pie goes straight into the oven. I also love using the filling for little tart shells — mini desserts “in one bite.” Sometimes I just stir a couple spoonfuls into oatmeal or yogurt — and breakfast instantly feels like a celebration.
7. Roasted Tomato Pasta Base
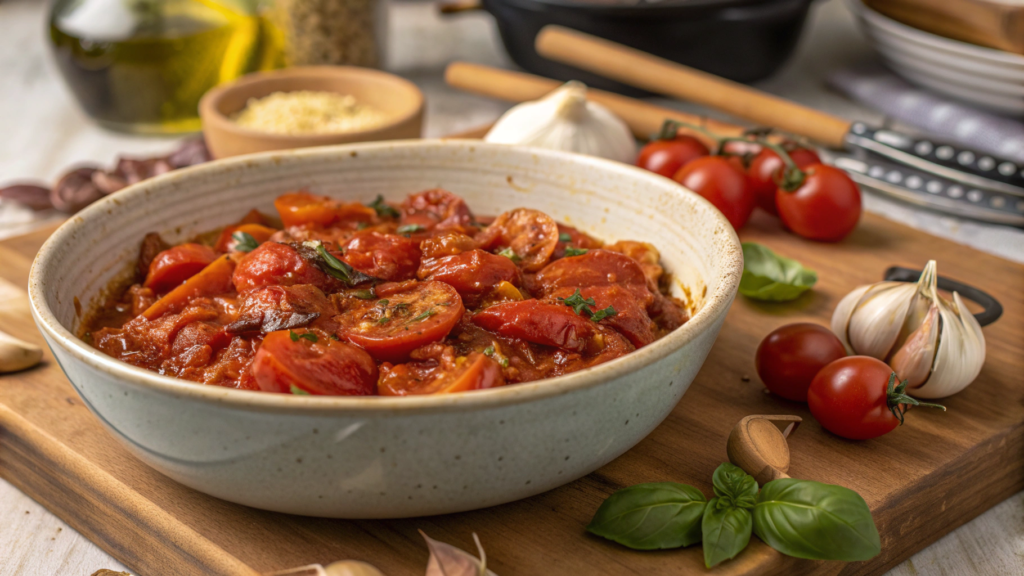
We picked the last tomatoes in October — overripe, a little cracked. Not great for a salad, but in the oven they turn into pure flavor. We spread them on a baking sheet, added garlic and herbs… and within an hour the kitchen smelled like a small Italian restaurant. This is one of our favorite pasta bases to can.
Ingredients (for 6 pint jars / about 3 L):
- 12 lbs ripe tomatoes (about 5.5 kg)
- 2 heads of garlic
- 1/2 cup olive oil (120 ml)
- 2 tbsp salt
- 1 tbsp sugar
- 2 tbsp dried oregano
- 1 tbsp dried basil
- 1/4 cup lemon juice (60 ml, for preservation)
For roasting, I recommend Nordic Ware Natural Aluminum Baker’s Half Sheet — it heats evenly and doesn’t warp in the oven.
How to make it canning recipes
- Roast the tomatoes. Cut the tomatoes in half and arrange them on a baking sheet. Peel the garlic and leave the cloves whole. Drizzle everything with olive oil, sprinkle with salt, sugar, and herbs. Roast at 400°F (200°C) for about 45 minutes, until the tomatoes are browned and slightly caramelized.
- Blend. Transfer everything into a large pot and blend until smooth. You can leave some chunks if you like a more rustic texture.
- Simmer. Bring the sauce to a gentle boil and simmer for 10 minutes so it thickens and the flavor deepens.
- Prepare jars and lids. Wash jars thoroughly with hot soapy water, rinse, and keep them hot (in a pot of water or in the oven at 225°F / 110°C).
Keep lids in hot water so the sealing ring stays soft and grips the glass well. - Fill and process. Here’s the key — keep stirring, because this sauce is thick and tends to settle. Ladle into jars, leaving 1/2 inch (1.2 cm) of headspace. Add a bit of lemon juice to each jar for safety.
Close with lids and screw on the bands until just snug. Process in a boiling water bath for 35 minutes.
The next morning, just check the lids: they should be pulled down and firm — that means your canning recipes worked.
Pro tip. Don’t rush to pull the tomatoes out of the oven. Under-roasted tomatoes will make a watery sauce, but caramelization is the key to a rich, concentrated flavor.
We mostly use this as a pasta base: just stir in a little cream or fresh herbs, and it’s ready. But I also love experimenting — a spoonful in stew makes the flavor deeper, and on pizza this sauce beats anything store-bought.
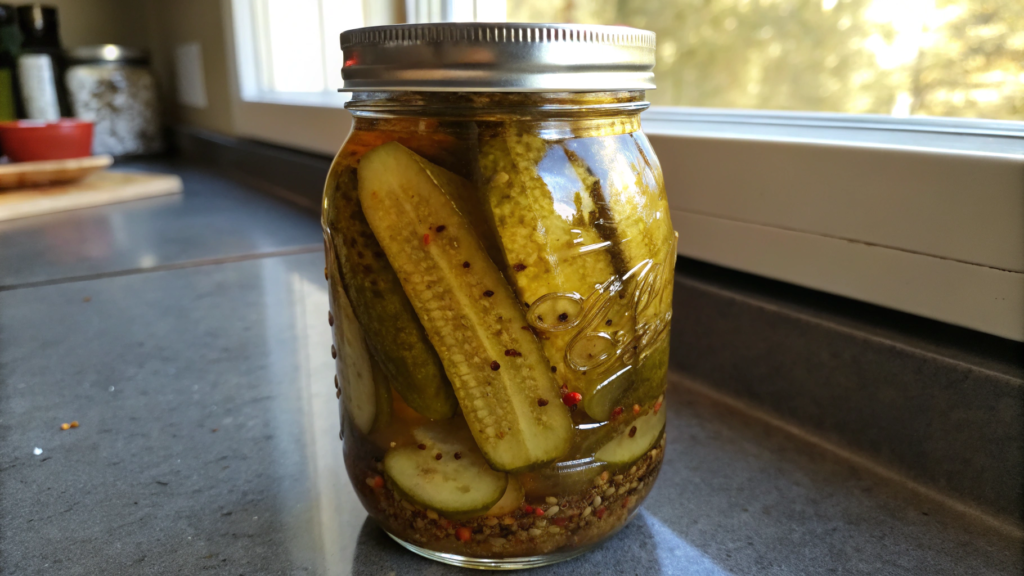
8. Quick Dill Pickle Spears
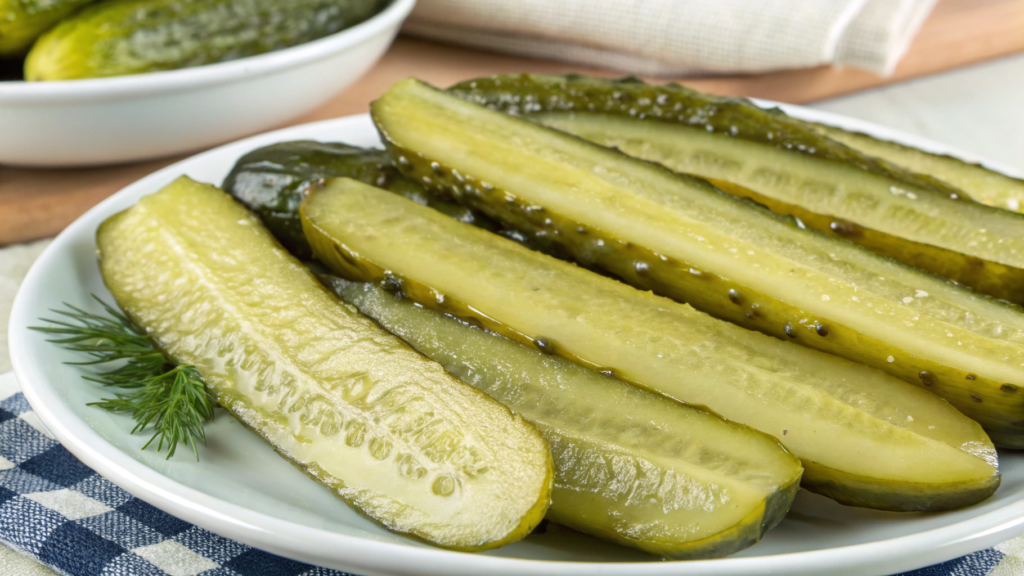
This is the perfect snack: crisp, flavorful, and with that classic dill taste we all love.
Ingredients (for 6 pint jars / about 3 L):
- 4 lbs fresh cucumbers (about 1.8 kg), quartered lengthwise
- 6 cups water (1.4 L)
- 2 cups white vinegar (480 ml)
- 1/4 cup salt (60 g)
- 2 tbsp sugar
- 6 sprigs fresh dill (one per jar)
- 12 garlic cloves (2 per jar)
- 2 tbsp dill seeds
- 1 tbsp whole black peppercorns
How to make it canning recipes
- Prepare the cucumbers. Wash the cucumbers and trim the ends. Slice them lengthwise into 4 spears.
- Make the brine. In a pot, combine water, vinegar, salt, and sugar. Bring to a boil until the salt and sugar fully dissolve.
- Prepare jars and lids.Wash jars thoroughly with hot soapy water, rinse, and keep them hot (in a pot of water or in the oven at 225°F / 110°C).
In each jar, place a sprig of dill, two garlic cloves, some dill seeds, and a few peppercorns. Keep lids in hot water (not boiling) so the sealing ring stays flexible. - Fill and seal. Pack the cucumber spears vertically into the jars. Pour the hot brine over them until fully covered, leaving 1/2 inch (1.2 cm) of headspace.
Place the lid on and screw the band finger-tight, not too tight. Process the jars in a boiling water bath for 10 minutes. - Let them rest. As the jars cool, the lids will “pop” and pull inward — that’s the sign of a good seal. Test by pressing the lid: it should be firm and not move. But remember: the flavor develops over time. Wait at least 2–3 weeks, and the pickles will become crisp with a full dill and garlic aroma.
Warning. If you pour cold brine over the cucumbers, they’ll turn out soft. Only hot brine gives that crunchy bite.
At our house, these jars almost always get opened at picnics: grilled meat, bread, sauces — and the pickles are gone first. But they’re just as good on weekdays: sliced into a salad, tucked into a hot sandwich, or served with mashed potatoes. And sometimes I just open a jar “for no reason” — because nothing beats the crunch of a dill spear in the middle of winter.
9. Spiced Peach Butter
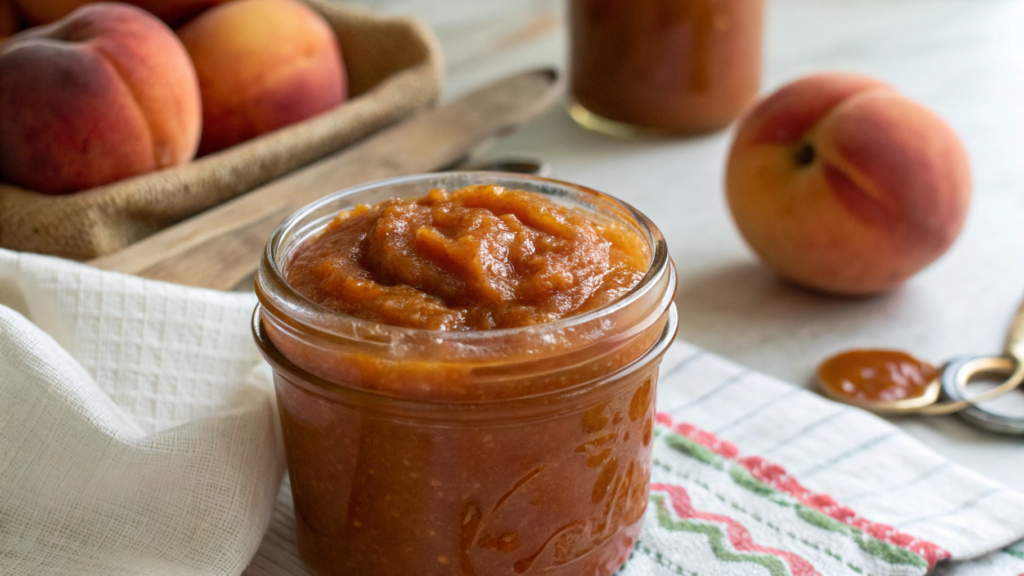
Peach butter isn’t butter in the usual sense — it’s a smooth, thick spread, almost like jam but without chunks. It’s silky, velvety, and the warm spices blended with peach sweetness make it the perfect flavor for chilly days.
Ingredients (for 6 pint jars / about 3 L):
- 8 lbs ripe peaches (about 3.5 kg), peeled and chopped
- 4 cups sugar (800 g)
- 1/2 cup apple juice (120 ml)
- 2 tsp ground cinnamon
- 1/2 tsp ground cloves
- 1/2 tsp nutmeg
- Juice of 1 lemon
For slow, gentle cooking, a Hamilton Beach Slow Cooker is a lifesaver — you can let the mixture simmer for hours without worrying.
How to make it canning recipes
- Prepare the peaches. Blanch the fruit in boiling water for 30 seconds, slip off the skins, and chop into pieces. Transfer to a large pot or slow cooker.
- Cook the base. Add apple juice and lemon juice. Cook over medium heat for 20–30 minutes until the peaches soften.
- Purée and reduce. Blend the peaches until smooth. Stir in sugar and spices. Lower the heat and cook another 1–2 hours, stirring often, until the mixture is thick and glossy. Test it by placing a drop on a spoon — it should hold and not slide off.
- Prepare jars and lids. Wash jars thoroughly with hot soapy water, rinse, and keep hot (in a pot of water or in the oven at 225°F / 110°C).
Wash lids and keep them in hot water (not boiling), so the sealing ring stays flexible. - Fill and can. Ladle the hot peach butter into jars, leaving 3/4 inch (2 cm) of headspace. Since the mixture is thick, smooth the top with a spoon to remove air pockets.
Place the lid on, screw the band finger-tight, and process in a boiling water bath for 10 minutes.
As the jars cool, you’ll hear soft “pops” — that’s the lids sealing. Check the next day: the lid should be pulled down and firm when pressed.
Common mistake. Under-cooking. The butter needs to be thick. If you pull it too early, it won’t store well.
Most often, we spread peach butter on warm bread or rolls. But I love surprising pairings too: a spoon stirred into oatmeal turns it into something festive, and in yogurt it works better than any store-bought syrup. Sometimes I even use it as a glaze — just spread a layer on top of pie or muffins, and they look like they came straight from a bakery.
10. Rich Tomato Basil Soup for Winter Stash
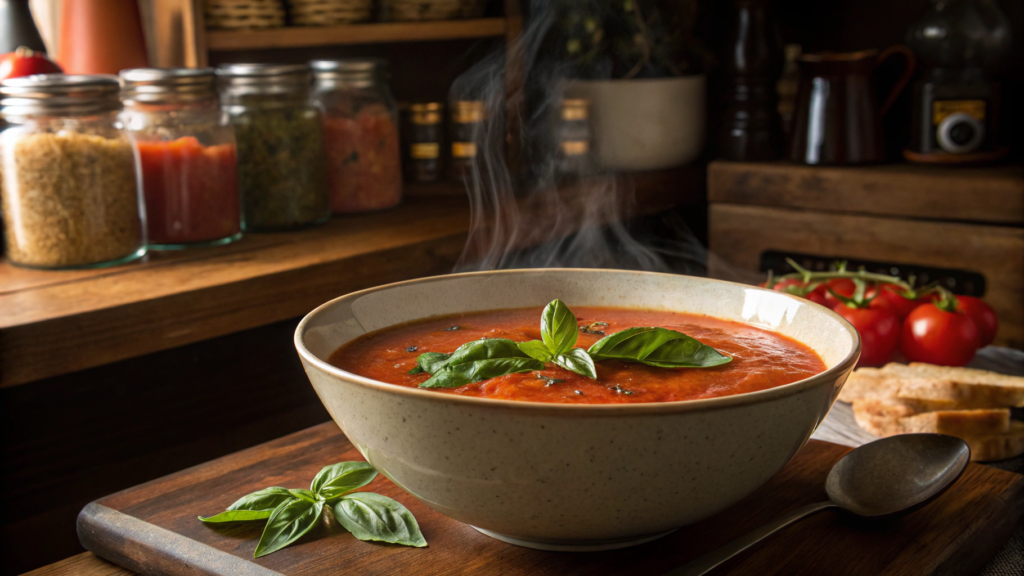
This recipe is our “insurance” for winter: in summer, we prepare a dozen jars, and later, even on the grayest evenings, the kitchen smells like fresh basil and ripe tomatoes.
Ingredients (for 6 quart jars / about 6 L):
- 12 lbs ripe tomatoes (about 5.5 kg)
- 2 large onions, chopped
- 6 garlic cloves
- 1/4 cup olive oil (60 ml)
- 6 cups vegetable or chicken broth (1.4 L)
- 1/2 cup fresh basil, finely chopped
- 2 tbsp salt
- 1 tsp sugar
- 1/4 cup lemon juice (60 ml, for canning recipes safety)
Tip: For large batches, an Immersion Blender Mueller Austria is a lifesaver.
How to make it canning recipes
- Prepare the vegetables.Blanch tomatoes in boiling water, slip off the skins, and roughly chop. Peel onion and garlic.
- Sauté the base. Heat oil in a large pot. Add onions and cook for 5–7 minutes until soft. Stir in garlic and cook for another minute until fragrant.
- Cook the soup. Add tomatoes, broth, salt, and sugar. Bring to a boil, then reduce heat and simmer for 30–40 minutes.
- Purée. Remove the pot from heat and blend the soup until smooth. Return to low heat, stir in fresh basil, and simmer for another 5 minutes.
- Prepare jars and lids. Wash jars with hot soapy water, rinse, and keep hot (in a pot of water or in the oven at 225°F / 110°C).
Wash lids and keep them in hot water (not boiling), so the sealing ring stays flexible. - Fill and process. Ladle soup into jars, leaving about 1 inch (2.5 cm) of headspace — important for liquid preserves. Add lemon juice to each jar for safe acidity.
Place the lid on, screw the band finger-tight, and process in a boiling water bath for 40 minutes.
As the jars cool, you’ll hear the soft “pops” — a sign the lids sealed. The next day, press the center: it should be firm and pulled down.
Personal note. Don’t overdo the basil. In storage, the flavor intensifies a lot. Better to use a little less and toss in fresh basil when serving.
Most often, we just reheat this soup and sprinkle parmesan on top. But I also use it as a base: add sautéed veggies or chicken, and dinner is ready. It’s also a secret helper for sauces — a couple spoonfuls make any ragù or lasagna richer.
When the jars start to sing
For me, canning recipes stopped being just a way to store food long ago. These are little stories we keep carefully.
The lid pops — and that’s already music, a sign everything worked. It’s also a way to start conversations: “Hey, was your salsa spicier than mine?”, “How many jars of peaches did you put up this year?”I’ll be thrilled if you try any of these canning recipes. And even more excited if you share in the comments which one became your favorite — or tell us about your family version. Because that’s how real cooking is born: when we connect and share experiences.


