
Сontainer herb pairings solve half the problems with herbs in pots. Here what matters is which plants you put next to each other and what conditions you give them.
We also made mistakes, like many. On our plot everything became stable and beautiful only when we started to match herbs to one rhythm.
Here I collected 10 herb combinations that showed themselves well in a small space. These are options for sun, for home, for cool season, for tea, for cooking every day. The ones that we actually use at home. Just simple combinations that don’t fall apart after a week.
If you have a balcony, a windowsill or a piece of terrace — that’s already enough. After that everything is simpler than it seems.
1. Mediterranean Pot: Rosemary + Thyme + Oregano
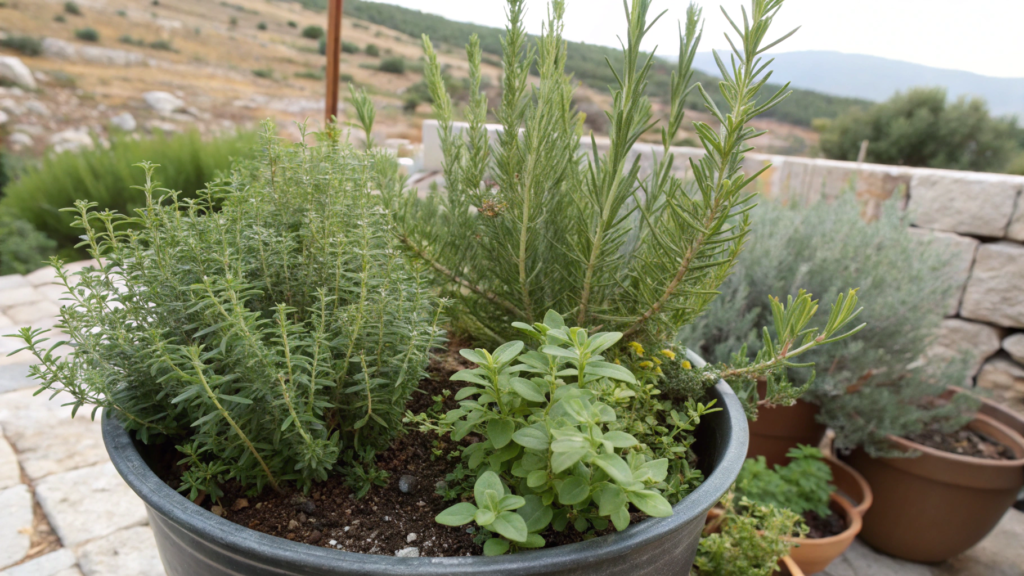
In this combination the herbs are not just neighbors, they are from one climate.
The Mediterranean climate is hot, dry, poor soil. They are literally tuned to the same conditions.
And understanding this makes life easier.
Why this combination works
- Rosemary (Rosmarinus officinalis) — loves dry conditions, lots of sun, hates “wet feet”
- Thyme (Thymus vulgaris) — grows even in stones, easily handles drought
- Oregano (Origanum vulgare) — spreads fast, covers the soil and keeps moisture
You get a mini-ecosystem where plants don’t compete, but instead stabilize conditions.
There is an interesting point: data from USDA Agricultural Research Service shows that Mediterranean herbs keep essential oils concentration even with limited watering — so the flavor stays rich, not “watery”.
What you’ll need
- Container 12–16 inches (30–40 cm) in diameter with good drainage holes
- Light, fast-draining soil
- Perlite or sand for loosening
- Seedlings or seeds: rosemary, thyme, oregano
- Watering can with a narrow spout, for example Bloem Easy Pour Watering Can 1.5 Gallon
In this case water should leave fast, without delays .
How to make a Mediterranean pot (without overcomplicating)
- Prepare the container
Choose a pot at least 12 inches (30 cm), otherwise roots will be tight already in one season. Check drainage holes — if there are few, better add more (with a regular drill). At the bottom you can add a thin layer of expanded clay or small stones — extra protection from water stagnation. - Mix the soil
Regular universal soil is too dense for these herbs. Take it as a base and add about 30–40% perlite or coarse sand. Mix with hands — the mix should be loose, almost crumbly. If you squeeze it in a fist, it should not hold shape like clay. - Place the plants
Don’t stick everything randomly. Put rosemary in the center — it grows higher and creates structure. Thyme — on the edges, it will slightly hang. Oregano — leave space on the side, it will quickly take free area. Keep distance between plants at least 3–4 inches (8–10 cm), even if now it feels “empty”. - Water after planting
Right after planting, water the container well until water starts coming out from the bottom. This helps remove air pockets around roots. Then pause. Don’t water again until the top soil layer becomes completely dry to about 1–2 inches (2–5 cm). - Put in the sun
These herbs need minimum 6–8 hours of direct sun. South-facing balcony, open terrace — perfect. If there is less light, plants will grow, but their flavor becomes weaker, and stems stretch.
Small details
Sometimes it feels like everything is done right, but herbs grow “somehow not right”. They don’t die, but also don’t make you happy. There is greenery, but almost no flavor. Here what you can do:
- Watering with pauses, not by schedule. These herbs don’t like constant moisture. Better one deep watering and then let soil fully dry, than “a little every day”. Check with your finger: if at 1–2 inches (2–5 cm) it’s dry — you can water.
- Poor soil is better than “rich”. Too nutritious soil gives fast growth, but weak aroma. If you see a lot of greenery but little smell — most likely soil is too rich.
- Maximum sun every day. Less than 6 hours of direct light — plants start stretching. Flavor becomes softer, leaves bigger but less intense.
- Air between plants. If planted too tight, moisture accumulates inside. Not critical at first, but over time leads to root problems and weak growth.
- Minimum fertilizers. Better without them. These herbs are used to surviving, not “overfeeding”.
Seems like small things, but they matter a lot.
How to care
This container quickly becomes part of the kitchen, not just decor. You look at it every day, cut, enjoy the aroma… and it only grows better from it.
Regular pruning keeps plants active — new shoots are softer, juicier. If you don’t touch rosemary, it quickly becomes tough, almost woody. Cutting right before cooking gives a completely different result than dried herbs from a jar — especially if you slightly rub leaves with your fingers.
With oregano it’s a separate story. It grows fast and can start taking all the space. So oregano growth control is just regular removal of long shoots. You just don’t let it take over the whole pot.
Here you don’t need to try to make conditions perfect. When there is too much water or nutrients, herbs become soft and lose aroma. A bit of dryness, some sun — and flavor becomes brighter.
2. Pickling Pair: Dill + Chives
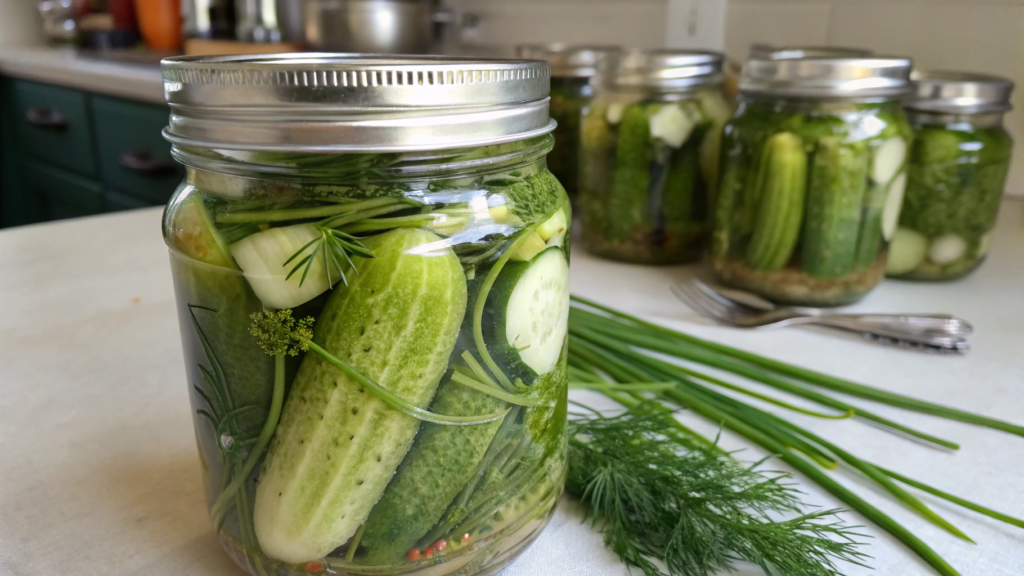
Homemade preserves without dill are just not the same. And if next to it there is also chives always at hand… you get a very practical pickling herb container that works both for everyday cooking and for jars for winter.
When we have a big cucumber harvest, it becomes clear that dill is essential. You need it constantly. And chives turned out to be an ideal neighbor — it doesn’t interfere with dill, but adds a green base when dill is still small or already cut.
Why this combination works
- Dill (Anethum graveolens) — grows fast, gives aromatic umbels and greens
- Chives (Allium schoenoprasum) — steadily produces green shoots, doesn’t conflict at root level
After cutting, dill quickly loses part of its aroma, so fresh from the container usually feels brighter than the one that sat for a few days.
What you’ll need
- Container 12–14 inches (30–35 cm) in diameter and at least 10 inches (25 cm) deep
- Universal soil + a bit of compost
- Dill seeds (better than seedlings — it doesn’t handle transplanting well)
- Chives seedlings or a divided clump
- Scissors for greens
This container is already closer to a “garden” one than decorative — here productivity matters.
How to make a dill and chives container
- Prepare a deep container
Dill has a long taproot, it needs space downward. If the container is shallow — it will go to flowering quickly, almost without greens. So minimum 10 inches (25 cm) depth is not a recommendation, but a requirement. - Make the soil moderately rich
Mix universal soil with 20–25% compost. Soil should hold moisture, but not turn into a dense mass. If after watering water sits on top for more than a couple seconds — add a loosening material. - Sow dill correctly
Don’t make one “hole”. Spread seeds evenly over the surface and lightly cover with about 0.5 inches (1–1.5 cm) of soil. Don’t overcrowd too much, otherwise plants will be thin and weak. - Place chives on the edges. Plant them in small clumps along the edge of the container. They won’t interfere with dill, and you can easily cut them separately without touching the seedlings.
- Water after planting. After sowing, water gently so you don’t wash away the seeds. Better to use a watering can with a soft stream. Then keep soil evenly moist until seedlings appear.
- Light and temperature. Dill loves sun, but in strong heat it goes to flowering faster. Optimal — 5–7 hours of sun, and during peak heat — a bit of diffused light in the afternoon.
- Reseed every 2–3 weeks. This is the key point. If you sow once — you get one harvest. If you reseed regularly — the container gives greens continuously.
What helps keep dill “in shape”
Dill is not the most stable crop, but if you understand its behavior, it becomes much easier to manage.
- Regular reseeding. Old plants go to flowering fast, new ones take over growth.
- Cut before flowering. As soon as you see signs of umbels — cut. Otherwise all energy goes into seeds.
- Even moisture. If it dries out — dill immediately speeds up the cycle and flowers.
- A bit of shade in heat. This really extends the life of greens.
- Don’t disturb roots. Dill doesn’t tolerate transplanting — better sow directly where it will grow.
If you follow these simple rules, you always have fresh greens.
How to use (and not run out of dill in a week)
Dill grows fast and disappears just as fast, so it’s important to use it on time.
Cut dill young, while leaves are soft and aromatic — in this state it works best for pickling and fresh dishes. If you let it overgrow, the flavor becomes rougher. Chives can be cut constantly, they recover easily and cover periods when dill is still growing or already cut.
With dill it’s dense today, empty in a week, then dense again. If you accept this and just reseed regularly, the container starts working like a continuous source of fresh greens. And having fresh dill ready to go into a jar of cucumbers — that alone makes it worth keeping this pot nearby.
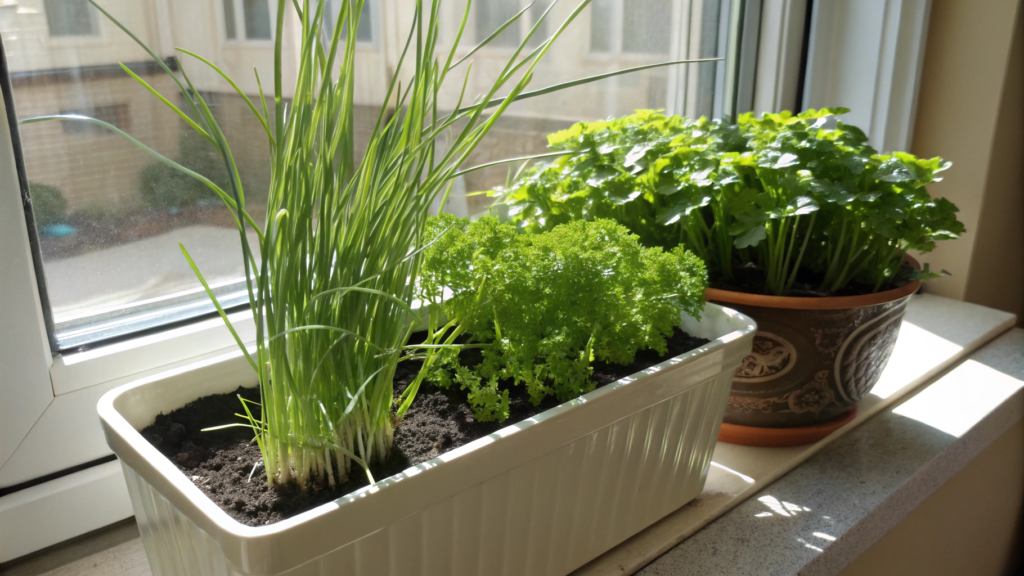
3. Salad Herb Bowl: Parsley + Chives + Cilantro
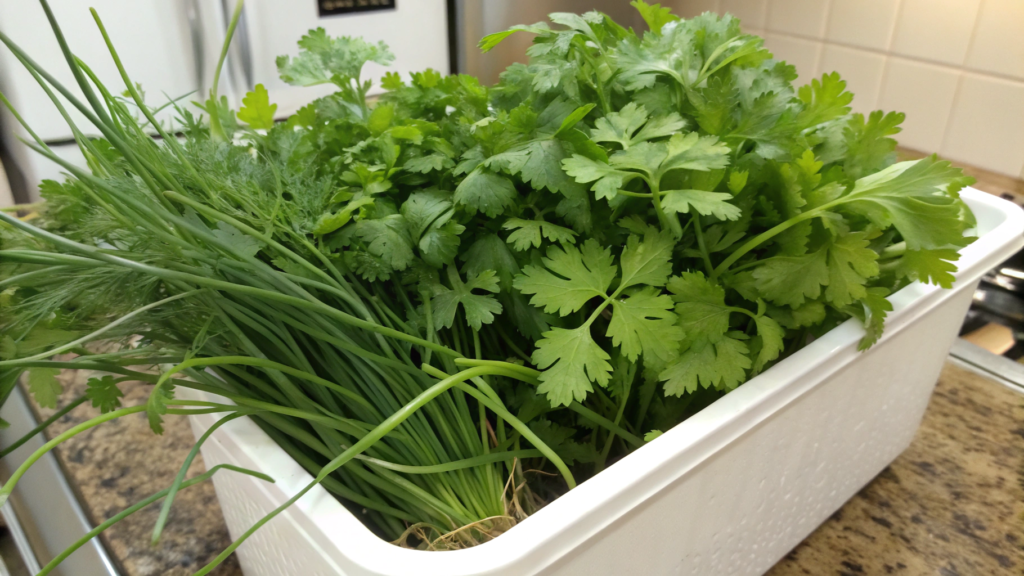
A salad herb container with parsley, chives, and cilantro is a constant flow of greens — for salads, omelets, soups, sauces.
We got this container when I got tired of buying bunches of greens that in two days turned into a sad cloth in the fridge. We planted three herbs in one container — and that’s it. The question was closed for the season.
Why this combination works
- Parsley (Petroselinum crispum) — gives a dense green mass, likes moderate moisture
- Chives (Allium schoenoprasum) — quickly recovers after cutting, adds “sharpness”
- Cilantro (Coriandrum sativum) — grows fast, but needs regular renewal
The herbs complement each other: one gives volume, another — flavor, the third — freshness.
Fresh-cut parsley is rich in vitamin C (about 130 mg per 100 g), and its bright taste comes not only from this, but also from preserved essential oils that are quickly lost during storage.
What you’ll need
- Container 10–14 inches (25–35 cm), at least 8 inches (20 cm) deep
- Universal loose soil
- A bit of compost or vermicompost
- Seedlings or seeds: parsley, chives, cilantro
- Scissors for harvesting
Here soil can be more nutrient-rich than in the Mediterranean version — these herbs like it.
How to make a Salad herb bowl
- Prepare the container
The container should hold moisture a bit better than for rosemary, but without turning into a “swamp”. Check holes, add a drainage layer if needed. Depth matters — parsley has a fairly strong root. - Prepare the soil
Mix universal soil with 20–30% compost. Soil should be loose, but slightly more “dense” than for drought-tolerant herbs. If it’s too light — moisture will leave too fast. - Place the plants
- Parsley — in the center (it forms the main volume)
- Chives — in clumps along the edges
- Cilantro — give it a separate sector so it’s easy to renew
Keep about 2–3 inches (5–8 cm) distance between plants.
- First watering
After planting, water well until water comes out from the bottom. Then keep soil slightly moist — not dry like dust, but not constantly wet. - Placement
Ideal — 4–6 hours of sun. In strong heat, better light partial shade, especially for cilantro, otherwise it quickly goes to bolting.
Small details that actually make a difference
Care here is a bit different from drought-loving herbs, and it’s important not to mix it up.
- Stable but moderate moisture. If soil dries out completely — cilantro starts stressing and flowers faster.
- Regular cilantro reseeding. It doesn’t live long. Sow new seeds every 2–3 weeks so greens don’t run out.
- Cutting from the bottom, not the top. Especially for parsley — remove outer stems, then the plant will keep growing new ones.
- Light shade in heat. This really preserves flavor and extends the life of greens.
- No excess fertilizers. Too much nutrition — and flavor becomes weaker, growth too fast.
It’s simple to do, but without this the container quickly loses its shape.
How to use (and not let it turn into a one-time harvest)
Frequent cutting triggers new growth — especially with chives, it literally bounces back in a few days. Harvesting in small portions is better than one big cut — this way plants don’t go into stress. With cilantro it’s simpler: it ages fast, so better to use it actively and not be precious about it.
Don’t wait for the perfect moment to harvest. If greens are already good — cut them. Tomorrow they might already be tougher or go to flowering.
4. Tea Corner: Lemon Balm Separate from Mint

tea herb container with lemon balm and mint — your own small corner for tea. And here the key word is separate. Because if you plant them together… mint will very quickly take over all the container space.
Why it’s important to keep them separate
- Lemon Balm (Melissa officinalis) — soft growth, likes space, not aggressive
- Mint (Mentha) — quickly takes territory, spreads through roots
They are similar in care, but behave completely differently.
Plants from the Mentha genus actively spread through underground runners — this is described in botanical observations by the Royal Horticultural Society. That’s why in open ground it’s often limited with borders… or simply kept in a separate pot.
What you’ll need
- Two separate containers 10–12 inches (25–30 cm) in diameter
- Universal soil with good moisture retention
- A bit of compost
- Lemon balm seedling
- Mint seedling (any type — peppermint, spearmint)
- Watering can with a soft stream
In this case, two pots are better than one.
How to make a Tea corner (without survival competition)
- Choose two separate containers
Don’t save on this step. Even if space is limited, better place two compact pots next to each other than later trying to save lemon balm. Mint root system quickly fills all the volume. - Prepare moisture-retentive soil
Unlike Mediterranean herbs, here you need soil that holds moisture a bit longer. Mix universal soil with 20–30% compost. It will feed plants and keep water. - Plant at the right depth
Don’t bury too deep. Soil level in the pot should match the level where the plant was growing before. If covered higher — stems may start rotting. - First watering — soft and even
Water gently so soil is fully soaked, but not turned into mud. Water should come out through drainage, but not stand on top. - Place containers nearby, but not tightly
Leave a small gap between pots — this improves air circulation. Visually it will look like one “corner”, but plants won’t interfere. - Light — moderate
Ideal — 4–6 hours of sun. In strong heat better light partial shade, especially for mint — it can start wilting from overheating.
What helps keep flavor and aroma
Here you don’t need complex care systems, just follow a few rules:
- Regular watering without full drying. If soil dries out completely, leaves become tougher and less aromatic.
- Frequent top trimming. This stimulates bushier growth and gives more soft leaves.
- Removing old stems. Frees space for new growth.
- Mint control. Even in a separate pot it can “jump out” — just trim it so it doesn’t stretch too much.
- Light shade in heat. Helps keep leaves tender.
How to use
Pick leaves right before brewing, not in advance. Essential oils evaporate quickly after cutting, and in a couple hours the taste is already different. Don’t let plants overgrow — young leaves are softer and more aromatic, especially for lemon balm. If it becomes tall and tough, just cut it back to about half — it recovers fast.
With mint it’s important not to try to “keep perfect shape”. It will still try to grow faster. Better just use and trim it regularly than try to control every shoot.
A couple of lemon balm leaves, some mint… you pour hot water — and this is not the same tea as from a bag. It’s soft, fresh, with a light sweetness. And you know exactly where it came from.
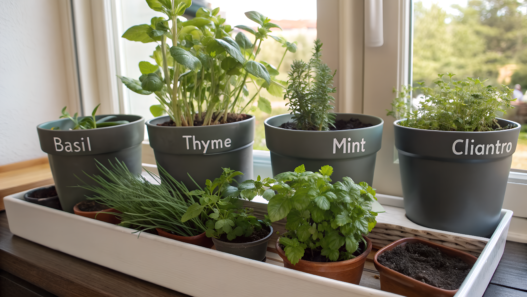
5. Indoor MVPs: Chives + Parsley
indoor herb container with chives and parsley is one of the most stable options. Without strict moisture control, without constant stress.
- Chives (Allium schoenoprasum) — easily handles low light, quickly regrows after cutting
- Parsley (Petroselinum crispum) — gives a dense green mass and doesn’t need extreme sun
They don’t require perfect conditions, and that’s their main advantage.
In practice, parsley and chives tolerate limited indoor light better than, for example, basil, which loses shape and aroma faster without enough light.
What you’ll need
- Container 8–12 inches (20–30 cm) in diameter and at least 6–8 inches (15–20 cm) deep
- Universal soil with good air permeability
- A bit of compost (up to 20%)
- Seedlings or seeds: parsley, chives
- Water tray (very recommended for indoors)
- Compact grow light (if light is low), for example GHodec Grow Light with Timer
How to make an indoor container
- Choose the right spot in advance
Don’t place the container “where there is space left”. Better find a window with at least 3–5 hours of light. East or south-facing — great. If light is less, plan for a lamp right away, not “we’ll see later”. - Prepare a container with a tray
Water will drain — and without a tray it will end up on the windowsill or floor. Check drainage holes, and make sure excess water leaves, but doesn’t stay at the bottom. - Make soil light but moisture-holding
Mix universal soil with a small amount of compost. Don’t make it too “airy” like for rosemary — indoors soil dries slower, but evaporation is also weaker. Balance matters. - Plant with growth in mind
- Parsley — closer to the center
- Chives — in clumps along the edges
Leave at least 2–3 inches (5–8 cm) distance. Indoors air circulation is worse, and overcrowding leads to problems faster.
- First watering — careful
Water soil to even moisture, but not to a “swamp” state. Indoors overwatering is one of the most common mistakes. Better slightly less water than slightly more. - Add light if needed
If leaves start stretching or turning pale — it’s not that “they are weak”, it’s lack of light. A lamp for 10–12 hours a day solves it. And nothing complicated is needed — a simple compact model is enough. - Check surrounding air
Don’t place the container right next to a heater or under an AC. Dry hot air quickly “eats” the greens. Better slightly aside, where conditions are more stable.
Care
Indoors plants don’t “forgive” things that outside go unnoticed.
- Watering control. Soil should be slightly moist, but not wet. On average — watering 2–3 times a week, but better to go by the top layer.
- Light matters more than it seems. Even if it “looks bright”, plants may still lack light. You’ll see it in stretched stems.
- Air circulation. Fresh air reduces mold risk and makes growth stronger.
- Leaf cleanliness. Dust on leaves blocks photosynthesis. Sometimes just wiping or spraying — and plants look more alive.
- No overdoing fertilizers. Indoors less is better than more.
How to use (and not let greens turn into decor)
Cut greens regularly, don’t wait until they become too dense. Chives handle frequent cutting well and recover fast. Parsley is better cut from outer stems, leaving the center — this way it keeps producing new shoots longer.
It’s important not to turn harvesting into a rare event. Small, frequent cuts work better than one big one. Plants don’t go into stress and keep actively growing.
Don’t keep greens “for later”. Indoors they won’t become better with time. If they look good — use them now.
6. Full Sun Box: Sage + Rosemary
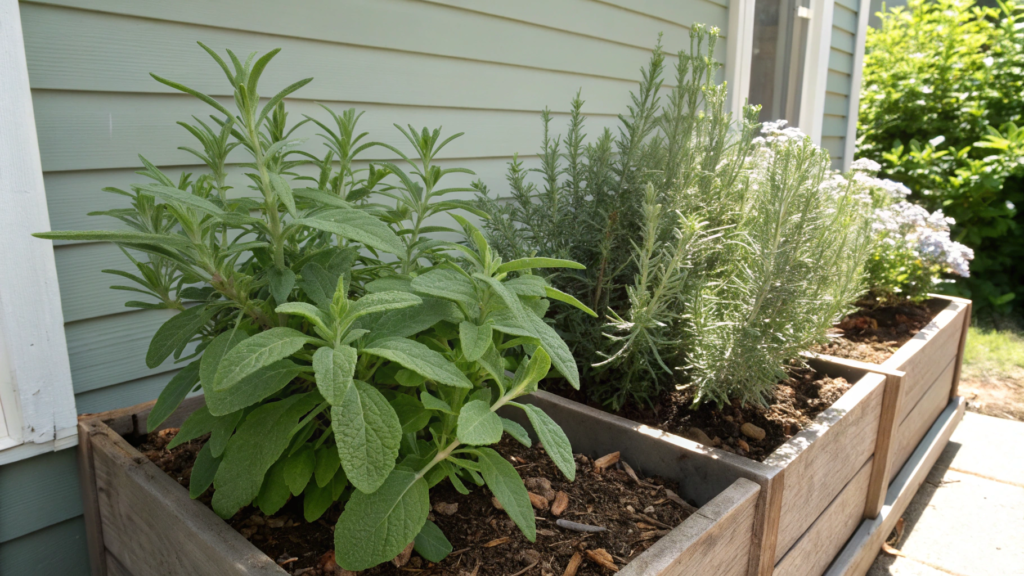
If you have a spot where the sun really hits all day, then a full sun herb container with sage and rosemary will fit there perfectly. These plants love sun.
We have such a box standing by the south wall of the house. First couple of weeks I was worried — watered more than needed… and plants started looking worse. I paused a bit, let the soil dry — and they literally “switched on”. Leaves became denser, aroma stronger. Sometimes less care is exactly what’s needed.
This happens because:
- Sage (Salvia officinalis) — loves dry air, direct sun and light soil
- Rosemary (Rosmarinus officinalis) — heat-tolerant, doesn’t handle overwatering
Lots of light, minimum water — that’s all they need.
In moderately dry and sunny conditions many aromatic herbs produce a more intense aroma, but it’s important not to push plants into strong stress.
What you’ll need
- Container or box 14–18 inches (35–45 cm) in diameter or width
- Depth at least 10–12 inches (25–30 cm)
- Very well-draining soil
- Perlite or coarse sand (up to 40%)
- Sage and rosemary seedlings
- Watering can with a narrow spout
Here the container should not hold moisture, but instead release it quickly.
How to make a Full sun box
- Choose a container that doesn’t overheat
Dark plastic pots heat up a lot. If you have a choice — take a light-colored container or wood. This reduces root overheating in heat. Size matters: the bigger the volume, the more stable the temperature inside. - Make drainage without compromise
Check holes — there should be enough. If in doubt, add more. You can put a layer of expanded clay at the bottom, but the main thing — soil itself should let water pass quickly. - Prepare dry-loving soil
Mix base soil with 30–40% perlite or sand. It should be loose, almost “grainy”. If after watering water stays on top — it means the mix is too dense. - Place plants with space in mind
- Rosemary — center or back of the container
- Sage — on the side, considering it will spread in width
Leave at least 4–5 inches (10–12 cm) between them. They don’t like crowding.
- First watering — then pause
After planting, water the container fully. Then don’t touch it until the top layer becomes dry. In heat it may happen faster, but better check than water “just in case”. - Put in maximum sun
This is a rare case where 8+ hours of sun is ideal. The more light, the more compact and aromatic plants become. - Watch overheating in peak heat
If temperature goes above 90°F (32°C), the container can overheat. On such days you can water a bit earlier than usual or give light shade in the afternoon.
What helps herbs not “give up” in heat
When sun is working at full power, it’s important not to interfere with plants.
- Rare but deep watering. Better one good soak than frequent small watering.
- Minimum interference. These herbs don’t like being “checked” every day.
- Good air circulation. Don’t place the container tightly against a wall without a gap.
- Pruning for renewal. Old, woody shoots are better removed — it stimulates new growth.
- No extra feeding. Fertilizers in such conditions can do more harm.
These principles sound simple, but they are what keep plants looking healthy even in heat.
How to use
This container gives not “a lot of greens”, but concentrated flavor. And it’s important to keep that in mind.
Cut a little at a time, because leaves are dense and aromatic — you need less than it seems. Sage is better used carefully: young leaves are softer, old ones can be rougher. Rosemary releases stronger if you slightly crush it before adding to a dish — then essential oils come to the surface.
When the sun heats this box all day, in the evening you come, run your hand over the leaves — and the smell becomes almost warm. Not sharp, but deep. And you already know dinner will be very good.
And all of this — from one container standing in the hottest spot.
7. Weeknight Flavor Pot: Basil + Chives
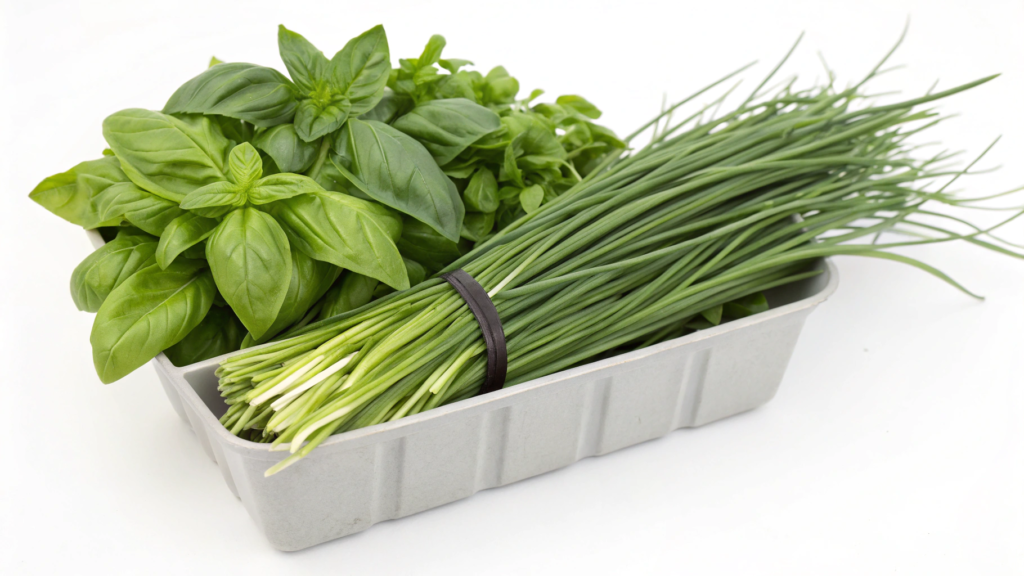
Weeknight herb container with basil and chives — with these herbs even simple pasta or eggs already feel different.
We love this combination, because basil gives softness and freshness, chives — light sharpness. Together they work like a ready “flavor booster” for every day.
Why this combination works
- Basil (Ocimum basilicum) — grows fast, gives soft aromatic leaves
- Chives (Allium schoenoprasum) — steadily regrows after cutting, adds structure to flavor
One is responsible for volume and aroma, the other — for balance and consistency. With good light and regular pruning, basil forms a denser bush and keeps a bright aroma.
What you’ll need
- Container 10–14 inches (25–35 cm) in diameter
- Depth at least 8–10 inches (20–25 cm)
- Universal loose soil
- A bit of compost (up to 25%)
- Basil and chives seedlings
- Scissors for greens
Soil should hold moisture, but not be heavy.
How to make a Weeknight flavor pot
- Choose a spot with good light
Basil is light-loving. It needs at least 6 hours of sun, otherwise it becomes weak and stretched. Chives are more flexible, but will adapt to basil. - Prepare a container with proper drainage
Check holes, add a tray if the container stands on a terrace or balcony. Water should drain, but soil shouldn’t dry out too fast. - Mix soil with light nutrition
Universal soil + 20–25% compost. This gives basil a quick start and supports green growth without overload. - Place plants with growth in mind
- Basil — in the center or closer to the light
- Chives — along the edges
Leave 3–4 inches (8–10 cm) distance. Basil needs space, otherwise it starts stretching.
- First watering — even
Water soil until water comes out from the bottom. Then keep it slightly moist. Basil doesn’t like drying out — you’ll see it immediately from drooping leaves. - Start pruning early
As soon as basil reaches 6–8 inches (15–20 cm), start pinching the tops. This triggers side growth and makes the plant bushier. - Watch temperature
Basil doesn’t like cold. If temperature drops below 50°F (10°C), it slows down. In such periods better move the container closer to the house or indoors.
Care
These plants react quickly to care — and that’s their advantage.
- Frequent cutting. Basil becomes denser, chives renew faster.
- Stable moisture. Don’t let it dry out, but don’t overwater.
- Remove basil flowers. As soon as they appear — remove them. Otherwise flavor
fades. - Good light every day. Without it basil loses aroma.
- Fresh air. Makes leaves stronger and reduces problems.
As you see, care is simple, and if you keep these things under control, the container will work long and predictably.
How to use
The more often you use this container, the better.
Don’t wait until basil becomes a big bush. Cut it early and regularly. Then it starts branching and gives more leaves. Chives can be cut almost without limits — they recover easily and keep a steady flow of greens.
If basil starts flowering — remove flowers immediately. This is a signal it wants to finish its cycle, but you need greens.
Add herbs at the very end of cooking. Don’t cook them long, just mix into the hot dish. This way the aroma stays alive.
8. Pollinator Planter: Thyme + Oregano
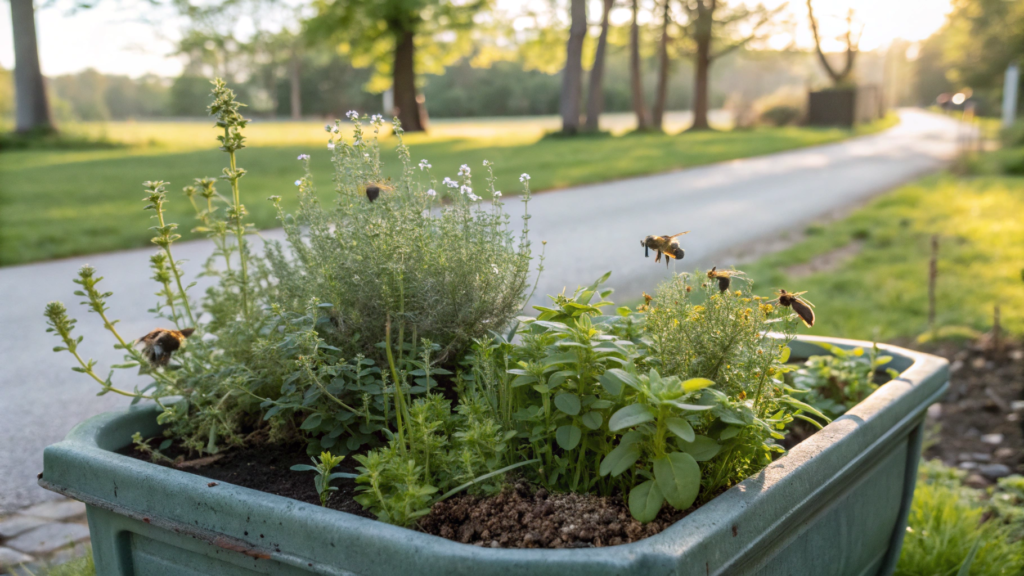
Pollinator herb container with thyme and oregano works like a small ecosystem.
When we placed such a pot near the path, we started noticing that something is always flying there. First one bee, then several. Then bumblebees. You walk by, and there is always movement.
Why this combination works
- Thyme (Thymus vulgaris) — low, dense, gives small flowers rich in nectar
- Oregano (Origanum vulgare) — actively blooms, attracts insects from a distance
Plants with small open flowers, like thyme and oregano, are usually easier for bees and bumblebees to access, so during flowering they often attract more pollinators.
What you’ll need
- Container 12–16 inches (30–40 cm) in diameter
- Depth at least 8–10 inches (20–25 cm)
- Light, well-draining soil
- Perlite or sand (up to 30%)
- Thyme and oregano seedlings
- Watering can
How to make a Pollinator planter that actually attracts life
- Choose a sunny spot near “movement”
Place the container where you are often — near the entrance, along a path or next to a sitting area. We have it right by the walkway, and it’s funny: you walk with coffee, and a bumblebee is hovering half a meter from you.
If you hide the container in a far corner, pollinators will still find it… but not as quickly and not as actively. - Prepare light, slightly dry soil
Mix soil with 25–30% perlite or sand. When you take this mix in your hand, it should easily fall apart. If it sticks — it’s not right.
We once made soil too “rich” — there was a lot of greenery, but almost no flowers. And accordingly, silence. No one came. - Place plants with growth in mind
- Thyme on the edges — over time it starts to slightly hang, and it looks very alive
- Oregano — in the center or slightly to the side
You don’t want to leave “empty space”, I know… but in a couple of weeks you’ll be grateful for it.
- First watering — moderate, no overdoing
Just water well so soil settles. And that’s it. No need to “maintain moisture” every day. These herbs perform better when it’s slightly dry than when it’s too comfortable. - Let plants flower (and don’t touch them at that moment)
This is probably the hardest part. Your hand wants to cut everything beautiful… but flowers are exactly what bees come for. - Light — as much as possible
Minimum 6–8 hours of sun. And the more, the better. In sun, flowers become brighter and more aromatic — and this works like a signal for pollinators. - Let the container “live its own life” a bit
Don’t level it every day, don’t trim everything into shape. When it becomes a bit more natural, life starts coming to it. It’s hard to explain, but you can see it.
What helps attract more pollinators
- Partial flowering, not “cut everything”. If you cut everything clean — insects simply have nothing to come for.
We usually leave about one third of the plant untouched. That’s enough for the container to keep “working”. - No chemicals (even “light” ones). Even mild products can scare bees away. We noticed this once — treated a nearby plant, and activity dropped immediately.
After a couple of days everything came back, but the conclusion was obvious. - Stable sun during the day. Pollinators love warm, well-lit places. In shade they appear, but much less often.
On our sunniest container there is always more “movement”. - Slightly dry soil. When soil is not overwatered, plants bloom more actively. Which means — more nectar.
You can literally feel it: slightly dry → more flowers → more bees. - Height and accessibility. A container at knee level or slightly higher works better than a high table. It’s easier for insects to land and move between flowers.
How to use (and not lose the flowers)
Don’t cut everything at once. Leave part of the plant to bloom. This allows the container to do its “job” and attract insects. When flowers are already done, you can simply cut shoots — flavor doesn’t suffer.
Thyme can be used more often — it recovers faster and doesn’t depend on flowering that much. Oregano is better to cut in parts, so there are always flowering sections left.
9. Cool Season Container: Cilantro + Dill
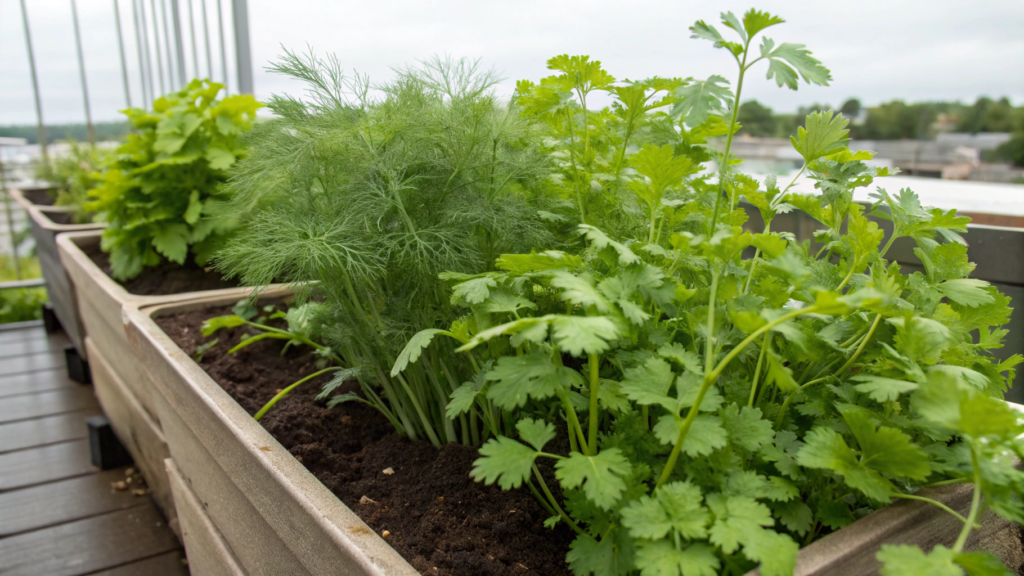
Summer ended, basil looked tired, and I still wanted fresh greens. We sowed cilantro and dill “just to try”… and in a couple of weeks got such dense, juicy growth that wasn’t there in summer at all. And it became clear — this is their time.
Why this combination works
- Cilantro (Coriandrum sativum) — grows better in cool weather, bolts slower
- Dill (Anethum graveolens) — likes mild temperatures, gives tender greens
Cilantro and dill are sensitive to heat and in warm weather go to flowering faster, shortening the harvest period. That’s why cooler months give more stable results.
What you’ll need
- Container 12–14 inches (30–35 cm) in diameter
- Depth at least 10 inches (25 cm)
- Universal soil with compost added (20–25%)
- Cilantro and dill seeds
- Watering can with a soft stream
How to make a Cool season container
- Choose the right season and place
Ideal — early spring or early fall. Place the container where there is sun, but without overheating.
4–6 hours of light is enough. Full sun is possible if temperature is not high. - Prepare moisture-retentive soil
Mix soil with 20–25% compost. Soil should be soft, but not loose “like dust”. When you take it in your hand — it holds shape, but easily falls apart. - Sow seeds evenly
Don’t make separate holes. Spread seeds over the surface and cover with about 0.5 inches (1–1.5 cm) of soil. Don’t overcrowd too much — otherwise plants will be thin. - Water after sowing — gently
Use a soft stream so seeds are not washed away. Soil should be evenly moist, especially before seedlings appear. - Divide space inside the container
You can roughly split the pot into two parts: one for cilantro, another for dill. This makes reseeding and harvesting easier. - Watch temperature
As soon as it gets too warm, plants speed up and go to flowering. On such days you can slightly shade the container or move it. - Reseed every 2–3 weeks
This is the main lifehack. Without it the container gives one harvest. With reseeding — it becomes a continuous source of greens.
What helps extend the life of greens
- Stable moisture. Drying out is one of the main triggers for bolting.
- Light partial shade in warm days. Even temporary cooling extends growth.
- Regular reseeding. New plants take over when old ones fade.
- Cut before flowering. The earlier you cut, the softer the taste.
- Minimum root stress. Don’t transplant — better sow directly in place.
These things are simple, but they turn the container from “one-time” into stable.
How to use
Cut greens while they are young — in this state flavor is the softest. Cilantro quickly becomes sharper if it overgrows. Dill is also better used before umbels appear.
If greens already look good — cut them right away, because after a couple of warm days they can change quickly.
And try to reseed even when there is still greenery. At first it feels strange, but then you realize — this way the container never “resets”.
10. Mint Control Setup: Mint Solo Pot Beside the Planter Box
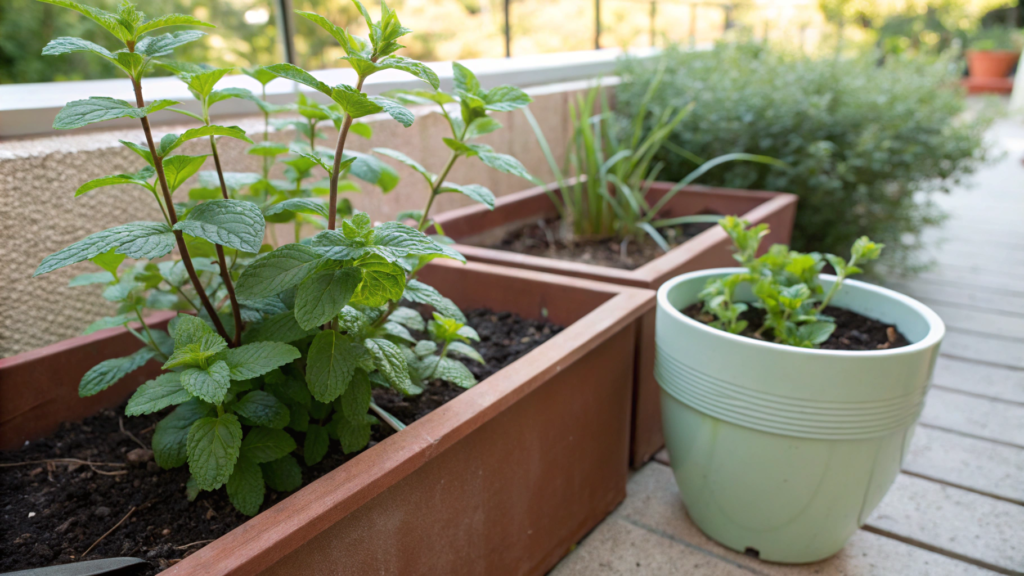
You already know that a mint container setup should be separate, otherwise in a couple of weeks it starts taking over all the space. Only a separate pot. And next to, not together.
Why mint needs a separate container
- Mint (Mentha) — spreads not only upward, but also underground
- Quickly fills the entire container volume
- Blocks light and pushes out more “slow” plants
Mint forms underground runners (rhizomes) that allow it to take over territory — this is described in botanical observations by the Royal Horticultural Society. That’s why even in a garden it is often restricted.
What you’ll need
- Separate container 10–14 inches (25–35 cm) in diameter
- Depth at least 8–10 inches (20–25 cm)
- Universal soil with good moisture retention
- Mint seedling
- Tray (if placing on a terrace or balcony)
- Scissors for harvesting
Here the container is not for convenience, but for control.
How to make a Mint control setup
- Choose a separate container
Don’t even think about “adding it to the side” of other herbs. A separate pot is the foundation of the whole system. Better to take a slightly bigger volume than a small one — roots will develop more stably, without stress. - Prepare moisture-holding soil
Mint likes more moisture than most herbs. Mix universal soil with 20–30% compost.
Soil should stay slightly moist, but not turn into a heavy mass. - Plant without burying
Soil level should match how the plant was growing before. If you bury it deeper — lower stems may start rotting. - First watering — full
Water the container well so soil settles and roots fix in place. After that water regularly, not letting it dry out completely. - Place near other containers, but not tightly
The idea is that mint is “at hand”, but has no physical contact with other pots. You use it together with other herbs, but it doesn’t interfere with their space. - Light — moderate or diffused
Mint grows both in sun and partial shade, but in light shade leaves stay softer.
Direct sun is fine if there is regular watering. - Check roots once per season
If you see the plant filled the whole pot — you can divide it and refresh. This keeps growth under control.
What helps keep mint “in bounds”
- Regular pruning. The more often you cut, the denser it becomes.
- Moisture control. Drying out makes leaves tougher and less aromatic.
- Plant renewal. Once a season you can divide the plant and replant part of it.
- Don’t let it stretch.If shoots become long — cut them, and it becomes denser.
- Keep distance from other plants. This is the main principle of the whole system.
These steps let you enjoy mint, not fight it.
How to use properly
Cut it often and boldly. The more you take — the better it grows. If you leave it “for later”, it starts stretching and loses shape.
Use young leaves, they are softer and give a cleaner taste, especially for tea or cold drinks.
Don’t try to make it a perfect bush. It will still try to grow fast and a bit chaotic. Better just trim and use it regularly — then it looks alive, not neglected.
Fresh Herbs Right in Your Kitchen
Fresh greensat hand — agree, it’s convenient. You don’t plan ahead, don’t buy extra. You just use what grows nearby. And over time you start noticing that even simple food becomes tastier. Not because of the recipe, but because of small details.
And also… containers seem to slightly bring life into the space. Somewhere there is movement, somewhere a smell, somewhere it’s just nice to walk by and touch the leaves. It’s hard to explain, but very easy to feel.
Choose one option, try it in your space. See how it behaves in your conditions. And build further from that.
Which container would you start with? Or maybe you already have your own setup that works best? Write in the comments what worked and what didn’t. These are exactly the details that build the whole experience.