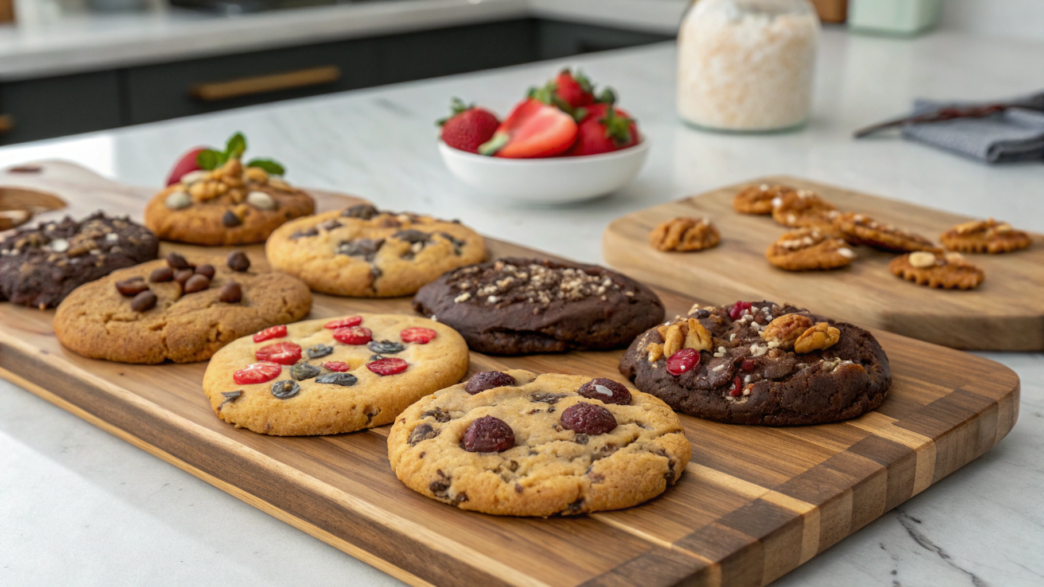
A couple of small changes in chocolate chip cookie dough can completely change the result: make the center softer, the chocolate richer, the texture denser, or add a completely new flavor without complicated techniques or rare ingredients.
There are no ordinary recipes in this article. Some of them we adjusted several times, changing the baking temperature, the amount of sugar, or the type of chocolate. And some became such regular favorites at home that we now make them almost automatically.
If you think chocolate chip cookies are always basically the same dough with chocolate inside, then by the time you finish this article, your opinion will most likely change.
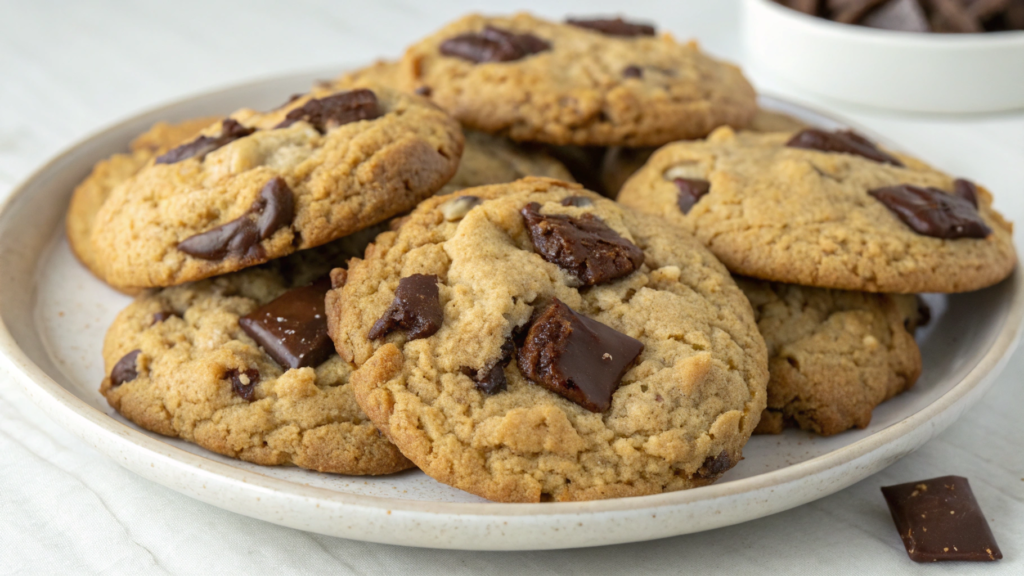
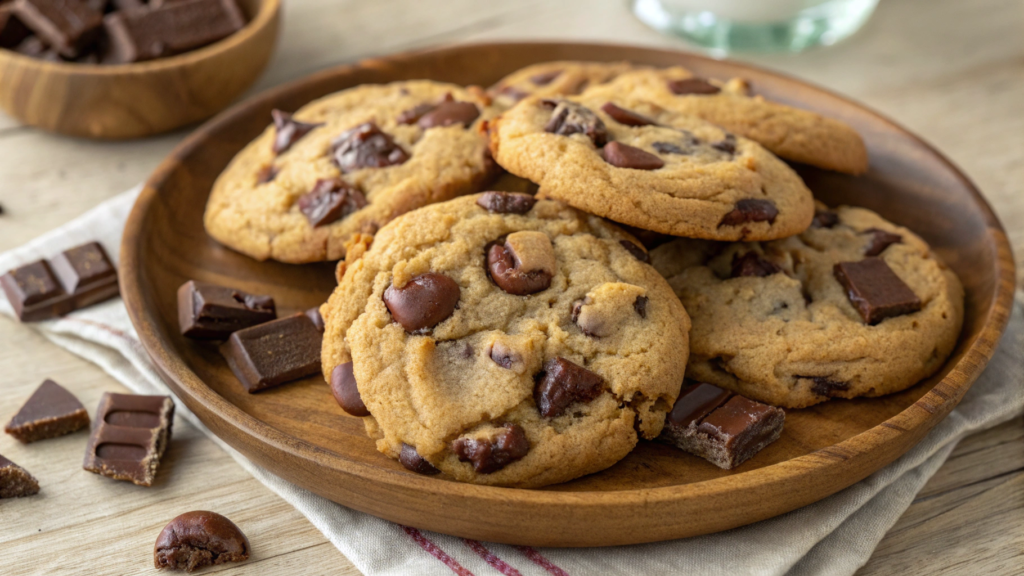
1. Brown Butter Sea Salt Chocolate Chip Cookies
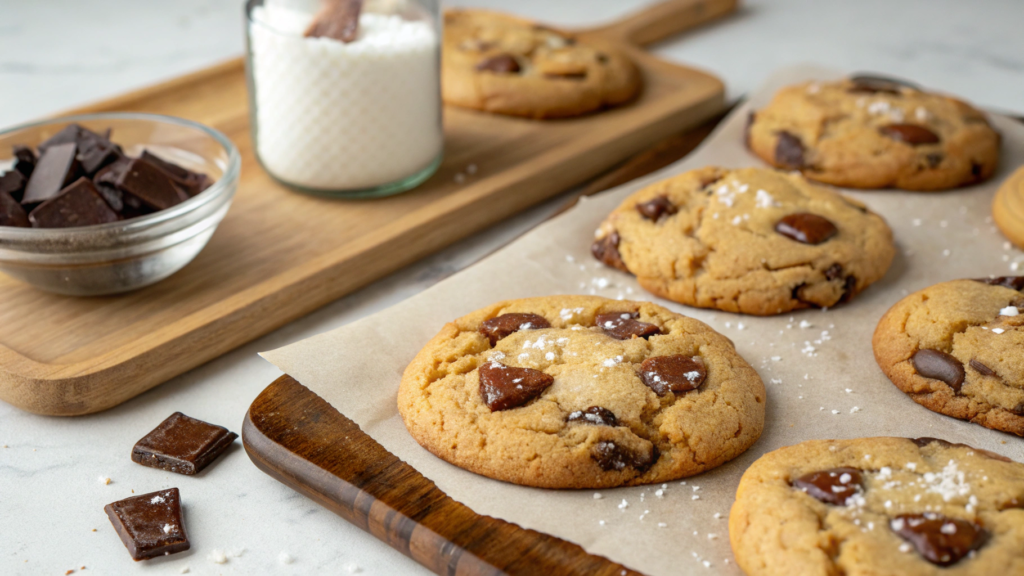
In this recipe, it’s specifically the brown butter that makes the flavor deeper and richer. It develops warm nutty notes without any syrups or artificial flavorings. And on top goes flaky sea salt, which doesn’t make the cookies salty but simply highlights the chocolate and caramel flavor of the dough.
Ingredients
- 1 cup butter (225 g)
- 1 cup brown sugar (200 g)
- 1/2 cup sugar (100 g)
- 2 large eggs
- 2 tsp vanilla extract
- 2 1/4 cups flour (280 g)
- 1 tsp baking soda
- 1 tsp salt
- 1 1/2 cups dark chocolate chunks (250 g)
- flaky sea salt for sprinkling on top
How to Make Them
- Brown the butter
Place the butter in a light-colored saucepan or pot and heat it over medium heat. First it will melt, then it will start foaming. After a few minutes, you’ll notice a roasted nut aroma, and golden bits will appear at the bottom. The important thing here is not getting distracted. Butter can go from perfect to burnt very quickly.
As soon as the color turns amber, immediately pour the butter into a bowl and let it cool slightly for 10–15 minutes. - Mix the dough base
Add the brown sugar and regular sugar to the warm butter. The mixture will become thick and glossy. After that, mix in the eggs and vanilla extract. The smell at this stage is honestly incredible. - Add the dry ingredients
In a separate bowl, combine the flour, baking soda, and salt. Gradually add the mixture to the wet part of the dough.
Do not overmix. As soon as the flour disappears into the dough, stop. Otherwise the cookies will turn out dense. - Add the chocolate
Mix in the chocolate chunks. I leave a few larger pieces on top because they look especially good after baking.
If the dough feels too soft, place it in the fridge for 20–30 minutes. That way the cookies will bake up thicker with a softer center. - Bake
Preheat the oven to 350°F (175°C). Form large dough balls and place them on a baking sheet with space between them. The cookies will spread while baking. Sprinkle each cookie with a little flaky sea salt on top.
Bake for 11–14 minutes. The edges should turn golden, while the center may still look slightly soft — it will finish setting as the cookies cool.
Don’t rush the first bite. Wait at least a few minutes. The chocolate inside stays hot, and the aroma of the brown butter cookies spreads through the whole house.
We like eating these cookies slightly warm with cold milk or strong coffee without too much sweetness. And if you make a large batch of dough ahead of time and keep it in the freezer, fresh homemade cookies are only about fifteen minutes away any day of the week.
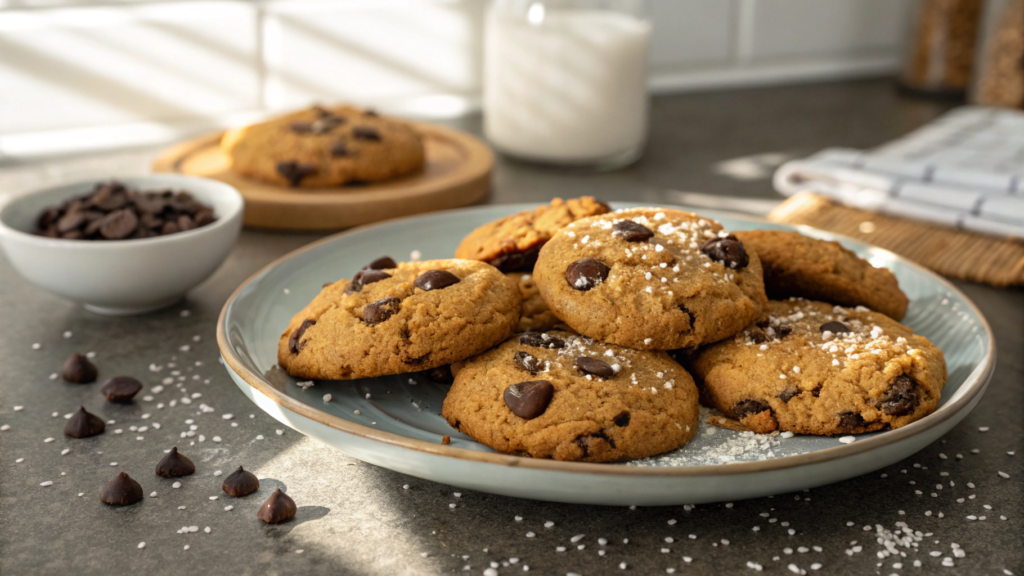
2. Chewy Oatmeal Chocolate Chunk Mash-Up
At the beginning of our homemade baking experiments, our oatmeal cookies constantly turned out too dense. Or dry. Or the kind you need to dunk into tea for ten straight minutes. But then we started combining classic chocolate chip cookie dough with oats and large chunks of chocolate instead of tiny chips. The texture immediately changed — softer, richer, and much more homemade.
One important detail: you really want to use old-fashioned rolled oats, not quick oats. They give that chewy texture people actually love in this kind of cookie.
For this recipe, I especially like Bob’s Red Mill Old Fashioned Rolled Oats — they don’t turn mushy inside the dough and keep their texture well after baking.
Ingredients
- 1 cup butter, room temperature (225 g)
- 1 cup brown sugar (200 g)
- 1/2 cup sugar (100 g)
- 2 large eggs
- 2 tsp vanilla extract
- 1 3/4 cups flour (220 g)
- 1 tsp baking soda
- 1/2 tsp salt
- 2 cups old-fashioned rolled oats (180 g)
- 1 1/2 cups dark chocolate chunks (250 g)
How to Make Them
- Prepare the dough base
In a large bowl, beat the softened butter with the brown sugar and regular sugar. The mixture should become lighter and slightly fluffy.
After that, add the eggs and vanilla extract. The dough will become thick and very fragrant. - Mix the dry ingredients
In a separate bowl, stir together the flour, baking soda, and salt. Gradually add the dry mixture into the butter and sugar mixture. Don’t try to make the dough perfectly smooth. This type of cookie doesn’t need that. - Add the oats and chocolate
Mix in the oats and large chocolate chunks. Large chunks of chocolate give the best result here. Small chocolate chips simply melt into the dough, while bigger pieces create real layers of chocolate inside the cookies.
Sometimes I purposely break the chocolate bar by hand so the pieces end up in different sizes. The cookies look less “perfect” that way, but much more appetizing. - Chill the dough
Place the bowl of dough into the fridge for at least 30 minutes. Chilling helps create thick, soft cookies instead of thin flat ones. - Bake
Preheat the oven to 350°F (175°C). Form large dough balls and place them on a baking sheet with space between them. Bake for 12–15 minutes. The edges should become golden, while the center should still stay slightly soft.
Don’t overbake them. Oatmeal chocolate cookies dry out very easily. After a couple of minutes outside the oven, the center becomes exactly what you want — soft, chewy, and full of melted chocolate.
Lindy likes eating these cookies in the morning with strong coffee. And if you warm one up slightly the next day, the chocolate inside becomes soft again. That’s when the combination of buttery dough, oats, and large chunks of dark chocolate really stands out. Honestly, these cookies are ridiculously good.
3. Espresso-Infused Breakfast Cookies
The coffee goes directly into the dough here, which makes the flavor deeper and the chocolate taste much brighter and richer. And not overly sweet.
When there’s a lot of work outside and dry “fitness snacks” get boring, I start craving real homemade baking. That’s when I make these espresso chocolate cookies.
Coffee doesn’t make the cookies bitter. It simply boosts the flavor of the chocolate and adds more depth to the aroma. That’s exactly why pastry chefs often add a little coffee even to chocolate cakes and brownies.
Ingredients
- 3/4 cup butter, room temperature (170 g)
- 3/4 cup brown sugar (150 g)
- 1/4 cup sugar (50 g)
- 1 large egg
- 1 tbsp espresso powder
- 1 tsp vanilla extract
- 1 1/2 cups flour (190 g)
- 1/2 tsp baking soda
- 1/2 tsp salt
- 1 cup old-fashioned rolled oats (90 g)
- 1 cup dark chocolate chunks (170 g)
- 1/2 cup walnuts, roughly chopped (60 g) — optional
How to Make Them
- Make the dough base
In a large bowl, beat the butter with the brown sugar and regular sugar. The mixture should become soft and creamy, but not too fluffy. After that, add the egg, vanilla extract, and espresso powder. The dough immediately starts smelling like freshly brewed coffee and warm baked goods at the same time. - Add the dry ingredients
In a separate bowl, combine the flour, baking soda, and salt. Gradually mix the dry ingredients into the dough, then add the oats. They’re not here for “healthiness” — they’re here for texture. The oats make the cookies denser, softer inside, and keep them from drying out the next day. - Mix in the chocolate and walnuts
Add the large chunks of dark chocolate and the walnuts. It’s better not to use tiny chocolate chips here — larger uneven chunks melt more slowly and create real layers of chocolate inside the cookies.
Sometimes I purposely break the chocolate bar by hand because perfectly even chunks make homemade baking look too store-bought. - Chill the dough
Place the bowl of dough in the fridge for about 30 minutes. After chilling, the flavor becomes slightly richer and the cookies spread less in the oven. The center stays soft while the edges turn more golden. - Bake
Preheat the oven to 350°F (175°C). Form large dough balls and place them on a baking sheet with space between them. Bake for 11–13 minutes until the edges become golden.
The center may seem too soft at first, but after cooling the texture becomes exactly right — soft, dense, and slightly chewy.
I love these cookies because they turn out softer and denser than regular chocolate chip cookies. The coffee doesn’t create a strong bitterness — it simply makes the chocolate flavor brighter. And thanks to the oats, the cookies feel more filling and don’t dry out just a couple hours after baking.
4. Secret Ingredient Olive Oil Chocolate Chip Cookies
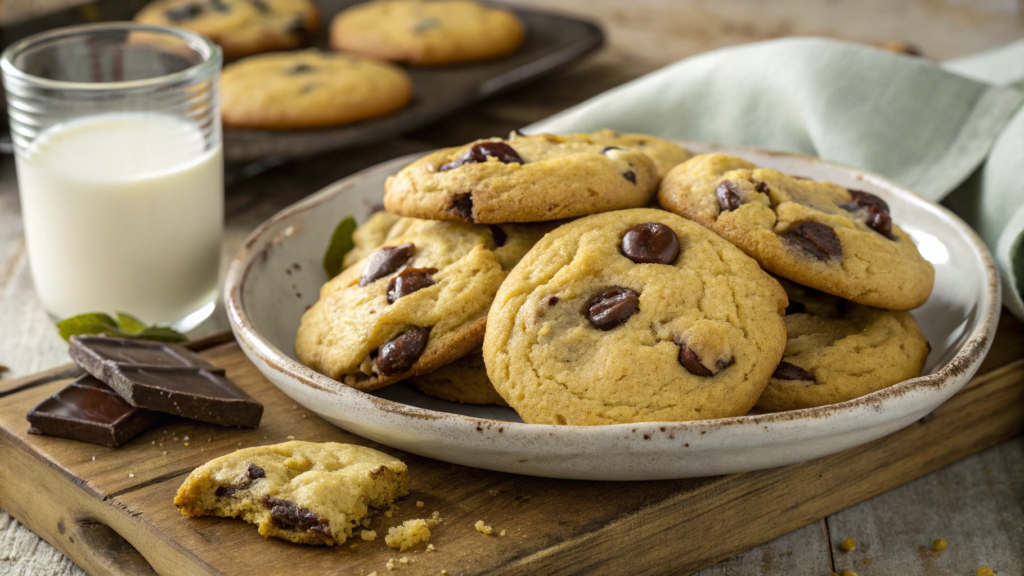
For anyone used to the classic butter version, olive oil chocolate chip cookies might sound a little strange at first. Lindy and I were no exception. But after the first batch, it became obvious why so many bakers love this version.
Olive oil makes the texture softer while also slightly denser at the same time. The cookies stay fresh longer, and the flavor turns out richer and less overly sweet.
The main thing here is using a good olive oil with a mild flavor, not one that tastes too sharp or bitter.
Ingredients
- 3/4 cup olive oil (180 ml) — California Olive Ranch Extra Virgin Olive Oil (it has a mild flavor without the strong grassy bitterness that richer oils sometimes have)
- 1 cup brown sugar (200 g)
- 1/3 cup sugar (65 g)
- 2 large eggs
- 2 tsp vanilla extract
- 2 cups flour (250 g)
- 1/2 tsp baking soda
- 1/2 tsp baking powder
- 3/4 tsp salt
- 1 1/2 cups dark chocolate chunks (250 g)
- 2 tbsp cornstarch
How to Make Them
- Mix the wet ingredients
In a large bowl, combine the olive oil, brown sugar, and regular sugar. The mixture will look thinner than dough made with butter — that’s completely normal. After that, add the eggs and vanilla extract.
The dough looks shinier and smoother than regular cookie dough. Lindy honestly thought I messed up the measurements the first time. But after baking, the texture turns out really good — soft in the center with lightly crisp edges. - Add the dry ingredients
In a separate bowl, combine the flour, baking soda, baking powder, salt, and cornstarch. The cornstarch helps keep the center soft and prevents the cookies from drying out the next day.
Gradually mix the dry ingredients into the dough. Don’t overmix. As soon as the flour disappears into the dough, stop. - Add the chocolate
Mix in the large chocolate chunks. It’s better to use chunks instead of tiny chips here. In cookies made with olive oil, the chocolate stands out more against the dough, so large melted pockets work much better.
Sometimes we also press a few extra chunks on top before baking so the cookies look a little more homemade instead of perfectly smooth. - Chill the dough
Place the dough in the fridge for at least 30–40 minutes. Without chilling, it will spread too much. After chilling, the dough becomes thicker and the flavor more balanced. It’s especially noticeable after a few hours. - Bake
Preheat the oven to 350°F (175°C). Form large dough balls and place them on a baking sheet with space between them. Bake for 11–13 minutes. The edges should become lightly golden while the center stays soft. Don’t wait for the cookies to look completely “done” in the oven — they will continue setting as they cool.
During the first few minutes after baking, the cookies are very delicate, so it’s better to let them rest on the baking sheet before moving them.
The olive oil doesn’t make these cookies taste salty or “grassy.” Instead, the flavor turns out softer and slightly richer than the classic butter version. These cookies go especially well with strong black tea, coffee, or even just a glass of cold milk in the evening.
5. Double Chocolate Tahini Cookies
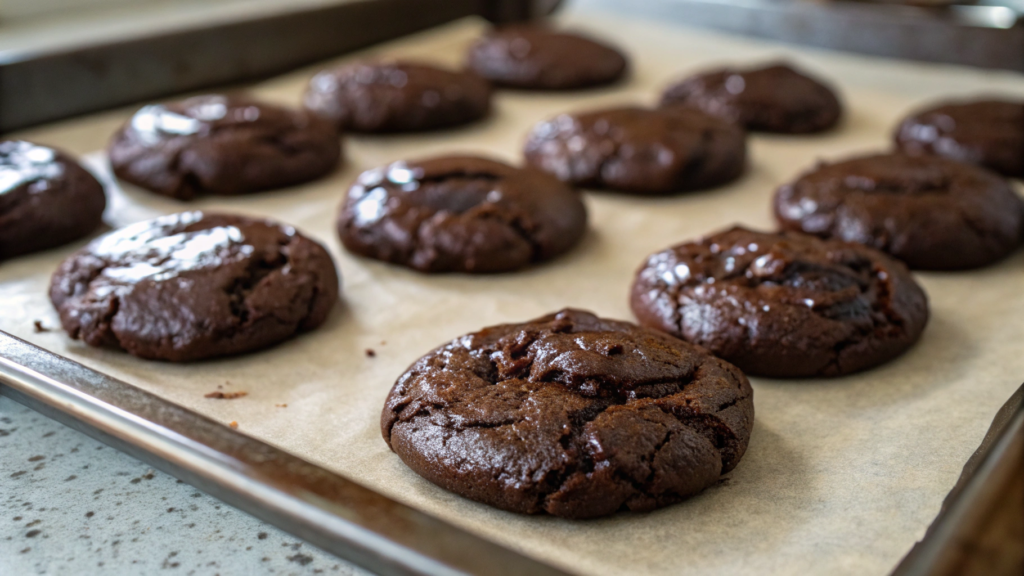
A jar of tahini sat in our fridge for weeks. But one day tahini ended up in chocolate cookie dough, and we immediately regretted not trying it earlier.
Tahini makes the flavor richer and slightly nutty, while the dough turns out soft and dense at the same time. The cookies don’t taste simply sweet — the flavor becomes deeper, almost like a mix between a chocolate cookie and a soft brownie.
The important thing is using tahini with a smooth texture and without too much bitterness.
Ingredients
- 1/2 cup butter, room temperature (115 g)
- 1/2 cup tahini (120 g)
- 3/4 cup brown sugar (150 g)
- 1/4 cup sugar (50 g)
- 1 large egg
- 1 tsp vanilla extract
- 1 cup flour (125 g)
- 1/3 cup cocoa powder (35 g)
- 1/2 tsp baking soda
- 1/2 tsp salt
- 1 1/4 cups dark chocolate chunks (210 g)
How to Make Them
- Make the dough base
Beat the butter, tahini, brown sugar, and regular sugar until smooth. The dough will turn out thicker and slightly glossy because of the sesame paste. After that, add the egg and vanilla extract.
Tahini doesn’t make the cookies taste strongly “sesame-like” in the usual way. Instead, it adds a light nutty note and makes the chocolate flavor richer. - Add the dry ingredients
In a separate bowl, combine the flour, cocoa powder, baking soda, and salt. Gradually mix the dry ingredients into the dough.
Don’t overmix. As soon as the dough becomes uniform, stop. Because of the cocoa powder, these cookies can become too dense if the dough is mixed too long. - Add the chocolate
Mix in the dark chocolate chunks. Use large chunks instead of tiny chocolate chips. In the finished cookies, the melted chocolate pockets contrast really well with the dense dough.
Sometimes Lindy and I leave a few extra chunks on top before baking. After the oven, the cookies look slightly less “perfect,” but much more appetizing. - Chill the dough
Place the dough in the fridge for about 30 minutes. After chilling, the cookies spread less and stay thicker in the center. Cold dough is also easier to shape because tahini makes it fairly soft. - Bake
Preheat the oven to 350°F (175°C). Form large dough balls and place them on a baking sheet with space between them.
Bake for 10–12 minutes. The edges should set while the center stays soft. Right after baking, the cookies will be very delicate, so it’s better to let them rest on the baking sheet for a few minutes.
Inside, the texture turns almost like a soft chocolate cake, especially while the cookies are still slightly warm.
The next day, the tahini becomes slightly more noticeable, which makes the flavor feel even richer. These cookies also store really well in a sealed container and stay soft for a long time. They taste great not only with coffee, but also with cold milk or even plain black tea without sugar — the chocolate and sesame already bring plenty of flavor on their own.
6. Sourdough Discard Chocolate Chip Treats
Anyone who keeps a jar of sourdough starter knows the same question: what do you do with the leftover discard after feeding it? Lindy and I first threw it away, then started adding it to pancakes, and eventually ended up using it in cookies too.
Sourdough discard makes the dough richer in flavor and helps the cookies stay soft longer. At the same time, the finished cookies don’t turn sour like many people expect. Instead, they develop a light caramel-like flavor. The cookies turn out soft in the center, with slightly firmer edges and large chunks of chocolate inside.
Ingredients
- 1/2 cup butter, room temperature (115 g)
- 1/2 cup sourdough discard (120 g)
- 3/4 cup brown sugar (150 g)
- 1/4 cup sugar (50 g)
- 1 large egg
- 1 tsp vanilla extract
- 1 3/4 cups flour (220 g)
- 1/2 tsp baking soda
- 3/4 tsp salt
- 1 1/2 cups dark chocolate chunks (250 g)
- 1/2 tsp cinnamon — optional
- sourdough starter jar
How to Make Them
- Prepare the dough base
In a large bowl, beat the butter with the brown sugar and regular sugar until soft and creamy. After that, add the egg, vanilla extract, and sourdough discard.
The discard makes the dough slightly looser and more moist. If it has been sitting in the fridge, take it out at least 20–30 minutes ahead of time so it’s not ice cold. - Mix the dry ingredients
In a separate bowl, combine the flour, baking soda, salt, and cinnamon if using. The cinnamon slightly boosts the flavor of the chocolate and brown sugar. Gradually mix the dry ingredients into the dough. It will turn out fairly thick and slightly sticky — that’s exactly how it should be. - Add the chocolate
Mix in the large chocolate chunks. It’s better to use chopped chocolate bars instead of tiny chips. In this type of dough, larger chunks stand out more and create richer pockets of melted chocolate inside the cookies.
Sometimes Lindy and I combine dark and milk chocolate in the same batch. The flavor turns slightly softer and less bitter that way. - Chill the dough
Place the dough in the fridge for at least 1 hour. Chilling is especially important for this recipe. During that time, the flour absorbs moisture from the sourdough discard and the flavor becomes richer. The cookies spread less later and hold their shape better. - Bake
Preheat the oven to 350°F (175°C). Form large dough balls and place them on a baking sheet with space between them. Bake for 11–14 minutes. The edges should become lightly golden while the center stays soft. Don’t overbake them — sourdough chocolate chip cookies taste best with a slightly soft middle.
After baking, let the cookies rest on the baking sheet for a few minutes. Right out of the oven they’re very delicate and can fall apart easily.
At our house, these cookies usually appear on the same days we bake bread and end up with half a jar of extra starter we don’t want to waste. The dough comes together quickly, and the final result is a cookie with a denser texture, a light caramel note, and large melted chunks of chocolate inside.
7. Salted Caramel Lava Cookies
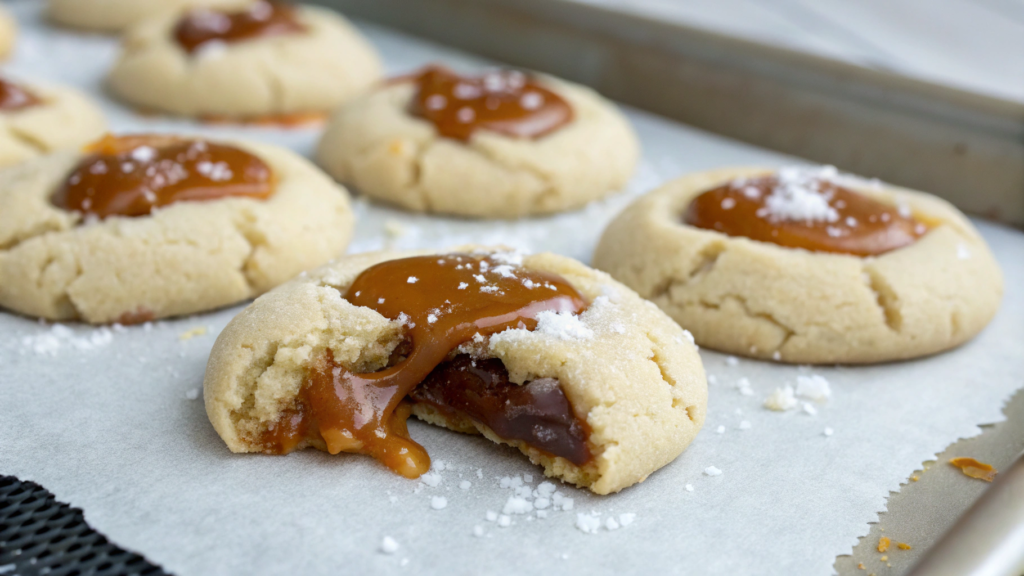
In this recipe, the center stays soft and slightly gooey, while the top gets a light salty contrast that makes the chocolate and caramel taste brighter. At the same time, the cookies don’t turn into sticky candy and don’t spread all over the baking sheet.
Ingredients
- 3/4 cup butter, room temperature (170 g)
- 3/4 cup brown sugar (150 g)
- 1/3 cup sugar (65 g)
- 1 large egg
- 2 tsp vanilla extract
- 2 cups flour (250 g)
- 1/2 tsp baking soda
- 3/4 tsp salt
- 1 1/4 cups dark chocolate chunks (210 g)
- 12 soft caramels that hold their shape when heated – Werther’s Original Soft Caramels
- flaky sea salt for topping
How to Make Them
- Prepare the dough
In a large bowl, beat the butter with both types of sugar until soft and creamy. After that, add the egg and vanilla extract.
The dough here should stay fairly thick. If the mixture turns too loose, the cookies will spread too much later and the caramel may leak out. - Add the dry ingredients
In a separate bowl, combine the flour, baking soda, and salt. Gradually mix the dry ingredients into the dough.
Don’t overmix. As soon as the dough becomes smooth, stop. Otherwise the cookies will turn too dense after baking. - Add the chocolate
Mix in the chocolate chunks. Large chunks work much better here because tiny chocolate chips almost disappear next to the caramel filling. Dark chocolate with a slight bitterness works best — it keeps the flavor from becoming overly sweet and prevents the caramel from overpowering everything else. - Hide the caramel inside
Take about 2 tablespoons of dough, flatten it slightly in your hand, and place a caramel in the center. Cover it with another piece of dough and gently roll it into a ball.
It’s very important to fully seal the caramel inside the dough. If there are gaps, the filling will leak onto the baking sheet in the oven. - Chill the dough balls
Place the shaped dough balls in the fridge for at least 30–40 minutes. This helps the cookies hold their shape and keeps the caramel inside longer while baking. - Bake
Preheat the oven to 350°F (175°C). Place the cookies on a baking sheet with space between them and lightly sprinkle flaky sea salt on top. Bake for 11–13 minutes. The edges should become golden while the center stays soft. Don’t overbake them. If the cookies dry out too much, the caramel inside will become too firm after cooling.
After baking, let the cookies rest for at least 10 minutes. The caramel inside gets extremely hot and will immediately spill out if the cookies are broken open too soon.
What I like most here is the contrast in texture: soft dough, melted chocolate, and thick caramel in the center. These cookies are best eaten slightly warm while the middle still stays gooey. With cold milk or strong black coffee, the sweetness feels more balanced and less heavy.
8. Chef-Inspired Miso Chocolate Chip Wonders
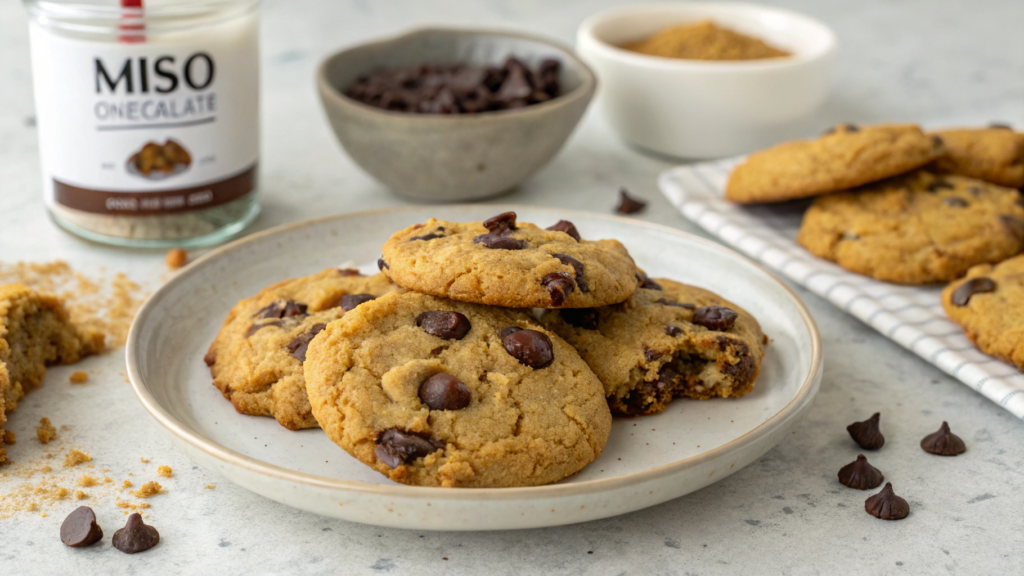
Lindy didn’t understand for a long time why anyone would add miso to desserts at all. But I convinced her to try these miso chocolate chip cookies.
White miso doesn’t make the cookies taste “salty” or like Asian food. It boosts the flavor of the buttery dough, makes the caramel notes brighter, and helps the chocolate taste richer.
Ingredients
- 3/4 cup butter, room temperature (170 g)
- 2 tbsp white miso, such as Hikari Organic White Miso Paste
- 3/4 cup brown sugar (150 g)
- 1/4 cup sugar (50 g)
- 1 large egg
- 2 tsp vanilla extract
- 2 cups flour (250 g)
- 1/2 tsp baking soda
- 1/2 tsp salt
- 1 1/4 cups dark chocolate chunks (210 g)
How to Make Them
- Mix the butter, miso, and sugar
In a large bowl, beat the butter, white miso, brown sugar, and regular sugar until the mixture becomes soft and completely smooth. It’s very important to mix the miso well at this stage so there are no salty spots left in the dough.
At this point, you can already notice that the dough smells different from regular chocolate chip cookie dough. The caramel aroma becomes much stronger. - Add the egg and vanilla
Mix in the egg and vanilla extract. The dough will become slightly smoother and shinier. Because of the miso, the mixture can sometimes look a little grainy — that’s normal. After adding the flour, the texture evens out. - Add the dry ingredients
In a separate bowl, combine the flour, baking soda, and salt. Gradually mix the dry ingredients into the dough. It’s important not to overload the dough with flour here. If the dough becomes too packed, the cookies lose their soft center and turn dry after cooling. - Add the chocolate
Mix in the large chunks of dark chocolate. It’s better to use chocolate with around 60–70% cocoa. Chocolate that’s too sweet makes the flavor less interesting, while very bitter chocolate starts competing with the miso.
Lindy and I sometimes use a mix of dark and milk chocolate for a softer version. - Chill the dough
Place the dough in the fridge for about 40 minutes. After chilling, the flavor becomes more balanced and the cookies spread less in the oven. Cold dough also creates a thicker and softer center. - Bake
Preheat the oven to 350°F (175°C). Form large dough balls and place them on a baking sheet with space between them. Bake for 11–13 minutes. The edges should become lightly golden while the center stays soft. Right out of the oven, the cookies may seem too delicate, but after a few minutes the texture becomes firmer.
In the finished cookies, the miso doesn’t stand out as a separate flavor. Instead, it creates a light salty caramel note.
Most people try these cookies carefully the first time, but after the second one they usually start asking for the recipe. These cookies taste especially good with hot black tea or black coffee without sugar.
9. Frozen Dough Tray-Bake Cookies
I don’t think anyone would argue that frozen cookie dough is incredibly convenient. You make one big batch of dough, and for the next few weeks you can bake fresh cookies whenever you want.
But in this recipe, the dough isn’t baked as separate cookie balls. Instead, it’s baked as one large layer on a sheet pan. After that, everything gets sliced into squares or broken into uneven chunks. The result lands somewhere between classic cookies and soft chocolate bars.
Ingredients
- 1 cup butter, room temperature (225 g)
- 1 cup brown sugar (200 g)
- 1/2 cup sugar (100 g)
- 2 large eggs
- 2 tsp vanilla extract
- 2 1/4 cups flour (280 g)
- 1 tsp baking soda
- 3/4 tsp salt
- 2 cups dark chocolate chunks (340 g)
- 1/2 cup chopped nuts (60 g) — optional
- flaky sea salt for topping
How to Make Them
- Make the dough
In a large bowl, beat the butter with both sugars until soft and creamy. Add the eggs and vanilla extract. After that, gradually mix in the flour, baking soda, and salt. The dough should turn out thick and soft, but not runny. If it feels too warm and sticky, it will be harder to spread on the baking sheet after freezing. - Add the chocolate
Mix in the large chocolate chunks and the nuts if using. Large chunks work much better here because baking the dough as one full layer creates big melted chocolate pockets inside. Tiny chocolate chips just disappear into the dough. - Freeze the dough
Transfer the dough into a container or wrap it tightly and place it in the freezer for at least a few hours.
Lindy and I usually make a double batch right away. Part of it becomes regular cookies, while the rest stays in the freezer for these quick “lazy” sheet-pan versions.
The dough stores well for weeks and still keeps a great texture after baking. - Prepare the baking sheet
Preheat the oven to 350°F (175°C). Take the dough out of the freezer about 15–20 minutes before baking. It should soften slightly so it can spread across the baking sheet more easily.
Line the pan with parchment paper and spread the dough into an even thick layer. You can add a few extra chocolate chunks and a little flaky sea salt on top. - Bake
Bake for 20–25 minutes depending on the thickness of the layer. The edges should become golden while the center stays slightly soft. Don’t wait for the center to become completely dry. After cooling, the dough will continue setting and become firmer. - Slice or break apart
Let the baked dough rest for about 15 minutes, then cut it into squares or simply break it into large uneven pieces.
It definitely doesn’t look as perfectly polished as classic round cookies, but that’s exactly what makes it feel more homemade and appealing.
Honestly, convenience is the main reason to love this recipe. The dough is already prepared, the oven does almost all the work, and in the end you get a big warm batch of chocolate chip cookies without dealing with separate dough balls or multiple baking sheets one after another. It’s especially useful on days when spending the whole evening in the kitchen sounds exhausting.
10. Five-Minute Skillet Chocolate Chip Cookie
For those moments when you need something for tea quickly and “right now,” there’s the skillet chocolate chip cookie. The dough comes together fast, cooks in one layer, and stays soft in the center, almost like a mix between a cookie and a warm chocolate dessert.
No chilling the dough. No multiple baking sheets. Everything cooks directly on the stovetop in just a few minutes.
For this recipe, a small nonstick skillet is especially convenient — 8-inch nonstick skillet GreenPan Mini Ceramic Nonstick Frying Pan Set.
Ingredients
- 2 tbsp butter (30 g)
- 2 tbsp brown sugar (25 g)
- 1 tbsp sugar (12 g)
- 1 egg yolk
- 1/4 tsp vanilla extract
- 1/3 cup flour (40 g)
- a pinch of baking soda
- a pinch of salt
- 1/4 cup dark chocolate chunks (45 g)
How to Make Them
- Melt the butter
Place a small skillet over low heat and melt the butter. Don’t overheat it — the butter should simply become liquid.
Right after that, add the brown sugar and regular sugar. Stir with a spatula directly in the skillet for about 20–30 seconds. - Add the yolk and vanilla
Remove the skillet from the heat for a minute so the mixture cools slightly. This is important, otherwise the yolk may start cooking. Add the yolk and vanilla extract, then quickly stir until smooth. - Add the dry ingredients
Mix in the flour, baking soda, and salt. The dough will turn out thick and soft. Don’t overmix. As soon as the flour disappears into the dough, stop. - Add the chocolate
Mix in the chocolate chunks and lightly spread the dough across the bottom of the skillet. You can leave a few chunks on top — they melt beautifully while cooking. - Cook the cookie
Return the skillet to very low heat and cover it with a lid. Cook covered for 5–7 minutes over low heat. The top should become matte and stop looking raw, while the center stays soft.
If you want an even softer middle, turn off the heat slightly earlier. If you prefer a firmer texture, leave it uncovered for one extra minute.
The result lands somewhere between a warm chocolate chip cookie and a soft café-style dessert. Lindy and I usually eat it straight from the skillet with spoons while the chocolate is still melted. Honestly, it’s really good.
Favorite Cookies
The base of all these cookies is similar, but they all feel completely different. Some have a softer and denser center, some make the chocolate stand out more, and some change completely because of just one unexpected ingredient.
Lindy and I usually don’t bake all these versions at once. We just pick whatever fits the mood that day: caramel, coffee, miso, tahini, and so on.
By now, you’ve probably noticed that small details really do change the final result. Different chocolate, slightly colder dough, or even five extra minutes of chilling can completely change the texture of a cookie.If you try one of these recipes first, leave a comment and say which one you picked. Our favorites change almost every month.