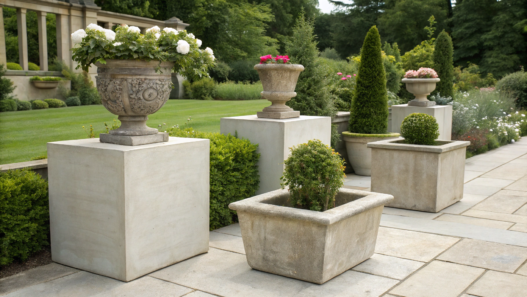
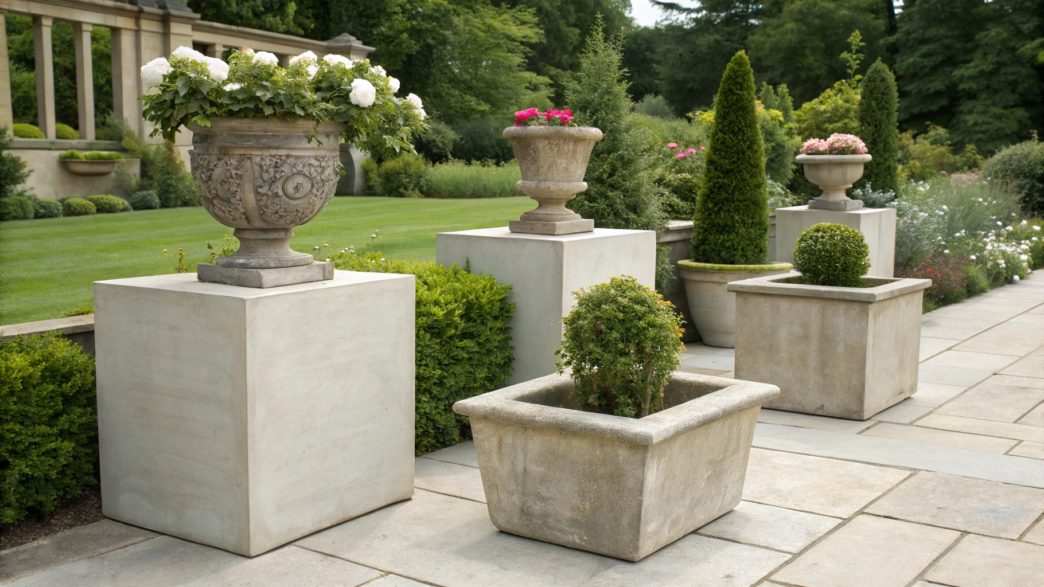
Concrete planters often look like an expensive piece from a garden store, even though the process itself is often pretty simple. For me, it’s not even really about saving money, but about being able to make a planter shape that fits your space exactly — a wide bowl for the patio, a tall narrow option by the door, or a small cylinder for a group of plants.
I love projects where the mold is made from the most ordinary things: plastic containers, fabric, cardboard tubes, concrete pavers, or a piece of PVC.
I picked 10 concrete planter ideas that you can make yourself. They differ not only in shape but also in the way they’re made, so you can choose a project based on the tools you already have, the space, and how much time you want to spend on it.
1. Large round concrete planter
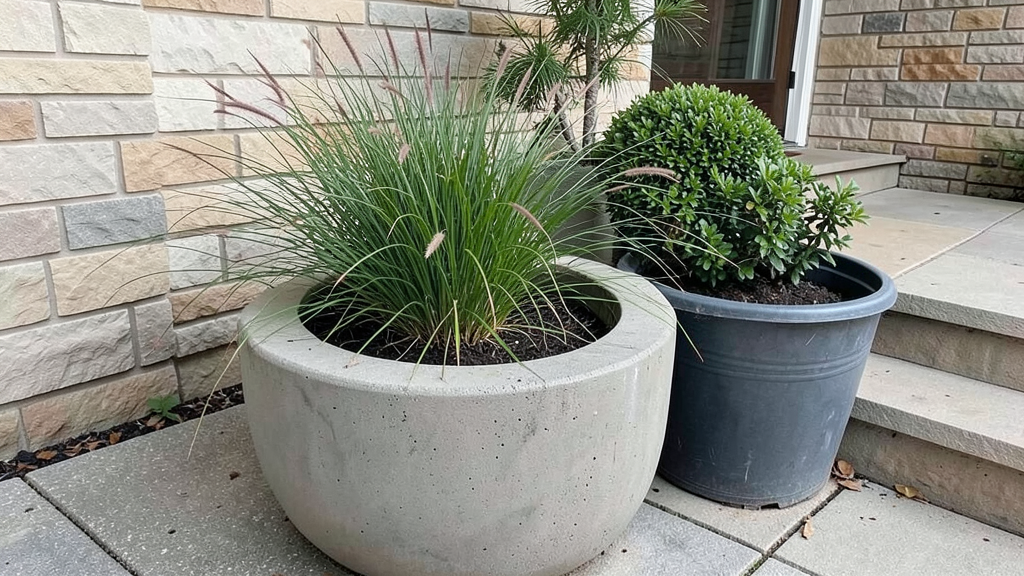
A large round concrete planter is a good project if you want to try working with concrete for garden decor without dealing with complicated formwork. You only need two plastic containers of different sizes. One creates the outside of the planter, while the other creates the inner space for soil.
In our yard, we use large planters for one big ornamental grass, a compact shrub, or a composition of several plants, and next to a wall, steps, or the edge of a patio, a planter like this doesn’t get visually lost.
You don’t have to buy special molds. Regular plastic buckets, tubs, or large containers will work as long as they fit inside one another and have smooth walls.
What you’ll need
- A large plastic container about 20–24 inches (51–61 cm) in diameter. This will be the outer mold. It’s better to choose a container that gets slightly wider toward the top, without protruding details or deep texture.
- A smaller plastic container for the inner mold. Once it’s placed inside, there should be enough space between the two walls for a layer of concrete.
- Ready-mix concrete for outdoor use. The amount depends on the size of your molds, so it’s better to check the coverage information on the package of the specific mix you’re using.
- Water and a mixing container.
- Mold release or vegetable oil for coating the molds.
- Rocks, sand, or bricks to weigh down the inner mold.
- A wooden dowel or a small piece of tubing for the drainage hole.
- Gloves and safety glasses.
- If you decide to make the drainage hole after casting, you’ll need a masonry drill bit set, for example, Masonry Drill Bit Set.
How to make a large round concrete planter
1. First, test the molds without concrete. Place the smaller container inside the larger one and check the distance between the walls. The large container creates the outer surface of the planter. The smaller one takes up the space where the soil will go later. The concrete is poured into the gap between them.
The outer mold needs to have a shape that allows you to release the finished planter afterward. Don’t use a rigid container that gets noticeably narrower toward the top. Once the concrete hardens, it can simply get trapped inside.
For me, old plastic that I don’t mind ruining is the easiest to work with. Lindy once gave me a perfectly good storage container for a similar project, and then we realized that keeping the container intact while also getting the casting out was… a pretty optimistic plan.
2. Prepare the plastic. Coat the inside of the large container and the outside of the smaller one with a thin layer of oil or mold release. There’s no need to soak the walls in oil. A thin, even coating is enough.
3. Mix the concrete. Follow the proportions recommended by the manufacturer instead of guessing. A long time ago, I got the amount of water wrong, I admit it, but now I just follow the instructions on the bag.
The consistency should allow the mix to fill the mold, but it shouldn’t turn into a runny liquid.
4. Make the base of the planter. Pour concrete into the bottom of the large mold in a layer about 2 inches (5 cm) thick. To create the drainage hole right away, place a greased wooden dowel or a small piece of tubing in the center of the base. It should go through the full layer of concrete down to the bottom of the plastic mold. Once the concrete hardens and the dowel is removed, you’ll have a ready-made hole for water drainage.
5. Place the inner container. Set it in the center on top of the concrete base. Put rocks, sand, or bricks inside the smaller mold. Without weight, the empty plastic will try to float upward.
Check the mold from above. If the gap between the containers is much smaller on one side than on the other, adjust it now. Once the concrete is poured in, this will be much harder to fix.
6. Fill the walls with concrete. Add the mix gradually into the space between the two containers, working your way around the entire circle. After every few portions, lightly tap the outer mold with your hand or a rubber mallet. This helps the concrete fill the space more tightly and releases some of the air bubbles.
Don’t try to get a perfectly smooth surface. Small holes and variations are completely natural in a concrete planter.
7. Let the concrete harden and remove both molds. Don’t try to take everything apart after just a few hours simply because the top already feels hard.
Leave the concrete in the molds for at least 48 hours, unless the manufacturer of your chosen mix recommends a different time. Even if the surface already feels hard, the concrete inside is still gaining strength. Before removing the molds, always check the instructions on the package, since some mixes need more time.
- First, remove the inner mold. Take out the weight, squeeze the plastic walls inward slightly, and try to gently wiggle the container. If it releases easily, simply pull it upward.
If the plastic doesn’t move, don’t force it against the fresh concrete edge. Cut the inner container from top to bottom with a utility knife and remove the plastic in pieces. - Now remove the outer mold. If the plastic is flexible, carefully bend the top edge outward all the way around and gradually separate the walls from the concrete. If the mold is stuck tightly, make a vertical cut from the top edge almost to the bottom, then bend the plastic outward and remove it in sections. If needed, make a second cut on the opposite side.
That’s why it’s better to use an inexpensive plastic tub, bucket, or container that you don’t mind cutting for the outer mold. It makes removing the mold easier and reduces the risk of damaging the edge of the planter.
After demolding, remove the dowel from the drainage hole. If you didn’t make the hole during casting, wait until the planter has hardened enough and drill it with a masonry bit.
Our result
This kind of planter has a pretty simple look — a wide round shape, a thick concrete rim, and the natural surface of the material. In my opinion, there’s no need to complicate it with patterns or bright paint.
Lindy might move a plant into a planter like this even if she originally planned to put it somewhere completely different, and a couple of days later it’s already hard to imagine that corner of the yard without it.
If this is your first time working with concrete, starting with a planter like this makes perfect sense. Two molds, concrete, and a little patience during demolding are enough to understand the basic process and end up with a nice outdoor planter without a complicated construction.
2. Rectangular concrete planter box
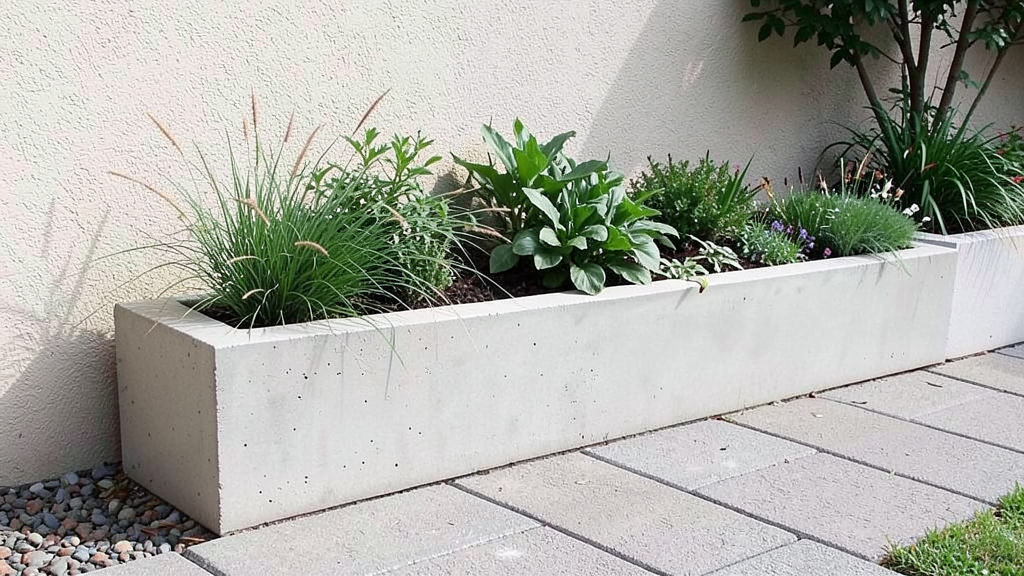
A rectangular concrete planter is easy to place along a wall, the edge of a patio, or a path. With this shape, it’s easier to use the full length of the container and plant several plants in one row.
These long planters usually find their place in our yard pretty quickly. We plant grasses in one, and several matching plants along a wall in another. Before making the planter itself, Lindy simply places the future plants on the ground and looks at how much space they’ll take up. That makes it easier to understand how long the mold needs to be.
There’s no need to look for suitable plastic containers. It’s much more practical to build a removable mold from melamine board or smooth plywood. It consists of an outer rectangular box and a smaller inner box. The concrete will go between them.
What you’ll need
- 3/4-inch (1.9 cm) melamine board or smooth plywood for making the mold. A melamine surface gives the concrete a smoother finish and releases more easily after curing.
- Screws for assembling the outer and inner parts of the mold.
- Ready-mix concrete for outdoor use.
- Water and a mixing container.
- Silicone caulk, such as Silicone Caulk, for the inside joints of the mold. It keeps the liquid part of the mix from escaping through gaps and helps create cleaner corners.
- A wooden dowel about 1/2 inch (1.3 cm) in diameter for the drainage hole. This size is also used in instructions for cast concrete planters.
- Mold release or vegetable oil, if the surface of your chosen mold requires it.
- Gloves and safety glasses.
- A rubber mallet or regular hammer for lightly tapping the mold after pouring.
How to make a rectangular concrete planter
1. Decide on the size and build the outer mold. First, decide where the planter will go and how many plants it should hold. Then cut the bottom and four sides from melamine board.
Assemble them with screws into a rectangular box with no top. All the corners should fit tightly together, otherwise the concrete can start escaping through the gaps during pouring.
2. Build the inner mold. Now you need a second, smaller box. It will create the inner space for the soil.
Leave about 1 1/2–2 inches (3.8–5 cm) between the outer and inner molds for the concrete walls. This range is also used when making larger cast concrete containers.
3. Seal the joints. Run a thin line of silicone caulk along the inside corners of the outer mold and smooth it out. The purpose of the caulk is to close small gaps between the boards.
If the mold is made from melamine board, it usually doesn’t need any additional coating. If you’re using regular plywood, apply a thin layer of mold release or vegetable oil to the surfaces that will come into contact with the concrete.
4. Make the base and drainage. Pour concrete into the bottom of the outer mold before installing the inner box.
For this planter, the base can be about the same thickness as the walls. Push a greased wooden dowel about 1/2 inch (1.3 cm) in diameter through the concrete all the way to the bottom of the mold. Once it’s removed, it will leave a hole for excess water to drain out.
For a long planter, one hole may not be enough, so the number of drainage holes is better determined by the size of the container itself and the plants that will go inside.
5. Install the inner box. Place it on top of the concrete base and align it carefully. Check the distance between the mold walls on all four sides. In a rectangular planter, misalignment is much more noticeable than in a round one. If the inner box shifts noticeably to one side, one concrete wall will end up thicker than the other.
The inner mold needs to be securely fixed or weighted down. Fresh concrete can lift lightweight parts of the mold during pouring.
6. Fill the walls with concrete. Add the mix gradually, working your way around the perimeter of the mold. Pay special attention to the corners. Push the concrete down with a wooden stick so there aren’t any large voids inside, then lightly tap the outside walls of the mold several times with a hammer. The vibration helps the mix fill the corners and reduces air pockets.
7. Let the concrete harden and take the mold apart. With a large rectangular casting, it makes more sense not to rush the removal of the boards. Some instructions for large cast concrete containers call for at least four days of curing before removing the mold. Still, always check the exact timing on the package of the concrete mix you’re using.
- First, remove the screws and take off the outer box walls one at a time. That’s exactly why we built the mold so it could be taken apart instead of permanently gluing it together.
- After that, take apart the inner box. If it was assembled with screws, unscrew the walls one by one and remove them inward into the empty space. Don’t try to pull out the entire inner rectangle in one piece — the long walls may grip the concrete too tightly.
Remove the wooden dowels from the drainage holes and let the planter continue curing according to the instructions for your mix.
Our result
It’s easy to find a place for a rectangular planter in the yard — along a wall, fence, the edge of a patio, or between two garden areas. Lindy often plants several plants of the same kind in these long containers to emphasize the elongated shape. But you can also create a mixed planting — it all depends on your preferences.
3. Towel draped concrete planter
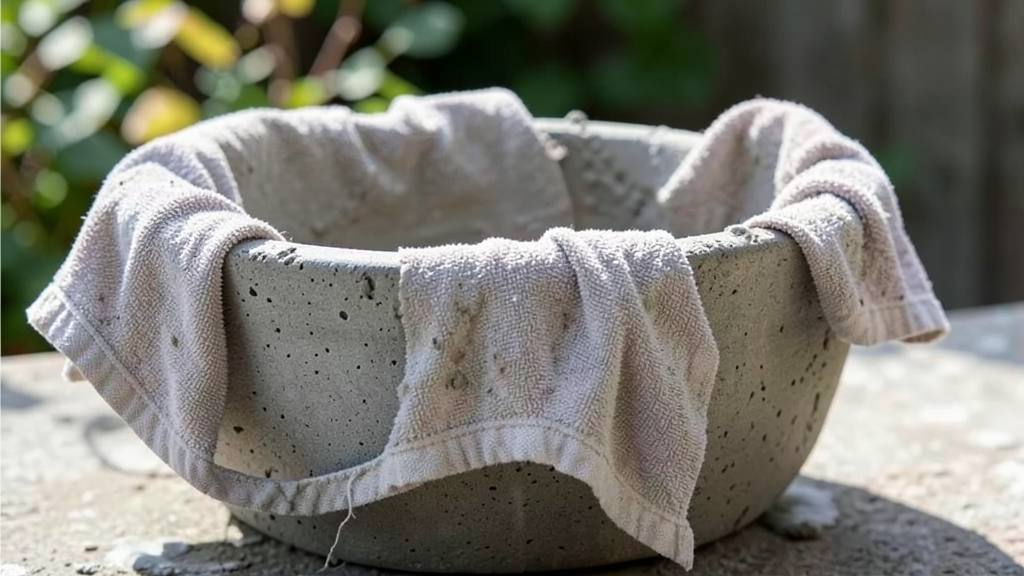
With this method, an old towel is soaked in a cement mix and draped over an upside-down bucket. Once the cement hardens, the fabric keeps its folds and turns into a rigid bowl.
I’ve always found projects like this especially interesting right before the flip. While the towel is hanging over the bucket, the whole thing looks pretty strange. Then you remove the mold, turn it over, and suddenly it’s clear why all those folds were needed.
Choose a dense, absorbent towel rather than thin, smooth fabric. Terry cotton holds more cement mix and helps create thicker walls.
What you’ll need
- An old thick towel. Its size will determine the size of the finished planter. The towel should fully cover the mold and hang freely down the sides.
- Portland cement or a fine cement mix without large aggregate. Regular concrete mix with stones is inconvenient for this technique because it doesn’t soak into the fabric fibers well.
- Water for mixing and for pre-wetting the towel.
- A plastic bucket or wide flower pot for the mold. It will be used upside down.
- A plastic bag or plastic sheet to cover the mold and make the hardened planter easier to remove later.
- A large mixing container big enough to fully submerge the towel.
- Nitrile gloves, safety glasses, and a mask for working with dry cement. Wet cement can irritate and burn skin, so it’s not something you want to handle with bare hands.
How to make a towel and cement planter
1. Choose the mold first. Turn the bucket upside down and place the dry towel over it. The flat bottom of the upside-down bucket will become the bottom of the future planter, while the hanging parts of the towel will form the walls and uneven edge. So check now whether the fabric is long enough on all sides.
If the towel almost touches the ground, raise the mold by placing the bucket on a stable stand. The folds should hang freely instead of bunching up on the surface.
Before you start, cover the bucket with plastic. Once the cement mix hardens, this will make it much easier to separate the planter from the mold.
2. Wet the towel. Before dipping it into the cement mix, soak the fabric with plain water and wring it out well. A dry towel quickly pulls water out of the cement mix. Pre-wet fabric absorbs the mix more evenly.
3. Prepare the cement mix. It should be more fluid than the concrete used for the previous planters. Its job is to work its way into the fabric, not just coat the towel on the surface.
Add water gradually. The mix should spread through the fabric easily, but it shouldn’t run off almost completely as soon as you lift the towel. Don’t use a mix with large gravel or stone. The aggregate simply won’t distribute properly through the towel.
4. Fully soak the towel. Lower it into the container with the cement mix and work it thoroughly with your gloved hands. Simply dipping both sides isn’t enough. The cement needs to get between the fibers across the entire surface.
Check the corners and edges, since those are the areas most likely to stay under-saturated.
Lift the towel above the container and let the excess mix drip off for a moment.
5. Drape the towel over the upside-down mold. Find the middle of the fabric and place it roughly in the center of the bottom of the upside-down bucket. In the center of the future base, leave a small drainage hole by separating the fabric and clearing away the excess cement mix around it.
Now arrange the hanging sides and shape the folds. This step determines almost the entire final look of the planter. If you want a more even shape, distribute the fabric roughly the same way on all sides. For deeper folds, gather some sections closer together.
There’s no need to reshape it twenty times. While the mix is fresh, the towel moves easily, but once it starts setting, constant adjusting can disturb the surface.
Check the future bottom of the planter as well. The fabric sitting on the flat top of the bucket should lie evenly enough that the planter can stand securely once it’s flipped over.
6. Leave the planter on the mold until it hardens. Don’t move the bucket or adjust the folds once the shape is set. After 24–48 hours, the fabric is usually rigid enough for careful removal, but the exact timing depends on the cement mix, temperature, and humidity.
The hardest part here is simply leaving it alone. Especially when you walk past it several times a day and really want to check how hard it has become.
7. Remove the mold. Once the planter is firm enough to hold its shape, carefully lift it off the bucket. The plastic inside can usually be peeled away from the cement surface.
After removing the mold, don’t rush to fill the planter with wet soil right away. Leave it for a few more days to continue curing. Cement-based pieces need much more time to develop full strength than the first day or two it takes them to simply hold their shape.
Our result
With this method, the towel itself literally shapes the planter. Every fold, dip, and uneven edge stays in place after curing, so no two planters will come out exactly the same.
And an old towel gets a few more years of life in a completely different role. Around our homestead, that’s a pretty familiar scenario.
4. Fabric wrapped concrete pot
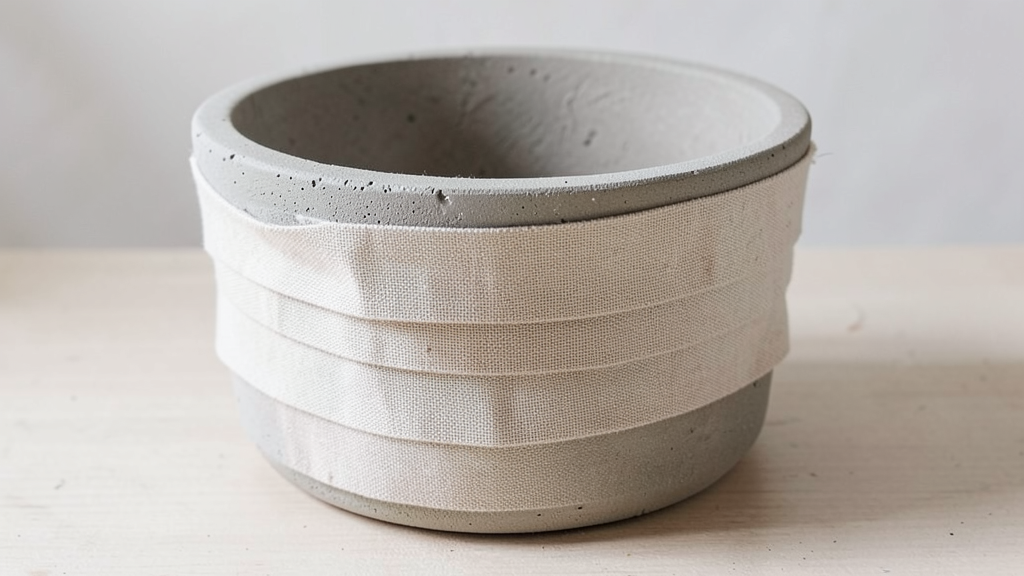
In this version, the fabric doesn’t hang in folds but wraps tightly around the mold in layers. The result is a smoother planter, while the fabric lines and overlapping areas still remain visible on the surface.
For this project, it’s better to use dense cotton or canvas and cut it into medium-width strips. Strips that are too narrow take longer to lay, while very wide ones are harder to wrap neatly around a round mold.
What you’ll need
- Dense cotton fabric or canvas. You can use an old heavy sheet, a piece of work fabric, or another material that absorbs moisture well.
- Portland cement or a fine cement mix without gravel.
- A plastic bucket or pot with smooth walls to use as the mold.
- Plastic sheeting or a plastic bag to cover the mold.
- Water and a wide container for the cement mix.
- Scissors for cutting the fabric.
- A short piece of plastic tubing or a wooden dowel for the drainage hole.
- Heavy-duty nitrile gloves, safety glasses, and a mask.
How to make the planter
1. Prepare the mold and fabric. Choose a plastic bucket or pot with a simple shape, without handles, raised details, or a wide rim. Turn it upside down and place it on a stable surface. The bottom of the upside-down container will form the base of the future planter, while the fabric strips will run down from it along the sides.
Cover the entire mold with plastic so it will be easier to remove once the cement has hardened. Cut the fabric into wide, long strips. They should wrap easily around the mold and overlap slightly.
2. Wet the fabric. Soak the strips in water and wring them out lightly. Damp fabric takes the cement mix better and doesn’t pull water out of it too quickly.
3. Prepare the cement mix. It should be fluid enough to soak through the fabric well, but not so runny that it almost completely drips back into the container.
A mix with large gravel isn’t suitable here. The fabric needs to be saturated evenly through its full thickness.
4. Soak the first strip. Submerge it completely in the cement mix and work it thoroughly with your gloved hands.
Check the entire length of the strip. There shouldn’t be any dry areas. Then remove some of the excess mix with your hands, but don’t wring the fabric dry.
5. Start wrapping the mold and make the drainage hole right away. Lay several soaked strips crosswise over the top surface of the upside-down mold — once the planter is removed and flipped over, this will become its bottom.
Place a short piece of plastic tubing or a greased wooden dowel in the center and arrange the fabric around it, keeping the opening clear. Once the cement hardens, you’ll be able to remove the insert.
Then continue laying the strips from the future base down along the sides of the mold. Place the next strips with a slight overlap so there are no weak gaps between them.
The base should be even and dense enough for the finished planter to stand securely after it’s turned over.
6. Add several more layers. One layer of fabric isn’t enough. Keep laying new soaked strips over the previous ones, shifting the joints slightly each time. This is what creates the texture. Neater placement will give you a cleaner surface, while small folds and overlaps will remain visible after curing.
The main thing is that all the fabric is thoroughly saturated with cement and the individual strips are firmly bonded together.
7. Let the planter harden and remove the mold. Leave the whole piece in the same position until the cement is hard enough for the fabric to hold its shape on its own. Check the exact timing in the manufacturer’s instructions for your mix.
Then carefully separate the top edge from the plastic and slightly squeeze the plastic mold inward. If the pot or bucket is flexible enough, you can gradually pull it out of the concrete shell.
Then remove the plastic tube or wooden dowel from the bottom and make sure the drainage hole is completely open.
Our result
The main feature of this planter is the wrapped texture. From a distance, the shape looks fairly simple, but up close you can see the fabric fibers, overlapping lines, and small irregularities.
Lindy usually chooses plants with a clean silhouette and a more structured shape for planters like this. Against the rougher concrete texture, that kind of planting stands out especially well — the contrast between the uneven planter surface and the neat shape of the plant works really nicely.
5. Paver concrete planter
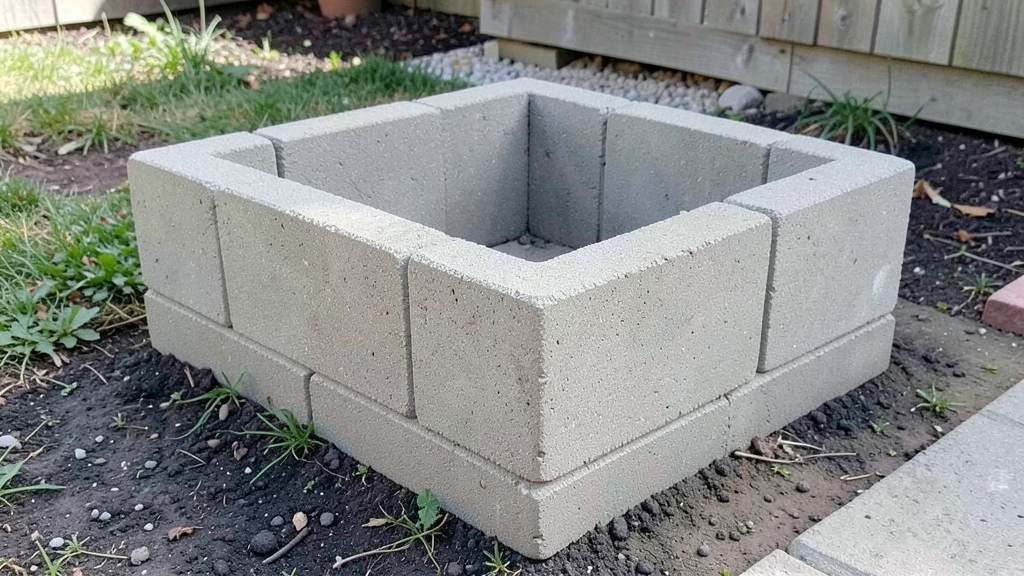
For this project, you won’t need to mix concrete at all. The planter is built from ready-made concrete pavers, which become its walls. Four matching pavers are joined together to create a heavy square container with simple geometry.
We rarely throw away leftover building materials. This method works especially well when you have a few pavers left after laying a path or finishing another project around the property. Lindy already knows that a stack of materials by the shed can easily turn into something useful a few months later.
What you’ll need
- 4 matching concrete pavers for the walls. For a small planter, square pavers around 12 × 12 inches (30 × 30 cm) work well.
- Landscape block adhesive. It should be suitable for concrete and outdoor use.
- A caulking gun for the adhesive tube.
- Rubber straps or corner clamps to hold the walls in place while the adhesive cures.
- A brush and water for cleaning the pavers before assembly.
- Landscape fabric for the inside of the planter.
- Gloves and safety glasses.
How to make a concrete paver planter
1. Choose the pavers and the spot for the planter. All four pavers should be the same size and have fairly even edges. Before assembling them, place them next to each other and check how well they fit together.
It’s better to build this planter close to where it will stay. Concrete pavers are heavy, and once soil is added, moving the finished planter will be even harder.
Before gluing, clean the edges with a brush and let the concrete dry completely. Dust and loose particles can weaken the adhesive bond.
2. Join the first two walls. Stand two pavers upright at a 90-degree angle. Apply a continuous line of outdoor concrete adhesive to the edge of one paver and press it firmly against the second. One paver should meet the inside face of the neighboring paver with its edge. Keep the same arrangement at all four corners so the box stays square.
3. Attach the remaining walls. Glue the third and fourth pavers in place one at a time until you have a closed square.
Before the adhesive starts to set, check the corners and wall alignment. Then wrap the entire box with a rubber strap or secure the corners with clamps. Let the adhesive fully cure before adding any soil. Check the exact curing time on the packaging of the product you’re using.
It’s worth spending a couple of extra minutes getting everything aligned. With four large flat pavers, even a small shift is easy to notice.
4. Don’t add a solid concrete bottom. This kind of planter works best directly on soil, gravel, or another prepared draining surface. You don’t need a fifth paver underneath — the soil stays inside the box while excess water can drain freely into the ground.
5. Line the inside walls with landscape fabric. Place the fabric along the inner walls of the concrete box and let it extend slightly onto the soil or gravel at the bottom. It helps keep the soil inside and prevents it from washing out through the gaps between the pavers.
Don’t cover the entire bottom — water should still be able to drain freely into the soil or gravel underneath.
6. Add the plants. Once the adhesive has fully cured, you can place a ready-made plastic pot with a plant inside or fill the planter directly with soil if it sits on the ground or another well-draining surface. For a heavy planter made from concrete pavers, using a separate pot is often easier for plant care and replacement.
Our result
This planter has clean geometry and a heavy concrete texture without any extra finish. It works well next to paths, retaining walls, and other concrete elements around the property because it visually ties them together.
And as you already know, I’m always in favor of reusing materials. A few leftover pavers from a construction project can become a full garden planter instead of sitting around unused. Around our place, that kind of approach is always appreciated.
6. Post mold concrete planter
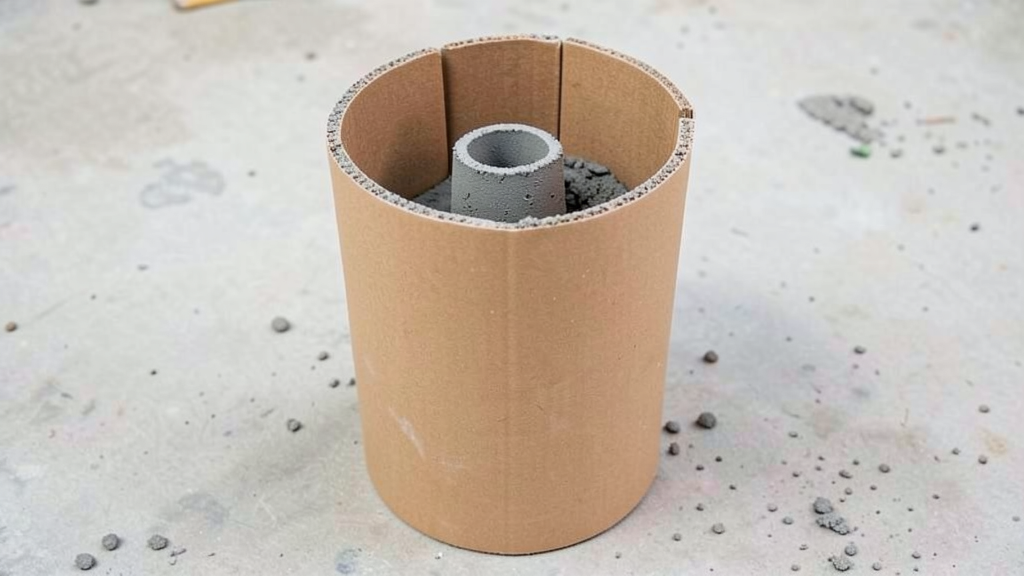
For this planter, instead of a bucket or homemade formwork, you use a cardboard cylindrical form made for pouring concrete posts. These forms are sold in hardware stores as thick tubes in different diameters. Take two tubes, place the smaller one inside the larger one, and fill the space between them with concrete.
This method works well when you want a clean, tall cylinder. You don’t have to look for two matching plastic containers, and you can choose the height yourself — just cut the form to the length you need.
What you’ll need
- 2 cardboard concrete form tubes in different diameters, for example, Concrete Form Tube. The larger one, around 10–12 inches (25–30 cm), will form the outer wall of the planter. The smaller one, around 6–8 inches (15–20 cm), will create the inner space for soil.
- Ready-mix concrete for outdoor use.
- Water and a mixing container.
- Heavy plastic sheeting and strong tape for closing the bottom of the inner form.
- Rocks or another weight for the inner tube.
- A short piece of tubing or a wooden dowel for the drainage hole.
- A utility knife for cutting the cardboard after curing.
- Gloves, safety glasses, and a mask.
How to make a planter with a post form
1. Cut the outer form to the height you need. A cardboard tube can be shortened with a regular utility knife or saw, so it’s easy to adjust the height of the planter for a specific spot.
For example, for a fairly noticeable floor planter, you can make the cylinder around 20–24 inches (51–61 cm) tall.
Place the outer cardboard tube on a flat rigid base, such as a piece of plywood covered with heavy plastic. Run silicone caulk or hot glue around the bottom edge of the tube so the concrete doesn’t leak out underneath during pouring. Once the concrete has hardened, the base and plastic can be separated from the concrete bottom.
2. Prepare the inner tube. It should be shorter than the outer one by roughly the thickness of the future concrete base. If the base will be around 2 inches (5 cm) thick, make the inner form about 2 inches shorter.
Close the bottom end of the inner tube with a rigid circle cut from heavy cardboard or thin plywood and secure it around the edge with strong tape. This keeps concrete from getting inside and gives the bottom enough support for the weight you’ll add later.
3. Mix the concrete. Add water according to the instructions on the bag. For this mold, the concrete should be workable enough to fill the narrow space between the two tubes, but not runny.
4. Form the concrete base. First, fill the bottom of the larger form with about 2 inches (5 cm) of concrete. Place a short piece of tubing or a greased wooden dowel in the center for the future drainage hole. It should go through the full thickness of the base.
5. Install the inner form. Place the smaller tube with its closed end facing down right in the center, leaving roughly the same amount of space around it on all sides for the concrete walls.
Put rocks or another weight inside the smaller tube. Without weight, the lightweight cardboard form can start to lift as you add the concrete.
6. Fill the space between the tubes. Add the concrete in small portions all the way around. Periodically tap the outer form so the mix settles lower and fills any possible voids. Keep an eye on the inner tube too — it should stay roughly centered until the pour is finished.
Level the top of the concrete with a trowel or small shovel.
7. Let the concrete harden and remove the cardboard. Leave the planter in the form for at least 48 hours, unless the instructions for your chosen mix call for more time. First, remove the weight and take out the inner cardboard tube. You can cut it vertically and gradually peel it away from the concrete.
Then cut the outer form from top to bottom in the same way and remove the cardboard in strips. That’s one of the biggest advantages of these forms — there’s no need to try to save them after pouring.
Remove the insert from the drainage hole and let the planter continue curing according to the instructions for your concrete mix.
Our result
The result is a clean cylindrical planter without corners or noticeable seams. You can adjust the height pretty freely, so the same type of form can work for anything from a smaller pot to a taller floor-standing version.
Around our place, the taller cylinders usually end up near the entrance or along a wall. They don’t take up much space widthwise, but their height still keeps the plant easy to notice.
7. Large outdoor concrete bowl
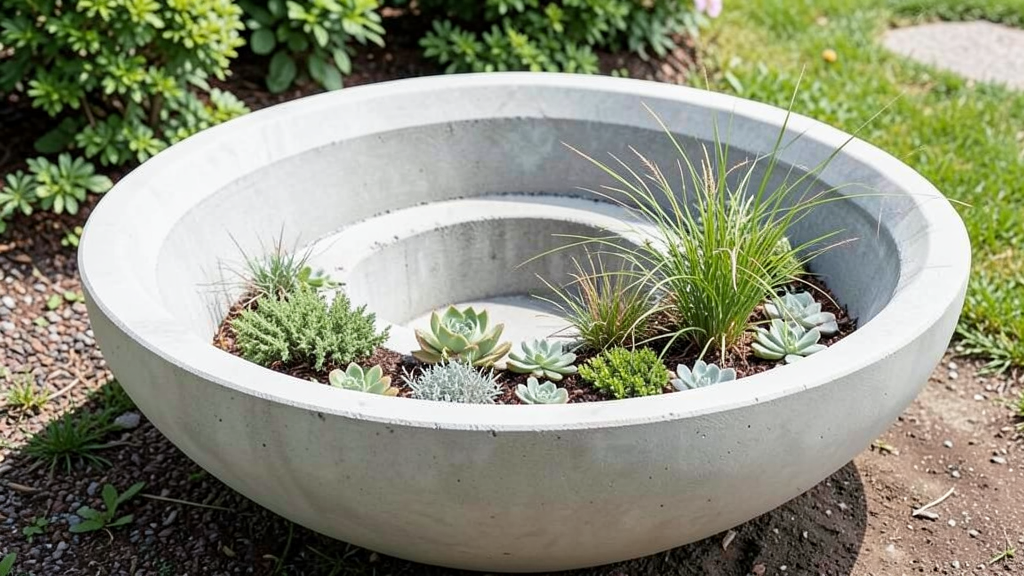
A large outdoor concrete bowl is usually low, wide, and works well for succulents, ornamental grasses, or a small plant composition.
For this project, you need two large bowls in different sizes. The larger one forms the outside of the bowl, while the smaller one creates the inner space. A layer of concrete stays between them. The result is a practical round concrete planter or decorative bowl.
What you’ll need
- A large plastic bowl or wide tub about 20–24 inches (51–61 cm) in diameter for the outer mold.
- A second, smaller bowl that fits inside the first one while leaving enough space between the walls for concrete.
- Ready-mix concrete for outdoor use.
- Water and a mixing container.
- Mold release or vegetable oil for both molds. Coat the inside of the large bowl and the outside of the smaller one so the molds are easier to remove later.
- Rocks or sand to weigh down the inner bowl.
- A short piece of plastic tubing or a wooden dowel for the drainage hole.
- Rubber gloves, safety glasses, and a mask.
- A concrete mixing tub works well for mixing.
How to make a large concrete bowl
1. Choose two suitable molds. Place the smaller bowl inside the larger one before mixing the concrete. There should be roughly the same amount of space between them all the way around.
It’s better to use flexible plastic bowls without texture or wide protruding rims. They’re easier to separate from the concrete after it hardens.
2. Prepare the molds. Coat the inside of the large bowl and the outside of the smaller one with a thin layer of mold release or oil. Place the large bowl on a flat surface. It needs to sit securely because it will become fairly heavy once the concrete is added.
3. Mix the concrete. Add water according to the manufacturer’s instructions. The mix should be workable but not runny. Concrete is easier to distribute in wide molds than in tall, narrow planters. I always keep an eye on the amount of water so I don’t add too much.
4. Make the bottom of the bowl. Add a layer of concrete to the bottom of the larger mold. For a large outdoor bowl, you can make it about 2 inches (5 cm) thick.
Place a short piece of tubing or a greased dowel in the center to create the drainage hole right away.
5. Place the inner bowl. Set it in the center on top of the concrete base and press it down lightly. Add sand or a few rocks inside. Without weight, a lightweight bowl can lift as you fill the space around it. This kind of weight is also used when casting concrete planters.
Check from above to make sure the gap between the two bowls stays roughly even all the way around.
6. Fill the space between the molds. Add the concrete in small amounts around the perimeter of the bowl. Lightly tap the outside bowl from time to time. This helps the mix fill empty spaces and reduces larger air bubbles.
Level the top edge with a trowel or with gloved hands.
7. Let the concrete harden and remove the molds. Don’t try to take the bowl apart after just a few hours. For similar concrete forms, 24–48 hours is usually allowed before careful removal, but the exact timing is best checked in the instructions for the mix you’re using.
First, remove the weight and take out the inner bowl. If the plastic is flexible, squeeze the sides inward slightly and gradually separate it from the concrete.
Then turn the bowl over and remove the outer mold. With flexible plastic, it’s usually enough to bend the edges outward a little. If the mold is stuck tightly and you don’t mind sacrificing it, you can carefully cut the plastic.
Remove the insert from the drainage hole and let the bowl continue curing.
Our result
A wide concrete bowl like this works well with one larger plant or a small composition made from several different plants. The simple, low shape already has a strong presence on its own.
Lindy often takes care of the styling around our place, and for bowls like this she usually chooses plants at different heights without filling every bit of available space. The wide shape already stands out, so a few well-chosen plants are usually enough.
8. Textured mold concrete planter
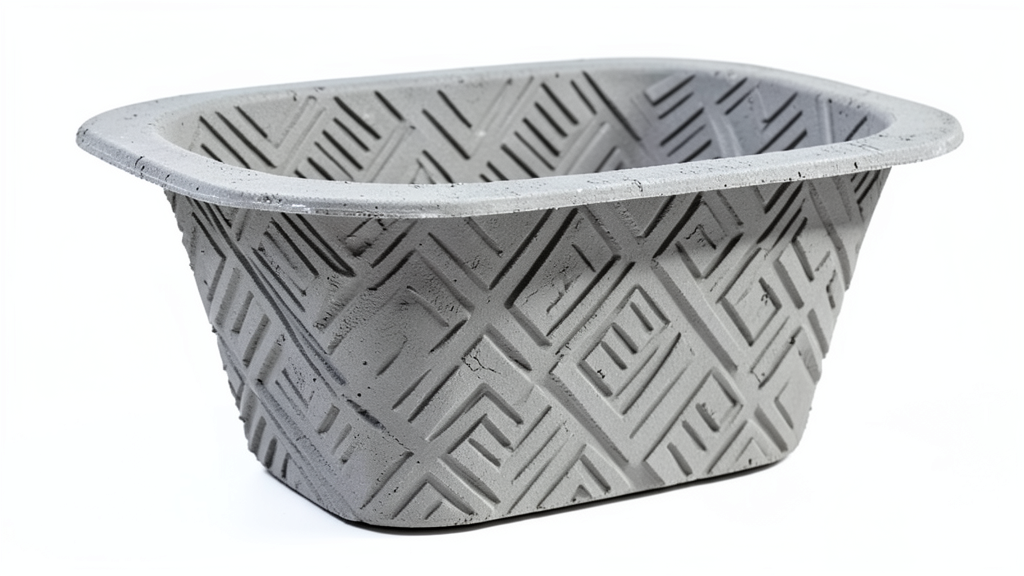
With this version, the pattern on the concrete appears during casting, right inside the mold, not afterward. To do this, line the inside of a smooth plastic container with a material that has a strong texture — for example, a soft rubber or foam mat with a geometric pattern. Once the concrete hardens, the pattern stays on the outside surface of the planter.
You really can make a pretty simple pot look much more interesting without using paint or adding separate decoration. You just need to find the right texture.
What you’ll need
- A large plastic container with straight or slightly flared sides for the outer mold.
- A smaller plastic container for the inner cavity.
- A soft textured mat made from rubber or foam. It should be flexible enough to bend and sit closely against the walls of the mold.
- Ready-mix concrete for outdoor use.
- Water and a mixing container.
- Scissors or a utility knife for trimming the textured material.
- Mold release for the inner mold if the plastic you’re using needs it.
- Rocks or another weight to keep the inner container from lifting during the pour.
- A small wooden dowel or piece of tubing for the drainage hole.
- Gloves, safety glasses, and a mask.
How to make a concrete planter with a textured mold
1. Prepare the outer mold. Take a plastic container with fairly smooth walls and measure the inside. Cut a piece of textured mat to match the height of the mold and make it long enough to fully cover the inside wall. The textured side should face inward, toward the concrete. That’s the pattern that will transfer onto the finished planter.
2. Secure the textured layer. Press the mat tightly against the wall of the mold and join the edges so there isn’t a large gap between them.
Check the bottom edge. The material should meet the bottom evenly, without large folds. Any fold or gap will also show up in the concrete.
It’s worth spending an extra five minutes getting this part right. Once the concrete is poured, you won’t be able to adjust the pattern.
3. Mix the concrete. Add water according to the manufacturer’s instructions. The mix should be workable enough to fill the small recesses in the texture.
4. Form the base. Add a layer of concrete about 1 1/2–2 inches (3.8–5 cm) thick to the bottom of the outer mold. Place a short dowel or piece of tubing in the center for the drainage hole. It should pass through the full thickness of the future base.
5. Place the inner container. Set it in the center on top of the concrete base and check that the gap between it and the textured wall is roughly even on all sides.
Put rocks or another weight inside. An empty plastic container can start to lift as the concrete fills the space around it.
6. Fill the mold with concrete. Add the mix gradually all the way around the perimeter. After every few portions, tap the outer container with your hands or a rubber mallet so the concrete works its way into all the recesses in the textured material. Level the top edge with a trowel and leave the mold undisturbed.
7. Remove the molds and reveal the pattern. Wait until the concrete reaches the demolding time recommended by the manufacturer of your mix.
First, remove the weight and take out the inner plastic container. Then remove the outer mold. After that, carefully peel the textured mat away from the concrete, starting at one edge and gradually revealing the pattern.
Remove the insert from the drainage hole and let the planter continue curing.
Our result
The same basic shape can look completely different depending on the texture you choose. Stripes, diamonds, small waves, or another geometric pattern transfer directly onto the concrete.
I always get tempted to choose the most complicated pattern, but Lindy usually stops me in time. Even a simple repeating design shows up really well on concrete, especially when the light hits from the side and brings out the relief.
9. Tall concrete entryway planter
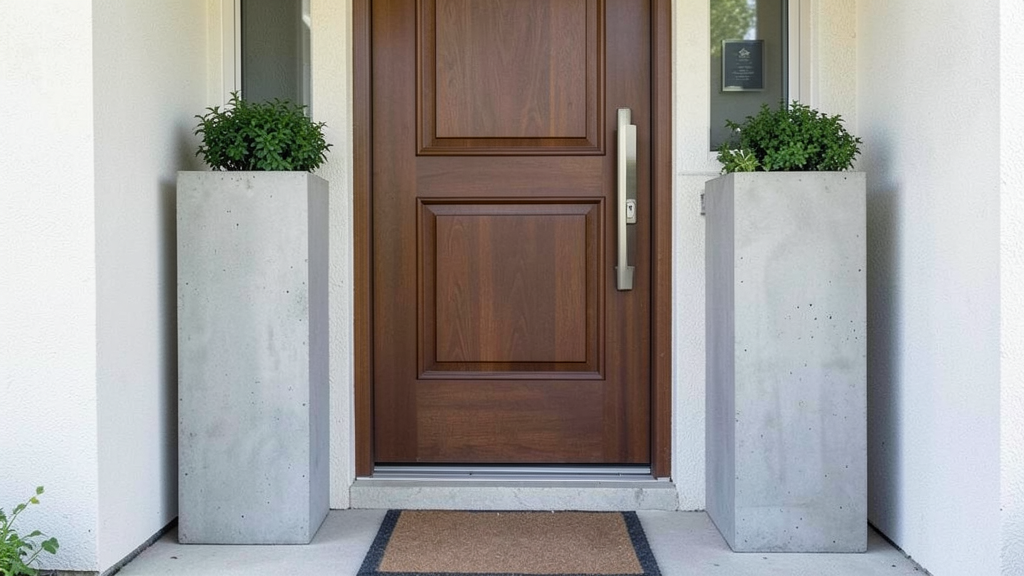
A tall concrete planter works well in an entry area. You can place one on one side of the door or use a matching pair on both sides. The narrow, elongated shape takes up little space and fits nicely next to the entrance.
For this project, we’ll make a simple rectangular mold with straight walls. And to keep the planter from becoming too heavy, we’ll use glass fiber reinforced concrete. It still looks like regular concrete, but it allows for thinner walls and significantly reduces the overall weight.
What you’ll need
- Melamine board about 3/4 inch (1.9 cm) thick for the outer and inner molds.
- Screws for assembling the removable formwork.
- Ready-mix glass fiber reinforced concrete. Choose a mix already designed for thin-walled concrete pieces and prepare it according to the manufacturer’s instructions.
- Water and a mixing container.
- Silicone caulk for the mold joints.
- A short piece of plastic tubing for the drainage hole.
- Wooden strips for securing the inner mold.
- Gloves, safety glasses, and a mask.
How to make a tall concrete planter
1. Build the outer mold. Use melamine board to make a tall rectangular box about 28–30 inches (71–76 cm) high and 14–15 inches (36–38 cm) wide. Join the panels with screws so the mold can be taken apart after the concrete hardens. Seal the inside joints with a thin layer of silicone caulk.
2. Build the inner box. This will create the space for the soil. Size it so there is about 3/4–1 inch (18–25 mm) between the two molds for the walls. That thickness is typical for glass fiber reinforced concrete pieces.
Assemble the inner box with screws as well, since it will need to be taken apart inside the planter after curing.
3. Form the bottom. Add a layer of glass fiber reinforced concrete about 3/4–1 inch (18–25 mm) thick to the bottom of the outer mold. Place a short piece of plastic tubing or a greased dowel in the center right away for the future drainage hole.
4. Secure the inner mold. Position it right in the center of the outer box and secure it at the top with wooden strips. The distance to the outer walls should be the same on all four sides.
It’s especially important to check everything before you start working with the mix. With walls only about an inch thick, even a small shift will be noticeable.
5. Prepare the glass fiber reinforced concrete. Use a ready-made glass fiber reinforced concrete mix and prepare it strictly according to the manufacturer’s instructions. Different mixes can require different amounts of water, additives, and mixing methods.
6. Fill the mold gradually. Add the mix between the two boxes in small amounts, working your way around the entire perimeter. Lightly tapping the mold helps remove larger air pockets.
Keep an eye on the inner box so it doesn’t shift. Smooth out the top edge of the planter.
7. Let the planter harden. Don’t remove the mold before the time recommended by the manufacturer of the mix. Once the glass fiber reinforced concrete has gained enough strength, remove the outer panels and then carefully take the molds apart.
Remove the outer panels first, then disassemble the inner box piece by piece. After that, check the drainage hole and leave the planter to continue curing for the amount of time recommended for your chosen mix.
Our result
Once finished, this planter looks fairly clean and minimal, so it doesn’t really need any extra decoration. The concrete itself, the straight lines, and one well-chosen plant already create a balanced look.
Lindy would probably choose something with dense foliage or a distinctive crown shape. And if you make two matching planters, you can place them symmetrically on both sides of the door — together, they look simply beautiful.
10. Modern concrete cylinder planter
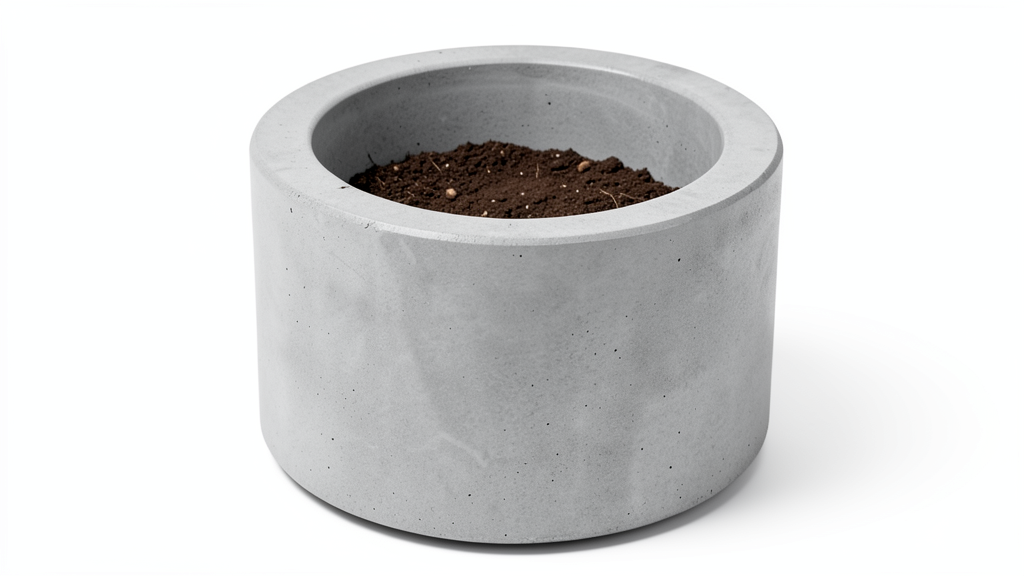
A smooth cylindrical concrete planter has no texture, complicated edges, or extra decoration — the whole idea comes down to a simple cylindrical shape and a clean concrete surface.
For the mold, we’ll use two pipes with different diameters. The outer PVC pipe will give the planter a smooth surface, while the smaller pipe will create the inner space for soil and the plant.
What you’ll need
- A wide PVC pipe for the outer mold, about 10–12 inches (25–30 cm) in diameter.
- A smaller pipe for the inner mold.
- A flat piece of laminated plywood or another smooth rigid sheet for the bottom of the mold.
- A hacksaw for cutting the pipes.
- Strong adhesive tape.
- Hot glue or silicone caulk for sealing the joint between the outer pipe and the base.
- Ready-mix concrete for outdoor use.
- Water and a mixing container.
- Mold release or vegetable oil.
- A short piece of plastic tubing or a wooden dowel for the drainage hole.
- Rocks or another compact weight for the inner mold.
- Gloves, safety glasses, and a mask.
How to make a modern cylindrical planter
1. Prepare the outer pipe. Cut the PVC pipe to the height you need — around 12–16 inches (30–41 cm). Make one vertical cut along the full length of the pipe, then bring the edges back together and secure them tightly with adhesive tape on the outside. While the mold is filled with concrete, the pipe should stay closed. You’ll only need the cut when it’s time to remove the mold.
2. Close the bottom of the mold. Place the outer pipe vertically on a flat, smooth sheet. Secure the pipe to it, then carefully seal the entire joint around the bottom edge with hot glue or silicone caulk.
This creates a simple closed mold: the PVC pipe forms the walls, and the flat sheet forms the bottom. The concrete has nowhere to escape underneath.
Lightly coat the inside surface of the PVC with mold release.
3. Prepare the inner mold. The smaller pipe should be shorter than the outer one so there is space underneath for the concrete bottom of the planter. Close the lower end of the pipe with a round piece of plastic or plywood cut to match the pipe diameter, and secure it around the edge with strong adhesive tape. Thoroughly coat the outside of the pipe with mold release.
4. Form the bottom of the planter. Add a layer of concrete about 1½–2 inches (4–5 cm) thick to the outer mold. Place a short piece of tubing or a greased wooden dowel in the center of this layer — once the mold is removed, it will leave a drainage hole.
5. Install the inner pipe. Place it in the center on top of the concrete base. There should be roughly the same amount of space between the inner and outer pipes on all sides.
Put several heavy rocks or another compact weight inside so the mold doesn’t shift or lift while the concrete is being added.
6. Fill the space between the pipes. Add the concrete gradually all the way around, making sure the inner mold stays centered.
Lightly tap the outer pipe from time to time. This helps the mix fill the space along the walls and reduces larger air pockets.
Level the top edge and leave the concrete to harden. Check the instructions for your chosen mix for the correct demolding time.
7. Remove the molds. First, take out the weight and remove the inner mold. Then remove the adhesive tape from the vertical cut in the outer PVC pipe. Gently spread the edges of the pipe apart along the cut so it releases from the concrete, then carefully remove the mold from the planter.
Remove the insert from the drainage hole and let the concrete continue curing.
Our result
Once the mold comes off, you get a smooth cylindrical planter with very simple geometry. PVC leaves almost no texture, so the concrete surface looks clean and even.
It feels like a planter like this doesn’t really need any extra decoration. Leave the concrete in its natural color and add one noticeable plant or a small group. The simple planter shape and living greenery work really well together and create a very balanced look.
Your unexpected result
With projects like these, the result can often be a little different and unpredictable. You might end up with a small uneven spot, the concrete may come out slightly lighter or darker, and the texture can look a little different from what you expected. For a garden, that’s only a plus.
Start with the option you already have a suitable mold or materials for. And once the planter is finished and the first plant is in place, tell me in the comments what you made and what you decided to plant. I’d really love to see your results.