I always put off the moment when it’s time to throw flowers away. Especially if they’re from our garden or connected to some special event. Luckily, you can preserve flowers at home without resin — sometimes all you need is an old heavy book, a rubber band, or even a regular iron.
And the results can be completely different. Some flowers can be dried whole and kept three-dimensional, while others can be pressed almost as thin as a sheet of paper and then used in a frame, diary, or card. For large roses, I prefer one method, while for small pansies, I use a completely different one.
Lindy and I now know exactly that some methods take two or three weeks of waiting, while others can give you a finished flower in just a few minutes.
I want to share our experience with you too, so I’ve put together 10 easy ways to preserve flowers at home without resin and explained in detail what you’ll need and how to do each one.
1. Air drying a small bouquet
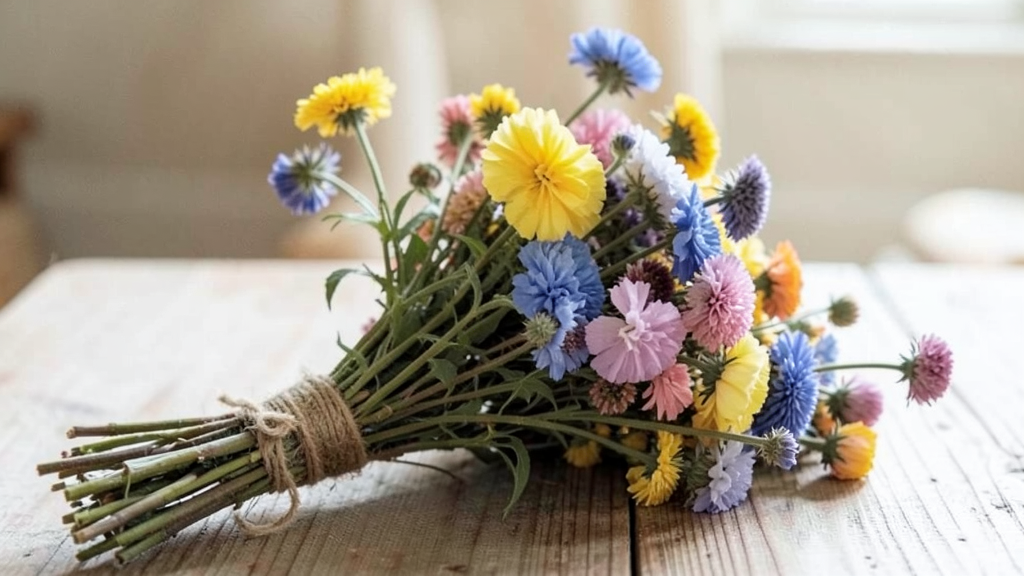
Air drying flowers is the easiest way to preserve a small bouquet at home without resin, special equipment, or a lot of preparation. I think this is the method to start with if you’ve never dried flowers before.
I hate throwing bouquets into the compost as soon as they start to wilt. Sometimes it’s just a few flowers from the garden, sometimes what’s left of a larger bouquet. Of course, you don’t want to wait until the petals are already starting to fall off. For drying, it’s better to choose flowers that still hold their shape.
During air drying, flowers gradually lose moisture, and hanging them flower heads down helps the stems stay straight. Experts at Iowa State University recommend tying flowers into small bunches and hanging them in a dark, dry, well-ventilated place. It usually takes around 2–3 weeks for them to dry completely.
What you’ll need
The list is pretty short:
- a small bouquet;
- a rubber band for tying the stems;
- scissors or pruning shears;
- a hook, nail, or rail where you can hang the flowers;
- a dry place away from direct sunlight.
I use a rubber band rather than simply tying the stems with string. As the stems dry, they get thinner, and the rubber band keeps tightening around them. That lowers the chance of one day finding half your bouquet on the floor.
How to dry a small bouquet
1. Remove the leaves from the lower part of the stems.
Extra foliage holds moisture and slows down the drying process. I usually leave only the leaves that I actually want to keep in the finished dried bouquet.
2. Don’t make the bunch too large.
A small bunch will dry better than a large, tightly tied bouquet. Air needs to move between the stems. By the way, larger flowers like hydrangeas or peonies are generally better dried separately rather than tied into a dense bunch.
3. Secure the stems with a rubber band and hang the bouquet with the flowers facing down.
A closet, pantry, or another dry place where the flowers won’t be exposed to sunlight will work well. Direct sunlight speeds up fading, so a window is not the best option.
4. Don’t hang the bouquet right against a wall or other flowers.
Leave enough space between bouquets so air can circulate freely. This helps the flowers dry evenly and reduces the risk of mold.
5. Check the bouquet after about two weeks.
Complete drying usually takes 2–3 weeks, although the exact timing depends on the flowers and the humidity in the room. The petals should feel dry and papery, and the stems should no longer feel soft or damp.
Unfortunately, the color will change a little. Air drying won’t preserve a fresh flower exactly as it was. Roses, for example, can become noticeably darker and shrink a little. But that has never really bothered me. I’d much rather keep a bouquet around for a few more months and see it in our home than throw it away after a week.
2. Pressing flowers in a heavy book
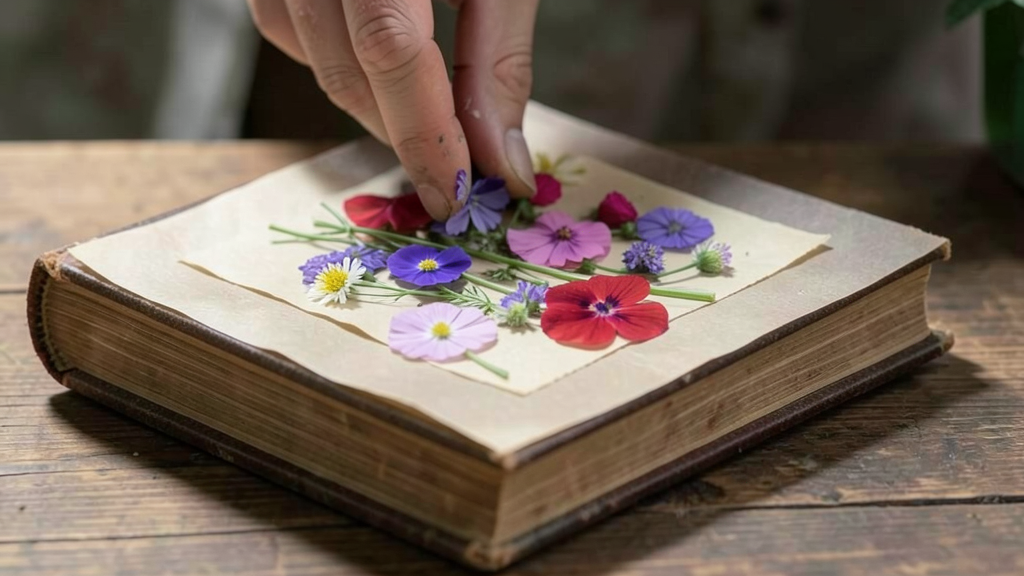
A heavy book can replace a flower press if you only need to preserve a few small flowers. No special equipment needed. Place the flower between sheets of paper, close the book, and add some weight on top.
I was doing this with small flowers long before I ever had a real flower press. And this old method still makes sense, especially if you only want to preserve a few flowers from the garden or one flower from a bouquet.
The truth is, not every flower handles pressing equally well. From experience, I know that flat flowers, like pansies, work best. You can also press geraniums, daisies, cosmos, delphiniums, and many other flowers. Very fleshy stems and leaves are not as good for this method.
What you’ll need
- fresh flowers without wilted or damaged petals;
- a large heavy book;
- several sheets of clean absorbent paper;
- a few more books or another heavy object for extra weight.
I think you already know this isn’t the time to use your favorite book or a beautiful edition with expensive pages. Plants release moisture while they dry, so it’s better to use an old thick book that you don’t mind using specifically for this.
How to press flowers in a book
1. Choose flowers that still hold their shape well.
Use fresh flowers without darkened edges, torn petals, or other visible damage. All of that will be easy to see after pressing. If you picked the flowers after rain or early in the morning, make sure there’s no moisture left on the petals or leaves. Wet plants take longer to dry and can spoil inside the book.
2. Remove any leaves you don’t need and shorten the stem.
First decide exactly what you want to preserve — just the flower head, a flower with a short stem, or a small sprig with leaves.
It’s better to remove or shorten thick parts of the stem as much as possible because they hold more moisture and take longer to dry. You can keep the leaves if you want them in the final composition, but gently flatten them out too.
3. Place the flower between two sheets of paper.
Open the book somewhere around the middle and place a sheet of absorbent paper on the page. Put the flower on top exactly how you want it to look after drying. Gently arrange the petals and leaves with your fingers, and if you’re pressing several flowers at once, leave a little space between them so they don’t overlap. Then cover the flowers with a second sheet of absorbent paper. You end up with a simple layer — paper, flowers, paper.
4. Close the book and add weight on top.
Close the book carefully so the movement of the page doesn’t shift the petals. You can stack a few more heavy books on top. The weight should be spread evenly across the surface, and the book itself should lie on a flat surface. For the first few days, it’s better not to open it unless you really need to — while the plant is still damp, the petals can easily shift and change shape.
5. Check the paper and flowers after a week.
Open the book carefully and see whether the paper feels noticeably damp. If it does, replace it with clean, dry paper without moving the flower too much. The University of Missouri recommends changing damp paper after about a week so the remaining moisture can continue to leave the plant. Then close the book again and keep the flowers under weight until they are completely dry.
After pressing, flowers become flat, which makes them easy to use in cards, bookmarks, diaries, albums, or framed compositions. And sometimes the reason is much simpler — you just want to keep one specific flower as a memory. By the way, I have one like that… Do you?
3. Flower pressing with parchment paper
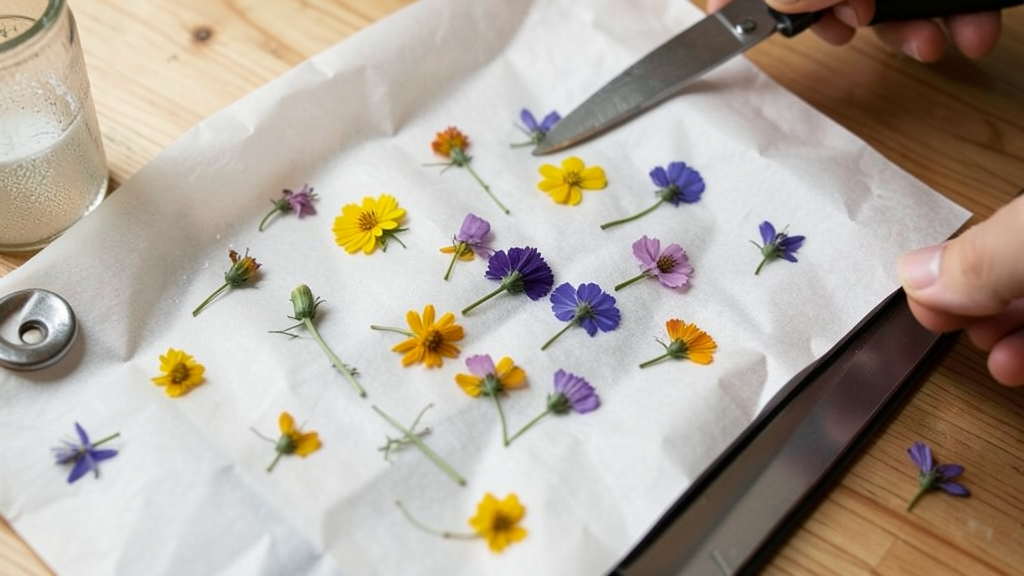
The method with parchment paper and a regular iron takes much less time than pressing flowers in a book because the heat helps remove moisture from the flower.
Use small, relatively flat flowers. Thick buds are less predictable — they contain more moisture and don’t heat evenly.
What you’ll need
- small fresh flowers;
- parchment paper;
- an iron;
- a heavy book;
- a flat surface suitable for ironing.
How to press flowers with parchment paper
1. Prepare the flowers.
The flowers should be dry on the outside. Remove any extra leaves and thick parts of the stem. If the flower head is large and bulky, it’s better to preserve it using another method — small flowers with thin petals work better for pressing with an iron.
2. Place the flowers between two sheets of parchment paper.
Put the flower on one sheet and gently arrange the petals. Shape it the way you want it to look because once it’s heated, it will be difficult to fix a folded petal. Cover it with the second sheet.
3. Flatten the flower slightly with a book first.
Place a heavy book on top and gently press the flower. This helps flatten it a little before you start heating it with the iron. Then remove the book.
4. Heat the iron on a low setting and turn off the steam.
Choose one of the lowest heat settings on your iron and completely turn off the steam. There isn’t one exact temperature that works for every iron, so use a low setting rather than focusing on a specific number of degrees. There should be no water in the reservoir.
5. Press with the iron in short intervals.
The whole process usually takes just a few minutes per flower. Heat it in short 10–15 second intervals without moving the iron back and forth. Let it cool slightly each time and check whether the flower has become dry and flat. The exact timing depends on the thickness of the petals and how much moisture is in the flower.
Tip
Don’t increase the temperature just to finish faster. Too much heat can quickly darken thin petals. It’s better to use several short intervals on low heat and check the flower each time.
As you can see, small flat flowers can be dried in just a few minutes instead of waiting several weeks, like you would when pressing them in a book. So if you need flowers for a card, bookmark, or small arrangement the same day, parchment paper and an iron can get the job done.
4. Preserving flowers in a floating frame

If the flowers are already dried and pressed, a floating frame with two glass panels is one of the easiest ways to turn them into a finished arrangement. The flowers are held between two transparent panels while the background stays visible. This makes them look like they’re almost “floating” inside the frame.
A few small flowers or thin sprigs look especially nice in this kind of frame. You don’t need to fill every bit of space. Sometimes one stem and a couple of leaves look very elegant between the glass panels.
What you’ll need
- fully dried and pressed flowers;
- a floating frame with two glass panels;
- tweezers;
- a soft cloth for cleaning the glass.
For this project, something like the NCYP Small 4X6 Inches Gold Glass Floating Frame for Display Pressed Dried Flowers will work well. The important thing is to choose a frame with two transparent panels rather than a regular frame with a cardboard backing.
How to preserve flowers in a floating frame
1. Use only completely dry flowers.
Before putting the frame together, make sure the flowers are fully dry. Fresh or even slightly damp flowers aren’t suitable for this kind of frame — they can start to deteriorate between the glass panels.
2. Clean both glass panels well.
Wipe both sides and remove fingerprints, dust, and lint. Once the arrangement is assembled, you won’t be able to reach the inside surfaces without taking the whole frame apart. After cleaning, I try to hold the glass only by the edges.
3. Arrange the composition first.
Place the flowers on the bottom glass panel and move them around a few times until you’re happy with the layout. Tweezers are useful for moving thin stems and small petals without pressing them with your fingers. Leave a little space between the flowers so each one is clearly visible.
4. Carefully cover the flowers with the second glass panel.
Lower it slowly so you don’t shift the light petals and stems. The second panel will press the thin flowers gently and hold them in place. Before closing the frame completely, look at the arrangement from the front and adjust anything if needed.
5. Close the frame.
Once everything is in place, secure the glass panels according to the design of your frame. Then wipe the outside of the glass one more time, especially around the edges where fingerprints may be left.
In the end, this becomes more than just a way to preserve flowers — it’s ready-made decor for your home. Lindy loves choosing plants from our garden for frames like this, and a few months later it’s nice to look at them and remember what was growing in our garden that season.
5. Pressed flowers in a journal
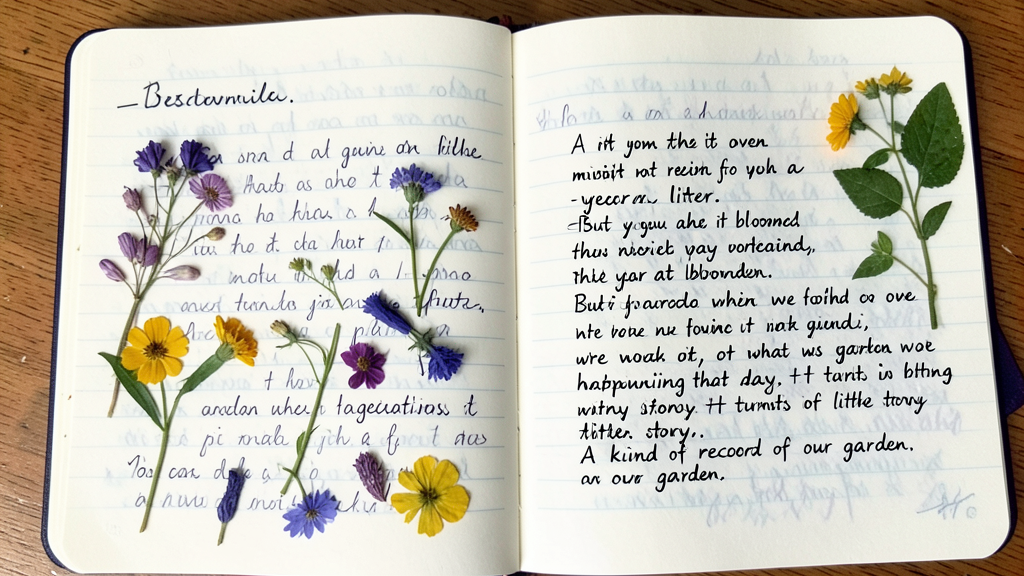
Pressed flowers can be used right on the pages of a garden journal — next to plant notes, drawings, photos, or seasonal observations. You can add flowers little by little, one at a time, along with notes about when they bloomed and what was happening in the garden at that time.
A flower from the garden on its own might not remind you of much a year later. But if you write down when it bloomed, where we found it, or what was happening that day, it turns into a little story. A kind of record of our garden.
What you’ll need
- fully dried and pressed flowers;
- a journal or notebook;
- paper glue that dries clear;
- a small brush or wooden stick for applying glue;
- tweezers.
For this kind of journal, it’s better to choose a notebook with thicker pages and use flowers that are fully dried and well pressed. This helps keep the pages from warping as much after gluing and helps the flowers hold their shape better.
Don’t glue fresh or even slightly damp plants into the journal. Dry and press the flower completely first, and only then add it to the page.
How to add pressed flowers to a journal
1. Choose the right page.
Open the journal first and see where the flower actually fits. If it’s fairly large, leave some open space around it for notes. You can arrange several small flowers together, but lay them out without glue first.
2. Decide how you want the flower to sit.
Turn it a few times and gently arrange the stem and leaves with tweezers. This is also a good moment to leave room for the date, plant name, or a couple of sentences. Once it’s glued down, you won’t be able to change the placement.
3. Apply just a little glue.
Regular craft glue works for attaching dried flowers to paper. Apply it in small dots to the back of the flower, especially around the center and thicker parts of the plant. You don’t need to cover the petals completely with glue.
4. Move the flower onto the page.
Pick it up carefully with tweezers and place it where you want it. Gently press the thicker parts onto the paper, but don’t rub your finger across the petals — pressed petals can break easily. If any glue squeezes out, remove it right away with the tip of a wooden stick.
5. Let the page dry completely.
Don’t close the journal right after gluing. Leave it open until the glue is fully dry. Only after that should you turn the page and keep writing.
I always try to add a very short note next to the flower — just a few words about the weather, the harvest, or what was happening in our garden that day. After some time, you read it again, and it feels so good to remember all of it.
6. Pressed flowers in a diary
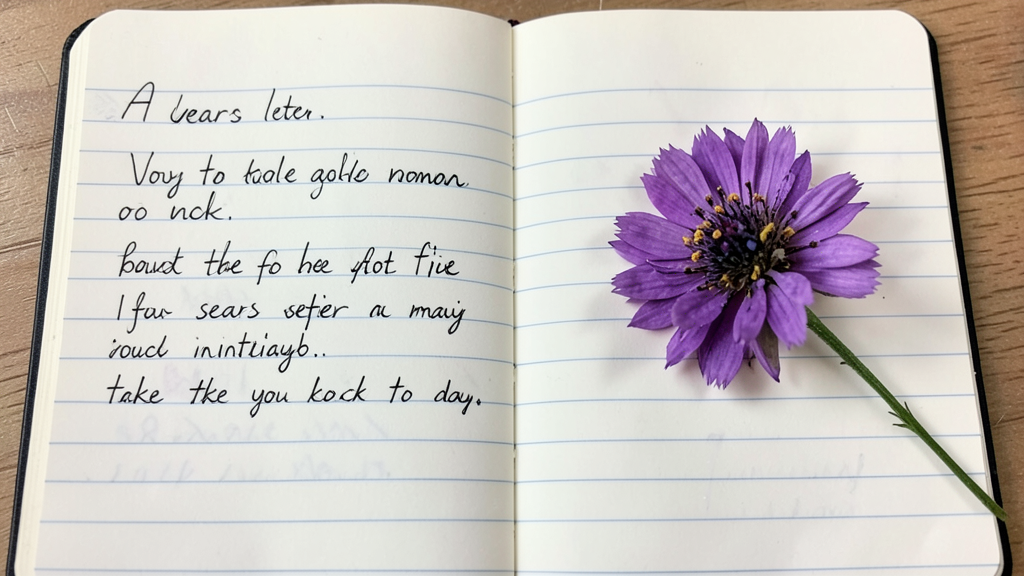
In a personal diary, flowers play a completely different role. You don’t necessarily need to write down the name of the plant or keep track of when it bloomed. The flower becomes part of the memory of a specific day — a trip, a walk, a celebration, or a bouquet someone gave you.
You can save a small flower from an anniversary bouquet or a few petals brought home from a family trip. A few years later, you may barely remember the entry itself, but seeing the flower beside it can instantly take you back to that day.
What you’ll need
- fully dried and pressed flowers;
- a diary with fairly thick pages;
- clear acid-free glue;
- tweezers;
- a small brush or wooden stick for applying glue;
- a pen for writing the date or a few words.
It’s better to choose a diary with thick paper — thin pages wrinkle more easily and can warp after flowers are glued onto them. Choose small, well-pressed flowers too. That way, they add less extra bulk inside the diary.
How to preserve a flower in a diary
1. Choose a flower connected to a specific event.
You don’t need to save the whole bouquet. Sometimes one small flower or even a few petals are enough. The main thing is that the plant is completely dry and doesn’t crumble when you touch it lightly.
2. Find a place for it next to the entry.
First place the flower on the page without glue. Check that it doesn’t cover the text and that there’s still room for a date, a note, or a couple of sentences. If the flower is larger, it’s better to place it closer to an open edge of the page.
3. Apply a small amount of glue.
For albums and journals like this, people use acid-free glue made for paper and photographs. Apply a thin layer or a few small dots to the back of the thicker parts of the plant. You don’t need much glue — too much can make the page warp.
4. Carefully glue the flower in place.
Move it with tweezers and gently press it onto the page. Be especially careful with the edges of the petals — they become fragile after pressing. Don’t rub the flower against the paper with your fingers. Just press it gently in a few spots.
5. Leave the diary open until the glue is completely dry.
Don’t close it right away. Once the glue has dried, check that the edges of the flower are holding, and only then close the diary.
Over time, some colors in pressed flowers will fade, and the plants themselves will become more fragile. That’s why it’s better to keep the diary in a dry place and avoid leaving it in direct sunlight for long periods.
Lindy loves saving little things that would normally get lost pretty quickly — a ticket, a note, a dried flower. In a diary, they finally have a place of their own. I think pages like these become more interesting than ordinary entries over time because they hold not just words, but something real from a memorable day that you can actually touch.
7. Silica gel flower drying
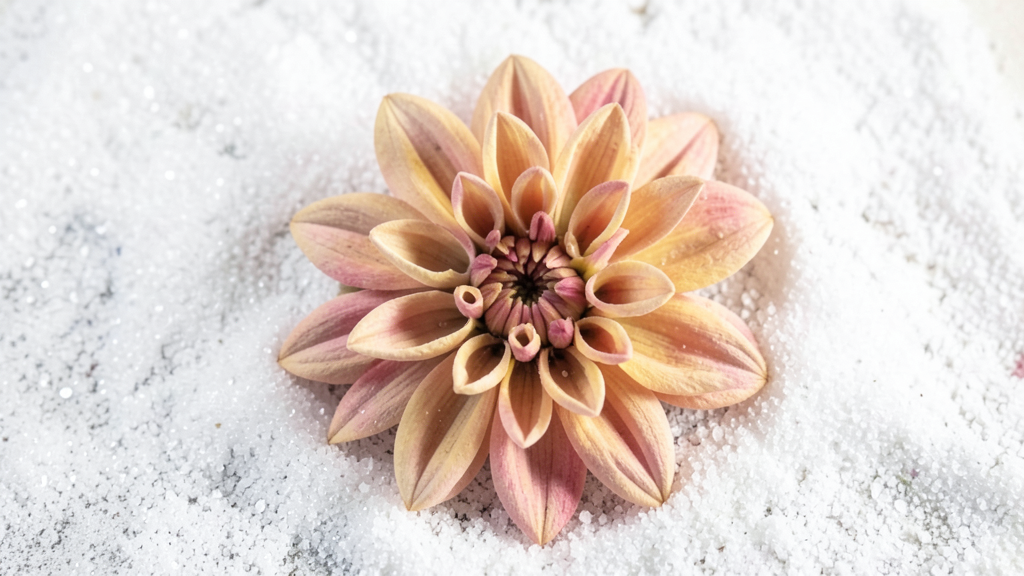
If you want to preserve not a flat flower but its volume and shape, silica gel works really well for that. The tiny granules surround the petals from all sides and gradually pull moisture out of them, so a rose, dahlia, or peony looks much more like a fresh flower after drying than it would after pressing.
The first time, this method feels a little strange. Completely bury a beautiful flower in granules? Yes! Because the silica gel supports the petals while they dry, they lose less of their shape.
What you’ll need
- fresh flowers without damaged petals;
- silica gel for drying flowers;
- a shallow container with a tightly fitting lid;
- a spoon or small scoop;
- a soft brush.
For this, you need fine silica gel made specifically for drying flowers, not the little packets you find in shoe boxes. You can use, for example, Silica Gel Flower Drying.
How to dry flowers in silica gel
1. Prepare the flowers.
Choose fresh flowers that still hold their shape well. Remove the leaves and most of the stem — for most flowers dried in silica gel, you mainly keep the flower head. There should be no drops of water or dew on the petals.
2. Pour silica gel into the bottom of the container.
Make a layer about ½–¾ inch (1.3–1.9 cm) deep. This keeps the flower from sitting directly on the bottom and allows the granules to surround it from all sides. For most flowers, a shallow container works better because you’ll need less silica gel.
3. Place the flower on the silica gel.
Position it the way you want it to keep its shape. Then slowly start adding granules around the petals. Don’t dump a whole handful on top at once — the petals can bend. If one shifts out of place, gently adjust it with a toothpick or another thin tool.
4. Completely cover the flower.
Keep slowly adding silica gel between and around the petals until the flower disappears completely under the granules. Then you can gently tap the container on the table so the silica gel fills any remaining gaps. Check that no petals have come back up to the surface.
5. Close the container tightly.
This is important when drying flowers in silica gel. If the lid lets air in, the granules start absorbing moisture not only from the flower but from the surrounding air too. As a result, the drying process takes much longer. That’s why it’s better to use a tightly sealed container.
6. Check the flower after a few days.
Many flowers dry in about 2–5 days. For example, the University of Missouri gives around 2–3 days for roses and 4–5 days for hyacinths. If you take the flower out too early, the petals may droop, while leaving it too long can make them very brittle.
7. Remove the flower very carefully.
First, slowly pour away the silica gel from the top and free the petals. Then support the flower from underneath and lift it out of the container. Gently shake off any remaining granules, and remove fine dust with a soft dry brush.
I love that moment when you start uncovering the flower from the silica gel! It’s been completely hidden for several days, and then it comes out looking almost the same shape as when we put it in. For fuller flowers, this is one of those results that really makes the slightly longer process worth it.
8. Microwave flower pressing
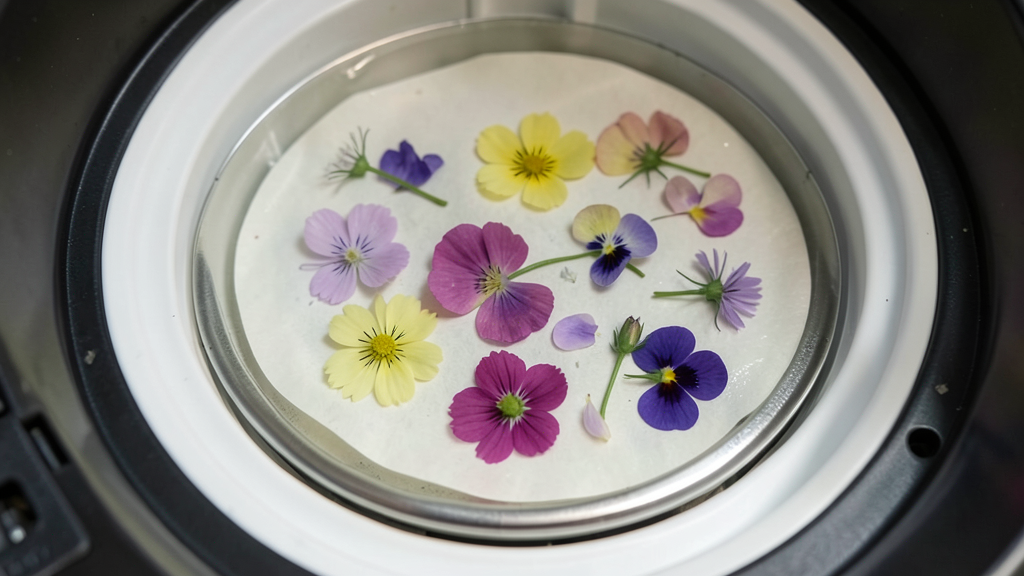
If you don’t have time to wait several weeks, you can press flowers in the microwave in just a few minutes. The result is similar to traditional book pressing — the flower becomes flat, but the moisture leaves much faster because of the heat.
For this method, it’s better to choose small flowers with relatively thin petals. Daisies, pansies, cosmos, and individual petals usually work much better than thick, dense buds.
What you’ll need
- fresh, dry flowers;
- parchment paper;
- a flat plate or small microwave-safe dish;
- a microwave;
- tweezers.
How to press flowers in the microwave
1. Prepare the flowers.
Choose fresh flowers without damaged or damp petals. Remove extra leaves and any thick parts of the stem. If the flowers were just picked after rain or while there was still dew on them, wait until they’re completely dry on the outside.
2. Place the flowers between sheets of parchment paper.
Fold a sheet of parchment paper in half. Place the flowers on one side and gently arrange the petals so they don’t fold over or overlap. Then cover them with the other half of the paper.
3. Press the flowers down with a plate.
Place a flat microwave-safe dish on top of the parchment. It should cover all the flowers and press them evenly against the surface. Metal objects, of course, should never be used for this method.
4. Microwave in short intervals.
Use low power and heat the flowers for about 30 seconds at a time. After each round, take them out or open the microwave, let them cool slightly, and check the petals. These short intervals help prevent the flowers from overdrying.
5. Repeat until the flower is dry.
You’ll usually need a few rounds. Don’t try to speed things up by using high power — the flowers can quickly turn brown and brittle. Once the petals feel dry and flat, leave them between the parchment sheets until they cool completely.
6. Remove the flowers from the paper.
Once they’re cool, lift them carefully with tweezers. Don’t pull on the edge of a petal — after this quick drying method, it can already be quite fragile.
This method is useful when you already have an idea for a card or small frame but don’t have two or three weeks to wait. A few minutes, and the flowers are ready for the next step. For an impatient person like me who wants to start a little project right now, that’s very convenient.
9. Hanging roses upside down
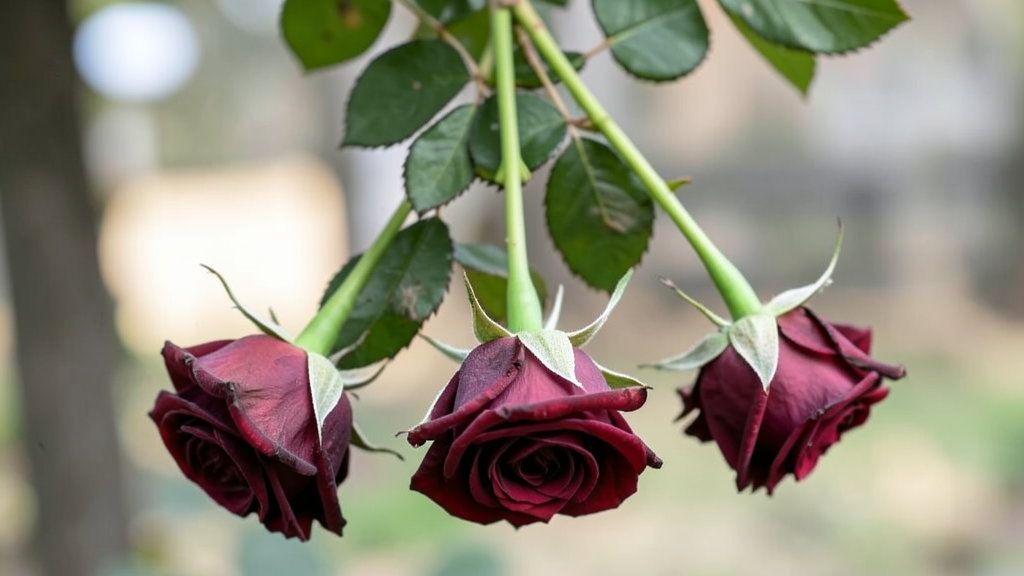
You can preserve roses without a press or silica gel — just hang them with the flower heads facing down and let them slowly air dry. Unlike pressing, the flower keeps its three-dimensional shape, although the petals usually shrink a little and become darker.
This method lets you preserve the actual shape of the rose, which matters to me personally.
What you’ll need
- fresh roses;
- pruning shears or sharp scissors;
- a rubber band or twine;
- a hook, rail, or hanger;
- a dark, dry, well-ventilated place.
How to dry roses upside down
1. Choose roses that haven’t started wilting yet.
It’s better to dry flowers that still hold their shape well and haven’t fully opened. If the petals are already falling off or have visible damage, it will become even more noticeable after drying. If the roses were picked after rain or while there was dew on them, let them dry completely on the outside first.
2. Remove extra leaves.
Take off most of the foliage from the stems, especially the lower leaves. They hold extra moisture and can slow down the drying process. You can leave the stems as long as you’ll need later for a bouquet or arrangement.
3. Tie the roses into a small bunch.
If you’re drying several flowers, don’t pack them into one large, tight bouquet. Tie together around 3–5 stems, leaving some space between the flower heads so air can move around them. A rubber band works well because the stems get thinner as they dry, while the band continues to hold them together.
4. Hang the roses with the flower heads facing down.
Secure the bunch by the stems so the flowers hang freely and don’t touch the wall or other flowers. A pantry, closet, or another place away from direct sunlight will work. A darker spot helps reduce fading in the petals.
5. Leave the roses for about 2–3 weeks.
You don’t need to keep taking them down to check. By the end of the drying process, the petals should feel dry and slightly papery, while the stems will be firm. The exact timing can vary a little depending on the size of the roses and the humidity in the room.
6. Handle the dried roses carefully.
Once dry, the petals become fragile. Hold the flower by the stem and try not to touch the flower head more than necessary. If the roses were tied with a rubber band, remove it carefully so you don’t break the dry stems — or simply cut it off.
Of course, roses dried this way won’t look like a fresh bouquet anymore, but that wasn’t what we were trying to achieve. The shape of the flower stays recognizable, and the bouquet can keep decorating the room for a long time.
10. Storing dried flowers away from light
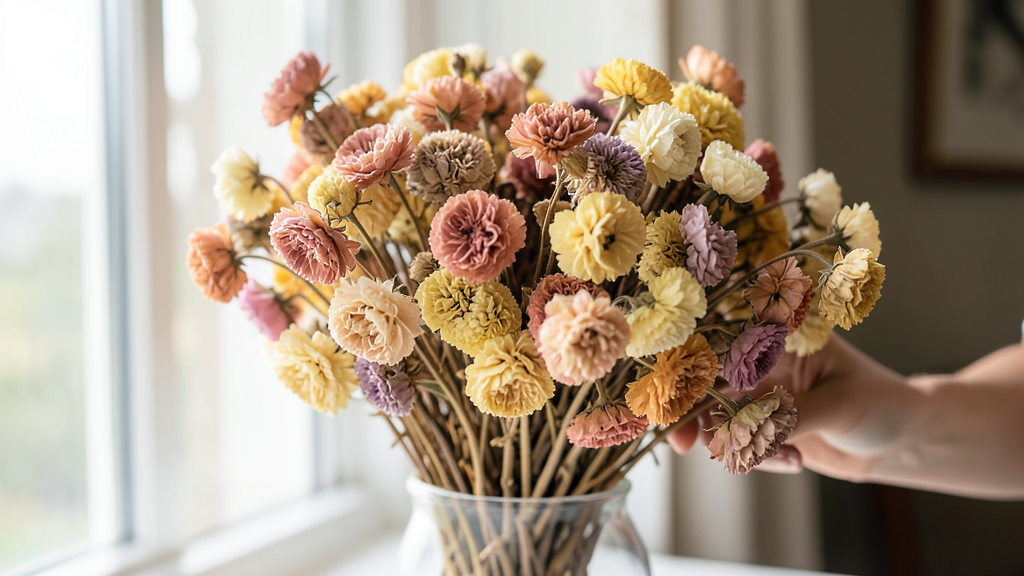
Even after drying, flowers still continue to change. The most noticeable issue is fading, especially if a bouquet sits near a window or gets direct sunlight every day. That’s why where you store dried flowers really matters.
I usually don’t keep dried flowers anywhere the sunlight hits them for several hours a day. A pretty windowsill may seem like the perfect place for a bouquet, but if you want the color to last, it’s actually not the best choice.
How to store dried flowers
1. Choose a spot away from direct sunlight.
Place the arrangement farther from the window or somewhere the sun doesn’t hit it directly. A bouquet sitting in a room doesn’t need complete darkness, of course. The main thing is not to leave it in bright direct sunlight every day.
2. Avoid humid rooms.
A bathroom, a room with constant steam, or a damp basement isn’t a good place for dried flowers. Dried plants need to stay dry, otherwise mold can develop.
3. If you’re not using the flowers yet, store them in a closed box.
Completely dried flowers can be kept in a box or another closed container in a dry place. This helps them collect less dust and protects fragile petals from accidental damage. Closed storage also helps protect dried plants from household insects.
4. Store fuller dried flowers loosely.
Don’t stack other things on top of them or press the petals against the sides of the box. Once dried, flowers become fragile, so the stems and edges of the petals can break even under light pressure.
5. Remove dust very carefully.
If the bouquet is displayed out in the open, dust will eventually collect on it. The Royal Horticultural Society recommends occasionally blowing the dust away with a hair dryer on low heat. Keep the dryer at a distance and use a gentle airflow so you don’t damage the dry petals.
Our dried flowers usually stay in places where they don’t get direct sunlight. Some bouquets stay there for several seasons, and I love spotting flowers among them that we once cut from our own garden.
I think that’s probably the nicest part of this whole flower-drying thing — the season ends, but we still get to keep a little piece of it at home.
My dried flower
Yes, I still keep drying flowers, even though it would be much easier to toss them into the compost and put fresh ones in a vase. Not every flower needs to be saved, and the house would quickly turn into a storage room full of dried bouquets! But some of them are still worth keeping.
Six months later, it doesn’t really matter anymore which method we used to dry a flower. It’s much nicer to see it again and remember where it came from in the first place.
If you have a bouquet at home right now that you’re not ready to part with, choose the method that works best for your flowers and tell me about it in the comments. As always, I really enjoy reading everything you want to share with me.