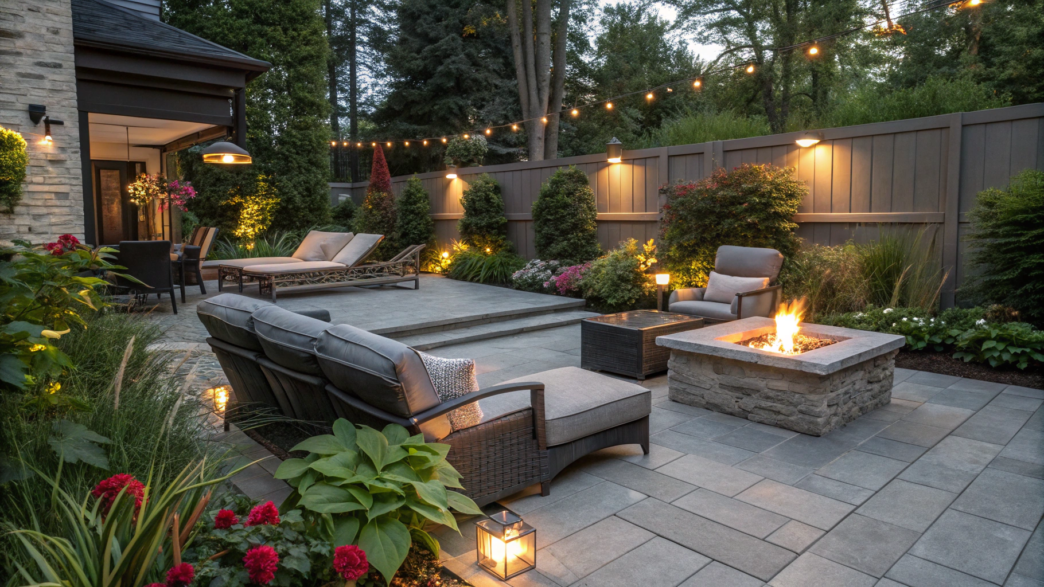
When you start updating a patio, it’s very easy to add too much at once. A new table, a couple more chairs, lights, planters, an awning, a grill… and then you realize it still isn’t that comfortable to sit out there.
So the first thing I figure out is how we actually use this space — where we sit in the evening, where we put food, whether there’s shade during the day, whether it gets windy. And only then do I think about how it looks.
This list includes 10 backyard patio design upgrades, all with the same goal — to make the patio more comfortable for everyday use and more visually appealing, rather than simply adding more decor.
1. Fire pit patio upgrade for evening gatherings
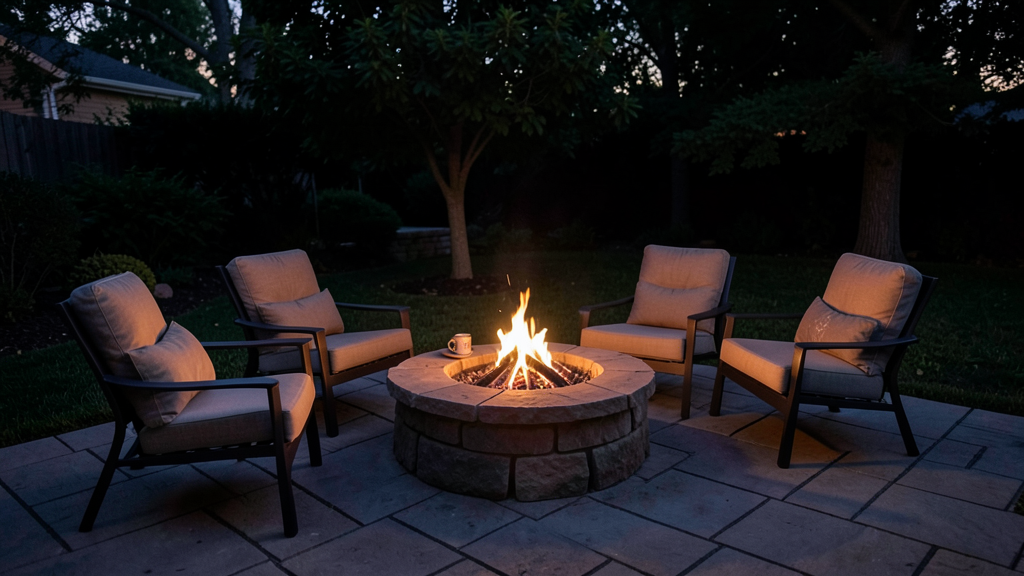
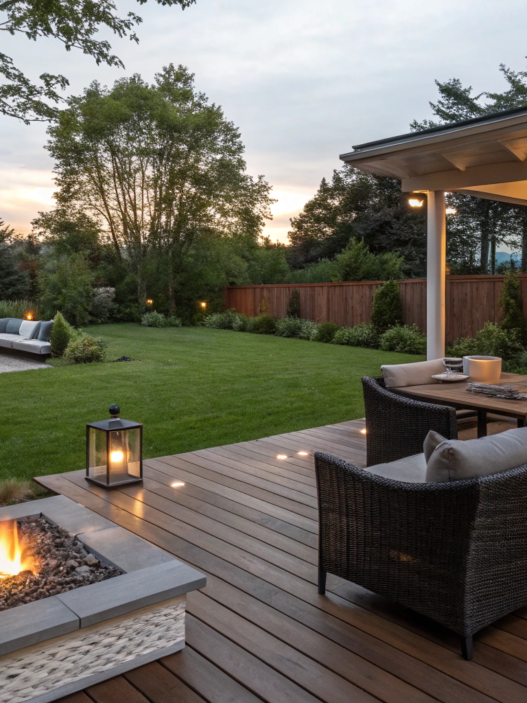
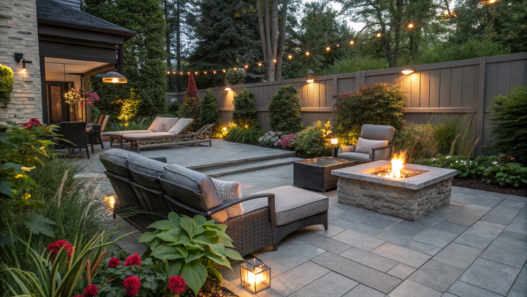
A fire pit can make a noticeable difference to an ordinary patio, especially if you barely use it in the evening. A fire gives you a reason to head outside after dinner, bring some tea or a snack, and stay out there for another hour or two. At our place, spots like this quickly become where everyone gathers. And you don’t need to rebuild the entire patio to make it happen. A fire pit, a few comfortable chairs, and some open space around them are enough.
What you’ll need
- A fire pit around 30–36 inches (76–91 cm) in diameter. That’s usually enough for a small group without taking up too much of the patio. If you choose a wood-burning model, add a Fire Pit Spark Screen too.
- 3–4 outdoor chairs with comfortable backs. Choose chairs you can sit in for an entire evening, not just ten minutes.
- A non-combustible base if the fire pit would otherwise sit on wood or another unsuitable material. Concrete pavers, stone, or gravel can work.
- A small outdoor side table for drinks and food.
How to create a fire pit area
- Choose a safe spot.
Don’t start with how the setup looks. Look at what’s around it first. The fire pit should be positioned away from the house, fences, overhanging branches, dry grass, and other combustible materials. For portable fire pits, a distance of at least 10 feet (3 m) from the house and anything that can catch fire is often recommended. It’s also worth checking local rules for outdoor fires before you start. - Prepare the base.
If the patio is already paved with stone or concrete, you may not need to do anything else. Placing a fire pit directly on a wooden surface and leaving it there is a bad idea. Create a separate non-combustible area using pavers, stone, or gravel. It also helps visually separate the fire pit area from the rest of the patio. - Arrange the chairs around the fire pit.
There’s no need to create a perfect circle. These areas usually look more natural when the chairs are spaced a little more freely and there’s room to walk between them. A good starting point is around 3 feet (91 cm) from the edge of the fire pit to the nearest part of the chair, then check the instructions for your specific model — the manufacturer may require more clearance. Leave some space behind the chairs too, so people can get up and walk past without moving closer to the fire. - Put a small table nearby.
It’s useful to have somewhere beside the chairs for drinks, food, or a phone. One table is enough for a small seating area, while two can be more convenient if the chairs are arranged on both sides of the fire pit. - Plan the evening lighting.
The fire itself lights the area around the chairs, but the path to the patio, steps, and edges of the space can still be dark at night. Small outdoor lights or low-level lighting work well there. This keeps the area comfortable after sunset and makes it easier and safer to move around.
I think places like this quickly become somewhere you want to stay a little longer — spend an evening together, invite friends over, or simply sit by the fire after a long day. Comfortable chairs, the fire pit itself, and soft, unobtrusive lighting around the area make the patio more comfortable and stylish.
2. Outdoor kitchen zone for family entertaining
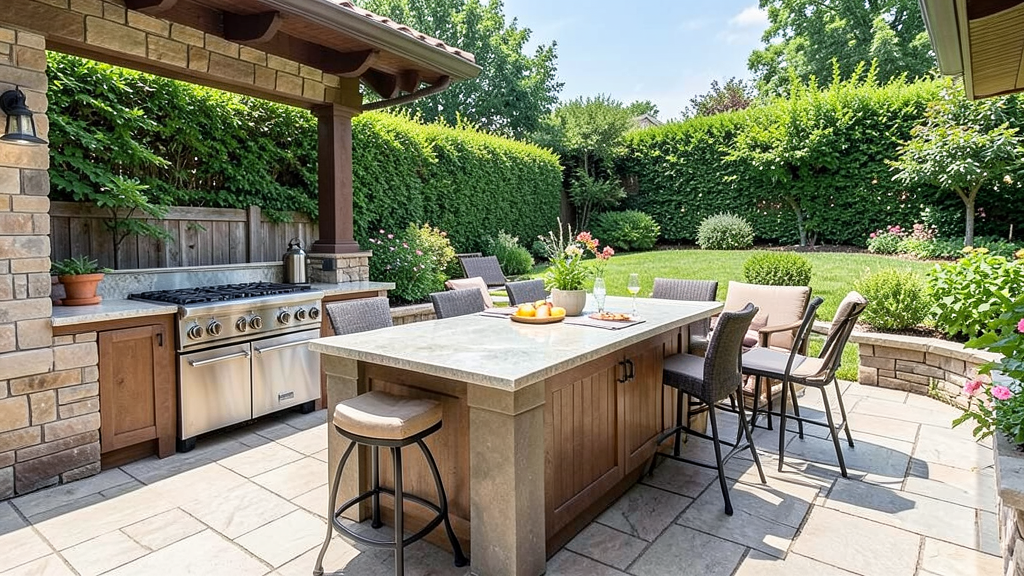
Lindy and I cook at home a lot, so for us, an outdoor kitchen has never been just about putting a nice grill next to a wall. If you have to run back inside every five minutes for a knife, a plate, or some vegetables, cooking outside gets annoying pretty quickly. It’s much easier to set up a small prep area in one place where you can get food ready, cook dinner, and still stay part of the conversation with family or friends.
And you definitely don’t need a full second kitchen out there. For most patios, a grill, some counter space, storage, and a good table nearby are enough.
What you’ll need
- A grill in the right size. For a family and a few guests, a model around 45–55 inches (114–140 cm) wide is usually enough. Before buying, check the cooking grate size too, especially if you often cook for several people at once.
- Counter space next to the grill. There should be enough room for at least a cutting board, a serving plate, and a couple of bowls.
- A closed cabinet or outdoor storage box for tongs, spatulas, napkins, and all the little things you’d otherwise keep carrying out from the house.
- A table and chairs close to the prep area, but far enough from the grill to leave a clear walkway between them.
How to create an outdoor kitchen area
- Plan the cooking flow.
Lindy and I first look at how the cooking will actually happen: take out the ingredients, prep them on the counter, move them to the grill, and then take the finished food off. If every step means walking across the whole patio, the layout needs to change. - Put the counter next to the grill.
Even 24–36 inches (61–91 cm) of free counter space makes cooking much easier. You can keep raw ingredients on one side of the work surface and a clean plate for cooked food on the other side, so they don’t come into contact.
This isn’t just more convenient. The U.S. Department of Agriculture also recommends not using the same plates and utensils for raw and cooked meat to avoid cross-contamination.
- Add storage next to the grill.
Tongs, oven mitts, a bottle opener, napkins, and a few shatter-resistant plates can stay in a closed outdoor cabinet. The less you have to run between the house and the patio, the easier it is to keep cooking with everyone else instead of disappearing into the kitchen looking for some small thing you need. - Keep the dining table nearby, but not right next to the grill.
It’s nice when the person cooking can still talk to everyone at the table without feeling separated from the group. At the same time, there should be a clear walkway between the grill, the counter, and the table so you can carry ingredients and finished dishes without anything getting in the way. - Don’t install every appliance right away.
A refrigerator, sink, or extra burner can definitely be useful, but you don’t need to add everything from day one. In our outdoor kitchen, Lindy and I started with just a grill and counter space, and over time it became obvious what we actually needed. That makes it easier not to waste space and money on equipment you barely end up using.
As you can see, this kind of kitchen doesn’t separate the person cooking from everyone else. Lindy or I can make dinner, talk with friends, pass ingredients back and forth, and sit down at the table right away. A clean counter, proper storage, and a dedicated grill area also make the patio look much neater and make it a lot easier to use.
3. Poolside patio with sun loungers
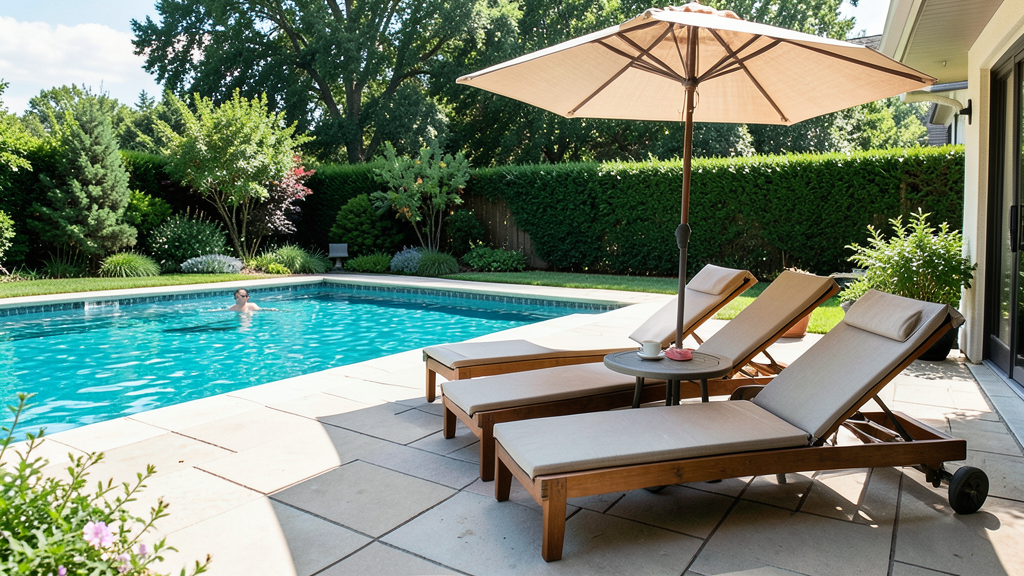
If you already have a patio by the pool, a couple of good sun loungers, a small table, and some shade can make the area much more comfortable and inviting. For Lindy and me, spaces like this always feel like an extension of the house — somewhere to step out with a cup of coffee in the morning, lie down after working in the garden, or sit with friends while someone else is swimming.
What you’ll need
- 2–4 sun loungers with adjustable backs. If space is limited, it’s better to use fewer pieces of furniture and keep the walkways clear.
- A small side table between the loungers or next to them.
- An outdoor umbrella or another source of shade if the area gets direct sun for most of the day.
- Outdoor cushions if the loungers themselves are hard.
- If the loungers sit on a smooth surface, non-slip furniture pads can be useful.
How to set it up
- Keep a clear path around the pool.
The loungers shouldn’t sit so close to the water that people have to squeeze past them. Leave enough space between the pool edge and the furniture for people to walk comfortably, especially if children use the pool. - Put the loungers where you’ll actually want to use them.
If you like being in the sun, some can stay in an open spot, while at least one or two can sit closer to the shade. Lindy, for example, really doesn’t enjoy spending all day in direct sunlight, and I’m not always a fan of strong sun either. - Don’t crowd the furniture together.
Leave enough room between the loungers for a small table and easy access from both sides. That way, no one has to step over things or move furniture every time someone gets up. - Add shade where you’ll spend the most time.
A large umbrella works best over the area with the loungers or a small table. That way, it gives you shade during the hottest part of the day instead of simply filling an empty corner of the patio. - Keep the decor minimal.
There’s already plenty going on around a pool with towels, shoes, and people moving back and forth. A couple of large planters or one small table usually make more sense than lots of small decorative pieces that constantly need to be moved.
After working outside, sometimes Lindy and I just want to lie down by the water, stretch our legs, and spend half an hour doing absolutely nothing. And when friends come over, the same area becomes a place to chat, have something cold to drink, and stay close to the pool without having to be in the water the whole time. Sun loungers, shade, and a few larger elements make the area both more functional and more visually appealing.
4. Covered patio extension on a budget
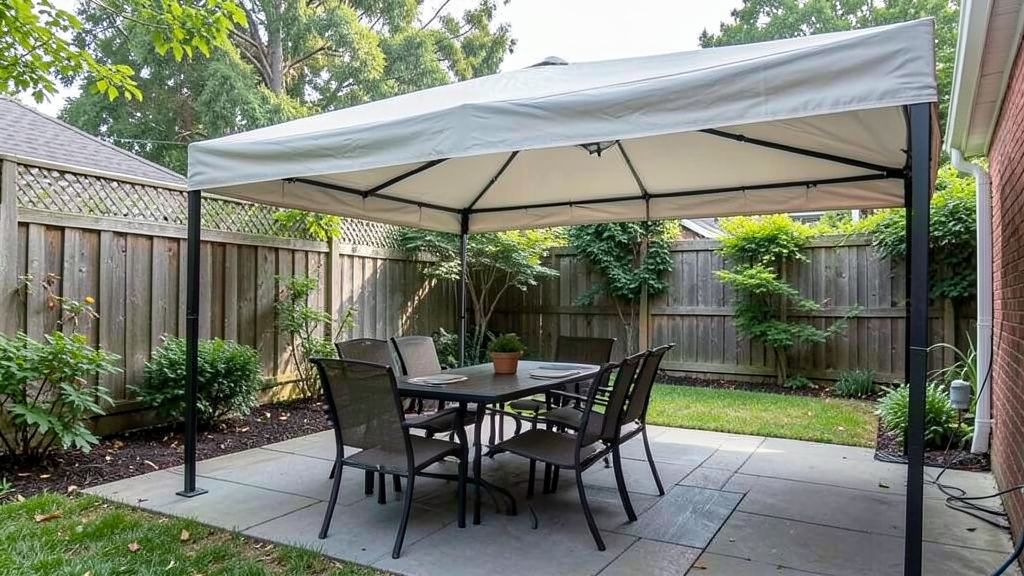
If you add a cover over part of the patio, the space becomes much easier to use in different weather. On a hot day, you get shade, during light rain you don’t have to immediately clear everything off the table, and the furniture spends less time fully exposed to the weather.
You don’t need to build a full permanent extension for this. If the budget is limited, you can start with a simple freestanding structure, a ready-made canopy, or an awning and cover only the part of the patio where you spend the most time.
What you’ll need
- A canopy or awning in the right size. For a budget-friendly option, it’s easier to look at a ready-made structure that doesn’t need to be built like a full roof. If you want to control how much sun comes through, a retractable awning is a good option.
- Strong posts and hardware if the model you choose requires them. It’s best to use the parts specifically recommended by the manufacturer.
- An outdoor table and chairs that fit comfortably under the cover.
- Water-resistant cushions or covers for the furniture you already have.
How to do it
- Decide how much of the patio actually needs to be covered.
You don’t have to cover the whole area. If you usually sit around one table or one group of chairs, you can start with just that section. The smaller the canopy, the fewer materials you’ll need and the less the whole update will cost. - Choose the simplest type of cover.
A ready-made fabric canopy is usually much cheaper than a permanent roof, while an awning means you don’t need extra posts in the middle of the patio. But if the structure is attached directly to the house, it’s important not to improvise, because poor installation and waterproofing can lead to leaks. For more complicated installation, it’s better to hire a professional. - Set up the furniture first, then decide on the roof size.
On projects like this, we always look at how much space the table and chairs actually take up when people are sitting there. The canopy should cover the entire seating area, not just the table itself, otherwise some of the chairs will still be exposed to direct sun or rain. - Match the canopy to the style of the patio.
If you already like the patio itself, choose the canopy color and materials so they work with the furniture, the exterior of the house, and the patio surface. That way, the new covered area looks like part of the existing space, rather than a separate addition. - Check local requirements before installation.
A lightweight freestanding canopy may have very few requirements, while a permanent structure or a canopy attached to the house may already fall under local building codes. It’s better to find this out before buying materials, not after everything has already been delivered.
I think it makes sense that you don’t need to redo the whole yard just to get a few extra hours outside. You can have breakfast in the shade, sit with coffee during a light rain, or gather around the table in the evening. And the canopy also makes this part of the yard feel more finished visually and helps define a separate area for relaxing.
5. Pergola design with modern lighting
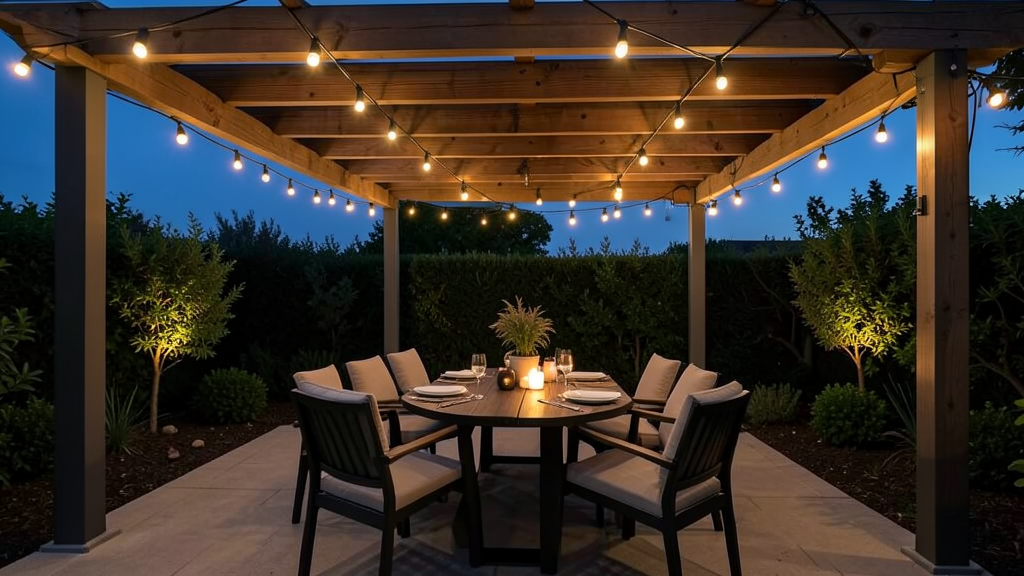
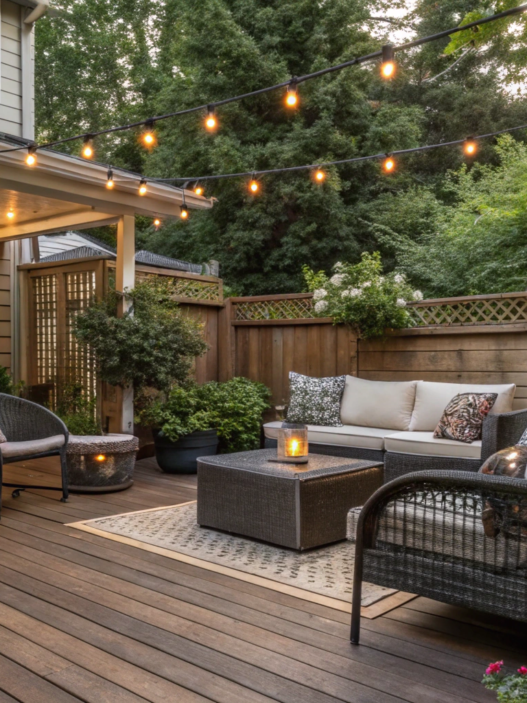
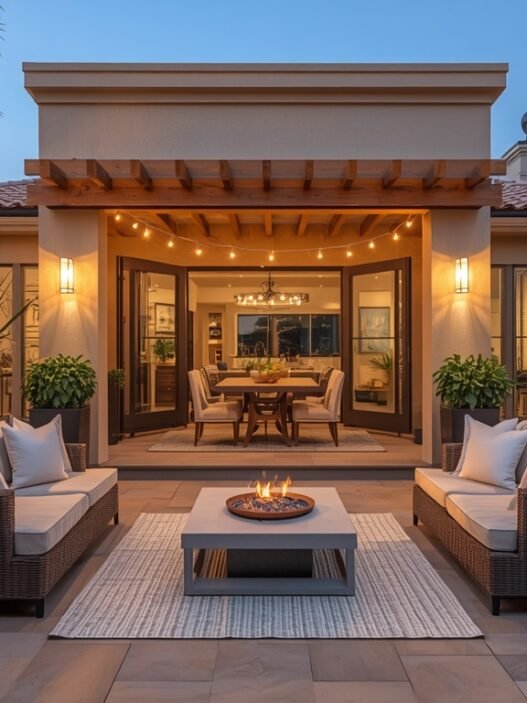
A pergola helps define a separate place for relaxing without turning the patio into a fully enclosed veranda. During the day, its beams provide a bit of shade, and in the evening you can hang string lights or small outdoor light fixtures on them.
Lindy really likes having a few lights over the table or chairs so you can comfortably spend the evening outside, but without lighting that feels too bright.
What you’ll need
- A pergola in the right size. It should fully fit the furniture underneath it, along with the walkways around it.
- Outdoor string lights or a few small light fixtures made for outdoor use. You can use Outdoor LED String Lights.
- Lighting hardware that works with the pergola material.
- Outdoor furniture for the area under the pergola.
- A dimmer, if the lights you choose allow you to adjust the brightness.
How to do it
- Arrange the furniture.
If there will be a dining table under the pergola, think not only about the size of the tabletop, but also about the space needed for pulled-out chairs. For a sofa and chairs, it also makes sense to decide on their placement first. That makes it easier to choose the pergola size and avoid putting supports in the middle of a walkway. - Choose one main lighting option.
Usually, string lights along the beams or a few parallel rows of lights are enough. There’s no need to add hanging fixtures, post lighting, and several more light sources at the same time. The simpler the setup, the neater it looks. - Light the seating area.
If there’s a dining table under the pergola, hang the lights or string lights directly above it. If there’s a sofa and chairs there, place a few light sources above the whole seating area so there aren’t overly dark corners in the evening. - Make sure the lighting is safe.
For a pergola, use only string lights, fixtures, and connections rated for outdoor use. They should be able to handle rain and moisture, and all cables and connectors should be kept away from places where water collects. - Run the wiring neatly.
It’s better to secure the cables along the beams and posts so they don’t hang down or get in the way. For power, use an outdoor outlet with moisture protection, and if there isn’t one nearby, it’s safer to call an electrician and install the right outlet than to run a regular extension cord out from the house.
Personally, I can easily imagine a long, unhurried summer dinner under a pergola like this, ending after sunset. The string lights softly light the table, the garden gradually gets darker around it, and no one is in a hurry to go back inside.
6. Attached patio with foldable glass doors
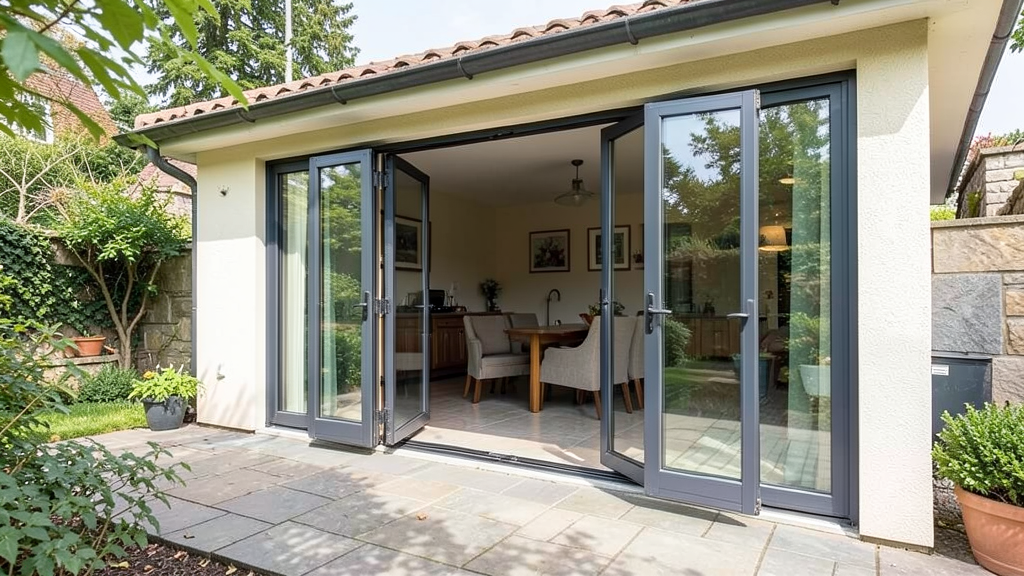
If the patio connects directly to the kitchen, dining room, or living room, a regular door or part of the exterior wall can be replaced with a wide system of folding glass doors between the house and the patio. In good weather, the panels fold to the side and open up almost the entire doorway. You get a wide opening from the room straight onto the patio, instead of a standard door only a few feet wide.
This isn’t a small weekend project, but the result can make a big difference to both how the space works and how the house looks.
One thing to be clear about right away: this is not a project you should try to handle entirely on your own, especially if the existing opening in the exterior wall needs to be widened. You can plan the layout, choose the door system, finishes, and furniture yourself, but changes to the wall and installation of the large glass panels are better left to professionals.
What you’ll need
- A folding glass door system designed for an exterior wall.
- Tracks and hardware included with the chosen door system.
- A threshold designed for exterior installation and to help keep water out of the house.
- Patio flooring that visually works with the flooring inside the house.
- For cleaning large glass panels, a window squeegee can be useful.
How to do it
- Choose the location for the wide opening.
These doors usually make the most sense between the living room or kitchen and the patio. If the wall is load-bearing, you can’t change the size of the opening without proper structural calculations. You’ll need a professional to determine what header and reinforcement are required. - Decide where the doors will fold.
The panels can stack to one side or split and fold in both directions. Before ordering, check that the folded panels won’t block a light switch, furniture, or the walkway onto the patio. - Plan the floor levels.
The smaller the height difference between the room and the patio, the easier it is to move between them. But the outdoor surface still needs to drain water away from the house, so you can’t simply make the transition completely level without a properly designed threshold and drainage. - Connect the interior with the patio.
You don’t have to use exactly the same flooring indoors and outside. Similar tones or materials are enough. For example, warm wood flooring inside can be paired with outdoor tile in a similar color. With the doors open, the two spaces then feel much more connected. - Keep the area around the doors clear.
Don’t place a large table or sofa directly in front of the opening. People should be able to walk out onto the patio easily even when several panels are folded to the side.
Lindy would especially appreciate this setup during big family dinners. Someone can stay in the kitchen, someone else can already be sitting outside, and everyone still feels close together. And large glass doors bring in so much daylight on an ordinary day too.
You can handle much of the visual side of the project yourself, such as choosing the patio flooring, furniture, and frame color, and deciding how the space will be used when the doors are open.
But for creating the opening, reinforcing the wall, waterproofing, and installing the door system itself, it’s better to hire a professional. Too much depends on the structure of the house and precise installation to take the risk of doing it yourself.
7. Small patio with vertical garden
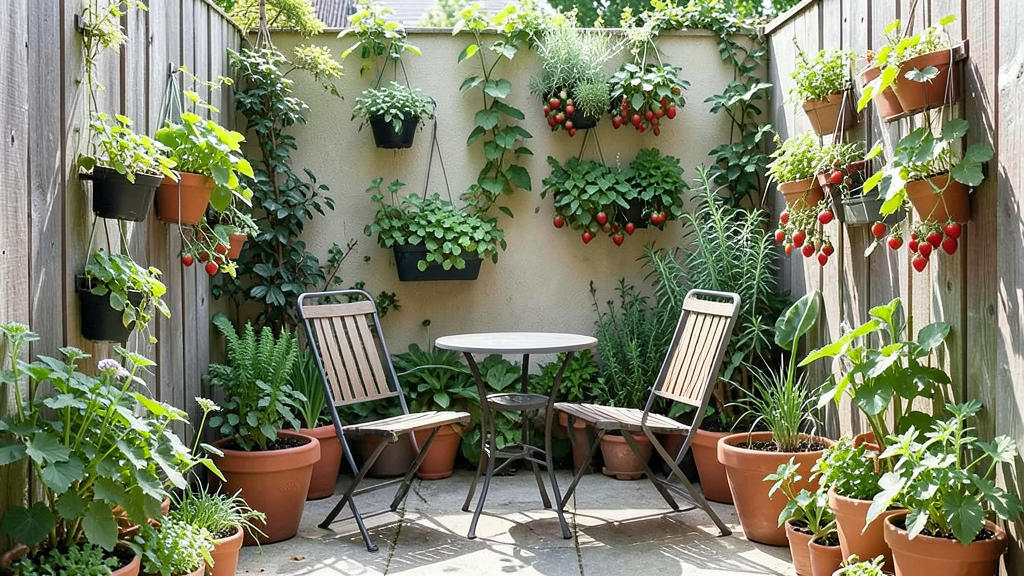
On a small patio, every free foot matters, so a dozen pots on the ground can start getting in the way pretty quickly. A vertical garden lets you move most of the plants onto a wall or fence, leaving room below for chairs, a small table, and a clear walkway. And it doesn’t have to be just decorative greenery. On a sunny wall, you can grow herbs, strawberries, and some compact vegetables too.
What you’ll need
- A wooden trellis, metal grid, or wall-mounted planter system. Choose the option based on the size of the wall and the number of plants.
- Small pots or planters with drainage holes. For most herbs and flowers, containers around 6–10 inches (15–25 cm) deep will work, while larger plants will need more room for their roots.
- Potting mix for container plants.
- Plants for the vertical garden. On a sunny patio, you can grow basil, thyme, parsley, strawberries, nasturtiums, or compact lettuce varieties. For a shadier spot, mint, parsley, some ferns, and begonias can work.
- If you have a lot of containers, you can add a drip irrigation kit.
How to do it
- Choose the right wall.
First, check how much sun it gets during the day. A south- or west-facing wall usually gets hotter, while a north-facing wall stays shaded longer. That will help determine which plants make sense to buy. - Install the support for the plants.
For a few small pots, individual wall-mounted holders can work. If you have a lot of containers, it’s easier to install one sturdy trellis or metal grid and attach them to that. Before installation, make sure the hardware is suitable for the wall or fence material. - Arrange the plants by size.
Keep larger and heavier containers lower down and place smaller ones higher up. Climbing plants can be trained along the trellis, while trailing plants can go closer to the top. This keeps the plants from completely blocking one another and makes each pot easier to reach. - Group the plants into one composition.
Don’t spread the pots evenly across the entire wall. It’s better to use one section and group the plants more closely together: place larger containers lower down, medium-sized ones in the middle, and small and trailing plants higher up. This keeps the vertical garden looking neat without turning the whole wall into one long row of pots. - Make watering easier. A few pots are easy enough to water with a regular watering can. If you have ten or fifteen, a drip irrigation system can save a lot of work. Also check where the excess water will drain so it doesn’t collect under furniture or against the wall of the house.
Personally, I’d use a wall like this mostly for herbs and strawberries that I can pick right before cooking. Lindy would probably add a few flowering plants between them. Even on a small patio, you can grow quite a lot without covering everything around you with pots.
8. Hot tub patio with privacy screens
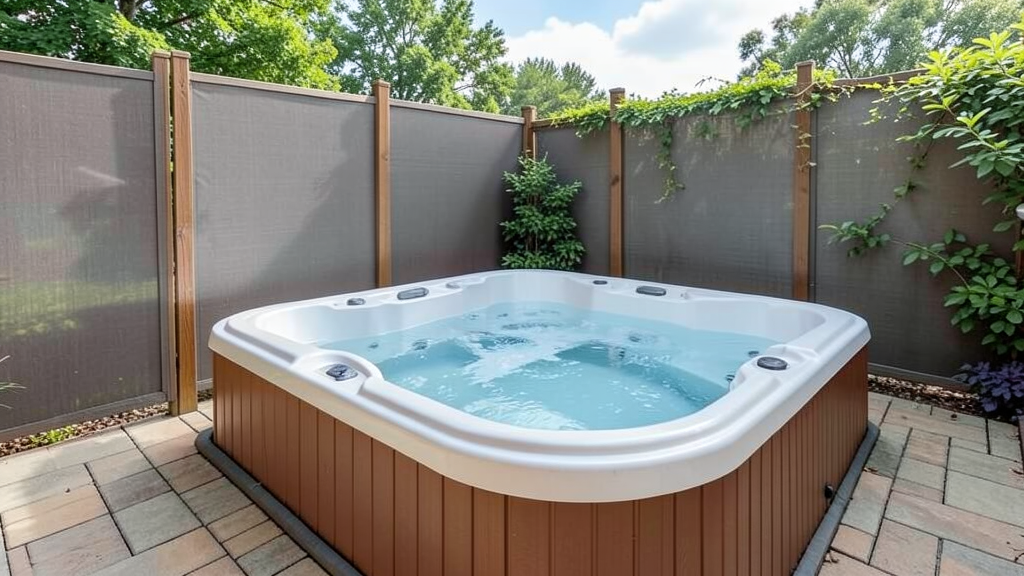
When buying a hot tub, a lot of people forget that sitting in the water only feels relaxing when you don’t feel exposed to the neighbors. So it makes sense to plan not only where the hot tub will go, but also what will block the view from nearby yards, the road, or surrounding windows. You don’t need to build a solid wall for that. A few privacy screens, trellises with plants, or a mix of both can be enough.
What you’ll need
- A hot tub in the right size and a base designed to support its weight.
- Privacy screens made from wood, composite, or metal. You can also use a ready-made Outdoor Privacy Screen.
- Posts and hardware if they aren’t included with the screen you choose.
- Large planters with plants if you want the screening to look less rigid. Ornamental grasses, bamboo in containers, or dense evergreen shrubs suited to your climate can all work.
How to do it
- Check the sightlines first.
Stand where the hot tub will go and look at where you can actually be seen from. Sometimes you only need to block one side, such as a neighbor’s window or part of the fence, instead of surrounding the whole area with screens. - Don’t place the screens too close to the hot tub.
Leave enough room for walking around it, maintenance, and removing the cover. There should also be clear access to the equipment, especially if panels or the pump are located on the side of the tub. - Combine different types of screening.
On the side facing a neighbor’s window or the road, it makes sense to use a solid privacy screen that actually blocks the view. On the other sides, you can use a wooden trellis with large planters of ornamental grasses or evergreen plants in front of it. Another option is to place a section of trellis for climbing plants between two solid panels. This keeps the most exposed sides private while still letting in light, air, and views of the garden. - Think about the height from a seated position.
A screen may look too low when you’re standing next to the hot tub, but the sightline changes once you’re sitting in the water. Before installing anything, sit at roughly the same height and check which areas actually need to be covered. - Keep part of the area open.
There’s usually no need to surround the hot tub with tall walls on every side. It’s better to block only the directions where privacy is actually a problem and leave the side facing the garden or a nice view open.
I think it’s enough to put privacy screens on the sides facing neighboring windows or the road and keep the other sides more open. You can also place a few large planters nearby to make the screening feel lighter and help it blend in with the garden. That way, you get enough privacy while the area still feels open and comfortable for relaxing.
9. Cozy patio for all-season use
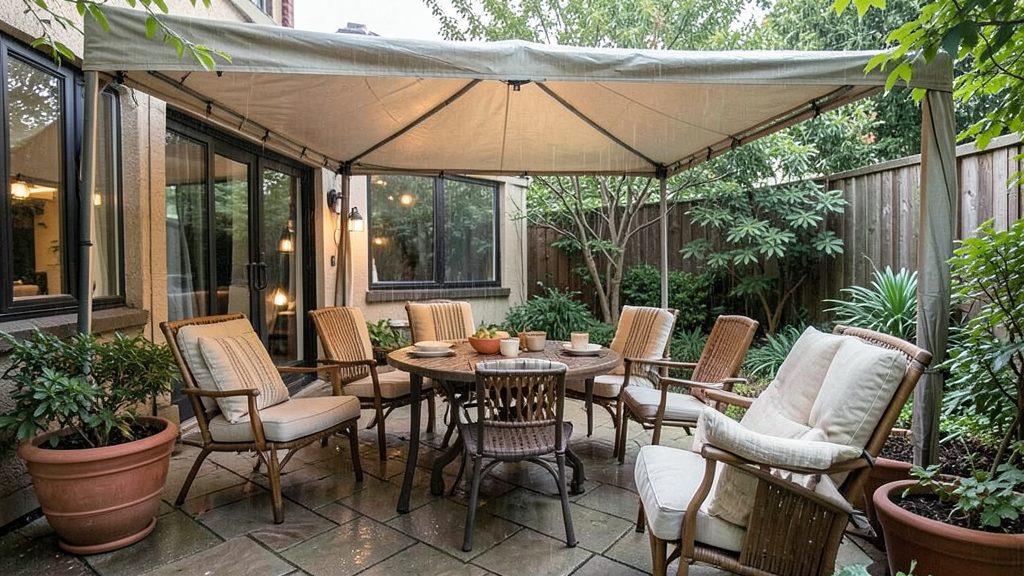
To use the patio for more than just summer, you need to deal with a few basic things: sun, rain, wind, and cooler evenings. You don’t have to turn the space into an enclosed veranda. A cover and some protection on one or two sides already give you many more days when you can have breakfast, read, or spend time outside with friends.
What you’ll need
- A canopy or covered section of the patio to protect the table and chairs from sun and light rain.
- Outdoor curtains or screens on the side where the wind usually comes from.
- Outdoor furniture and cushions with removable covers.
- A storage box for blankets, extra cushions, and other things you don’t want to carry in and out of the house every time.
How to do it
- Create shelter from rain and sun.
A pergola with a waterproof canopy, a retractable awning, or a simple patio cover can all work. You don’t have to cover the entire patio. It’s enough to cover the area with the table and chairs, but the shelter should be large enough to fit both the furniture and the people using it. - Block the windiest side.
If wind usually blows into the patio from one direction, put up a screen or hang a heavy outdoor curtain there. You notice the difference especially in fall, when the temperature is still pleasant but a cold wind can quickly make sitting outside uncomfortable. - Prepare the textiles for damp weather.
For a patio, it’s better to use cushions with removable covers and fabrics made for outdoor use. Blankets and extra cushions can be stored in a closed outdoor box so they stay dry and are always close by. - Plan the evening lighting.
For an area with a table or chairs, you can use string lights, hanging lights, or small outdoor lanterns around the edges of the patio. The main thing is to keep the light soft enough for relaxing and make sure all the equipment is made for outdoor use and protected from moisture.
In autumn, you can sit here with a hot coffee and a blanket; in summer, the space offers shade; and in spring, even a light rain doesn’t force you to cancel your evening relaxation. Ultimately, the patio is used almost year-round, not just during the warmest months.
10. DIY patio makeover using concrete pavers
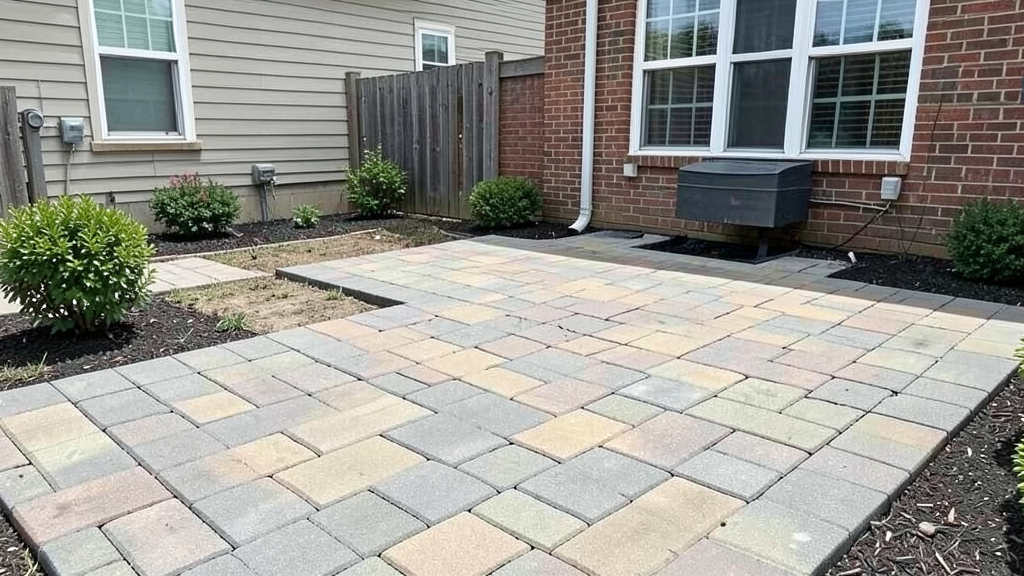
If the patio surface is already cracked, sunken, or simply overdue for replacement, concrete pavers make it possible to completely update the area yourself. You can choose a simple laying pattern and a color that works with the exterior of the house and other materials in the yard. A small patio is very realistic to redo on your own.
What you’ll need
- Concrete pavers in the size and shape you want. For a first DIY project, rectangular or square pavers with a simple pattern are easier to work with.
- Crushed stone base for the pavers.
- Sand for the leveling layer.
- Edge restraints to keep the outer pavers from shifting.
- Polymeric joint sand to fill the gaps between the pavers and lock them in place after activation with water.
- A hand tamper for a small patio or a plate compactor, which you can rent for a larger area.
- A rubber mallet, level, tape measure, shovel, and rake.
- For marking the layout, you’ll also need mason’s line and stakes.
How to do it
- Mark out the new patio area.
Decide on the patio dimensions and stretch a line around the perimeter. Before any digging, make sure you know where underground utilities are located. Also plan a slight slope away from the house so rainwater doesn’t run toward the foundation. - Remove the old surface and prepare the base.
Take out the old tile, pavers, or other material, then remove enough soil to make room for the new base and the pavers themselves. For a typical patio, several inches of compacted crushed stone are often used with about 1 inch (2.5 cm) of sand on top. The crushed stone base can be around 6 inches (15 cm) deep and is usually compacted in layers. - Create a slope away from the house and compact the base.
Add the crushed stone in layers of around 2–3 inches (5–7.5 cm) and compact each layer thoroughly. For a small patio, you can do this with a hand tamper, while for a larger area it’s easier to rent a plate compactor. - Level the sand and lay the pavers.
Add about 1 inch (2.5 cm) of sand over the crushed stone, spread it out, and remove the excess with a long straight board so the surface is even. Then start laying the pavers from one straight side of the patio, such as the wall of the house or a pre-marked guideline.
Every so often, step back a few feet and check the overall pattern. A small shift in a row is much easier to fix right away than after half the patio has already been laid. - Secure the edges and fill the joints.
Once the pavers are in place, install edge restraints around the perimeter so the outer pieces don’t spread apart. Then fill the gaps between the pavers with joint sand. If you’re using polymeric sand, lightly wet it according to the manufacturer’s instructions. Once it dries, it sets between the pavers and is less likely to wash out.
We’ve had to completely redo old areas around our property before, and the difference after this kind of work is obvious right away. A new, even paver surface noticeably updates the look of the patio. Then you can put the usual table, chairs, and plants back in place, and the whole area already feels different.
Where to start?
First, look at what is actually keeping you from using your patio more often. When it gets too hot, a canopy or pergola might be needed. If space is limited, a vertical garden and a better furniture layout can help. If the patio feels empty in the evenings, simply adding lighting, an outdoor fire pit, or a few comfortable chairs will do the trick.
Our best updates usually started with one specific problem rather than the idea of “redoing everything.” We fixed one thing, lived with it for a while, and then figured out what was still missing.
Tell me in the comments what you’d like to change about your patio. And if you’ve already done something similar, what actually turned out to be useful, and what would you skip the second time around?