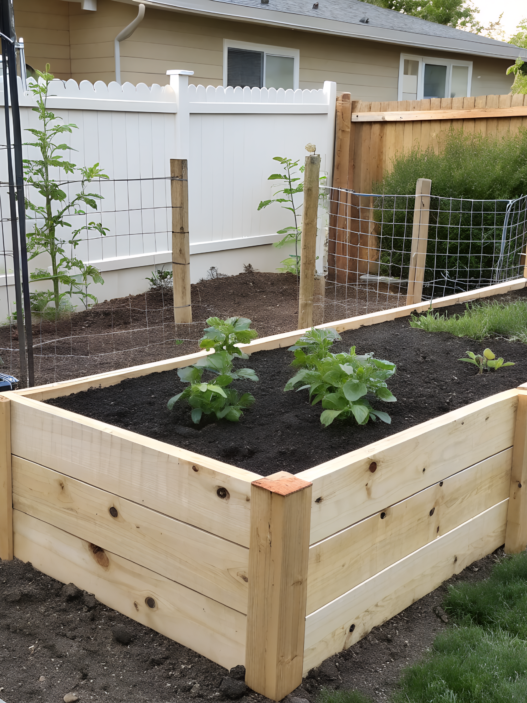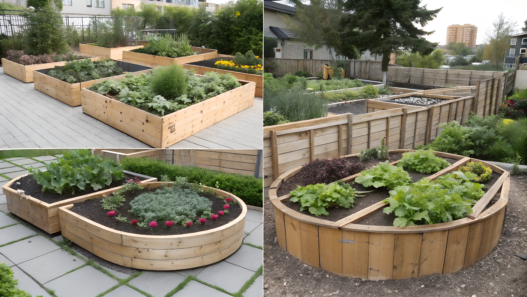

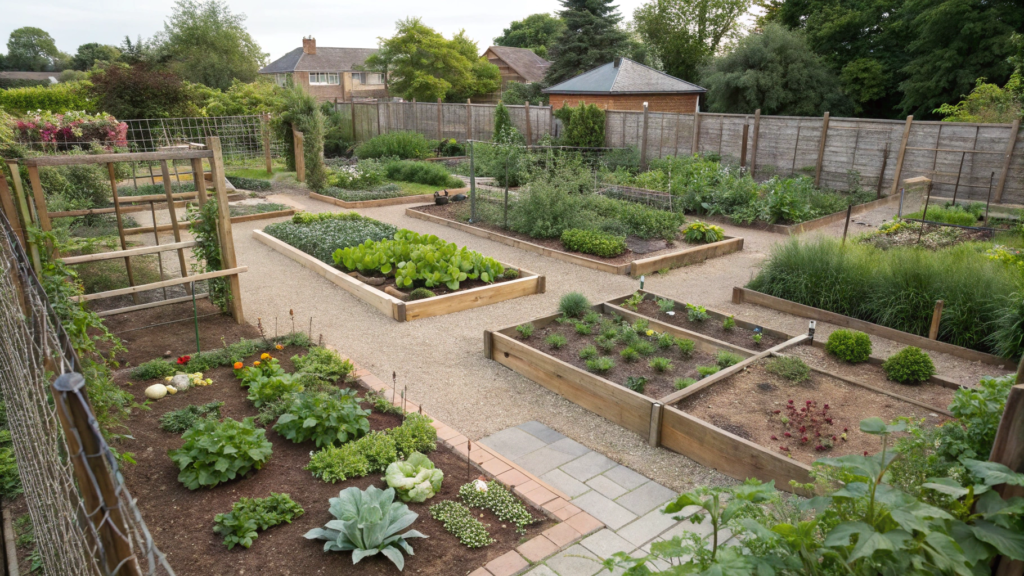
If you’re planning raised garden bed layout designs, you should start not with choosing plants and not even with buying materials, but with how everything will be arranged.
Here I tried to break down 10 layout options for garden beds: from strict geometry to more flexible shapes. Each of them solves a specific task — in some cases it’s easier maintenance, in others it’s saving space, or clear zoning. And each of these solutions is up to your choice and taste.
All these approaches can be combined. And that makes the decision much easier. You don’t need to stick to just one option. In practice, a mix almost always works: a bit of geometry, a bit of flexibility, some beds higher, some lower.
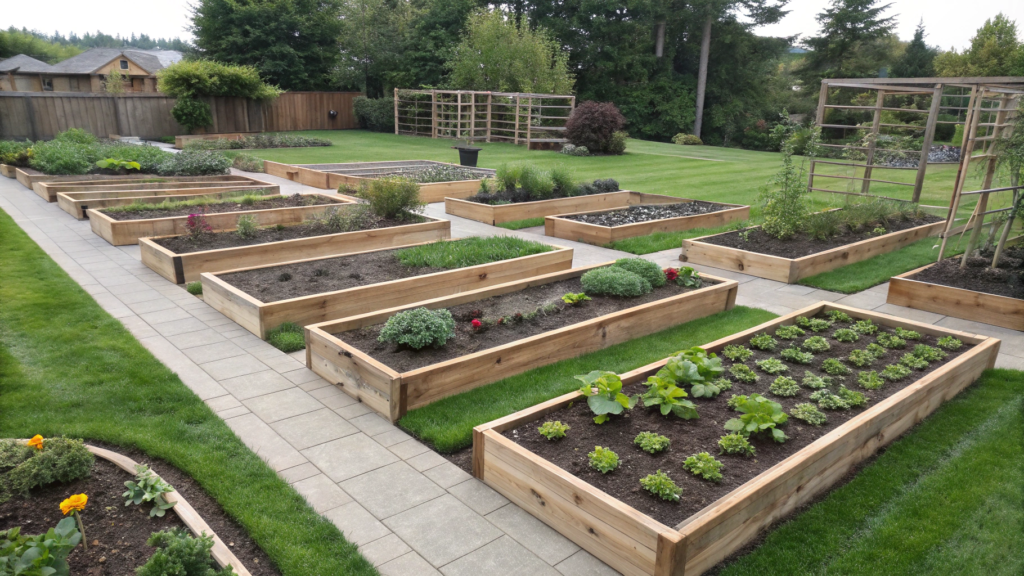
1. Geometric Layouts for Modern Landscapes
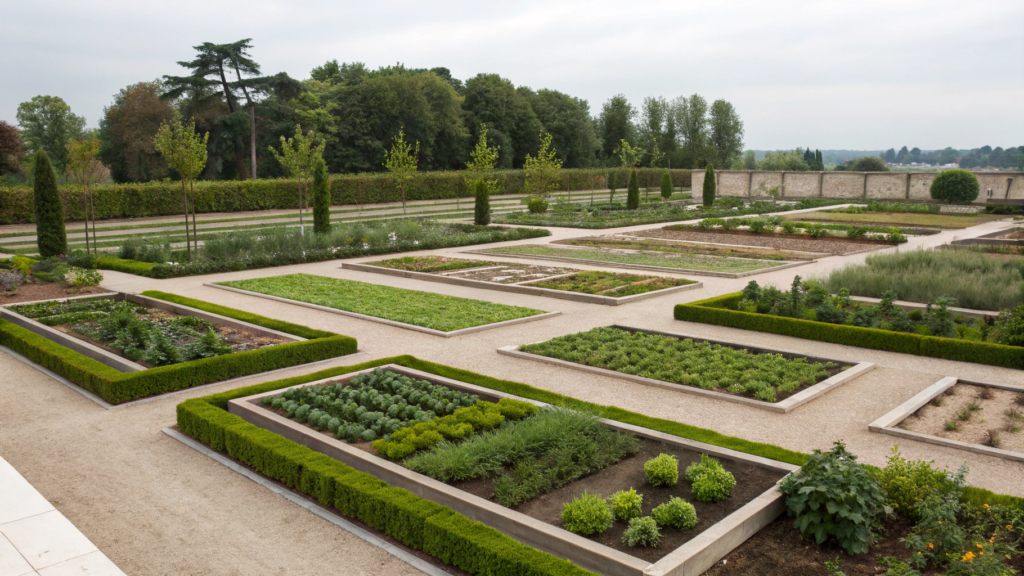
I like when a garden looks like part of a modern landscape. That’s why Lindy and I marked out a geometric section — straight lines, clean angles, everything aligned. Geometric layouts are not just about looks. They have very specific advantages:
- Clear separation of crops — easier to plan planting
- Distance control — less chaos, fewer mistakes
- Easier maintenance — you’re not walking “wherever”
- Time saving during watering and harvesting
There are several options that are actually easy to implement:
- Squares (4×4 ft / 120×120 cm) — classic for small spaces
- Rectangles (4×8 ft / 120×240 cm) — удобны for row crops
- Parallel lines — if the area is long
- Grid — ideal for planning seasonal planting
On our first plot, we had a simple grid of 6 beds. And it made everything easier — from planting to composting.
What you’ll need
- Boards (cedar or pine, 1–2 inches / 2.5–5 cm thick)
- Screws
- Drill
- Layout tools: rope + stakes
- Cardboard or landscape fabric for the base
- Soil mix
If you don’t like working with tools, you can use ready-made options like Best Choice Products Raised Garden Bed 4x8ft Wooden Planter.
How to create a geometric layout
- Define the shape of your beds for your space
Look at the area: if it’s square — go with a grid, if it’s long — parallel rows. Don’t try to fit everything, leave space for paths. - Mark the area with rope and stakes
Stretch lines to define exact boundaries. Check the angles — they should be straight (90°), otherwise the whole layout will shift. - Set the width of the paths
Leave at least 18–24 inches (45–60 cm) so you can walk comfortably with tools and not step into the beds. - Build and install the frames
Assemble rectangular or square frames and place them exactly along the lines. The optimal height is 10–12 inches (25–30 cm), for more comfort you can go up to 18 inches (45 cm). - Prepare the base
Lay cardboard or thick paper on the bottom — it will suppress weeds and break down over time. - Fill the beds with the right soil mix
The best basic option:
- 40% compost
- 40% garden soil
- 20% sand or perlite
This mix holds moisture but doesn’t turn into dense clay.
What grows best in geometric beds
When everything is arranged in lines, it becomes easier to choose crops. Not everything grows equally well in this system, so it’s better to think about it in advance.
Best options:
- Leafy greens: lettuce, spinach, kale
- Root crops: carrots, beets, radish
- Compact fruiting crops: peppers, eggplant
- Herbs: basil, thyme, oregano
If you use a grid, it’s easy to divide the bed into squares and plant different crops in each. This reduces disease risk and simplifies crop rotation.
In geometric beds, you immediately understand what grows where and how to take care of it. When everything is laid out in a clear system, even basic tasks — watering, weeding, harvesting — become faster and calmer. And you feel it right away.
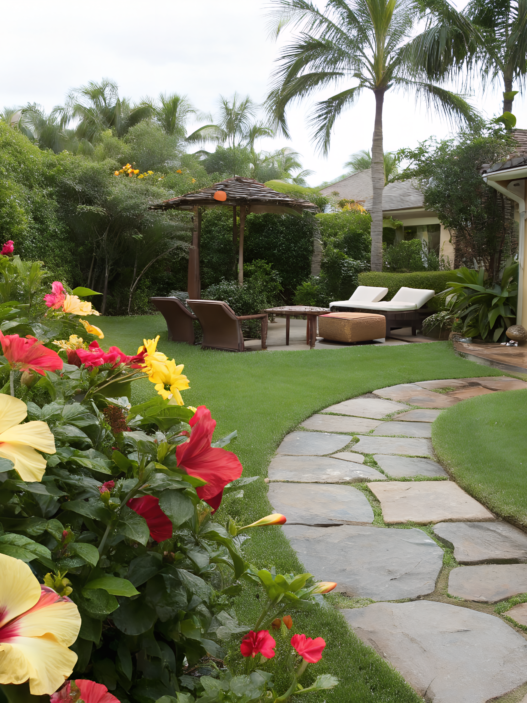
2. Circular Raised Beds for Centerpiece Gardens
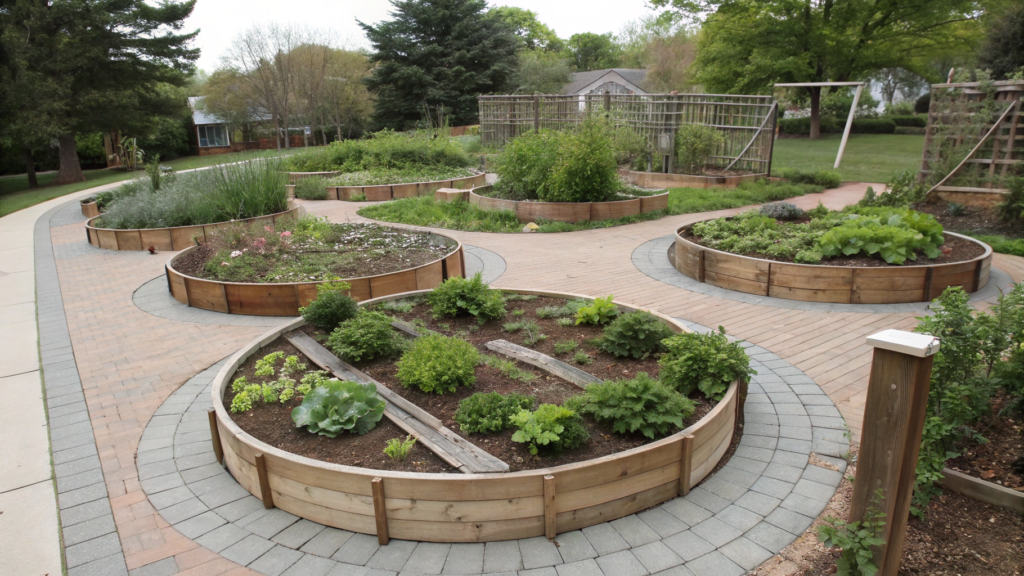
Circular raised beds used to feel more aesthetic than practical to me. But it’s actually a good option, especially if the space is small or you want to highlight a center point.
- Easy access from all sides — no need to reach across the bed
- The center can be used for taller plants or a support
- Easier to organize planting “layers” — low on the edges, taller toward the center
- Visually connects the space, especially if there are paths around
- And it looks really clean in the garden
What you’ll need
We usually use the following:
- Flexible boards or segmented panels (wood or metal)
- A center stake and rope for layout
- Screws or fasteners
- Drill
- Cardboard or landscape fabric
- Soil mix
How to build a circular raised bed
The most important part is getting the circle right. Everything else follows the same logic as standard beds.
Here’s how we do it now:
- Find the center and set the radius
Drive a stake into the center and tie a rope to it. The rope length becomes your radius. Usually 3–4 ft (90–120 cm) works well so you can reach the center by hand. - Mark the circle
Walk around with the rope stretched and mark the line. This is much more accurate than trying to eyeball it. - Install the frame
Place segments or flexible boards along the line. If you’re using wood, shorter sections are easier to shape into a circle. - Check height and stability
The optimal height is 10–12 inches (25–30 cm). If the soil is loose, you can set the frame slightly deeper so it stays stable. - Prepare the base
Remove large weeds and roots first. Then lay cardboard with overlap (about 2–4 inches / 5–10 cm) so there are no gaps — weeds will find their way through openings.
If the soil is compacted, lightly loosen the top layer with a garden fork before laying the cardboard so water can drain better. After placing it, lightly wet the cardboard — it softens, sits tighter against the ground, and starts breaking down faster. - Fill with soil
You can start with a rough bottom layer (branches, dry leaves) about 2–3 inches (5–8 cm) if you want better drainage and to use less soil.
Then the main mix:
- 40% compost
- 40% garden soil
- 20% sand or perlite
Mix directly inside the bed, not in layers — otherwise water will move unevenly. Fill almost to the top, leaving 1–2 inches (2–5 cm) so water doesn’t overflow when watering. After filling, lightly water — the soil will settle and you’ll see if you need to add more.
What grows best in circular beds
The circular layout gives you a natural planting structure, and it’s worth using it.
Best options:
- Tall plants in the center (tomatoes, corn, sunflowers)
- Mid-level crops (peppers, eggplants, cabbage)
- Low crops on the edges (lettuce, strawberries, herbs)
- Climbing plants with a central support
This setup makes access easier and helps distribute light more evenly. Plants don’t block each other as much as they do in straight rows.
A circular bed pulls the space together and makes the garden feel more structured. And once you add even one in the center, you start thinking not just about planting, but about how the whole space looks.
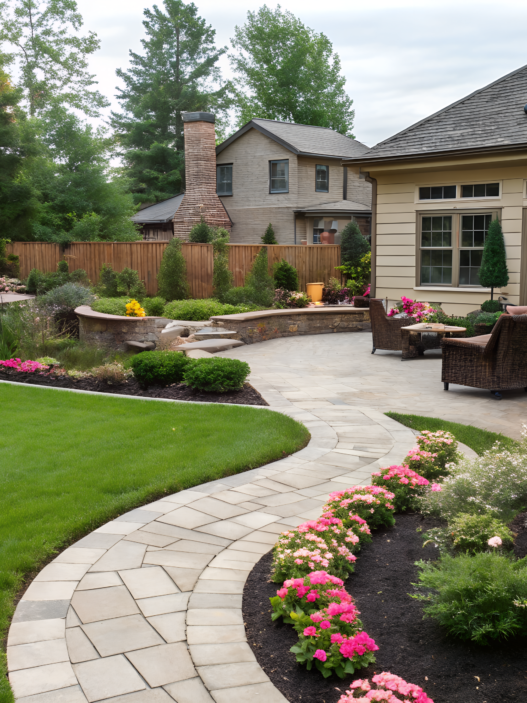
3. Rectangular Layouts That Streamline Maintenance
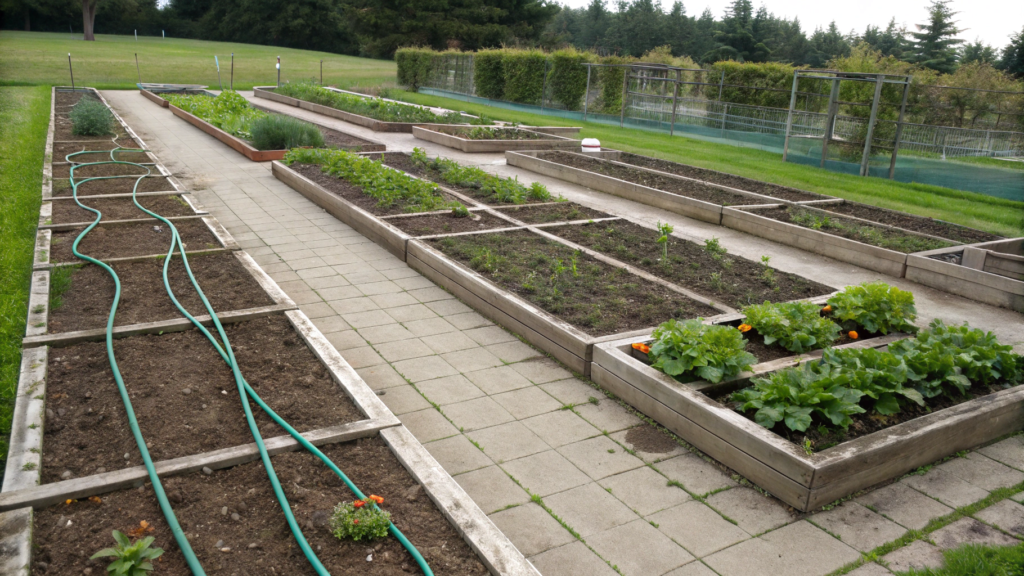
When you have 2–3 beds, you can experiment. But once it turns into 6, 8, 10… any inefficiency starts to annoy you every day. When everything is arranged in lines, you don’t think about where to go — you just follow the logic of the space.
Here’s what this kind of rectangular layout actually gives you:
- Paths become clear and predictable
- Watering is easier to organize (hose or drip system)
- Crops are easier to rotate by season
- Tools are easier to use — everything is aligned
We tried different bed shapes… and rectangular ones turned out to be the most practical. Everything else looked interesting but was harder to work with.
What you’ll need
- Boards 6–8 ft (180–240 cm) long
- Screws
- Drill
- Level (helpful, but not critical)
- Rope and stakes for layout
- Cardboard or landscape fabric
- Soil mix
How to create a rectangular layout
We do it like this:
- Define bed dimensions
The most удобный format is 4×8 ft (120×240 cm). A width of 4 ft (120 cm) lets you reach the center from either side without stepping inside. - Mark the bed lines
Stretch ropes to create straight lines. Try to keep everything parallel — it immediately makes the space look more organized. - Set paths between beds
Leave at least 18–24 inches (45–60 cm). If you plan to use a wheelbarrow — aim closer to 24 inches (60 cm). - Build the frames
Assemble rectangular frames and place them directly on the layout. Check that they sit evenly and don’t shift out of alignment. - Prepare the base
Remove large weeds and roots, especially perennials — they tend to come back fast. Lay cardboard with overlap (2–4 inches / 5–10 cm) so there are no gaps. If the soil is compacted, loosen the top layer slightly before placing the cardboard. After laying it down, wet it — it softens and settles better without air pockets. - Fill the beds with soil
You can add a bottom layer of branches or organic material (2–3 inches / 5–8 cm) if available — it improves drainage.
Main mix:
- 40% compost
- 40% garden soil
- 20% sand or perlite
Mix directly inside the bed, not in layers. Fill almost to the top, leaving 1–2 inches (2–5 cm) for watering. After filling, water it — the soil will settle, and you can top it up if needed.
When everything is aligned, you start to see a system — and that changes how you work on the garden.
What grows best in rectangular beds
This shape works best for crops that benefit from rows and repetition.
Best options:
- Tomatoes — easy to add supports along the long side
- Carrots and beets — straight rows make care and harvesting easier
- Onions and garlic — can be planted in dense lines
- Zucchini and pumpkins — if given their own beds
A rectangular layout makes it easier to plan where tall crops go, where low ones stay, and how they won’t interfere with each other.
4. Mixed-Height Beds for Texture and Interest

Different bed heights looked a bit strange at first, but later it turned out to be really practical. When everything is on one level, you get tired faster. When there’s variation, the нагрузка gets distributed.
Here’s what this kind of mixed-height beds setup gives you:
- Less bending — especially when some beds are higher
- Easier to separate crops by care needs
- Better drainage in taller beds
- The space looks more structured, even with dense planting
And it doesn’t require anything complicated — you just need to think about height in advance.
What you’ll need
- Boards of different heights: 10–12, 14–16, and 18 inches (25–30, 35–40, and 45 cm)
- Wood screws
- Drill
- Stakes and rope for layout
- Level (optional, but helps avoid uneven lines)
- Cardboard or landscape fabric for the base
- Soil mix (compost, garden soil, sand or perlite)
If you don’t want to select boards manually, you can use modular options like Vego Garden Modular Metal Raised Bed Kit — height variations are already built in, and assembly is faster.
How to build mixed-height beds
Here the key is not the construction itself, but how the different levels work together.
- Divide the space into zones
Look at where you work most often. Closer to the house or paths, it’s better to place higher beds — they’re easier to reach without extra strain. - Choose 2–3 height levels
You don’t need five different heights. Usually three is enough: around 10–12 inches (25–30 cm), 14–16 inches (35–40 cm), and up to 18 inches (45 cm). That’s enough to feel the difference. - Place beds with light in mind
Avoid putting taller beds in front of lower ones — they’ll block light. It’s better to place them in the center or toward the back. - Build the frames
Each bed is assembled separately according to its height. The taller the structure, the more important strong connections are — this is not the place to save on fasteners. - Prepare the base
Remove large weeds and deep roots first. Lay cardboard with overlap (2–4 inches / 5–10 cm) so there are no gaps. If the soil is dense, loosen the top layer slightly before placing it — this helps with drainage. After laying, lightly wet the cardboard so it settles properly and stays in place. - Fill the beds with soil
In taller beds, it helps to add a bottom layer of branches or rough organic material (about 3–5 inches / 8–12 cm) — this reduces soil usage and improves drainage. Then add the main mix: 40% compost, 40% garden soil, 20% sand or perlite. Mix everything directly inside the bed, not in layers. Fill close to the top, leaving 1–2 inches (2–5 cm), then water — after settling, you’ll see if you need to add more.
When everything is set up, the space starts to work differently — not like a flat surface, but like a system of levels.
What grows best at different heights
Height really helps with organizing crops. It’s not just “what fits where.”
The usual logic looks like this:
- In higher beds — greens, herbs, anything you harvest often
- Mid-level — peppers, strawberries, compact vegetables
- Lower beds — root crops and plants that don’t need depth
Also, taller beds warm up faster in spring, so they’re good for early planting.
5. Fence-Connected Layouts for Compact Yards
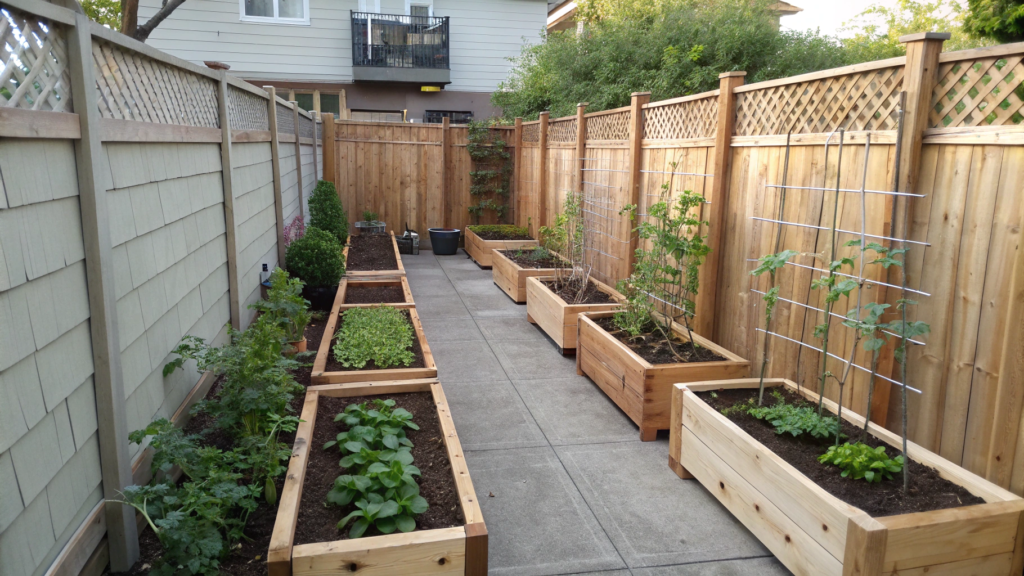
On small spaces, every foot counts. And if you ignore the fence, you lose usable space. This is one of the most convenient ways to add raised beds without taking up the center of the yard.
Here’s what this approach gives you:
- The central area stays open
- Natural wind protection appears
- You can use the fence as support
- Easier to organize vertical planting
This becomes especially noticeable when you start growing climbing crops — you instantly get an extra level.
What you’ll need
The bed will be connected to the fence, so нагрузка and conditions are slightly different.
- Boards or metal panels for the bed
- Screws and a drill
- Stakes and rope for layout
- Cardboard or landscape fabric
- Soil mix
- Mounts or mesh for vertical supports
- Path material (wood chips, gravel)
How to build a bed along a fence
Here it’s important not to push everything too close. Access and airflow matter more.
- Define the distance from the fence
Leave at least 6–12 inches (15–30 cm) between the bed and the fence. This allows airflow and access if repairs or maintenance are needed. - Set the length and width
Width is usually 2–3 ft (60–90 cm), so you can reach across from one side. Length depends on your space. - Mark the installation line
Use rope to create a straight line along the fence. Even small misalignments are very noticeable here. - Build the frame
Assemble a long bed and place it along the line. Check that it stands straight and doesn’t lean toward the fence. - Prepare the base
Remove weeds and roots, especially those growing from the fence line. Lay cardboard with overlap (2–4 inches / 5–10 cm), with no gaps.
If the soil is dense, loosen the top layer slightly. Lightly wet the cardboard so it settles properly and stays in place. - Fill the bed with soil
If the bed is tall, you can add a bottom layer of branches or rough organic material (about 3–5 inches / 8–12 cm).
Main mix:
- 40% compost
- 40% garden soil
- 20% sand or perlite
Mix directly inside the bed. Leave 1–2 inches (2–5 cm) at the top so water doesn’t overflow when watering.
- Add vertical supports
Attach mesh or stretch wire along the fence. This lets you use vertical space without extra structures.
What grows best along a fence
The logic here is simple — use height.
Best options:
- Cucumbers and beans — easy to guide upward
- Peas — quickly take over vertical space
- Tomatoes — easy to tie and support
- Raspberries or blackberries — if you have space and want to secure them
You can plant low crops too, but the main idea here is vertical growth.
What to pay attention to
There are a few details that affect the result:
- Don’t place the bed right against the fence — airflow will be poor
- Consider shade from the fence at different times of day
- Check that support structures are stable
Also, if the fence is metal, it can heat up in the sun. This is worth considering when choosing crops.
6. Raised Bed Islands for Large Spaces
Raised bed islands are separate zones that set rhythm and make a large space feel more structured. They also make movement easier.
Here’s what this layout gives you:
- Access to the bed from all sides without walking around
- The ability to divide the space into functional zones
- Easier to combine different crops within one “island”
- Less feeling of empty space
What you’ll need
- Boards or metal panels for frames
- Screws or fasteners
- Drill
- Stakes and rope for layout
- Cardboard or heavy paper for the base
- Soil mix
- Path materials (wood chips, gravel, or bark)
After preparing materials, don’t rush the placement — that’s what defines how comfortable the layout will be.
How to build raised bed islands
- Divide the space into zones
Mentally split the area into sections: where vegetables go, where herbs go, where flowers go. The islands should match these zones, not be placed randomly. - Define the size of each island
The goal is to reach the center from any side. Usually this means 3–5 ft (90–150 cm) in width. - Mark the placement
Use stakes and rope to see how the islands sit in the space. Leave at least 24 inches (60 cm) between them, or more if you plan to use a wheelbarrow. - Build the frames
The shape can vary — square, rectangular, even slightly rounded. The key is that the structure stays stable and doesn’t shift. - Prepare the base
Remove weeds and roots, especially perennial ones — they come back quickly.
Lay cardboard with overlap (2–4 inches / 5–10 cm) so there are no gaps.
If the soil is dense, loosen it slightly before placing the cardboard.
Lightly wet the cardboard so it settles and stays in place. - Fill the beds with soil
If the bed is tall, you can add a bottom layer of branches or rough organic material (about 3–5 inches / 8–12 cm) to reduce soil use.
Main layer:
- 40% compost
- 40% garden soil
- 20% sand or perlite
Mix directly inside. Fill close to the top, leaving 1–2 inches (2–5 cm). After watering, the soil will settle — that’s normal.
What grows well in raised bed islands
These beds are great for mixed planting. There are no strict rows, and you can use that.
What works well:
- Mixes of vegetables and herbs (for example, tomatoes + basil)
- Flowers with vegetables — to attract pollinators
- Crops with different heights — taller in the center, lower around
- Seasonal combinations that are easy to change
In this type of bed, it’s usually not one crop, but a combination. And that’s exactly what makes it effective.
7. Metal and Wooden Hybrid Layouts
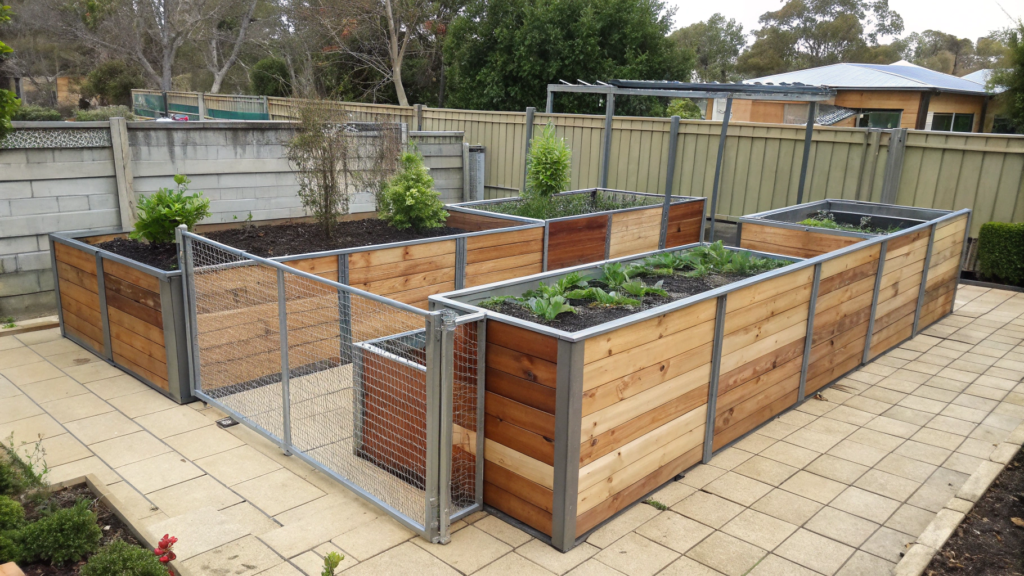
This kind of setup gives you balance: wood feels warm and familiar, while metal is more durable. At first, it seems easier to choose just one material. But each one has weak points, and in combination they cover each other.
Here’s what we noticed:
- Metal holds its shape better and doesn’t rot over time
- Wood is easier to work with and install
- The structure becomes stronger without adding extra weight
- The look doesn’t feel “cold” like fully metal beds
This becomes especially noticeable after a couple of seasons, when fully wooden beds start to wear out faster.
What you’ll need
Here it’s important to understand from the start which parts will be wood and which will be metal.
- Metal panels or galvanized sheets
- Wooden boards for frames or corners
- Screws for metal and wood
- Drill
- Stakes and rope for layout
- Cardboard or landscape fabric
- Soil mix
How to build a hybrid bed
- Decide where metal and wood will go
Usually, metal is used for the side panels, and wood for the top frame or corners. This makes the structure look cleaner and more comfortable to use. - Mark the layout
Set the shape using rope and stakes. It’s better to stick to simple forms — rectangle or square — to avoid complicating the build. - Prepare wooden elements
Cut boards to size and treat them for moisture protection if they are untreated. This extends their lifespan. - Install metal panels
Place them along the perimeter and secure them. Make sure the edges don’t shift — this affects the stability of the whole structure. - Connect metal and wood
Attach wooden elements on top or at the corners. This strengthens the structure and makes the edges safer, especially if the metal is sharp. - Prepare the base
Clear the area of large roots and weeds. Lay cardboard with overlap (2–4 inches / 5–10 cm) so there are no exposed gaps.
If the soil is dense, loosen the top layer slightly. After placing, lightly wet the cardboard so it settles and doesn’t shift. - Fill the bed with soil
If the bed is tall, you can add a bottom layer of branches or rough organic material (3–5 inches / 8–12 cm).
Main mix:
- 40% compost
- 40% garden soil
- 20% sand or perlite
Mix directly inside. Fill close to the top, leaving 1–2 inches (2–5 cm). After watering, the soil will settle — that’s normal.
What to plant in hybrid beds
Hybrid beds hold their shape well and maintain moisture levels, so they work for a wide range of crops.
We most often use them for:
- Tomatoes and peppers — easy to add supports
- Greens and herbs — stable soil moisture
- Strawberries — clean edges make maintenance easier
- Mixed plantings
Because the structure is strong, you don’t have to worry about dense planting or additional weight.
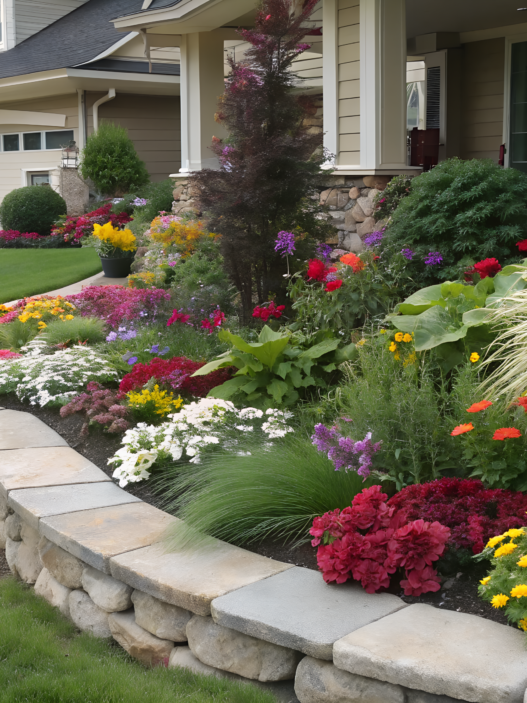
8. Flower-and-Veggie Combo Layouts
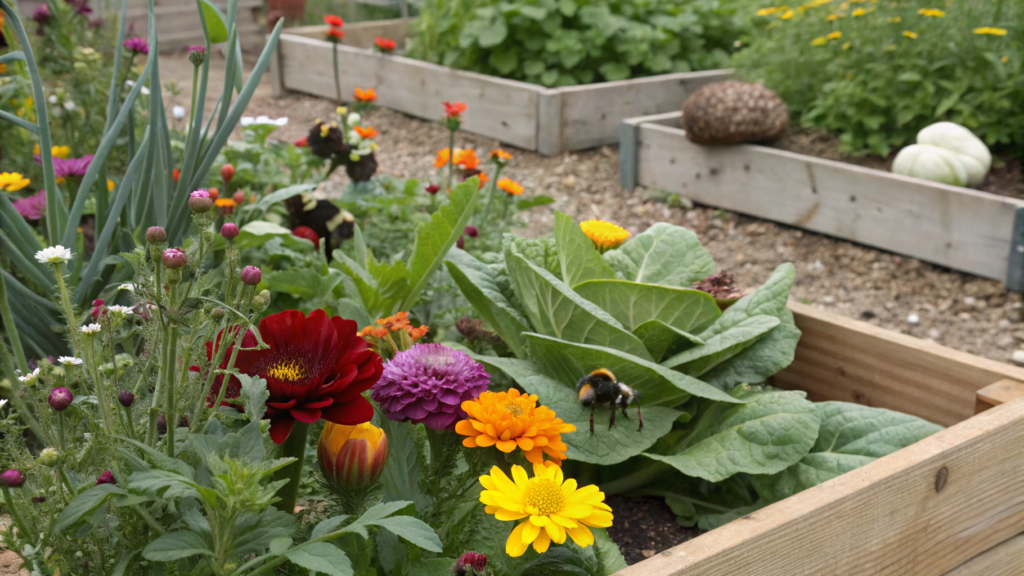
When you mix flowers and vegetables, there’s a real benefit, and it becomes noticeable pretty quickly.
Here’s what this approach gives you:
- More pollinators — bees and bumblebees become more active
- Fewer pest outbreaks thanks to plant diversity
- Space is used more efficiently, without “empty zones”
- Beds look cleaner even mid-season when some plants are fading
There’s also support beyond personal experience. Materials from Royal Horticultural Society show that plant diversity helps attract beneficial insects and can reduce pest pressure. We noticed it in the first year — aphids became less of an issue.
What you’ll need
The setup stays the same, only the planting approach changes. You don’t need to buy anything special “for flowers.”
- Raised beds (wood or metal)
- Screws and a drill
- Cardboard or landscape fabric
- Soil mix
- Vegetable seedlings or seeds
- Flower seedlings or seeds
You can also use ready-made options like Greenes Fence Raised Garden Bed Kit.
How to create a combined bed
Here the goal is not to “plant as much as possible,” but to keep balance. Flowers should support, not compete.
- Define the main crop
Start with what will be the focus — tomatoes, peppers, greens. Flowers act as support, not the main element. - Choose the right flowers
Stick with proven options: marigolds, nasturtium, calendula. They don’t just look good — they actually influence the bed ecosystem. - Plan the placement
Keep the center for vegetables, and plant flowers along the edges or between crops. Avoid overcrowding — airflow matters. - Prepare the base
Remove large roots and weeds, especially perennials. Lay cardboard with overlap (2–4 inches / 5–10 cm) so there are no gaps. If the soil is heavy, loosen the top layer slightly. Then lightly wet the cardboard so it settles and stays in place. - Fill the bed with soil
Mix:
- 40% compost
- 40% garden soil
- 20% sand or perlite
Mix directly inside the bed. Fill close to the top, leaving 1–2 inches (2–5 cm) so water doesn’t overflow when watering.
- Plant everything
Start with vegetables, keeping proper spacing. Then add flowers. It’s better to think about how plants will look in a month, not on planting day.
After planting, the bed may look a bit “empty,” and that’s normal. In a couple of weeks, it fills in and starts to come together.
Proven vegetable and flower combinations
When you start mixing plants, it’s easy to overdo it or choose random combinations. We went through that — half of the experiments didn’t work.
Over time, these combinations proved reliable:
| Vegetable | Flowers | What it does |
| Tomatoes | Marigolds | Helps reduce soil pests and repel some insects |
| Tomatoes | Basil | Attracts pollinators and affects aroma |
| Cucumbers | Nasturtium | Draws aphids away and protects leaves |
| Cabbage | Calendula | Helps reduce pest pressure |
| Carrots | Alyssum | Attracts beneficial insects |
| Peppers | Marigolds | Supports a more stable soil environment |
You can start with one option and see how it works in your space. Over time, you’ll develop your own combinations.
What to keep in mind
It’s tempting to add more flowers because it looks good. But if you overdo it, vegetables start to compete for space.
It’s better to keep balance:
- Don’t block light for vegetables
- Keep access to each plant
- Consider height — flowers shouldn’t shade main crops
Also, not all flowers are useful. Decorative but non-functional plants don’t add much value here.
Combined beds gradually start working like a small ecosystem. Not perfect, but noticeably more stable than separate planting. And when you see plants actually influencing each other, your whole approach to planting changes.
9. Designing Beds for Easy Access Paths
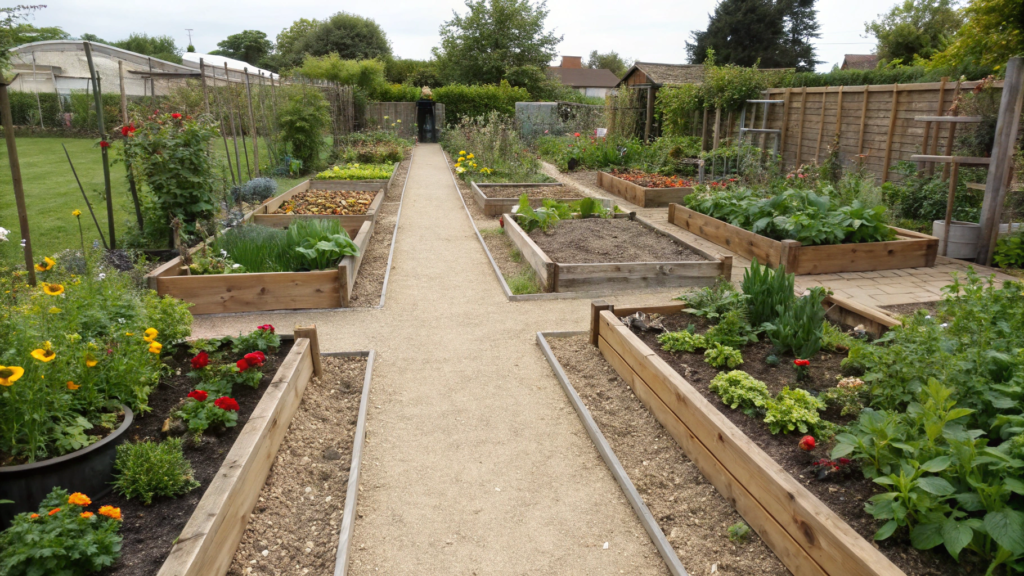
When planning a garden, it’s tempting to use every foot. But if you don’t leave proper paths, working becomes uncomfortable within the first month.
Here’s what a well-planned access path system gives you:
- Easy access to every part of the bed
- Less damage to plants during maintenance
- More convenient watering without dragging a hose through plants
- The ability to use a wheelbarrow or baskets
I’ve noticed for a long time that if a bed is hard to reach, you start avoiding it and delay maintenance. And that quickly affects the results.
What you’ll need
Here it’s not just about the beds, but also the surface of the paths.
- Materials for beds (wood or metal)
- Screws and a drill
- Stakes and rope for layout
- Cardboard or landscape fabric
- Soil mix
- Path materials (wood chips, bark, gravel, or mulch)
- Shovel or rake for leveling
How to design удобные paths
The goal here is not just to “leave space,” but to create routes that are actually comfortable to use.
- Imagine how you’ll move
Walk through the space mentally: where you get water, where you harvest, where tools go. Paths should follow these movements. - Set path width
Minimum is 18 inches (45 cm), but 24–30 inches (60–75 cm) is more comfortable. If you use a wheelbarrow — stay closer to the wider range. - Mark paths and beds together
Don’t place beds first and then fit paths in. Plan both at the same time. Rope and stakes help you see how it will actually look. - Level the surface
Remove the top layer of grass and roots. If you skip this, the path will quickly become uneven. - Prepare the base for paths
Lay cardboard or landscape fabric with overlap (2–4 inches / 5–10 cm) to block weeds. If the ground is compacted, loosen it slightly before placing. Lightly wet the material so it settles properly. - Add the top layer
Spread wood chips, bark, or gravel about 2–3 inches (5–8 cm) thick. Level the surface so there are no dips. Over time, it will settle — that’s normal, you can top it up.
What materials work best
There’s no single right option — it depends on your conditions and preferences. But a few solutions consistently work well.
- Wood chips or bark — soft to walk on, break down over time
- Gravel — lasts longer but needs a solid base
- Mulch — simple and quick
- Combination — for example, landscape fabric + wood chips
We usually go with wood chips — they’re forgiving and easy to refresh.
One thing worth saying upfront: don’t make narrow paths “just for now” — they stay that way. Proven. Also consider plant growth — by summer, everything expands, and paths get tighter. And always leave access to all sides of the bed.
It’s better to make paths wider once than redo everything later.
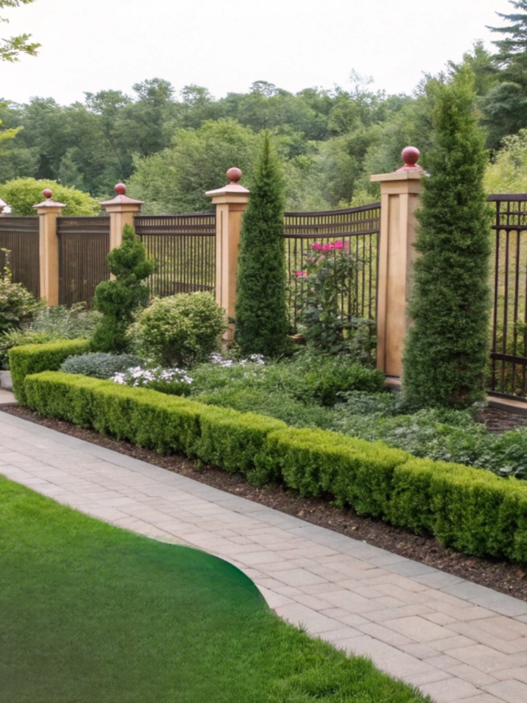
10. Creative Shapes to Define Garden Zones
When the space gets bigger or more varied, a new task appears — not just placing beds, but dividing the space. So it’s clear: this is the vegetable zone, this is herbs, this is flowers.
Here’s what working with garden bed shapes gives you:
переведи дальше
- Natural separation of zones without fences
- Clear navigation across the space
- The ability to define specific functions (vegetables, herbs, flowers)
- A more structured look even with many beds
When zones are clear, you don’t get lost in the space and move faster, especially in the season when everything starts growing.
What you’ll need
- Materials for beds (wood, metal, or a combination)
- Screws and a drill
- Stakes and rope (or a hose — useful for curved lines)
- Cardboard or landscape fabric
- Soil mix
After preparing materials, don’t rush — layout first, then everything else.
How to create zones with shapes
- Define the zones you need
Divide the space by function: vegetables, herbs, flowers, maybe a sitting area. You don’t need many — 3–4 zones are enough. - Choose a shape for each zone
Straight lines work for structured planting. Curves or arcs fit softer areas like flower beds. Mixing shapes makes the space more interesting. - Mark shapes on the ground
Use rope for straight lines and a hose for smooth curves. This helps you see the layout before building anything. - Check spacing and access
Leave at least 24 inches (60 cm) for paths so it’s easy to move between zones. Make sure every area is accessible. - Prepare the base
Remove weeds and large roots. Lay cardboard with overlap (2–4 inches / 5–10 cm), without gaps. If the soil is compacted, loosen the top layer slightly. Lightly wet the cardboard so it settles properly. - Build and fill the beds
Assemble frames following the shapes. Fill with:
- 40% compost
- 40% garden soil
- 20% sand or perlite
Mix directly inside the bed, leave 1–2 inches (2–5 cm) at the top. After watering, the soil will settle — that’s normal.
What shapes work best
You don’t need complex designs. Simple solutions work better.
- L-shaped beds — good for separating zones
- Half circles — work well for flower areas
- Zigzag lines — add movement
- A mix of straight and curved lines — the most flexible option
We usually use a combination of straight lines and soft curves — the space doesn’t feel too rigid that way.
From experience
- Don’t make overly complex shapes — they’re harder to maintain
- Consider plant growth — boundaries become less defined in summer
- Leave enough space to move, especially between zones
Also, it’s better to mark everything and live with it for a couple of days before building.
Shapes don’t just divide the space — they make it easier to understand. And when you start seeing zones instead of just beds, working becomes simpler, because every part of the space has its purpose.
Productive Raised Beds
Everything we talked about here is not for a perfect design. It’s for everyday convenience. When beds are placed logically, paths are comfortable, and it’s clear what grows where — maintenance becomes easier. And results come faster, without extra effort.If you’ve already tried any of these layouts or are planning to — write in the comments what worked best for you. It’s always interesting to see how different people solve the same tasks.